Notes from a fuel pump replacement on a 1999 Bravada/ Blazer/ Jimmy
#1
 07-20-2010, 05:24 AM


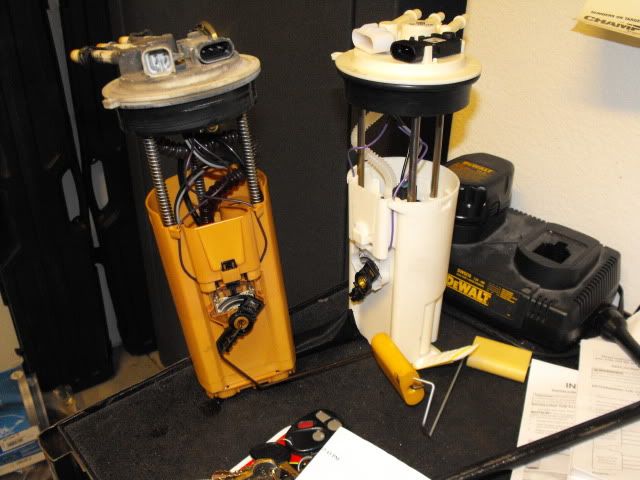
Replaced a fuel pump on a 1999 Bravada last weekend. The pump was working fine, the fuel level indicator failed and although one can purchase just the level indicator- these pumps are known as a high failure item so I replaced it all.
One of the hardest decisions was which pump to buy. Many reviews state that the Airtex pumps fail in the Bravada, so it was down to AC Delco, Bosch or Delphi. The only reason I considered the Bosch (barely) was the AC Delco/ Delphi pumps were known to fail. In the end I went with the Delphi, found a seller on E-bay that sells them $50 less than RockAuto. Upon receipt- I was thrilled to read a document in the box provided by Delphi showing all the modifications/ improvements to the pump in great detail, from the springs used to the sensor update to the connector update.
About a week prior to the tank removal I started spraying the strap bolts with PB Blaster. This was a waste as the strap bolt was so corroded that I used a bolt cutter to get it off. I ordered new straps, but discovered ALL the strap sets sold by RockAuto, Autozone, Advance and Orielly only contain the two main straps, and the top strap is a dealer only item. Note this if you plan on doing a Sunday replacement and need the top strap- you will be waiting for the dealer to open on Monday.
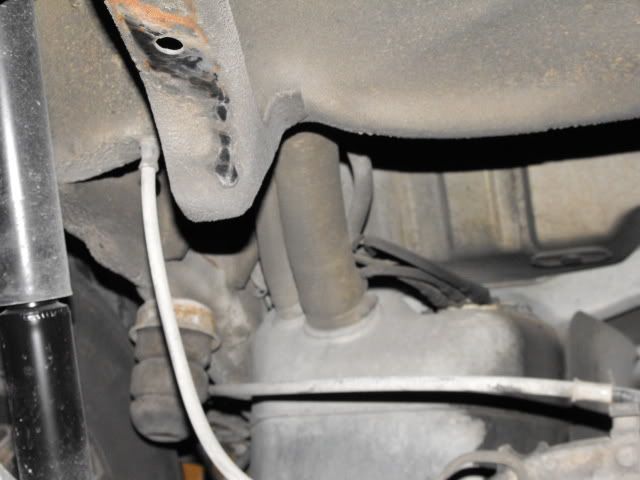
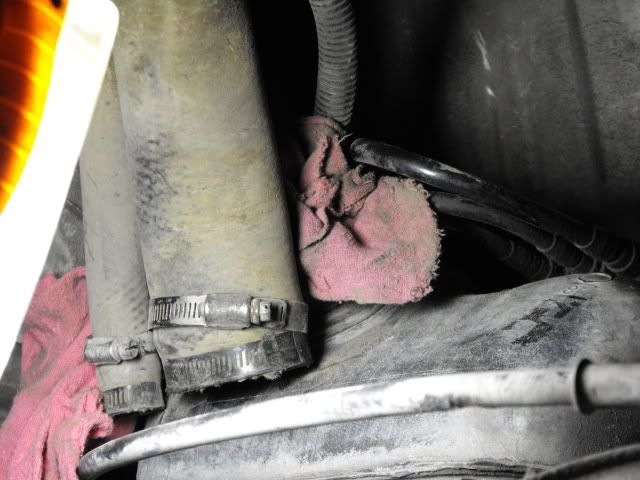
Removing the tank was fairly easy. I had less that 2 gallons of fuel left in the tank. After lowering the straps about halfway- I disconnected the three fuel line connectors, two electrical connectors and the front vent tube. I then tried to disconnect the rear vent and filler hose and took about 30 minutes to get them off. Just takes time and patience, and as Mike stated- a little Mission Impossible music blasting for some focused motivation.
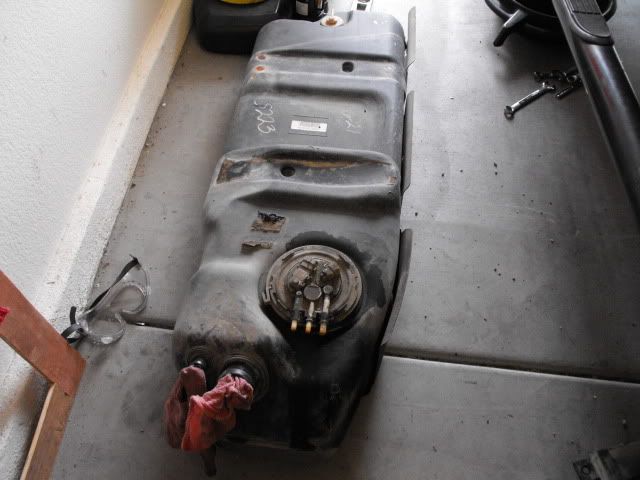
After pulling the tank out- I noticed the OEM pump had a Delphi label on it- made me feel a bit better with my replacement decision. What I hadn�t expected was how badly the fuel pump ring had corroded to the tank ring hooks. If I had known this I would have dropped the tank the night before and soaked the ring in PB Blaster. If you damage the ring hooks- the tank is shot and it is a plastic $500 tank. I spent about an hour with PB Blaster and a carefully placed chisel/hammer and finally got the pump out. Although I continually cleaned the area outside of the tank where the pump mounts, plenty of tiny stones entered the tank and I used a paper towel with the tank on its side to clear out every tiny piece of material that entered the tank.
The ring hooks had corroded badly. I used Rust-oleum rust restorer and covered the ring hooks and added a few more coats. I did this as I doubt these hooks, left untreated would withstand another pump replacement. Installed the replacement pump and then placed a light coat of anti-seize over the hooks where it hits the ring. I know this may attract dirt- but it is sealed and may protect from salt/ water corrosion.
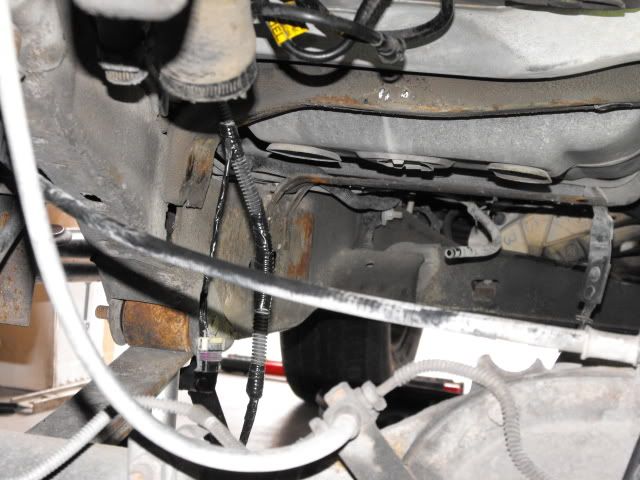
What I didn�t expect/ plan for was the rewiring and replacement of one of the electrical connectors. Delphi updated the connecter and it requires cutting of 4 wires. Delphi provided 4 wire crimps, but I decided to solder instead as I am not a fan of crimping. Had to run to Wal-Mart and buy a solder iron, solder and heat shrink tube (all located in automotive) as I left my soldering equipment at home (working at a rented garage) and didn�t want to run home. Spliced the wires, soldered, heat shrink and then wrapped in high temp electrical tape.
Installed the new tank, added a gallon of gas and turned the key. Started right up. Overall a fairly easy job. A little tough doing it on jack stands as clearance is limited. Only tool really needed was a 15mm socket w/ extensions and 15 mm box end- along with electrical wire strippers, pliers for clamps and jack/ jack stands.
Very glad I did this myself. On my 1997 Bravada fuel pump failed while traveling and dealer charged over $1500 for the same repair, and had to return to the dealer a week later as the fuel tank leaked when I fueled up- and they charged my $300 stating the ring seal had failed (a $10 part- should have been replaced when they did the pump).
One of the hardest decisions was which pump to buy. Many reviews state that the Airtex pumps fail in the Bravada, so it was down to AC Delco, Bosch or Delphi. The only reason I considered the Bosch (barely) was the AC Delco/ Delphi pumps were known to fail. In the end I went with the Delphi, found a seller on E-bay that sells them $50 less than RockAuto. Upon receipt- I was thrilled to read a document in the box provided by Delphi showing all the modifications/ improvements to the pump in great detail, from the springs used to the sensor update to the connector update.
About a week prior to the tank removal I started spraying the strap bolts with PB Blaster. This was a waste as the strap bolt was so corroded that I used a bolt cutter to get it off. I ordered new straps, but discovered ALL the strap sets sold by RockAuto, Autozone, Advance and Orielly only contain the two main straps, and the top strap is a dealer only item. Note this if you plan on doing a Sunday replacement and need the top strap- you will be waiting for the dealer to open on Monday.
Removing the tank was fairly easy. I had less that 2 gallons of fuel left in the tank. After lowering the straps about halfway- I disconnected the three fuel line connectors, two electrical connectors and the front vent tube. I then tried to disconnect the rear vent and filler hose and took about 30 minutes to get them off. Just takes time and patience, and as Mike stated- a little Mission Impossible music blasting for some focused motivation.
After pulling the tank out- I noticed the OEM pump had a Delphi label on it- made me feel a bit better with my replacement decision. What I hadn�t expected was how badly the fuel pump ring had corroded to the tank ring hooks. If I had known this I would have dropped the tank the night before and soaked the ring in PB Blaster. If you damage the ring hooks- the tank is shot and it is a plastic $500 tank. I spent about an hour with PB Blaster and a carefully placed chisel/hammer and finally got the pump out. Although I continually cleaned the area outside of the tank where the pump mounts, plenty of tiny stones entered the tank and I used a paper towel with the tank on its side to clear out every tiny piece of material that entered the tank.
The ring hooks had corroded badly. I used Rust-oleum rust restorer and covered the ring hooks and added a few more coats. I did this as I doubt these hooks, left untreated would withstand another pump replacement. Installed the replacement pump and then placed a light coat of anti-seize over the hooks where it hits the ring. I know this may attract dirt- but it is sealed and may protect from salt/ water corrosion.
What I didn�t expect/ plan for was the rewiring and replacement of one of the electrical connectors. Delphi updated the connecter and it requires cutting of 4 wires. Delphi provided 4 wire crimps, but I decided to solder instead as I am not a fan of crimping. Had to run to Wal-Mart and buy a solder iron, solder and heat shrink tube (all located in automotive) as I left my soldering equipment at home (working at a rented garage) and didn�t want to run home. Spliced the wires, soldered, heat shrink and then wrapped in high temp electrical tape.
Installed the new tank, added a gallon of gas and turned the key. Started right up. Overall a fairly easy job. A little tough doing it on jack stands as clearance is limited. Only tool really needed was a 15mm socket w/ extensions and 15 mm box end- along with electrical wire strippers, pliers for clamps and jack/ jack stands.
Very glad I did this myself. On my 1997 Bravada fuel pump failed while traveling and dealer charged over $1500 for the same repair, and had to return to the dealer a week later as the fuel tank leaked when I fueled up- and they charged my $300 stating the ring seal had failed (a $10 part- should have been replaced when they did the pump).
#2
07-21-2010, 11:03 PM

IM really glad you posted this because I am going to be doing this tomorrow on my 99 trailblazer.. I took over 50 pics with my digital camera of areas I couldnt see on top of the tank so I had an idea what i was getting into.... My fuel sending unit wont be in intil tomorrow but i cant wait! Ive been guessing my fuel levels since i bought the truck 2 years ago. Im going to run this tank out.. I got less than 2 galons but my question is what do you clean it out with to get the debris out if there is any?
#3
07-22-2010, 05:04 AM
I used a roll of paper towels. Tried a slightly moistned sponge (new), but found butting the tank on its side and using a new sheet of paper towel really did the trick. Kind of slow to do, but very easy, about 15 minutes. You will be able to hear any tiny rocks, etc while you are cleaning the tank. I worried also and it was no problem- just takes a little while. My bigger problem was what to do with the old gas- didn't want to reuse it.
Don't worry if you have some gas left in the tank. I had about 1.5 gallons and caused very little weight issues for removal. I did the job without any help.
Don't worry if you have some gas left in the tank. I had about 1.5 gallons and caused very little weight issues for removal. I did the job without any help.
#4
07-24-2010, 08:38 AM
Well you were right.. That job wasnt too difficult.. It toook a half can of pb blast to get rusted ring that holds the sending unit in place lol .. so the fuel pump works and so does the guage but I think... the 2 black wires might be crossed because after i changed the unit im getting a dtc p1404 code... I cleaned the erg but because this is an aftermarket pump the wiring harness came with a black purple grey black wiring config... but as you know the factory has black purple grey and a black/white wire... I have a hunch that this might be my issue....
#5
03-20-2011, 09:57 PM

Thought I would put my notes in here as well. I pulled my tank today and had very few issues. The blazer has lived in Florida and Nevada. Rust was no issue for me. Total time for this project was about four hours.
Removed the spare tire.
Lifted the rear end of the vehicle and put it on jack stands as high as they would safely go. (chocked the front wheels!)
I was able to crawl into the space where the spare tire goes and "easily" remove the vent and inlet hoses. They were super dirty, were a PITA to get off the tank, but after pulling and prying (gently so not to rip them) they finally came free. Stuffed a rag in each and pushed them off to the side.
Because the Haynes manual said to do so, I disconnected the fuel line at the inlet side of the fuel filter. I left an oil pan underneath it which I am glad I did; when I disconnected the line from the fuel pump fuel poured out of it. I'm glad I did this because if not, it would of came out of the fuel pump side of the fuel line.
I was also able to reach the fuel pump lines quite easily from this spot, disconnected them very easily.
Then I put a jack with a 2x4 to prop the tank to prep it for lowering. Removed the straps and lowered the tank enough to pull off the vent line in the front of the tank with a pair of channel locks.
Replacing the pump and sender unit was pretty straightforward. Rewiring the electrical connectors took a few minutes but had those wires wrapped up nicely.
Putting the tank back up was a little tricky, using my knees for leverage and the same setup to lower it to get the straps in place was awkward but effective. Ran into trouble with that 2x4 because I placed it right where a strap needed to go. So using the knees once again instead of the jack and 2x4 I got the straps on no problem. Had to lower the rear strap after tightening it because after inspection of the install I saw the strap tab was not inserted into the frame where it should have been.
Filled her up, gave her a test drive, and had a beer. I'm glad my fuel gauge works again!
Last edited by ravenhurst; 03-21-2011 at 02:03 PM. Reason: Spellcheck

Thread
Thread Starter
Forum
Replies
Last Post
762mm
Article Submissions/Discussions
8
03-28-2021 01:54 PM
sky_blazer
2nd Generation S-series (1995-2005) Tech
11
09-09-2018 09:24 PM
BouncingRadical
2nd Generation S-series (1995-2005) Tech
14
11-27-2015 12:30 AM
ned4spd8874
2nd Generation S-series (1995-2005) Tech
8
02-10-2011 10:48 PM
rdhack
2nd Generation S-series (1995-2005) Tech
3
04-17-2008 09:47 AM