How to: Blower Motor & Resistor - DISCUSSION THREAD
#1
 06-11-2009, 10:10 PM


I couldn't find a good write up so here it goes... Feel free to comment or add anything!
1. Disconnect the ground on the battery.
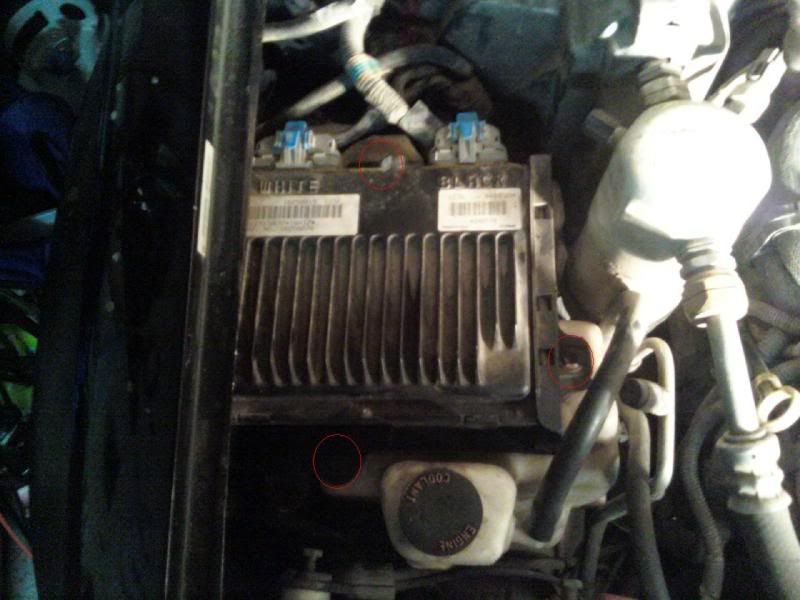
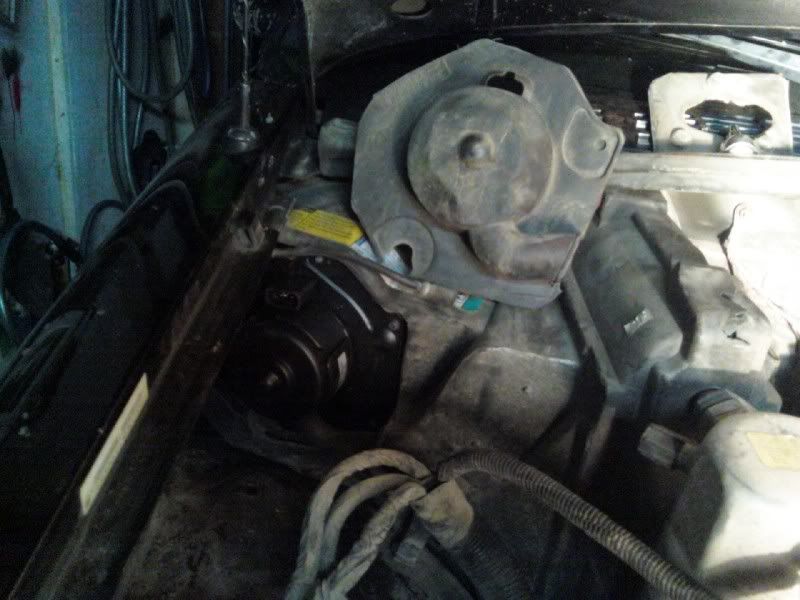
2. Unbolt the computer, bolts are circled.
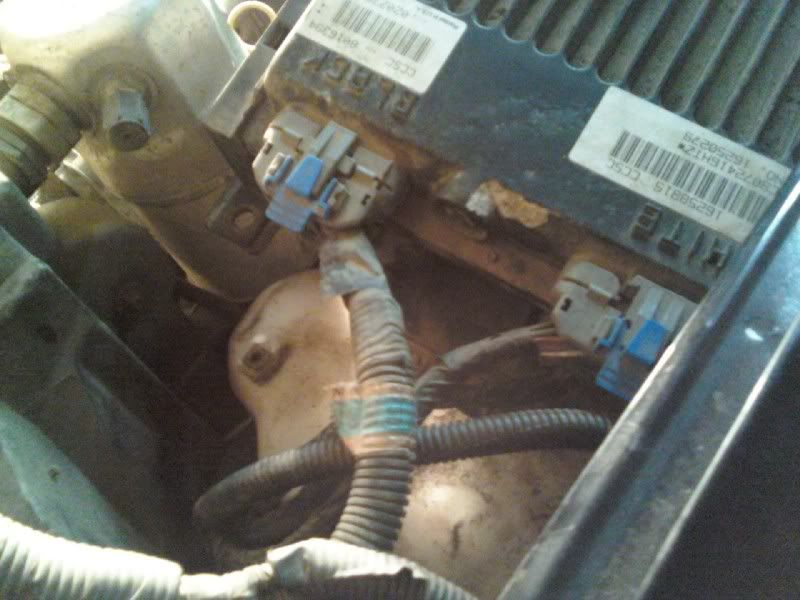
3. Unplug the 4 connectors. They are color coated so you cant mix them up. I used a screw driver to unhook the clips.
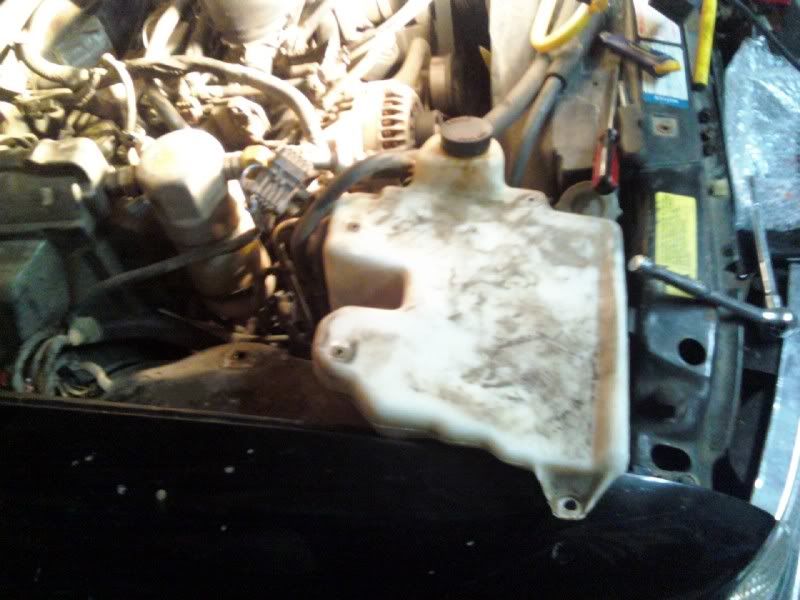
4. Move computer out of the way, and remove the 3 nuts holding the coolant reservoir out of the way. Bolts are high lighted.

I placed the tank beside the battery. This saves draining it. I found it a whole lot easier.
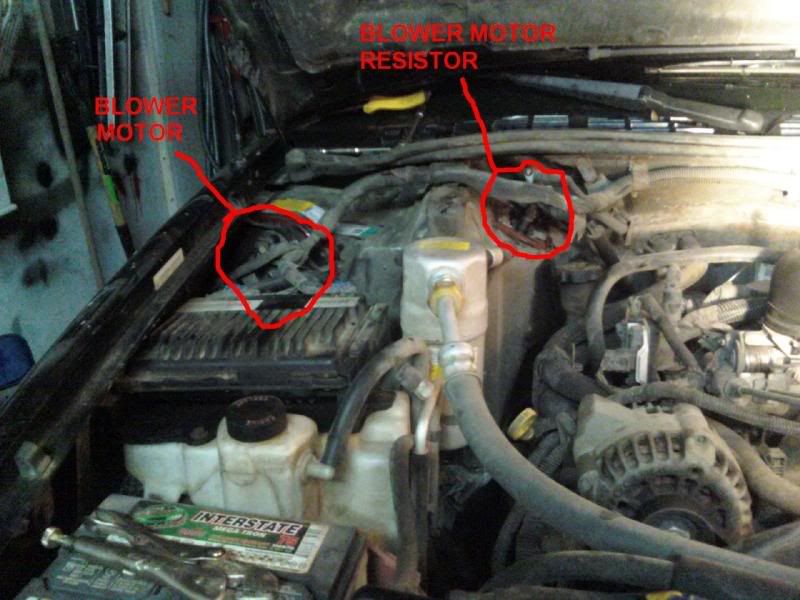
5. Move the wire connector on the fender, and un-clip the connector to the blower motor. Move wire harness off to the side.
6. Remove any bolts that may be holding the blower in. On my 1998 ZR2 there was one under and to the left (looking at it straight on)
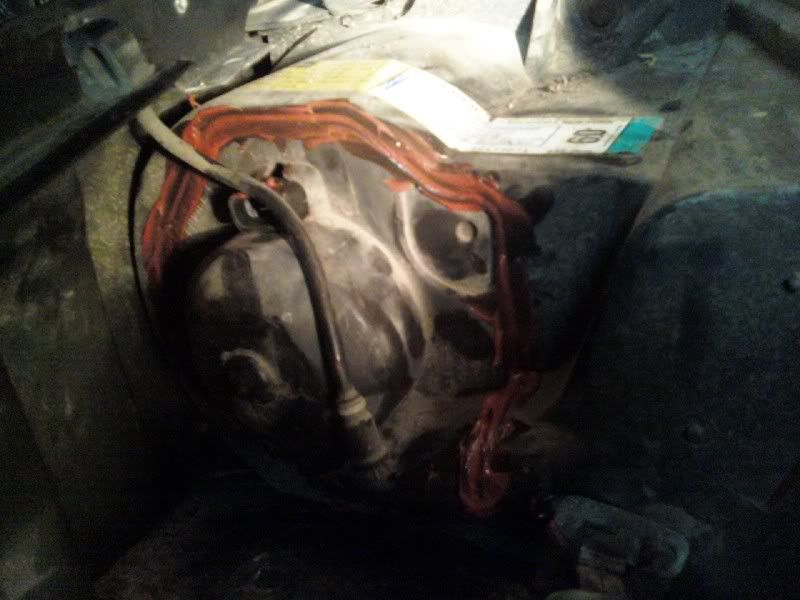
7. Now there is a "cut here" line. Using a knife cut along that. BE CAREFUL NOT TO CUT THE HOSE thats attached to the blower motor!!!!!
8. Remove the rest of the screws, and replace blower motor.
9. Use a urethane, or silicone to seal the rubber piece you cut off. I couldn't find my black urethane, so I used red silicone...
10. Replace everything in reverse!!!
The resistor:
1.Disconnect the battery.
2. Unplug the wire harness going to the resistor.
3. Cut along the "cut here" line.
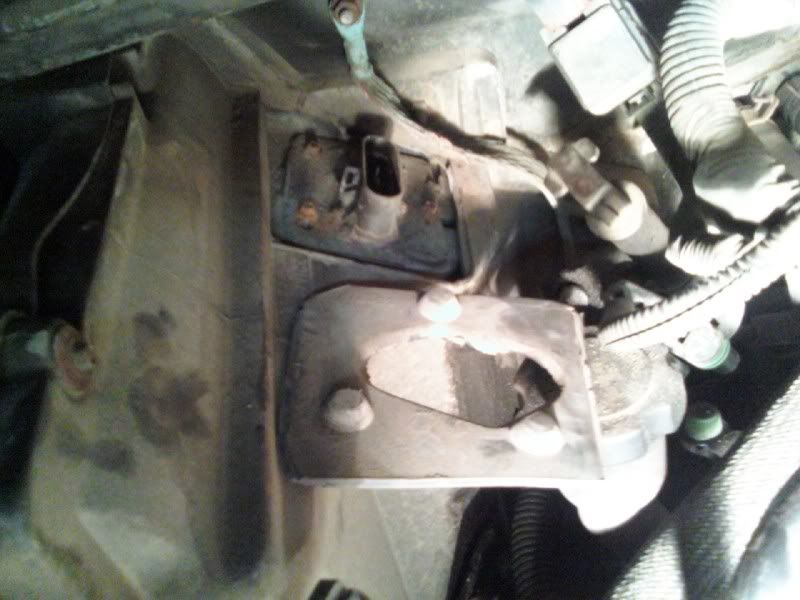
4. Unbolt the bolt holding the plastic cover to the firewall, and loosen the ground strap. This allows you to easily remove the 3 bolts holding the resistor in.
5. Remove the 3 bolts holding the resistor in and replace.
6. Use urethane or silicone to seal the plastic piece you cut off back in place.
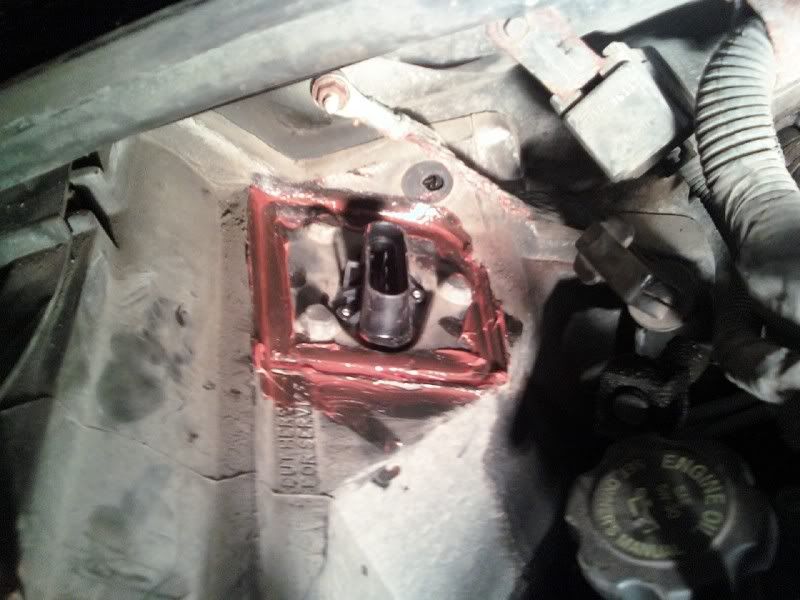
7. Install everything in reverse.
Any questions, just ask!
1. Disconnect the ground on the battery.
2. Unbolt the computer, bolts are circled.
3. Unplug the 4 connectors. They are color coated so you cant mix them up. I used a screw driver to unhook the clips.
4. Move computer out of the way, and remove the 3 nuts holding the coolant reservoir out of the way. Bolts are high lighted.
I placed the tank beside the battery. This saves draining it. I found it a whole lot easier.
5. Move the wire connector on the fender, and un-clip the connector to the blower motor. Move wire harness off to the side.
6. Remove any bolts that may be holding the blower in. On my 1998 ZR2 there was one under and to the left (looking at it straight on)
7. Now there is a "cut here" line. Using a knife cut along that. BE CAREFUL NOT TO CUT THE HOSE thats attached to the blower motor!!!!!
8. Remove the rest of the screws, and replace blower motor.
9. Use a urethane, or silicone to seal the rubber piece you cut off. I couldn't find my black urethane, so I used red silicone...
10. Replace everything in reverse!!!
The resistor:
1.Disconnect the battery.
2. Unplug the wire harness going to the resistor.
3. Cut along the "cut here" line.
4. Unbolt the bolt holding the plastic cover to the firewall, and loosen the ground strap. This allows you to easily remove the 3 bolts holding the resistor in.
5. Remove the 3 bolts holding the resistor in and replace.
6. Use urethane or silicone to seal the plastic piece you cut off back in place.
7. Install everything in reverse.
Any questions, just ask!
#2
06-14-2009, 05:29 PM


I really love the pics and the info but on my 2001 Blazer there is a different cover on the blower motor. I am trying to figure out how to remove this cover so that I can remove some type of dead animal. Yes something got in there and was apparently killed by the fan and now has began stinking up everything. I have to get in there and remove it.
I have pictures but I am not sure how to put them in my post.
I have pictures but I am not sure how to put them in my post.
#5
01-10-2010, 07:42 PM

i just changed the blower motor resistor thanks to this post, i also changed out the blower motor it was squealing for about a year, when i took it out i compared it with the new one, and the old one would barely spin when turned by hand, is it possible that the blower motor killed the resistor over time because it is wearing out, also do you really need to put the plastic cover back on the blower motor.............
#6
01-29-2010, 04:31 PM

i just changed the blower motor resistor thanks to this post, i also changed out the blower motor it was squealing for about a year, when i took it out i compared it with the new one, and the old one would barely spin when turned by hand, is it possible that the blower motor killed the resistor over time because it is wearing out, also do you really need to put the plastic cover back on the blower motor.............
I'm not sure about the plastic cover, mine was soft & brittle, disintegrating into tiny little pieces at the slightest touch. I think it's just cosmetic.
I actually had a pin in my resistor bank connector burn up. Just the common wire for the resistor bank (dark blue in position C, third from the firewall). It must have been loose, causing a hot spot, and just burned itself open over time. The pin was completely gone. Other than the missing pin the resistor bank was perfectly fine.
Simple fix. I drilled a small hole in the resistor bank cover and soldered a #14 stranded & insulated wire to the metal connection underneath. Ran the wire through the hole and spliced it to the dark blue wire using a male/female plastic shielded spade connection. I covered my crimp connections with heat-shrink and then silicone over the wire hole. Essentially, I just bypassed the burned up connector pin with a new wire. So looking at it, you see the original 4 wire connector with only 3 wires attached and the new common wire along side with a separate connector.
Without the resistor bank common wire (dark blue) as described above, you only have high speed fan and the other three lower speeds are dead.

#8
11-26-2010, 12:37 PM
Wow. Can't say thanks enough 
I was looking all around under the dash for access to the blower and your instructions saved me a ton of time and frustration. Did the job today and it took less than an hour. Found a HUGE mouse nest and now that it is gone, the dash no longer shakes apart when the blower runs.
I was looking all around under the dash for access to the blower and your instructions saved me a ton of time and frustration. Did the job today and it took less than an hour. Found a HUGE mouse nest and now that it is gone, the dash no longer shakes apart when the blower runs.
#9
02-19-2012, 02:25 PM
It's taking me a bit over an hour so far to get this done (about halfway now) and, aside from cutting the cover it's not that bad.
Couple notes though:
Popping out the stud that the coolant reservoir tank mounts to is easy and makes reaching the bottom of the cover much easier with your razor knife.
Seriously GM? 5.5MM screws to hold the motor in?
Side note, has anybody done this without putting that cover back on? Is this something that will affect my heat in any way?
#10
02-19-2012, 03:37 PM

GEEZ, people! Look at it and think about it.