How-To: CV Axle Replacement - DISCUSSION THREAD
#1
 12-14-2009, 11:54 PM


So Ive been seeing a lot of posts about CV problems and a lot of people seem to be looking for some info on the swap. I replaced mine a little while back and took lots of pics with the idea to do a how-to...but got a little distracted since then....buuuttttt here's an attempt at a decent write up:
Click thumbnails for fullsize image!
Note: There are two types of CV axles used on Blazers...I believe it was 94-95 GM went to a "slip-in" style CV, but pre-94s will have a bolt-on "flange" style CV. This write up applies to the slip-in style CV, but the general process should be the same up to the actual removal of the CV.
Tools Needed (2nd Gen..1st Gen should be the same, but may be different sizes):
*36mm deep well socket
*Breaker Bar and pipe to remove bearing nut
*18mm wrench
*15mm wrench
*Hex Keys (not sure of size, if anyone can supply this, post below)
*Crescent wrench or larger sizes of box end wrenches
*Hammer
*Pry bar, slide hammer, or block of wood (to remove old CV)
Pre-Install Notes:
-This is a great time to do balljoints if you need to, the first few steps are the same for balljoints/CV replacement, so have those ready if you're going to.
-I didnt say when to jack up the truck...that depends how you have to remove the bearing nut. I trust you know when your truck needs to be jacked up...
-When jacked up use jack-stands as you will be doing a generous amount of hammering and pounding on this install.
Step 1: You need to loosen the main axle bearing nut (36mm deep well) before you do anything else. If you have rims with removable center caps, try to loosen the nut with the tire on the ground, if not, see alternate method..both require a lot of force to loosen the nut! (I had to use a HD breaker bar with about 4ft of pipe)
Alternate method: Take the wheel off, and use a large barrel screw driver and jam it down in the vents of the rotor, and use the screw driver against the brake caliper to prevent the wheel from moving, then loosen the nut.
Step 2: Now you need to remove the caliper and rotor assembly. Im not sure what years the bolts change, but my 2000 uses an 18mm bolt for the caliper bracket, and a 15mm bolt for the caliper slide pins. As when doing the brakes, do not hang the caliper by the brake line! Use zip ties is my tip. Remove dust shield.
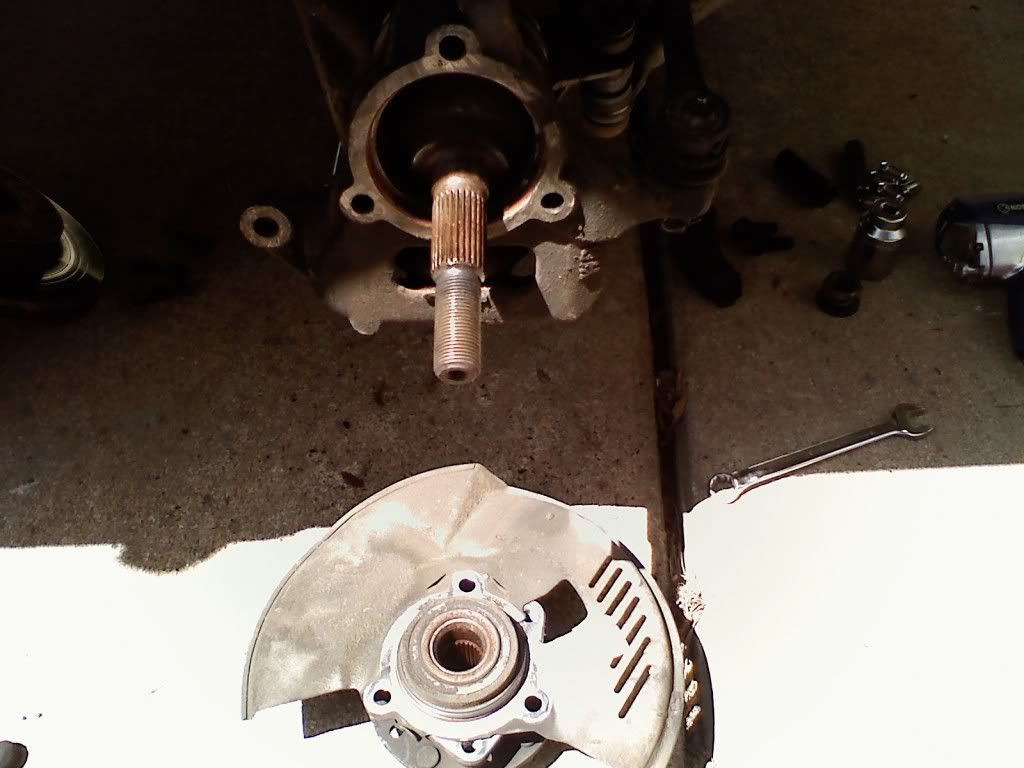
Now you should be looking at the wheel bearing.
Step 3: Next step is to remove the wheel bearing. There are 3 bolts holding this on that you need to access from the backside of the spindle (I found it was easiest to have the whole front end off the ground and turn the wheels as needed to access the bolt heads).
The clearance is tight behind the spindle with the CV in place..I found a combination of adapters (you might have the right sized extension) puts the socket wrench in the right place

Now remove the wheel speed sensor. (My 2000's was held on with a female hex head, If anyone knows the size Allen Key needed, please PM me or post below)
Now with the 3 bolts and the speed sensor removed, you should be able to get the bearing off. It may be stuck on real good.....i used a hammer on the end of the axle shaft to coax the bearing off.
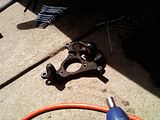
This should leave you with the bare spindle attached by the tie rod and balljoints:

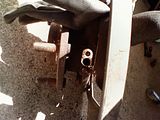
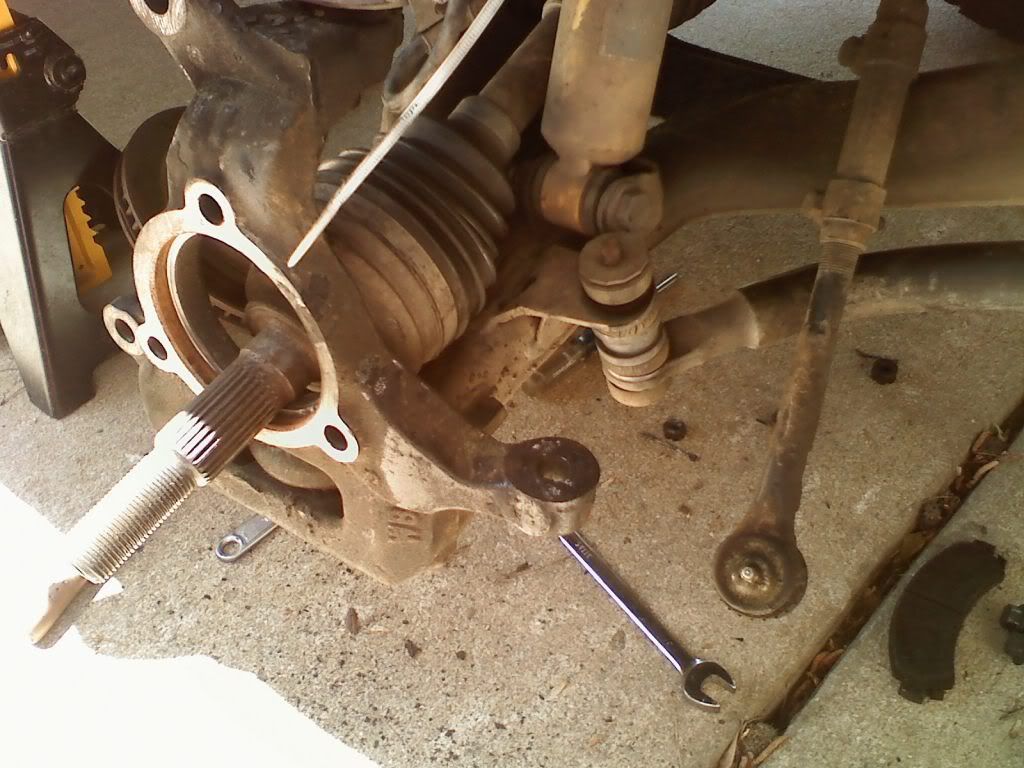
Step 4: Separate tie rod end. First straighten the cotter pin going through the castle nut. Then remove the nut. I did not have a box end wrench large enough, so I used a large crescent wrench, which worked great, but I do not know the size of the stock nut. You may have to tap the bottom of the TRE stud to coax it out of the spindle.

Step 5: Separate balljoints from spindle.
Note: This can be interesting, and can also be very different depending if you still have stock balljoints, or if aftermarket, which brand balljoint was installed.
I removed the upper balljoint first. As with the TRE, straighten the cotter pin and remove castle nut. A few good hits to the control arm should be enough to coax the balljoint stud out of the spindle.
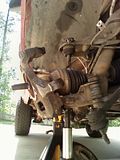
Now the lower balljoint. Again straighten the cotter pin, and remove the castle nut. My lower joint was stuck to the spindle much more than the upper was, so rather than pounding against the shock, I used a bottle jack to support the control arm. After a few minutes struggling against it..I decided to just remove the balljoint from the lower control arm. Since mine had already been replaced with aftermarkets, it was simply 4 bolts to drop the spindle+lower balljoint from the control arm. Then I could get at the balljoint from a few different angles. If your spindle comes off without balljoint removal, your result will look different from mine (it wont have the balljoint attached ):
):
Step 6: Remove CV from differential.
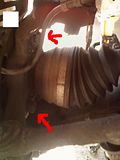
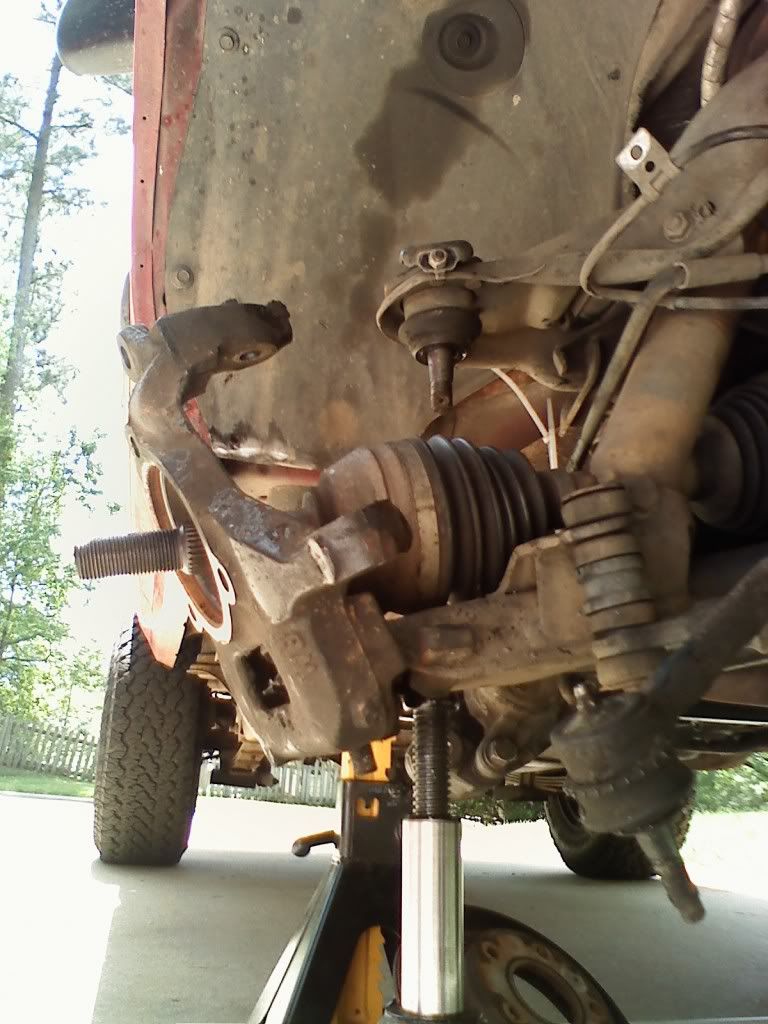
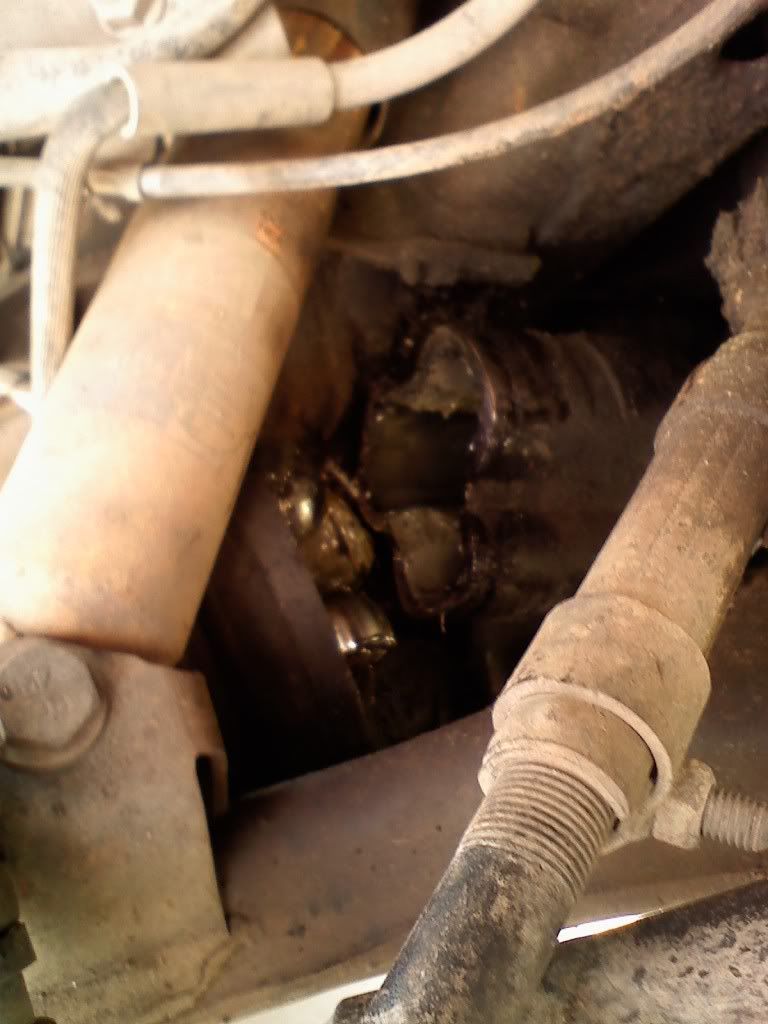
Now if your CV is really shot, it is probably already hanging loose at this point, as mine was:
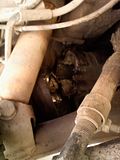
If this is the case, once the spindle is removed, 3/4 of the CV will just pull right out between the control arms. If not, no worries, just move on to the removal from the differential.
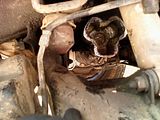
If youre the newer slip-in style CV, you just need to pop the upper CV joint out of the differential housing or tube. I used a cat's claw pry bar, but the proper method is a slide hammer. If neither are available, use a block of wood against the CV and give it a few hits with a hammer.
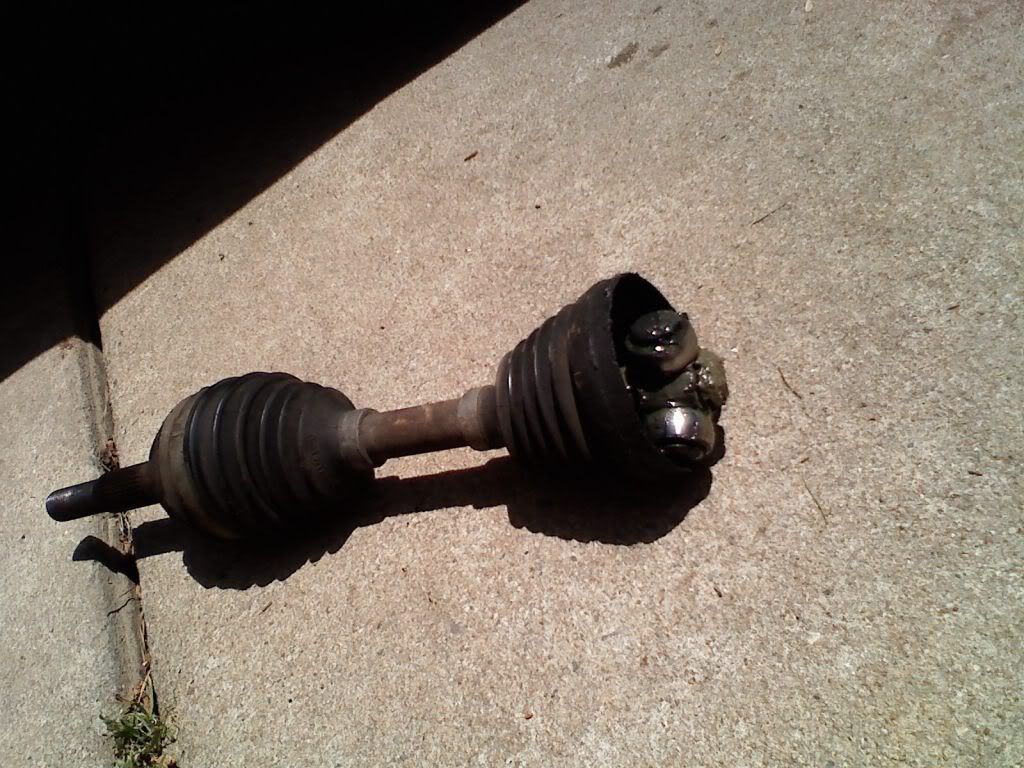
Now the entire CV should be out.
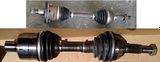
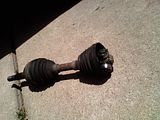
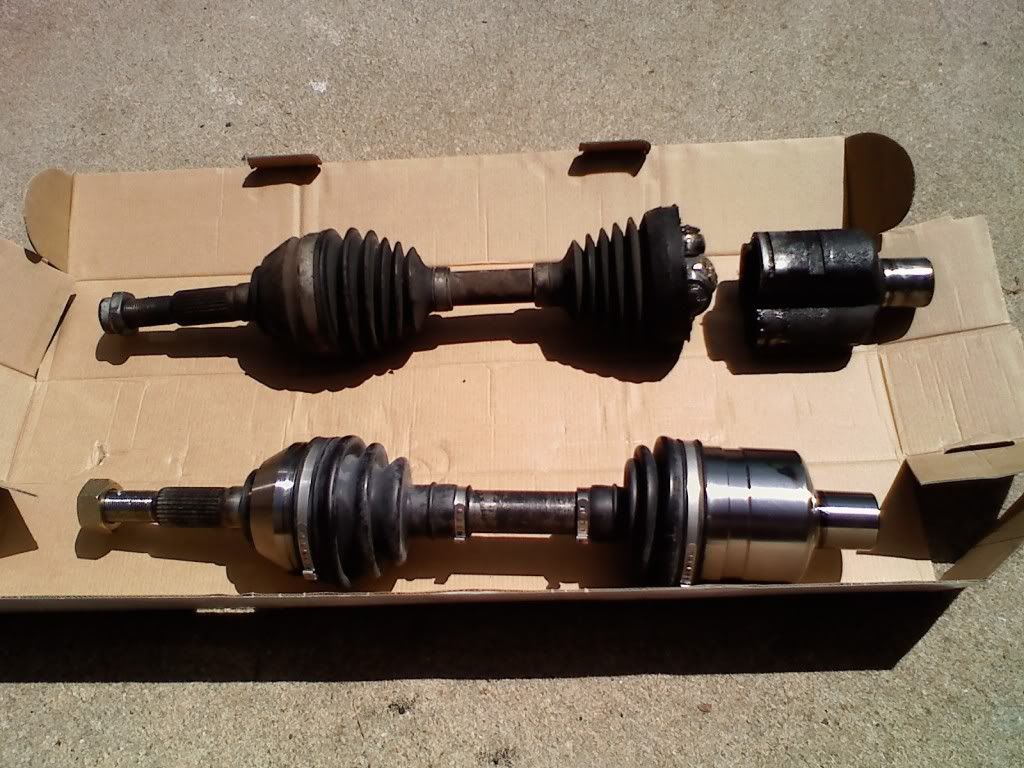
Step 7: Next step is to install the new CV. You can see below GM has redesigned the joint and boot for hopefully a little better reliability. It definitely looks a little more stout.
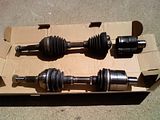
It may take a few attempts to line up the splines of the new CV with the differential.

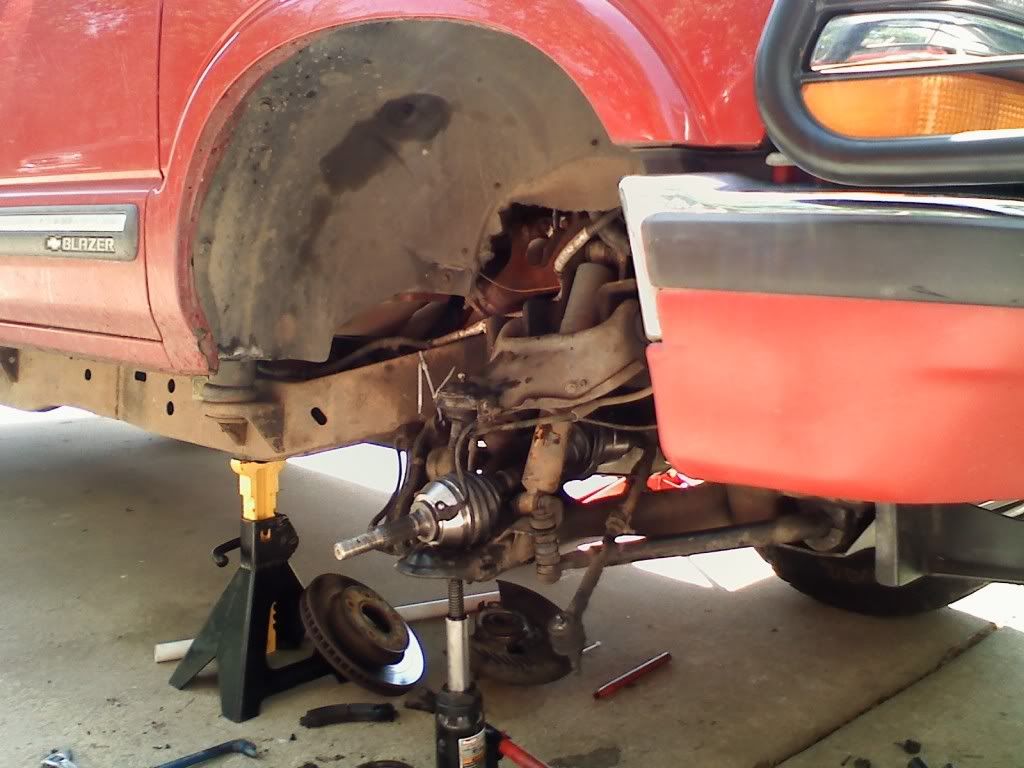
Once you have it installed, reattach the spindle, and continue reversing the removal steps!
Step 8....or 15 (after reassembly)...: Enjoy your new CV!
Please post below with anything you see incorrect, mistyped, not clear, etc!
Added to the Tech Article Section --> How-To: CV Axle Replacement
Click thumbnails for fullsize image!
Note: There are two types of CV axles used on Blazers...I believe it was 94-95 GM went to a "slip-in" style CV, but pre-94s will have a bolt-on "flange" style CV. This write up applies to the slip-in style CV, but the general process should be the same up to the actual removal of the CV.

Tools Needed (2nd Gen..1st Gen should be the same, but may be different sizes):
*36mm deep well socket
*Breaker Bar and pipe to remove bearing nut
*18mm wrench
*15mm wrench
*Hex Keys (not sure of size, if anyone can supply this, post below)
*Crescent wrench or larger sizes of box end wrenches
*Hammer
*Pry bar, slide hammer, or block of wood (to remove old CV)
Pre-Install Notes:
-This is a great time to do balljoints if you need to, the first few steps are the same for balljoints/CV replacement, so have those ready if you're going to.
-I didnt say when to jack up the truck...that depends how you have to remove the bearing nut. I trust you know when your truck needs to be jacked up...
-When jacked up use jack-stands as you will be doing a generous amount of hammering and pounding on this install.
Step 1: You need to loosen the main axle bearing nut (36mm deep well) before you do anything else. If you have rims with removable center caps, try to loosen the nut with the tire on the ground, if not, see alternate method..both require a lot of force to loosen the nut! (I had to use a HD breaker bar with about 4ft of pipe)
Alternate method: Take the wheel off, and use a large barrel screw driver and jam it down in the vents of the rotor, and use the screw driver against the brake caliper to prevent the wheel from moving, then loosen the nut.
Step 2: Now you need to remove the caliper and rotor assembly. Im not sure what years the bolts change, but my 2000 uses an 18mm bolt for the caliper bracket, and a 15mm bolt for the caliper slide pins. As when doing the brakes, do not hang the caliper by the brake line! Use zip ties is my tip. Remove dust shield.
Now you should be looking at the wheel bearing.
Step 3: Next step is to remove the wheel bearing. There are 3 bolts holding this on that you need to access from the backside of the spindle (I found it was easiest to have the whole front end off the ground and turn the wheels as needed to access the bolt heads).

The clearance is tight behind the spindle with the CV in place..I found a combination of adapters (you might have the right sized extension) puts the socket wrench in the right place

Now remove the wheel speed sensor. (My 2000's was held on with a female hex head, If anyone knows the size Allen Key needed, please PM me or post below)

Now with the 3 bolts and the speed sensor removed, you should be able to get the bearing off. It may be stuck on real good.....i used a hammer on the end of the axle shaft to coax the bearing off.
This should leave you with the bare spindle attached by the tie rod and balljoints:
Step 4: Separate tie rod end. First straighten the cotter pin going through the castle nut. Then remove the nut. I did not have a box end wrench large enough, so I used a large crescent wrench, which worked great, but I do not know the size of the stock nut. You may have to tap the bottom of the TRE stud to coax it out of the spindle.
Step 5: Separate balljoints from spindle.
Note: This can be interesting, and can also be very different depending if you still have stock balljoints, or if aftermarket, which brand balljoint was installed.
I removed the upper balljoint first. As with the TRE, straighten the cotter pin and remove castle nut. A few good hits to the control arm should be enough to coax the balljoint stud out of the spindle.
Now the lower balljoint. Again straighten the cotter pin, and remove the castle nut. My lower joint was stuck to the spindle much more than the upper was, so rather than pounding against the shock, I used a bottle jack to support the control arm. After a few minutes struggling against it..I decided to just remove the balljoint from the lower control arm. Since mine had already been replaced with aftermarkets, it was simply 4 bolts to drop the spindle+lower balljoint from the control arm. Then I could get at the balljoint from a few different angles. If your spindle comes off without balljoint removal, your result will look different from mine (it wont have the balljoint attached
):
Step 6: Remove CV from differential.
Now if your CV is really shot, it is probably already hanging loose at this point, as mine was:
If this is the case, once the spindle is removed, 3/4 of the CV will just pull right out between the control arms. If not, no worries, just move on to the removal from the differential.

If youre the newer slip-in style CV, you just need to pop the upper CV joint out of the differential housing or tube. I used a cat's claw pry bar, but the proper method is a slide hammer. If neither are available, use a block of wood against the CV and give it a few hits with a hammer.
Now the entire CV should be out.
Step 7: Next step is to install the new CV. You can see below GM has redesigned the joint and boot for hopefully a little better reliability. It definitely looks a little more stout.
It may take a few attempts to line up the splines of the new CV with the differential.
Once you have it installed, reattach the spindle, and continue reversing the removal steps!
Step 8....or 15 (after reassembly)...: Enjoy your new CV!
Please post below with anything you see incorrect, mistyped, not clear, etc!
Added to the Tech Article Section --> How-To: CV Axle Replacement
Last edited by WolfPack; 12-14-2009 at 11:57 PM.

#4
12-17-2009, 01:54 PM

Great post Wolfpack. Thanks, this will help me alot! I'll try to get those wrench sizes and send you some pics of my truck if you want to augment your post.
#5
12-17-2009, 02:09 PM

Great write up Jason! I have moved it to the Article Submission/Discussion section, copied the initial post over to the Tech Article (DIY) section and linked to it in the Tech Article Index post. THANKS!
#6
12-17-2009, 04:31 PM
Ahhh I forgot there was a whole section for article submission..thanks for moving it Kyle! And yes raven any more pics or info would be great!
I'd say start to finish time really depends on how easily you can get the bearing nut off. Also if you know your way around the brake assembly, that will certainly keep your swap time low. I did the swap in 3-4 hours, but have done the brakes and other front end work quite a few times, so I know my way around up there.
I'd say start to finish time really depends on how easily you can get the bearing nut off. Also if you know your way around the brake assembly, that will certainly keep your swap time low. I did the swap in 3-4 hours, but have done the brakes and other front end work quite a few times, so I know my way around up there.
Last edited by WolfPack; 12-17-2009 at 04:52 PM.
#7
12-17-2009, 07:14 PM
No problem Jason!
I'll add this. You should be able to do the job without breaking the steering knuckle loose from the ball joints and tie rod. You have to turn your steering completely one way (can't remember which way), and then you should be able to push the CV shaft in towards the diff and slide it out of the knuckle.
I'll add this. You should be able to do the job without breaking the steering knuckle loose from the ball joints and tie rod. You have to turn your steering completely one way (can't remember which way), and then you should be able to push the CV shaft in towards the diff and slide it out of the knuckle.
#8
12-17-2009, 08:08 PM
Hrm..that makes sense..it would have to be turned away from the side you're working on..so me doing the pass side I'd turn it all the way left..otherwise the tie rod would be in the way haha It was nice having all the room with the spindle gone..but if I have to swap one again I might try turning the wheel to gain access now that I know what's involved!
#9
12-30-2009, 01:40 PM
Wolfpack,
Did you have to refill your differential fluid? If you did, what kind of fluid did you use and how much?
Did you have to refill your differential fluid? If you did, what kind of fluid did you use and how much?
#10
12-30-2009, 01:47 PM
Nope I didnt have to add any. Hardly any fluid came out of the axle tube. But both of my differentials have Royal Purple synthetic 75w140 in them. There's plenty of threads on diff fluid though To each their own!
To each their own!