Mini-Motorhome
#1
 09-20-2014, 07:46 PM


Was wondering if any others have used their Blazer in this way. I took the back seat out and put in a good 3/4 size mattress (also called a Hollywood style mattress) because it fits right in between the wheel wells. I had to special order it at the mattress store because they do not normally carry them. Then I made some special wood supports for the mattress in the back seat floor area and some custom shelves for each side of it. My wife and I use this rig for camping trips from Bar Harbor, Maine to Redwoods Forest in California and from the International Peace Garden, on the Canadian border to Saguaro National Park in Arizona. I will keep making updates to this thread showing more features that I use on the Blazer and would like to hear from others who have done likewise.


Last edited by Barondeau; 09-21-2014 at 08:53 AM.


#5
09-23-2014, 05:01 PM
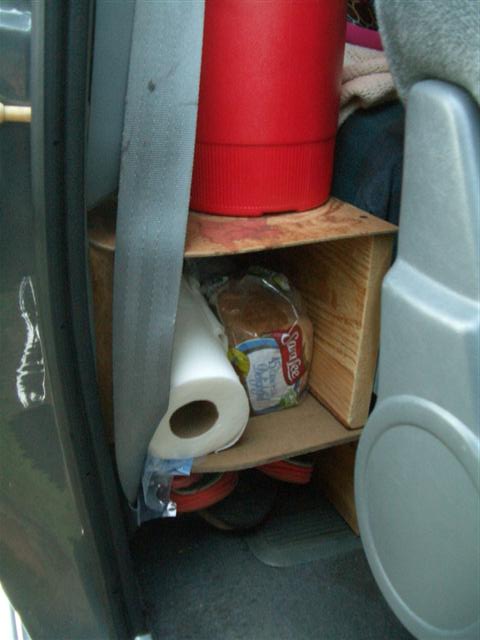
The following pictures show how I made wood shelves to support the 3/4 mattress and for storage spaces on each side behind the seats.

The center gray shelf has access doors for the storage space underneath when the mattress is slid back.

Back view of storage shelves behind the driver's seat.

Front view of same storage shelves.

Front view of storage shelves behind passenger seat.
The next posting will show other storage innovations I use.
The center gray shelf has access doors for the storage space underneath when the mattress is slid back.
Back view of storage shelves behind the driver's seat.
Front view of same storage shelves.
Front view of storage shelves behind passenger seat.
The next posting will show other storage innovations I use.
#6
09-23-2014, 05:26 PM
I also built a roof rack storage rack that is only 6" deep x 42" wide and 6 feet long that holds a tremendous amount of stuff. I wanted to keep the profile low for a little better gas mileage.

Inside it I can carry a 9' x 9' umbrella tent, tool bags, camp stove, replacement propane tanks, fold-up toilet, as well as space for many other things like replacement batteries, plastic baggies, tow rope, booster cables, extension cords, and souviners. LED light illuminates contents at night.

I can access the roof top carrier easily with my modified truck tire steps. Bought two, took the step off the second one and added it to the first one for a 2-step model. It folds easily for storage inside beside the mattress. (Later picture will show where it is stored.)

Next posting will be more interior mods.
Inside it I can carry a 9' x 9' umbrella tent, tool bags, camp stove, replacement propane tanks, fold-up toilet, as well as space for many other things like replacement batteries, plastic baggies, tow rope, booster cables, extension cords, and souviners. LED light illuminates contents at night.
I can access the roof top carrier easily with my modified truck tire steps. Bought two, took the step off the second one and added it to the first one for a 2-step model. It folds easily for storage inside beside the mattress. (Later picture will show where it is stored.)
Next posting will be more interior mods.
Last edited by Barondeau; 09-24-2014 at 11:09 AM.
#7
09-24-2014, 10:58 AM
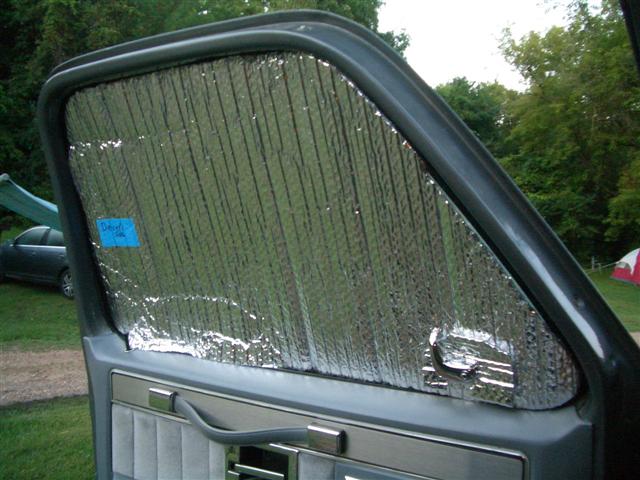
For the next installment: I use Reflectix Insolation to cover the windows for sleeping. I used to use black plastic, but found the Reflectix easier to shape and work with as it is stiffer and can be pressed into the window spaces, eliminating the need for tape or Velcro to hold it in place. Old gun racks make excellent places to store tent poles and walking sticks.

Here it is on the driver's side window. I leave a little extra tab on top that can be inserted out the opening with the window rolled down slightly, then when you roll the window back up it holds it securely in place.
For added storage space, I added a Steel Horse brand shelf above the sun visors. I use it for storing binoculars, cameras, etc. It is also a great place to clip my cell phone holder while traveling. I have my altimeter mounted to the left side. You can also see several of my LED lights mounted to the topper. I mounted metal L-brackets to the screws holding the topper to the cab and the LED lights attach with strong magnets as they are trouble lights sold at auto supply stores. Recently I moved the mount for my GPS unit up to the shelf above the sun visors as well.

Stayed tuned for my next installment.
Here it is on the driver's side window. I leave a little extra tab on top that can be inserted out the opening with the window rolled down slightly, then when you roll the window back up it holds it securely in place.
For added storage space, I added a Steel Horse brand shelf above the sun visors. I use it for storing binoculars, cameras, etc. It is also a great place to clip my cell phone holder while traveling. I have my altimeter mounted to the left side. You can also see several of my LED lights mounted to the topper. I mounted metal L-brackets to the screws holding the topper to the cab and the LED lights attach with strong magnets as they are trouble lights sold at auto supply stores. Recently I moved the mount for my GPS unit up to the shelf above the sun visors as well.
Stayed tuned for my next installment.
Last edited by Barondeau; 09-24-2014 at 11:01 AM.
#8
09-24-2014, 01:24 PM
Up here in the colder climates, people often put in 110 volt heaters to heat up the inside of the vehicle. I remounted one to a stub of 4x4 cut down to fit in one of my cup holders. Next, I added a 110 volt thermostat to an outlet box, so that when it gets cool inside my mini-motor home I can turn up the thermostat and have controlled heat inside. My wife thinks it is a "toasty" idea!

Here is a close-up view of the 110 volt thermostat from the front and the side, mounted in a plastic electrical box with a 110 volt outlet out the back.


To get 110 volts inside the vehicle, I added an extension cord through the grill.

If it is to warm inside, I can plug in my swiveling fan that is also mounted on a piece of 4x4 cut to fit in the console cup holder. This and the heater are carried in the shelves beside the mattress behind the driver's seat.

Next installment is under the hood.
Here is a close-up view of the 110 volt thermostat from the front and the side, mounted in a plastic electrical box with a 110 volt outlet out the back.
To get 110 volts inside the vehicle, I added an extension cord through the grill.
If it is to warm inside, I can plug in my swiveling fan that is also mounted on a piece of 4x4 cut to fit in the console cup holder. This and the heater are carried in the shelves beside the mattress behind the driver's seat.
Next installment is under the hood.
Last edited by Barondeau; 09-24-2014 at 05:31 PM.
#9
09-24-2014, 06:27 PM
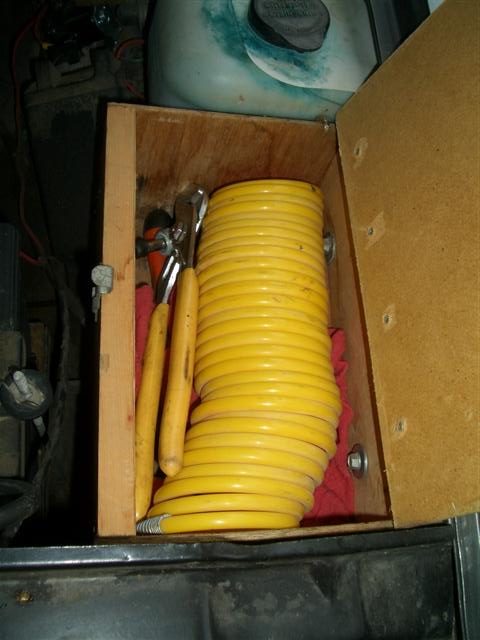
Modifications under the hood include the following: First, I installed the 12 volt air compressor from my old camper (mounted between the jack and the windshield washer fluid reservoir). When I upgraded my camper to a demand system, I had not use for the air compressor any more, so it got relegated to the Blazer. Second, I installed a DIY toolbox for storing the coiled hose for the air compressor and a few tools that I use often. Third, I installed a 2nd backup battery in the empty space on the driver's side of the radiator. This battery is charged during driving, but isolated by a relay when the ignition is shut off. This battery is wired into the interior for all of the 12 volt accessories I run for the mini-motor home such as the oscillating fan, DVD player, and electronics chargers.

Tool box with coiled air compressor hose.
For easier access at the rear, I routed an air hose from the underhood air compressor to the rear bumper with a quick-connector. Now I can use the coiled air hose from the rear tires and for the Air-Lift kit that I installed to level the ride.


Next installment: boxes on the back
Tool box with coiled air compressor hose.
For easier access at the rear, I routed an air hose from the underhood air compressor to the rear bumper with a quick-connector. Now I can use the coiled air hose from the rear tires and for the Air-Lift kit that I installed to level the ride.
Next installment: boxes on the back
