
Idler pulley bearing replacement
#1
 11-15-2012, 12:21 PM


Join Date: Nov 2012
Location: Edmonton, Alberta, Canada
Posts: 26

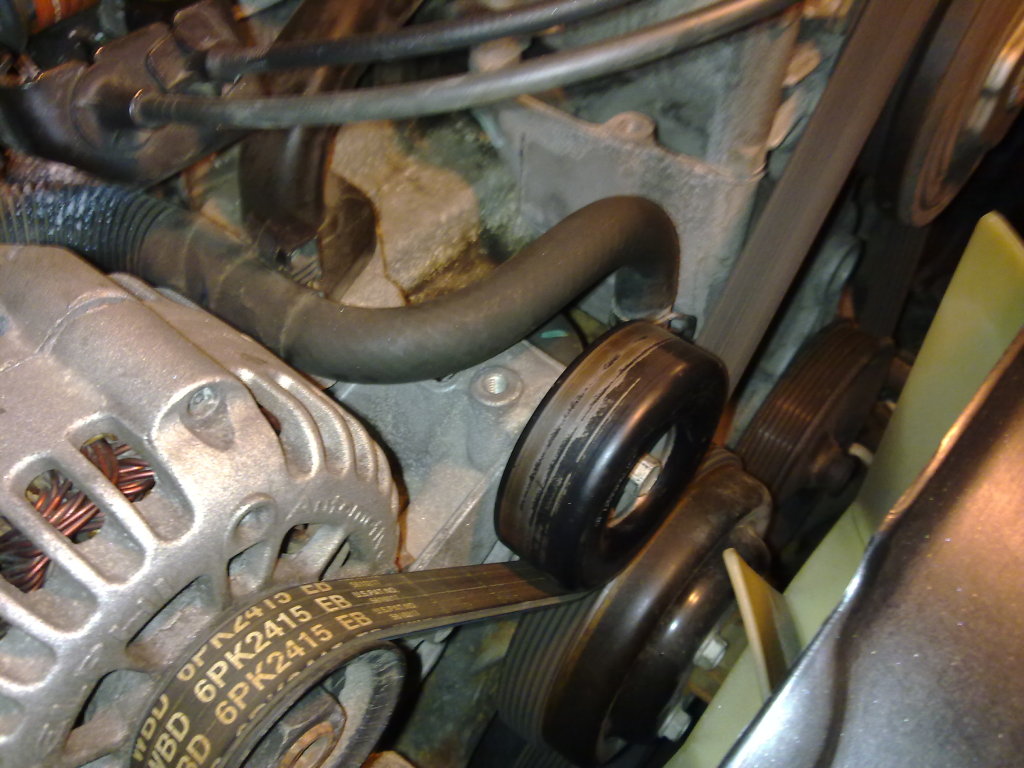
These things can make an incredible amount of “engine noise” long before the bearing dries out enough to squeal and I didn’t see anything here documenting the process so I thought I’d share my experience. This was done on a 2005 4.3l and others will vary slightly.
After removing the belt grab the pulley and try to move it front to back. If any movement is detected it has the potential to make noise. Next spin it and see how long it goes by itself. Generally the easier/longer it spins the less lubricant is left and again it’s potential to make noise rises.
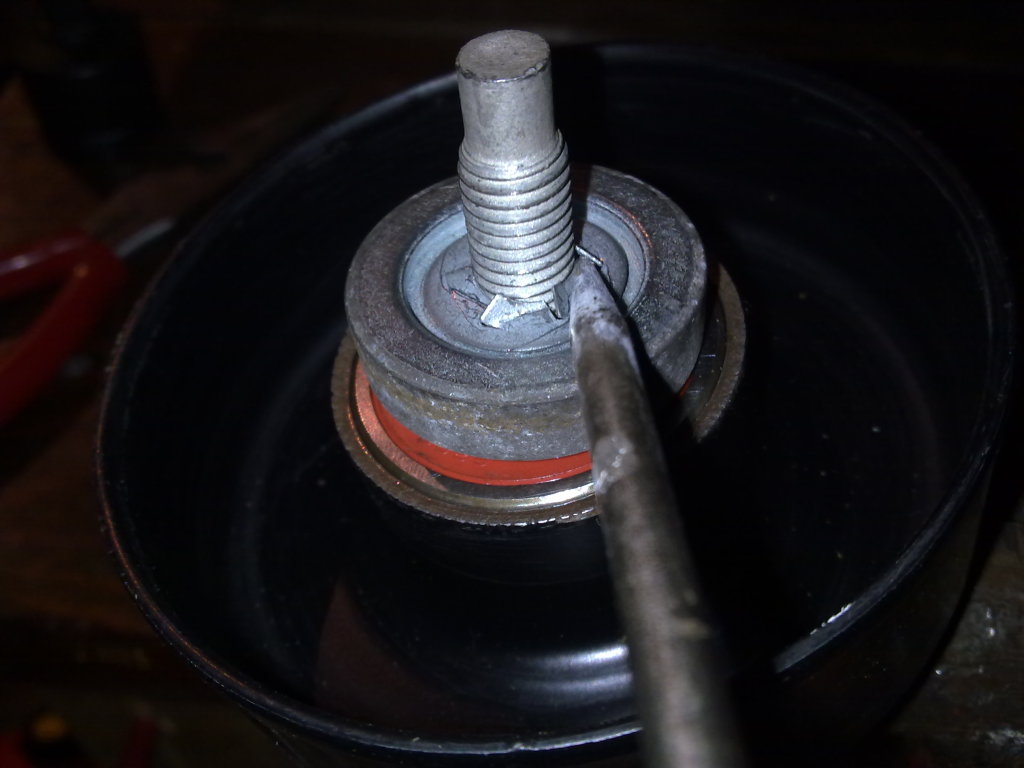
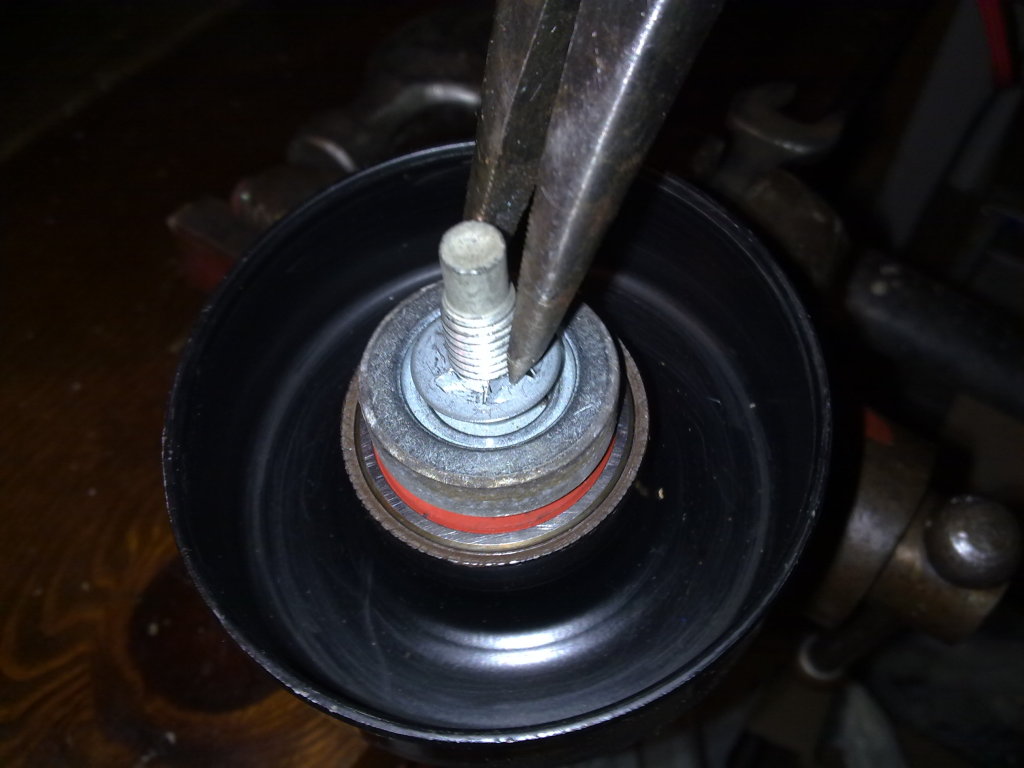
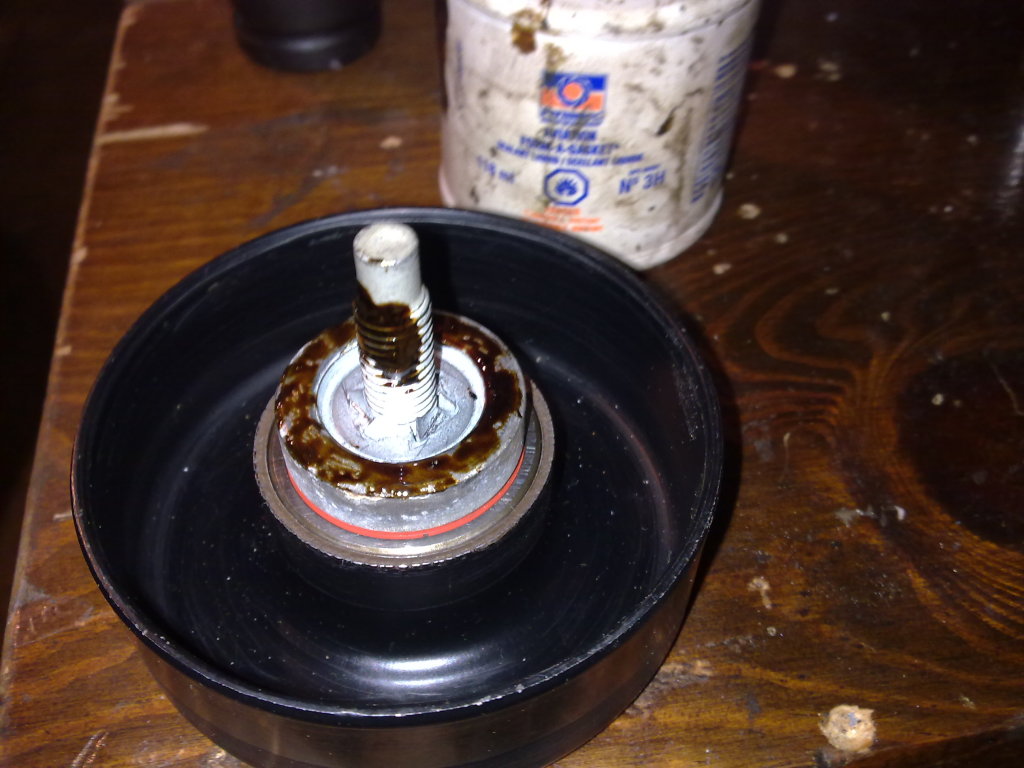
Remove the bolt so it’s free of the vehicle. Clamping a socket or wrench in a vise to hold the bolt will make removing the retainer easier. Slightly lift the tabs a bit all around using an awl as shown to loosen it and then it can be rotated off with needle nose pliers.
Locate a socket or other suitable cylindrical part just slighty smaller than the bearing’s outside diameter. The bearing can be driven out cold but will come out easier if the outside of the pulley is warmed up a bit with a propane torch.
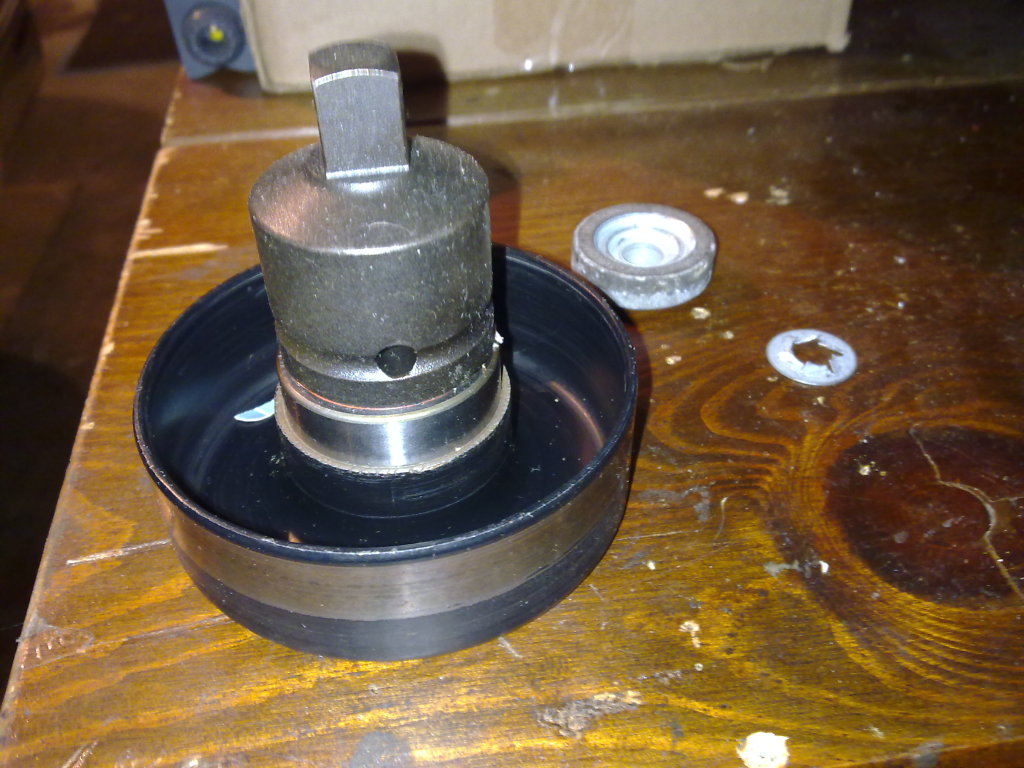
Bearing is an NTN 6203 LUA which I found at a local supplier for $5 and is retained in the pulley by what is known as an interference fit. Pounding it in can damage the bearing especially the seal so warming and expanding the pulley greatly reduces the required installation force. I had a space heater handy and held the pully in front of it for a few minutes after which it only needed a few light taps to install.
Assemble in the same way it came apart an personally I like a bit of gasket sealer on the threads and mounting face so it doesn’t try to vibrate loose. Hope this info helps somebody.
After removing the belt grab the pulley and try to move it front to back. If any movement is detected it has the potential to make noise. Next spin it and see how long it goes by itself. Generally the easier/longer it spins the less lubricant is left and again it’s potential to make noise rises.
Remove the bolt so it’s free of the vehicle. Clamping a socket or wrench in a vise to hold the bolt will make removing the retainer easier. Slightly lift the tabs a bit all around using an awl as shown to loosen it and then it can be rotated off with needle nose pliers.
Locate a socket or other suitable cylindrical part just slighty smaller than the bearing’s outside diameter. The bearing can be driven out cold but will come out easier if the outside of the pulley is warmed up a bit with a propane torch.
Bearing is an NTN 6203 LUA which I found at a local supplier for $5 and is retained in the pulley by what is known as an interference fit. Pounding it in can damage the bearing especially the seal so warming and expanding the pulley greatly reduces the required installation force. I had a space heater handy and held the pully in front of it for a few minutes after which it only needed a few light taps to install.
Assemble in the same way it came apart an personally I like a bit of gasket sealer on the threads and mounting face so it doesn’t try to vibrate loose. Hope this info helps somebody.
#3
11-15-2012, 01:16 PM
Join Date: Nov 2012
Location: Edmonton, Alberta, Canada
Posts: 26
I spent the $15 on beer


#6
11-15-2012, 08:05 PM
Join Date: Nov 2012
Location: Edmonton, Alberta, Canada
Posts: 26
Tensioners are a different animal which I would consider non user serviceable. Along this same topic however the tensioner on my 1988 Blazer (2.8) started to whine this fall and I was stunned to discover how much engine noise I had been putting up with for several years after changing it.
Last edited by Curt B; 11-15-2012 at 08:10 PM.

Thread
Thread Starter
Forum
Replies
Last Post
jimbob533
1st Generation S-series (1983-1994) Tech
4
10-03-2007 03:13 PM