
so you want a tire carrier on your 4 door?? - DISCUSSION THREAD


ok....first off, yes i should have done this as i went but i hope this still helps someone.
first off, i dont remember the diameter of the bolts i used, what i did was take the latch plate and the mounting bracket down to the hardware store and see what fit. now for length i believe i went with 5.5" long....if i am wrong please correct me.
ok...
step one:
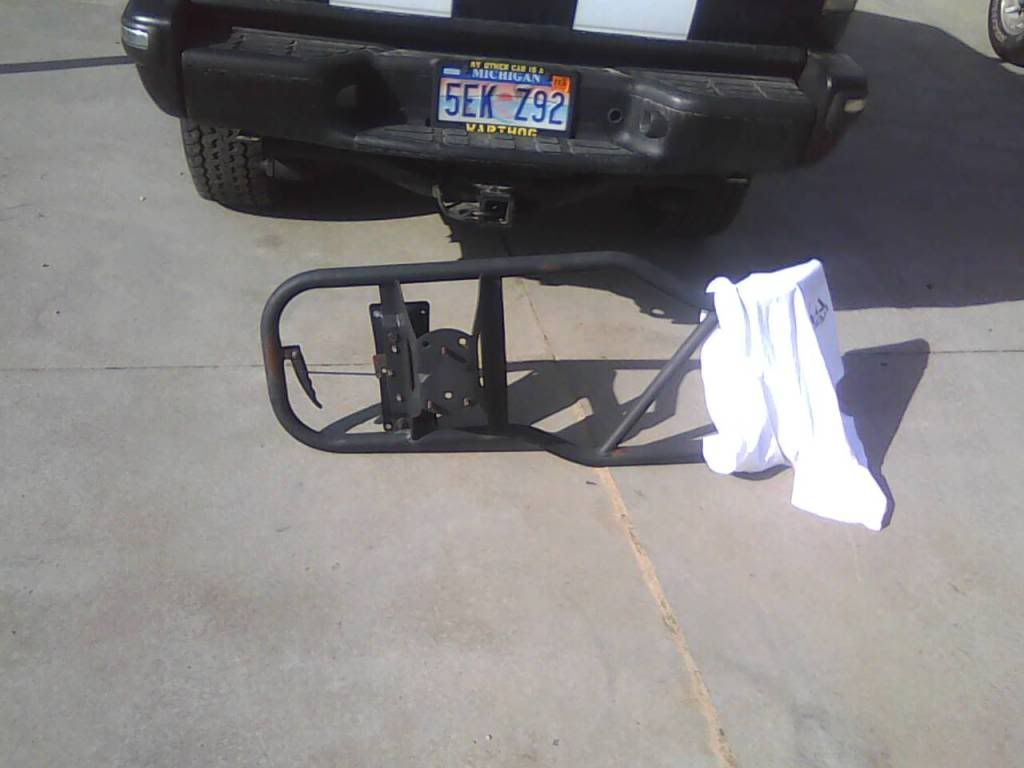
get one of these babies...
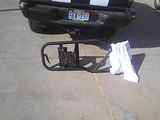
i have no idea if year of vehicle matters as long as its off second gen.
**********if i am wrong then please correct me.*********
when you pull it leave all the bolts from donor there...wont need them.
step two:
finish / rust proof that bad boy how ever you want...you want black go for it....pink ...well ahhhh, it is your ride.
also what i did was to make a rubber backer from some liner i had lying around...think gasket type situation.
step three:
ok sorry no pics for this step. ok on a level slab / driveway line up the carrier. what i did since i had to go it alone was use ratcheting straps and over the roof rack to position the carrier. you might want to put something on the back of the brackets to keep the scratches down.
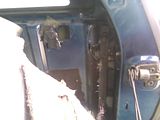
step four:
ok so hopefully all is going well for you...here is where you need to get brave. take a drill and put six holes in the body panel where you marked the mounting brackets. be sure to go thru to inside of body panel face as well...this will help reinforce you carrier.
this is what i did....
close up....this bar stock by the way is the only extra reinf. i did.
i also sprayed on some rustproofing to seal against any leaks.
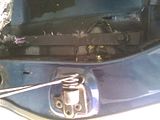
sorry the other bolt locations dont show well in pics, because of locations, but i think this gets the point across.
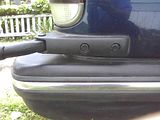
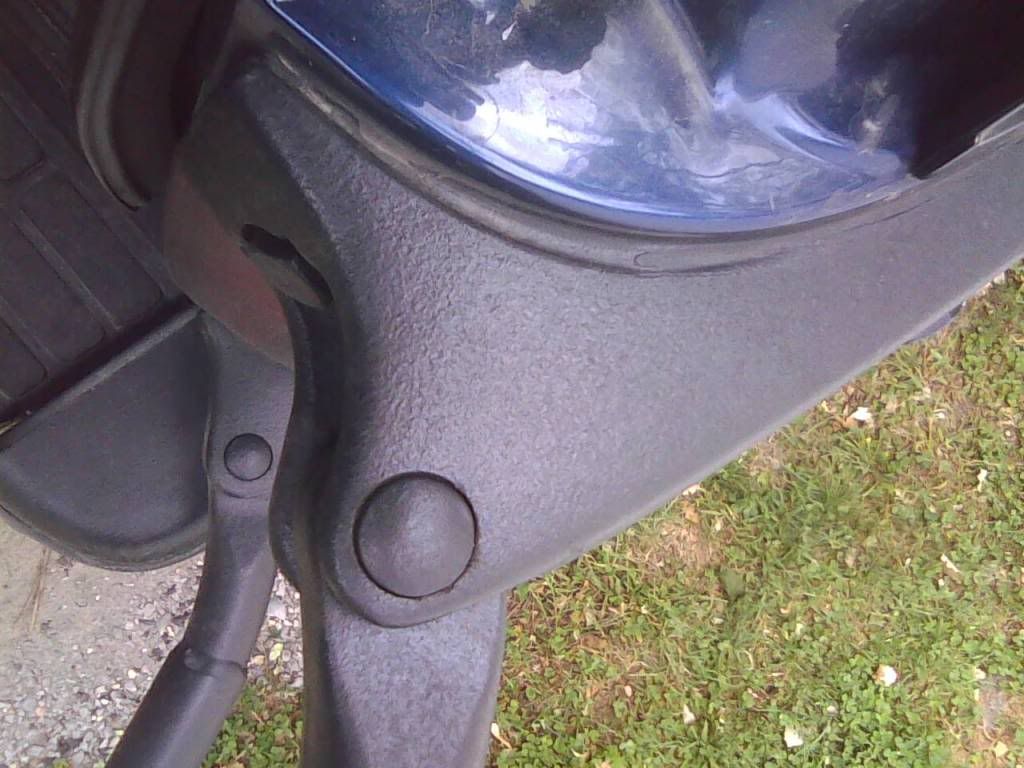
ok...some close up of finished product.
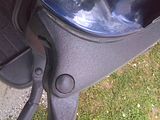
yes some black silicon to finish the deal...all around the mounting bracket.
i look at it as some nice weather stripping and a way to see if you have movement issues.

as you can see, several months mounted and no flexing of panel.
now the bolts for the inner part of bracket take some persistence..very tight space

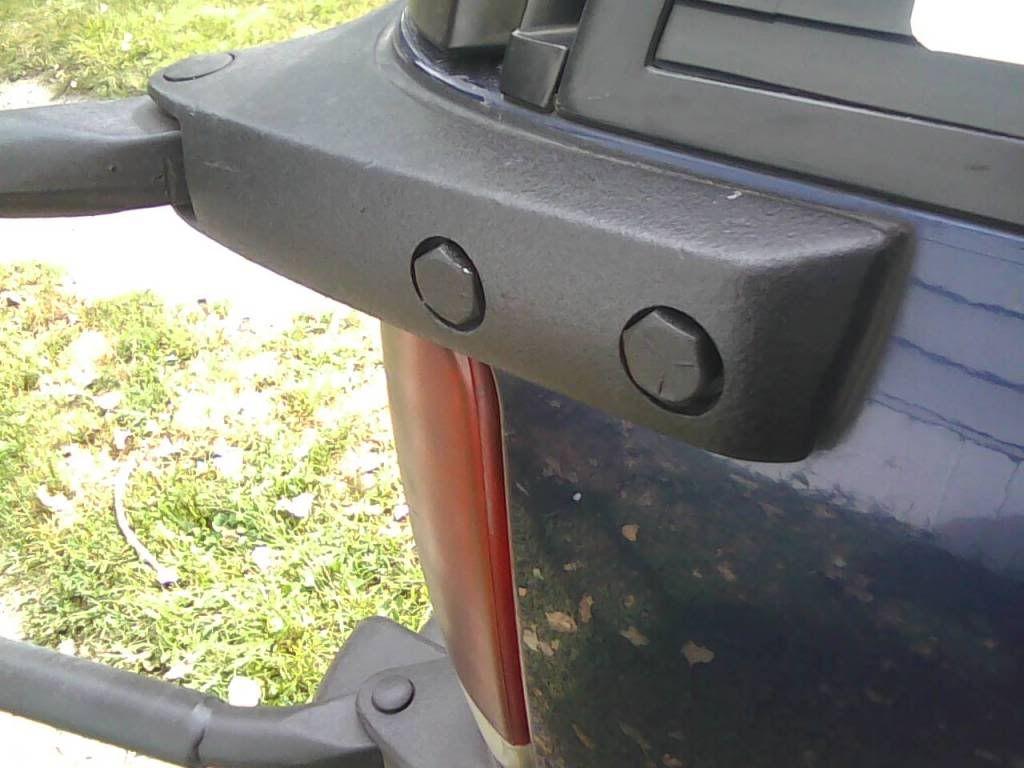
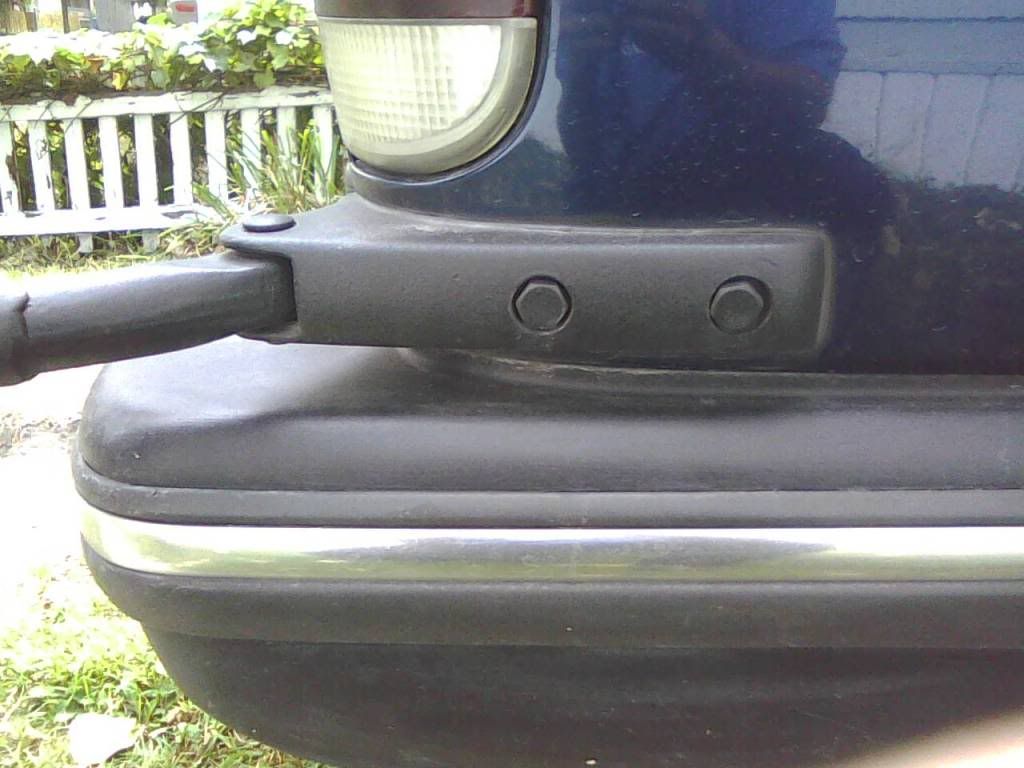
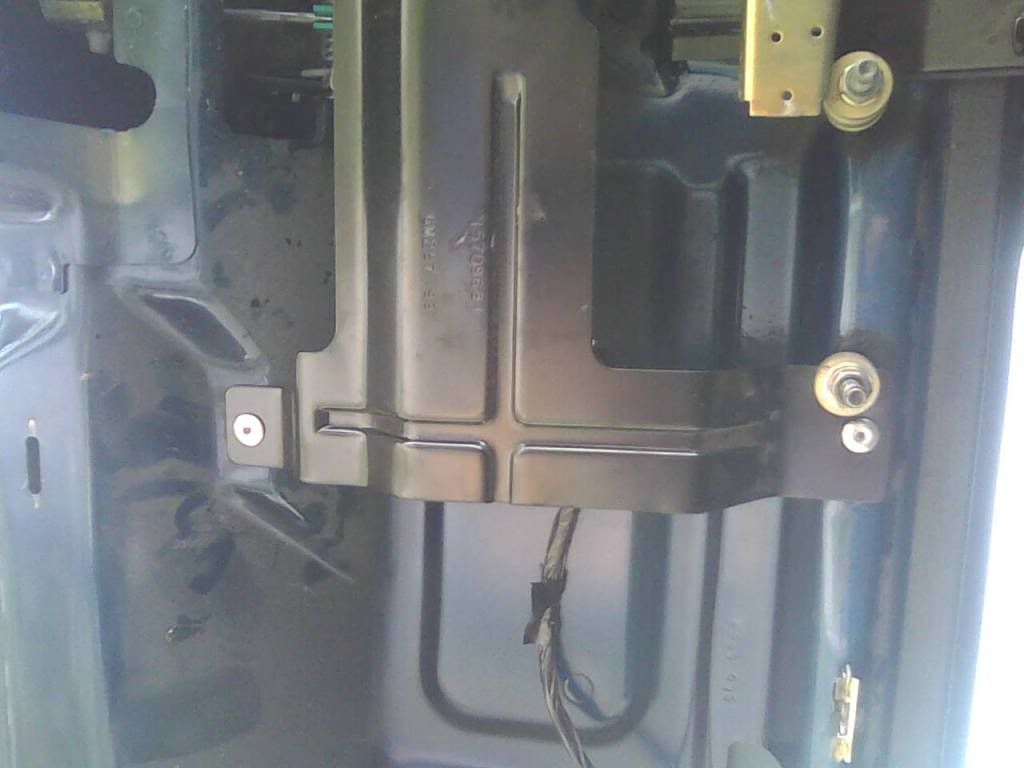
and now for the rear hatch...mine as you can tell is not the fold down style but i imagine the methods will be similar..
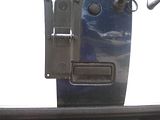
inside face...again bolts go thru to panel on inner face of hatch.

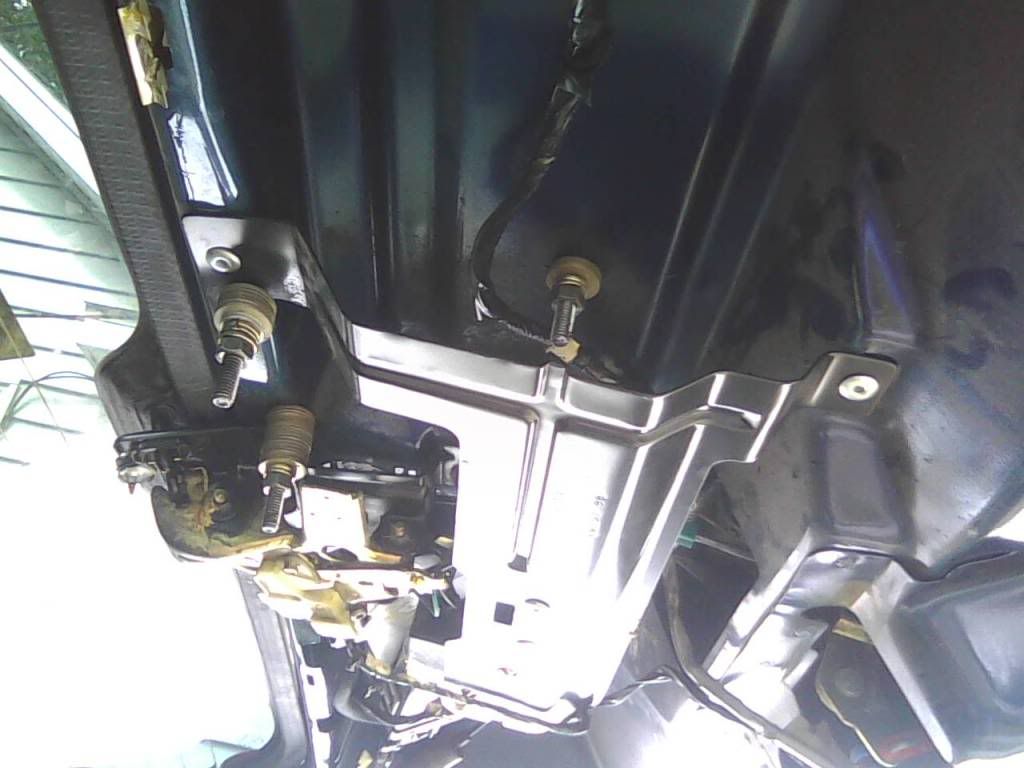
and like so.....yes i had to use some washers to adjust the bolts.

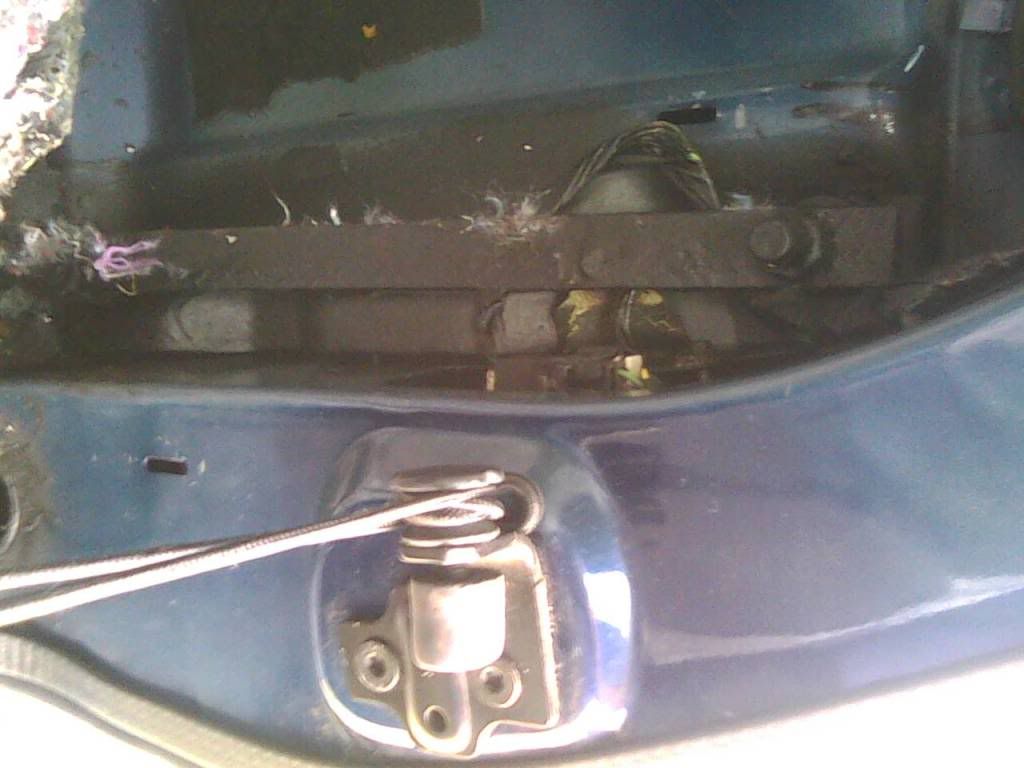
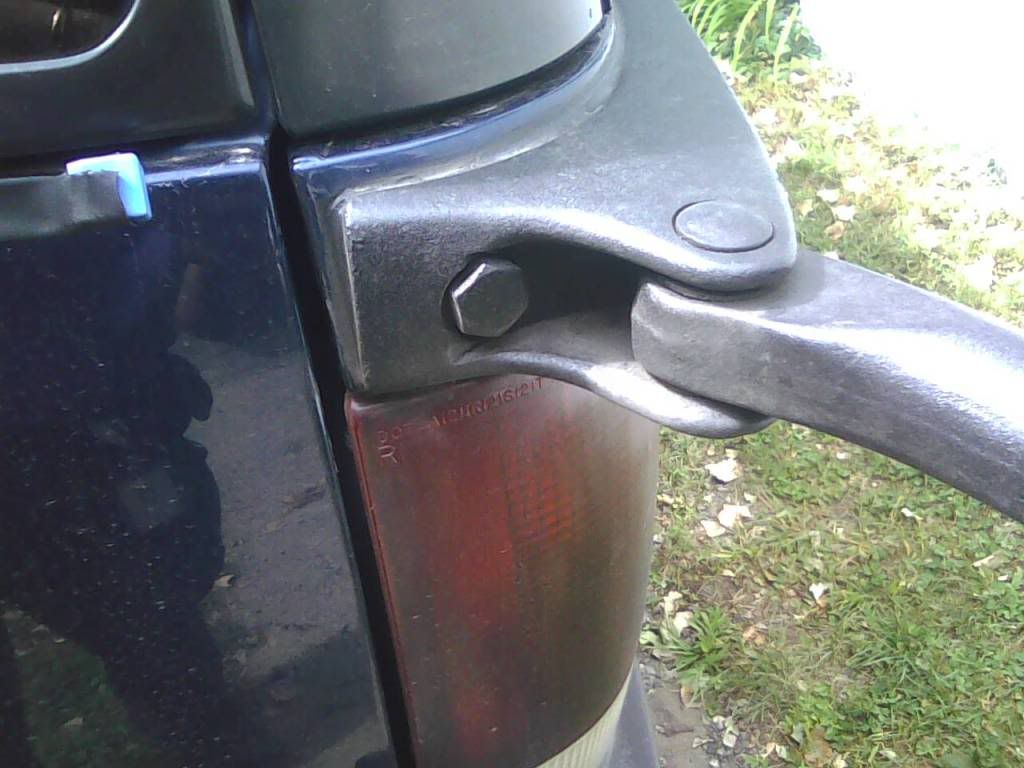
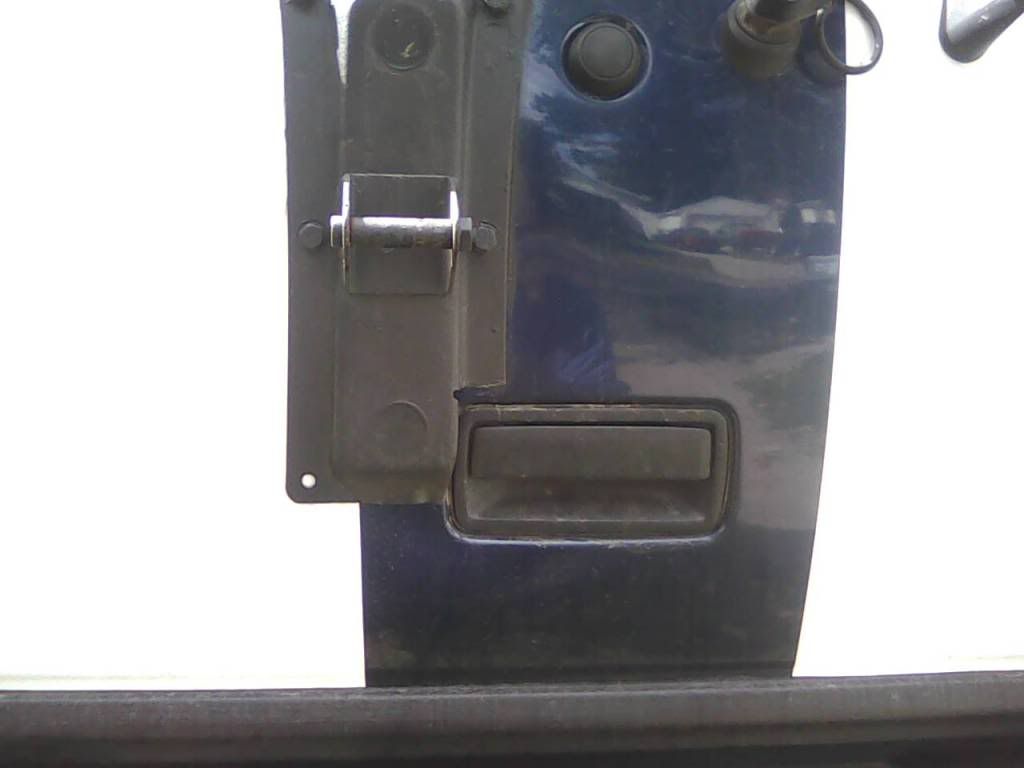
now, one thing to note here. the latch plate for the tire carrier will have to be trimmed to fit around the rear hatch handle like so..
 .
.
and that my friends is all i have for now. many thanks to the brave souls who came before me and inspired me to take a 3/4" drill to my blazer.
Benedict1337 for one.
i would do this mod again if ever i had the choice, i love the look and it sets you out from the crowd.
one thing though...you will not be able to open you glass portion of hatch with carrier in locked position...keep that in mind.
if you have any questions feel free to post them up..i will try my best to help you out.
Link to the DIY Article
first off, i dont remember the diameter of the bolts i used, what i did was take the latch plate and the mounting bracket down to the hardware store and see what fit. now for length i believe i went with 5.5" long....if i am wrong please correct me.
ok...
step one:
get one of these babies...
i have no idea if year of vehicle matters as long as its off second gen.
**********if i am wrong then please correct me.*********
when you pull it leave all the bolts from donor there...wont need them.
step two:
finish / rust proof that bad boy how ever you want...you want black go for it....pink ...well ahhhh, it is your ride.
also what i did was to make a rubber backer from some liner i had lying around...think gasket type situation.
step three:
ok sorry no pics for this step. ok on a level slab / driveway line up the carrier. what i did since i had to go it alone was use ratcheting straps and over the roof rack to position the carrier. you might want to put something on the back of the brackets to keep the scratches down.
step four:
ok so hopefully all is going well for you...here is where you need to get brave. take a drill and put six holes in the body panel where you marked the mounting brackets. be sure to go thru to inside of body panel face as well...this will help reinforce you carrier.
this is what i did....

close up....this bar stock by the way is the only extra reinf. i did.
i also sprayed on some rustproofing to seal against any leaks.
sorry the other bolt locations dont show well in pics, because of locations, but i think this gets the point across.
ok...some close up of finished product.
yes some black silicon to finish the deal...all around the mounting bracket.
i look at it as some nice weather stripping and a way to see if you have movement issues.
as you can see, several months mounted and no flexing of panel.
now the bolts for the inner part of bracket take some persistence..very tight space
and now for the rear hatch...mine as you can tell is not the fold down style but i imagine the methods will be similar..
inside face...again bolts go thru to panel on inner face of hatch.
and like so.....yes i had to use some washers to adjust the bolts.
now, one thing to note here. the latch plate for the tire carrier will have to be trimmed to fit around the rear hatch handle like so..
 .
.and that my friends is all i have for now. many thanks to the brave souls who came before me and inspired me to take a 3/4" drill to my blazer.
Benedict1337 for one.
i would do this mod again if ever i had the choice, i love the look and it sets you out from the crowd.
one thing though...you will not be able to open you glass portion of hatch with carrier in locked position...keep that in mind.
if you have any questions feel free to post them up..i will try my best to help you out.
Link to the DIY Article
Last edited by swartlkk; Sep 9, 2010 at 02:55 PM. Reason: Added link to tech article.


to paraphrase a great comedian
besides your ride was the one that pushed me to the point of doing this mod.