
95-97 Blazer Composite Retrofit HOW TO(Finished--PIC HEAVY)


Thread Starter
|
New Member
Joined: Oct 2009
Posts: 84
From: Spring,TX

Hey all, I'm sure there are a few of you who have seen my thread about retrofitting Blazer composites. This is just a post about what i did, and the steps i took to get there.
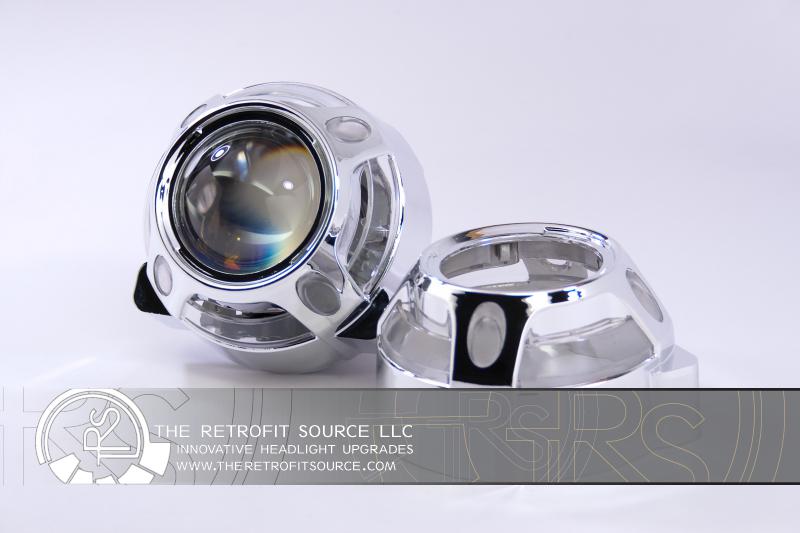
I started with the FX-35 Bi-Xenon projectors for their size, output, and their ease of installation.

Decided that the Panamera shrouds that TRS offered would be the lucky winner, one reason for its size, and another because its sexy and would work fantastic for the plans i had in store.
If you've ever had to pop your head lights apart for, whatever reason, then you should know how to do this. If you don't, I'm not going to explain, go do a search some where .
.
The first thing i did once i had the housings disassembled was strip all the chrome off, i did the shrouds at the same time since i would be later painting those as well.
Once they were de-chromed, i shaved off the 9005 and 9006 bulb holder positions, giving me a rounded housing:
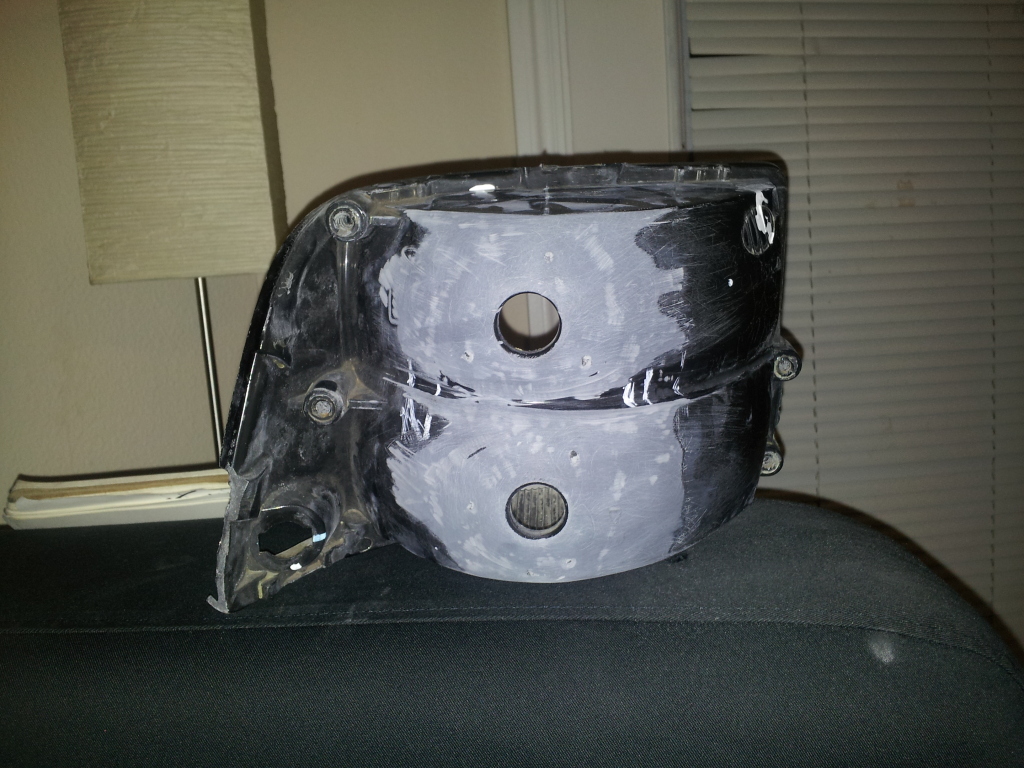 (you can see where the brittle plastic cracked on the side)
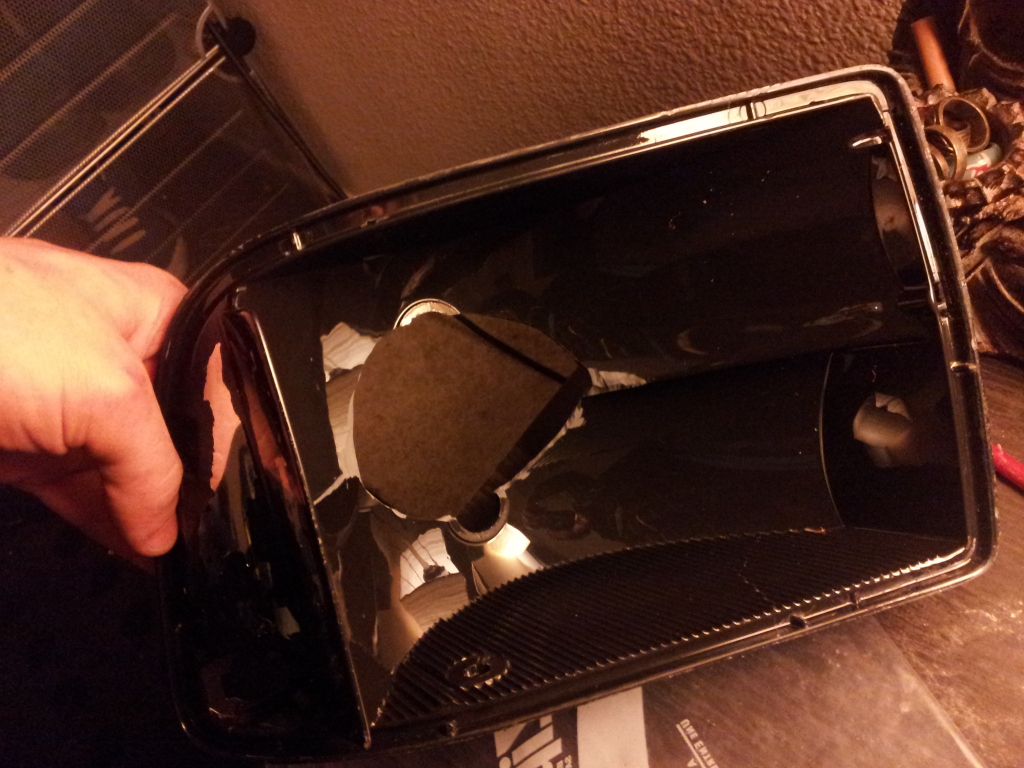
Then i began cutting the opening for the projectors, and the contours of the housings onto the shrouds, resulting in this:

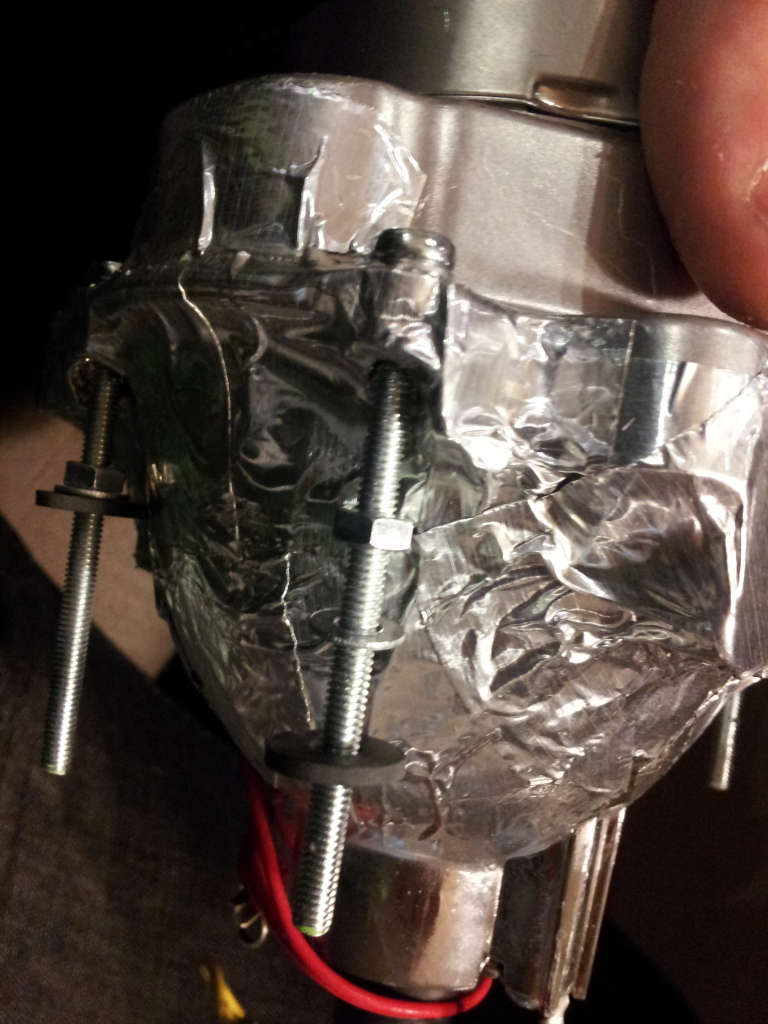
I found the same thread screws at Lowes to mount the projectors to the housing. they're 7mm threads, IIRC, but dont hold me to that, i cant remember correctly. i then threaded a nut, washer, and rubber washer on the inside, then star lock washers and nylock nuts on the outside of the housing. giving me full adjusting control.
once everything was mocked up, and test fitted, i pulled it all apart and sprayed the inside of the housing with Rustoleum High Temp Semigloss Black paint, and the shroud with Duplicolor Dark Storm Grey Metallic.
I put the projector back into the housing and aligned the cut off
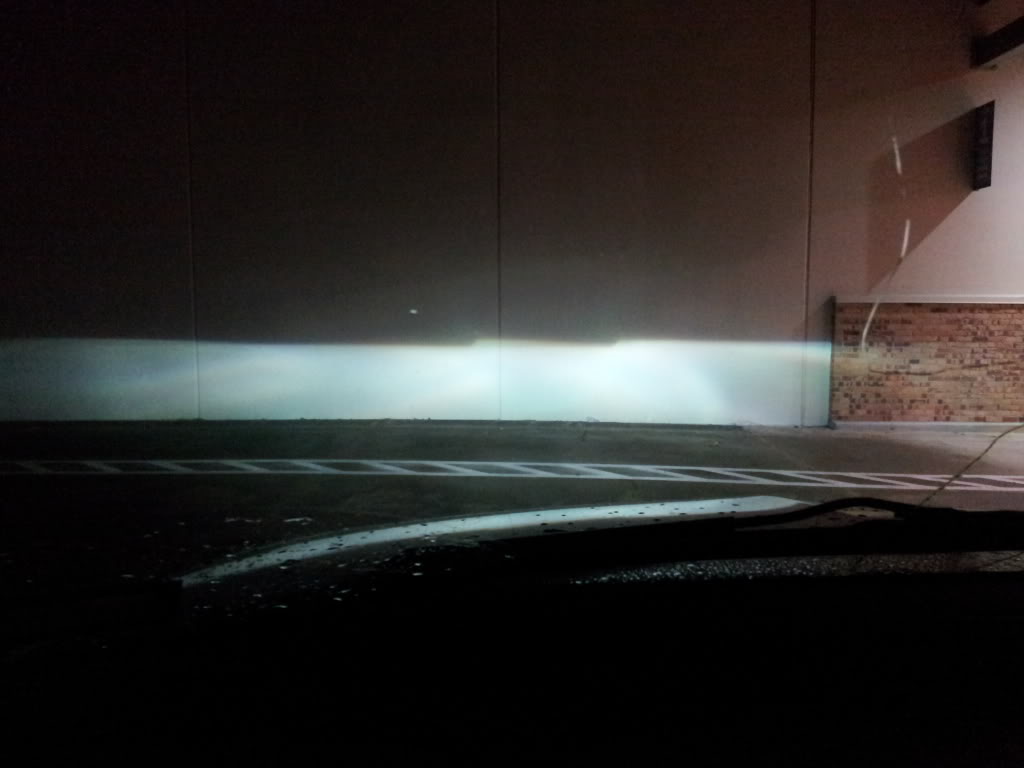 (yes, i adjusted the pass. side down)
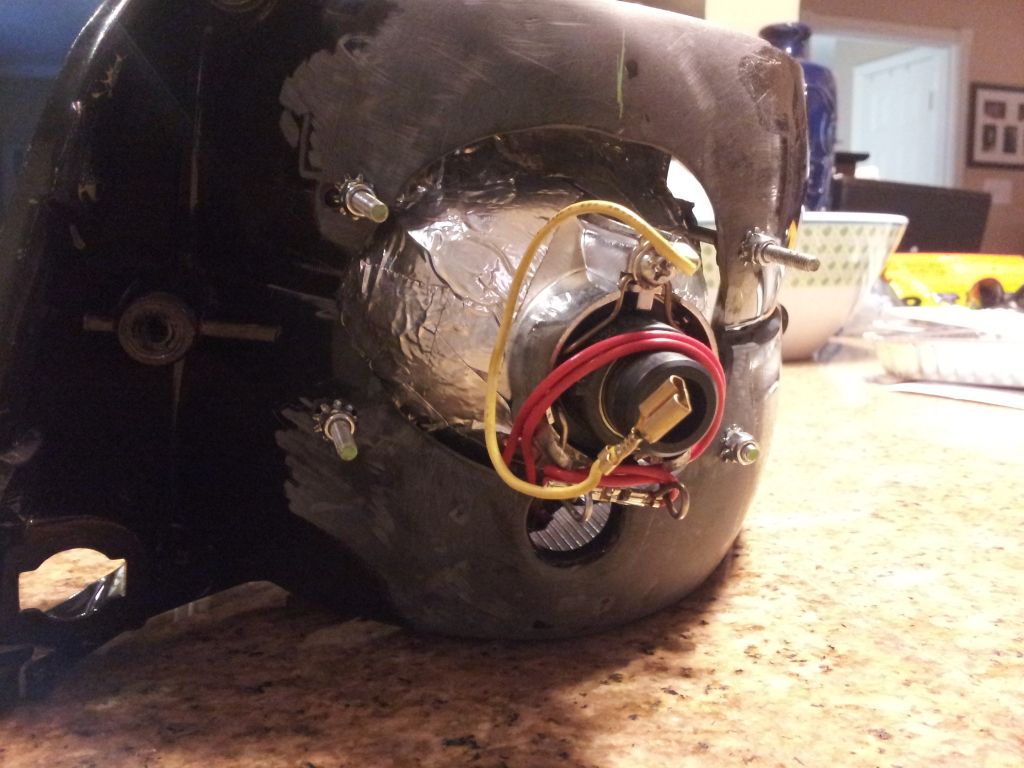
Since i had them apart at this point, and because I really like the look of them when they're done properly (which i hope i achieved), I decided to install "Demon Eyes" into the projector, and while i couldnt find any real info on mounting positions for the LED, aside from "aim it at the shield", i decided to do just that. so i drilled a hole in the projector on the edge of where the lens holder meats the more flat area of the projector, and aimed it at the shield (jb welded into position). i then wired it to a "LED touch switch." tapped into a 12v ignition on source as the trigger, so i can only have them on when the ignition is triggered (as to not accidently kill the battery)
 (this is the pass. side, so tilt head 90 degrees to the right)
I then began to seal up the back. I decided to go with a pretty easy solution - instead of trying to contour the cut edges, i just "vacuum formed" (it didnt work /exactly/ like i wanted, but turned out good) a piece of acrylic that i had left over from my led bar project around the back, cut, shaved, and siliconed it to the back
 (this is before i attached/sealed it to the housing)
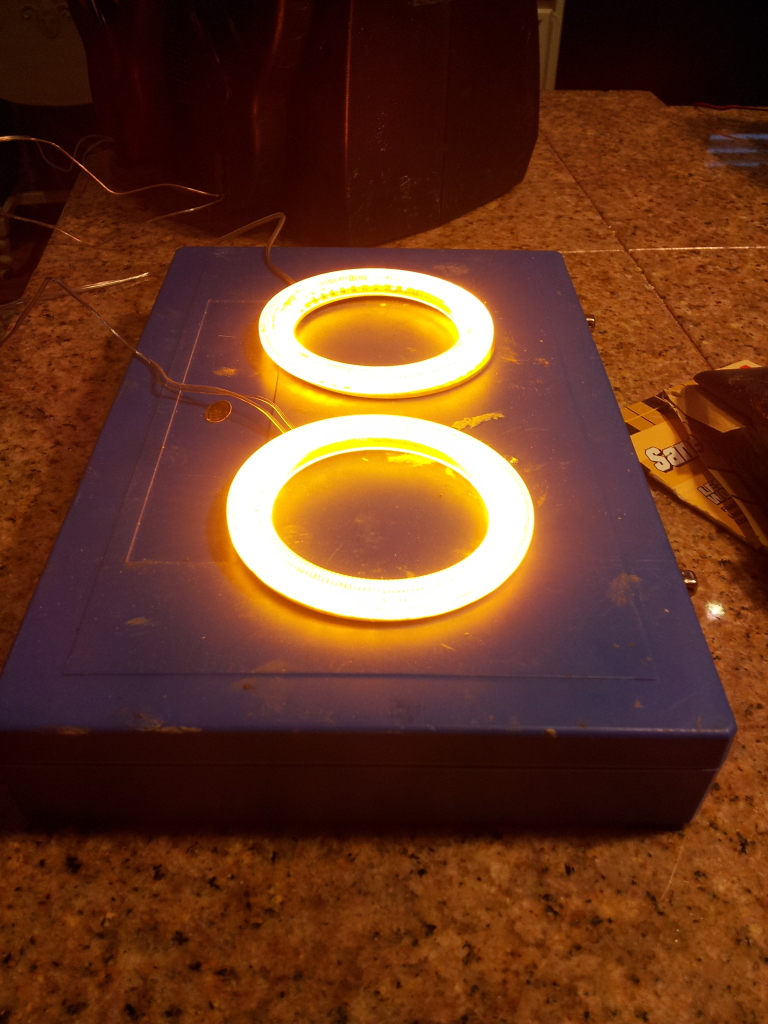
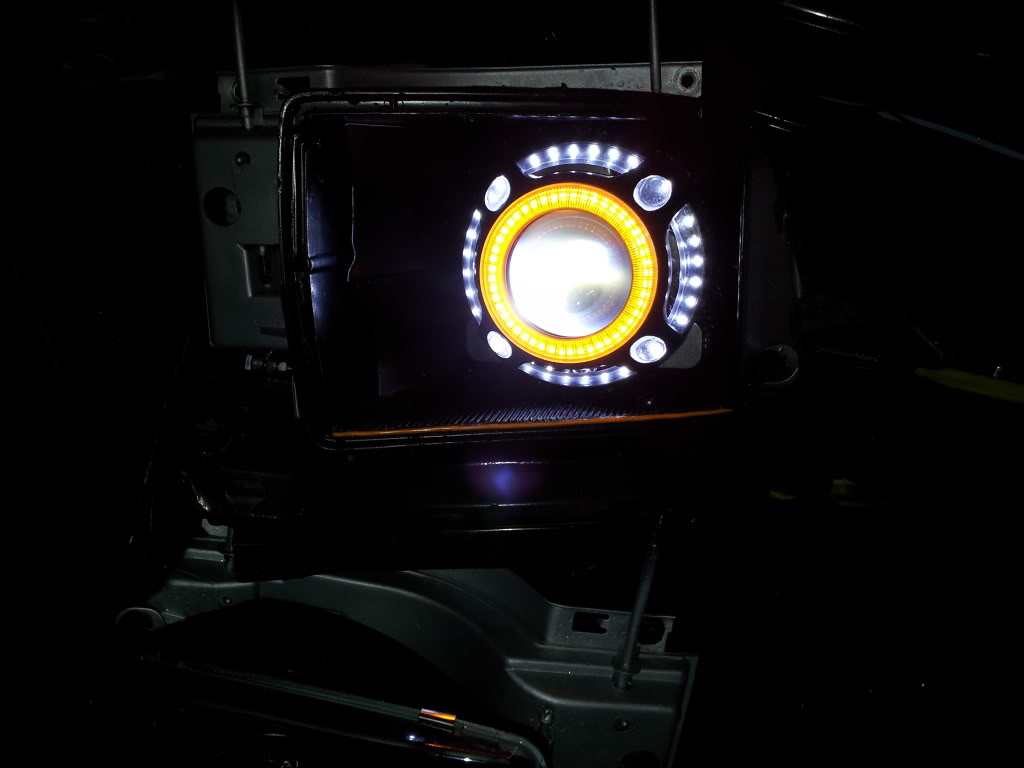
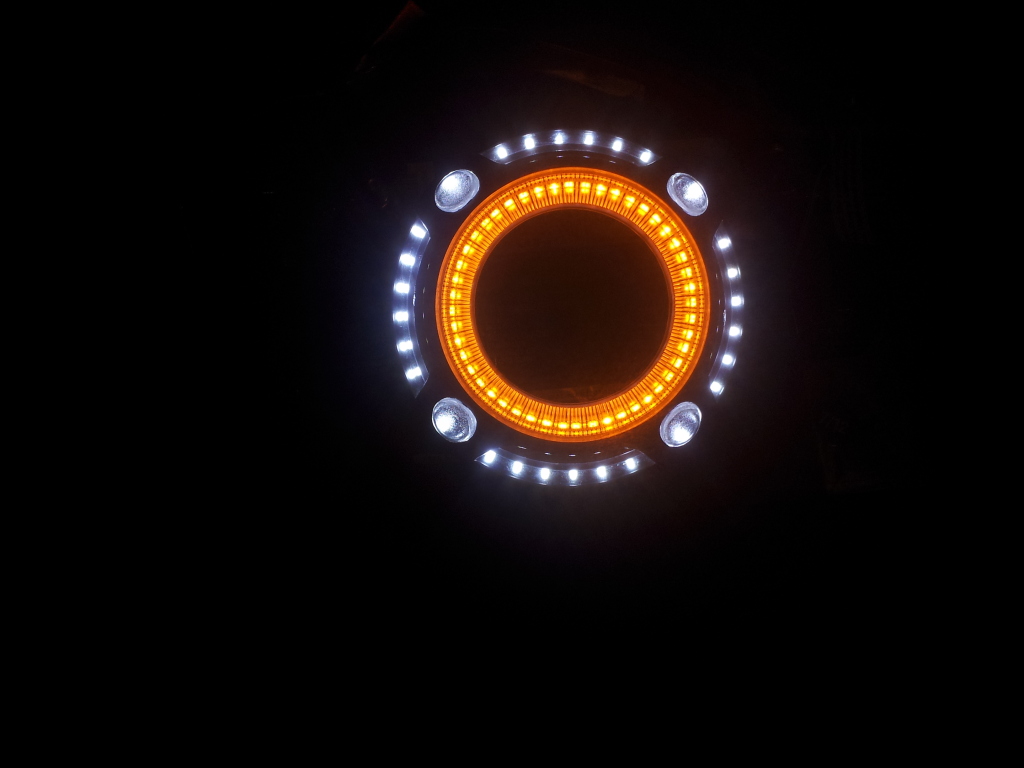
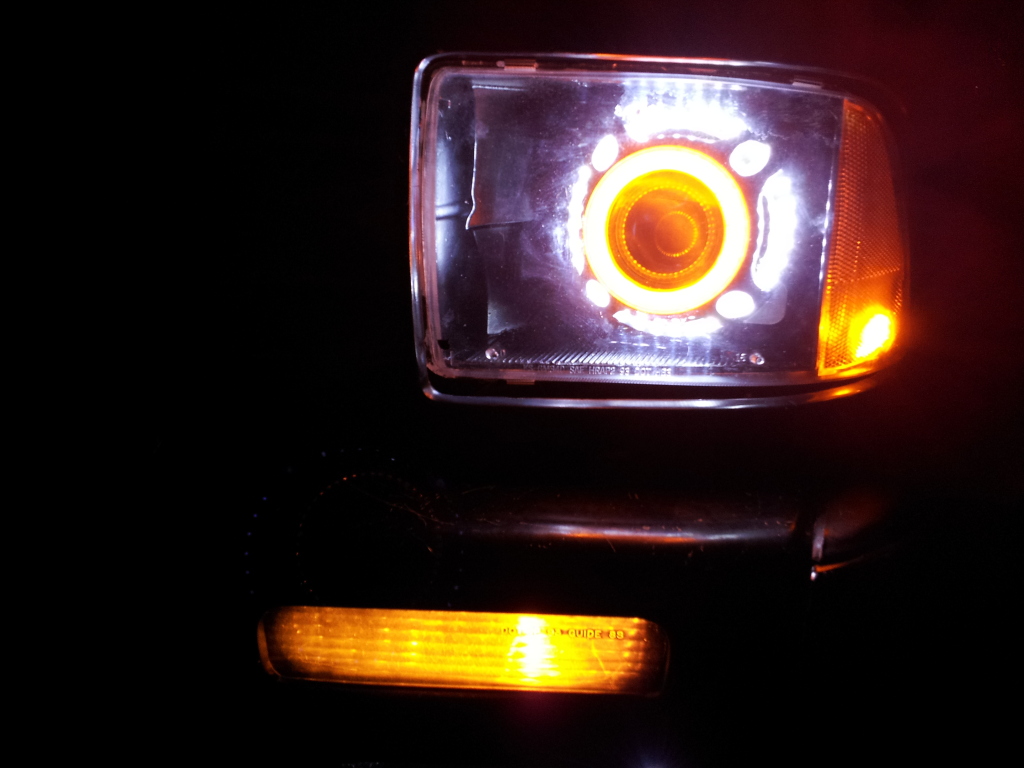
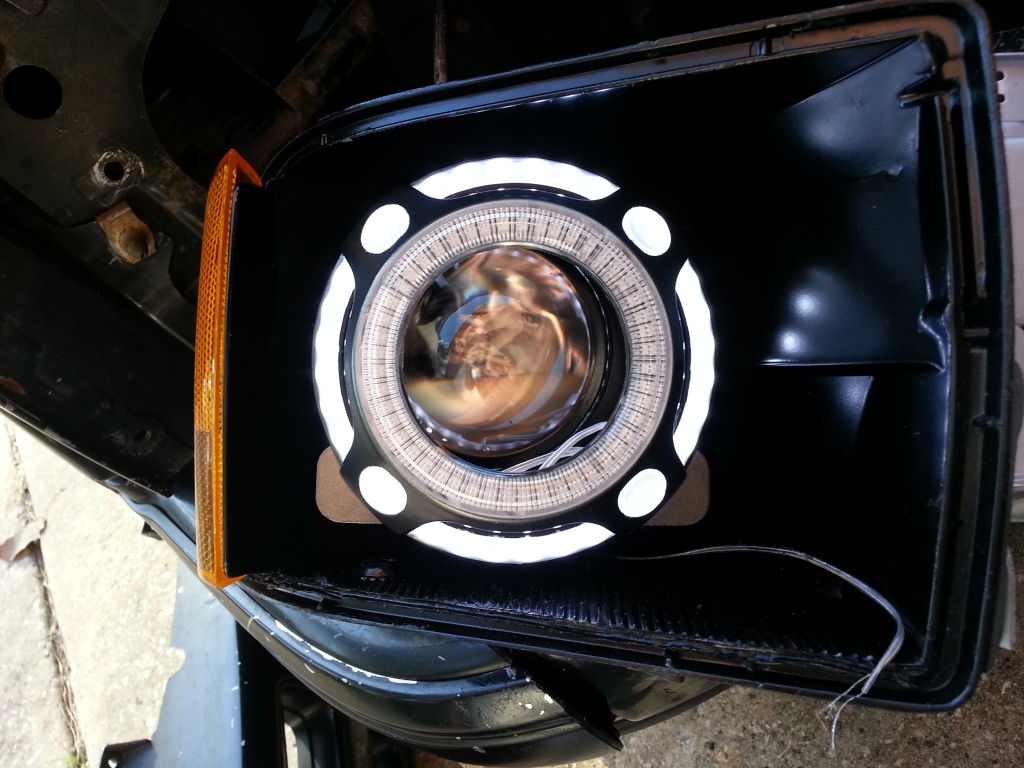
once the hard part was out of the way, i began working on the shrouds. I went with 2 LED rings per shroud, a "cool white" 120mm ring on the inside of the shroud, to shine through the clear plastic panels the Panamera shroud offers, used as a running light (hooked to a 12v ignition trigger). As well as an 80mm amber ring with a diffuser, around the face of the shroud, to act as a forward facing turn signal. the white rings were ordered from FactoryKiss.com, and though i was very pleased with the price, as well as the quality of the product, they came from china, and took too long, when AFTER i ordered these, i refined a search on amazon.com, and found some for the same price, coming from within the US, which would have saved time on shipping, but it doesn't matter. the amber rings and diffusers came from SuperBrightLEDs.com, and are the black PCB models. The diffuser did have to be trimmed quite a bit to fit exactly how i wanted it to on the shroud, as well as the face of the shroud had to be "bored" a little, in order for the led ring to become more "inside" the face of the shroud, as opposed to just sitting on top, which would have looked ugly.
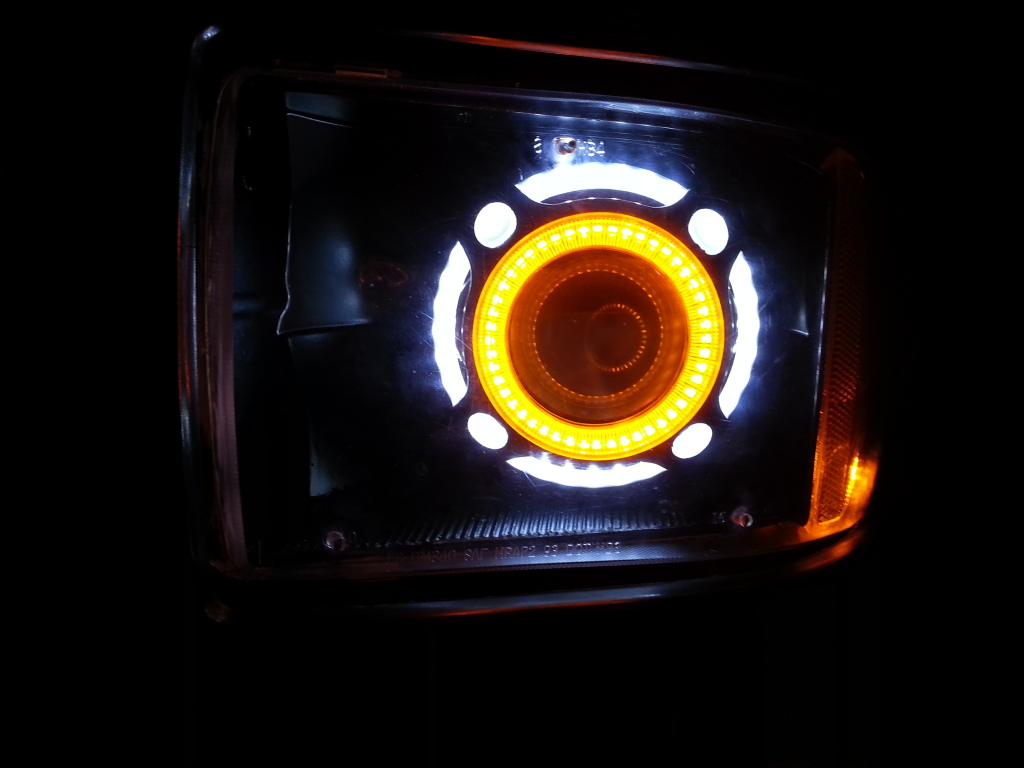
AMBER:
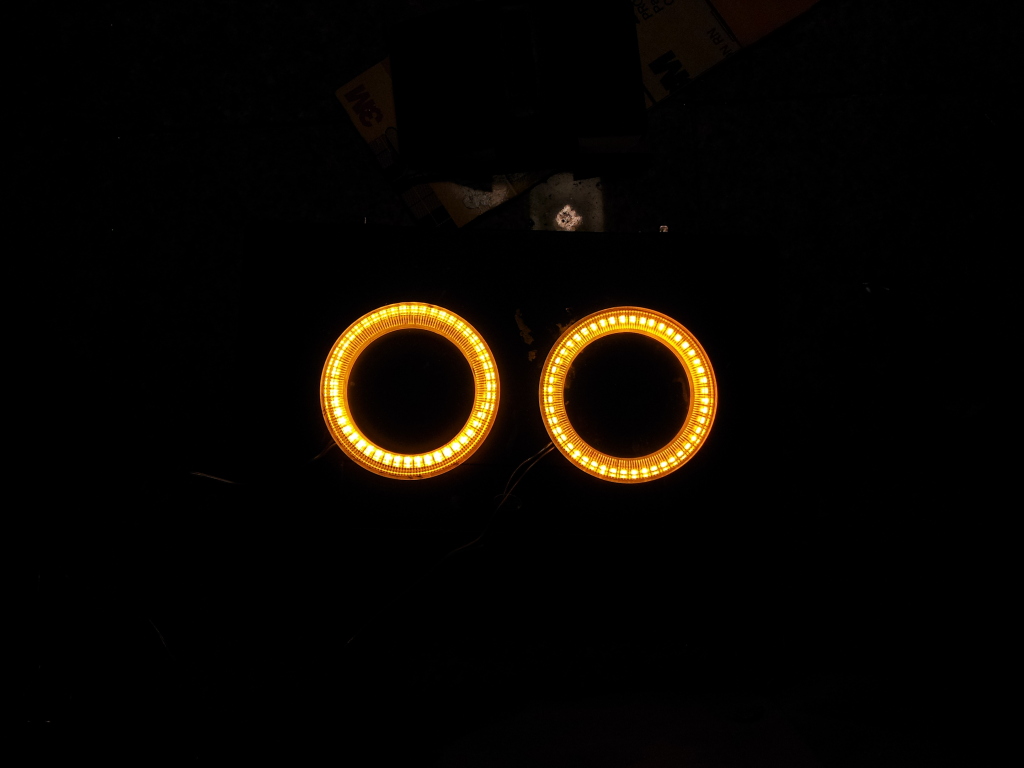

heres where you can see the diffuser on the face a lot better
 (you can see on the bottom of the housing where i was going to attempt to do an EL wire "parking light" but decided to scrap it since i didnt like the look of it)
and the white ring
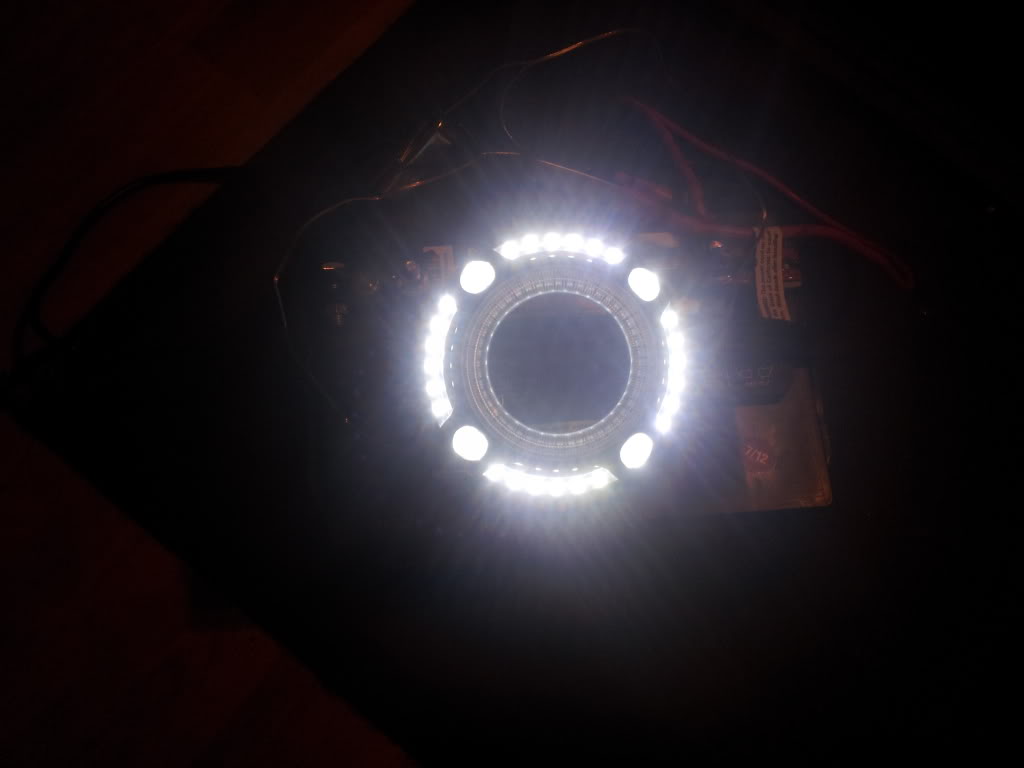
and the both of them on
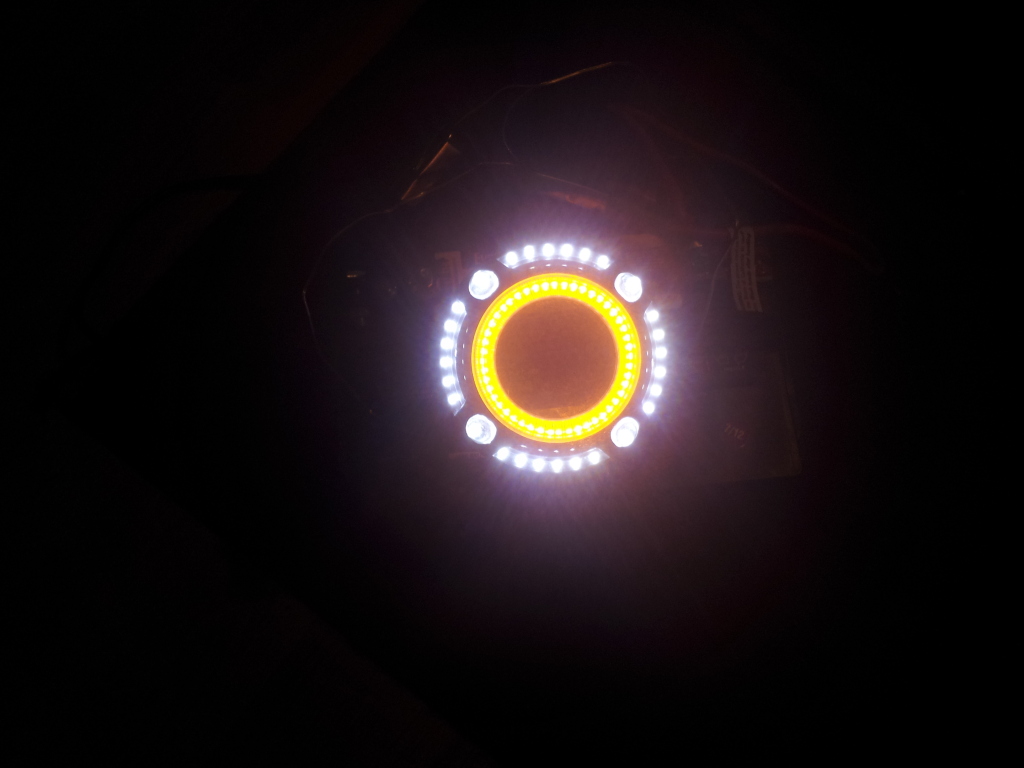
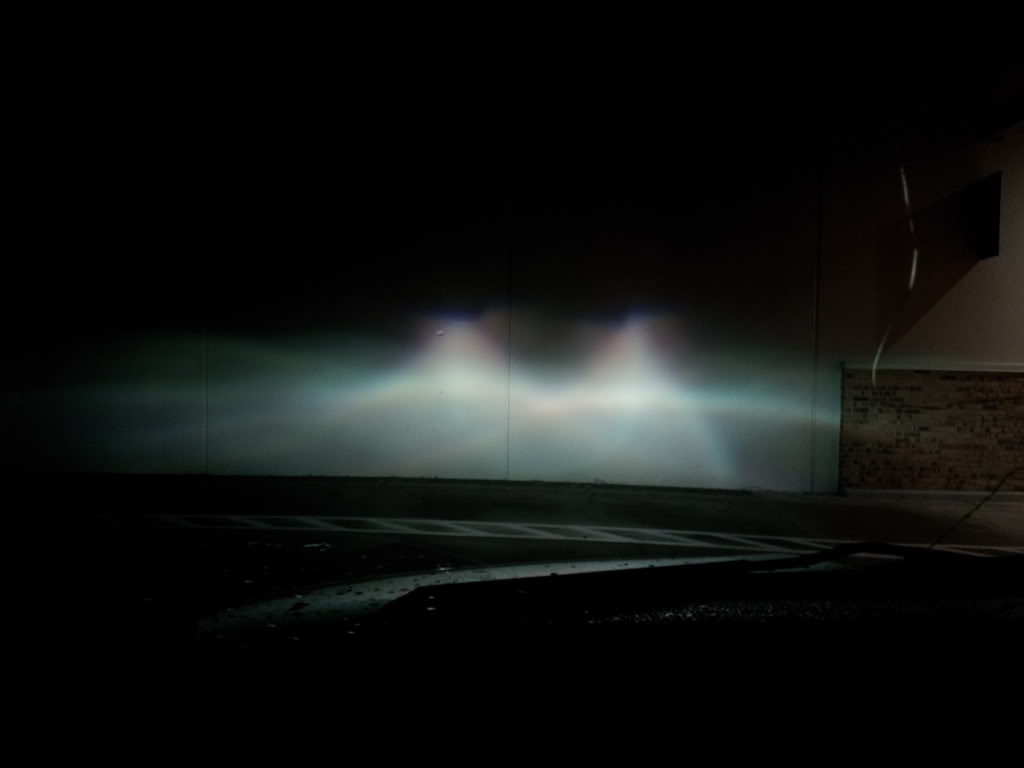
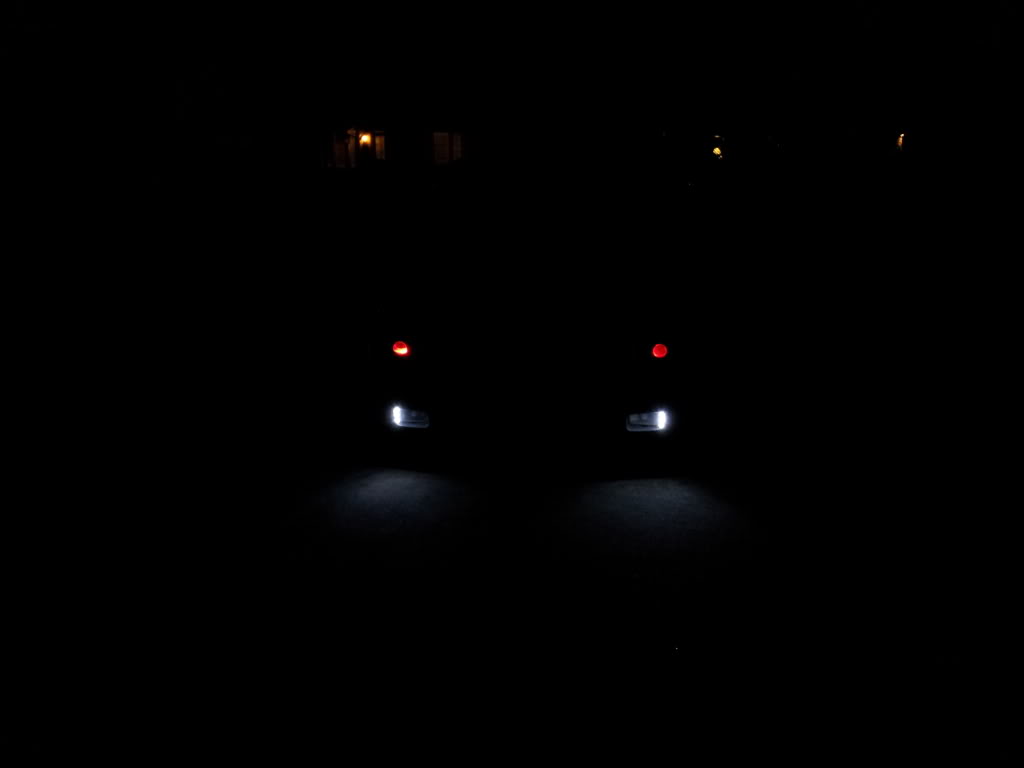
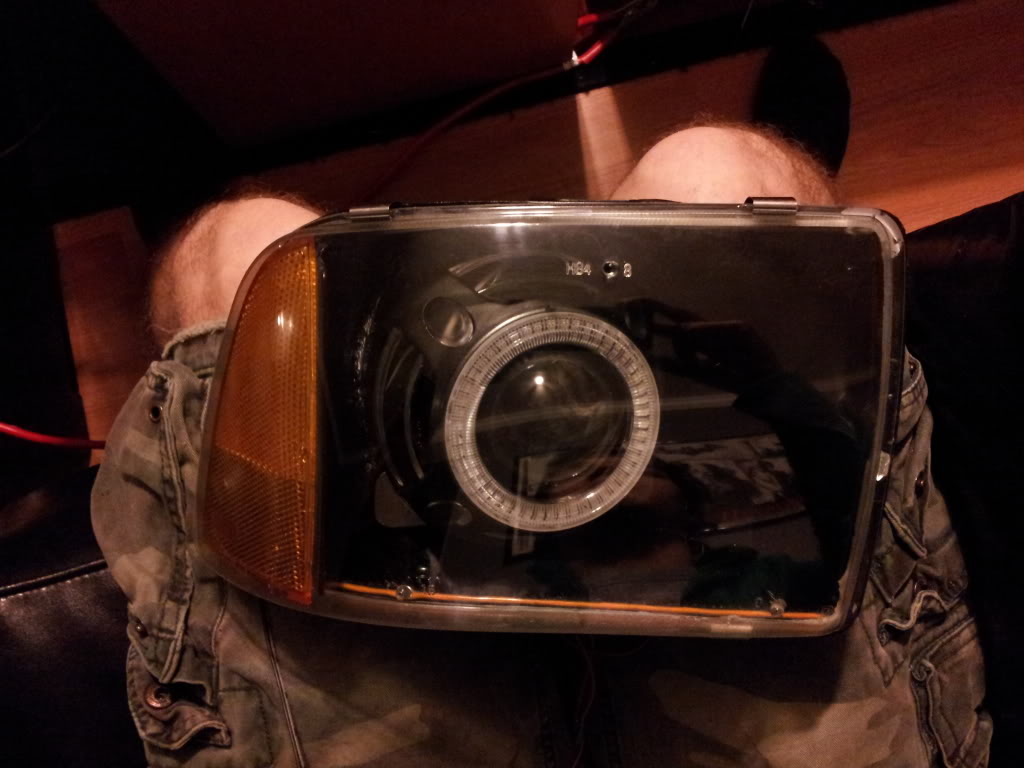
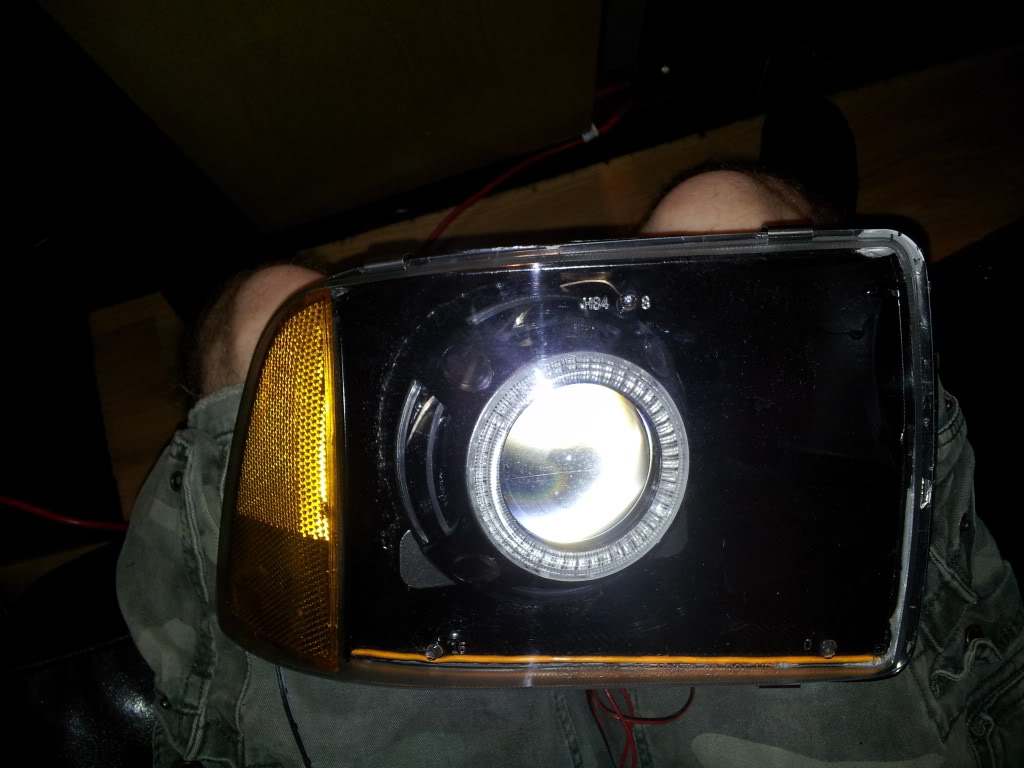
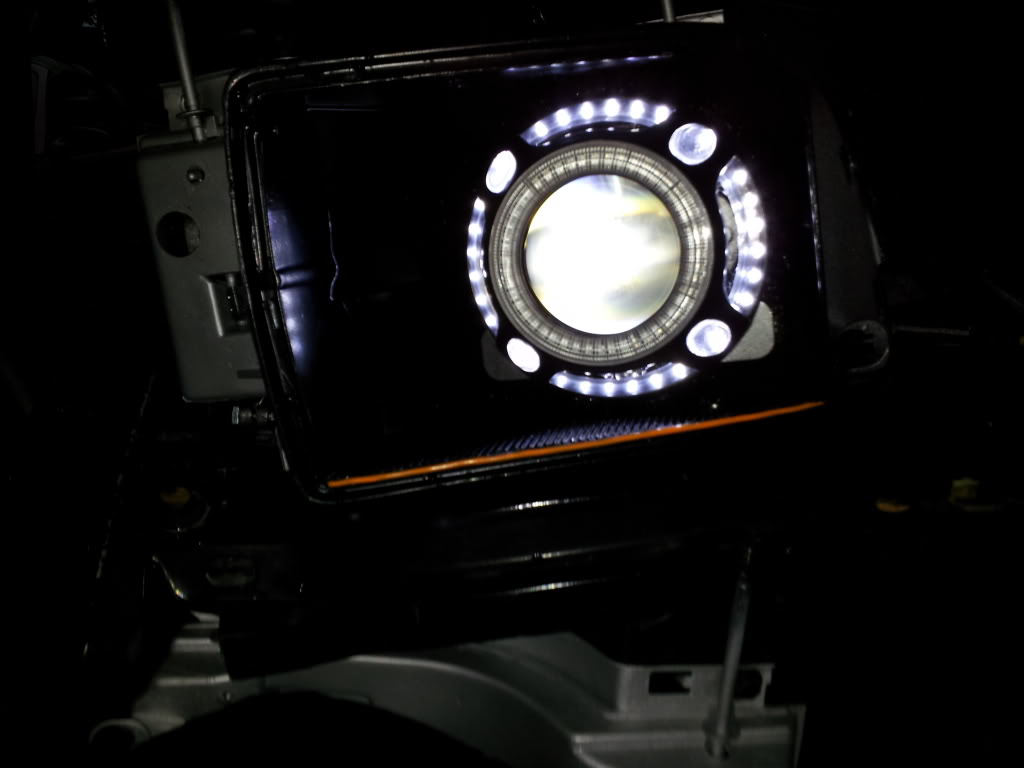
and the full installation
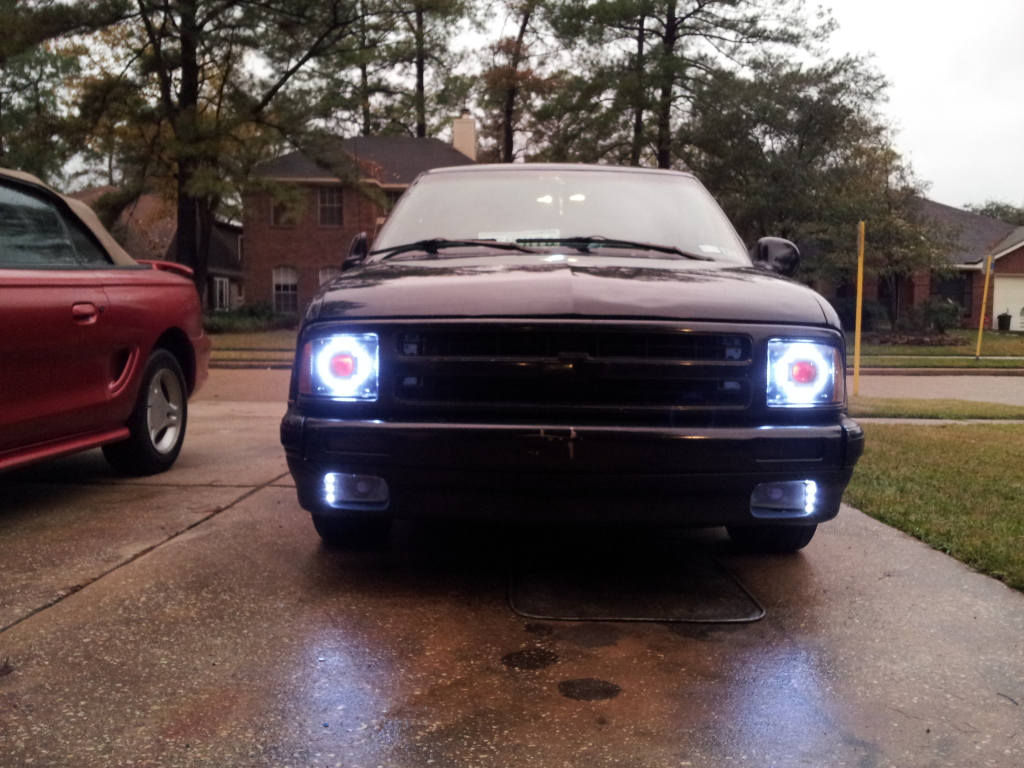
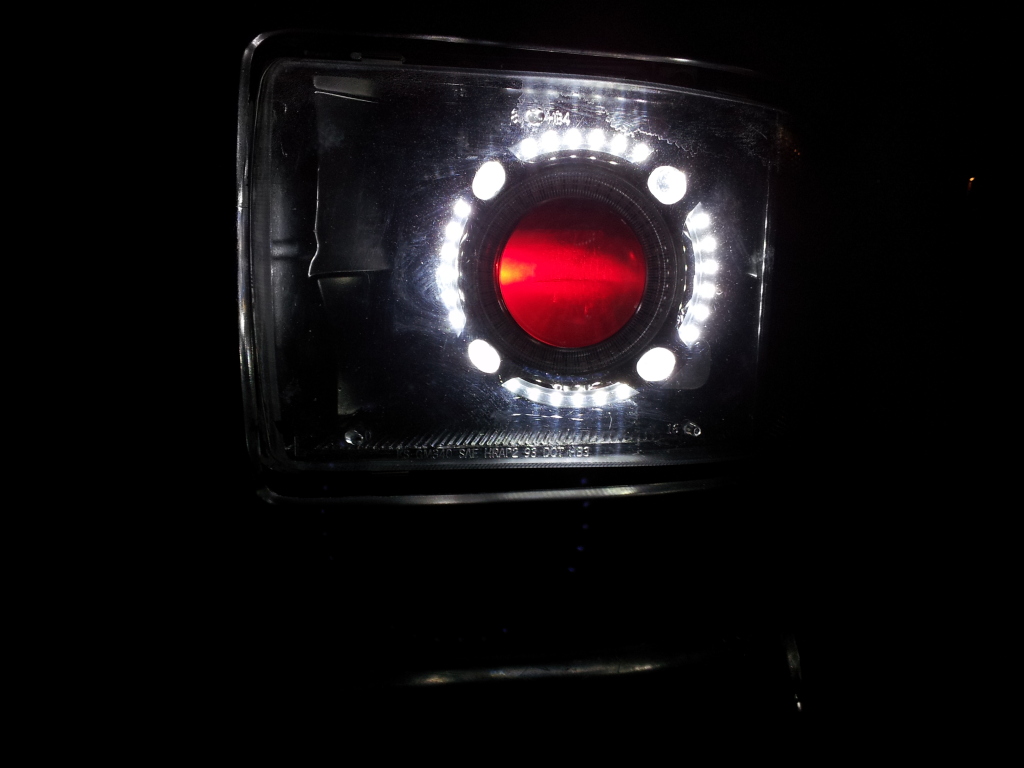
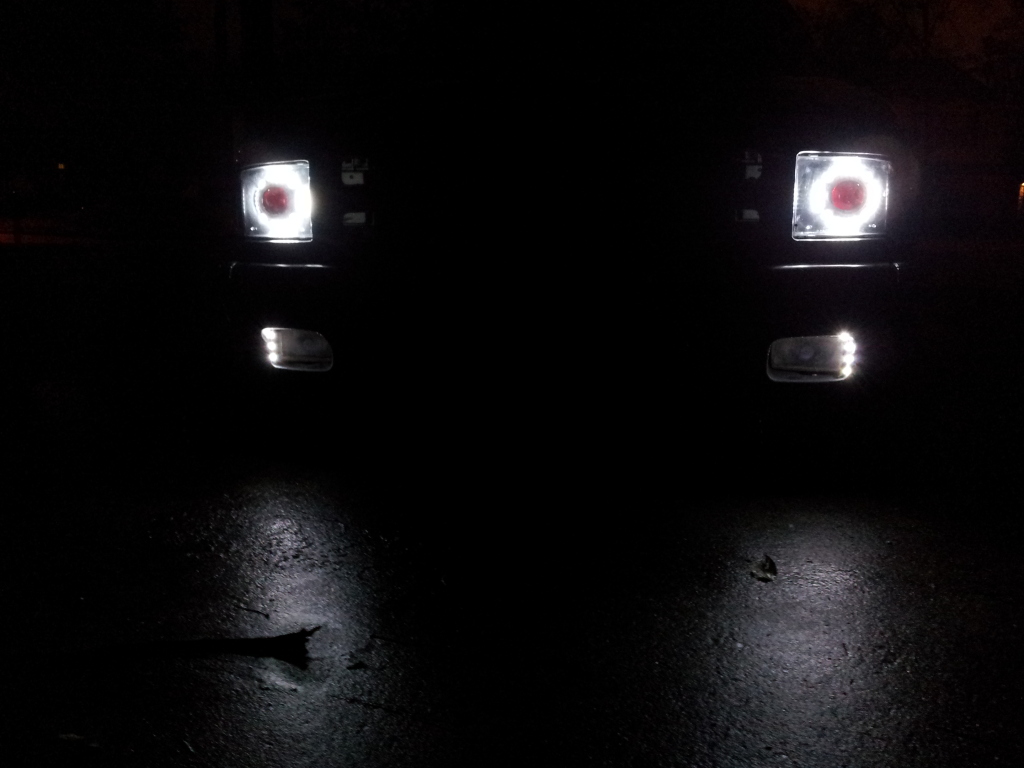 (ignition on - white rings on, demon eyes on)
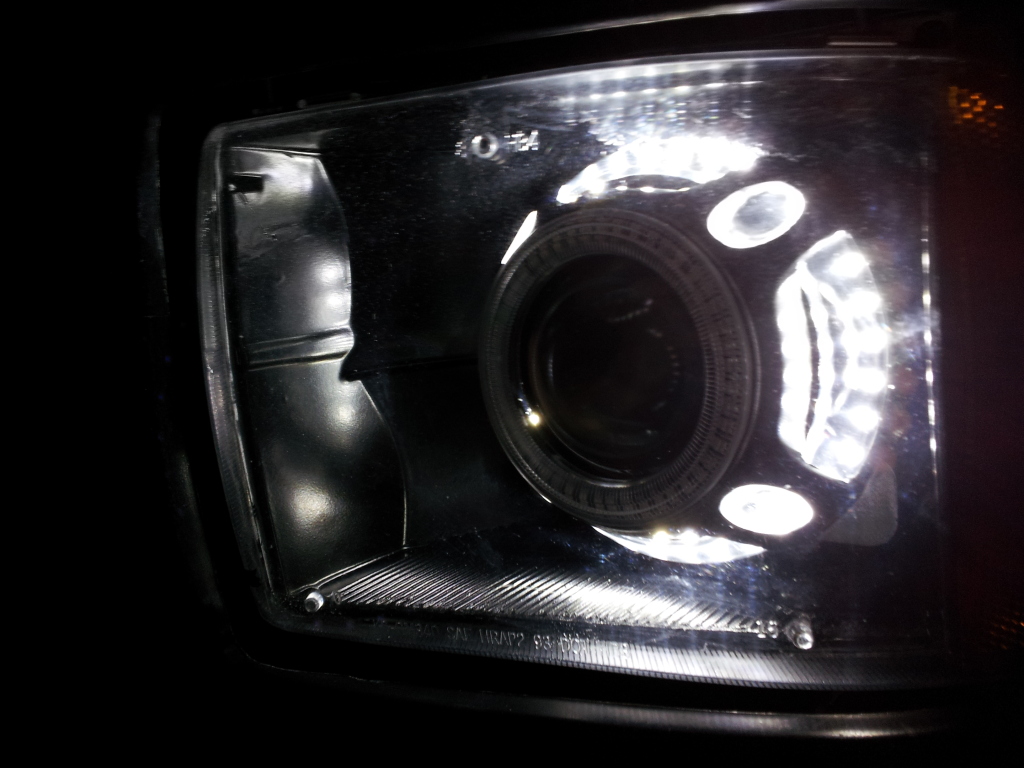
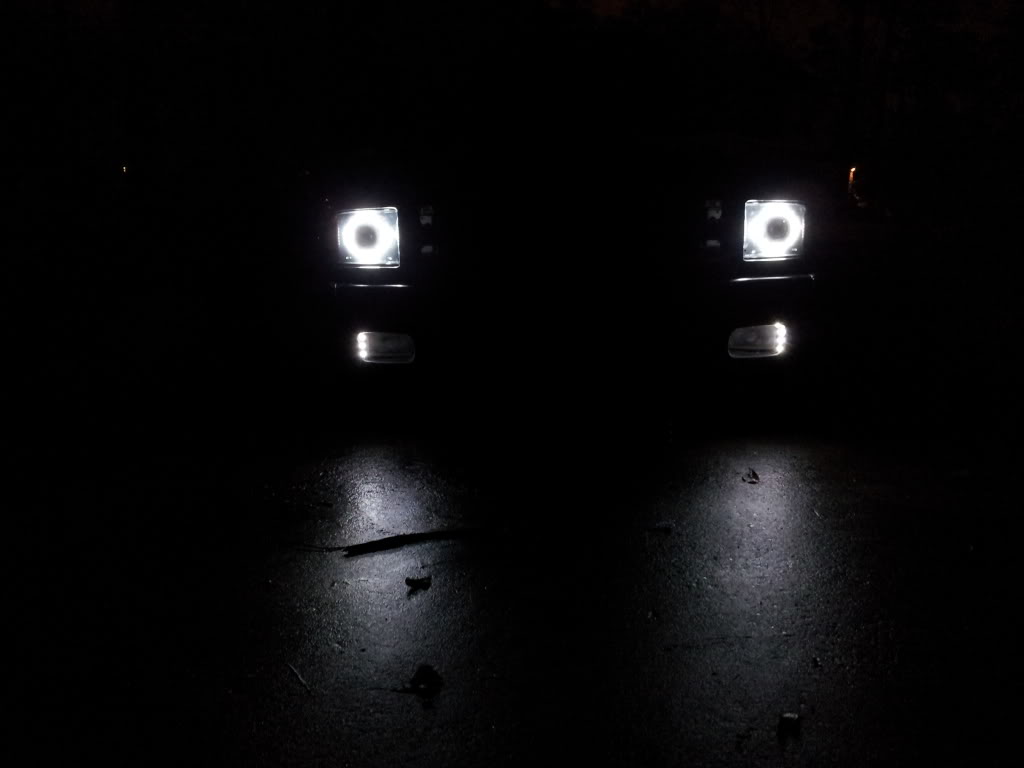 (ignition on - white rings only)
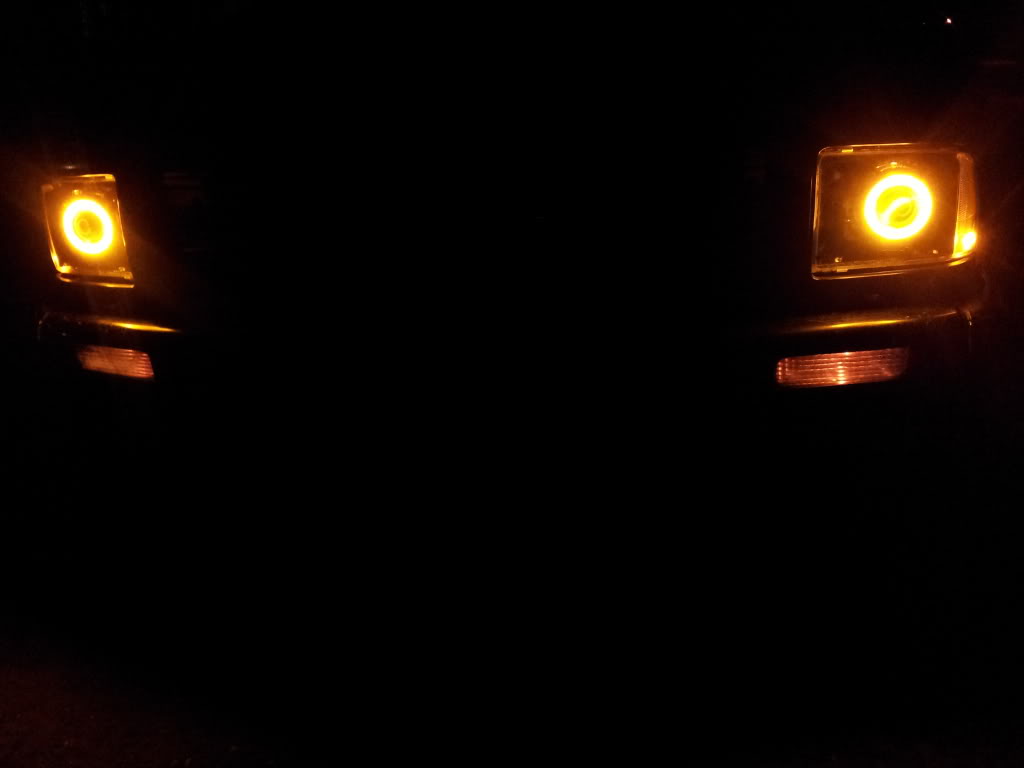
 (igniton on - white rings on, hazards on)
Since the Amber rings are tied into my flashers on my bumber lights, the blink when my bumper lights blink (turn signal, hazards) but not when the parking lights are on. acting as a stand alone Hazard/flasher light.
the only thing i dont like, is the hot spots on the white rings, so im probably going to get some of the Rustoleum "Frosted Glass" spray, and see what kind of diffusing effect i can get to try and soften the hot spots. Day shots are what i really need, but seeing as its been nothing but rain out here since i got these baby's finished, i have to wait until the weather clears. but that i shouldnt be too much longer. so until then, ENJOY!
I started with the FX-35 Bi-Xenon projectors for their size, output, and their ease of installation.
Decided that the Panamera shrouds that TRS offered would be the lucky winner, one reason for its size, and another because its sexy and would work fantastic for the plans i had in store.
If you've ever had to pop your head lights apart for, whatever reason, then you should know how to do this. If you don't, I'm not going to explain, go do a search some where
. The first thing i did once i had the housings disassembled was strip all the chrome off, i did the shrouds at the same time since i would be later painting those as well.
Once they were de-chromed, i shaved off the 9005 and 9006 bulb holder positions, giving me a rounded housing:
(you can see where the brittle plastic cracked on the side)Then i began cutting the opening for the projectors, and the contours of the housings onto the shrouds, resulting in this:
I found the same thread screws at Lowes to mount the projectors to the housing. they're 7mm threads, IIRC, but dont hold me to that, i cant remember correctly. i then threaded a nut, washer, and rubber washer on the inside, then star lock washers and nylock nuts on the outside of the housing. giving me full adjusting control.
once everything was mocked up, and test fitted, i pulled it all apart and sprayed the inside of the housing with Rustoleum High Temp Semigloss Black paint, and the shroud with Duplicolor Dark Storm Grey Metallic.
I put the projector back into the housing and aligned the cut off
(yes, i adjusted the pass. side down)Since i had them apart at this point, and because I really like the look of them when they're done properly (which i hope i achieved), I decided to install "Demon Eyes" into the projector, and while i couldnt find any real info on mounting positions for the LED, aside from "aim it at the shield", i decided to do just that. so i drilled a hole in the projector on the edge of where the lens holder meats the more flat area of the projector, and aimed it at the shield (jb welded into position). i then wired it to a "LED touch switch." tapped into a 12v ignition on source as the trigger, so i can only have them on when the ignition is triggered (as to not accidently kill the battery)
(this is the pass. side, so tilt head 90 degrees to the right)I then began to seal up the back. I decided to go with a pretty easy solution - instead of trying to contour the cut edges, i just "vacuum formed" (it didnt work /exactly/ like i wanted, but turned out good) a piece of acrylic that i had left over from my led bar project around the back, cut, shaved, and siliconed it to the back
(this is before i attached/sealed it to the housing)once the hard part was out of the way, i began working on the shrouds. I went with 2 LED rings per shroud, a "cool white" 120mm ring on the inside of the shroud, to shine through the clear plastic panels the Panamera shroud offers, used as a running light (hooked to a 12v ignition trigger). As well as an 80mm amber ring with a diffuser, around the face of the shroud, to act as a forward facing turn signal. the white rings were ordered from FactoryKiss.com, and though i was very pleased with the price, as well as the quality of the product, they came from china, and took too long, when AFTER i ordered these, i refined a search on amazon.com, and found some for the same price, coming from within the US, which would have saved time on shipping, but it doesn't matter
. the amber rings and diffusers came from SuperBrightLEDs.com, and are the black PCB models. The diffuser did have to be trimmed quite a bit to fit exactly how i wanted it to on the shroud, as well as the face of the shroud had to be "bored" a little, in order for the led ring to become more "inside" the face of the shroud, as opposed to just sitting on top, which would have looked ugly.AMBER:
heres where you can see the diffuser on the face a lot better
(you can see on the bottom of the housing where i was going to attempt to do an EL wire "parking light" but decided to scrap it since i didnt like the look of it)and the white ring
and the both of them on
and the full installation
(ignition on - white rings on, demon eyes on)(ignition on - white rings only)(igniton on - white rings on, hazards on)Since the Amber rings are tied into my flashers on my bumber lights, the blink when my bumper lights blink (turn signal, hazards) but not when the parking lights are on. acting as a stand alone Hazard/flasher light.
the only thing i dont like, is the hot spots on the white rings, so im probably going to get some of the Rustoleum "Frosted Glass" spray, and see what kind of diffusing effect i can get to try and soften the hot spots. Day shots are what i really need, but seeing as its been nothing but rain out here since i got these baby's finished, i have to wait until the weather clears. but that i shouldnt be too much longer. so until then, ENJOY!
Last edited by KerbyG; Jan 14, 2013 at 02:15 AM.
Very nice write up.
If you want to get rid of hot spots on your led rings completely, I'd suggest going to COB led rings. TRS and superbrightleds offer them (depending on size) for around $55 It's a little steep, but you can't argue with TRS's quality and customer service.
Edit: I'd also suggest not running the leds while the hids are on, the heat can damage the leds. You may already be aware, but just in case you weren't I figured I'd say something.
Last edited by Thogert; Jan 14, 2013 at 02:37 AM.
Super Member
Joined: Apr 2012
Posts: 1,279
From: Port huron,Mi
Sir are you missing some unkown time frame from your life?I think you were abducted at sometime and you are sharing alien technology LOL.Looks Good though I admire your effort although you find a stange place to focus it on.
Thread Starter
|
New Member
Joined: Oct 2009
Posts: 84
From: Spring,TX
Very nice write up.
If you want to get rid of hot spots on your led rings completely, I'd suggest going to COB led rings. TRS and superbrightleds offer them (depending on size) for around $55 It's a little steep, but you can't argue with TRS's quality and customer service.
Edit: I'd also suggest not running the leds while the hids are on, the heat can damage the leds. You may already be aware, but just in case you weren't I figured I'd say something.
If you want to get rid of hot spots on your led rings completely, I'd suggest going to COB led rings. TRS and superbrightleds offer them (depending on size) for around $55 It's a little steep, but you can't argue with TRS's quality and customer service.
Edit: I'd also suggest not running the leds while the hids are on, the heat can damage the leds. You may already be aware, but just in case you weren't I figured I'd say something.
Thread Starter
|
New Member
Joined: Oct 2009
Posts: 84
From: Spring,TX
Hah, thanks man. I might be missing a bit of time, but the creativity might be worth it xD
Thread Starter
|
New Member
Joined: Oct 2009
Posts: 84
From: Spring,TX
Hey guys, so I ripped the headlights off again, because I didn't like the way the white less looked behind the shroud. So I went to HobbyLobby and picked up a can of Testor's "Dull Coat" to soften the led hit spots, and it worked out perfectly
Thread Starter
|
New Member
Joined: Oct 2009
Posts: 84
From: Spring,TX
Oh right. I ordered a pair of the "Euro Clear" lights. I got them about a year ago from StreetBeatCustoms.com for around 150. The mounting bracket is pretty shotty though, and doesn't hold much of an alignment. I actually did all the work on the Factory housings, and swapped the clear lenses from the Euros. So I ended up with factory housing, factory bracket, and "euro" lenses.

Starting Member
Joined: Jul 2016
Posts: 220
From: South New Jersey
i know it is an old thread but i a resurrecting it Holy crap dude, those things look absolutely bad**s . I have always hated how not one aftermarket company makes any cool headlights for the 95-97's. I had always wished i had projectors because they are just brighter. i love the way they look and project light. Yours look fantastic. Funny as i was reading i was thinking you were probably going to buy and need one of the euro clear headlight sets. I am tempted to go to my local pick and pull and grab a set of oem housings and work on them while i keep driving it. Would be a nice project to do on the side.
I am not sure you still have your blazer but did you ever have any problems with condensation? I have problems with that in some of the led bars i have put in the front of mine, in the bumper. I bought a pair, then one started to get moisture in the inside and eventually fried the led's inside. The other one is fine to this day. I put in a replacement which is PC, the first ones are glass. and that one seems to have moisture in it too. still works but not for long i expect. Your post is perfect. Thank you so much for the write-up and the picks!!
Holy crap dude, those things look absolutely bad**s . I have always hated how not one aftermarket company makes any cool headlights for the 95-97's. I had always wished i had projectors because they are just brighter. i love the way they look and project light. Yours look fantastic. Funny as i was reading i was thinking you were probably going to buy and need one of the euro clear headlight sets. I am tempted to go to my local pick and pull and grab a set of oem housings and work on them while i keep driving it. Would be a nice project to do on the side. I am not sure you still have your blazer but did you ever have any problems with condensation? I have problems with that in some of the led bars i have put in the front of mine, in the bumper. I bought a pair, then one started to get moisture in the inside and eventually fried the led's inside. The other one is fine to this day. I put in a replacement which is PC, the first ones are glass. and that one seems to have moisture in it too. still works but not for long i expect. Your post is perfect. Thank you so much for the write-up and the picks!!