
how do you change the spider, what's needed?


Thread Starter
|
Beginning Member
Joined: Jul 2010
Posts: 14

1994 3.4l w vortec. After a new pump, sender, filter and tune-up, with no gas getting to the cylinders, I finally found out the injector coil is open. After pulling the plenum top off I saw slight evidence of gas leaking on both sides, so a new nut kit is needed, as well as the regulator (I realize it comes with the new spider). I pressurized the fuel system with the plenum off and saw no leaking, but the washing tells me it will leak again. I measured the resistance right on the two electrical posts and there is no continuity. When we measured the fuel pressure we found it a little low, it was 55 psi and bled off very slowly (after 10 mins dropped to 54 psi) so I attribute that to a damaged regulator. This would start up as long as there was starter fluid in the throttle body.
I have three questions, first of all is there any way to change out the injector itself, is there any after market part available? I'm trying to save my girlfriend some money. Secondly to change the input/return fuel lines (nut kit) do you have to pull the rest of the intake manifold? Or do they screw into the back wall with a seal/o-ring? Finally to change the injector assembly (spider), how does it come out? It looks as if the regulator attaches to a housing that is to high to slide out under where the gasket runs.
thanks for any help. Dan

Search is your friend! So is the Tech Article (DIY) section! 
Fuel pressure regulator on Blazer 4.3L CPI W engine
The FPR comes with the CPI spider. Not sure if that thread mentions the 'nut kit' (internal lines), but if you are replacing the spider, replace those lines as well. You do not have to pull the lower manifold the change the nut kit. Once you get down to that, you will see how it comes apart. I believe other threads get into this as well.
Just change the whole thing if you are looking to change it. Don't mess with it too much or you will only have more problems down the road.
Thread Starter
|
Beginning Member
Joined: Jul 2010
Posts: 14
Thanks for the link, I already had read this, and I wish all I had to do was change the regulator as discussed in this thread. But taking the entire spider was not mentioned. Does it slide out towards the passenger side after the fuel lines and poppets are disconnected? is there any screws holding it or is it floating freely?


Junior Member
Joined: May 2010
Posts: 289
From: Philadelphia, PA
The spider comes straight up. You have to rip the gasket, so just get a new one and replace the old when putting the plenum back together.
But to get the spider out. Just Squeeze the tabs on each injector and pull them up and out slowly and carefully. Disconnect the "nut Kit" lines from the spider. Theres a Clip that goes over both lines to hold in place on the spider, just slide that clip off towards the firewall, it looks like a big bobby pin. Stuff some paper towels or rags into your lower intake holes incase that clips escapes your grasp and you drop it. Pull the hoses off the spider and lift up the spider. You'll see that theres a groove for the spider to slide down into, so when you put the new one in, just drop it in.
Hope this helps.
Thread Starter
|
Beginning Member
Joined: Jul 2010
Posts: 14
thank you very much 94BLAZERPA. I have a new gasket. I looked at it hard and I thought the gasket might be in the way, but it's so black I couldn't tell. I would have figured it out once I get the new part, and take a good look at it. What holds the intake/return lines into the back wall? are they threaded in? I guess I can tell when I get those too. I hope this picture comes up showing the wash on both sides. I will have to save money for the parts and I will up=date this when It's working, I hope. Dan
 Well that didn't work, here we go again
Last edited by swartlkk; Aug 3, 2010 at 05:57 AM. Reason: *Consecutive Posts* - Please use the edit feature to add more information to your post if another member has yet to reply.
Junior Member
Joined: May 2010
Posts: 289
From: Philadelphia, PA
yeah i'm not sure on the nut kit on how they attach, never missed with mine, yet. I know they just slide on with an O-ring to the spyder. I'm thinking there the same on the other end.
That connector on top of the spyder, theres a black rubber gasket that goes around the prongs that it connects to, check that while your at it. the rubber thing gets a bit mushy from the gas and it sometimes will loosen the connection at that point. A loose connectin can cause spyder issues.
keep us updated on how it goes.

Senior Member
Joined: Aug 2008
Posts: 532
From:

I honestly don't remember where I found this, but it might have been here or over in the Blazer section of automotive forums....either way, here you go:
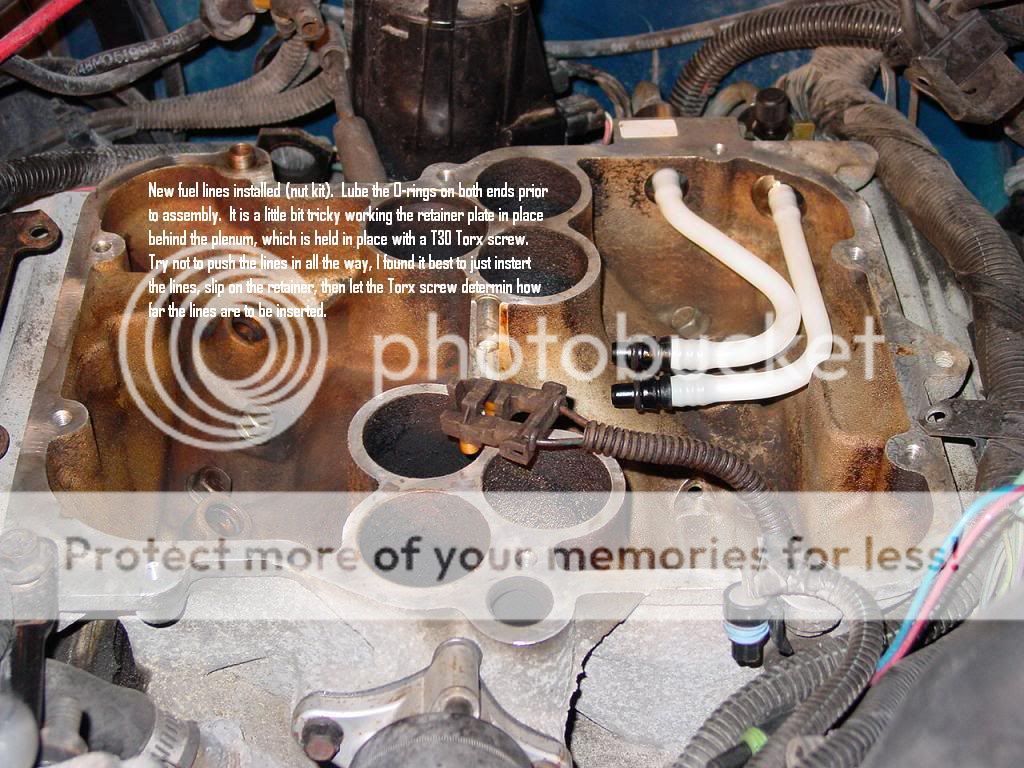
Oh, and here's the nut kit:
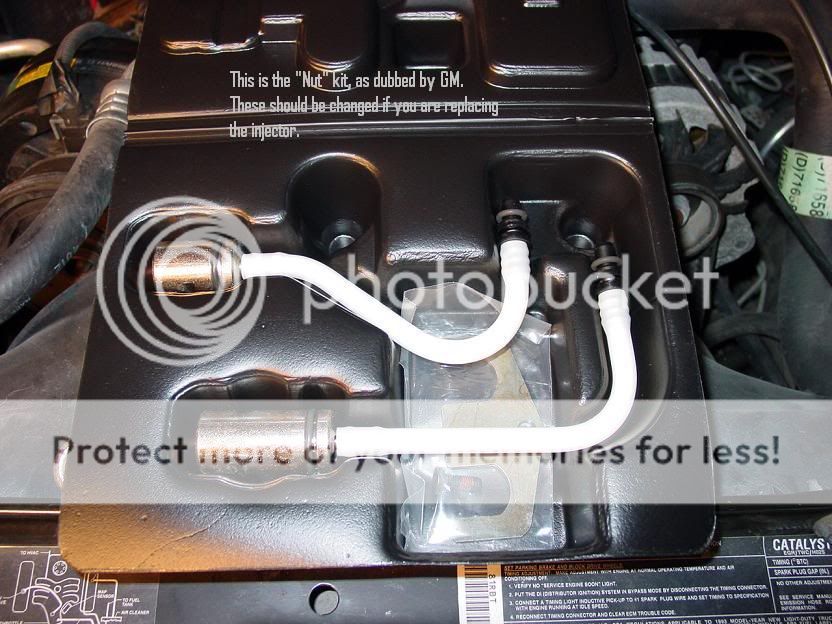
As you can sorta maybe see, the metal ends of the lines thread onto the fuel lines that come to the back of the plenum (there are o-rings for sealing).
Oh, and here's the nut kit:
As you can sorta maybe see, the metal ends of the lines thread onto the fuel lines that come to the back of the plenum (there are o-rings for sealing).
Last edited by Leeann_Bravada; Aug 4, 2010 at 07:46 PM.
Dont forget to change out that electrical connector too, its only 8 bucks...
And if you have tiny Orings, slide 2 onto each pin on the injector before snapping on the harness, it will keep everything very tight.
And if you have tiny Orings, slide 2 onto each pin on the injector before snapping on the harness, it will keep everything very tight.