
Motor Mount - LH - '00 Jimmy
#1
 04-04-2011, 10:41 AM


I replaced the drivers side motor mount on my 2000 Jimmy 4wd yesterday.
It took me 3.5 hours. However, I believe I could shave 2.5 hours off knowing what I know now. I hope this helps out anyone doing this job themselves.
1. Remove center cap from wheel
2. Break loose lug nuts (19mm)
3. Jack vehicle up high enough to get wheel off, Place jack stand under frame
4. Remove lug nuts & wheel
5. Remove front plastic skid plate, (6 x 15mm screws)
6. Remove Motor mount/tower bolt
a. Using a 16mm socket, universal swivel, 10" extension+6" extension, rachet or impact, snake it all through the front to reach the bolt
head
b. Using an 11/16" open end wrech on the nut
7. Using a block of wood, place it on the floor jack and gently jack up the engine (I used oil pan)
a. For added clearance, loosen the 2 transmission mount nuts (15mm)
b. At this point if the mount is broken in half, wiggle it toward the front and down and out. (this allows for easier access to the
mount/engine block bolts
8. Remove the 3 mount/engine bolts
a. Access through the fender well, lift flap up (I placed my drop light inside and this helped hold the flap up.
b. Using a 15mm shallow socket, 3/8" ratchet remove all 3 bolts. Plate is removed through fender well flap.
1. If mount is still attached to plate use a 15mm deep well socket, 3/8" ratchet for the top-front bolt.
2. If you wish to avoid these next steps, tear the mount off the plate and go to step 8.b.
a. Using 15mm shallow socket, 3/8" ratchet remove the bottom bolt
b. Position yourself under vehicle and place socket on bottom bolt (you will not see the bolt, so feel around)
c. You will need to go between the frame and oil pan/just above oil lines with your ratchet
9. Install new mount.
a. Put mount through fender well flap. It may look impossible but it will fit. Gently pry the metal line obstructing entry and wiggle new
mount through.
b. Using a 15mm deep well socket for the top-front bolt. Use a piece of towell between bolt/socket to keep bolt in socket
then start thread by hand, do not tighten yet!
c. Thread top-rear bolt in by hand
d. Position yourself under vehicle place socket on bottom bolt (you will not see the bolt, so feel around)
e. You will need to go between the frame and oil pan/just above oil lines with your 15mm shallow socket, 3/8" ratchet; Tighten.
f. Through fender well flap tighten top-rear bolt with 15mm shallow socket, 3/8" ratchet.
g. Through fender well flap tighten top-front bolt with 15mm deep well socket, 3/8" ratchet.
10. Lower engine down
11. Install motor mount/tower bolt & nut
12. Tighten transmission mount nuts
13. Install plastic skid plate
14. Install wheel
15. Remove jack stand
16. Torque lug nuts, install center cap.
17. You're done!
Last edited by 00JimmySLT; 04-04-2011 at 10:47 AM.
#3
08-06-2012, 11:53 AM
Man I wish i would have found this post prior to doing my mount. 
A few tips I learnt;
It is easy to remove the mount if it is broken into two pieces
if you slot the bottom hole on the new mount it goes in easier
bolts into the block are 15mm
through bolt was 11/16" on the nut and 5/8" on the bolt head
2" body lift makes access easier
tightening the bottom bolt is a PITA, I used a 1/4" ratchet with a 1/4 to 3/8 adaptor and a 15 mm regular socket
a 15mm deep socket is too long and a regular socket was too short
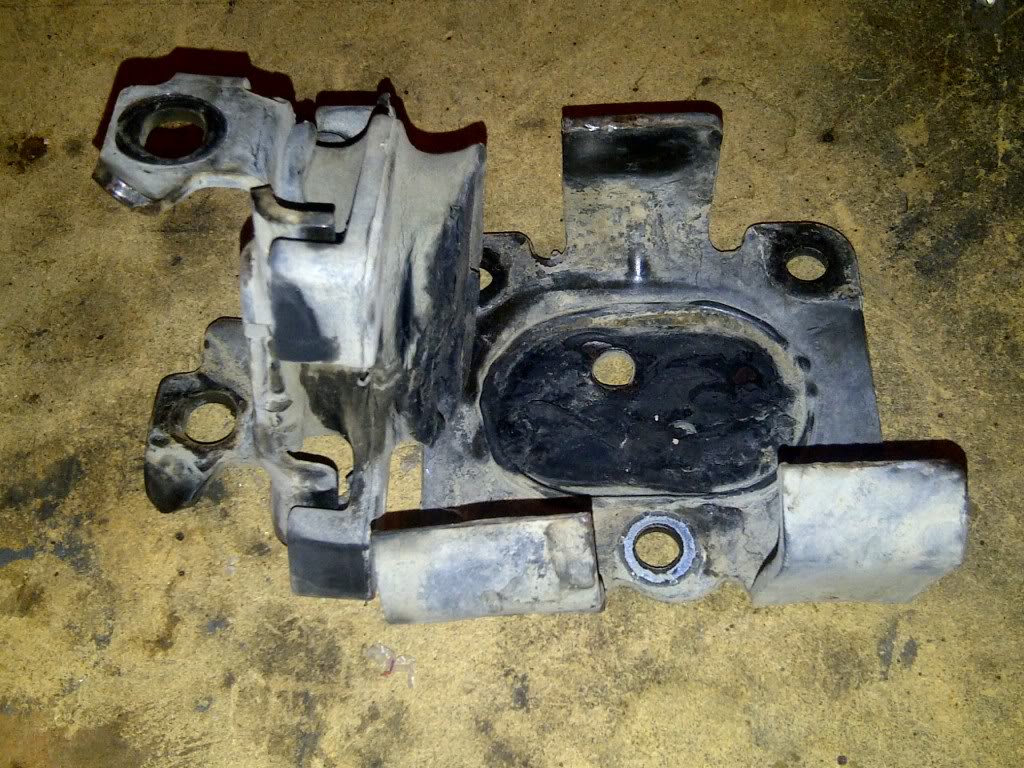
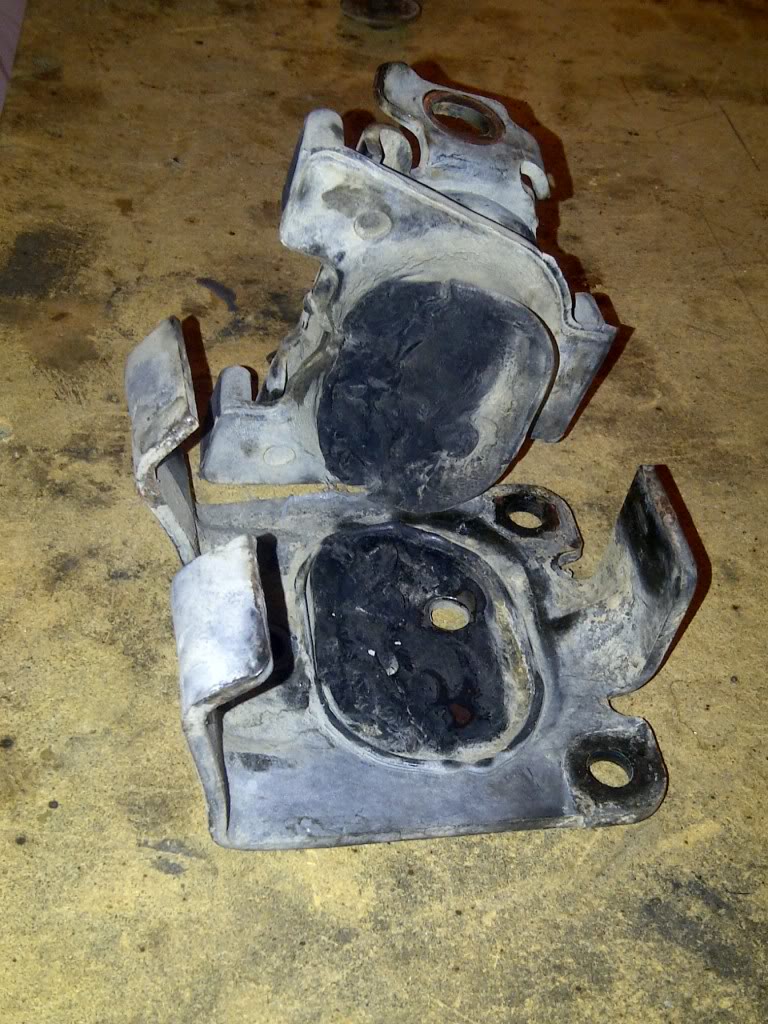
Pics of the old mount;
A few tips I learnt;
It is easy to remove the mount if it is broken into two pieces
if you slot the bottom hole on the new mount it goes in easier
bolts into the block are 15mm
through bolt was 11/16" on the nut and 5/8" on the bolt head
2" body lift makes access easier
tightening the bottom bolt is a PITA, I used a 1/4" ratchet with a 1/4 to 3/8 adaptor and a 15 mm regular socket
a 15mm deep socket is too long and a regular socket was too short
Pics of the old mount;

Thread
Thread Starter
Forum
Replies
Last Post
95Blazer4x4
Engine & Transmission
5
02-01-2008 08:19 PM
lionel2
2nd Generation S-series (1995-2005) Tech
1
01-23-2008 05:05 PM