
so now you want flares on your 4 door??


from the proud sponsors of:
so you want a tire carrier on your 4 door??
Yes it can be done......continue on for all the juicy details, in this visual buffet of a mod write up.
comes this little gem.
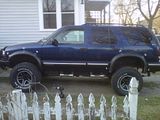
ok, you will have to bear with me on this thread....this is going to be basically me reporting back my adventure to bring zr2 flares to my 4 door ride.
i know, i know...it cant be done you say...your crazy you say....
well you might be right,I may be crazy
But it just may be a lunatic you're looking for.....
alright, A.D.D out of the way.
Parts list:
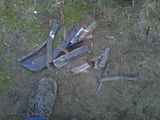
Set of ZR2 flares and flarettes
new hardware (stainless)
bolts, lock washers, and washers.
alum stock, (i used 3 feet by 1" width..thickness 1/8")
Tools / Materials:
drill
1/4" bit
utility knife
chalk, marking pen/pencil
screwdriver
sockets
loctite
black silicon/caulk
sandpaper
paint
primer
rust treatment
great stuff - expanding foam in a can (2 or 3)
fiberglass mesh and resin
medical supplies
tetanus shot...you will be working with rusty metal....trust me you will get cuts
So here are my findings as of:
DAY 1:
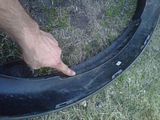
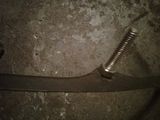
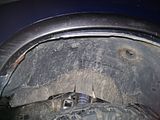
removed the metal bracket that would normally bolt to the zr2 fender...save this for later.
definitely needs to be cleaned up.
so to remove it i just drilled out the rivets.
and there we go bracket off
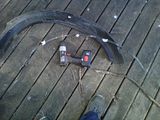
(all brackets will need to be removed to be cleaned up at the least, for reuse)
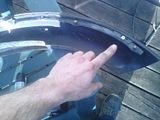
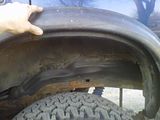
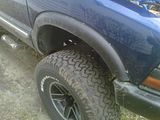
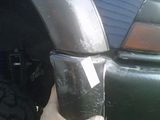
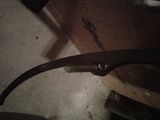
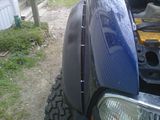
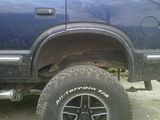
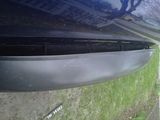
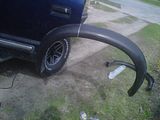
so once that is removed i checked for fitment...
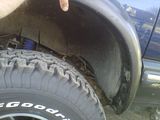
not to bad, i found that about 1/4" or so needs to be trimmed off the upper inner lip of the flare
and it fits no problem.
dont mind that overlap by door hinge, was falling off fender at time of pic
ok front looks to be a piece of cake so far.
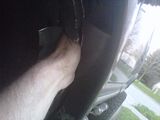
i also sized up flarette (sp?) no problems there, however with my valance trimmed i will be trimming it as well.
ok so here is the big problem with the project, what i call a
"point of no return".
its that point when if you go further what you did cannot be undone....
i.e. wheel carrier project...holes in rear panel.
so now that this is clear we can continue.
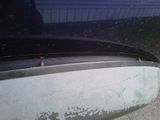
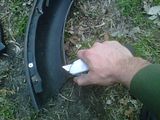
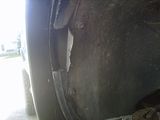
my initial findings aren't to bad.
i marked the lower portion of flare....
the white line represents what has to be trimmed from the rear panel.
so in conclusion of day one, i find that this is totally doable, just not for the faint of heart, some trimming is going to be involved.
..and cannot be undone...
keep that in mind.
DAY 2:
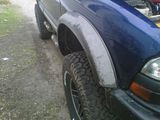
alright started fitting the front flares to the fender.
i used white poster paint on the end of the oem mounting hardware to mark the fenders for drilling.
i used 1/4" drill bit for this.
holes made
so now the holes are in the fender, from what i can tell these bolts will be a real treat to get nuts and washers on.
you will have to remove some things off the wheel well in engine bay.
this shows the line up of the holes to the flare bracket
now after looking at the mounting bolts on the bracket they are gonna have to go.
i swapped in stainless for the mount hardware.
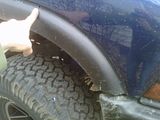
now that i have the flare on the fender it sits ok, but not tight enough.
this is where some trimming comes in. i was going to just mark and cut off excess plastic but this plastic is, lets say "delicate" so i turned to a whittling action to trim slow and accurately. i will smooth out the surface when prepping for paint.
now she sits much nicer on the fender surface.
ok so on the under side i have used chalk to mark what needs to be trimmed and possible points to make up some mounting hardware connections..
as well as locations that need more shaping.
now for the "flarette" its pretty much the same steps...test fit, mark and shape.
,
there nice and snug.
now i will have to cut the hangover portion off seeing as how i trimmed my valance off.
DAY 3:
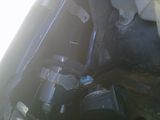
ok so now we look at the mounting equipment/hardware
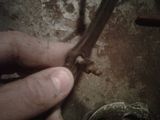
most likely your flares will be like mine, the mounting portion will have some rust on the brackets and hardware and/or missing pieces.
what you have here is the mounting fasteners and the rivets that hold the bracket to the flare and body panel.
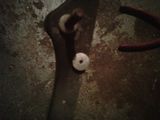
they have seen better days and so they are gone....
now the mounting fastener seems to have a plastic retaining ring on it, that comes off easy enough.
i then used a hammer to knock out the fasteners and remove them.
now be sure not to bend or mangle your bracket...you cannot get more!!!!
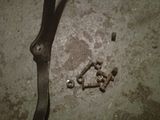
ok so now with all the old rusty schtuff removed you can prep your bracket for new hardware.
i went with stainless 1/4" - 1 1/2" screws and nuts for the portion that fastens the flare to the body panel.
for the hardware that replaced the rivets i went with #10-24 1/2" screws, lock washers, nuts.
now the 1 1/2" length is a bit longer then the stock mounting hardware but i figured it will make threading them in the tight spaces easier.
now as far as the brackets themselves i sanded them down rust treated them then used self etching primer and then just shot some black paint on them.....noooo no bed liner here, sorry.
here are some finished brackets reattached to the flare..

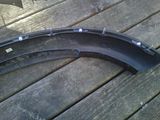
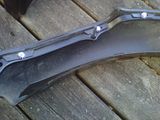
if you look you can see i used the longer bolts with a nut on them to hold them on bracket for applying to the body panels for mounting....the smaller bolts hold the bracket to the flare...no later those bolts on the bracket to flare mount are going to need to be ground down to flush with back of flare...i guess shorter hardware could have been used but i was not going back to the store.
DAY 4:
ok so now the brackets have been repainted and had new hardware attached the real fun begins....
this pic shows the bolts going into the fender.
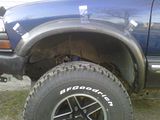
now you will not know how much you really have to trim the fender till you have the flare set in place.
that trim job was minor....i know you will see what major is later.

and that is the finished trim...not clean mind you but trimmed.
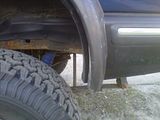
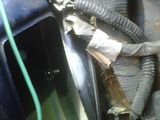
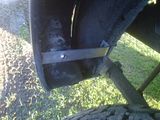
i also found that i need to cut a hole in each front fender well for access to the bolts...
i made the cut mid point to attach two bolts with one hole.
this is where you can see one of the upper bolts coming through fender
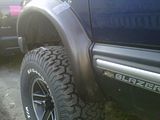
now those pics should give you some idea of what is involved in the front flares.....i know its kinda brief but i think you get the idea....just rinse and repeat for each side up front and you will be fine.
continued in post #3
so you want a tire carrier on your 4 door??
Yes it can be done......continue on for all the juicy details, in this visual buffet of a mod write up.
comes this little gem.

ok, you will have to bear with me on this thread....this is going to be basically me reporting back my adventure to bring zr2 flares to my 4 door ride.
i know, i know...it cant be done you say...your crazy you say....
well you might be right,I may be crazy
But it just may be a lunatic you're looking for.....
alright, A.D.D out of the way.
Parts list:
Set of ZR2 flares and flarettes
new hardware (stainless)
bolts, lock washers, and washers.
alum stock, (i used 3 feet by 1" width..thickness 1/8")
Tools / Materials:
drill
1/4" bit
utility knife
chalk, marking pen/pencil
screwdriver
sockets
loctite
black silicon/caulk
sandpaper
paint
primer
rust treatment
great stuff - expanding foam in a can (2 or 3)
fiberglass mesh and resin
medical supplies
tetanus shot...you will be working with rusty metal....trust me you will get cuts
So here are my findings as of:
DAY 1:
removed the metal bracket that would normally bolt to the zr2 fender...save this for later.

definitely needs to be cleaned up.
so to remove it i just drilled out the rivets.

and there we go bracket off

(all brackets will need to be removed to be cleaned up at the least, for reuse)
so once that is removed i checked for fitment...

not to bad, i found that about 1/4" or so needs to be trimmed off the upper inner lip of the flare

and it fits no problem.

dont mind that overlap by door hinge, was falling off fender at time of pic

ok front looks to be a piece of cake so far.
i also sized up flarette (sp?) no problems there, however with my valance trimmed i will be trimming it as well.
ok so here is the big problem with the project, what i call a
"point of no return".
its that point when if you go further what you did cannot be undone....
i.e. wheel carrier project...holes in rear panel.
so now that this is clear we can continue.


my initial findings aren't to bad.
i marked the lower portion of flare....

the white line represents what has to be trimmed from the rear panel.
so in conclusion of day one, i find that this is totally doable, just not for the faint of heart, some trimming is going to be involved.
..and cannot be undone...
keep that in mind.
DAY 2:
alright started fitting the front flares to the fender.
i used white poster paint on the end of the oem mounting hardware to mark the fenders for drilling.
i used 1/4" drill bit for this.

holes made

so now the holes are in the fender, from what i can tell these bolts will be a real treat to get nuts and washers on.
you will have to remove some things off the wheel well in engine bay.
this shows the line up of the holes to the flare bracket

now after looking at the mounting bolts on the bracket they are gonna have to go.
i swapped in stainless for the mount hardware.
now that i have the flare on the fender it sits ok, but not tight enough.

this is where some trimming comes in. i was going to just mark and cut off excess plastic but this plastic is, lets say "delicate" so i turned to a whittling action to trim slow and accurately. i will smooth out the surface when prepping for paint.

now she sits much nicer on the fender surface.

ok so on the under side i have used chalk to mark what needs to be trimmed and possible points to make up some mounting hardware connections..


as well as locations that need more shaping.
now for the "flarette" its pretty much the same steps...test fit, mark and shape.
,


there nice and snug.
now i will have to cut the hangover portion off seeing as how i trimmed my valance off.
DAY 3:
ok so now we look at the mounting equipment/hardware
most likely your flares will be like mine, the mounting portion will have some rust on the brackets and hardware and/or missing pieces.

what you have here is the mounting fasteners and the rivets that hold the bracket to the flare and body panel.
they have seen better days and so they are gone....

now the mounting fastener seems to have a plastic retaining ring on it, that comes off easy enough.

i then used a hammer to knock out the fasteners and remove them.
now be sure not to bend or mangle your bracket...you cannot get more!!!!
ok so now with all the old rusty schtuff removed you can prep your bracket for new hardware.
i went with stainless 1/4" - 1 1/2" screws and nuts for the portion that fastens the flare to the body panel.
for the hardware that replaced the rivets i went with #10-24 1/2" screws, lock washers, nuts.


now the 1 1/2" length is a bit longer then the stock mounting hardware but i figured it will make threading them in the tight spaces easier.

now as far as the brackets themselves i sanded them down rust treated them then used self etching primer and then just shot some black paint on them.....noooo no bed liner here, sorry.
here are some finished brackets reattached to the flare..


if you look you can see i used the longer bolts with a nut on them to hold them on bracket for applying to the body panels for mounting....the smaller bolts hold the bracket to the flare...no later those bolts on the bracket to flare mount are going to need to be ground down to flush with back of flare...i guess shorter hardware could have been used but i was not going back to the store.
DAY 4:
ok so now the brackets have been repainted and had new hardware attached the real fun begins....
this pic shows the bolts going into the fender.

now you will not know how much you really have to trim the fender till you have the flare set in place.

that trim job was minor....i know you will see what major is later.

and that is the finished trim...not clean mind you but trimmed.
i also found that i need to cut a hole in each front fender well for access to the bolts...


i made the cut mid point to attach two bolts with one hole.
this is where you can see one of the upper bolts coming through fender


now those pics should give you some idea of what is involved in the front flares.....i know its kinda brief but i think you get the idea....just rinse and repeat for each side up front and you will be fine.
continued in post #3
Last edited by warthogdriver; May 3, 2011 at 09:23 PM.

Day 5:
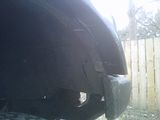
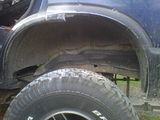
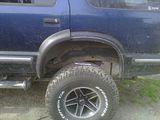
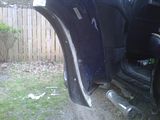
ok now the rear flares are where it gets real fun.
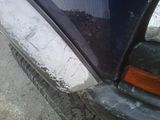
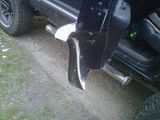
its time to buck up and cut some body panels.....
this is the rough trim line i got using the same methods above....
1. apply poster paint to bracket mounting hardware
2. line up brackets on panel
3. when happy with placement drill where the bolts left paint on the panel
4. 1/4" bit to drill...or whatever matches your chosen hardware dia.
5. apply flare for placement only...dont attach!!!
6. mark panel for the rough trim only.
7. now cut away at the panel...i recommend cut-off wheel...sawzall will hack it to hell.
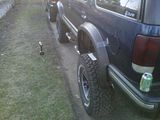
placement of the rear flare for marking panel.
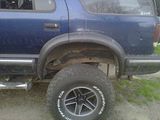
so this is half way through the trim....to give you an idea of what i removed.
now after you are happy with your rough trim go inside and remove the interior panels...you need to make an access hole for the back side of those upper bolts...now i recommend mid point to save your panels from looking like swiss
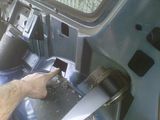
now since we are doing this on a four door.
you say......."how do you make the flare fit the rear door????"
well remember those holes you drilled in panel? you did the door to right?? ok go do them then......
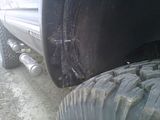
ok here is how i made the flare cut for the rear door.
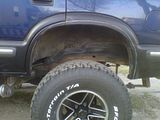
its easy....just use the hole in door (should be 3)and mount the flare on door.
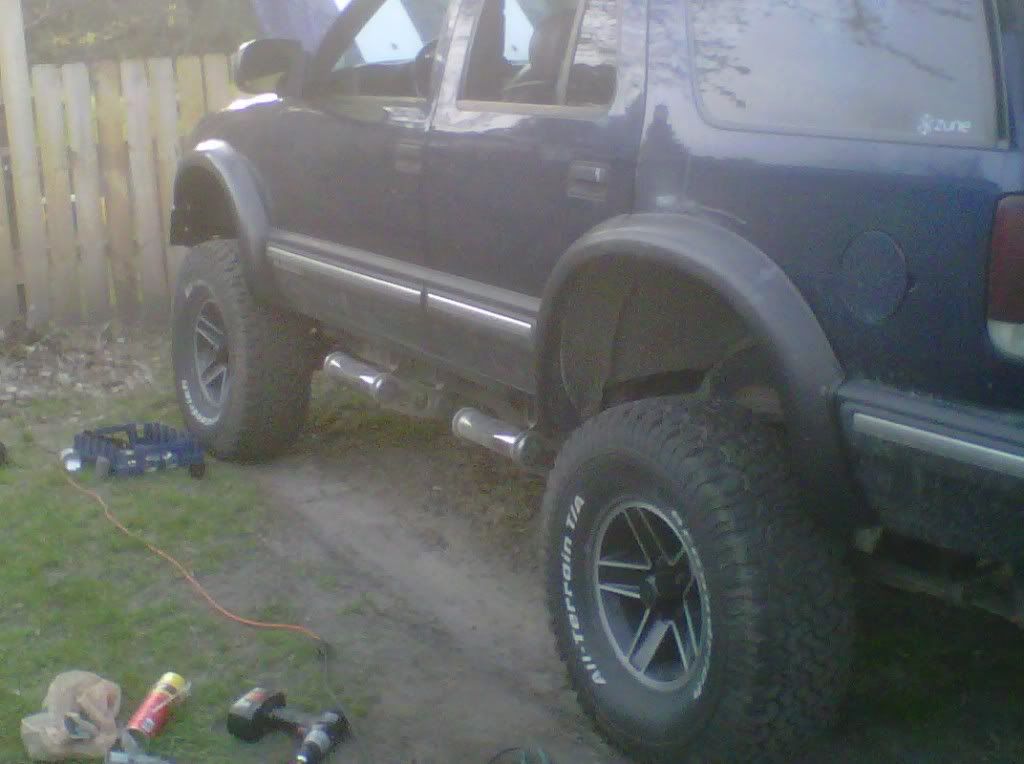
see not so bad after all.
now that the big bad rear door is in its place lets continue on.

see not so bad after all...by now you should have some cuts and scrapes and your flares should be almost done....
and for those performance nuts...yup...you shaved some weight off.
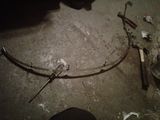
ohh and i bet you wondered when that aluminum was gonna come in right
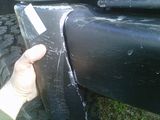
i used this to stiffen the lower rear quarter...not much left there when you hack off that inner lip.
i know, not the most cosmetic but it does the job....
so here is the final stretch....now before you replace those interior panels you need to do one thing.
break out the expanding foam in a can..
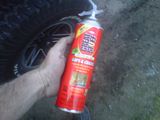
so what you do is take this to the rear and apply liberally....while cutting you opened up a few "small" areas so we need to seal them up....once that is done replace your interior panels.
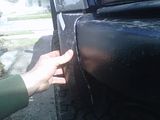
ok, by now you have noticed that there is a big open space between flare and face of rear door....go ahead and fill it up with expanding foam...let it cure overnight and then shape it with some 80 grit sandpaper...like so
now i did that for two reasons.
1. it will fill those voids and keep the flare secure
2. it will provide a great backer for the fiberglass i will be laying in the door gaps and ends of flares...for that more
finished look later on.
also now that the flares are in place go back and CAREFULLY use an angle grinder to clean up the trimmed panels...i tried to make my as tight to bottom of the flare as possible.
one other thing, the small rubber trim on the flare can be moved around to make the fit tighter, if your not happy with the body panel and flare line up then apply the black silicon to make the close the gap....lets be honest these flare where not made for this so there is some "accommodations" that need to be made...mine were minor and blend well with the flare and panel connection.
this is where i leave you...
now i know i skipped somethings....int panel removal...and door panel removal...that is around here i am sure if you search you will find it.
i also admit this is the cliff notes version, but i believe that this will get you started and show you that this can be done and its not that bad.
all in all this cost me.
200.00 that includes everything to do the job, yes, flares included.
so feel free to ask away...and enjoy your flares
ok now the rear flares are where it gets real fun.
its time to buck up and cut some body panels.....

this is the rough trim line i got using the same methods above....
1. apply poster paint to bracket mounting hardware
2. line up brackets on panel
3. when happy with placement drill where the bolts left paint on the panel
4. 1/4" bit to drill...or whatever matches your chosen hardware dia.
5. apply flare for placement only...dont attach!!!
6. mark panel for the rough trim only.
7. now cut away at the panel...i recommend cut-off wheel...sawzall will hack it to hell.
placement of the rear flare for marking panel.


so this is half way through the trim....to give you an idea of what i removed.

now after you are happy with your rough trim go inside and remove the interior panels...you need to make an access hole for the back side of those upper bolts...now i recommend mid point to save your panels from looking like swiss


now since we are doing this on a four door.
you say......."how do you make the flare fit the rear door????"
well remember those holes you drilled in panel? you did the door to right?? ok go do them then......
ok here is how i made the flare cut for the rear door.

its easy....just use the hole in door (should be 3)and mount the flare on door.
see not so bad after all.

now that the big bad rear door is in its place lets continue on.


see not so bad after all...by now you should have some cuts and scrapes and your flares should be almost done....

and for those performance nuts...yup...you shaved some weight off.
ohh and i bet you wondered when that aluminum was gonna come in right

i used this to stiffen the lower rear quarter...not much left there when you hack off that inner lip.
i know, not the most cosmetic but it does the job....
so here is the final stretch....now before you replace those interior panels you need to do one thing.
break out the expanding foam in a can..

so what you do is take this to the rear and apply liberally....while cutting you opened up a few "small" areas so we need to seal them up....once that is done replace your interior panels.
ok, by now you have noticed that there is a big open space between flare and face of rear door....go ahead and fill it up with expanding foam...let it cure overnight and then shape it with some 80 grit sandpaper...like so


now i did that for two reasons.
1. it will fill those voids and keep the flare secure
2. it will provide a great backer for the fiberglass i will be laying in the door gaps and ends of flares...for that more
finished look later on.
also now that the flares are in place go back and CAREFULLY use an angle grinder to clean up the trimmed panels...i tried to make my as tight to bottom of the flare as possible.
one other thing, the small rubber trim on the flare can be moved around to make the fit tighter, if your not happy with the body panel and flare line up then apply the black silicon to make the close the gap....lets be honest these flare where not made for this so there is some "accommodations" that need to be made...mine were minor and blend well with the flare and panel connection.
this is where i leave you...
now i know i skipped somethings....int panel removal...and door panel removal...that is around here i am sure if you search you will find it.
i also admit this is the cliff notes version, but i believe that this will get you started and show you that this can be done and its not that bad.
all in all this cost me.
200.00 that includes everything to do the job, yes, flares included.
so feel free to ask away...and enjoy your flares
Last edited by warthogdriver; May 4, 2011 at 08:06 PM.

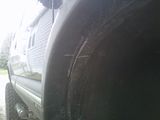
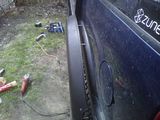
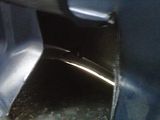
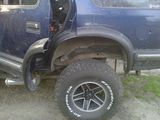
if you look at the pic i have some trouble spots showing their ugly head.
so think of it as a two-fer.
Last edited by warthogdriver; Apr 15, 2011 at 07:41 PM.