
Bear's 95 jimmy

Thread Starter
|
Starting Member
Joined: Mar 2013
Posts: 197
From: Ontario, Canada

I have done a bit more work on the mounts for the brush guard but its not done yet...
Anyways with all the black on my truck my rusty frame stood out, so I got some rust converter and paint/primer.

So here is the frame right now

I used a bit of sand paper and a wire brush to remove the loose rust and then I sprayed the frame with some rust converter.
Tomorrow I will put some more on and then prime/paint it.
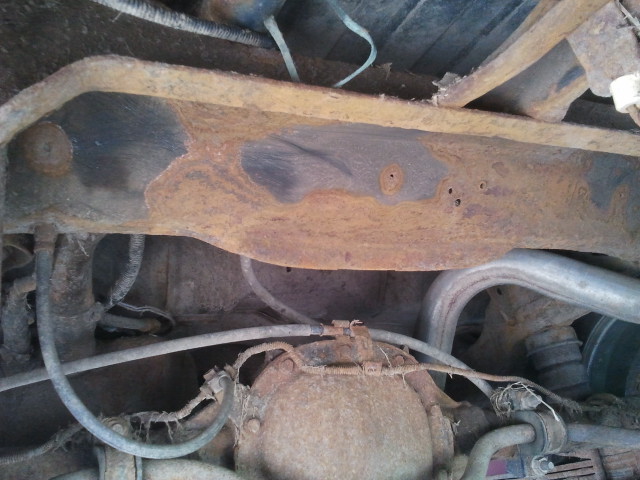
This is before the rust converter, more pics will be up tomorrow.
Thread Starter
|
Starting Member
Joined: Mar 2013
Posts: 197
From: Ontario, Canada
Alright here are the rest of the pics of the frame.

This is after the rust converter.

Putting primer on
And here is it painted.
It looks much better with out the rust, I will undercoat it soon too.

This is after the rust converter.

Putting primer on

And here is it painted.

It looks much better with out the rust, I will undercoat it soon too.
Thread Starter
|
Starting Member
Joined: Mar 2013
Posts: 197
From: Ontario, Canada
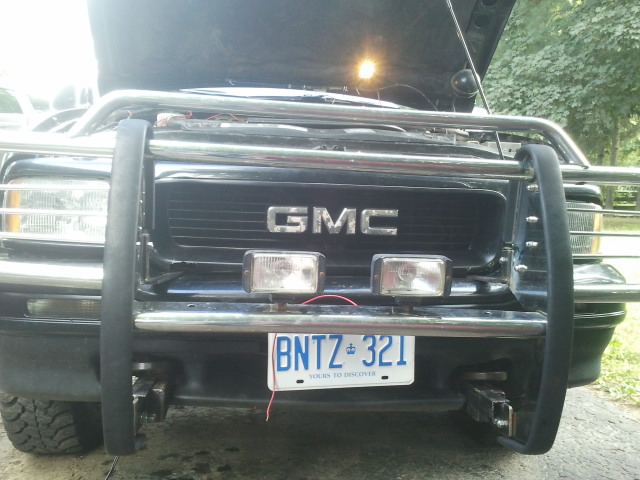
I also got my bush guard on. The bush guard was off a jeep so it was not an exact fit and I had to make the mounts.

Here I am lining it up. If it does not look even its because the metal holding the tow hook is bent down on one side. Also the bush guard is dented, not bad but at least its on.

The only way to tell if its level is to look at it where the hood is, it looks about a half inch lower on the drivers side but its not that bad.

The top mounts.

Bottom mounts, I also added another piece of metal on the top just for extra strength.

Now the light guard part on this side is slightly bent up so again it looks uneven...
But for $75 its not that bad, I like it and its on there good.
Not sure what i'm doing next but i'm sure I will think of something.
Thread Starter
|
Starting Member
Joined: Mar 2013
Posts: 197
From: Ontario, Canada
Today I got some lights hooked up to my bush guard. I used two if my old lights that I used to have on my roof, they are 55 watt lights.
I was going to put them on the outside holes but I think it looks better with them close together.

I ran out of the plastic to put around the wires so I will have to get more tomorrow to finish covering it.

I decided to put the switch down in that spot for a few reasons...
First is I did a terrible job with my other switches so I wanted these where I don't have to see them. Plus I don't mind it being there out of the way.

Here is them wired and on, they are much brighter at night.

And here is all my lights on.
So far I like the light setup and I might add two on the back but i'm not sure yet.
Thread Starter
|
Starting Member
Joined: Mar 2013
Posts: 197
From: Ontario, Canada
This morning my light guards came in!
I got them on and they look great.

Here is a close up.

I also am looking for every little piece of rust I can find and sanding it down/painting it.
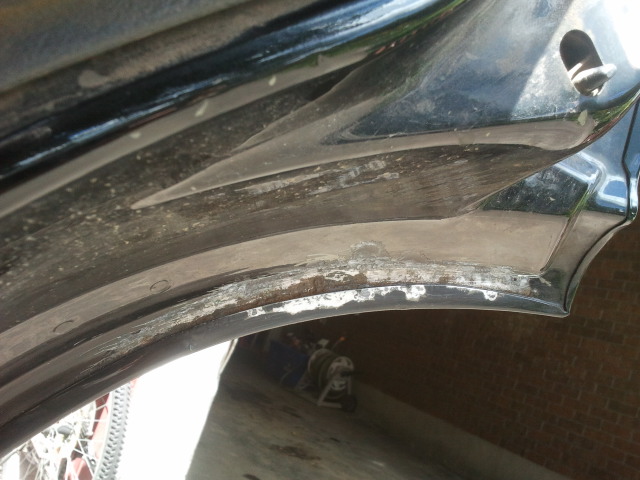
On all the the doors there is a small strip of rust...
Here is it painted.

I also noticed bubbles in the paint near the rear door so I grabbed some of the peeling paint and...

A lot of paint came off...

So I sanded it all down and put some flat black rust paint on. I will put matching paint on later this week.
Thread Starter
|
Starting Member
Joined: Mar 2013
Posts: 197
From: Ontario, Canada
Today I did some more painting and touch ups.

Painted the bush guard mounts.
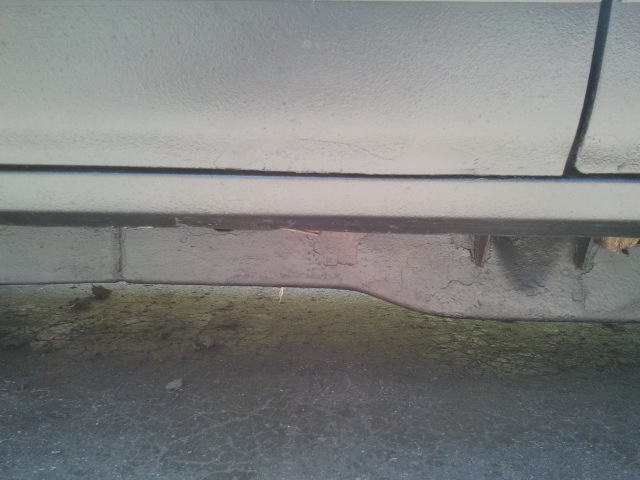
The paint was chipped and peeling off of all the steps under the doors.
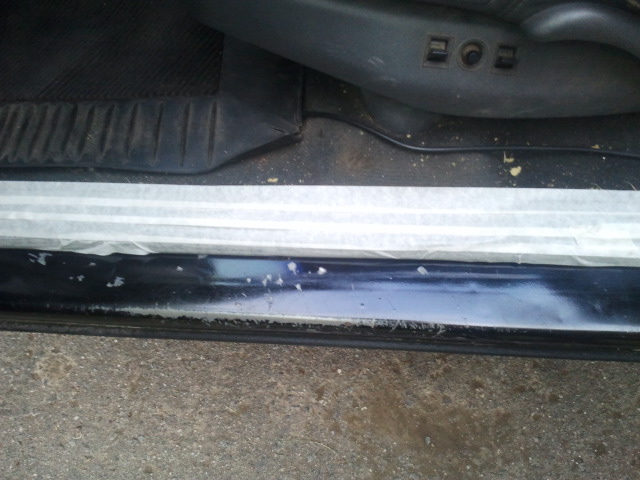
Before

And after.
I used bedliner on them so there more durable and last a lot longer.
I also drilled some holes in the roof rack so I can mount two more lights on the back, they will be my reverse lights for when i'm offroading. That's all for today.

Painted the bush guard mounts.
The paint was chipped and peeling off of all the steps under the doors.

Before

And after.
I used bedliner on them so there more durable and last a lot longer.
I also drilled some holes in the roof rack so I can mount two more lights on the back, they will be my reverse lights for when i'm offroading. That's all for today.

Thread Starter
|
Starting Member
Joined: Mar 2013
Posts: 197
From: Ontario, Canada
I got my lights on and wired today.


They are a lot brighter at night but they still look good.
I will slowly start saving up for a lift kit, might take a while...
A body lift with probably be first then maybe a rc lift, depends on how much I save up.
For now I will be removing rust and doing more painting.


They are a lot brighter at night but they still look good.
I will slowly start saving up for a lift kit, might take a while...
A body lift with probably be first then maybe a rc lift, depends on how much I save up.
For now I will be removing rust and doing more painting.
