
My 1997 Blazer 2dr REbuild

Thread Starter
|
New Member
Joined: Mar 2011
Posts: 59
From: Minnesota

I'm calling this a rebuild, because lately, it seems that all I've been doing is replacing parts on the thing to keep it going. That being said, with the winters we get in MN, I wouldn't trade my Blazer away for anything, except maybe a newer ZR2. I know my posts will be sporadic, but bear with me, as I REbuild and build UP my old machine.
Background:
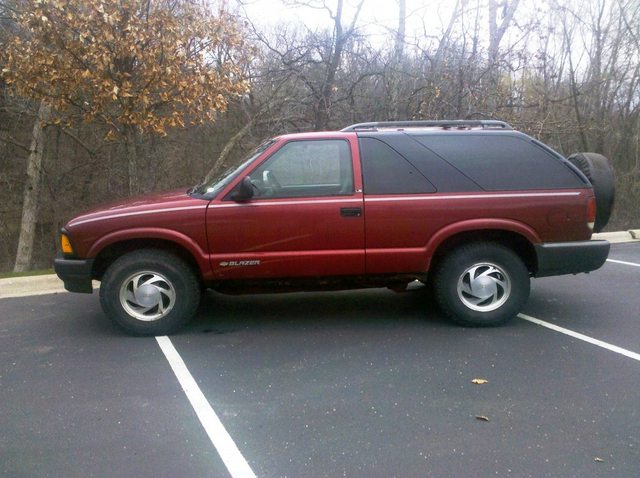
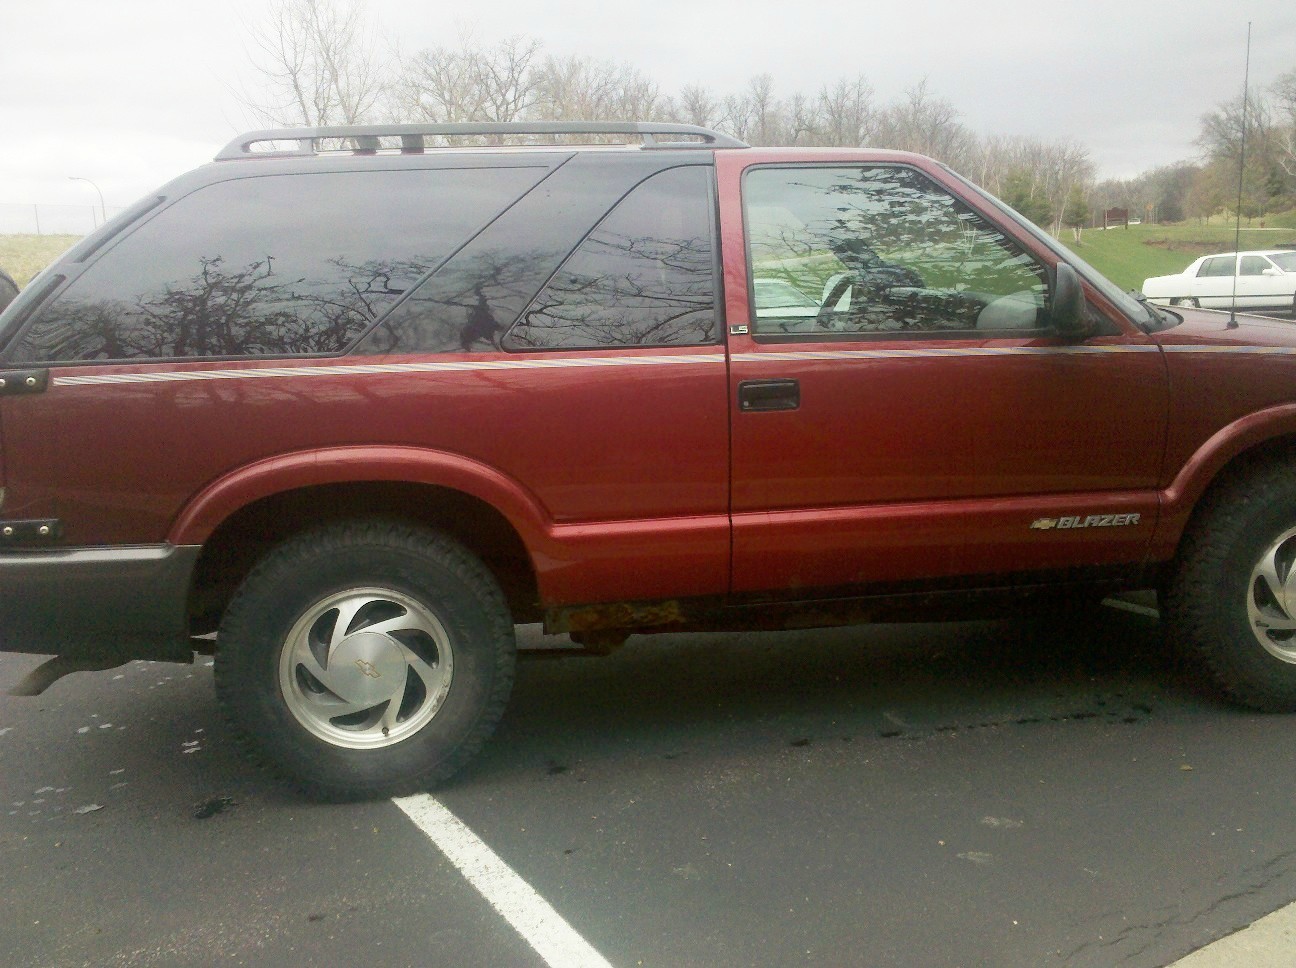
1997 Chevy Blazer 2dr LS
160k miles on original engine and original transmission.
What I've already done:
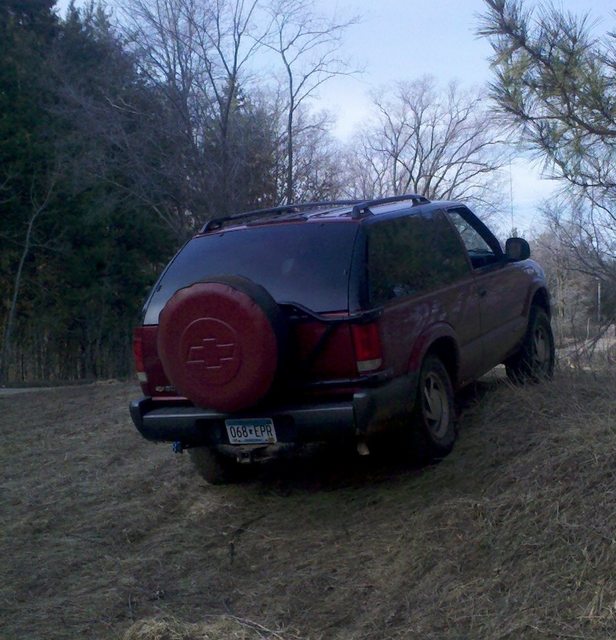
Painted the Pillar between rear windows black
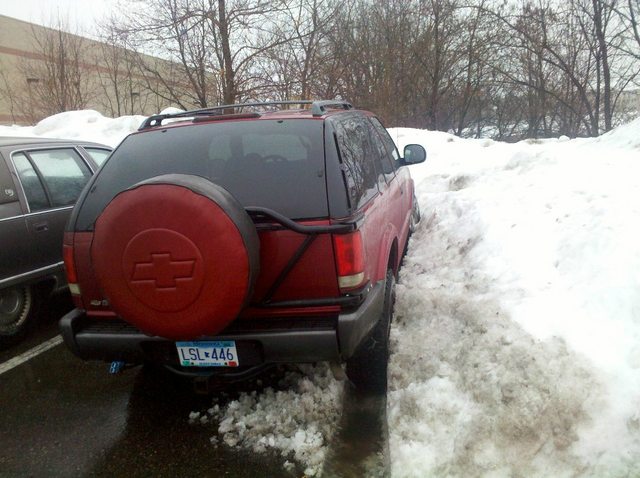
Custom spare tire cover
Added a hookup in rear for the Ramsey QM 5000
New front and rear U-joints
New Radiator
New Alternator
New front CV Joints/half shafts
Step 1-This winter
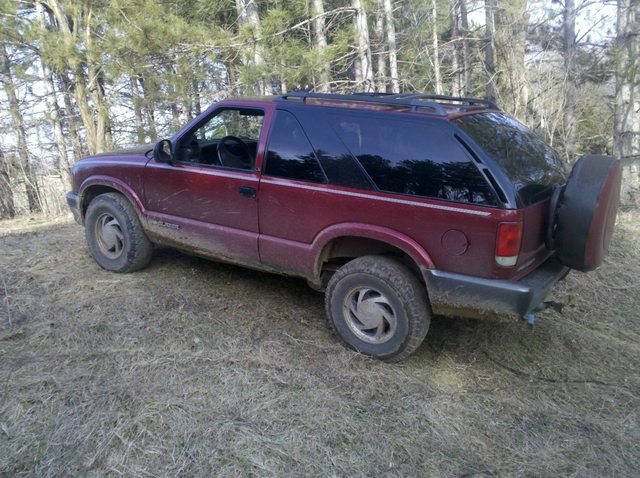
NEW BFG All-Terrain T/A KO 31X10.5R15
(No lift, or torsion bar crank, I'll cut fenders if I have to
These tires are great, I've got a set of 30x9.5R15 now, and they let me craw through snow and mud great!
Step 2-Summer 2012
Airaid Cold Air Intake
Airaid PowerAid Throttle Body Spacer
(This will fit under the stock hood right?)

Step 3-Fall 2012 - Fixing the RUST
New RH&LH Rocker Panels
New hood - 1994-05 Chevy/GMC S10/S15 Ram Air Style Hood
MAYBE look into getting new rear fender panels (ANY help on this would be great as I can't seem to find them on the internet anywhere)
PLEASE feel free to add comments or suggestions for the build! This vehicle will be around for a long time, and I will primarily use it as a daily whip/snow-runner/LIGHT off-roader
Background:
1997 Chevy Blazer 2dr LS
160k miles on original engine and original transmission.
What I've already done:
Painted the Pillar between rear windows black
Custom spare tire cover
Added a hookup in rear for the Ramsey QM 5000
New front and rear U-joints
New Radiator
New Alternator
New front CV Joints/half shafts
Step 1-This winter
NEW BFG All-Terrain T/A KO 31X10.5R15
(No lift, or torsion bar crank, I'll cut fenders if I have to
These tires are great, I've got a set of 30x9.5R15 now, and they let me craw through snow and mud great!
Step 2-Summer 2012
Airaid Cold Air Intake
Airaid PowerAid Throttle Body Spacer
(This will fit under the stock hood right?)
Step 3-Fall 2012 - Fixing the RUST
New RH&LH Rocker Panels
New hood - 1994-05 Chevy/GMC S10/S15 Ram Air Style Hood
MAYBE look into getting new rear fender panels (ANY help on this would be great as I can't seem to find them on the internet anywhere)
PLEASE feel free to add comments or suggestions for the build! This vehicle will be around for a long time, and I will primarily use it as a daily whip/snow-runner/LIGHT off-roader
Thread Starter
|
New Member
Joined: Mar 2011
Posts: 59
From: Minnesota
Only reason for that order is because I'm likely not going to get it done before this winter, and rust really won't progress during next spring/summer, so I was going to get it done before NEXT winter.
I really like that tire cover! Thats awesome.
It took me a while to figure out why your ride looked so different, and I couldnt figure it out... Then I actually read that you painted the pillar in the back and I was like "Doh, I shoulda noticed that one!"... Makes me think S10 with a canopy. Thats the first time I have seen that part not body color. I think you should do the whole roof and doorframes to match, that would look sick.
It took me a while to figure out why your ride looked so different, and I couldnt figure it out... Then I actually read that you painted the pillar in the back and I was like "Doh, I shoulda noticed that one!"... Makes me think S10 with a canopy. Thats the first time I have seen that part not body color. I think you should do the whole roof and doorframes to match, that would look sick.
Thread Starter
|
New Member
Joined: Mar 2011
Posts: 59
From: Minnesota
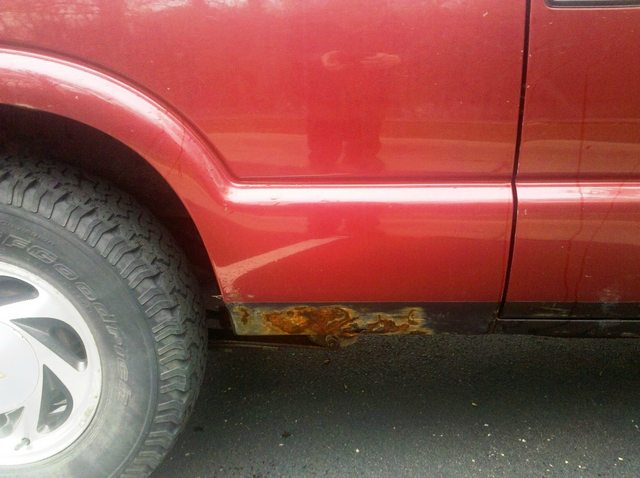
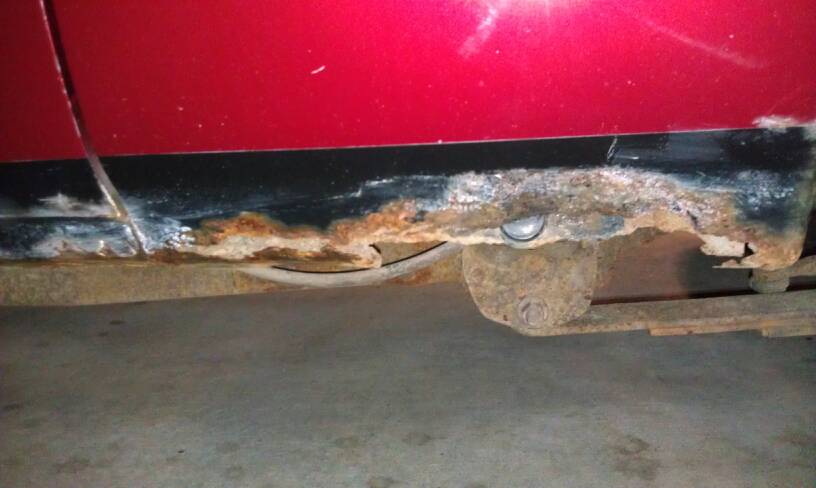
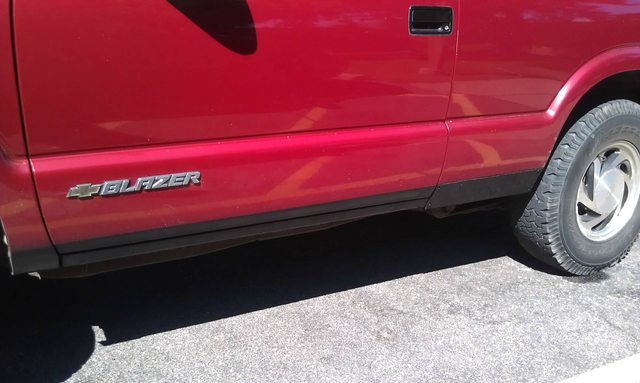
Below are some close up pictures of the rust I'm really wanting to repair. Remember, this is a 2dr, and the bad areas are behind/more rewards from the door.
- passenger side -
- passengers side too -
Would replacing the rocker panels fix this, or do the rocker panels only replace the door area? (Raybuck Autobody Parts LLC) (Raybuck Autobody Parts LLC)
Overall question is, do the rocker panels from above stretch from font fender to rear fender, or do they stop before the rear fender and if so where? I wish we had a shot of these highlight or circled while on the tuck. Or should I be looking at rear fenders instead?
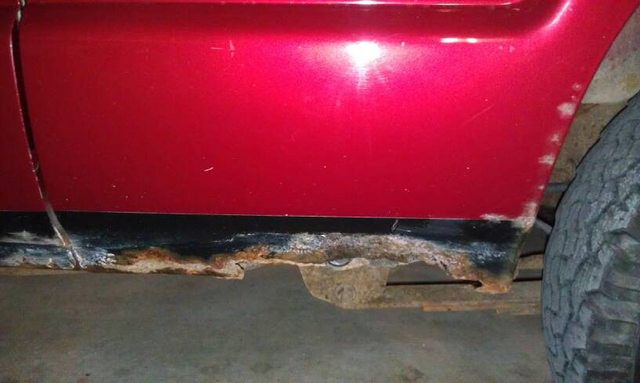
The drivers side rust is in the same location as passenger side, directly behind the the door towards the rear of the vehicle.
- drivers side -

- drivers side too -
Once I get it all fixed, I am spraying the whole thing with Rust inhibitor, and painting it black. My blazer is going to be my winter driver, so it needs to hold up to the salty roads of MN
- passenger side -
- passengers side too -
Would replacing the rocker panels fix this, or do the rocker panels only replace the door area? (Raybuck Autobody Parts LLC) (Raybuck Autobody Parts LLC)
Overall question is, do the rocker panels from above stretch from font fender to rear fender, or do they stop before the rear fender and if so where? I wish we had a shot of these highlight or circled while on the tuck. Or should I be looking at rear fenders instead?
The drivers side rust is in the same location as passenger side, directly behind the the door towards the rear of the vehicle.
- drivers side -
- drivers side too -
Once I get it all fixed, I am spraying the whole thing with Rust inhibitor, and painting it black. My blazer is going to be my winter driver, so it needs to hold up to the salty roads of MN
Thread Starter
|
New Member
Joined: Mar 2011
Posts: 59
From: Minnesota
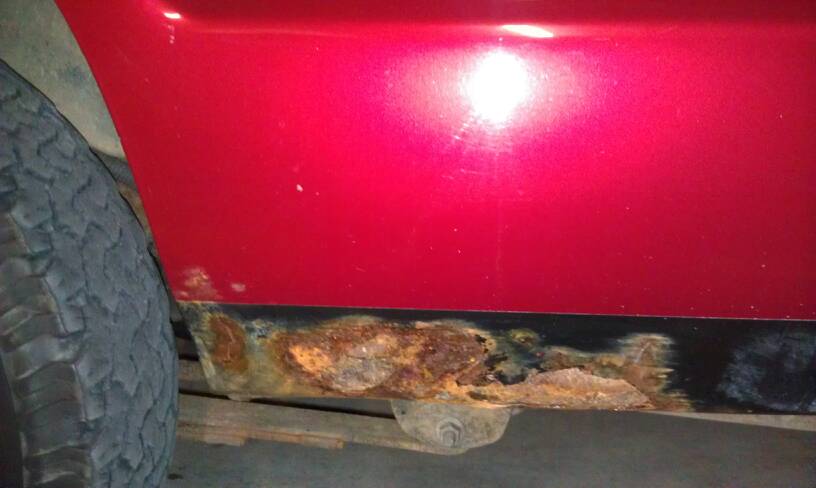
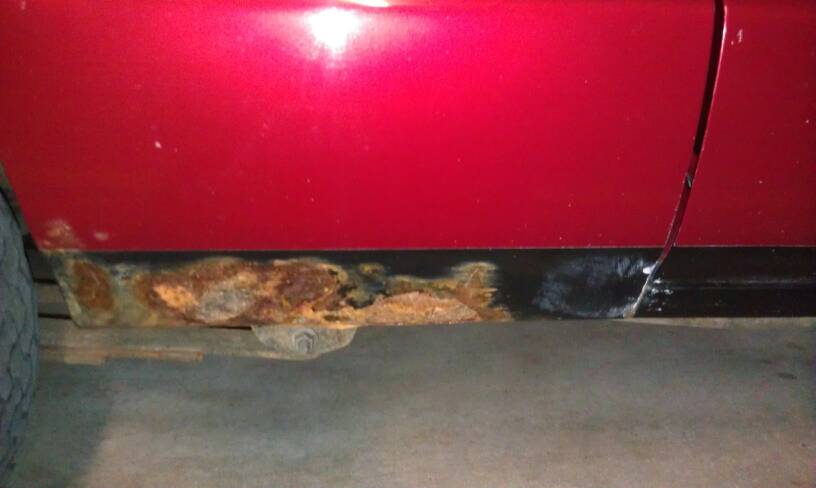
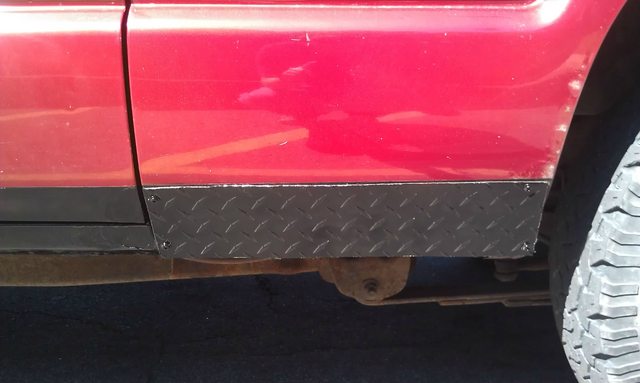
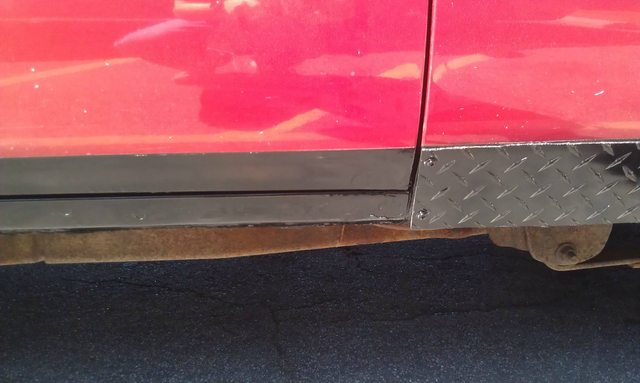
So, I spent some time on the rust issue and came up with a good, but tempoary fix, as seen below.
Before:
After:
After:
After:
I put up Diamond plate aluminium to cover the gaping hole of nothingness on my bottom rear quarter panel. Mounted it with some screws into what remains of the body, and then hit it with "rust proof" paint, followed by a black gloss. After this I'll get some Herculiner bed liner on to really seal it up good. By the time this is done, and I've gone over the rest of the rear quarter panel with a grinder, paint, and Herculiner, I bet I'll have a two tone paint job going on.