When you click on links to various merchants on this site and make a purchase, this can result in this site earning a commission. Affiliate programs and affiliations include, but are not limited to, the eBay Partner Network.
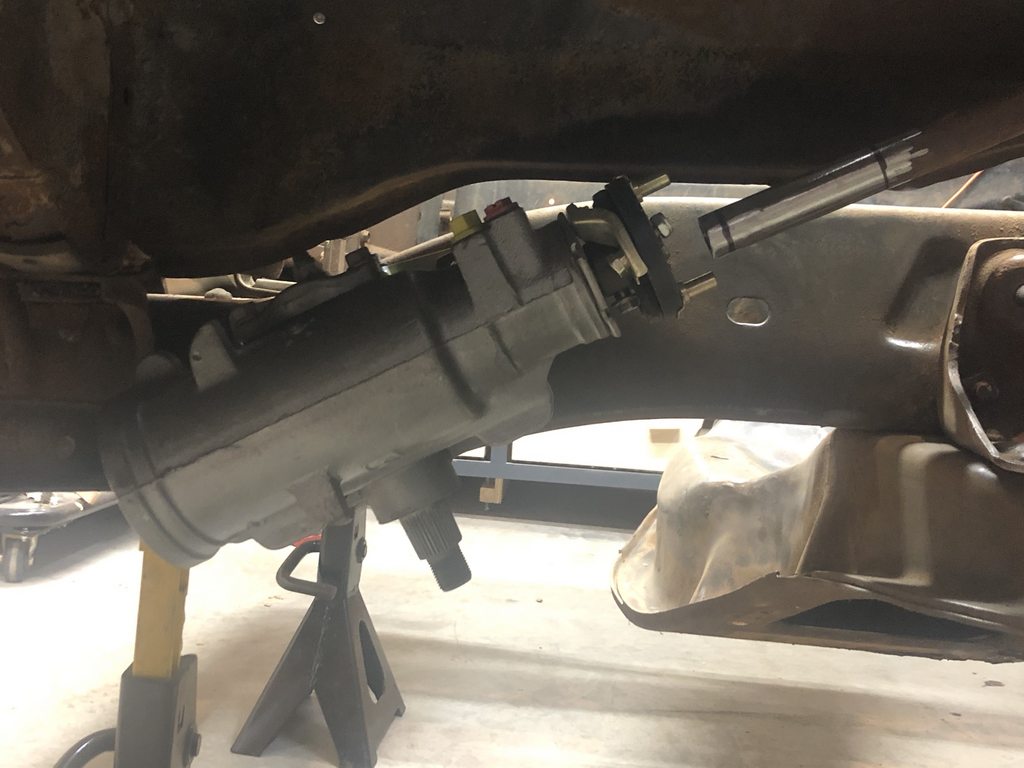
Not much but I got the power steering box mounted and cleaned up the engine bay a bit. I still need to cut and weld the shaft but I didn't want to drag the welder out just for that so I'll do it when I've got it out for a bigger welding project.
Yeah I've seen lots of people with totally rusted out windshield frames so I was happy to find only one little spot. As for the floor they make panels specifically for every location that I have rust and the rest of the floor is really solid. I thought about doing the entire pan but it's double the cost after shipping is figured in (about $1k) and its way more work to keep everything square and lined up so I figure I'll just take my time with the smaller patch panels and hope I don't screw it up lol.
I always knew I couldn't stay away! With the holidays time has been limited on doing anything at all but now that thats behind us I hope to be able to get some more hours in on it. So far I have only managed to remove some uneeded things in the engine bay, do a bit of wire wheel cleanup and got the power steering box installed on the frame. I still need to cut and weld the flange on the steering shaft but I am waiting to do that until I have the front suspension and steering done so I can clock it properly.
Thats all for now but hopefully the updates will be more regular and I can start to feel like I am making some progress soon!
Finally found a little time to spend in the garage this weekend. I got the front clip removed so I would have a little more room to work and this way I can clean up and paint the frame and firewall. This also makes it that much easier to install the suspension and motor. I dropped the front engine crossmember to make it easier to clean up and drill out the u bolt holes to accept the larger 9/16 u bolts.
Luckily a full replacement bolt kit is cheap for the front clip! I've got some broken bolt removal to do I guess. Some idiot put those two shiny bolts into the inner fender to fire wall holes and decided to just send it when they realized they weren't the correct thread size.
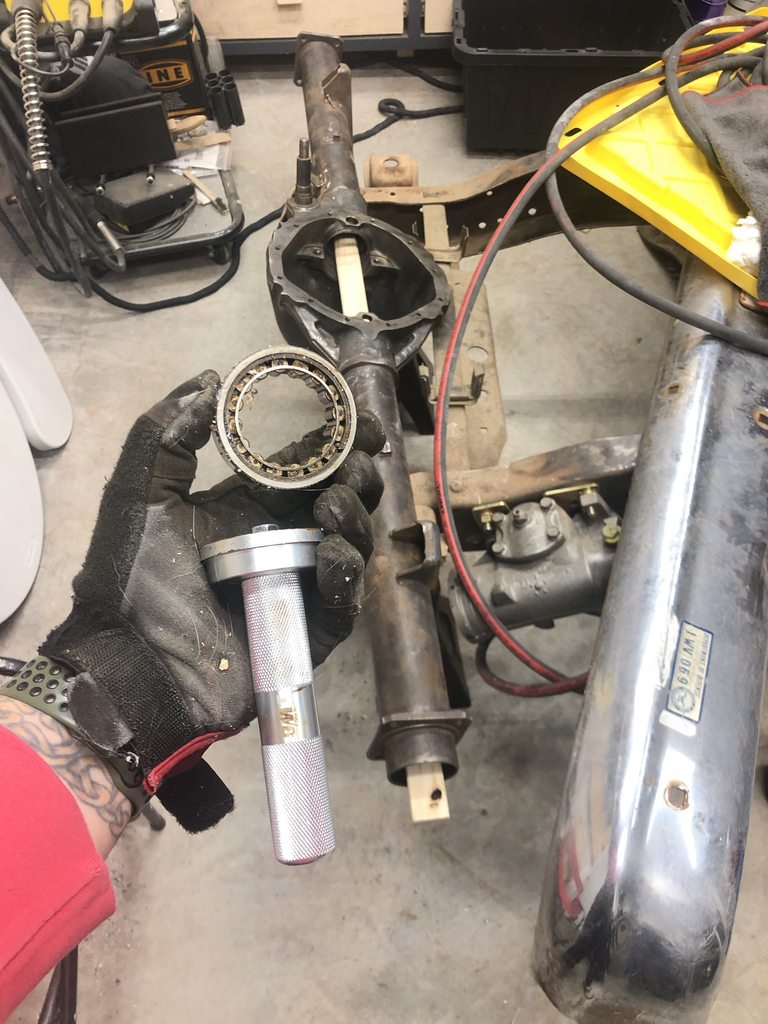
After that I pulled the rear axle to clean it up and rebuild. I have the outer bearings and new carrier bearings but I'll need to get new pinion bearings. I probably could have left them alone but if I'm this far in I should do it all I figure.
I still need to clean and de-grease the axle more but this is where I got to today. Hopefully I can keep moving forward and get this thing at least as a roller here in the next few weeks.
Nice to have room to work. Looking forward seeing it come together again. I guess it will be a while but if done nicely as you do it will be a really nice truck.
Nice to have room to work. Looking forward seeing it come together again. I guess it will be a while but if done nicely as you do it will be a really nice truck.
Thanks for the compliment!
Nothing much to update other than I got the axle bearings removed last night after receiving my bearing and race driver set from Amazon yesterday. I almost ordered the proper bearing removers and slide hammer but I figured I would see if I could make this work and I'm really glad I saved the money! I slide the driver inside the tube followed by a piece of scrap 1x2 and three wacks with a dead blow and the bearings popped right out.