
Newguy`s New Build

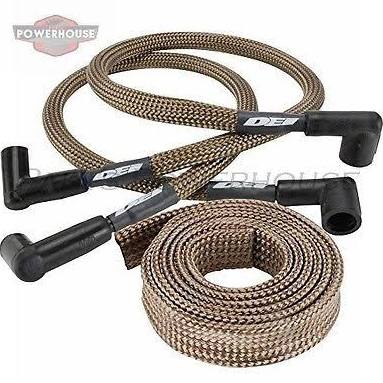
been having occasional issue with plug wire melting and arcing. Do the best I can to keep them away from the headers but the manage to end getting to close. Its only 2 of them so I am going try these. 22 bucks. should help.

Beginning Member
Joined: May 2016
Posts: 26
From: Conway, AR

Man, I love seeing what you've been doing over the years on this thing, Have been following your thread off and on for over a year.
I have to admit, many of my mods and ideas on my LS have come from your ZR2, so hopefully you will take it as a compliment of the highest order and not as any sort of insult as I go along with mine. Your winch bumper being a perfect example.... I fully intend on doing the same bumper on mine in the spring!
Beautiful offroader! and well maintained and cared for!

Starting Member
Joined: Jul 2016
Posts: 220
From: South New Jersey
I like what you have been doing with your rig, i just wish mine didn't look like it actually had 226,000 miles on it. eh slowly but surely getting it there. yours look like its been loved, maintained and used like you care about it. i have gotten a few good ideas off it. The flares and the tires look badass btw
fixed a rust issue zr2`s have. Right in front of the rear tires. drivers side this weekend passengers next
<a href="http://s561.photobucket.com/user/wavehopper1/media/14141716_10209666466835594_4649225504184687603_n.j pg.html" target="_blank"><img src="http://i561.photobucket.com/albums/ss51/wavehopper1/14141716_10209666466835594_4649225504184687603_n.j pg" border="0" alt=" photo 14141716_10209666466835594_4649225504184687603_n.j pg"/></a>
using cuttoff wheel and drilled out welds in door, well and underneath. then wired wheeled it and loaded it up with undercoating
<a href="http://s561.photobucket.com/user/wavehopper1/media/14238170_10209666467435609_8506312172186665085_n.j pg.html" target="_blank"><img src="http://i561.photobucket.com/albums/ss51/wavehopper1/14238170_10209666467435609_8506312172186665085_n.j pg" border="0" alt=" photo 14238170_10209666467435609_8506312172186665085_n.j pg"/></a>
used this 2 part glue recommended by body shop. mix it and use it quick. sets up fast
<a href="http://s561.photobucket.com/user/wavehopper1/media/14199471_10209666467875620_7370295290179732869_n.j pg.html" target="_blank"><img src="http://i561.photobucket.com/albums/ss51/wavehopper1/14199471_10209666467875620_7370295290179732869_n.j pg" border="0" alt=" photo 14199471_10209666467875620_7370295290179732869_n.j pg"/></a>
cut the panel bigger than the cut out on the truck, sanded down to bare metal. Used glue on top and sides rivets on the bottom
<a href="http://s561.photobucket.com/user/wavehopper1/media/14199697_10209666468595638_6398346172040808620_n.j pg.html" target="_blank"><img src="http://i561.photobucket.com/albums/ss51/wavehopper1/14199697_10209666468595638_6398346172040808620_n.j pg" border="0" alt=" photo 14199697_10209666468595638_6398346172040808620_n.j pg"/></a>
with this method in stead of grinding welds, only one small bead of body filler needed along the top
<a href="http://s561.photobucket.com/user/wavehopper1/media/14237531_10209666469635664_2986216592117960655_n.j pg.html" target="_blank"><img src="http://i561.photobucket.com/albums/ss51/wavehopper1/14237531_10209666469635664_2986216592117960655_n.j pg" border="0" alt=" photo 14237531_10209666469635664_2986216592117960655_n.j pg"/></a>
Paint from automotive touch up , primer base gloss. wet sand with 2000 grit between coats. and all done.
<a href="http://s561.photobucket.com/user/wavehopper1/media/14233268_10209666469795668_8064650533566843196_n.j pg.html" target="_blank"><img src="http://i561.photobucket.com/albums/ss51/wavehopper1/14233268_10209666469795668_8064650533566843196_n.j pg" border="0" alt=" photo 14233268_10209666469795668_8064650533566843196_n.j pg"/></a>
<a href="http://s561.photobucket.com/user/wavehopper1/media/14183933_10209666470435684_3594905779556095109_n.j pg.html" target="_blank"><img src="http://i561.photobucket.com/albums/ss51/wavehopper1/14183933_10209666470435684_3594905779556095109_n.j pg" border="0" alt=" photo 14183933_10209666470435684_3594905779556095109_n.j pg"/></a>
<a href="http://s561.photobucket.com/user/wavehopper1/media/14184319_10209666470835694_9220967908817229671_n.j pg.html" target="_blank"><img src="http://i561.photobucket.com/albums/ss51/wavehopper1/14184319_10209666470835694_9220967908817229671_n.j pg" border="0" alt=" photo 14184319_10209666470835694_9220967908817229671_n.j pg"/></a>
Starting Member
Joined: Jul 2016
Posts: 220
From: South New Jersey
fixed a rust issue zr2`s have. Right in front of the rear tires. drivers side this weekend passengers next
<a href="http://s561.photobucket.com/user/wavehopper1/media/14141716_10209666466835594_4649225504184687603_n.j pg.html" target="_blank"><img src="http://i561.photobucket.com/albums/ss51/wavehopper1/14141716_10209666466835594_4649225504184687603_n.j pg" border="0" alt=" photo 14141716_10209666466835594_4649225504184687603_n.j pg"/></a>
using cuttoff wheel and drilled out welds in door, well and underneath. then wired wheeled it and loaded it with undercoat

