
Zuk Mod - 1997 Blazer

Thread Starter
|
Beginning Member
Joined: Nov 2010
Posts: 37
From: Albuquerque NM

1997 Chevy Blazer ZUK MOD
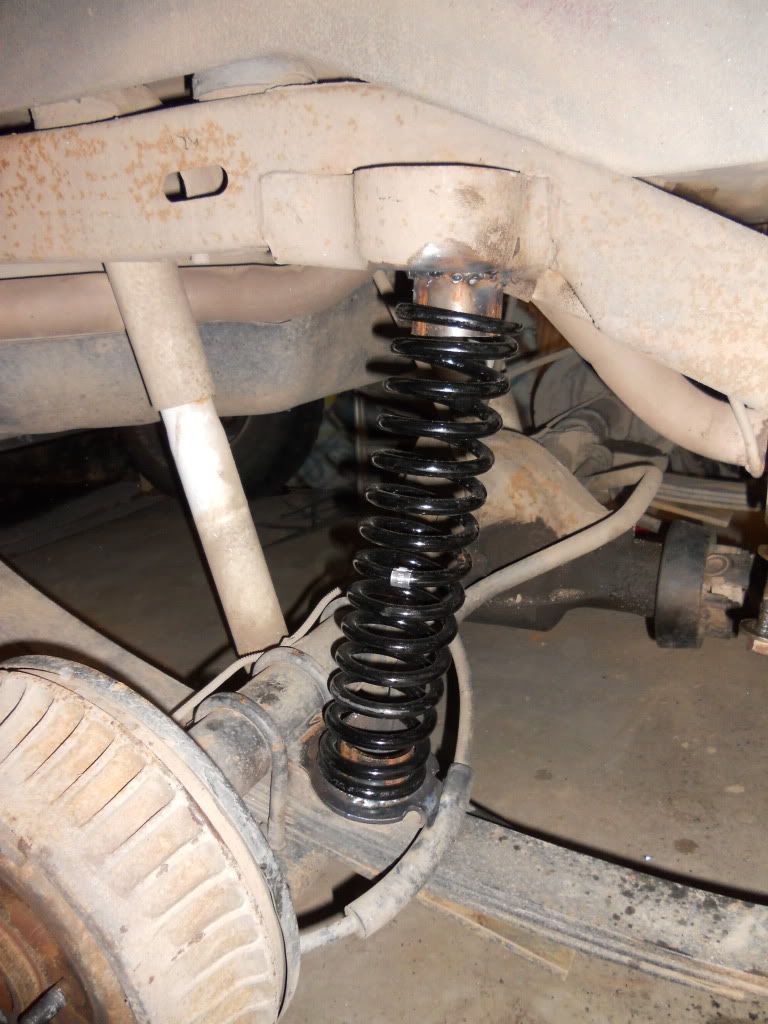
Brief Description
Tools
� Bottle Jack (Screw and Hydraulic Type)
� Hydraulic Jack (For the Blazer)
� (2) Jack stands
� Welder
� Grinder
� Saw (Any kind that is able to cut a 2 �� steel pipe)
� Coils Compressor
Materials
� (2) Black Magic Coils (Available at southwestspeed.com)
� 6� � 2 3/8� to 2 �� O.D. Steel Pipe (I recommend a wall thickness of 1/8�)
Inspection of your Leafs
First you must inspect your leafs before ordering coils to ensure that proper materials are installed.
1. Suspend your vehicle on jack stands so your tires will be off the ground. The stands should be on your frame to not interfere with your suspension
2. Remove the tire of one side. (Only one side is necessary for this process)
3. Inspect all bolts and welds to ensure that your vehicle will be able to handle the stress of a bottle jack separating the leafs from the frame while still connected.
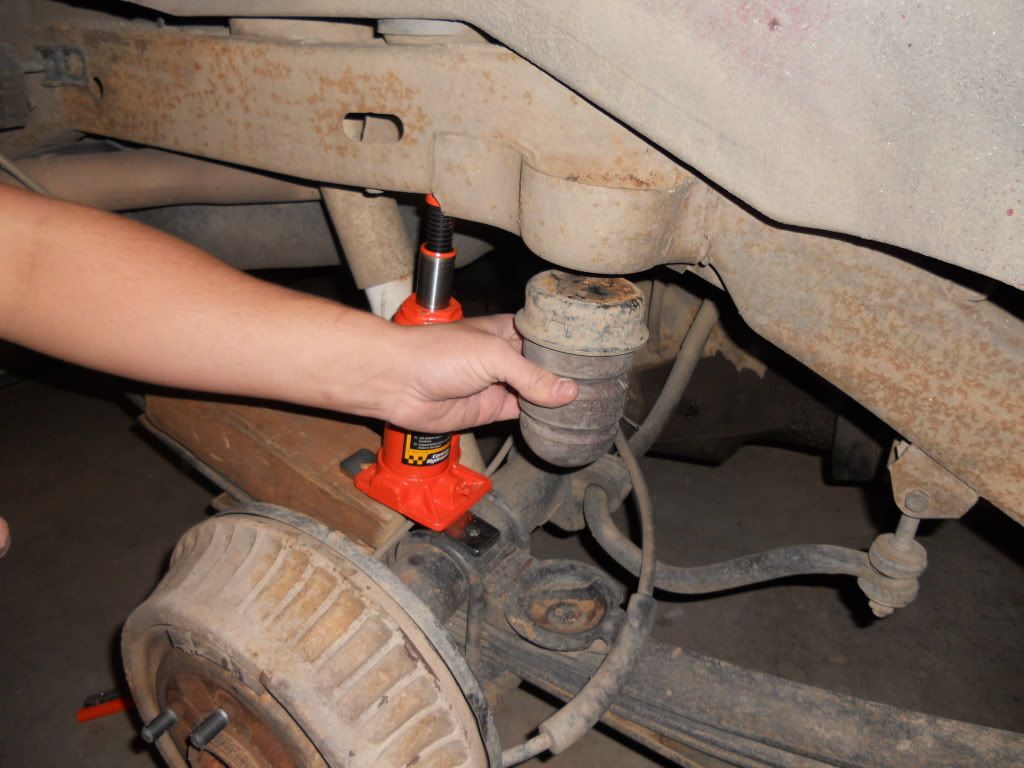
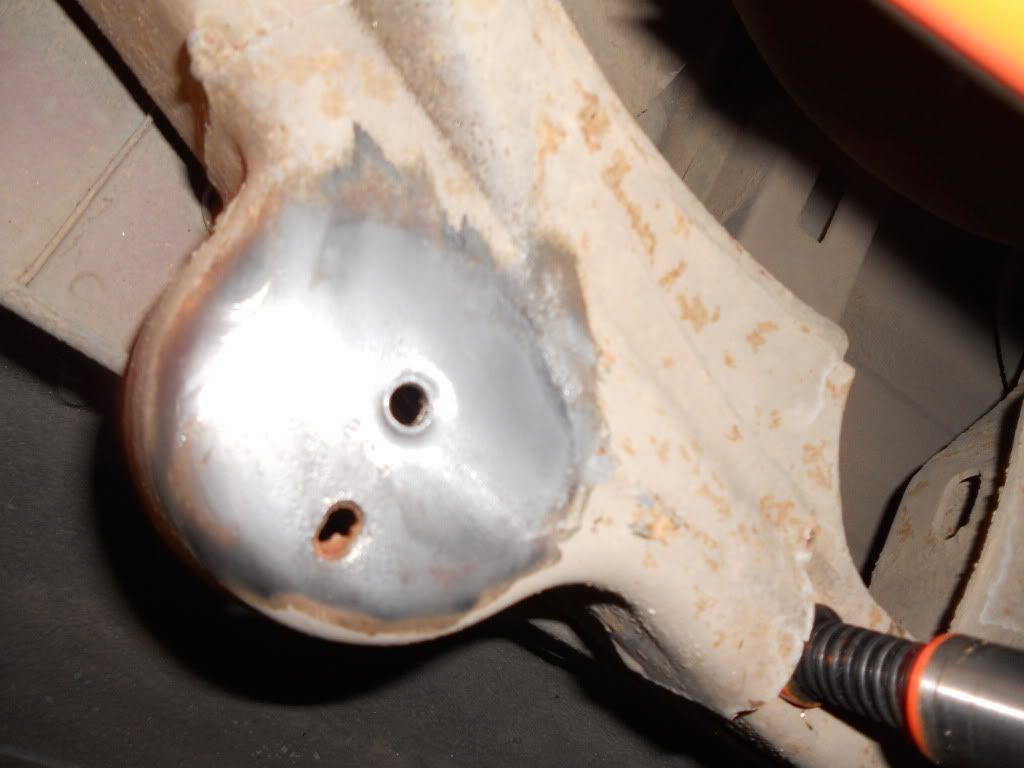
4. Remove the Bump Stop (as picture below) the bolt is in the inside of the bumps stop so you will need a 6� extension on a deep well socket.
5. Position your bottle jack on the lower bump stop pad and raise it until it reaches the top bracket.
6. At this point you should proceed to jack your leafs away from your frame. Keep jacking until you feel that the leafs will no longer push away from the frame.
7. Measure from the bottom of the bottle jack to the top of the bottle jack. This measurement will be the length of your coil. (My length was 13�, but since the coils only come in 12� and 14� I compressed 14� coils)
8. Put everything back together.
Preparation
1.At this point you have to decide which coils to buy. (You will most likely have to buy 14� coils to get the best results) Besides the lengths you must choose the harness of it. I chose 150lb shocks. This means that at 150 pounds the shock begins to compress. You can also buy 125, 175, 200, etc. A lot of 4Runner Zuk Mods have the 125 pound coils because it rides a lot smoother. I chose 150lb coils to stiffen my ride. I also plan on pulling a trailer. After deciding what coils to buy go to southwestspeed.com and order (2) black magic coils. (The 14� long x 2.5� I.D. x 150lb Black Magic Shocks I used are part number 022-015 and are $39.99) Wait for delivery

2.You will also need to buy �close to� 2.5� O.D. steel pipe. Remember the I.D. of the coils is 2.5� so try to get as close to 2.5� as you can. Cut (4) pieces in 1.5� lengths.
Installation
1. Jack up your vehicle and put on jack stands. Place the jack stands about half way down your frame
2. Remove your wheels and bump stops.
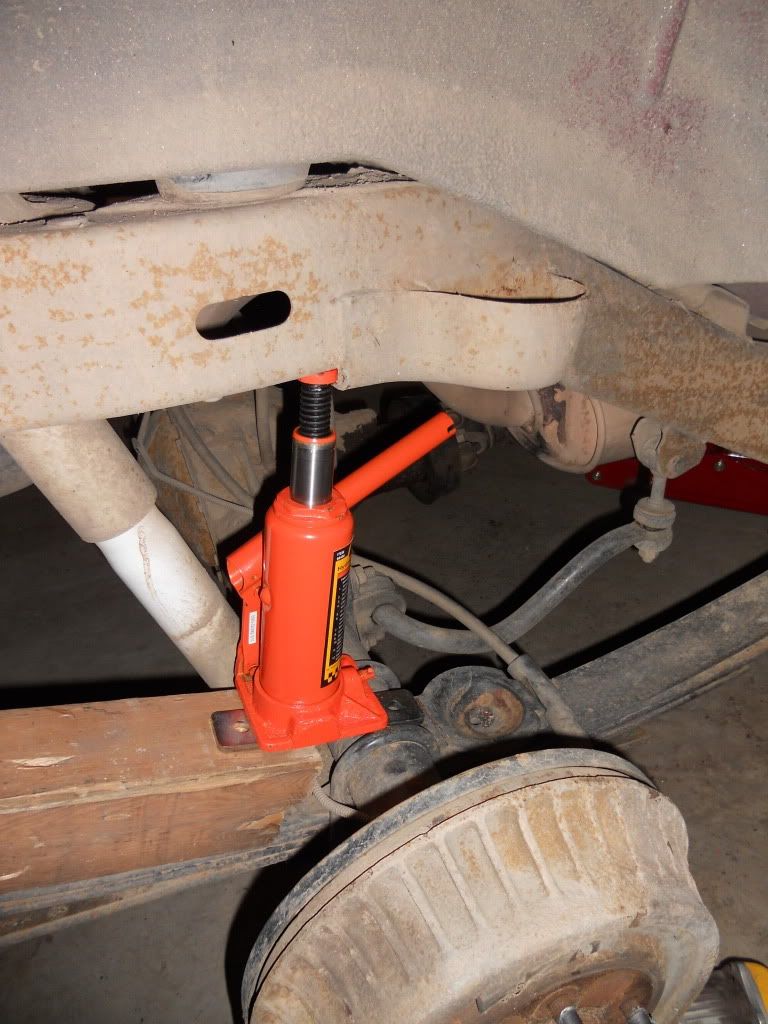
3. Place your bottle jack as pictured below and jack up to your planned height.
4. Clean your top and bottom bump stop brackets with your grinder.

5. Tack weld your 2.5� pipe on the bottom bracket as level as you can make it. (It doesn�t need to be perfect.)
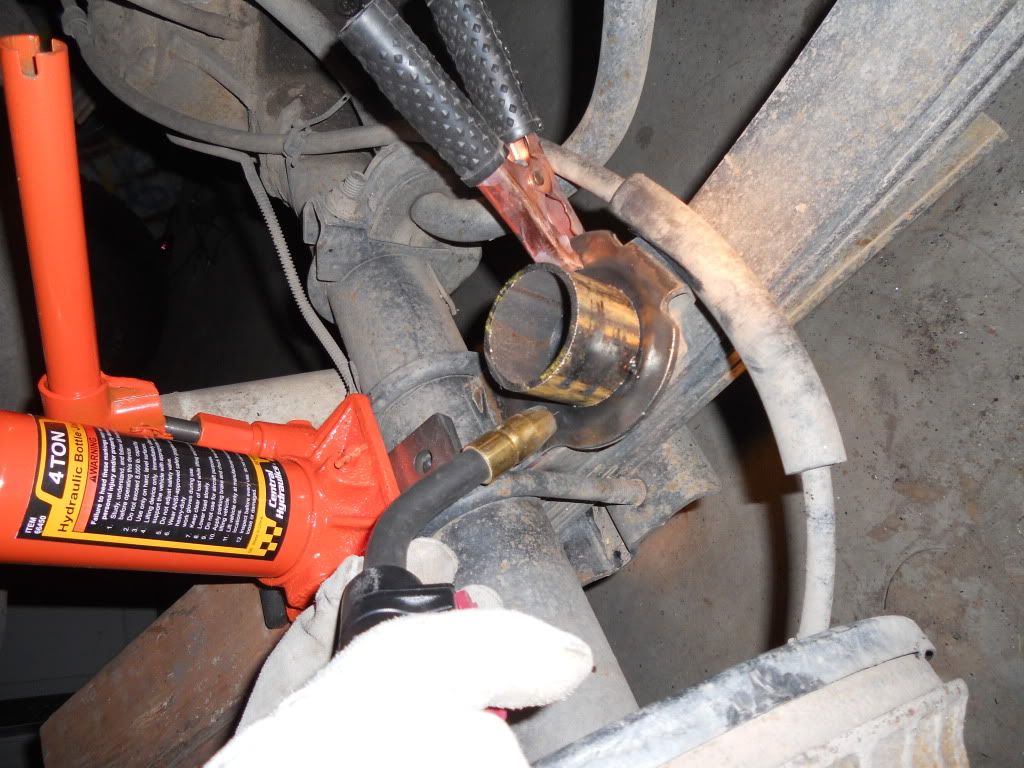
6. Using some sort of straight edge tack weld your top one on as well. Inspect and if you feel it is acceptable weld in place. 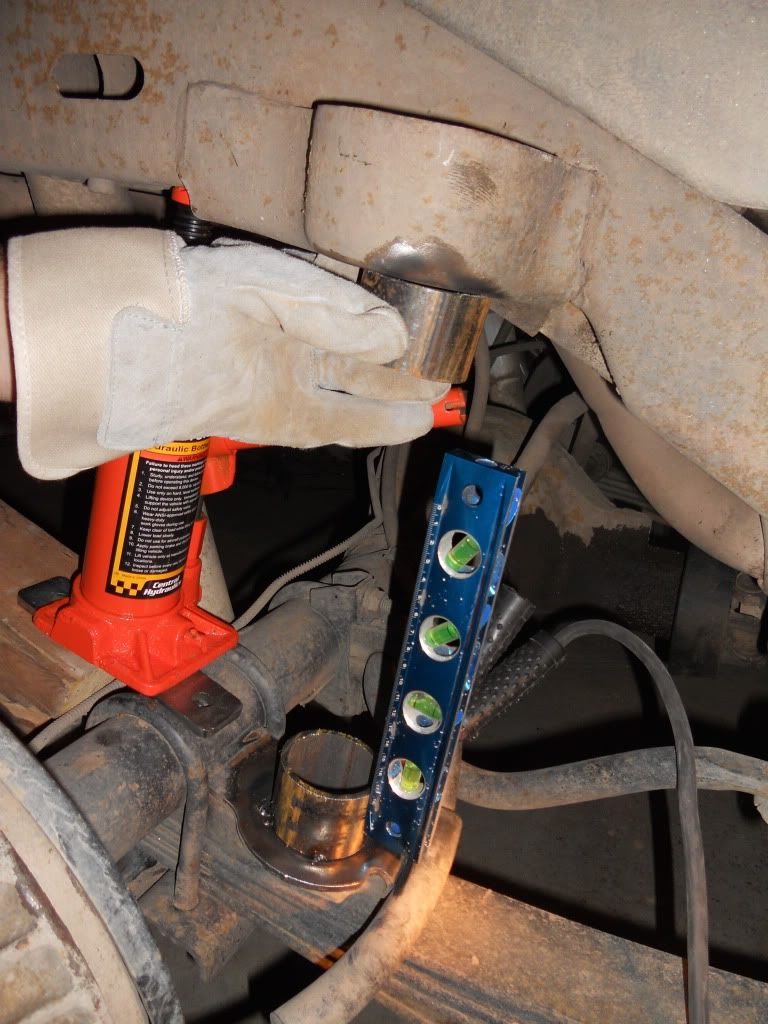
7. If you can find a coil compressor that fits the coil, use it to install the coils. (We were not lucky enough to find a compressor that small.)
a. If you cannot find one you need to unbolt the shocks and sway bars and let them hang.
b. Unbolt the rear leaf spring bolt and jack them down more.
c. At this point you should be able to slip your coils in.
d. You will have to fight the living crap out of your coils, leafs, and shackles to bolt your leafs back on, but you will get it.
e. Bolt on your sway bar and shocks.
8. Put your wheels back on and lower your vehicle.
9. Jump on the back bumper to help the springs settle initially.
It took about 3 weeks to a month but eventually my coils settled about 1�. With a torsion bar crank, the Blazer turned out great. The final numbers were 6.5� lift on the rear. (My leafs were completely flat)
If you have any questions let me know!


great mod adaption....not too complicated either, makes it even better.
great work on the how-to
edit:
question, how did you determine the length of the spring?
lets say i have some longer then stock shackles on the rear...any ideas?
ohhhh yeah before and after pics a must.
thanks again
great work on the how-to
edit:
question, how did you determine the length of the spring?
lets say i have some longer then stock shackles on the rear...any ideas?
ohhhh yeah before and after pics a must.
thanks again
Last edited by warthogdriver; Jan 10, 2011 at 04:30 PM.
Junior Member
Joined: Jul 2009
Posts: 374
From: SE Oklahoma
Nice write up! Do you have any pics of the finished product?
*EDIT*
Ok, now that's just funny! I did a Google image search for Zuk Mod Blazer, the first result is mdehoogh's sig
*EDIT*
Ok, now that's just funny! I did a Google image search for Zuk Mod Blazer, the first result is mdehoogh's sig
Last edited by s14sh3r; Jan 10, 2011 at 03:38 PM.

Thread Starter
|
Beginning Member
Joined: Nov 2010
Posts: 37
From: Albuquerque NM
Longer shackles, I believe you just add the extra height. So if the shackles added 1.5" I believe you would add 1.5" to the coil height. Which makes for an odd ball size, but I've heard of Toyota guys even cutting their coils to make their custom height. For $40 a piece I guess thats not too bad if you mess them up. lol
Also, I will have some before and after pics up soon
This is the before
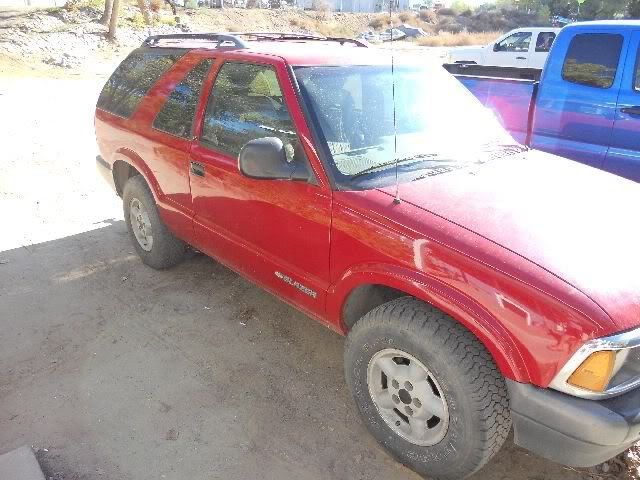
She was pretty played out.
I don't have any current pictures, but I will take some tonight. It looks way better though!
Thread Starter
|
Beginning Member
Joined: Nov 2010
Posts: 37
From: Albuquerque NM
It should be relatively easy. The top bracket could bolt into where the bump stop was bolted in,
and the bottom would be the only place you would actually have to look into. I think you could possibly bolt something under the frame using your "U" bolts...
What ever you do, just make sure to use heavy duty bolts. They may be expensive, but they are worth every penny.
You can check it out and make your own brackets and add to this build or make another on how to install bolt on brackets instead of weld on brackets.