
How To: Rough Country 2.5" Lift Install

Blaz and I installed the front RC 2.5" lift on his 2005 Blazer on Saturday. I took a fair number of pictures to do a little write up to help with some questions that pop up now and then. We didn't follow the RC instructions for removing everything so the order of this write up may be different than the order of the instructions.
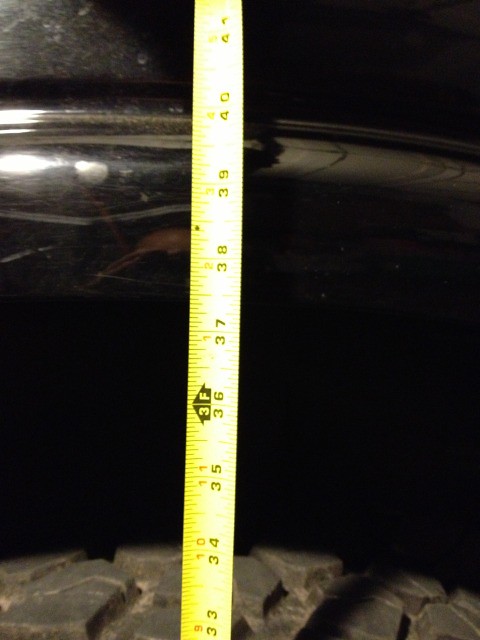
First off, we took measurements to the underside of all fenders for a comparison to show how much lift we ended up with.
Passenger side front

Driver side front
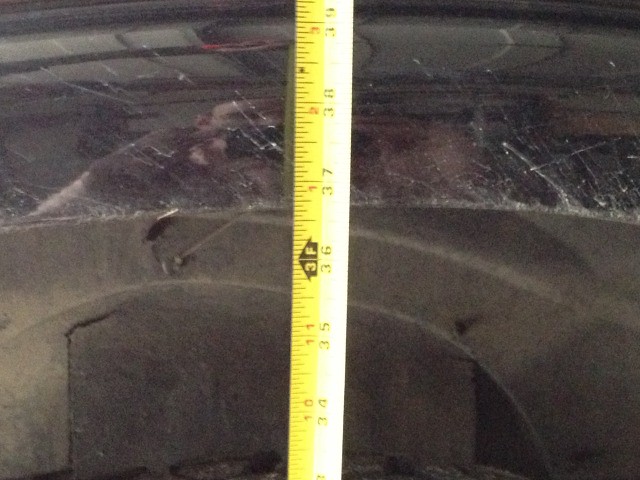
Driver side rear
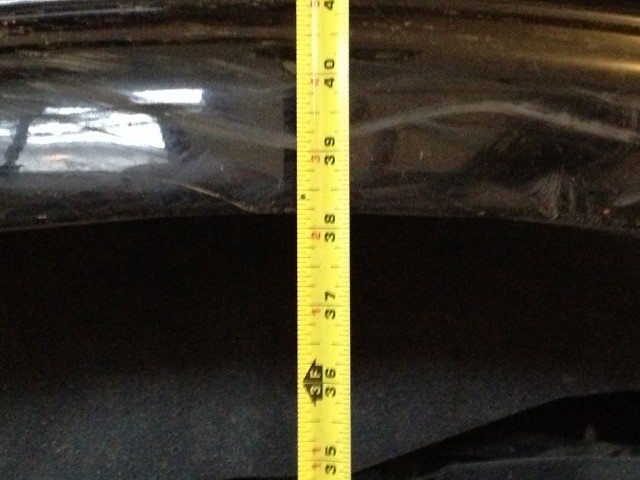
Passenger side rear

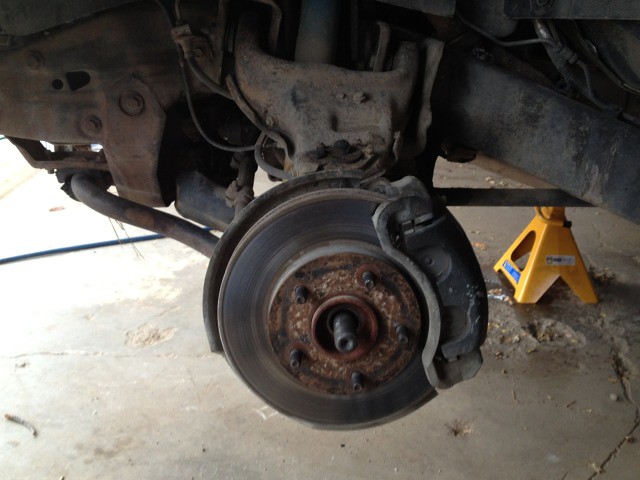
First thing to do is break the axle hub nut (36 mm) and all of the wheel bolts (19 mm) loose before jacking up the front end.
Now jack the front end up and support it on jackstands.
Remove the front wheels and axle hub nuts.
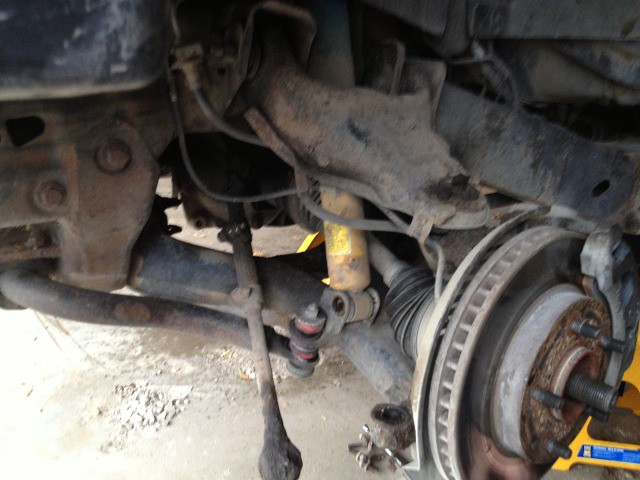
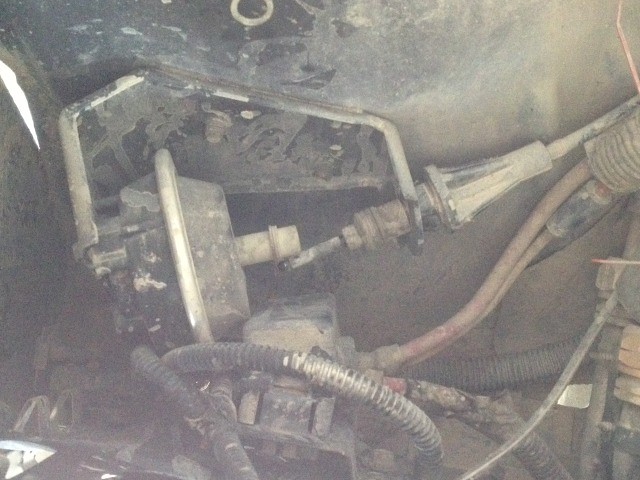
Next we disconnected both tie rod ends (18 mm).

And removed upper and lower shock bolts (18 mm)
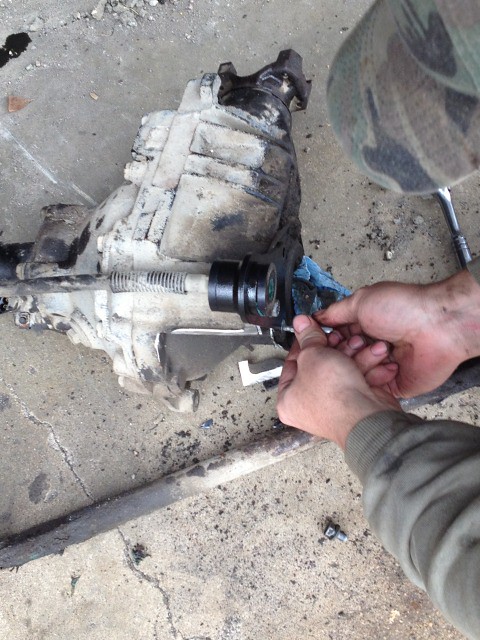
We then disconnected the front driveshaft (11 mm bolts) from the front axle and taped the u-joint caps.
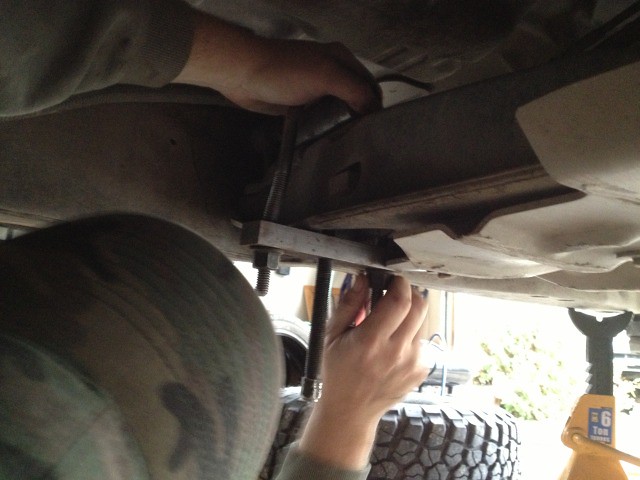
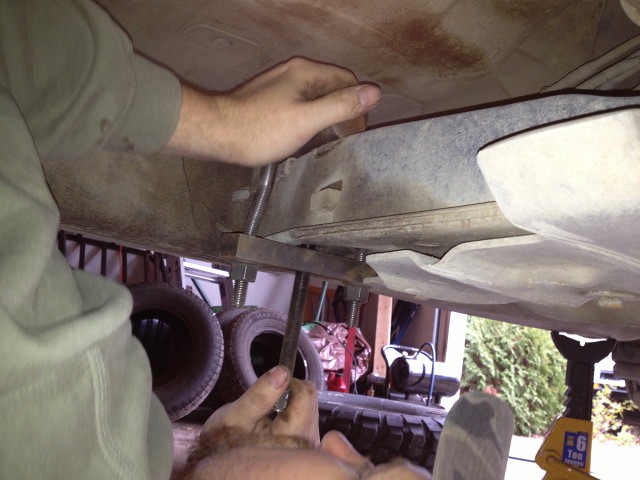
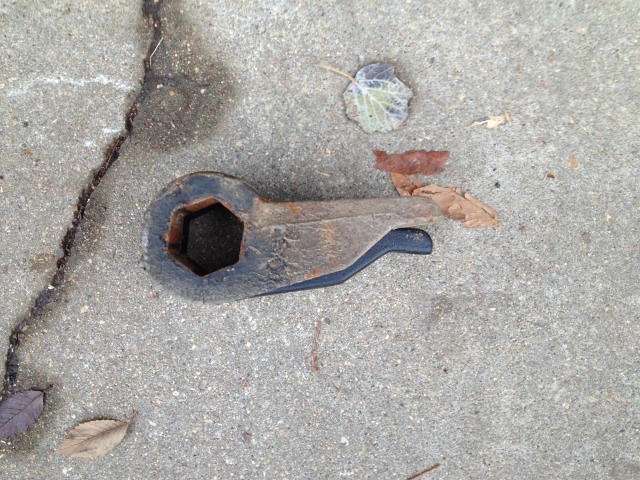
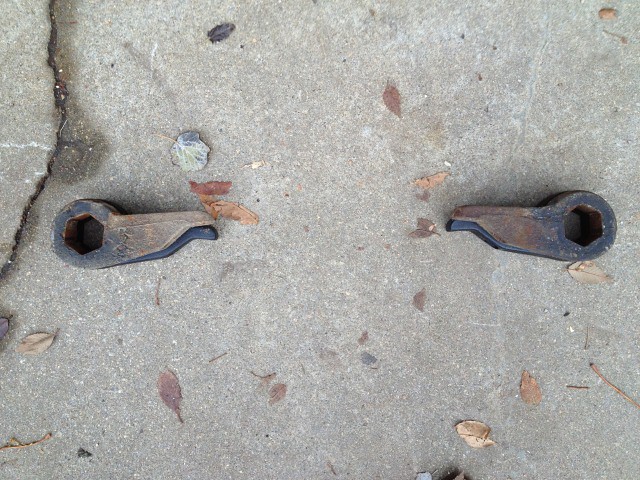
Torsion bars were next, Blaz had made his own unloading tool beforehand so we used that to unload the torsion bars (18 mm) and remove the keys.
Old and new keys
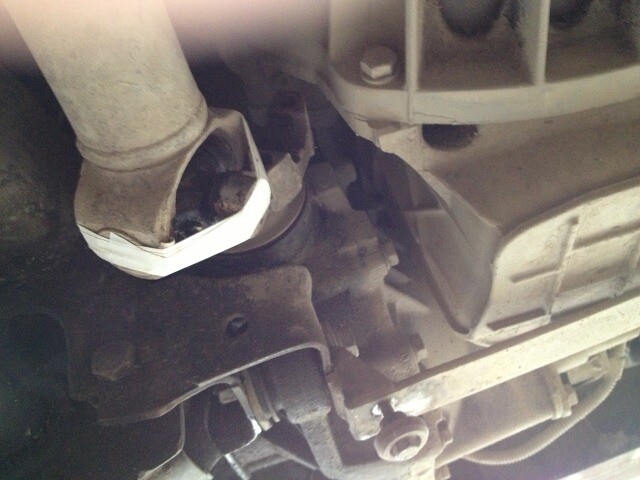
We were then ready to disconnect the upper ball joints
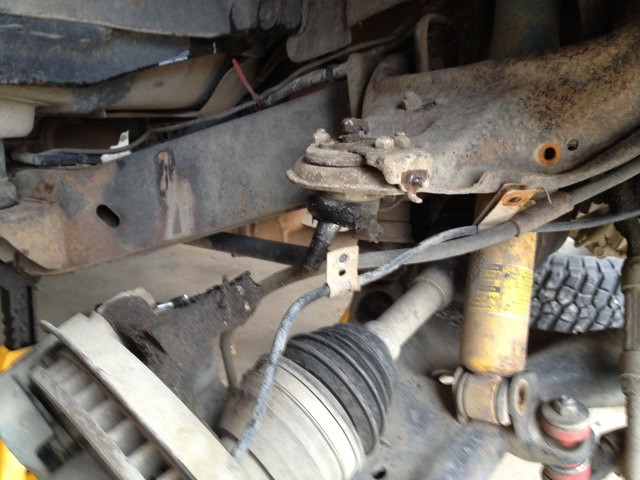
And remove the shocks
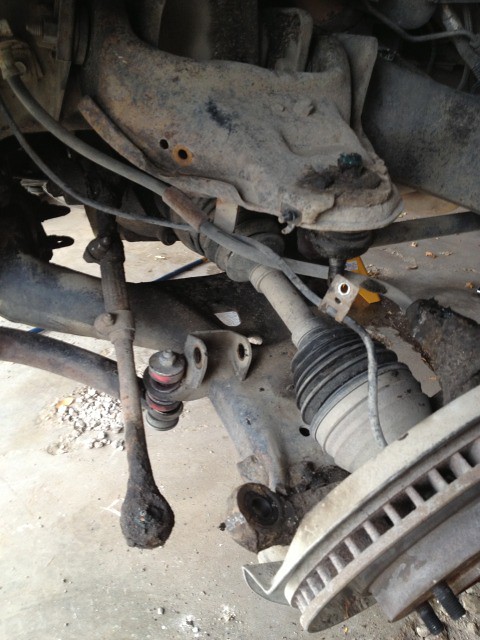
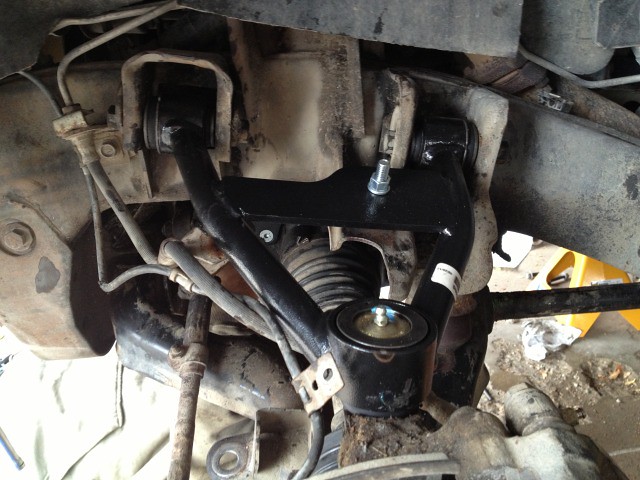
Now we could remove the upper control arm cam bolts (18 mm)
and upper control arm after unbolting the ABS and brake line brackets
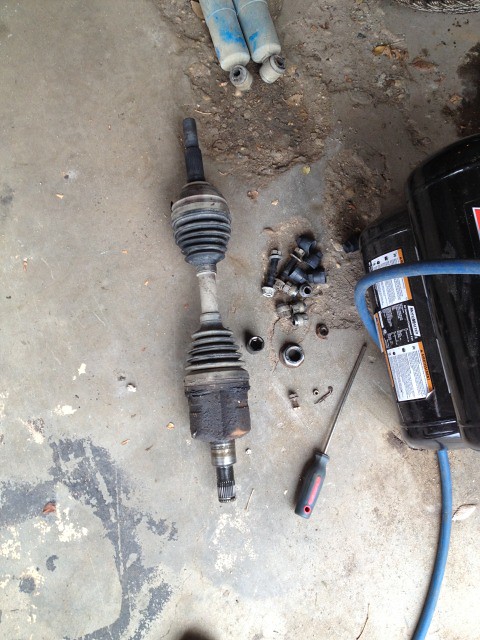
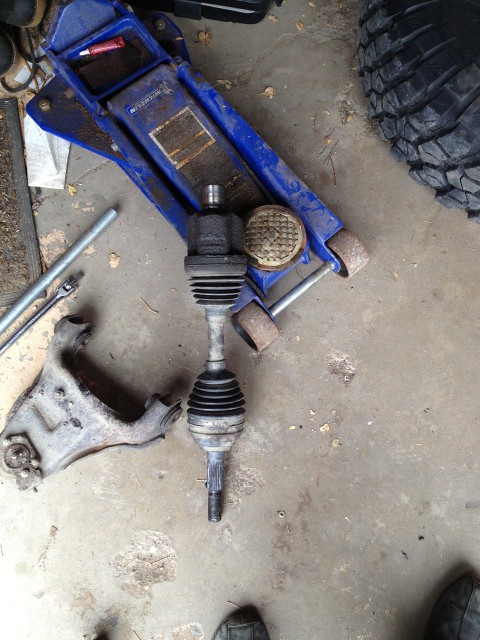
Now the CV shafts were free to be removed

Now we were a little confused with the instructions for this part, they say to only disconnect the front axle actuator for manual shift transfer cases. We couldn't figure out why this wouldn't apply to push button transfer cases as well, so we disconnected it.
Battery removed
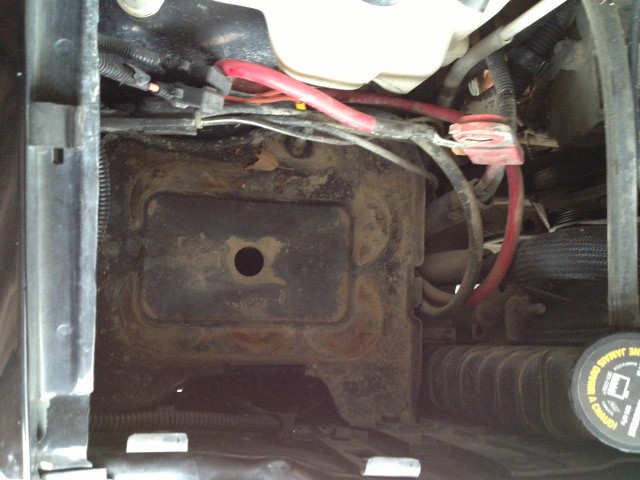
Tray removed
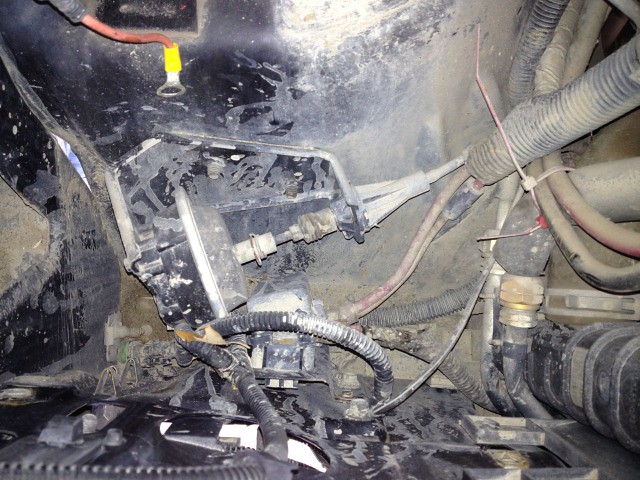
Actuator disconnected
Actuator frame bracket (13 mm) removed

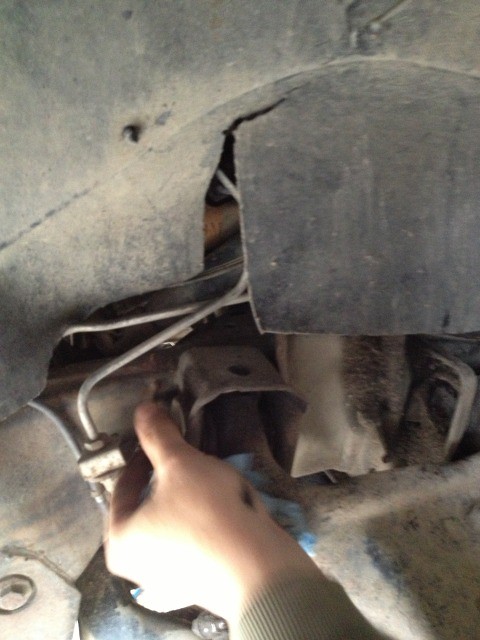
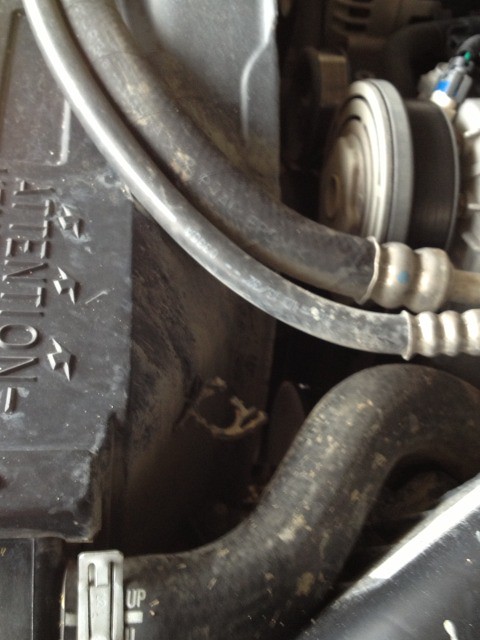
Next we unclipped the vent tube from the fan shroud
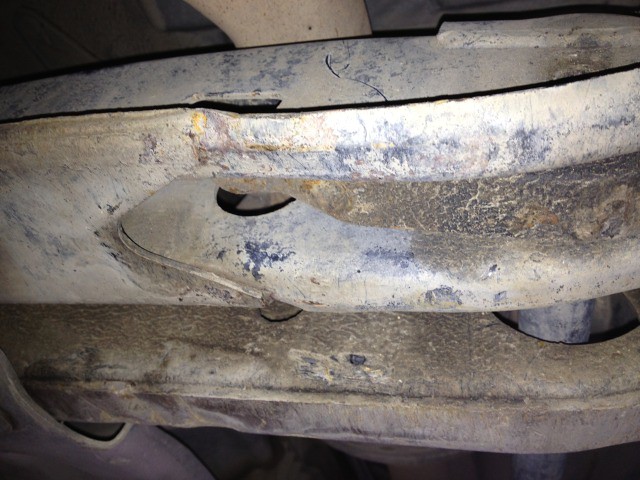
Next we removed the sway bar to gain access to the driver side lower control arm bolts (21 mm)
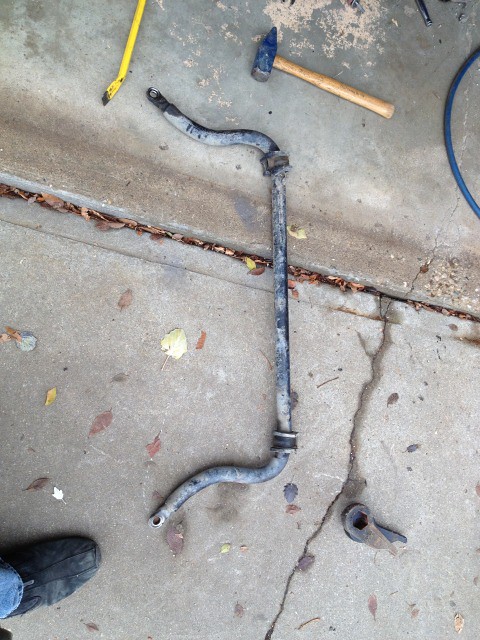
And remove lower control arm
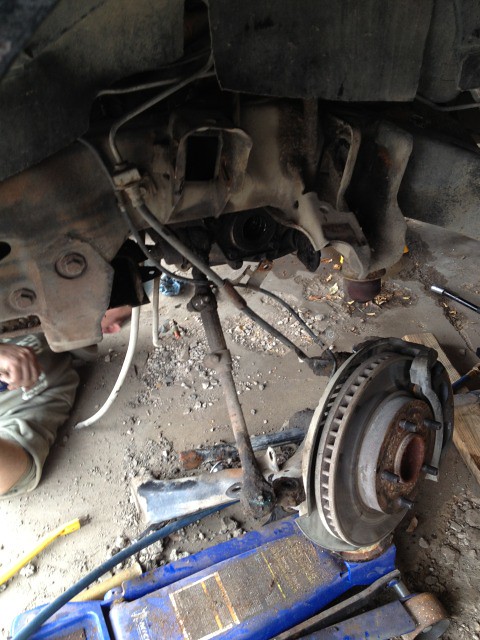
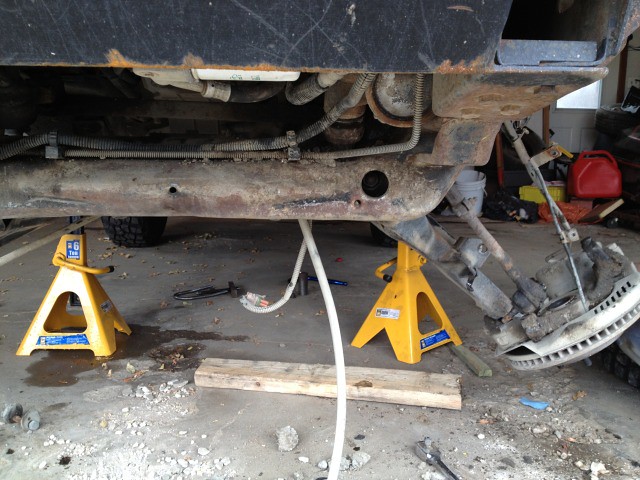
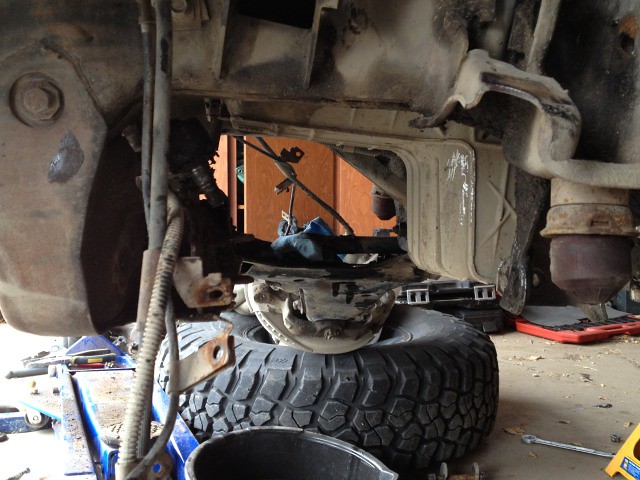
Now we were ready to remove the front diff mounting bolts (18 mm) after supporting the diff with a jack for safety.
Upper bolt through the frame rail
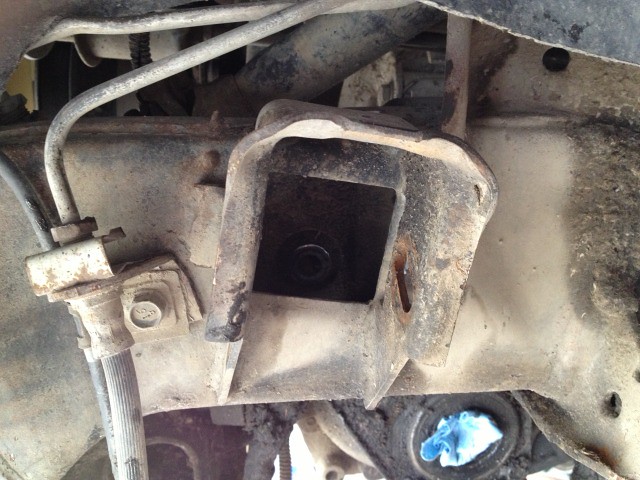
Lower bolt through the bracket
There's also the passenger side mount that I didn't get a picture of, but it's just two bolts. Pretty straight forward and easy to find.
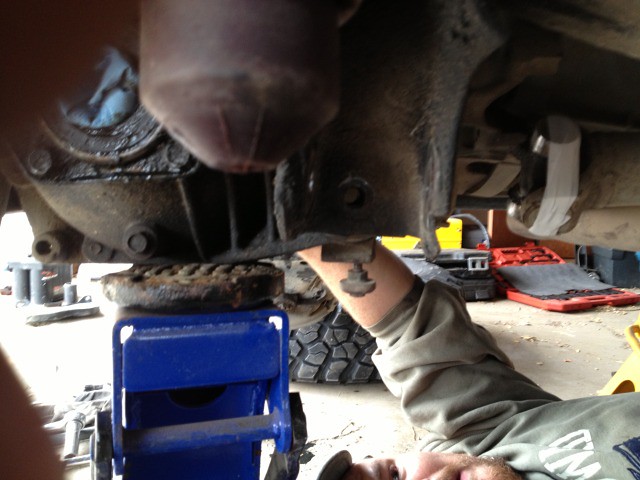
We fought with the diff for probably nearly an hour trying to get it out, but no matter what we tried we just couldn't get it to clear everywhere it needed to.
So this part isn't in the instructions but we completely removed the steering linkage and tie rods and it made life much easier. I definitely recommend doing this for anyone else looking to remove the front axle.
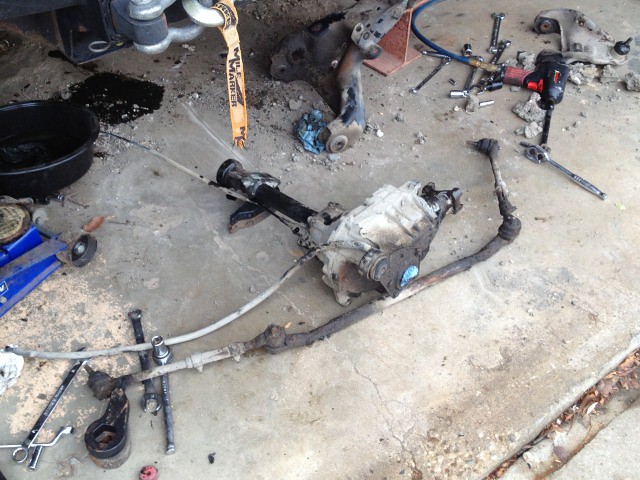
Front diff finally out
 r
r
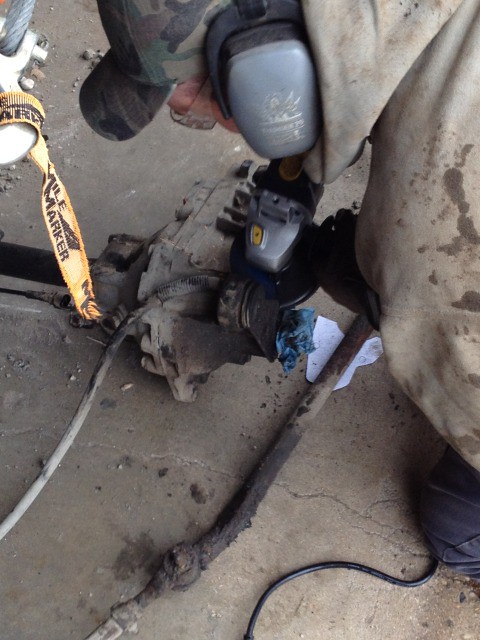
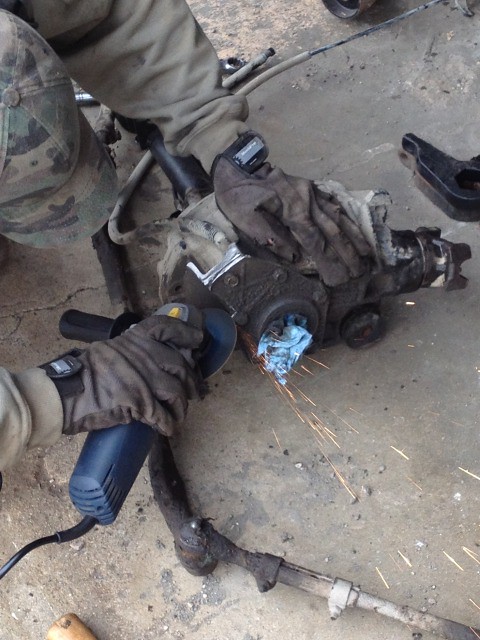
Now it was time to start cutting. This part is all as per the instructions, easy to follow with the template provided.

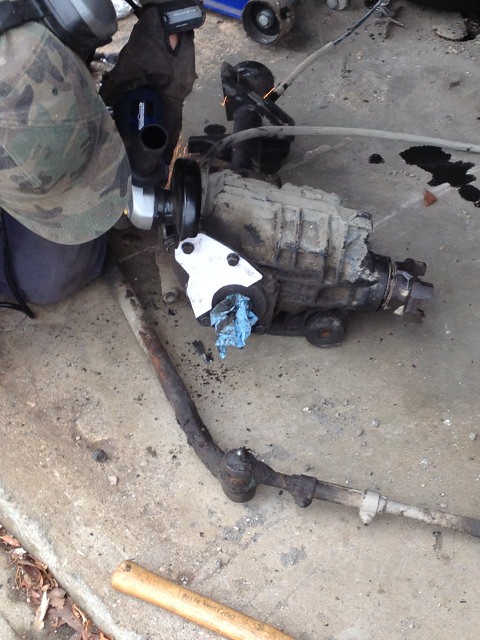
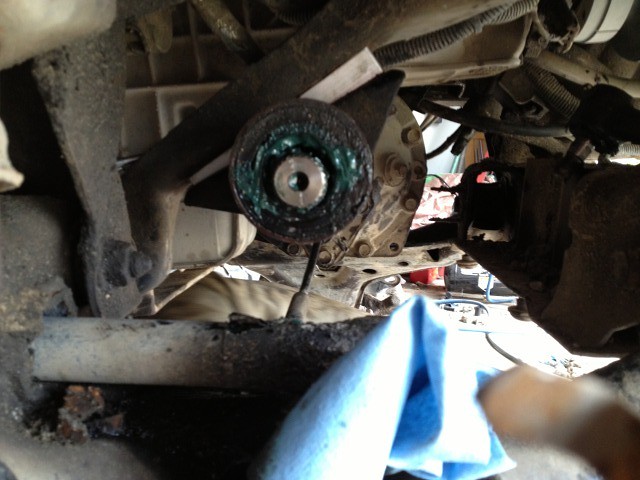
Now bolt on the provided bracket using the provided hardware. The two 13 mm bolts worked out fine, but the flush mount allen bolt was bottoming out before it was tight so we had to cut off about 1/8 - 3/16" to get it to work.
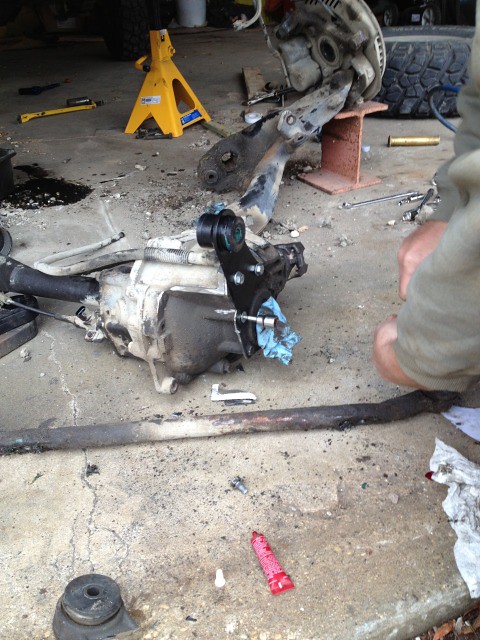
The diff is now ready to be re-installed.
Driver side

Passenger side with wedge installed
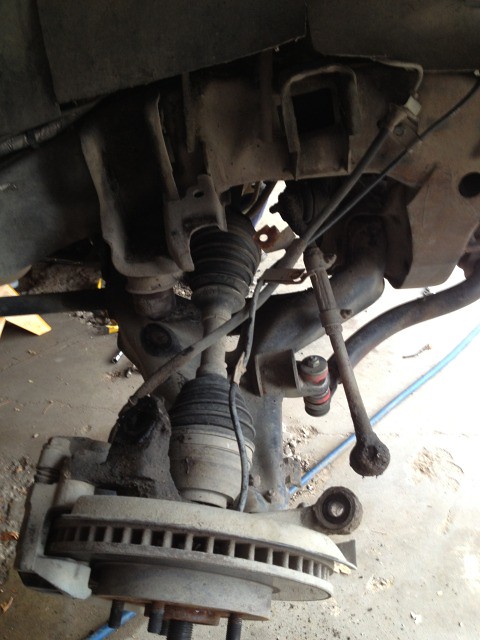
Re-install the lower control arm, CV shafts and install the new torsion keys
Install the new upper control arms and connect the upper ball joints and tie rod ends. Connect the ABS and brake line brackets to the bolt on the upper arm.

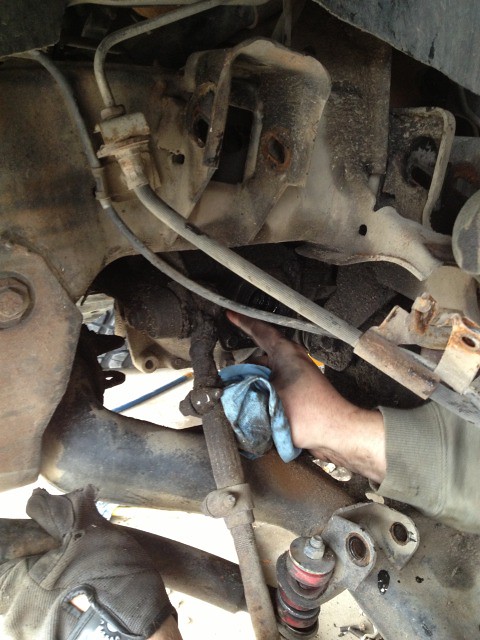
Connect the diff actuator cable and put the diff vent tube back in its plastic clip.
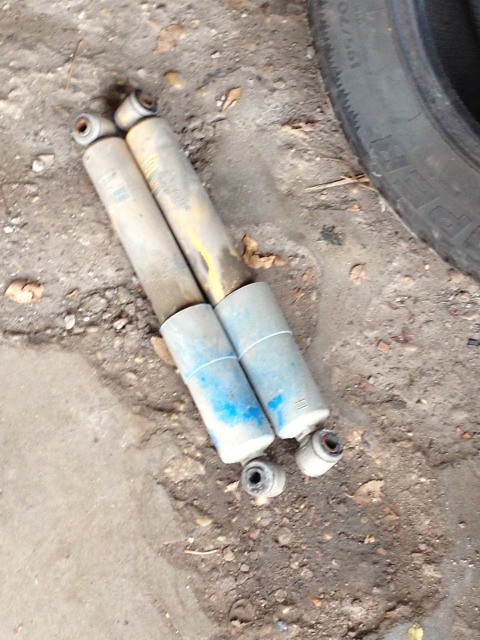
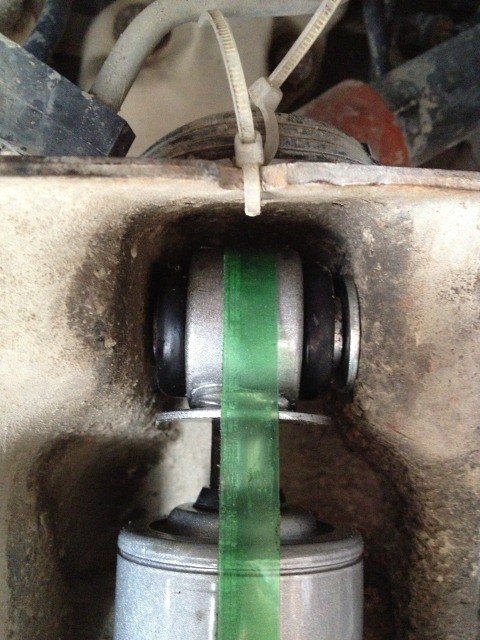
We then installed the new Rough Country shocks, we ran into another small issue here. The new shocks aren’t as wide as the stock ones and leave a relatively large gap between the shocks and mounting brackets. They would probably be fine as is, but we put some washers in as well.
Put the wheels back on and let it down. All done right?

... Maybe not
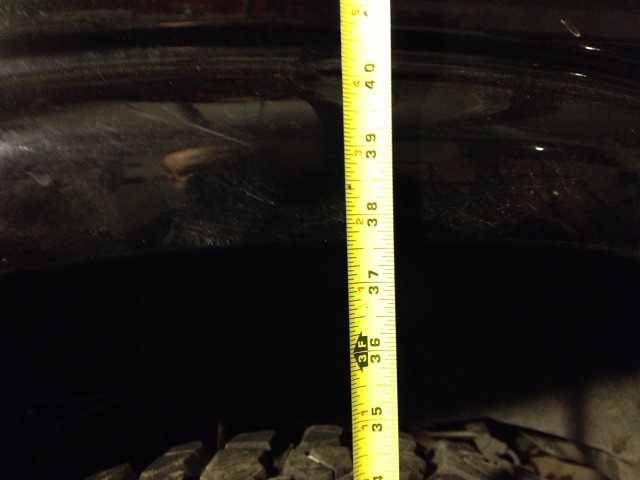
We did a calibrated eyeball alignment to get it driveable and took some new measurements.
Passenger side front
Driver side front
We also found that at full droop, the passenger side CV would bind really bad. So blaz made some �” bumpstop spacers to prevent the binding.
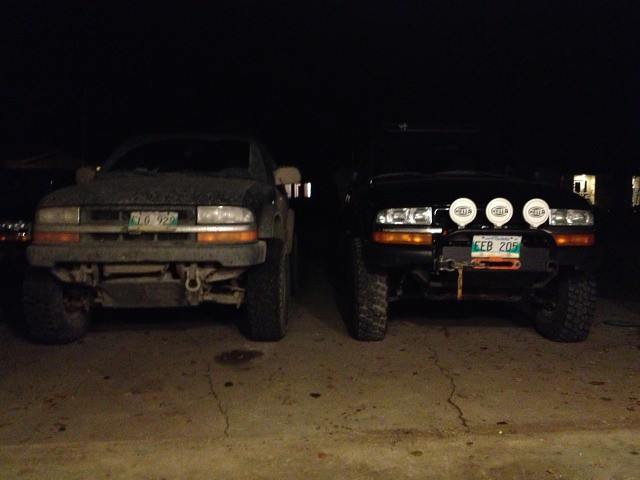
And here it is next all finished and next to mine. It’s about �” lower than mine at the mirrors, but as you can see, has more ground clearance at the front cross member. Sorry for the dark picture, I’ll get some more comparison shots next time we see each other and post them up.
It took us about 11 hours to get just the front done, including stopping for lunch and supper. We also installed a new seal on the driver side of the axle. I think it probably would have been about a 8.5 hour install time taking those things into account and if we had removed the steering linkage from the start.
The rear had already been lifted with extra leaves and shackles beforehand.
Any further questions feel free to ask.
First off, we took measurements to the underside of all fenders for a comparison to show how much lift we ended up with.
Passenger side front
Driver side front
Driver side rear
Passenger side rear
First thing to do is break the axle hub nut (36 mm) and all of the wheel bolts (19 mm) loose before jacking up the front end.
Now jack the front end up and support it on jackstands.
Remove the front wheels and axle hub nuts.
Next we disconnected both tie rod ends (18 mm).
And removed upper and lower shock bolts (18 mm)
We then disconnected the front driveshaft (11 mm bolts) from the front axle and taped the u-joint caps.
Torsion bars were next, Blaz had made his own unloading tool beforehand so we used that to unload the torsion bars (18 mm) and remove the keys.
Old and new keys
We were then ready to disconnect the upper ball joints
And remove the shocks
Now we could remove the upper control arm cam bolts (18 mm)
and upper control arm after unbolting the ABS and brake line brackets
Now the CV shafts were free to be removed
Now we were a little confused with the instructions for this part, they say to only disconnect the front axle actuator for manual shift transfer cases. We couldn't figure out why this wouldn't apply to push button transfer cases as well, so we disconnected it.
Battery removed
Tray removed
Actuator disconnected
Actuator frame bracket (13 mm) removed
Next we unclipped the vent tube from the fan shroud
Next we removed the sway bar to gain access to the driver side lower control arm bolts (21 mm)
And remove lower control arm
Now we were ready to remove the front diff mounting bolts (18 mm) after supporting the diff with a jack for safety.
Upper bolt through the frame rail
Lower bolt through the bracket
There's also the passenger side mount that I didn't get a picture of, but it's just two bolts. Pretty straight forward and easy to find.
We fought with the diff for probably nearly an hour trying to get it out, but no matter what we tried we just couldn't get it to clear everywhere it needed to.
So this part isn't in the instructions but we completely removed the steering linkage and tie rods and it made life much easier. I definitely recommend doing this for anyone else looking to remove the front axle.
Front diff finally out
rNow it was time to start cutting. This part is all as per the instructions, easy to follow with the template provided.
Now bolt on the provided bracket using the provided hardware. The two 13 mm bolts worked out fine, but the flush mount allen bolt was bottoming out before it was tight so we had to cut off about 1/8 - 3/16" to get it to work.
The diff is now ready to be re-installed.
Driver side
Passenger side with wedge installed
Re-install the lower control arm, CV shafts and install the new torsion keys
Install the new upper control arms and connect the upper ball joints and tie rod ends. Connect the ABS and brake line brackets to the bolt on the upper arm.
Connect the diff actuator cable and put the diff vent tube back in its plastic clip.
We then installed the new Rough Country shocks, we ran into another small issue here. The new shocks aren’t as wide as the stock ones and leave a relatively large gap between the shocks and mounting brackets. They would probably be fine as is, but we put some washers in as well.
Put the wheels back on and let it down. All done right?
... Maybe not
We did a calibrated eyeball alignment to get it driveable and took some new measurements.
Passenger side front
Driver side front
We also found that at full droop, the passenger side CV would bind really bad. So blaz made some �” bumpstop spacers to prevent the binding.
And here it is next all finished and next to mine. It’s about �” lower than mine at the mirrors, but as you can see, has more ground clearance at the front cross member. Sorry for the dark picture, I’ll get some more comparison shots next time we see each other and post them up.
It took us about 11 hours to get just the front done, including stopping for lunch and supper. We also installed a new seal on the driver side of the axle. I think it probably would have been about a 8.5 hour install time taking those things into account and if we had removed the steering linkage from the start.
The rear had already been lifted with extra leaves and shackles beforehand.
Any further questions feel free to ask.
Last edited by Jamaroon; Jul 13, 2017 at 01:49 PM.
BF Veteran
Joined: Sep 2008
Posts: 2,522
From: Winnipeg, Manitoba

^what he said^ & WTF didn't you ask me for help seeing as I had just done a driveway RC 2.5 SL?
Enjoy the chocolate cigar from the neigbor for his new born lol
BTW is his higher than yours yet? Still measuring lmao.
Enjoy the chocolate cigar from the neigbor for his new born lol
BTW is his higher than yours yet? Still measuring lmao.
Thanks.
Lol Tom, it all happened very quick, sorry we didn't invite you. It was a damn good chocolate cigar btw lol how was the real one?
No, mine is still taller... just barely though.
Lol Tom, it all happened very quick, sorry we didn't invite you. It was a damn good chocolate cigar btw lol how was the real one?
No, mine is still taller... just barely though.

New Member
Joined: Jul 2010
Posts: 84
nice write up. how much did you crank the torsion bolts?
nice torsion bar tool. I used the auto zone ball joint press rental (big *** C clamp basically). it was a squeeze to get it to fit the DR side, i had to loosen the gas tank a bit.
instead of taking out the steering linkage I cut the lower mounting tab off the frame to allow the diff to slide down. weld it back in when finished.
good call on taping the u joint caps. i forgot to and one fell off and needle bearings were scattered everywhere. $15 mistake.
also dont forget to grease/anti seize everything. esp the torsion bars at the LCA, prevent that blazer squeak
We put it to the measurement RC says from axle to fender (+ 2" for the body lift), whatever that number is. I don't remember.
That sounds like more work to me
Yeah, we did grease up the torsion bars, I forgot to put that in.
Yeah, we did grease up the torsion bars, I forgot to put that in.