
Bravada wheel painting - Step by step with pictures

Thread Starter
|
New Member
Joined: May 2010
Posts: 6
From: Bellevue, MI

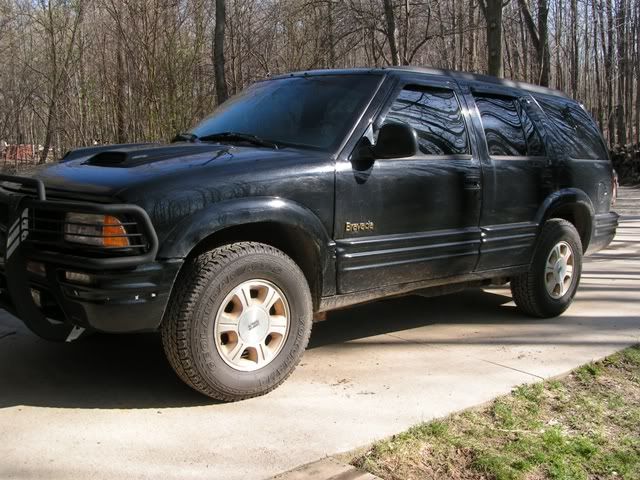
I had been kicking around the idea of painting the stock wheels on my '97 Olds Bravada since last summer, but never took the time out to actually do it. I finally commited to it as a two day project a couple weeks ago and thought I'd share my results. First let me say that I didn't do this the quick or easy way. I went about this project in the same way one would a typical autobody repair; Sand, Prime, Basecoat, Clearcoat. Heres how it went down:
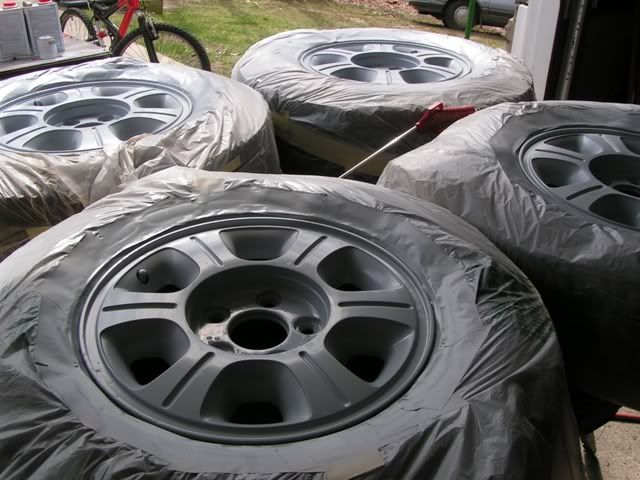
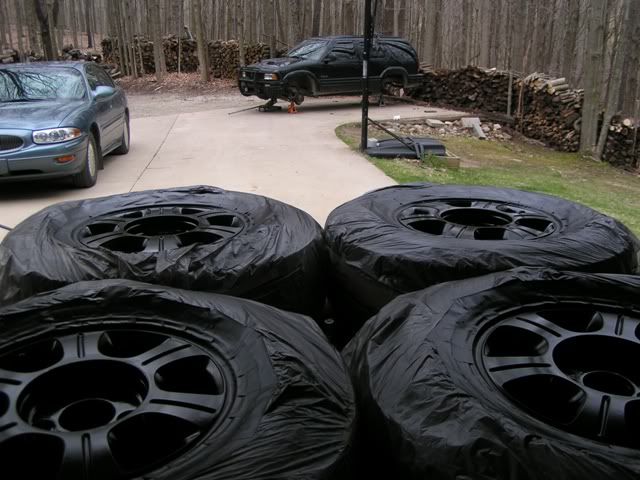
Before:
Washed wheels down with soap and water. Wiped down with Wax and Grease Remover.
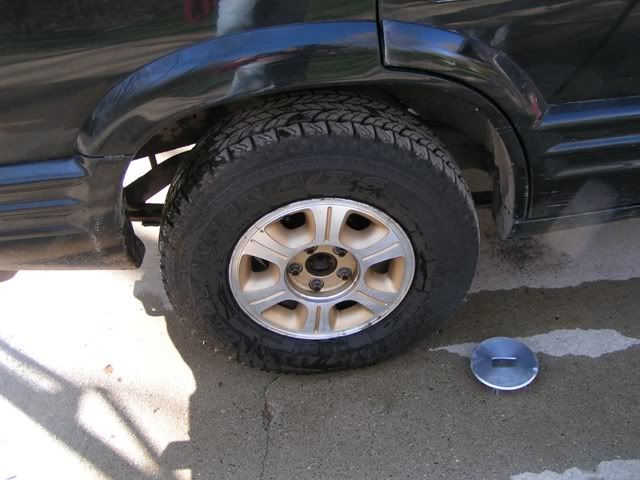
Sanded down rough/correded areas with 150 grit then followed up with 400 grit over the entire wheel. Wiped down thoroughly with Wax and Grease Remover.
Masked off, ready for primer.
Although these stock wheels were completely painted with little bare aluminum, I chose to go with a self etch primer to ensure adhesion on the few spots that were bare. I used SEM brand primer.
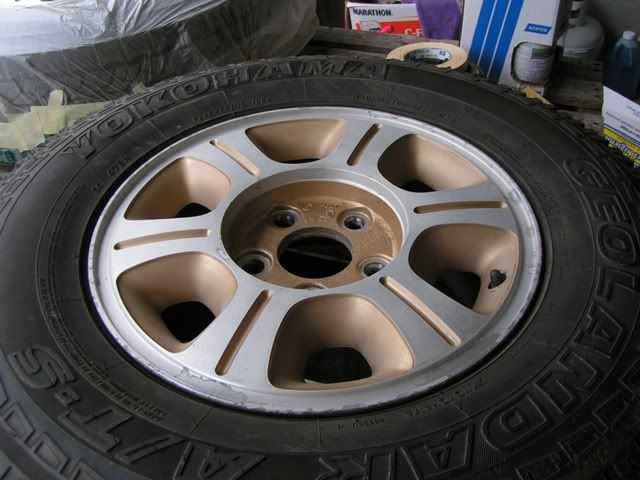
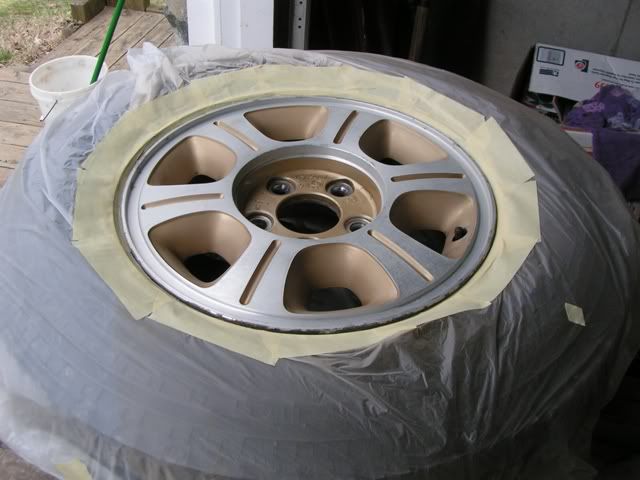
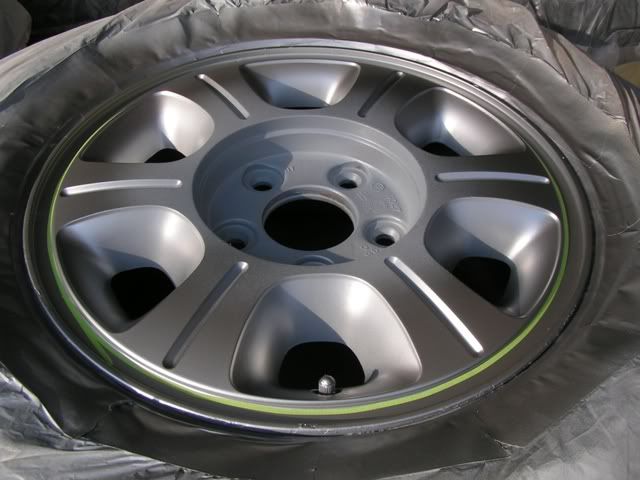
Sanded wheels down with 400 grit. I decided to spray the silver rings on the wheels since the original silver had been sanded down due to corosion from wheel weights. I sprayed three coats of Dupont Chromabase BC silver for the rings. I tried to target the outer edges of the wheel when spraying, however I wasn't worried about overspray since the whole wheel would be painted over with black later. (Picture shown with silver dry, being masked off for black coat)
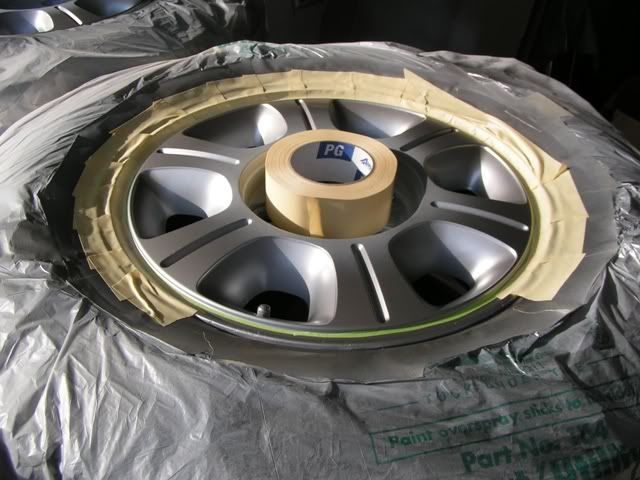
More masking for black coat.
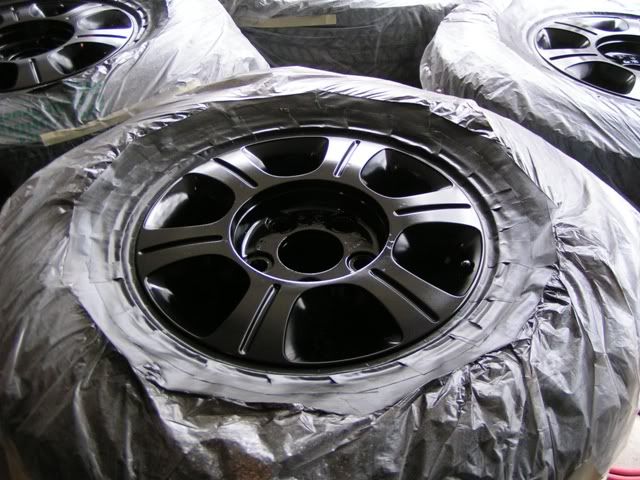
Black wheels! Sprayed with Chromabase BC 99K black, three coats.
Black wheels with Bravada on jacks...
Clearcoat applied. I sprayed about five to six coats of Nason 497-00 Clear over the wheels. (very good clear for the price!)
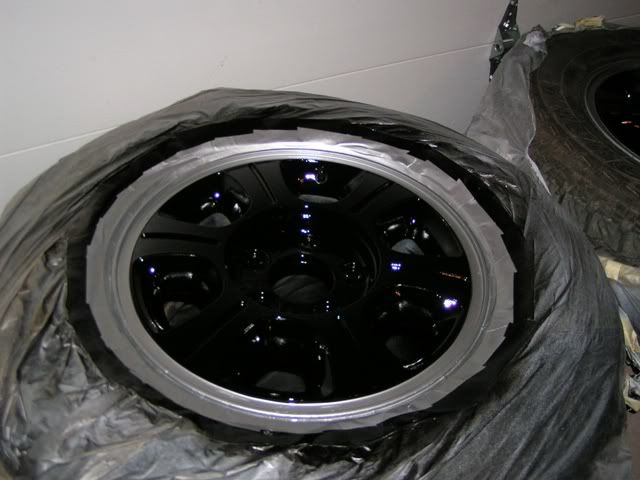
Unmasking.
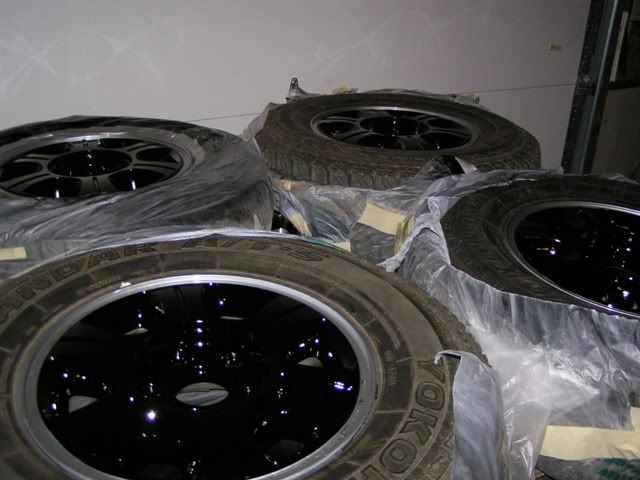
After:
For the lug covers I sanded them down with a red scotch bright pad, wiped them down, and sprayed with SEM adhesion promoter. From there they were sprayed using the same process, right along with the wheels.
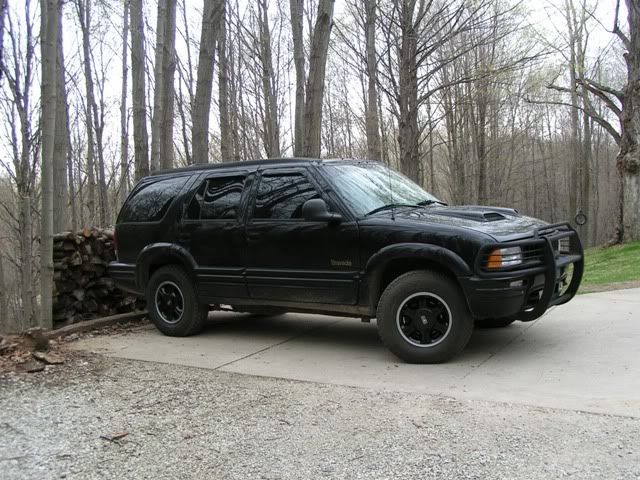
This was my first real painting project since working at an Autobody supply store for a year and a half. The wheels didn't come out flawless but I am overall very pleased with the results. If you have any questions I would be happy to answer them.
Before:
Washed wheels down with soap and water. Wiped down with Wax and Grease Remover.
Sanded down rough/correded areas with 150 grit then followed up with 400 grit over the entire wheel. Wiped down thoroughly with Wax and Grease Remover.
Masked off, ready for primer.
Although these stock wheels were completely painted with little bare aluminum, I chose to go with a self etch primer to ensure adhesion on the few spots that were bare. I used SEM brand primer.
Sanded wheels down with 400 grit. I decided to spray the silver rings on the wheels since the original silver had been sanded down due to corosion from wheel weights. I sprayed three coats of Dupont Chromabase BC silver for the rings. I tried to target the outer edges of the wheel when spraying, however I wasn't worried about overspray since the whole wheel would be painted over with black later. (Picture shown with silver dry, being masked off for black coat)
More masking for black coat.
Black wheels! Sprayed with Chromabase BC 99K black, three coats.
Black wheels with Bravada on jacks...
Clearcoat applied. I sprayed about five to six coats of Nason 497-00 Clear over the wheels. (very good clear for the price!)
Unmasking.
After:
For the lug covers I sanded them down with a red scotch bright pad, wiped them down, and sprayed with SEM adhesion promoter. From there they were sprayed using the same process, right along with the wheels.
This was my first real painting project since working at an Autobody supply store for a year and a half. The wheels didn't come out flawless but I am overall very pleased with the results. If you have any questions I would be happy to answer them.
Junior Member
Joined: Mar 2010
Posts: 399
From: Langley, BC
you took a lot more time with yours then I did, I sandblasted mine, epoxy primed, 4-1 urathane topcoat(I do industrial painting, not autobody haha)
looks good!!! I like the little extra with making the lip silver...
looks good!!! I like the little extra with making the lip silver...
