LOG IN
REGISTER
Forums
Announcements
Forum Notice
New Member Area
General
General Chat
The Lounge
Builds
Off Roading
Sights N Sounds
Street N Strip
The Chop Shop
Shows & Clubs
Mechanical & Maintenance
General Tech Help
Engine & Transmission
Lighting & Electrical
Steering, Suspension & Drivetrain
Modifications
Performance & Brainstorming
Tires and Wheels
Audio/Video Electronics
Paint, Body, & Interior
Suspension Tech
Detailing
Chevy Blazer Classifieds
Member Group And Special Buys
Absolutely Free!!!
PRIVATE For Sale / Trade Classifieds
Private 'Wanted' Classifieds
Online Auctions & Listings
The Site
Website Problems and Suggestions
Marketplace
Vendor Directory
Become a Vendor
New Posts
Tools
Car Payment Calculator
Tire Rim Calculator
Recalls
Technical Service Bulletins (TSBs)
Members List
Live Feed
Gallery
View Dark Mode
Please register or login to enable Dark Mode.
Log In
Register
Threads
Google
Threads
Posts
Advanced
Dark Mode
Please register or login to enable Dark Mode.
Log In
Forgot your Password?
By logging into your account, you agree to our
Terms of Use
and
Privacy Policy
, and to the use of cookies as described therein.
Recent
Commented
Albums
My Pictures
Share Your Pictures with Our Community.
Upload Now
0
2025/10/05 14:11:02
Gene H
0
2025/10/05 14:10:59
Gene H
0
2025/10/05 14:10:55
Gene H
0
2025/10/02 10:48:37
ZR2-4 Link
0
2025/10/02 10:47:46
ZR2-4 Link
0
2025/10/01 15:50:23
nomoresubi
0
2025/10/01 15:48:27
nomoresubi
0
2025/10/01 15:48:26
nomoresubi
0
2025/10/01 14:38:55
Perrels
0
2025/10/01 14:38:49
Perrels
0
2025/09/30 13:53:45
Tsparnell9
0
2025/09/30 11:28:24
501Blazer
Advertisement
0
2025/09/28 04:30:40
mr.vls
0
2025/09/21 13:08:06
JohnRich3
0
2025/09/21 13:08:03
JohnRich3
0
2025/09/17 03:23:23
swartlkk
0
2025/09/15 11:34:50
kernel
0
2025/09/15 11:34:47
kernel
0
2025/09/15 11:34:44
kernel
0
2025/09/15 11:34:41
kernel
0
2025/09/15 11:34:28
kernel
0
2025/09/15 11:34:26
kernel
0
2025/09/15 11:34:17
kernel
0
2025/09/15 11:34:13
kernel
0
2025/09/15 08:44:10
kernel
0
2025/09/15 08:44:08
kernel
0
2025/09/15 08:44:00
kernel
0
2025/09/15 08:43:56
kernel
0
2025/09/15 08:43:53
kernel
0
2025/09/15 08:43:50
kernel
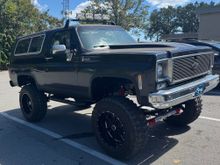
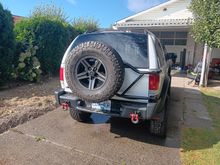
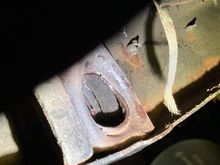
Back looks weird
0
2025/09/11 17:17:36
Northern V
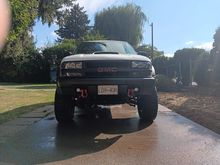
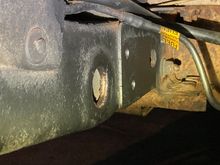
Front seems fine
0
2025/09/11 17:17:33
Northern V
Advertisement
First
Page
11 of 1467
Last
Go To
Page
1
...
9
10
11
12
13
...
1467
11 of 1467
Go To
GO
Go to page
of 1467
pages
1
...
9
10
11
12
13
...
1467