Blazer Forum - Chevy Blazer Forums
  • LOG IN
  • REGISTER
  • Forums
    • Announcements
      • Forum Notice
      • New Member Area
    • General
      • General Chat
      • The Lounge
      • Builds
      • Off Roading
      • Sights N Sounds
      • Street N Strip
      • The Chop Shop
      • Shows & Clubs
    • Mechanical & Maintenance
      • General Tech Help
      • Engine & Transmission
      • Lighting & Electrical
      • Steering, Suspension & Drivetrain
    • Modifications
      • Performance & Brainstorming
      • Tires and Wheels
      • Audio/Video Electronics
      • Paint, Body, & Interior
      • Suspension Tech
      • Detailing
    • Chevy Blazer Classifieds
      • Member Group And Special Buys
      • Absolutely Free!!!
      • PRIVATE For Sale / Trade Classifieds
      • Private 'Wanted' Classifieds
      • Online Auctions & Listings
    • The Site
      • Website Problems and Suggestions
  • Marketplace
    • Vendor Directory
    • Become a Vendor
  • New Posts
  • Tools
    • Car Payment Calculator
    • Tire Rim Calculator
    • Recalls
    • Technical Service Bulletins (TSBs)
    • Members List
    • Live Feed
  • Gallery
  • View Dark Mode
    • Please register or login to enable Dark Mode.
  • Log In
  • Register
Blazer Forum - Chevy Blazer Forums
    • Threads
      • Advanced
Dark Mode

Please register or login to enable Dark Mode.

Log In

Forgot your Password?

By logging into your account, you agree to our Terms of Use and Privacy Policy, and to the use of cookies as described therein.
  • Recent
  • Commented
  • Albums
  • My Pictures

Door Panel Repair

KYWes
February 7, 2016
 16
 0
Description:
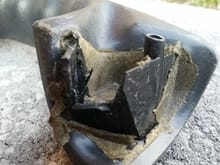
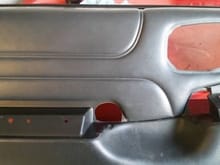
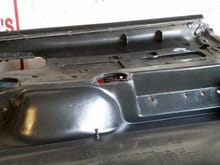
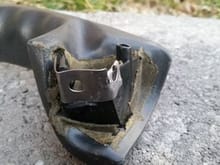
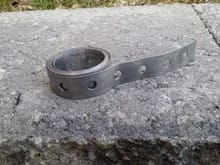
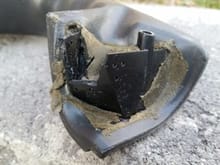
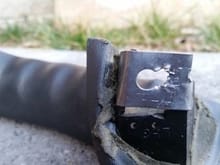
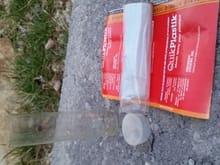
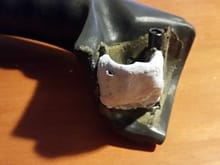
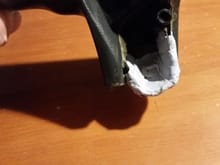
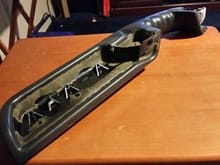
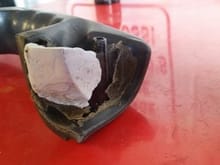
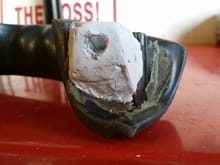
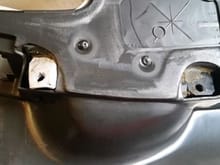
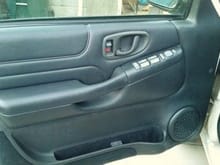
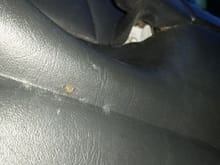
Steps I took to replace my driver's side door panel. I purchased a used one but the front mounting for the arm rest screw was broken out. These pictures show how I fixed the mount. Side note: I'm very aggravated at how pictures are arranged when uploaded and I can find no way to move them into the intended order. See my post to see further explanation and to see the process in the proper order.

Read more ยป
Sort:
Default
  • Default
  • Most Recent
This is the front mount for the door handle. Fortunately the rear mount was still intact.
0 2016/02/07 15:57:58 KYWes
This is the front of the door panel with the handle removed.
0 2016/02/07 15:57:58 KYWes
By removing four screw the door handle can be removed from the door panel. The screws are 9/32nds.
0 2016/02/07 15:57:58 KYWes
Here I have cut and bent the metal so as to form a mount. Potentially this may be sufficient to hold the handle on but I wanted to do more.
0 2016/02/07 16:00:33 KYWes
This is exhaust hanger or car stereo hanger. It is easy to cut with tin snips and easy to bend by hand. I wanted to increase the strength of the mount by putting some metal in the mix.
0 2016/02/07 16:00:33 KYWes
I will be using an epoxy putty to repair the door handle. To help the epoxy stick, roughen the plastic and drill some small holes.
0 2016/02/07 16:00:33 KYWes
I then elongated the hole. Actually the elongation should have been upwards. When I tried to mount the handle I need to drill the opening upward to get access to the screw speedi nut.
0 2016/02/07 16:04:57 KYWes
The brand doesn't matter. Using a two part epoxy putty like this is easier to mold to the needed shape. Once it hardens it can be sanded and drilled.
0 2016/02/07 16:04:57 KYWes
Here is the mount with the epoxy putty covering the metal form.
0 2016/02/07 16:04:57 KYWes
I applied the putty inside the handle as well. Remember the mounting screw will be inside the handle with the end sticking out the bottom of the hole in this view.
0 2016/02/07 16:08:49 KYWes
The putty can be worked for about 20 minutes, it hardens in 35-40 minutes but it is best to leave it for several hours for it to get it's hardest.
0 2016/02/07 16:08:49 KYWes
The next day I sanded the mounting surface and trimmed off any extra. Since this doesn't show once mounted there's no real need to make it super neat.
0 2016/02/07 16:08:49 KYWes
After sanding the epoxy I drilled a hole for the mounting screw.
0 2016/02/07 16:12:16 KYWes
This is how the handle looks from inside the door panel after the handle is mounted to the door panel.
0 2016/02/07 16:12:16 KYWes
The completed door panel installed. It's as good as new in regards to how securely it is mounted to the door.
0 2016/02/07 16:12:16 KYWes
This is a picture looking up into the front mount that was rebuilt using the metal frame and epoxy putty. As previously mention this is not seen unless one looks up into the mounting location.
0 2016/02/07 16:14:39 KYWes

Top
Blazer Forum - Chevy Blazer Forums
  • Contact Us
  • FAQ
  • Archive
  • Advertising
  • Cookie Policy
  • Privacy Statement
  • Terms of Service
  • Your Privacy Choices
  • Manage Preferences

© 2026 MH Sub I, LLC dba Internet Brands


When you click on links to various merchants on this site and make a purchase, this can result in this site earning a commission. Affiliate programs and affiliations include, but are not limited to, the eBay Partner Network.