
2000 LT Fuel Rail Troubleshooting Help


Moderator
Joined: Oct 2014
Posts: 4,347
From: North Central Indiana

Alright compression was low across the board, started to teardown. Dry Vs Wet made no difference it was the same reading. Compression tester was OK. So I tore into it tonight and looked inside the intake, there is some coolant in the very front intake port and some inside the pockets of the upper throttle body / intake manifold where the spider injector resides. Decided to take off the upper intake manifold and continue my inspection.
So question, should I take the heads off or just the intake manifold? Think at this point heads need to come off too?
So question, should I take the heads off or just the intake manifold? Think at this point heads need to come off too?
What about the coolant in the intake.... was this found after pulling the black plastic upper intake cover? Could there be coolant getting into the cylinders from the intake? That would certainly cause the spark plugs not to fire correctly. Coolant soaked plugs still look wet 10 minutes after removing them. Pics please of the coolant found in intake.
Best case scenario appears to be replace intake gaskets but I don't know the compression readings or how well you starter/battery was working. Once you tear the intake off, difficult to nail things down. If you have coolant inside intake you may want to fill things up and put a pressure tester on while you watch with the upper intake off. As I understand it, usually these intakes leak coolant into the engine crankcase but mabe you can see something on the top side. No other reason for coolant to be in there.
Les
Last edited by LesMyer; Aug 27, 2015 at 07:49 AM.

Thread Starter
|
Beginning Member
Joined: Aug 2015
Posts: 13
I have no idea what compression is because it�s 45 PSI on the dot across the board all cylinders. It�s a bad compression gauge so yea for renting tools! Uggh. I need to just buy one, this is rental #2 for this tool for my stupid projects, so I need to go just pick a decent one up.
Here is how I generally test compression.
1. Pulled all fender well stuff off both sides
2. Loosen the steering column what a pain in the butt never again club there
3. Pulled all the plugs
4. Went cyl to cyl
5. Cranked 8 times full cycle per each cyl
6. Had a fresh battery and a booster charger attached, it reached about 600 RPM or so during crank, it was a pretty healthy fast crank
7. Moved to each cyl like 3 times just to make sure I wasn't flipping out..
Did do a pressure test on the cooling system with a little test kit and compressor, and yea that coolant is leaking from the intake manifold into the upper plenum area, nasty. So I figured that the intake manifold is leaking for sure, and I didn�t really see anything wrong with my scope and there really no indication that a huge major melt down occurred.
Here is what I cheeked for� I used the borscope to poke around, drained fluids, dropped oil pan and cut open oil filter, found nothing of interest there, no copper bearing material, no metal shavings, no coolant in the oil mixed, everything looks good. Vales are quite nice, no marring pitting, cracks, flakes visible. Intake was tested with a straight edge and feeler gauges when pulled and was straight and not warped, no cracks for my non machine shop eyes to see. Looked good. Head gasket mating surface was uniform inside all cylinders and showed no visible leaks or issues on the scope. All timing was lined up and looking good. Put it at TDC and pulled the intake and distributor and it looked Ok too. Just looked like a little trickle of coolant in the cylinders where the intake gasket blew out, didn't mix to bad with anything, didn't hydro lock the cylinder, I didn't warp stuff, the walls had cross hatching and no serious gouging, a little ware, but pretty healthy looking overall. A few scrape marks here and there, nothing to indicate that it just melted down completely or any of the rings blew out. I would suspect a pretty good overall compression rating based on what I have seen and dealt with. So I decided what the heck the intake is doable in my garage and I don�t have to lift or do anything to crazy so I�d give it a shot. I am going to nab the FelPro kit and just go ahead and give it a shot. If that doesn�t work I don�t know that I really want to do any further work on it maybe have another set of eyes give it a once over and then worst case I may end up parting it out if its still a no start because I am getting up to the tipping point of scrap value for my budget unless we can narrow it down. But honestly everything else has been pretty thoroughly looked over so if it doesn�t run after the gasket and the work checks out its probably a compression issue, and it probably not worth head or block work. Up here there is one machine shop that�s worth it and they are pretty expensive, and were approaching the need to go get a hoist and engine stand and a transmission jack or at least another hack to block up the tranny and there is no way I want to swap out another engine :P too soon xD I�ve already had the pleasure. ZOMG not quite ready for that.
So far I have found:
Fuel pump not seated or sealed on the tank,
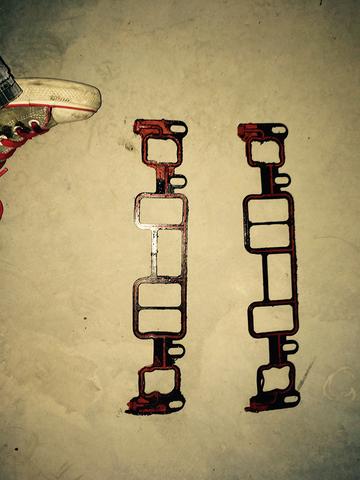
Leak in intake manifold gasket,
Low fuel pressure and fault fuel regulator
CPFI system was installed at the time of failure
Intake Manifold not torqued down to spec, very loose
The symptoms were the car �overheated� and then would not start. Didn�t make any funny noises and they pulled over immediately.
Here is some pics of the weekend fun xD
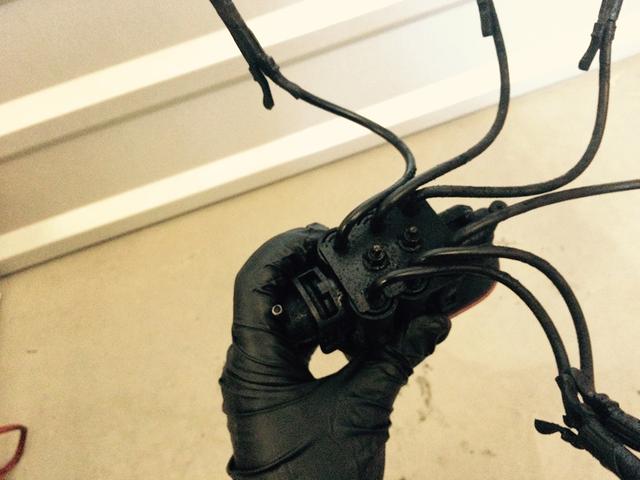
CPFI with clogged fuel regulator that was found leaking
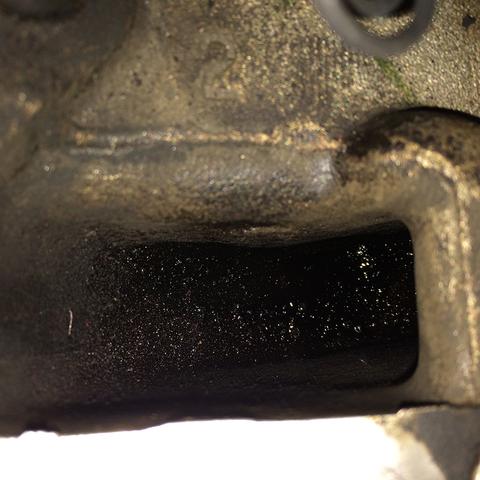
Port closest to fan with coolant in upper intake
Intake manifold complete top view
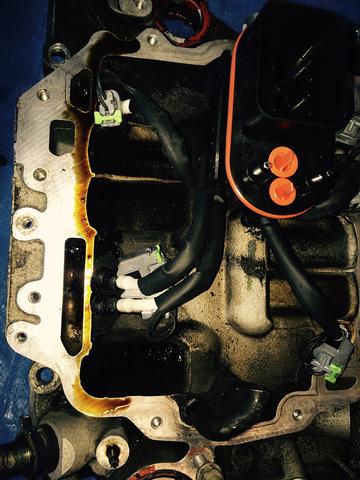
Intake removed from engine top
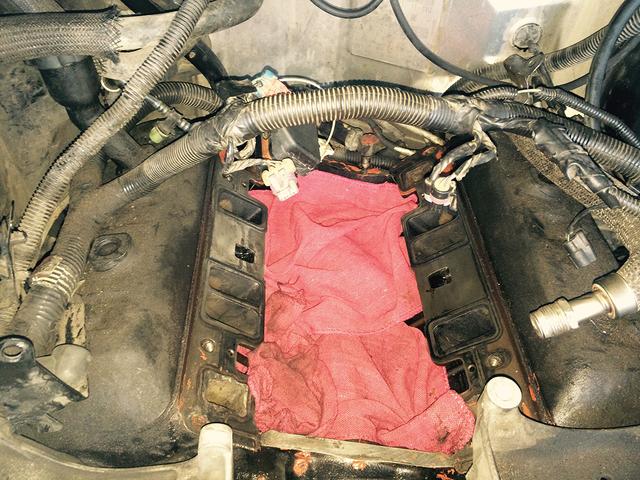
Toasty!!!
Here is how I generally test compression.
1. Pulled all fender well stuff off both sides
2. Loosen the steering column what a pain in the butt never again club there
3. Pulled all the plugs
4. Went cyl to cyl
5. Cranked 8 times full cycle per each cyl
6. Had a fresh battery and a booster charger attached, it reached about 600 RPM or so during crank, it was a pretty healthy fast crank
7. Moved to each cyl like 3 times just to make sure I wasn't flipping out..
Did do a pressure test on the cooling system with a little test kit and compressor, and yea that coolant is leaking from the intake manifold into the upper plenum area, nasty. So I figured that the intake manifold is leaking for sure, and I didn�t really see anything wrong with my scope and there really no indication that a huge major melt down occurred.
Here is what I cheeked for� I used the borscope to poke around, drained fluids, dropped oil pan and cut open oil filter, found nothing of interest there, no copper bearing material, no metal shavings, no coolant in the oil mixed, everything looks good. Vales are quite nice, no marring pitting, cracks, flakes visible. Intake was tested with a straight edge and feeler gauges when pulled and was straight and not warped, no cracks for my non machine shop eyes to see. Looked good. Head gasket mating surface was uniform inside all cylinders and showed no visible leaks or issues on the scope. All timing was lined up and looking good. Put it at TDC and pulled the intake and distributor and it looked Ok too. Just looked like a little trickle of coolant in the cylinders where the intake gasket blew out, didn't mix to bad with anything, didn't hydro lock the cylinder, I didn't warp stuff, the walls had cross hatching and no serious gouging, a little ware, but pretty healthy looking overall. A few scrape marks here and there, nothing to indicate that it just melted down completely or any of the rings blew out. I would suspect a pretty good overall compression rating based on what I have seen and dealt with. So I decided what the heck the intake is doable in my garage and I don�t have to lift or do anything to crazy so I�d give it a shot. I am going to nab the FelPro kit and just go ahead and give it a shot. If that doesn�t work I don�t know that I really want to do any further work on it maybe have another set of eyes give it a once over and then worst case I may end up parting it out if its still a no start because I am getting up to the tipping point of scrap value for my budget unless we can narrow it down. But honestly everything else has been pretty thoroughly looked over so if it doesn�t run after the gasket and the work checks out its probably a compression issue, and it probably not worth head or block work. Up here there is one machine shop that�s worth it and they are pretty expensive, and were approaching the need to go get a hoist and engine stand and a transmission jack or at least another hack to block up the tranny and there is no way I want to swap out another engine :P too soon xD I�ve already had the pleasure. ZOMG not quite ready for that.
So far I have found:
Fuel pump not seated or sealed on the tank,
Leak in intake manifold gasket,
Low fuel pressure and fault fuel regulator
CPFI system was installed at the time of failure
Intake Manifold not torqued down to spec, very loose
The symptoms were the car �overheated� and then would not start. Didn�t make any funny noises and they pulled over immediately.
Here is some pics of the weekend fun xD
CPFI with clogged fuel regulator that was found leaking
Port closest to fan with coolant in upper intake
Intake manifold complete top view
Intake removed from engine top
Toasty!!!
Moderator
Joined: Oct 2014
Posts: 4,347
From: North Central Indiana
I see you bought the upgrade injector kit! One thing I have never seen you report is the dead end fuel pressure. I know the pump is supposed to be new, but it can be the problem all along with the old-style injectors and if it could only put out 60psi. See the sticky on testing fuel pumps. As long as the engine has decent compression, I bet you are very close to solving things. You may find that the engine will start and run with the new injector system, but can still have some problems if the fuel pump is not putting out what it is supposed to.
So I recommend first solve the compression mystery (new gauge or whatever it takes). You can remove the fuel pump fuse or otherwise disable it so you don't blow fuel all over the place when cranking with the intake off.
If that is OK, check the dead-end fuel pump pressure. Also can be done with the intake off.
If those two things are good, then put it back together with the new gaskets and injection spider. Be sure to run a tap into all the intake bolt holes and clean them out really good, especialy the blind ones on the ends of each head. Wire brush all the intake bolt threads and use white sealer/inch pound torque wrench to tighten in sequence again and again until all bolts stay tight and exactly on torque spec. Be sure to put the engine on TDC#1 correctly (one mark down, the other lined up with pointer) and drop the distributor in with the rotor pointing towards #6 stamped in the distributor housing. Assuming your cap, rotor, and plug wires are already new - then put in correctly gapped new plugs - you really don't have to buy those dang expensive platinum spark plugs (they only last longer than the regulars - no performance advantage). Check plug wires for correct firing order (note numbers stamped on the distributor cap).
Bet it will start!
Best wishes and good luck!
Last edited by LesMyer; Sep 3, 2015 at 01:00 PM.
Thread Starter
|
Beginning Member
Joined: Aug 2015
Posts: 13
Hi I have a really dumb question. I messed up the fuel line connector to the fuel rail, and possibly need to remove the line from the firewall up to just about the fuel filter. How do you go about removing this? I was looking for a new nut that would fit into the line, and the repair kit has a new line but it has the flanged header attached to a straight line and uses a quick connector piece to secure it to a cut original line. Two problems with this, one is that, if I do that, there will be a plastic quick connection fitting really close to the engine block, and I don�t really like that for safety. The other issue is that my metal fabrication skills are non-existent, and I don�t have the pipe bender tool and have never used one so that would be fun. I was kind of thinking that maybe the best option would be to remove the line running up though the firewall but I am not too sure if that�s possible with out dropping the transmission? I could probably go pull a line out if it wasn�t too difficult to remove. Any tips for that? When I remove the lien from the rail the nut was really crusty and stuck, and then sure enough when I tried to put it back on it gets about � way and feels cross threaded and you can�t put it on in there and get it fully connected with out damaging the rail. I have messed with it for several hours and I also tired a different rail piece in hope that that would be the issue, but nope it�s the bolt on the fuel rail itself that seems damaged. Everything else buttoned up like clockwork stupid fuel rail. Oh yea and on my new injector assembly the bolt for the fuel rail to hold the bracket down into the plastic came pre-stripped so it just spins on there ROFL I am hoping that they will swap it with a new one. Here is a pic of where I am referring to.

Moderator
Joined: Oct 2014
Posts: 4,347
From: North Central Indiana
Hi I have a really dumb question. I messed up the fuel line connector to the fuel rail, and possibly need to remove the line from the firewall up to just about the fuel filter. How do you go about removing this? I was looking for a new nut that would fit into the line, and the repair kit has a new line but it has the flanged header attached to a straight line and uses a quick connector piece to secure it to a cut original line. Two problems with this, one is that, if I do that, there will be a plastic quick connection fitting really close to the engine block, and I don’t really like that for safety. The other issue is that my metal fabrication skills are non-existent, and I don’t have the pipe bender tool and have never used one so that would be fun. I was kind of thinking that maybe the best option would be to remove the line running up though the firewall but I am not too sure if that’s possible with out dropping the transmission? I could probably go pull a line out if it wasn’t too difficult to remove. Any tips for that? When I remove the lien from the rail the nut was really crusty and stuck, and then sure enough when I tried to put it back on it gets about � way and feels cross threaded and you can’t put it on in there and get it fully connected with out damaging the rail. I have messed with it for several hours and I also tired a different rail piece in hope that that would be the issue, but nope it’s the bolt on the fuel rail itself that seems damaged. Everything else buttoned up like clockwork stupid fuel rail. Oh yea and on my new injector assembly the bolt for the fuel rail to hold the bracket down into the plastic came pre-stripped so it just spins on there ROFL I am hoping that they will swap it with a new one. Here is a pic of where I am referring to.
Last edited by LesMyer; Sep 21, 2015 at 10:46 AM.
Thread Starter
|
Beginning Member
Joined: Aug 2015
Posts: 13
I am not sure? Haha I brought it into a shop here and they did the test I think it was so low they just wrote "no compression, appears to nead head gasket" and I just asked them to confirm. Given that I found scoring on the cylinder wall and the fact it overheated its toast and probably has some serious internal damage that will require more of an extensive tear down and rebuild. I'm not sure yet if that's something I wanted to tackle. I may see if I can source a new engine but if have to go borrow an engine hoist.  i didn't see any numbers written down they did say timing was ok though and the tech did preform the test. I could have asked but I didn't think to.
i didn't see any numbers written down they did say timing was ok though and the tech did preform the test. I could have asked but I didn't think to.
Thread Starter
|
Beginning Member
Joined: Aug 2015
Posts: 13
Well so I did some more testing and verified that there was no compression. Actually around 35 PSI was accurate and only in a few cylinders all together. Coolant was leaking past the heads and getting into the cylinder area, so I removed the heads to check those out first, and discovered that the heads were warped beyond specifications and they were going to need to be replaced. I also noticed that the little cylinder wall scoring that I discovered was worse than I though, and that I would need to to an engine rebuild on it to get it back into shape. So I sourced a replacement engine and am working on an engine swap. And that bracket on the block holding the fuel line in place, found that after removing the heads and so it was easy to get everything out after that. What a pain, don't know how you'd get to it otherwise. Well that's the news. After the swap is complete I will have it up and running :P WHoot! Probably spent more than I should have on it but this will be great, the new engine is in great shape with less mileage and came from a roll over, checked it out and it looks good. Going to put some new seals on it, check some of the components for specs and plop it in. No sense in doing heads on there to have a bad block at this stage, so I opted for a swap and she should be put together in a couple of weeks or two.
Thread Starter
|
Beginning Member
Joined: Aug 2015
Posts: 13
Update: SO I fixed it, turned out that engine wasn't worth fixing up, bad block, and all kinds of damage. I was pretty impressed with just how much damage someone could do... Not surprised but impressed. I replaced that entire fuel line from the filter on up with the engine out.
So its back on the road. WHOOT!!! Gave it a new engine with 50K on the clock rebuilt, and I also fixed some front end stuff (torn CV axle boot, worn upper and lower ball joints) and its back in action. That was a lot of work but it was fun. Found access to a shop manual and just dug in, took it to a mechanic a couple of times when I just could not get it but overall it was fun. I'll have to take some pics of it. Thanks for your help. I should have a nice warm (no soft top) winter vehicle.
I have to say it kind of won me over, I like it.