
HOW-TO: 95-97 Bull Bar - DISCUSSION THREAD

Thread Starter
|
Super Member
Joined: Sep 2010
Posts: 1,485
From: Lynnwood WA

Ok since there are no bull bars being sold for 95-97 blazers i know that turns a lot of people away from buying one, so i thought i would make a how to for ONE of the ways you can make it work. Its not challenging but you do need access to a welder. There are a couple of different bull bars out there, but this one attaches to the frame. its a Hunter Bull Bar
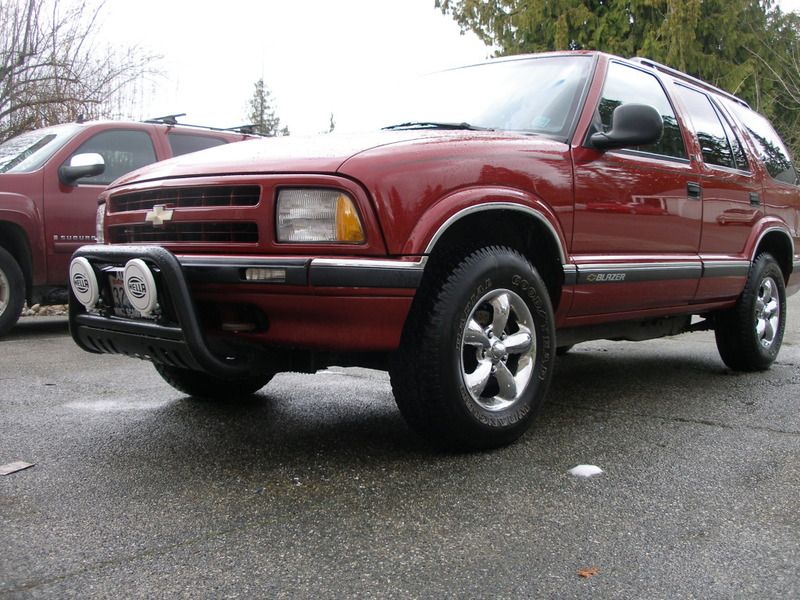
So first heres a picture of the end result to get you motivated:
What you will need:
(If needed i can get more pictures later)
Step One: Hold your steel plate up to the back of the body mount bracket so the top of the plate is level with the top of the body mount bracket and the side of the plate is flat against the frame. (you may need three hands for this) Then hold the bracket that comes in the kit up to the plate that you or a friend is holding in position, figure out where the bracket needs to be so that when you put a bolt through it, it wont run into the body mount. Then take a sharpie and mark the holes in the bracket onto the steel plate.
(Repeat for the other side)
Step Two: After you got the steel plate all marked up its time to drill. This is important to have precise. Take your nail punch and put it as close to the center of the hole you drew as you can and hit it with the hammer. you just need a small dent so that when you go to drill the drill bit doesnt walk all over the place. Then start drilling. REMEMBER start small with the bit size and work your way up, and use some sort of cutting fluid. I used 3 in 1 oil, which wasnt the greatest but it worked.
Step Three: Get all the prep work done on your frame, across the top of the body mount bracket and on the plate for welding, so grind or sand down to bare metal. Then position the plate to where it needs to be then weld it up. I welded across the top of the plate and the body mount bracket, then down the side of the frame, and also tacked it on the inside of the plate in the one spot where it touches the body mount bracket. (the bracket is kinda bent so it didnt touch all the way down the plate. Repeat for other side.
Heres a pic that shows where i welded, its a little hard to see because i took the picture after i painted and after i put the bracket on.

Step Four: After the bracket is welded on you need to finish drilling the holes through the body mount bracket. It was a little bit of a pain to get the drill in there on the inside hole, and the hole got drilled at a little bit of an angle which is ok.
Step Five: ALMOST DONE! Now its time to mount the bracket on. You may or may not need longer bolts, depending on what comes in with the bull bar. The ones that came with mine where to short so I went and got some 1 3/4" long bolts and that still is a little too short for the two inside bolts as you can see in the picture so i may need to go get 2" long ones. Then after you get the bracket on just attach the bull bar (may need to remove license plate), sit back and look at what a good job you did. Before to long get some paint on the places you ground down
So over all its pretty easy to do as long as you have a welder, it probably only took me about 3 hours to do everything. Sorry i didnt take more pictures along the way.. but if anyone needs more pictures or have any questions feel free to ask!
More pictures:
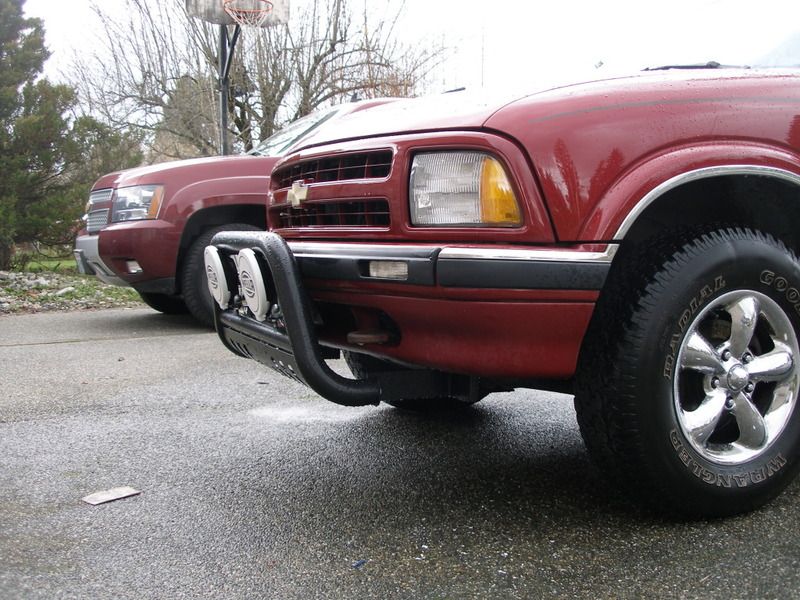
My truck with its big brother (dads suburban)
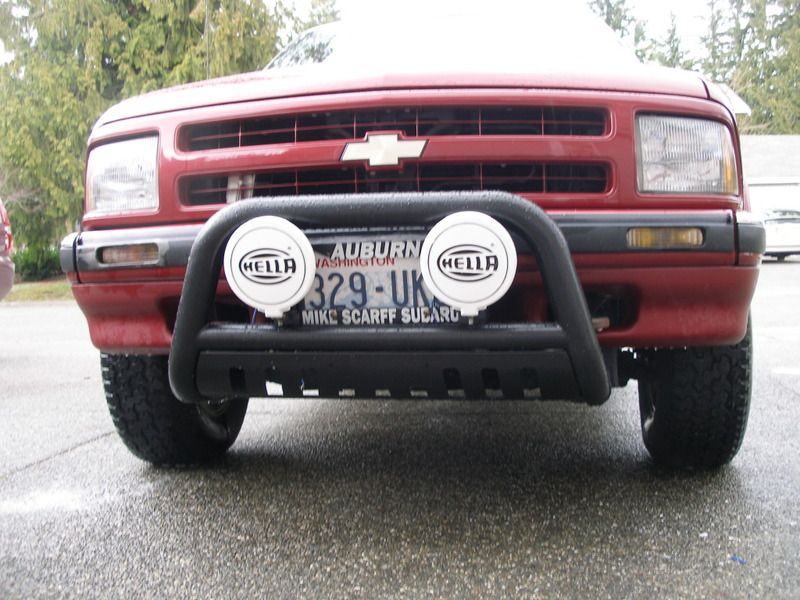
Looks kinda crooked but its not
So first heres a picture of the end result to get you motivated:
What you will need:
- 2 3 1/2" X 4" Steel plates (preferably 1/4" thick)
- Grinder, or sand paper and muscle
- Drill and drill bits up to 1/2" or 3/8" (depending on bolt size)
- Nail punch
- Hammer
- Welder
- Rust stopping paint
- And of course wrenches
(If needed i can get more pictures later)
Step One: Hold your steel plate up to the back of the body mount bracket so the top of the plate is level with the top of the body mount bracket and the side of the plate is flat against the frame. (you may need three hands for this) Then hold the bracket that comes in the kit up to the plate that you or a friend is holding in position, figure out where the bracket needs to be so that when you put a bolt through it, it wont run into the body mount. Then take a sharpie and mark the holes in the bracket onto the steel plate.
(Repeat for the other side)
Step Two: After you got the steel plate all marked up its time to drill. This is important to have precise. Take your nail punch and put it as close to the center of the hole you drew as you can and hit it with the hammer. you just need a small dent so that when you go to drill the drill bit doesnt walk all over the place. Then start drilling. REMEMBER start small with the bit size and work your way up, and use some sort of cutting fluid. I used 3 in 1 oil, which wasnt the greatest but it worked.
Step Three: Get all the prep work done on your frame, across the top of the body mount bracket and on the plate for welding, so grind or sand down to bare metal. Then position the plate to where it needs to be then weld it up. I welded across the top of the plate and the body mount bracket, then down the side of the frame, and also tacked it on the inside of the plate in the one spot where it touches the body mount bracket. (the bracket is kinda bent so it didnt touch all the way down the plate. Repeat for other side.
Heres a pic that shows where i welded, its a little hard to see because i took the picture after i painted and after i put the bracket on.
Step Four: After the bracket is welded on you need to finish drilling the holes through the body mount bracket. It was a little bit of a pain to get the drill in there on the inside hole, and the hole got drilled at a little bit of an angle which is ok.
Step Five: ALMOST DONE! Now its time to mount the bracket on. You may or may not need longer bolts, depending on what comes in with the bull bar. The ones that came with mine where to short so I went and got some 1 3/4" long bolts and that still is a little too short for the two inside bolts as you can see in the picture so i may need to go get 2" long ones. Then after you get the bracket on just attach the bull bar (may need to remove license plate), sit back and look at what a good job you did. Before to long get some paint on the places you ground down
So over all its pretty easy to do as long as you have a welder, it probably only took me about 3 hours to do everything. Sorry i didnt take more pictures along the way.. but if anyone needs more pictures or have any questions feel free to ask!
More pictures:
My truck with its big brother (dads suburban)
Looks kinda crooked but its not
Last edited by 97cherryblazer; Feb 23, 2012 at 04:09 PM.
BF Veteran
Joined: May 2007
Posts: 2,713
From: Chicago, IL

nah, you got it right the first time, it's set up so regular members can't post straight into the DIY section. have to post a thread in the submission area and then the staff moves it over and creates the discussion thread


Thread Starter
|
Super Member
Joined: Sep 2010
Posts: 1,485
From: Lynnwood WA
Yeah i was hoping thats all i would have to do but on the bracket that came with my bull bar the two holes were to far apart and one of the holes would only be half way into the body mount tab, which wouldnt do any good lol. and i didnt want to just have one bolt holding each side on.
But now that you say that, it makes me think that maybe on some Blazers the body mount perch is different? Because i have hard time seeing that there would be two different brackets for the two different Bull bars, because the pre-drilled holes on the 98+ blazers dont change. and if the brackets were different then you would have to modify them.
Soo hmm thats interesting


Thread
Thread Starter
Forum
Replies
Last Post
swartlkk
Article Submissions/Discussions
39
Feb 20, 2010 09:39 PM