
How to: R2 a Blend Door Actuator (Alternate Method)

Thread Starter
|
Starting Member
Joined: Oct 2008
Posts: 144
From: Las Vegas, NV

Alright, I've seen a few articles on here that pertain to this, but here's a good one with pictures. A quick search here on these forums will show you alot of blend door (aka temperature or temp door) problems, but below I hope will help others in finding an easy replacement; using the alternate method to removing the entire dash board carrier. (Who would want to do that!)
This "how-to" augments the following posts:
https://blazerforum.com/forum/tech-articles-diy-29/how-2nd-gen-blend-door-actuator-replacement-29981/ (The How-To primary method)
https://blazerforum.com/forum/showth...+door+actuator
http://www.automotiveforums.com/vbulletin/t574779.html (More good pics)
Please be aware that these blend door actuators fit multiple vehicle makes and models. The main difference is between the "Auto" climate control model and the "manual." Part numbers are listed above in the third link. If your dial for hot/cold air has numbers indicating set temperatures, you have to have the AUTO actuator. If you just have blue/red bars indicating temperature, you have the manual. Please be sure to order the correct part.
Pictures and procedure below are for a 2000 Chevy Blazer LT with AUTO Climate control. (Auto and Manual parts look identical) Left and Right are depicted from sitting in the vehicle facing forward.
Lets begin.
We're going to access the actuator through the glove box.
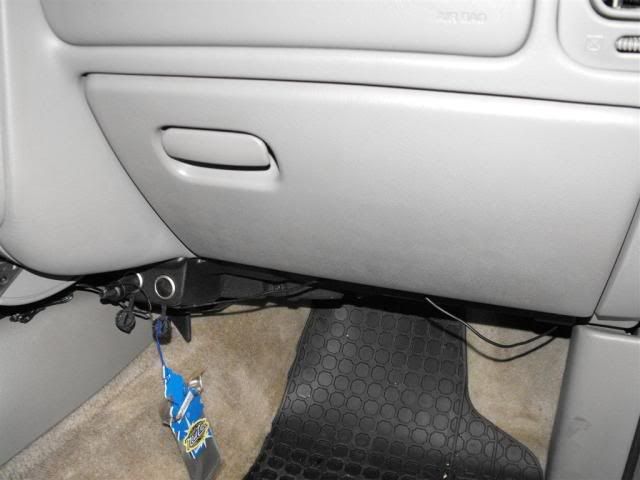
Clean out your glove box and locate the metal wire loop holding the glovebox from falling all the way to the floor. Lift up on the loop to release the glove box.
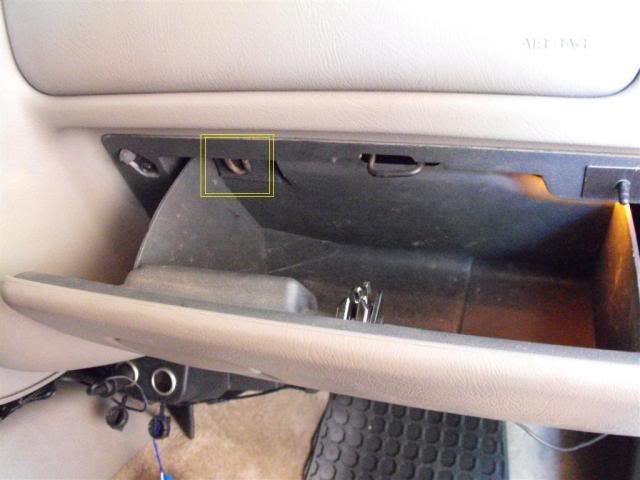
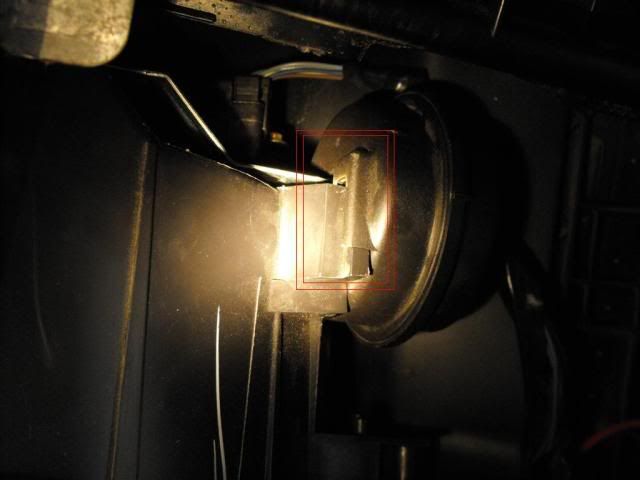
Here is a good view of where we will be working. Its awfully cramped but it took me about 20 minutes from start to finish.
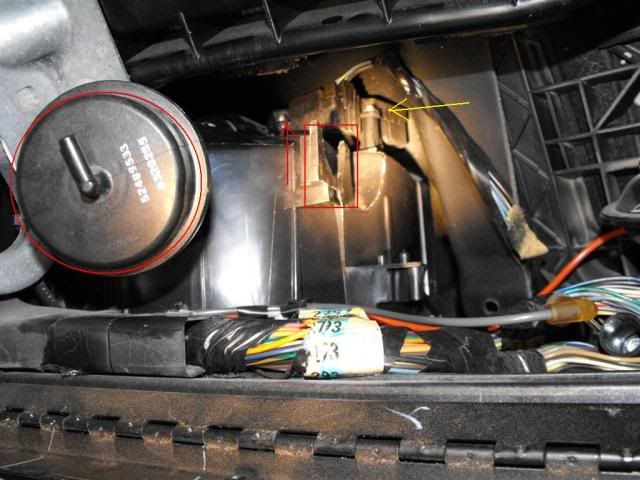
First carefully remove the vacuum hose connected to the vacuum actuator. (Big round thing in foreground)
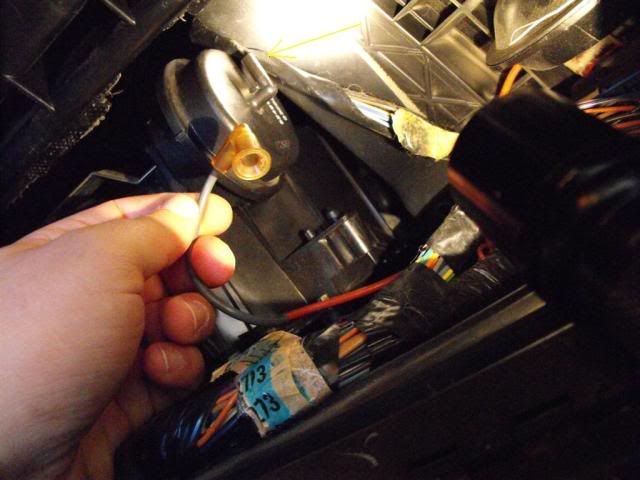
Grab the round vacuum actuator and wiggle it up. The pictures below show that it slides over a plastic bracket and easily comes up. Once you free it from the bracket, carefully swing it towards the left. It can get tricky, but do use some finesse when moving these parts around. They are fragile.
The below picture shows the blend door actuator "easily" accessible.
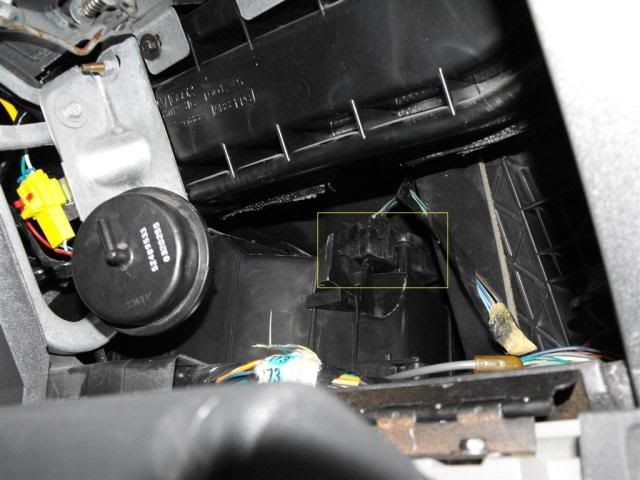
Disconnect the electrical connector from the blend door actuator.
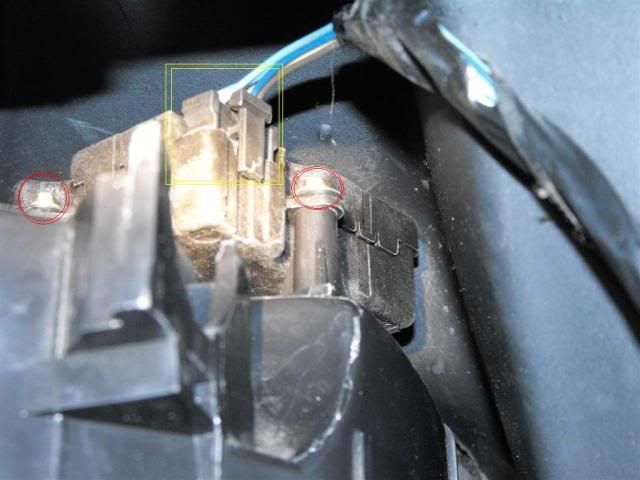
Using a 1/4" drive ratchet and a 7/32's socket with out an extension allows access to the mounting screws on the blend door actuator. Its very cramped so make sure you've had a few beers or are a patient person. Other articles in the links above show various techniques. Keeping the ratchet handle towards the left produced the best results, but be prepared to get "one click" per turn of the ratchet. This by far takes the most time out of all of this!
There are 2 screws that hold on the actuator. There is a post on the forward part that sticks up and just makes sure you align it properly when re-installing it. Once you remove the two screws, lift up on the actuator and it will easily come free of its mount.
Rest the new one on the forward post and slide down. As your pushing down, make sure the plastic stub that connects the actuator to the blend door in the air box lines up with the splines on the actuator gear itself. It can only fit one way. Again this is all plastic and teflon we're dealing with, so be gentle.
The rest of the installation is the reverse of removal.
Enjoy having control of your cabin air again!
This "how-to" augments the following posts:
https://blazerforum.com/forum/tech-articles-diy-29/how-2nd-gen-blend-door-actuator-replacement-29981/ (The How-To primary method)
https://blazerforum.com/forum/showth...+door+actuator
http://www.automotiveforums.com/vbulletin/t574779.html (More good pics)
Please be aware that these blend door actuators fit multiple vehicle makes and models. The main difference is between the "Auto" climate control model and the "manual." Part numbers are listed above in the third link. If your dial for hot/cold air has numbers indicating set temperatures, you have to have the AUTO actuator. If you just have blue/red bars indicating temperature, you have the manual. Please be sure to order the correct part.
Pictures and procedure below are for a 2000 Chevy Blazer LT with AUTO Climate control. (Auto and Manual parts look identical) Left and Right are depicted from sitting in the vehicle facing forward.
Lets begin.
We're going to access the actuator through the glove box.
Clean out your glove box and locate the metal wire loop holding the glovebox from falling all the way to the floor. Lift up on the loop to release the glove box.
Here is a good view of where we will be working. Its awfully cramped but it took me about 20 minutes from start to finish.
First carefully remove the vacuum hose connected to the vacuum actuator. (Big round thing in foreground)
Grab the round vacuum actuator and wiggle it up. The pictures below show that it slides over a plastic bracket and easily comes up. Once you free it from the bracket, carefully swing it towards the left. It can get tricky, but do use some finesse when moving these parts around. They are fragile.
The below picture shows the blend door actuator "easily" accessible.
Disconnect the electrical connector from the blend door actuator.
Using a 1/4" drive ratchet and a 7/32's socket with out an extension allows access to the mounting screws on the blend door actuator. Its very cramped so make sure you've had a few beers or are a patient person. Other articles in the links above show various techniques. Keeping the ratchet handle towards the left produced the best results, but be prepared to get "one click" per turn of the ratchet. This by far takes the most time out of all of this!
There are 2 screws that hold on the actuator. There is a post on the forward part that sticks up and just makes sure you align it properly when re-installing it. Once you remove the two screws, lift up on the actuator and it will easily come free of its mount.
Rest the new one on the forward post and slide down. As your pushing down, make sure the plastic stub that connects the actuator to the blend door in the air box lines up with the splines on the actuator gear itself. It can only fit one way. Again this is all plastic and teflon we're dealing with, so be gentle.
The rest of the installation is the reverse of removal.
Enjoy having control of your cabin air again!

Beginning Member
Joined: Jan 2010
Posts: 13
From: Southport, NC

Outstanding How-To!! On my wife's '98 with manual system, it switches from cold air to hot air and back just fine. The problem is that there is no floor air. Defroster, vents, work fine, just no air on floor. This would not be a blend door problem would it? Any suggestions? This is our first Blazer, so we are in the learning mode! Thanks!!

Outstanding How-To!! On my wife's '98 with manual system, it switches from cold air to hot air and back just fine. The problem is that there is no floor air. Defroster, vents, work fine, just no air on floor. This would not be a blend door problem would it? Any suggestions? This is our first Blazer, so we are in the learning mode! Thanks!!

Thread
Thread Starter
Forum
Replies
Last Post
stickemdano
2nd Generation S-series (1995-2005) Tech
0
Nov 14, 2009 11:13 AM
markrd
2nd Generation S-series (1995-2005) Tech
4
May 8, 2009 01:39 PM