Cigeratte Lighter Bass Knob DIY
#1
I've seen a few threads on other websites asking about turning the Cigarette lighter into a Bass Gain ****, well this morning I got bored and decided to give it a shot. So in case anybody was curious on how to do this project here is a walk through. Keep in mind I did this for a 98 and I'm not sure if the same steps will apply to other year models.
First take out the inner piece of the ashtray, then remove the two screws holding in the inner piece.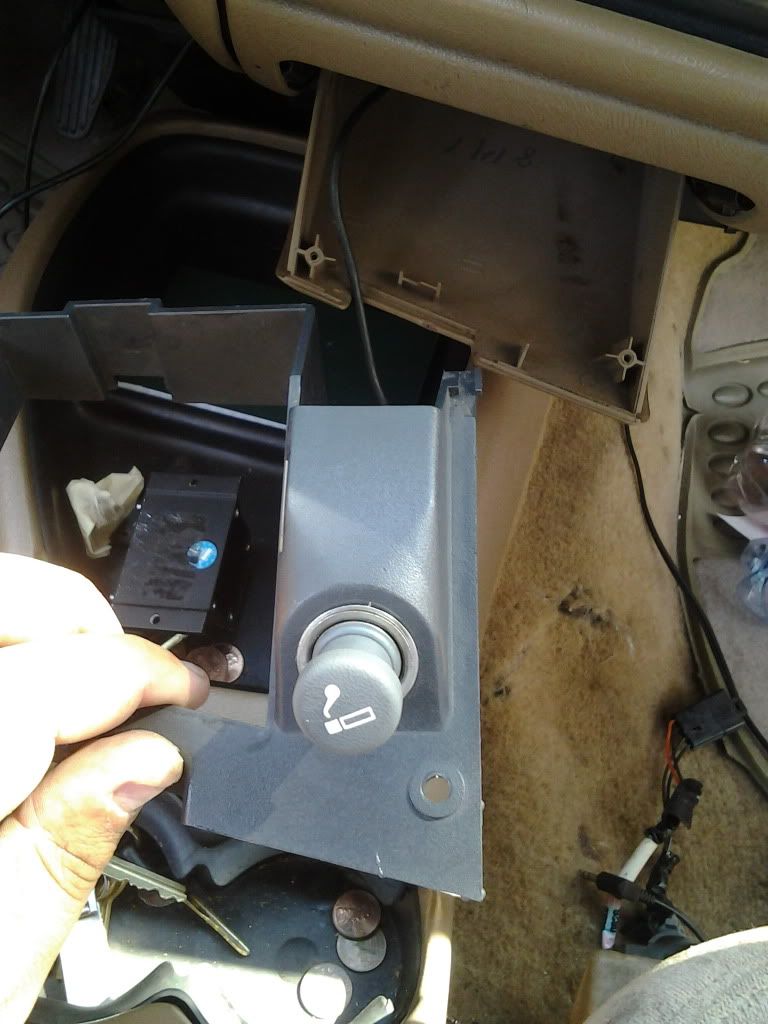
Step Two: There is a connector on the back of the lighter, you can trace it up to inside the dash and disconnect it. Afterwards unscrew the lighter assembly from the inner piece of the ashtray. (Don't have a picture, sorry)
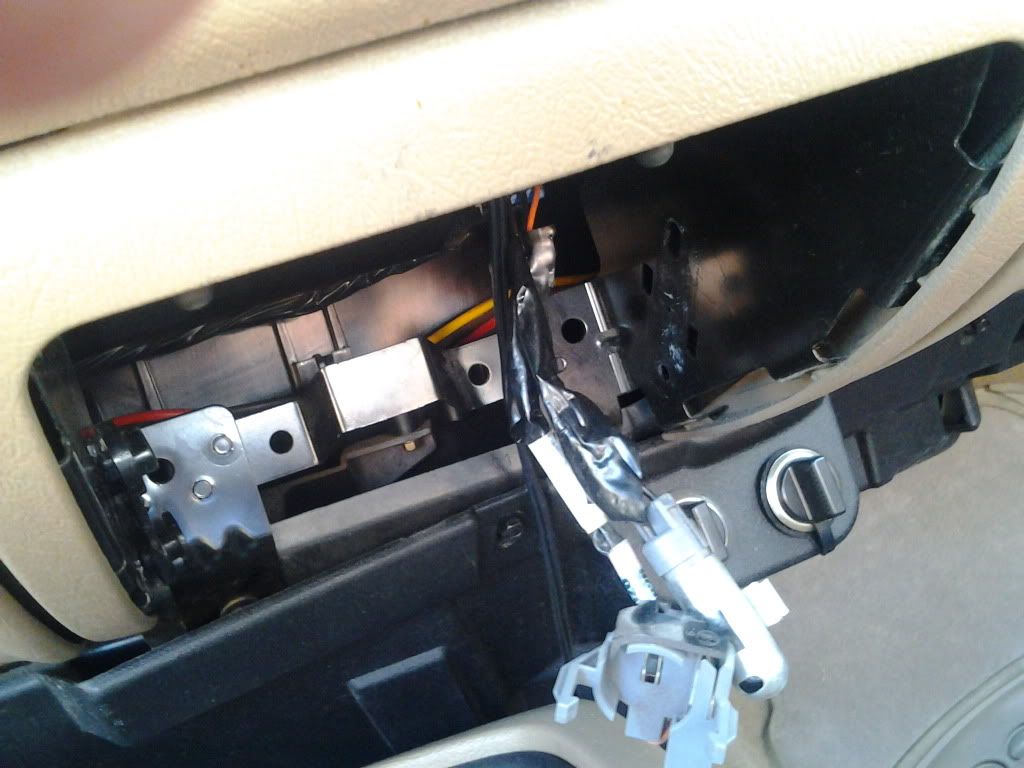
Step Three: I don't have a picture of this because I started taking pictures after I had already done this part but, take a pair of needle nose and take the coils out of the lighter, unscrew the little nut on the back side of the of the lighter housing, it's inside the copper area. After that the two inner pieces should separate. Now you'll have to take a drill and drill out the hole in the back to allow for your gain **** to fit through. Also you have to be careful to not bend the silver inner piece too much. Or if like me you can bend and somewhat cut out the hole back side of the housing. (see step four pic)
Step Four: Take your Epoxy and mix it up. I got mine at Autozone for 4.99 and it was the 60 Sec. set time, if you can work it fast enough I recommend it but, if not they should have a 4 minute set time Epoxy as well. Take the lighter housing (should be the one with the drilled hole) and set it back in it's mounting position and apply your epoxy generously to ensure that it's not going to go anywhere. Also drill a small hole in the middle of your bass ****, it should be the little plastic part where you would have turned up the gain on the original bass gain ****. After you drill the hole, there should be a little point in the area of where the coils used to be, insure that the **** fits snugly and apply epoxy so that it won't come off the lighter.
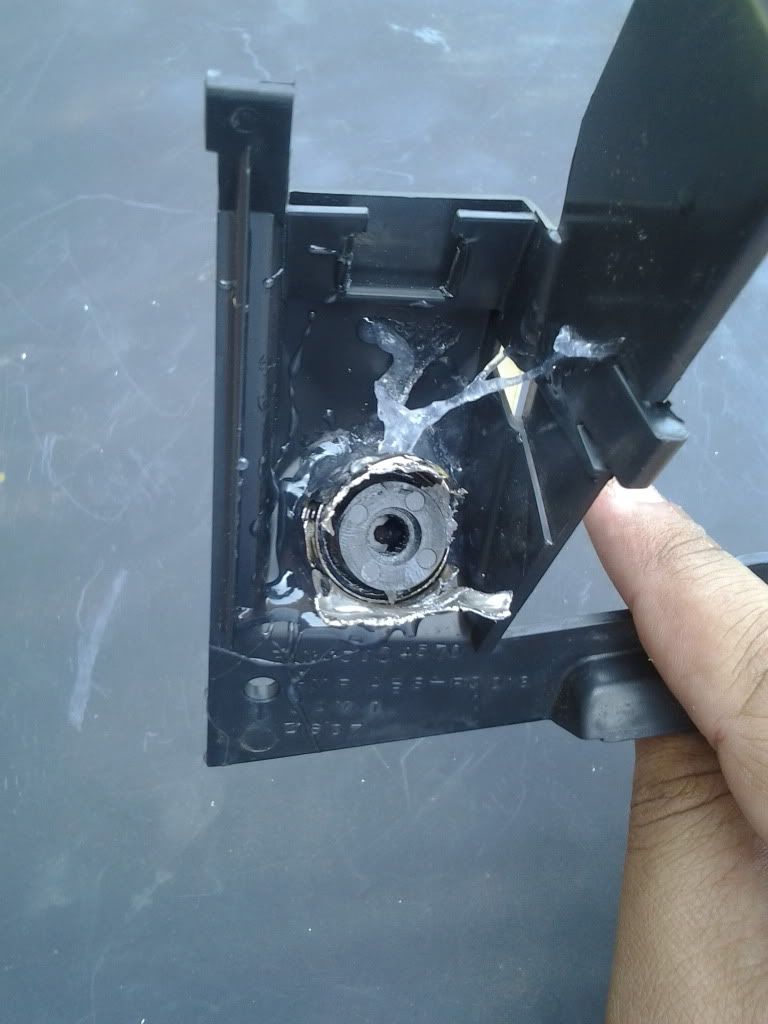
Step Five: Disassemble your bass **** and make any neccessary modifications to the guts of the bass ****. Make sure you do not take out any of the electrical area though. I had to shave down some of the sides of mine.
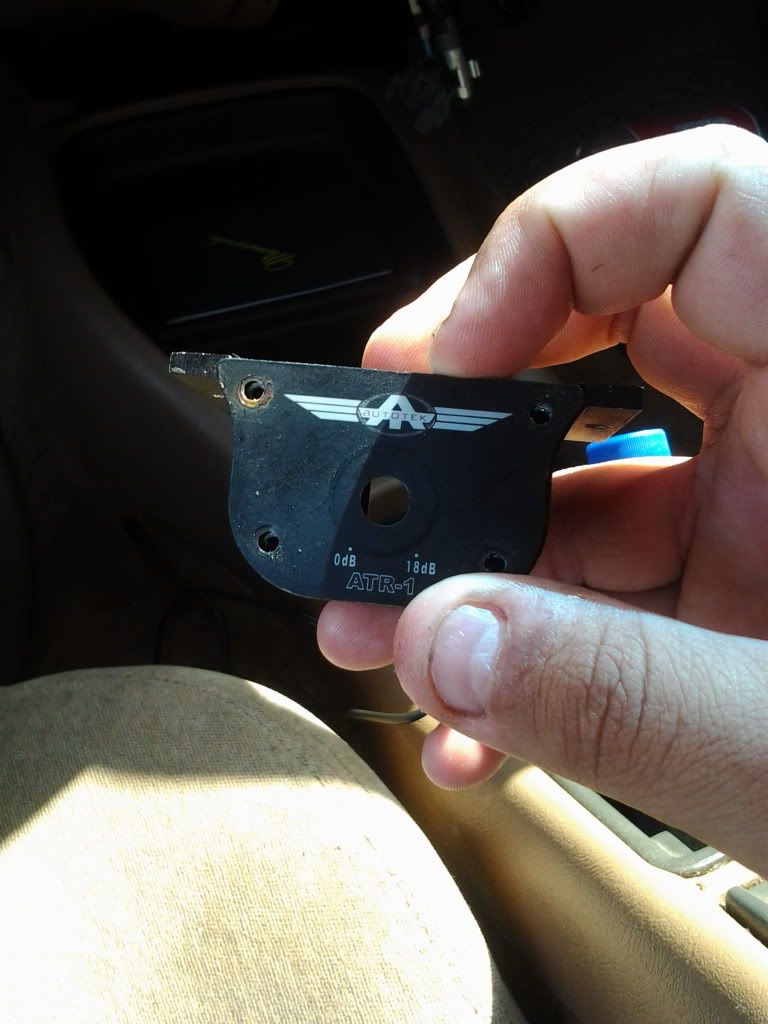
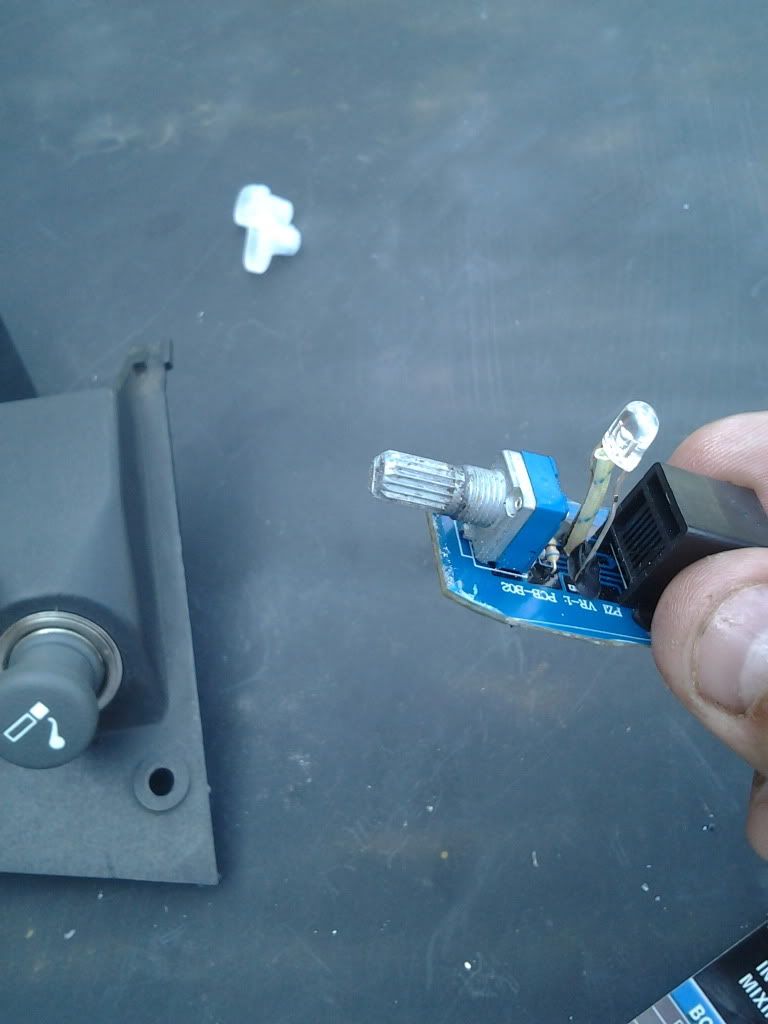
Step Six: After your epoxy has dried on the lighter housing and on the **** in the lighter you should be able to slide your bass gain **** guts back into the the original ****. Once the guts slide back on the ****, apply another generious coat of epoxy to the bottom side of the bass **** guts to the cigeratte lighter housing, I some what flatend mine out to the guts kinda sat on it. Let your epoxy dry once again. While your waiting, you can run your wire that attaches to the back of the bass **** up behind your dash and into the ashtray area (should be a phone line type). After your epoxy is dry hook up the wire again.
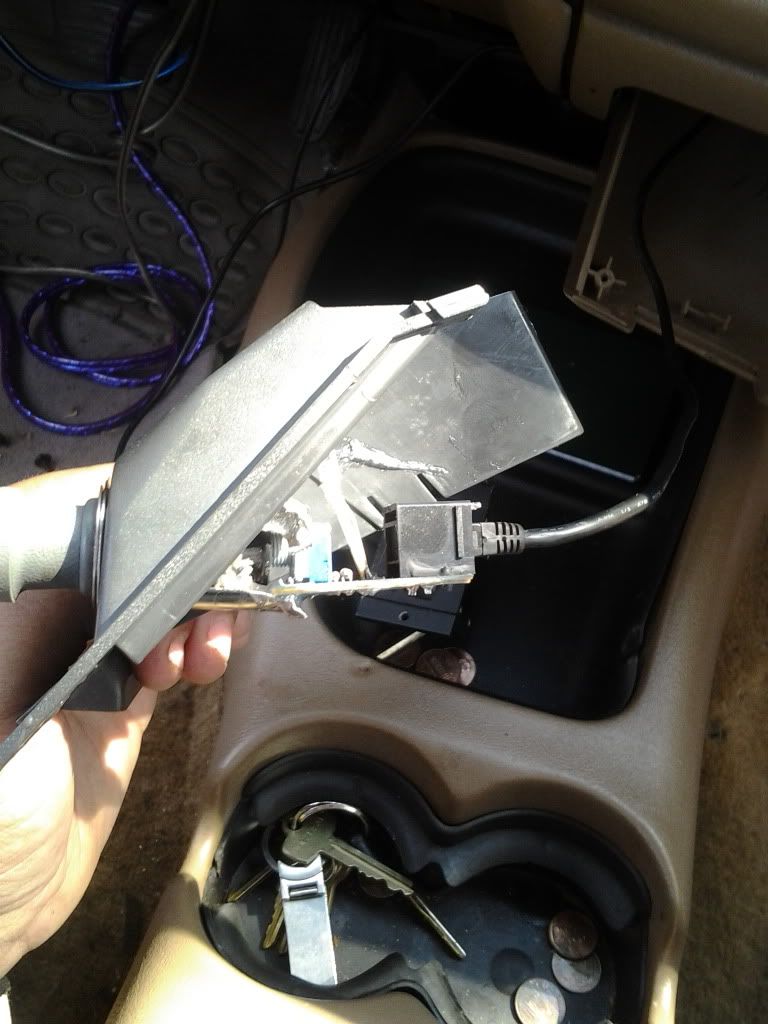
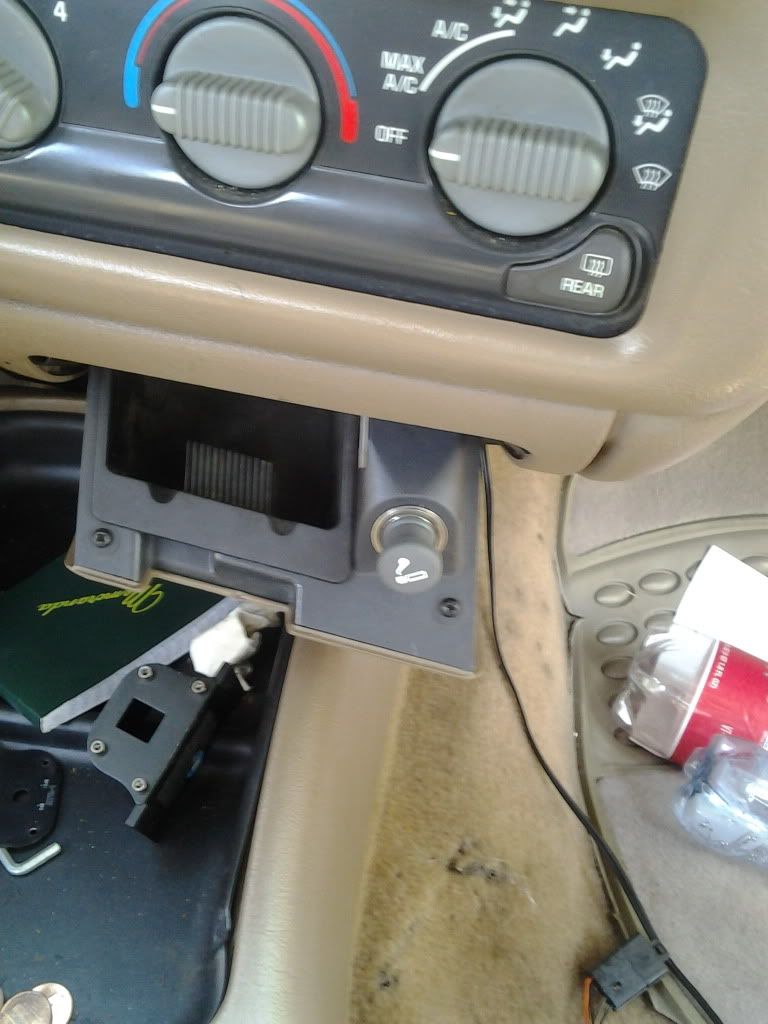
Step Seven: Once all your epoxy is dry, it's reassembly time from here. Re insert your ashtray inner piece, insert the two screws that held it in and that's it. You now have a cigeratte lighter that adjusts your bass.
Hope this helps out
First take out the inner piece of the ashtray, then remove the two screws holding in the inner piece.

Step Two: There is a connector on the back of the lighter, you can trace it up to inside the dash and disconnect it. Afterwards unscrew the lighter assembly from the inner piece of the ashtray. (Don't have a picture, sorry)

Step Three: I don't have a picture of this because I started taking pictures after I had already done this part but, take a pair of needle nose and take the coils out of the lighter, unscrew the little nut on the back side of the of the lighter housing, it's inside the copper area. After that the two inner pieces should separate. Now you'll have to take a drill and drill out the hole in the back to allow for your gain **** to fit through. Also you have to be careful to not bend the silver inner piece too much. Or if like me you can bend and somewhat cut out the hole back side of the housing. (see step four pic)
Step Four: Take your Epoxy and mix it up. I got mine at Autozone for 4.99 and it was the 60 Sec. set time, if you can work it fast enough I recommend it but, if not they should have a 4 minute set time Epoxy as well. Take the lighter housing (should be the one with the drilled hole) and set it back in it's mounting position and apply your epoxy generously to ensure that it's not going to go anywhere. Also drill a small hole in the middle of your bass ****, it should be the little plastic part where you would have turned up the gain on the original bass gain ****. After you drill the hole, there should be a little point in the area of where the coils used to be, insure that the **** fits snugly and apply epoxy so that it won't come off the lighter.

Step Five: Disassemble your bass **** and make any neccessary modifications to the guts of the bass ****. Make sure you do not take out any of the electrical area though. I had to shave down some of the sides of mine.


Step Six: After your epoxy has dried on the lighter housing and on the **** in the lighter you should be able to slide your bass gain **** guts back into the the original ****. Once the guts slide back on the ****, apply another generious coat of epoxy to the bottom side of the bass **** guts to the cigeratte lighter housing, I some what flatend mine out to the guts kinda sat on it. Let your epoxy dry once again. While your waiting, you can run your wire that attaches to the back of the bass **** up behind your dash and into the ashtray area (should be a phone line type). After your epoxy is dry hook up the wire again.

Step Seven: Once all your epoxy is dry, it's reassembly time from here. Re insert your ashtray inner piece, insert the two screws that held it in and that's it. You now have a cigeratte lighter that adjusts your bass.

Hope this helps out
#2
#3
Looks like a pretty sweet mod.
#4
thats pretty cool man. gotta love the original mods like that that not everyone is going to have.
#5
sometimes the subtle mods are the best...that is cool.
#7
As previously noted, that mod is cool. Your video, however, is not.
#8
nice mod...I love stealth types of mods
#9
I agree, these kinds of mods are the best. Not only for the stealthiness but also for the show of craftsmanship and imagination.
#10
Great idea.. and cool mod.. the write up is excellent.. your video is horrible though..
..jus sayin
..jus sayin


