
2000 Boring Blazer Build

Thread Starter
|
Super Member
Joined: Jul 2012
Posts: 1,542
From: Glen Rock, PA

I am thinking of doing the Big 3 this weekend to help with the amp draw from my e-fans (will post pictures soon), and my amp. My question is how much wire should I get? I was thinking of doing 0/1 or 2 gauge depending on what my local audio shop carries. I don't want to buy too much because it is expensive. However, on the other hand I don't want to buy too little either. I plan on removing the factory wiring because it is brittle and corroded, and I would rather just get rid of it. Any ideas would be a big help.
I dont remember how much I used on my 93, but you will need less... get 5-6 feet just to be safe. better to have extra than too little.
Side note, I do not know why people go with such a large gauge of wire, 0/1 or 2 is over kill IMO. I am running HID's, and 1000w amp for my sub, and can have the AC on high and I rarely drop below 14v, lights never dim, and I am using 4 gauge for the big 3
Side note, I do not know why people go with such a large gauge of wire, 0/1 or 2 is over kill IMO. I am running HID's, and 1000w amp for my sub, and can have the AC on high and I rarely drop below 14v, lights never dim, and I am using 4 gauge for the big 3
Thread Starter
|
Super Member
Joined: Jul 2012
Posts: 1,542
From: Glen Rock, PA
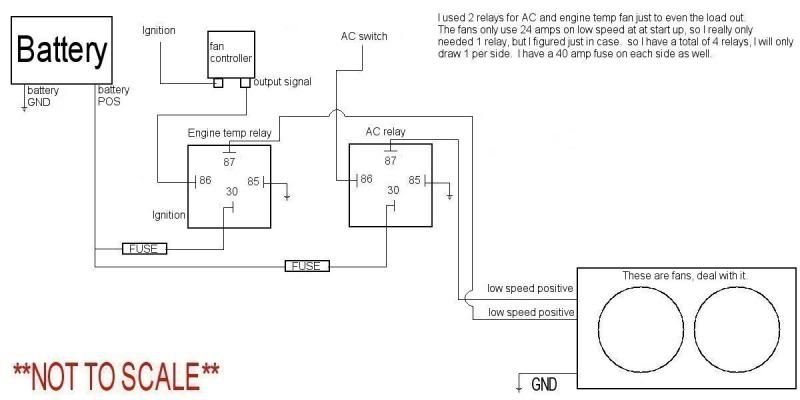
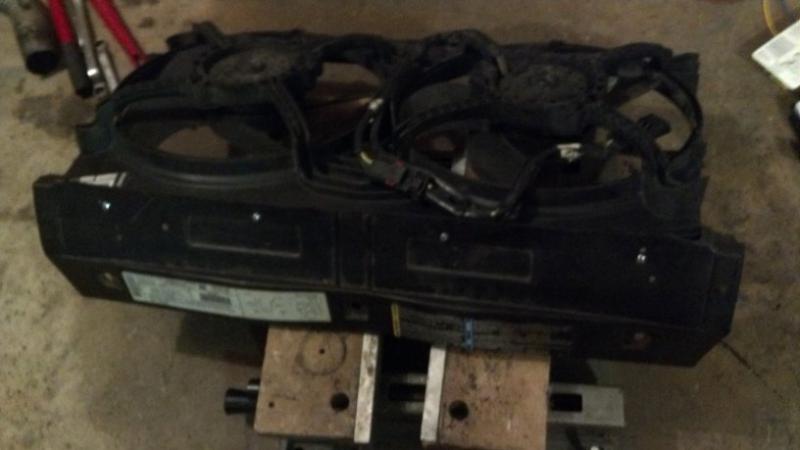
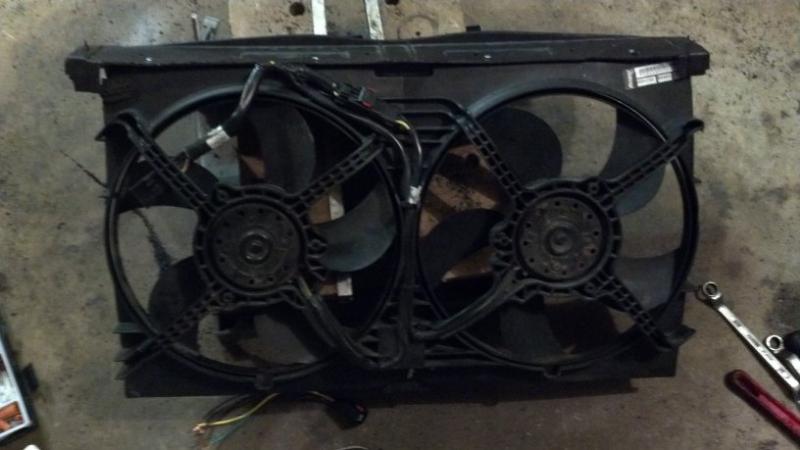
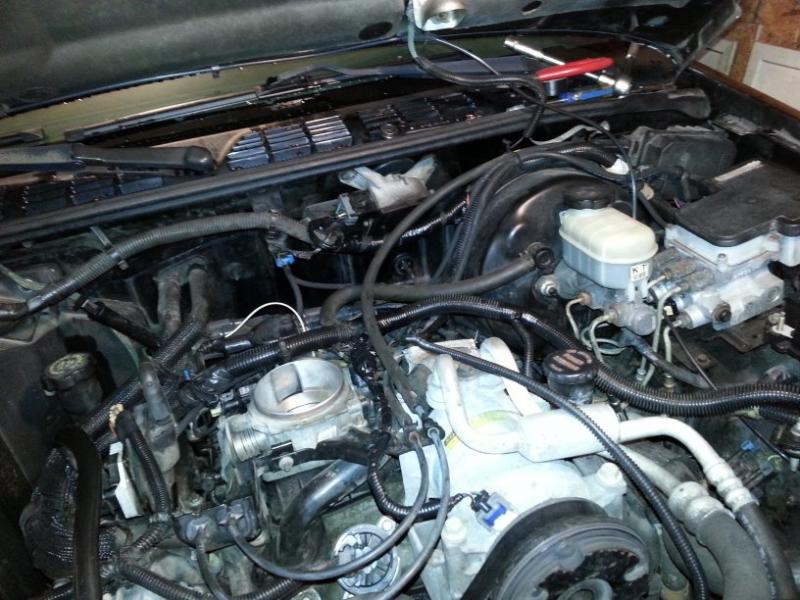
So I did an electric fan conversion. I'll start with the boring stuff, then on to pictures. I used a set of second generation Dodge intrepid fans I got from the junk yard for $20. I like them because with just a little bit of trimming they fit the blazer radiator perfectly. Also I like the way they are wired. Basically they have 3 wires, 2 positive and 1 ground. When either positive gets 12v they run at low speed. but when they both get 12v they go into high speed. I wired them so that when my temp switch gets to about 190 degrees low speed will come on. Also when my AC comes on the low speed comes on. If I have the AC on and the engine gets to 190 degrees they kick into high speed. The one draw back is that this drops my voltage to below 14v and it sounds like it is going to take flight. However, they don't run for too long. I do have to apologize for my lack of picture taking. I usually get into what I am doing and forget to take pictures. I will draw up a quick drawing of my wiring diagram then post pictures of the install.
Last edited by Tajohns34; May 17, 2013 at 09:57 AM. Reason: typo
Thread Starter
|
Super Member
Joined: Jul 2012
Posts: 1,542
From: Glen Rock, PA
Here is the fan controller that I picked up from my local advance.
Buy Imperial Adjustable Thermostatic Fan Control 226203 at Advance Auto Parts
Buy Imperial Adjustable Thermostatic Fan Control 226203 at Advance Auto Parts
Thread Starter
|
Super Member
Joined: Jul 2012
Posts: 1,542
From: Glen Rock, PA
Before I bought my blazer it was wrecked and apparently the body shop that fixed it didn't replace the fan shroud. So I didnt mind cutting it up to mount the fans since it was already cracked. I cut the shroud and screwed the top of the fans to it and I added a metal tab in the middle of the fans to sit in the factory slot at the bottom. I didn't grab a picture because I was running out of light. I also cut the edges off tabs and the sides off of the fans because they hit the tanks on my radiator. I'll clean up the cut on the top eventually. I was more focused on getting the wiring and operation done, and then focus on appearance.
Thread Starter
|
Super Member
Joined: Jul 2012
Posts: 1,542
From: Glen Rock, PA
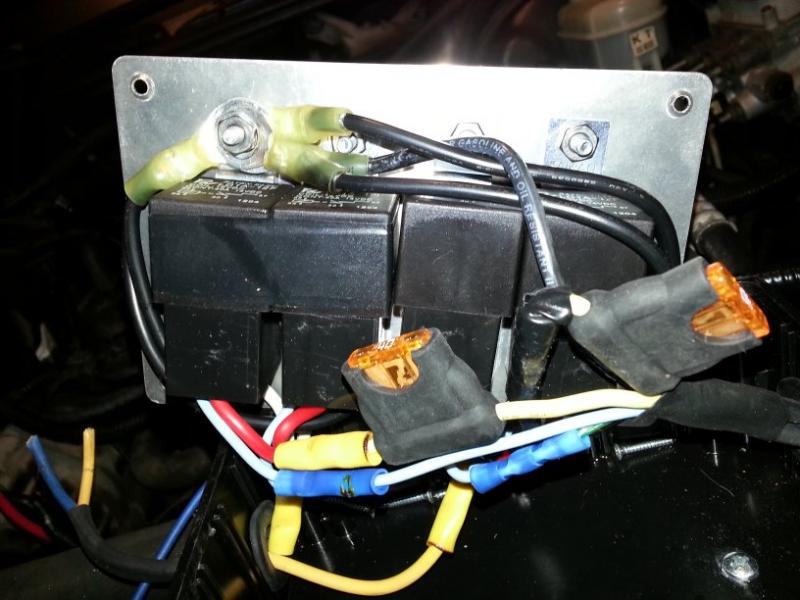
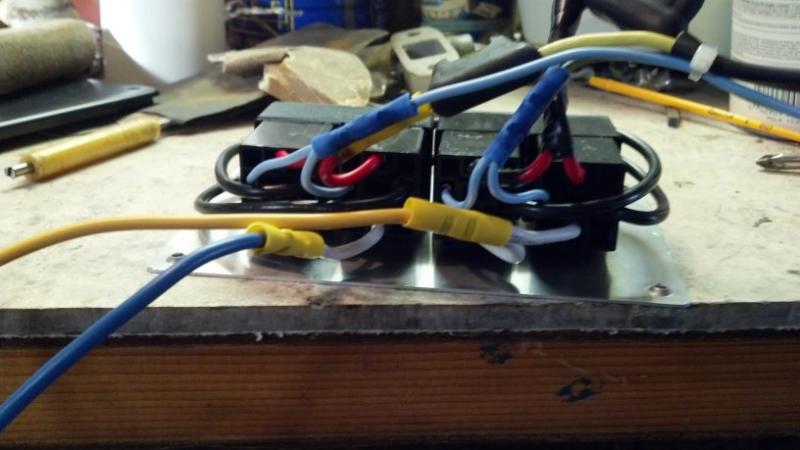
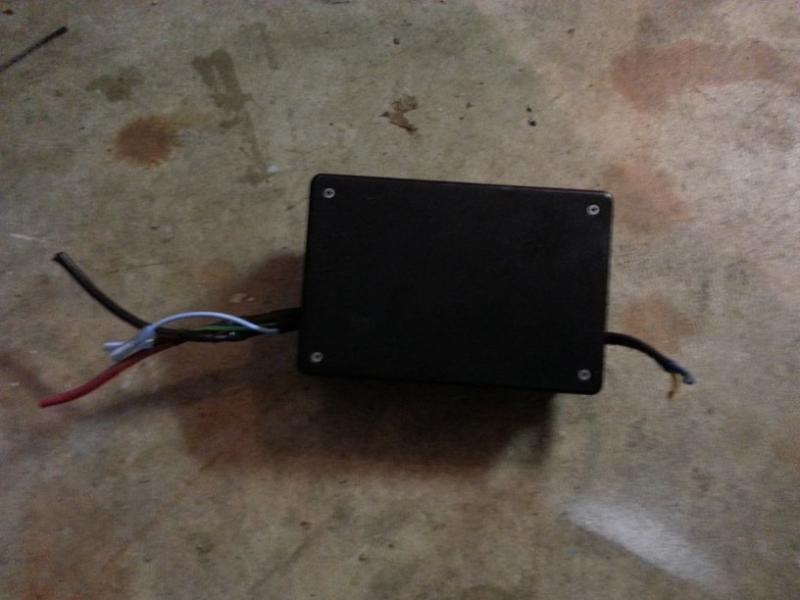
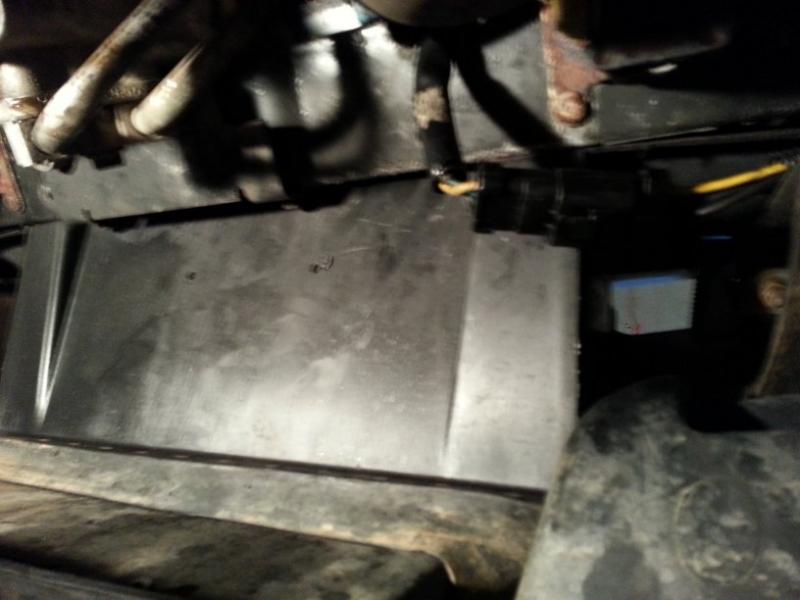
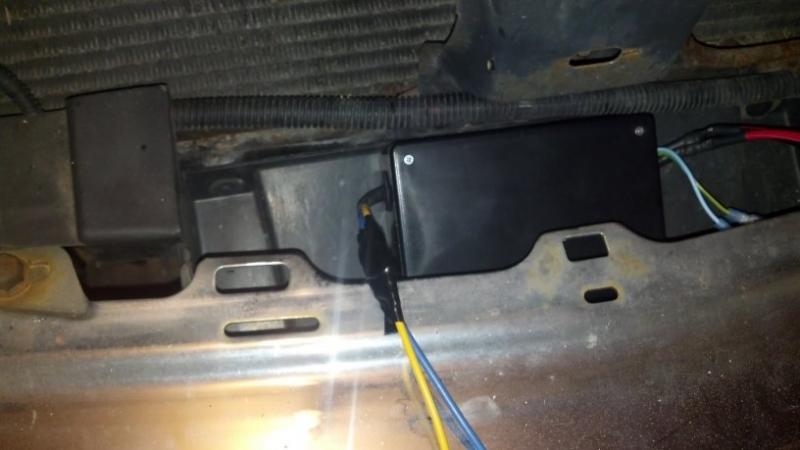
Here is the controller box that I build inside of a project box from Radio shack. It fits perfectly on the plastic panel inside the bumper. I ran some small screws with nuts through the panel to hold it in place. the wiring goes as follows. Black = Ground, yellow & blue connected to white = 12v to fans, yellow wires connected to red = 12v from batt., light blue = signal from temp sensor, green connected to light blue, signal from AC.
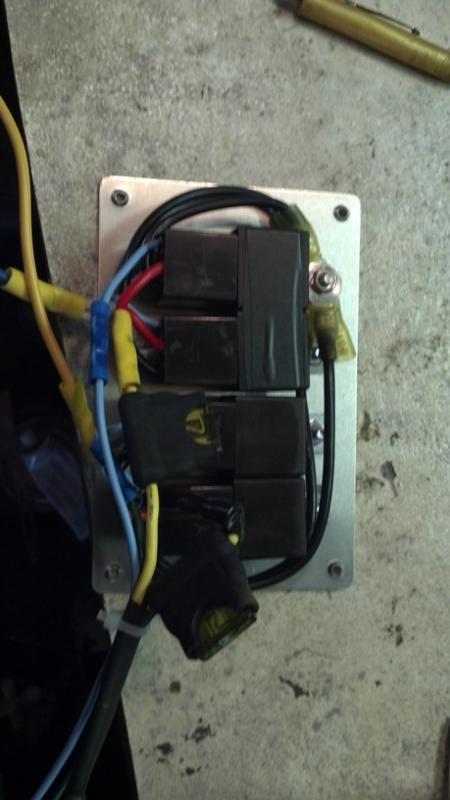
Here is the box mounted to the panel (this was mounted after all the wiring was done. Just in case some of this seems out of order.)
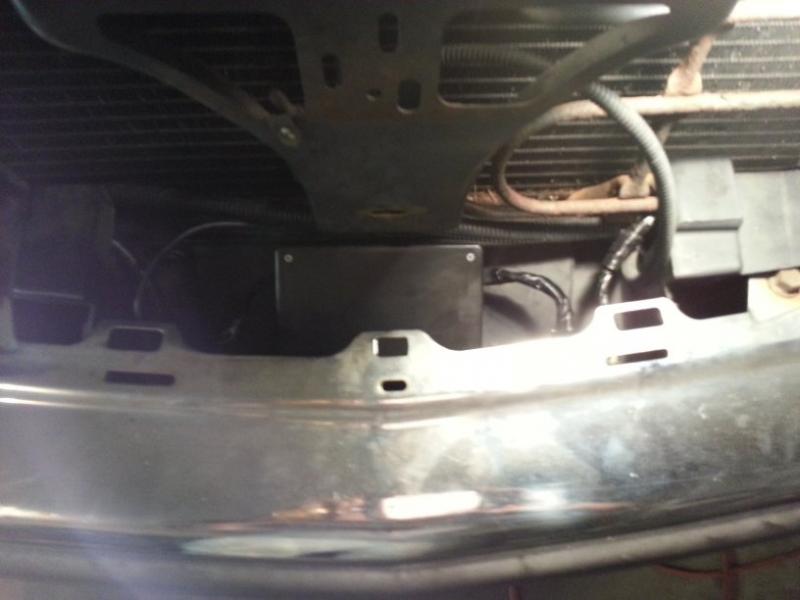
from underneath

Here is the box mounted to the panel (this was mounted after all the wiring was done. Just in case some of this seems out of order.)
from underneath
Thread Starter
|
Super Member
Joined: Jul 2012
Posts: 1,542
From: Glen Rock, PA
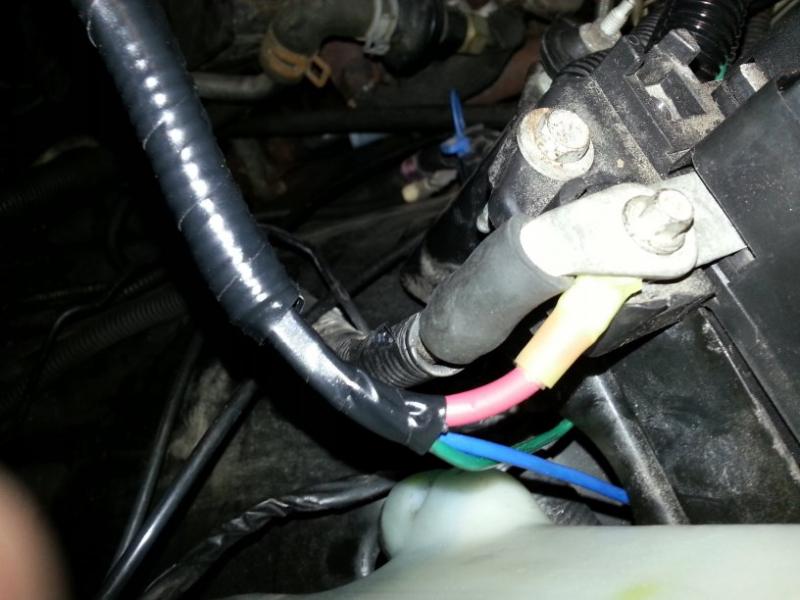
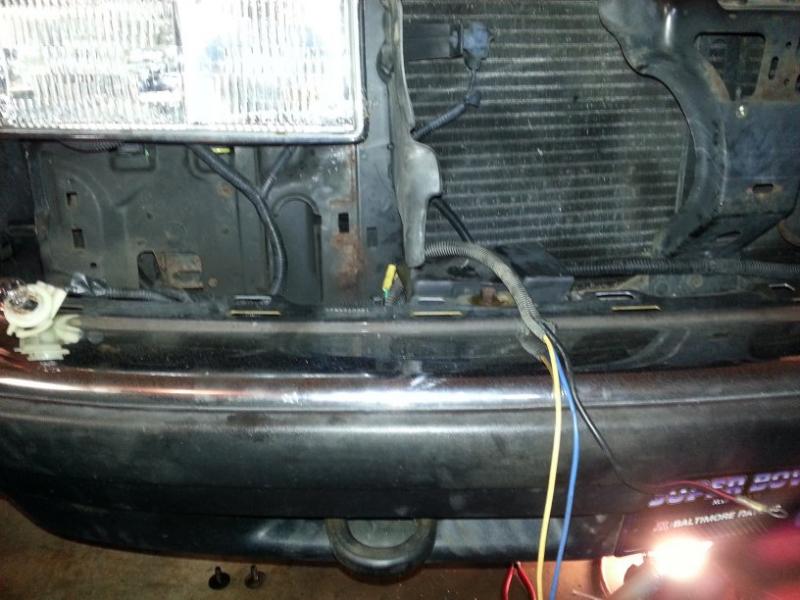
Here is my fan controller. It has a temp sensor which is attached to the radiator with the supplied hardware. The wire on the left goes to the engine temp relays and the one on the left comes from a wire on the core support (wiper motor harness) to tell it the key is on. This way the fans won't come on unless the key is in the ignition. This doesn't supply power, it just tells the relays when to turn the fan on. the larger bolt is also where the fans ground. The bolt it self is rusty but the metal underneath is clean. I know this wiring looks messy, but I took the picture of the temporary set up just to test it. It has all been cleaned up since then.

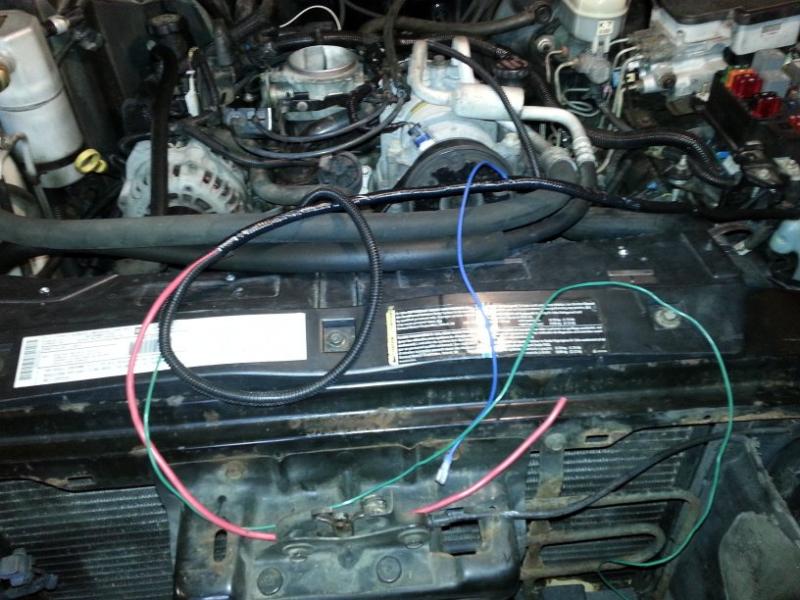
The green wire here is from the AC clutch that goes to the fan relays to tell the AC fan to come on. the blue one in the back goes to the fan controller. I actually ran them inside the wire looms down to the fuse box. This way they look nice and clean. at the fuse box I ran them out of the loom and under the fuse box. This is also where I connected the 12v and i put them all in some split loom and ran it down to the controller. the sigal for the controller comes out of the loom at the core support and goes to the controller. The the wire from the controller goes into the loom.

Here is where the power wire connects and meets the signal wires and goes into the loom. In the second picture you can see the harness before I ran it through the firewall and put the connector on the end. In the third you can see where it goes down to the core support by the washer bottle.
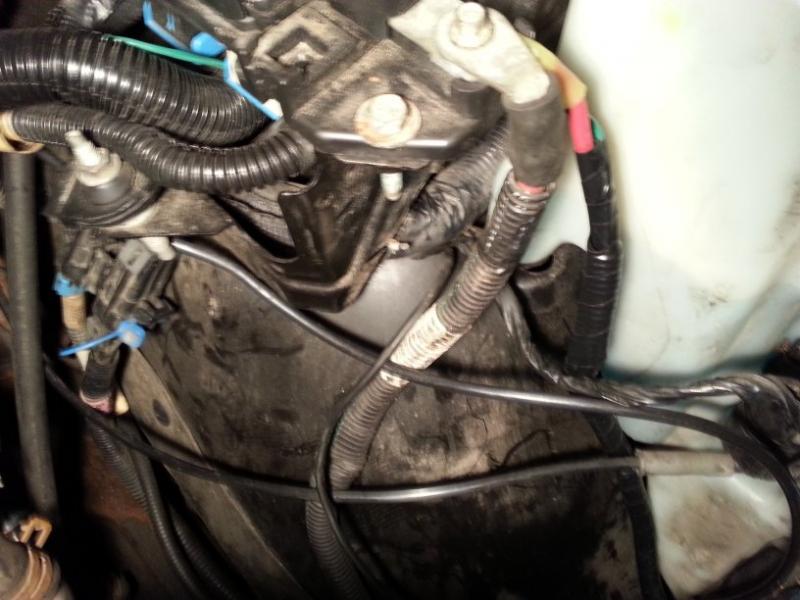
Here is the harness coming through the fire wall. I didn't get a picture, but the grounds for the relays are connected to the firewall.

Here the harness with the end on it. I used the stock connectors from the Intrepid since they have the right number of connectors and they are weather proof. I might shorten the loom up later because it is a little bit long. I just connected my wiring with crimp connectors, so shortening it wouldn't be a big deal.
The green wire here is from the AC clutch that goes to the fan relays to tell the AC fan to come on. the blue one in the back goes to the fan controller. I actually ran them inside the wire looms down to the fuse box. This way they look nice and clean. at the fuse box I ran them out of the loom and under the fuse box. This is also where I connected the 12v and i put them all in some split loom and ran it down to the controller. the sigal for the controller comes out of the loom at the core support and goes to the controller. The the wire from the controller goes into the loom.
Here is where the power wire connects and meets the signal wires and goes into the loom. In the second picture you can see the harness before I ran it through the firewall and put the connector on the end. In the third you can see where it goes down to the core support by the washer bottle.
Here is the harness coming through the fire wall. I didn't get a picture, but the grounds for the relays are connected to the firewall.
Here the harness with the end on it. I used the stock connectors from the Intrepid since they have the right number of connectors and they are weather proof. I might shorten the loom up later because it is a little bit long. I just connected my wiring with crimp connectors, so shortening it wouldn't be a big deal.
Thread Starter
|
Super Member
Joined: Jul 2012
Posts: 1,542
From: Glen Rock, PA
Richphotos, I tend to agree with you on 0 gauge be on overkill. I used 4 gauge on my 93 corolla. However, I have a 5 channel amp and electric fans. I would also like to run some fog lights and a power inverter at some point. Also, my local audio shop only charges a few cents more per foot for 0 gauge as opposed to 4 gauge.
Last edited by Tajohns34; May 28, 2013 at 09:09 PM. Reason: typo
Thread Starter
|
Super Member
Joined: Jul 2012
Posts: 1,542
From: Glen Rock, PA
More efan pics!
my signal wires are run inside the stock looms and taped up looking very factory
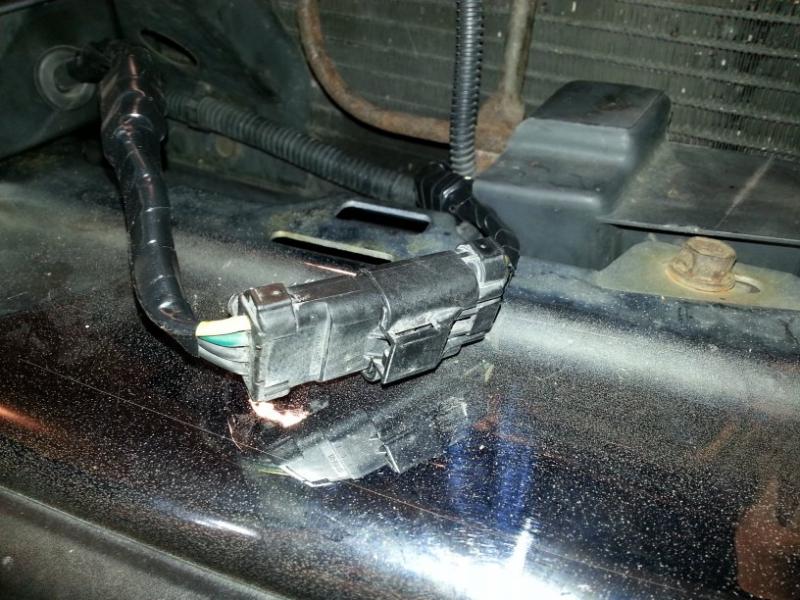
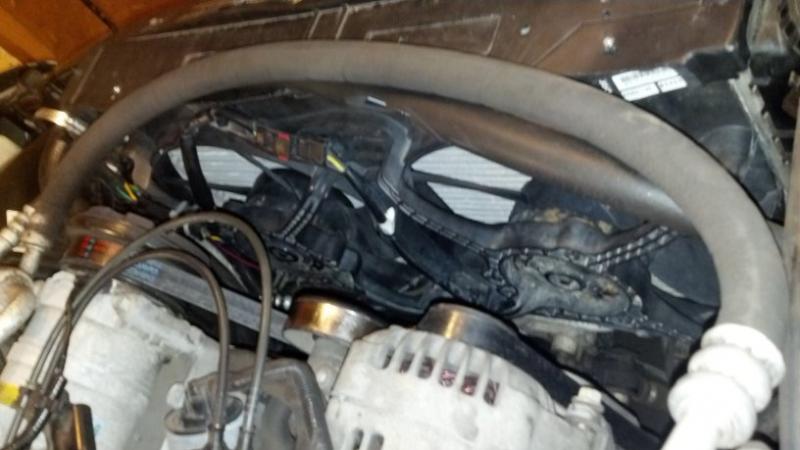
I didn't get a picture of the connector on the fans themselves because it was a weird spot. What I did was unhook them from up top and zip ties them to the frame on the bottom of the fan and ran them under the core support.
Here is the connector coming from the bottom of the fans.
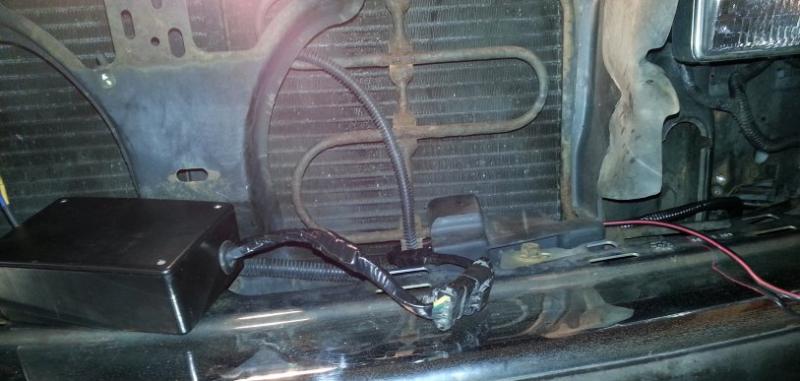
Here is the wire coming up to the back of the bumper to connect to the controller box
Fans mounted. the connector in this picture has been moved down to the bottom. It was much easier to connect it to the controller that way.
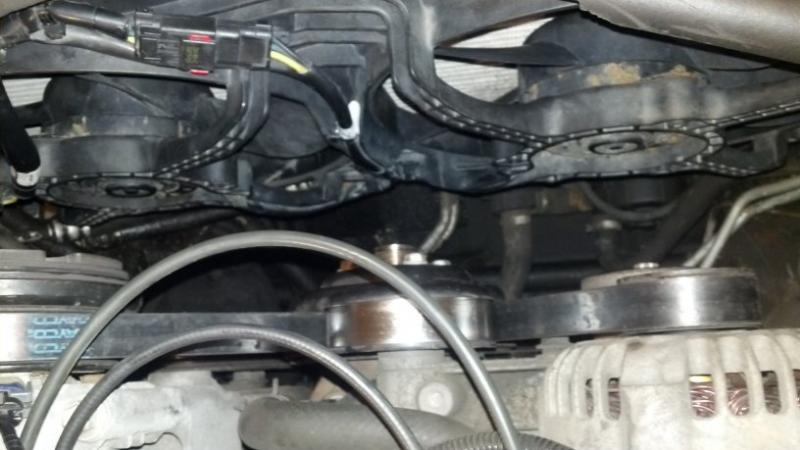
my signal wires are run inside the stock looms and taped up looking very factory
I didn't get a picture of the connector on the fans themselves because it was a weird spot. What I did was unhook them from up top and zip ties them to the frame on the bottom of the fan and ran them under the core support.
Here is the connector coming from the bottom of the fans.
Here is the wire coming up to the back of the bumper to connect to the controller box
Fans mounted. the connector in this picture has been moved down to the bottom. It was much easier to connect it to the controller that way.