
2004 Blazer LS Build "Deuce"

Thread Starter
|
Beginning Member
Joined: May 2016
Posts: 26
From: Conway, AR

Well, I've been meaning to get started on my build thread, and since I picked up the Blazer in the spring, I figured it was time to get started on the thread since I've nearly reached the goal I intended to have complete by this fall.
I primarily use my Blazers as my hunting/weekends in the mountains rigs so I don't tear up the newer truck, so I wanted to have it completed to a certain level By mid September this year.
My goal was:
1.) make certain Blazer was mechanically sound due to the fact it's a 10 mile walk to phone signal where I hunt primarily.
2.) lights and rack on top with spare tire mount.
3.) isolated accessory battery.
3.) 2.5" RC suspension lift.
4.) 31x10.5s
5.) 2"receiver hitch and wire for trailer lights.
6.) fix rust and bedline bottom half (truck saw a lot of salt apparently in a previous life in KY).
So, This is the vehicle I started with. 2004 Blazer LS 4x4, picked up at an auction for me by a family friend for $1800. 134k miles.

 [/URL]
you can see the rust on the right side.
I primarily use my Blazers as my hunting/weekends in the mountains rigs so I don't tear up the newer truck, so I wanted to have it completed to a certain level By mid September this year.
My goal was:
1.) make certain Blazer was mechanically sound due to the fact it's a 10 mile walk to phone signal where I hunt primarily.
2.) lights and rack on top with spare tire mount.
3.) isolated accessory battery.
3.) 2.5" RC suspension lift.
4.) 31x10.5s
5.) 2"receiver hitch and wire for trailer lights.
6.) fix rust and bedline bottom half (truck saw a lot of salt apparently in a previous life in KY).
So, This is the vehicle I started with. 2004 Blazer LS 4x4, picked up at an auction for me by a family friend for $1800. 134k miles.
 [/URL]
you can see the rust on the right side.
Thread Starter
|
Beginning Member
Joined: May 2016
Posts: 26
From: Conway, AR
So, Got it home, and to be honest, just did some playing around on it, getting a feel for the blazer. the factory cigarette lighter port was missing, and in this day and age of electronics, decided one day to fab up a digital voltmeter with powerport and usb chargers. Knowing I would be doing a VSR isolator with the accessory battery I would be installing, I wanted a digital voltmeter for the future. picked up a combo for 15 bucks on Amazon, and decided the ashtray could go away.
 While I was in there, I decided to play around some with a couple cans of plasti dip I had laying around, to see what I wanted to eventually go permanently black with interior paint later.


Also picked up an overhead console at the local junkyard. Wanted one for the map lights, as well as a place for my future switchbanks for lights to go.

Thread Starter
|
Beginning Member
Joined: May 2016
Posts: 26
From: Conway, AR
mocked up some sides for ashtray at the angle it needed to be open to hold the voltmeter combo, cut them out, painted, riveted them in place, and mounted the plate, wiring the voltmeter to the power supply for stereo, and the power port and usb chargers to the original wiring for the cigarette lighter. That way volt meter only reads when key is on, but charging ports charge full time.


Thread Starter
|
Beginning Member
Joined: May 2016
Posts: 26
From: Conway, AR
also wired in the trailer light plug and the 2 inch receiver that weekend, didn't think to take any pics of the wiring, but got the hitch for 20 bucks at a junkyard, prepped it and rattle can bedlined it before install.


Thread Starter
|
Beginning Member
Joined: May 2016
Posts: 26
From: Conway, AR
In the meantime, I was having a few overheating issues and the radiator was pure red inside. Considered a flush, but to be honest decided I was better off in the long run by replacing the radiator and thermostat. I had landed wrong behind my skid plate the weekend of the 4th of July, so had to get theexhaust rewelded just behind manifold, replaced the gasket on transmission pan along with filter kit, and had the radiator and thermostat redone.
The exhaust I traded work with a buddy that owns a transmission shop, and quite frankly, was out of town too much to do the radiator, thermostat, trans pan gasket and filter kit, so I dropped it off at a friends shop and he did it for me while I was out of town for work.
Kind of cheating to have someone else do it, I know, but they were issues I needed and wanted fixed asap and I wasn't home to do them myself.
Thus, no pics of any of that work.
Thread Starter
|
Beginning Member
Joined: May 2016
Posts: 26
From: Conway, AR
Next came the lights, VSR isolator, optima battery located in rear, and switches in that overhead console I had picked up and put in.
I need to get some pics of where I located isolator and battery, didnt realize til I started posting that I never actually took any.
So, we mounted the lights where we wanted them on the Kurt rack, and tore out all the interior panels that were in the way, and began running all our wiring.
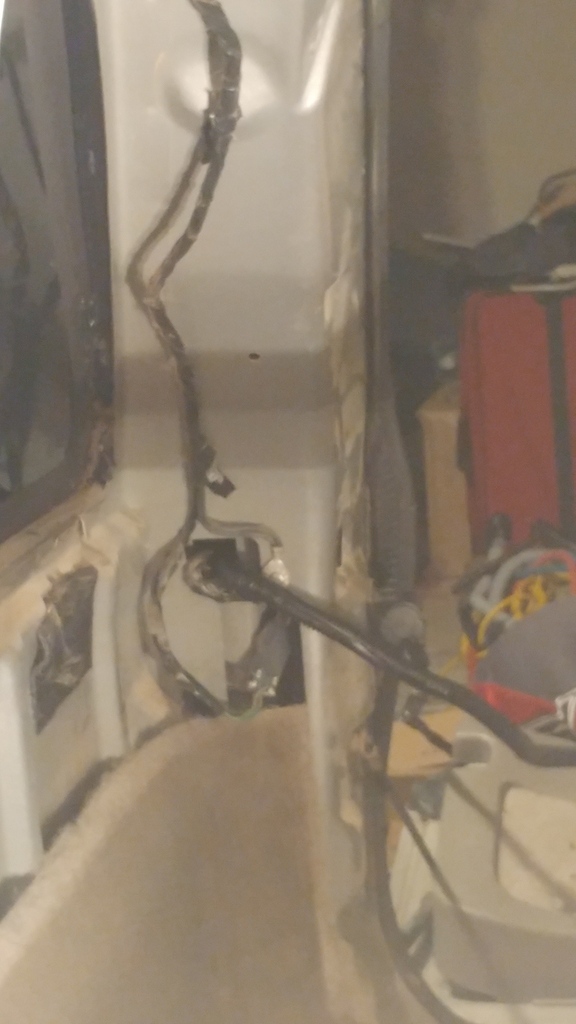
We took the line from the VSR isolator from just behind the stock starter location through the firewall, ran it under the trim at passenger door, though the interior body panel on passenger side, and came out at the right rear by the hatch, which is where I located the yellow top Optima battery.
Removed the roof liner and essentially all the interior panels on right side of vehicle. Drilled through to inset for the right rear tail light assembly, and used that as an access back up to drip ledge under the back glass and up through to the rack. Wired in two 20 amp "mains" with an 8 gauge supply to ghem, than ran individual switches for front floods, front spots, ride side floods, left side floods, and read light bar.


I need to get some pics of where I located isolator and battery, didnt realize til I started posting that I never actually took any.
So, we mounted the lights where we wanted them on the Kurt rack, and tore out all the interior panels that were in the way, and began running all our wiring.
We took the line from the VSR isolator from just behind the stock starter location through the firewall, ran it under the trim at passenger door, though the interior body panel on passenger side, and came out at the right rear by the hatch, which is where I located the yellow top Optima battery.
Removed the roof liner and essentially all the interior panels on right side of vehicle. Drilled through to inset for the right rear tail light assembly, and used that as an access back up to drip ledge under the back glass and up through to the rack. Wired in two 20 amp "mains" with an 8 gauge supply to ghem, than ran individual switches for front floods, front spots, ride side floods, left side floods, and read light bar.


Thread Starter
|
Beginning Member
Joined: May 2016
Posts: 26
From: Conway, AR
Next came the spare tire mount. Was getting tired of the strap and wanted something more solid and permanent. Spent some time thinking on it and decided to mock up one using a piece of unistrut, all thread, 2"x1/8" steel, and a center quick release spindle I welded up by welding 6 pieces of metal around a 1" anchor bolt nut at bottom, a ring on top, and some 1/2" steel rod I got from the scrap pile at work.
My welding skills arent all that great, so there was a lot of flapper wheel use and grinding before paint.


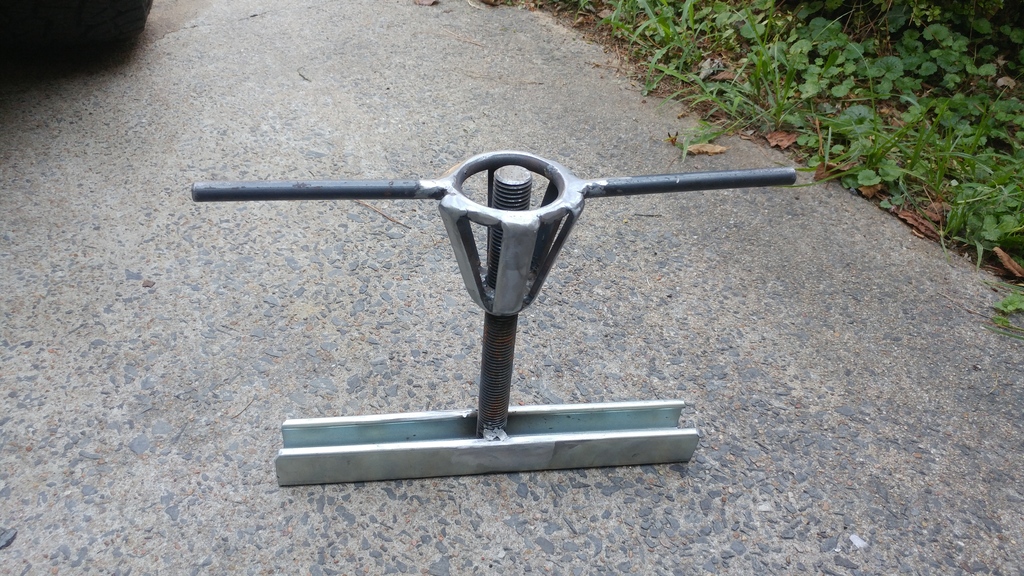

My welding skills arent all that great, so there was a lot of flapper wheel use and grinding before paint.


Thread Starter
|
Beginning Member
Joined: May 2016
Posts: 26
From: Conway, AR
Thats enough for tonight. I'll add the pics of the RC 2.5" suspension lift and a few other things tomorrow night or later, am currently dealing with the rust issues, so might take a few days before posting further, and add those in at same time as lift, wheels, and tires.