
AltonCustomTech's 2010 Chevy Traverse Audio Build

Thread Starter
|
Senior Member
Joined: Oct 2010
Posts: 931
From: Monroe City, IN

NOTE: I meant to post this last night, I fell asleep while putting the post together, lol.
Well, I'm a little later than I planned to get the pics of the enclosures up but I have way more to post up than just the enclosures!!!
I tore into it big time the last couple of days and got the enclosures in the door panels and all the foam work completed. Then, because the wife is a spoiled rotten brat, I threw the speakers in and hooked them up powered by the HU. Everything turned out pretty damn good. I still have a good bit of work to do to call the doors done, but I'm light years ahead of where I was a short time ago. Well, onto the pictures!
To start off with, I applied CCF (closed cell foam) to the backs of the enclosures to keep any possibility of a rattle between the back of the wood enclosure and the sheet metal of the door panel to a minimum.

Here's how the enclosures turned out.


Here I'm running the speaker wire that will carry the signal from the crossover to the woofer. I also ran another wire with this one that carries the signal from the crossover to the midrange and tweeter.

Here's what the door card looks like with the enclosure resting in it.

Here are some shots of the doors with the door cards and enclosures in place before applying the foam.


These two pictures show the doors after I've applied the foam. I used just regular old Great Stuff expanding foam in the can that any person can pick up from Walmart, Lowes, Home Depot, etc. I had originally planned on using crafting foam but when I tried to cut and apply it in the irregular locations of the top of the doors with the tweeter and midrange rings in the way I just couldn't get it to go without a LOT of trouble. I decided to just use the expanding foam to do the shaping around those speaker locations along with setting the enclosures in the door cards. Right now they look pretty bad, lol.


And finally here's what they look like with a little work on shaping the foam and with the speakers installed. I only worked the foam enough to get the basic shape and to get everything out of the way for the speakers to mount and the door to close. There's still more foam that needs to be applied, shaped, and then finally the fiberglass can be applied over it.


So, the speakers do sound fantastic even though I still need to do a lot of work to get everything dialed in and most of that work can't be performed until the false floor amp rack is installed so that the Harmony DSP and amp are there to run the speakers with. They have an amazingly natural sound and the staging and imaging are almost spot on. Still the most impressive part is the bass response with these enclosures, we'll barely even need the subs.
Well, I'm a little later than I planned to get the pics of the enclosures up but I have way more to post up than just the enclosures!!!
I tore into it big time the last couple of days and got the enclosures in the door panels and all the foam work completed. Then, because the wife is a spoiled rotten brat, I threw the speakers in and hooked them up powered by the HU. Everything turned out pretty damn good. I still have a good bit of work to do to call the doors done, but I'm light years ahead of where I was a short time ago. Well, onto the pictures!
To start off with, I applied CCF (closed cell foam) to the backs of the enclosures to keep any possibility of a rattle between the back of the wood enclosure and the sheet metal of the door panel to a minimum.
Here's how the enclosures turned out.
Here I'm running the speaker wire that will carry the signal from the crossover to the woofer. I also ran another wire with this one that carries the signal from the crossover to the midrange and tweeter.
Here's what the door card looks like with the enclosure resting in it.
Here are some shots of the doors with the door cards and enclosures in place before applying the foam.
These two pictures show the doors after I've applied the foam. I used just regular old Great Stuff expanding foam in the can that any person can pick up from Walmart, Lowes, Home Depot, etc. I had originally planned on using crafting foam but when I tried to cut and apply it in the irregular locations of the top of the doors with the tweeter and midrange rings in the way I just couldn't get it to go without a LOT of trouble. I decided to just use the expanding foam to do the shaping around those speaker locations along with setting the enclosures in the door cards. Right now they look pretty bad, lol.
And finally here's what they look like with a little work on shaping the foam and with the speakers installed. I only worked the foam enough to get the basic shape and to get everything out of the way for the speakers to mount and the door to close. There's still more foam that needs to be applied, shaped, and then finally the fiberglass can be applied over it.
So, the speakers do sound fantastic even though I still need to do a lot of work to get everything dialed in and most of that work can't be performed until the false floor amp rack is installed so that the Harmony DSP and amp are there to run the speakers with. They have an amazingly natural sound and the staging and imaging are almost spot on. Still the most impressive part is the bass response with these enclosures, we'll barely even need the subs.
Thread Starter
|
Senior Member
Joined: Oct 2010
Posts: 931
From: Monroe City, IN
Thanks man!! I can definitely say the first time I started to cut that door card up like that I was extremely apprehensive about it. Also every time something seemed to get in the way or I had to figure out how to make it work did scare the hell out of me.
Hopefully this weekend I'll get the last of the foam work done and the first layer of fiberglass down.
Hopefully this weekend I'll get the last of the foam work done and the first layer of fiberglass down.
Thread Starter
|
Senior Member
Joined: Oct 2010
Posts: 931
From: Monroe City, IN
I got a little work done on the amp rack today. So far I got the shape of the front of the amp rack/false floor down and the placement for each of the amps and the Harmony DSP. The more we listen to the speakers the more unreal the bass response is. Two friends that I've played them for thought the subs were already in the truck. It's going to be a real treat to get the amp on them and feed them what they're begging for! Onto a few pictures of the amp rack/false floor.
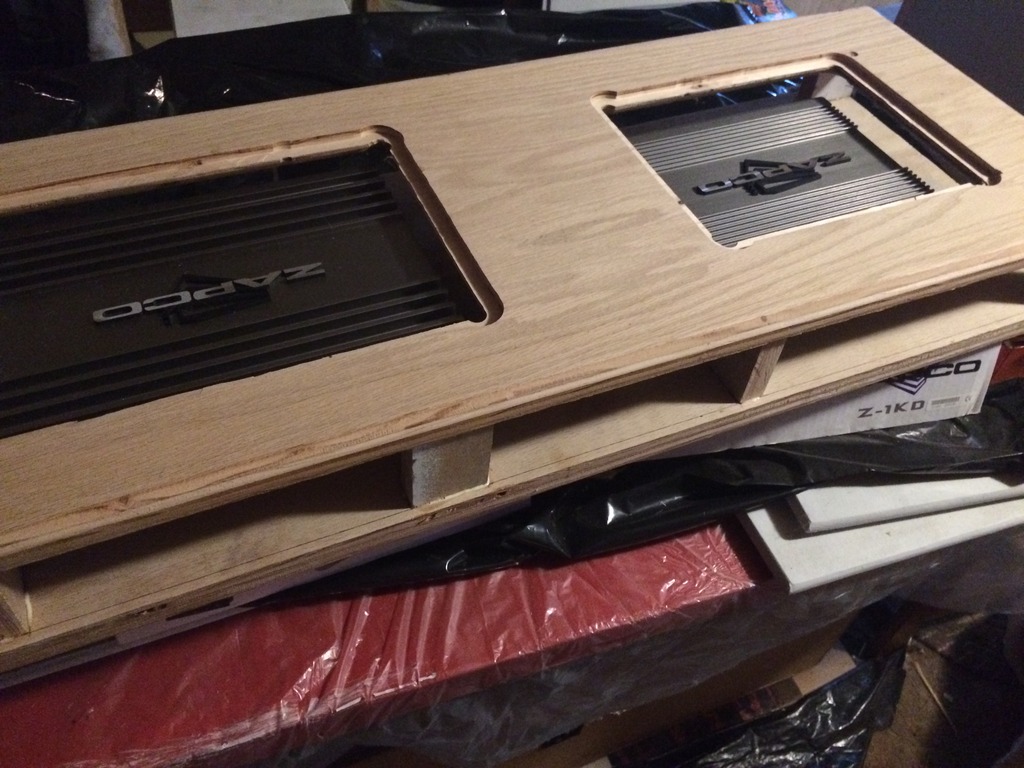
I am narrowing the front of the amp rack/false floor to match the width of the arm rest. That way it looks a little more natural being there. I used my flush trim bit on my router to match the boards up so they're both exactly the same.


Here's the layout for the amps and DSP. I have the sub amp in the center so that the power and ground wire runs are as short as possible to it since it will be drawing the most current. The DSP is at the front to get the signal from the HU and distribute it accordingly to the amps.


More to come....
I am narrowing the front of the amp rack/false floor to match the width of the arm rest. That way it looks a little more natural being there. I used my flush trim bit on my router to match the boards up so they're both exactly the same.
Here's the layout for the amps and DSP. I have the sub amp in the center so that the power and ground wire runs are as short as possible to it since it will be drawing the most current. The DSP is at the front to get the signal from the HU and distribute it accordingly to the amps.
More to come....
Thread Starter
|
Senior Member
Joined: Oct 2010
Posts: 931
From: Monroe City, IN
Another small update to post up. The amp rack is pretty much completed. The only thing left to do with the amp rack itself is the last second addition of hinges. I was going to just screw the top down to the base but I'm afraid that if I have to remove it to make adjustments too many times that it will ultimately end of causing problems. So I've opted to put some hinges on the top to allow for it to simply be opened when adjustments are needed along with the use of a cabinet lock to keep it shut. The only other part of the rack I have to complete is cutting some 1/4" thick perforated steel to size to fill the recesses in the top of the rack lid to protect the top of the amps while allowing air to ventilate. The 1/4" thick perforated steel has 3/4" holes and in adverse weather conditions I'll be temporarily covering the rack with floor mats to protect everything.
So onto some pictures.
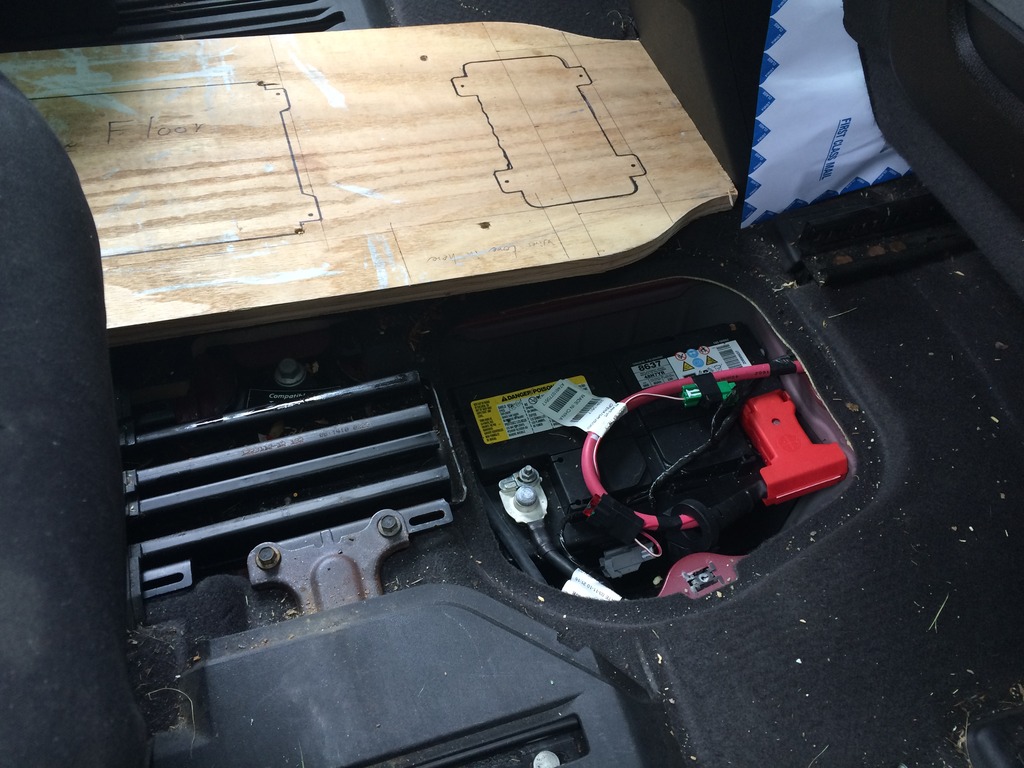
Here I'm checking the fitment of the rack base along with making sure there is sufficient clearance for the 4 gauge and 1/0 power wires to make the trip from the battery to the amps.
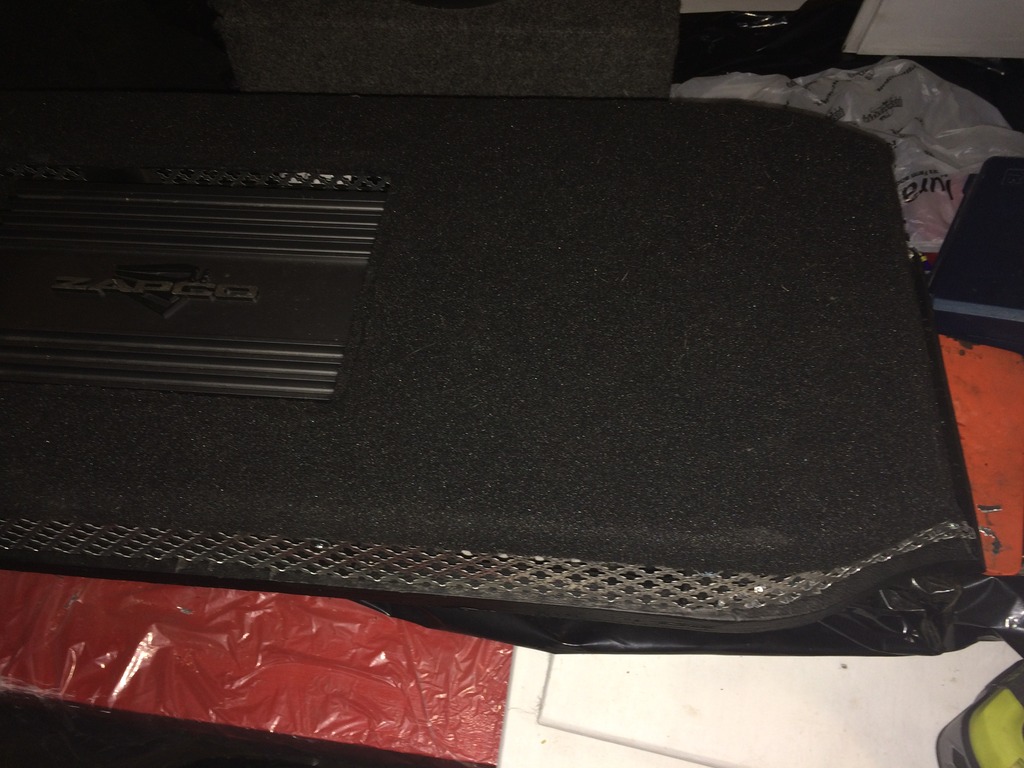
I've got the ventilation holes cut, routed and ready for the perforated steel inlays. I also have gotten the upright supports glued into place as well.

The amp rack is pretty much completely done at this point. The base is painted with rubberized undercoating and carpeting has been applied with contact cement. I have some thin sheet metal that was left over from the door inserts for our cabinet doors from the kitchen renovations we're also in the middle of. It looks pretty good but will not likely be permanent due to it's "overly light for the application" nature. I will likely find something in 16 gauge perforated steel to replace it at some point in the future.


That's all the updates I have to post up right now. If life will ever cooperate I will have the amp rack installed this weekend, or next considering that next weekend should be a 3 day weekend for me.
Double post fail, lol.
So onto some pictures.
Here I'm checking the fitment of the rack base along with making sure there is sufficient clearance for the 4 gauge and 1/0 power wires to make the trip from the battery to the amps.
I've got the ventilation holes cut, routed and ready for the perforated steel inlays. I also have gotten the upright supports glued into place as well.
The amp rack is pretty much completely done at this point. The base is painted with rubberized undercoating and carpeting has been applied with contact cement. I have some thin sheet metal that was left over from the door inserts for our cabinet doors from the kitchen renovations we're also in the middle of. It looks pretty good but will not likely be permanent due to it's "overly light for the application" nature. I will likely find something in 16 gauge perforated steel to replace it at some point in the future.
That's all the updates I have to post up right now. If life will ever cooperate I will have the amp rack installed this weekend, or next considering that next weekend should be a 3 day weekend for me.
Double post fail, lol.
Last edited by Thogert; Aug 13, 2015 at 10:14 PM. Reason: Double post fix
Thread Starter
|
Senior Member
Joined: Oct 2010
Posts: 931
From: Monroe City, IN
Okay, just a small update here. I've been working on getting some of the small stuff done the last couple of weeks. I prewired the amps and DSP in the false floor/amp rack so that all I have to do when I get the time is drop it in, get all the wires hooked up, and get everything tuned. I've gotten the remote **** for the Z-1K and the remote controller for the DSP mounted in a pocket at the bottom of the dash. Those associated wires and the RCA's and remote wire were all ran at that point. I also decided to go ahead and run new speaker wires to the doors which involved me having to take the doors off to drill holes, install rubber grommets and then run the wires up under the dash and through to the doors. So everything wiring related is ready to go.
Here's a few pictures. I would like to have taken more but with my super limited time to work on this stuff I keep finding myself taking pictures as an after thought. Sorry guys.
This is the remote **** for the sub amp and the controller for the Harmony DSP. I had to do some custom fab work to that little pocket to fit these here but they're in and don't look too shabby.
Here's a shot of the door jamb where the KnuKonceptz Karma SS speaker wire is passing through. The outer jacket on this wire makes it PERFECT for this application.

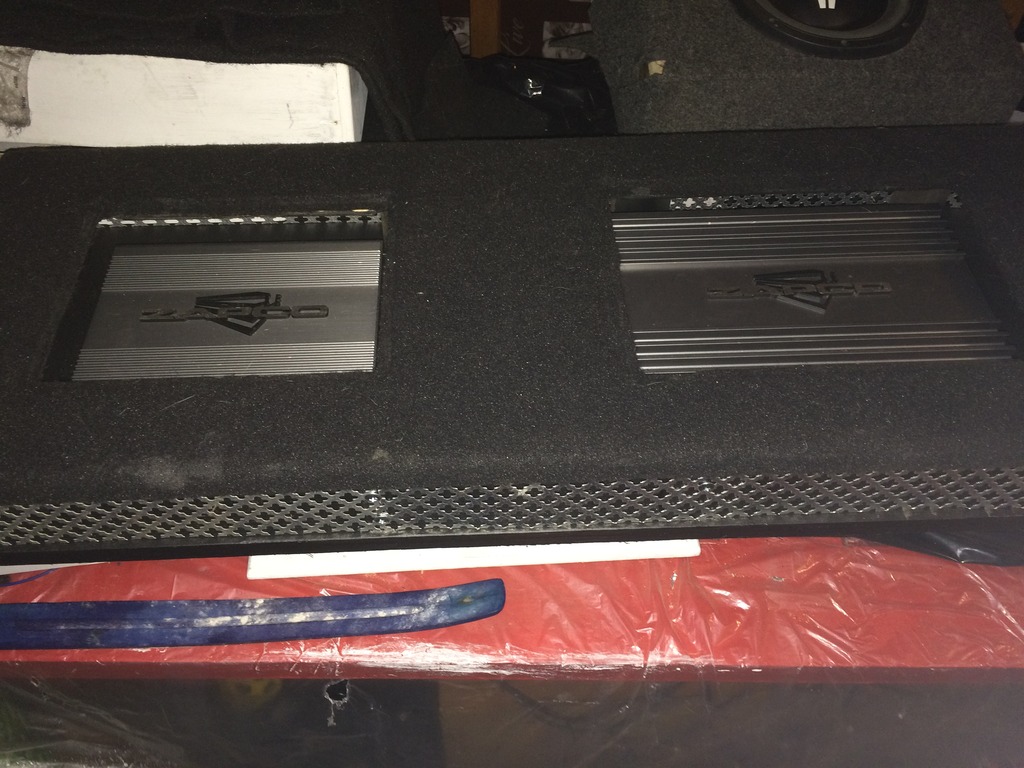
Finally here's the false floor/amp rack with the covers over the amps finished with paint and clear coat and the associated wiring. All it needs is put into the Traverse and hooked up!

There's this little update. I can't begin to pretend to have any clue when I'll be able to get it put in and that update posted up, lol.
Here's a few pictures. I would like to have taken more but with my super limited time to work on this stuff I keep finding myself taking pictures as an after thought. Sorry guys.
This is the remote **** for the sub amp and the controller for the Harmony DSP. I had to do some custom fab work to that little pocket to fit these here but they're in and don't look too shabby.
Here's a shot of the door jamb where the KnuKonceptz Karma SS speaker wire is passing through. The outer jacket on this wire makes it PERFECT for this application.
Finally here's the false floor/amp rack with the covers over the amps finished with paint and clear coat and the associated wiring. All it needs is put into the Traverse and hooked up!
There's this little update. I can't begin to pretend to have any clue when I'll be able to get it put in and that update posted up, lol.
Thread Starter
|
Senior Member
Joined: Oct 2010
Posts: 931
From: Monroe City, IN
I have an update!!
The false floor/amp rack is installed, hooked up, and the Bravox set has REALLY come to life now! That little Zapco ST-4D is a powerhouse for it's size and the Bravox CS603CS components are digging everything it's throwing at them bridged. The midbass impact went from definitely feeling it to almost feeling a little violent. It's a bit freaky to hear and feel the midbass like that and then take a close look at everything and it doesn't even look like it's working hard to do it. It's making me SUPER excited to get the SLS 8's shoehorned into the Jimmy!
Here's some pictures of it completed.
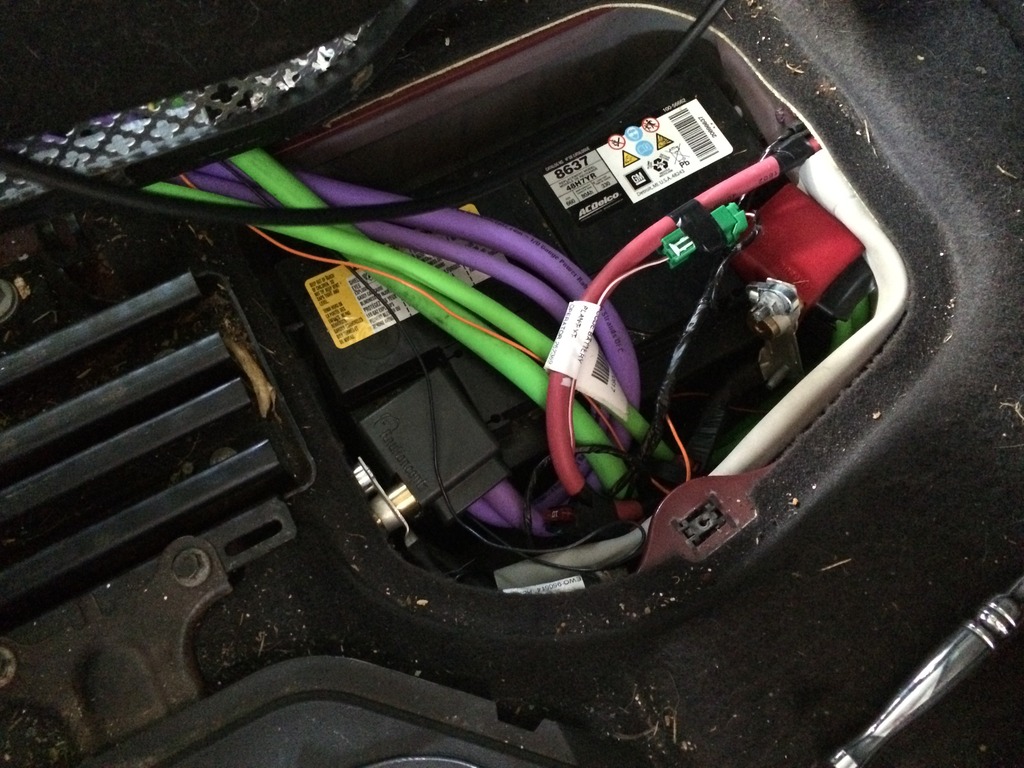
Here's the wiring connected at the battery. I ordered and used the new battery terminals that Knukonceptz has available. I wasn't horribly impressed with the first ones they had, which I used in the Jimmy. These are fantastic and tighten up on the terminals perfectly which was the issue I had with the other ones. These have three set screw connections, 1/0, 4 AWG and 8AWG respectively and a bolt on the side which can be used for ring terminals or, as in the case with my setup, with the available top post adapters that I used for the factory wires to connect to. All said and done it's a super solid setup and should serve me well for a long time.
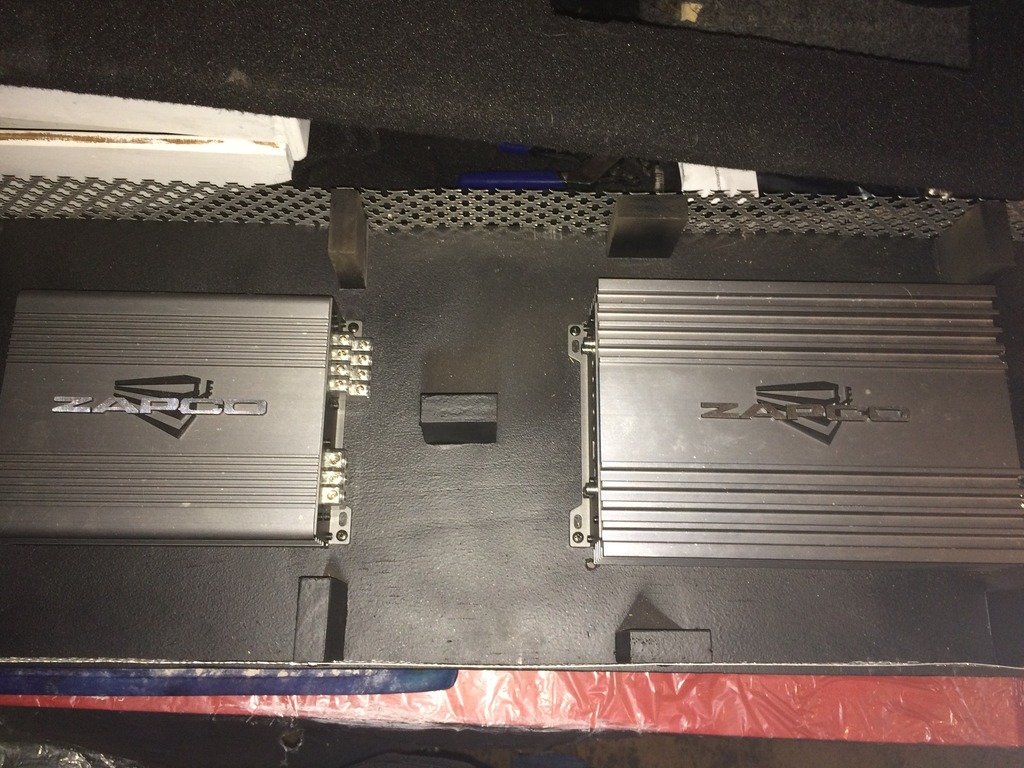
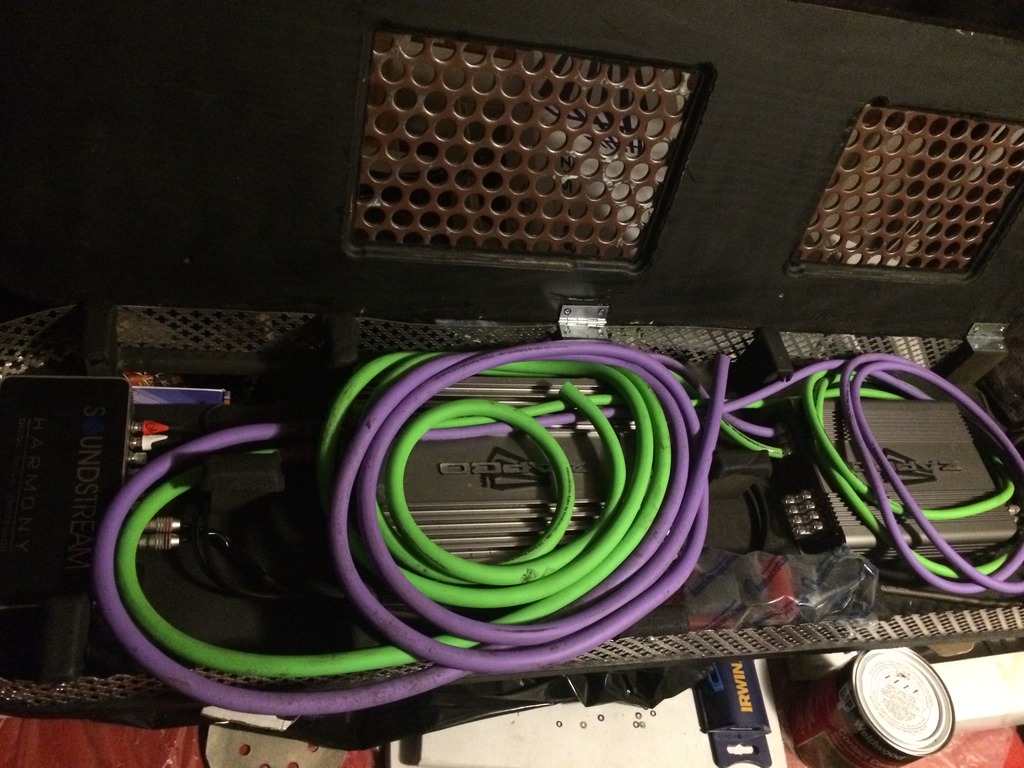
Here's the final wiring pictures of the amps in the amp rack. With everything connected there's not as much room as I had hoped for between everything but it should still all be far enough apart to prevent any issues. I can't wait to get the enclosure built for the DCON's so I can hear that Zapco Z-1KD do work. Being so close to the battery with the 1/0 wiring it shouldn't want for power at any time.


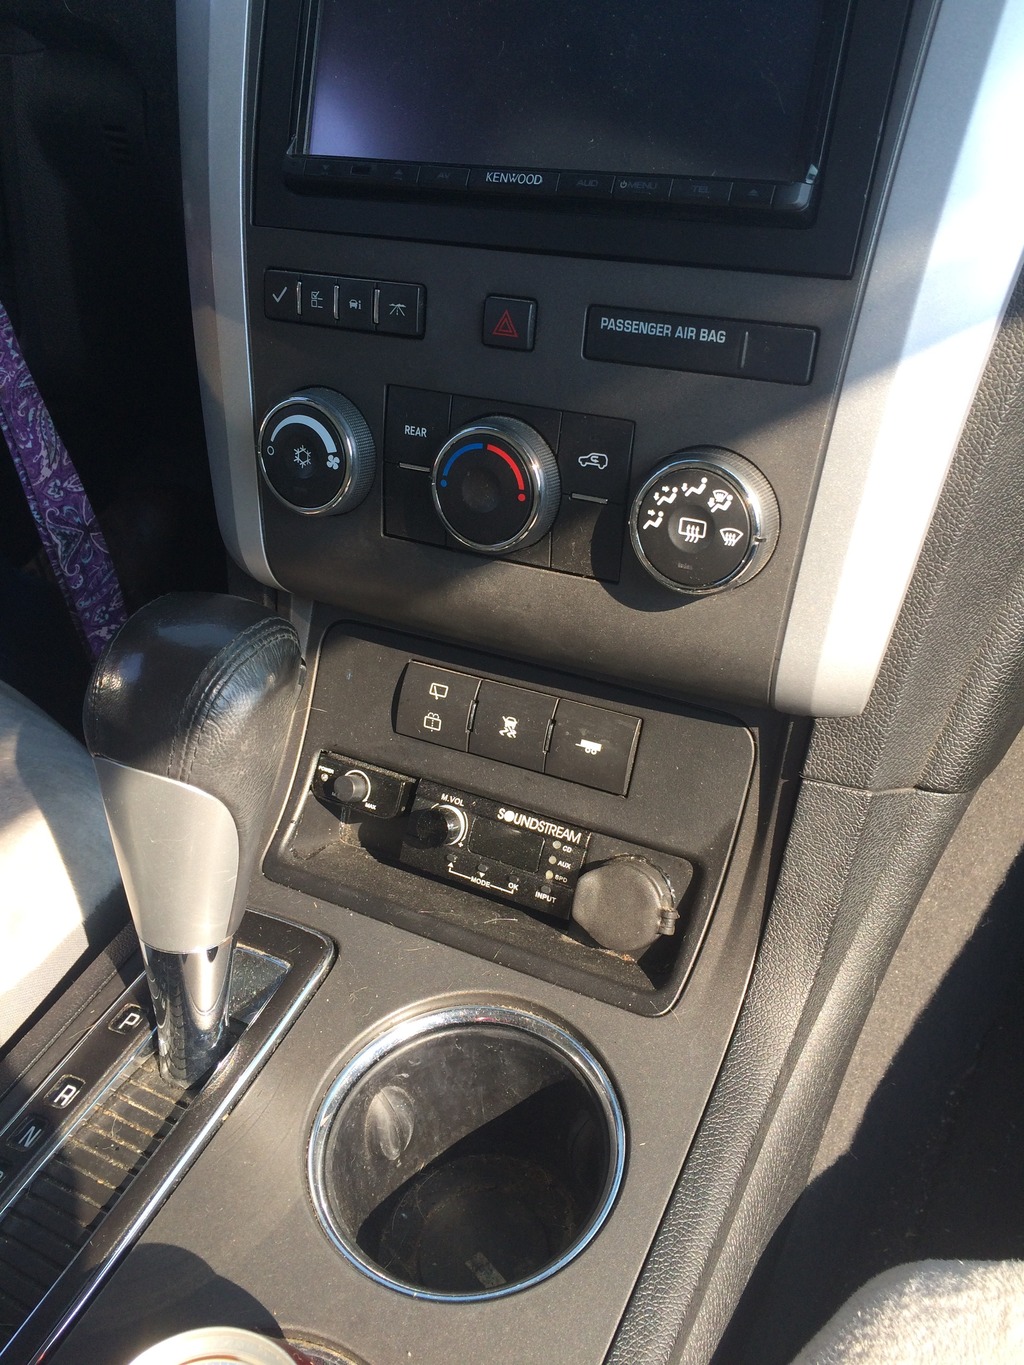
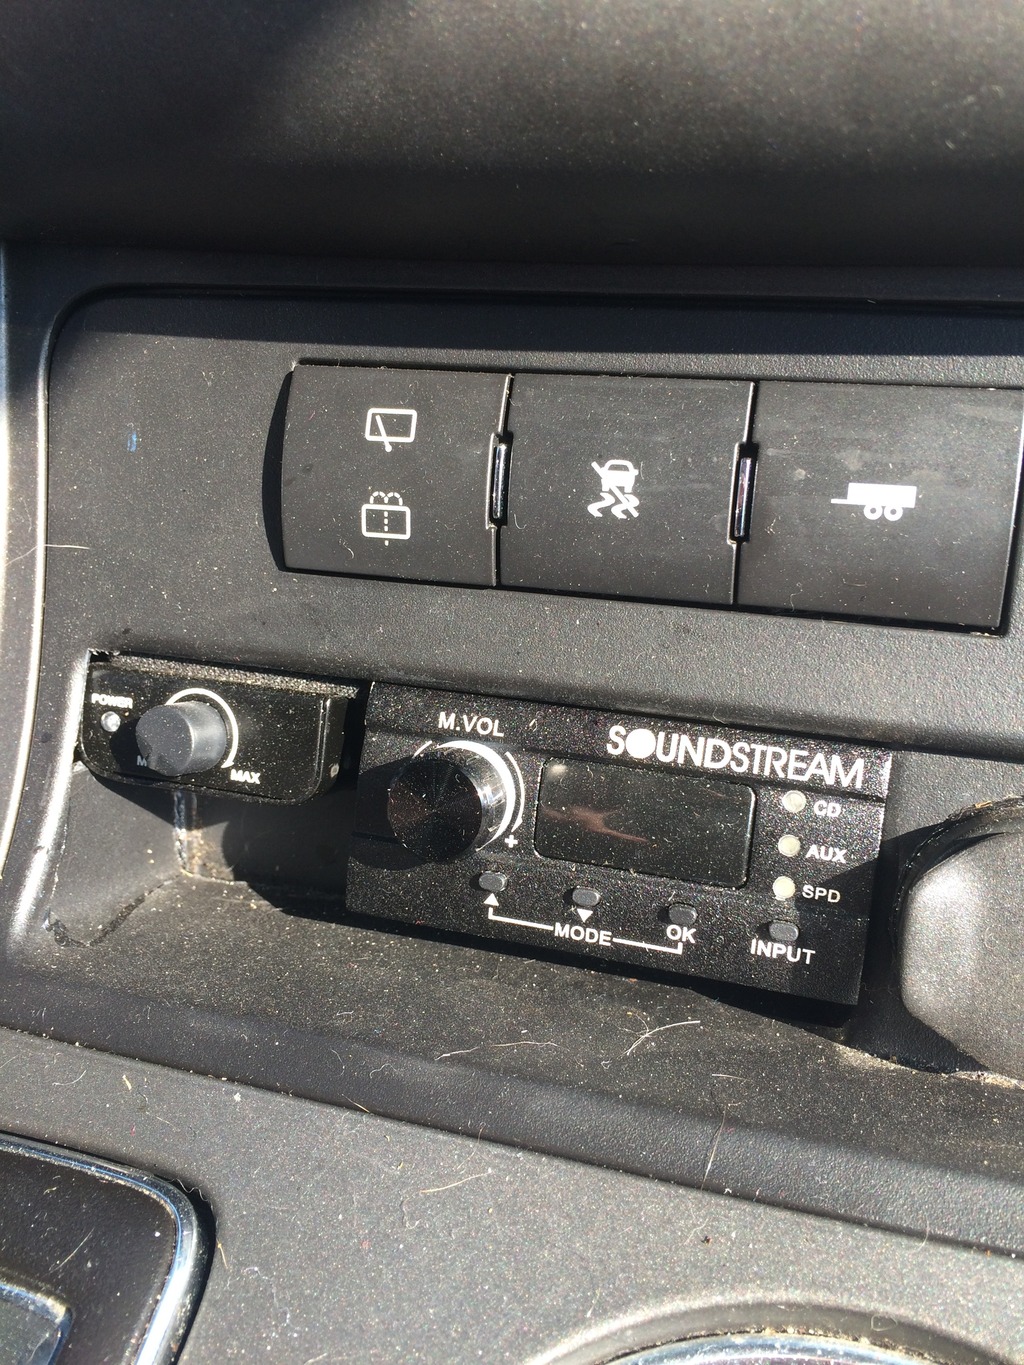
Here's another shot of the remote **** for the Zapco and the remote controller for the Soundstream Harmony. I'm going to have to put a little finger nail polish or something on that LED for the Zapco **** but otherwise they're lit up and showing that things are ready to rock!

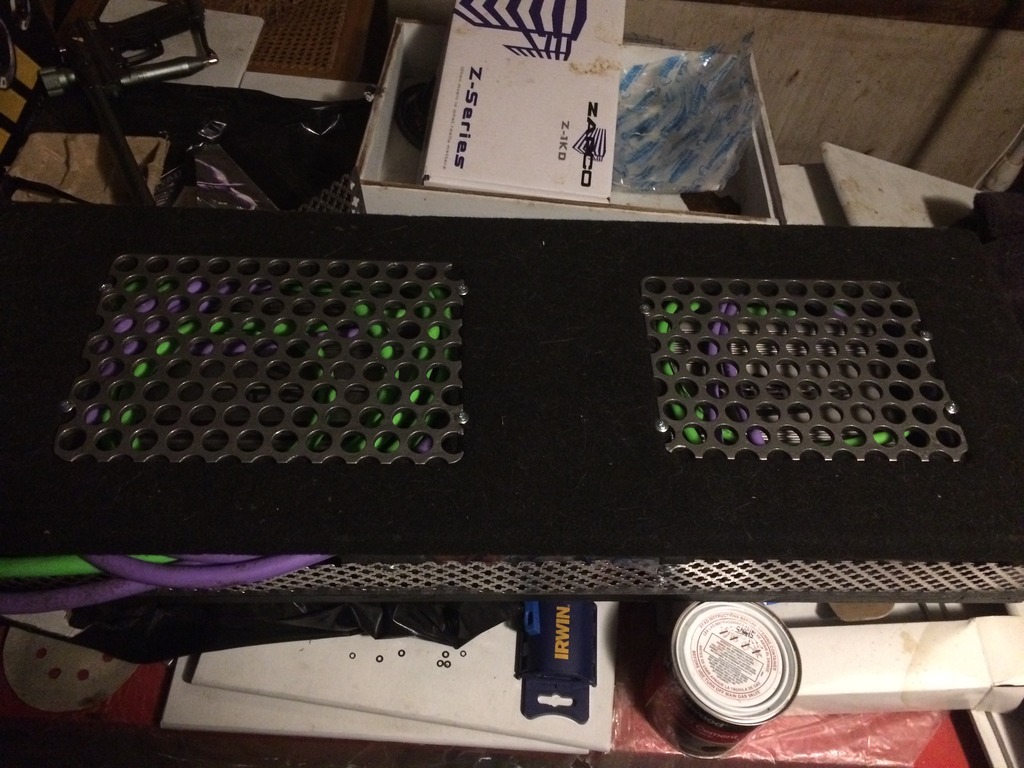
Lastly here's a few pictures of the amp rack with the lid shut and it slid fully into position after setting the gains on the Harmony and the ST-4D. Because it's bridged I played with everything and got one side as close to just right as I could setting it by ear then used a 400hz tone and my DMM to match the voltage output of the 3/4 bridged channels to the 1/2 bridged channels.

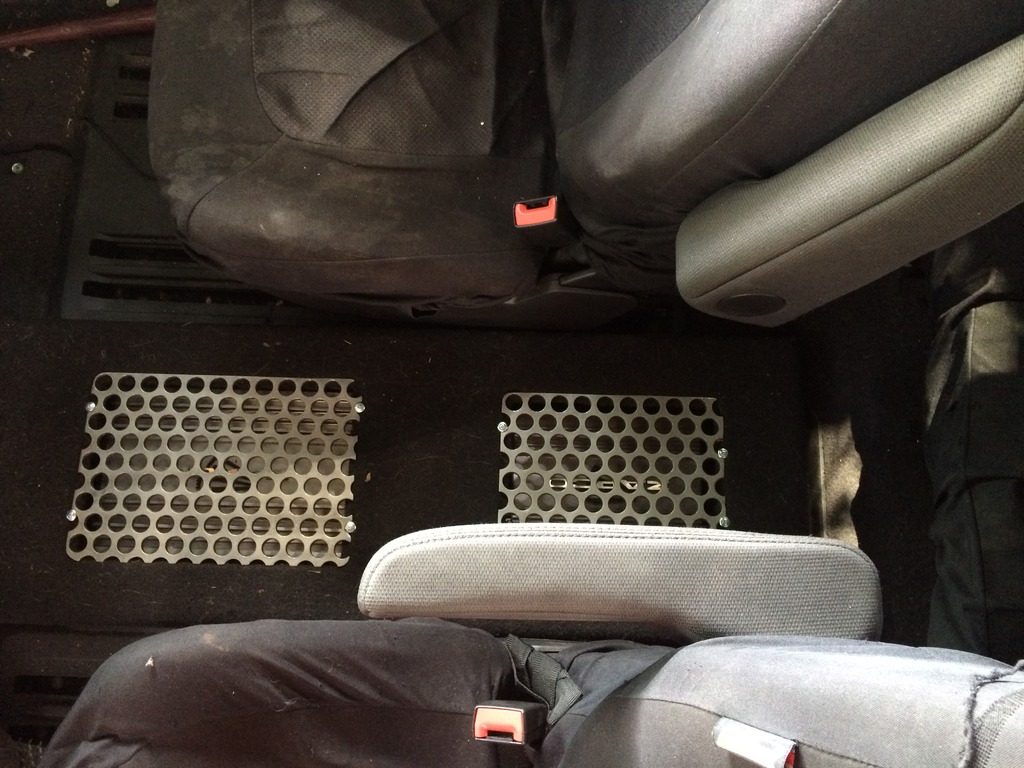

Well, that's it for now. I spent some time tuning the HPF, time alignment and EQ's for the speakers. I have plenty more tuning to do but the wife was too excited to get to go play with it for a bit to do any more today, lol. Time to start on a final design for the subwoofer enclosure and get started building that while looking for time to complete the fiberglass work on the front doors.
The false floor/amp rack is installed, hooked up, and the Bravox set has REALLY come to life now! That little Zapco ST-4D is a powerhouse for it's size and the Bravox CS603CS components are digging everything it's throwing at them bridged. The midbass impact went from definitely feeling it to almost feeling a little violent. It's a bit freaky to hear and feel the midbass like that and then take a close look at everything and it doesn't even look like it's working hard to do it. It's making me SUPER excited to get the SLS 8's shoehorned into the Jimmy!
Here's some pictures of it completed.
Here's the wiring connected at the battery. I ordered and used the new battery terminals that Knukonceptz has available. I wasn't horribly impressed with the first ones they had, which I used in the Jimmy. These are fantastic and tighten up on the terminals perfectly which was the issue I had with the other ones. These have three set screw connections, 1/0, 4 AWG and 8AWG respectively and a bolt on the side which can be used for ring terminals or, as in the case with my setup, with the available top post adapters that I used for the factory wires to connect to. All said and done it's a super solid setup and should serve me well for a long time.
Here's the final wiring pictures of the amps in the amp rack. With everything connected there's not as much room as I had hoped for between everything but it should still all be far enough apart to prevent any issues. I can't wait to get the enclosure built for the DCON's so I can hear that Zapco Z-1KD do work. Being so close to the battery with the 1/0 wiring it shouldn't want for power at any time.
Here's another shot of the remote **** for the Zapco and the remote controller for the Soundstream Harmony. I'm going to have to put a little finger nail polish or something on that LED for the Zapco **** but otherwise they're lit up and showing that things are ready to rock!
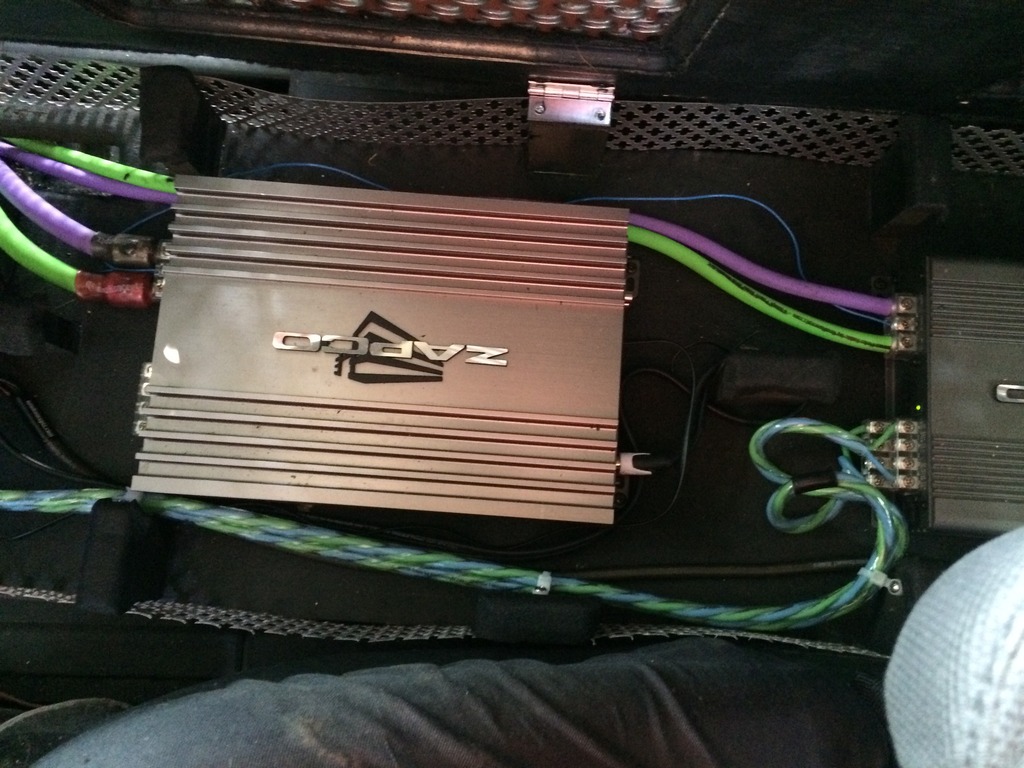
Lastly here's a few pictures of the amp rack with the lid shut and it slid fully into position after setting the gains on the Harmony and the ST-4D. Because it's bridged I played with everything and got one side as close to just right as I could setting it by ear then used a 400hz tone and my DMM to match the voltage output of the 3/4 bridged channels to the 1/2 bridged channels.
Well, that's it for now. I spent some time tuning the HPF, time alignment and EQ's for the speakers. I have plenty more tuning to do but the wife was too excited to get to go play with it for a bit to do any more today, lol. Time to start on a final design for the subwoofer enclosure and get started building that while looking for time to complete the fiberglass work on the front doors.

Thread
Thread Starter
Forum
Replies
Last Post