When you click on links to various merchants on this site and make a purchase, this can result in this site earning a commission. Affiliate programs and affiliations include, but are not limited to, the eBay Partner Network.
Now I want the cans where my gas tank is! Problem is I need to find another place for my gas tank. I did weld up some tabs on the spare tire carrier so I mount a jerry can on there, though.
Been slow here with my upgrades. Too many personal distractions to be able to get to the truck.
However, before the snow came, I wanted to do one last inspection of the truck to know if I should do any repairs now before the snow came and I would be down to only one vehicle, my Blazer.
The main symptom was apparent extra play in the steering wheel. So I wanted to make sure the play was not due to any failing components in the linkages or hubs. Well a check under the front end showed me that all the linkages were fine, there likely was some play in the steering gear, but not surprisingly my idler harm had vertical play in it. Grrr.
I've been meaning to do the 1-ton upgrade forever. I even tried to get it done last year. However, back then I found that the new idler arm to centerlink cone bolt used a nylock nut which would rotate the cone bolt when I tried to tighten it. (I've since learned of special nuts that act as seating tools for these fittings.*) Also, I'm much more a fan of the cotter-pin way of doing things. I also found that the 1-ton adapter bracket would not fit. Double Grrr.
But back to the current idler arm; it is a Moog one, supposedly better than the OEM types, that I installed about 27k miles and 6 years ago. I guess this shows that the 1-Ton idler arm upgrade is well worth doing. Now to find the time to do it.
* The tools for seating the cone studs for the front end connections are J-29194 and J-29193. I was able to pick up a J-29194 which I think will work on the pitman arm and perhaps the idler arm too for about $15 total. However, these normally go for over $50. So if any of you find yourself with the nylok type nuts, find a standard nut of the same size and pitch and use it for seating the cone stud. Then hopefully there will be enough friction to allow the nylok nut to go on.
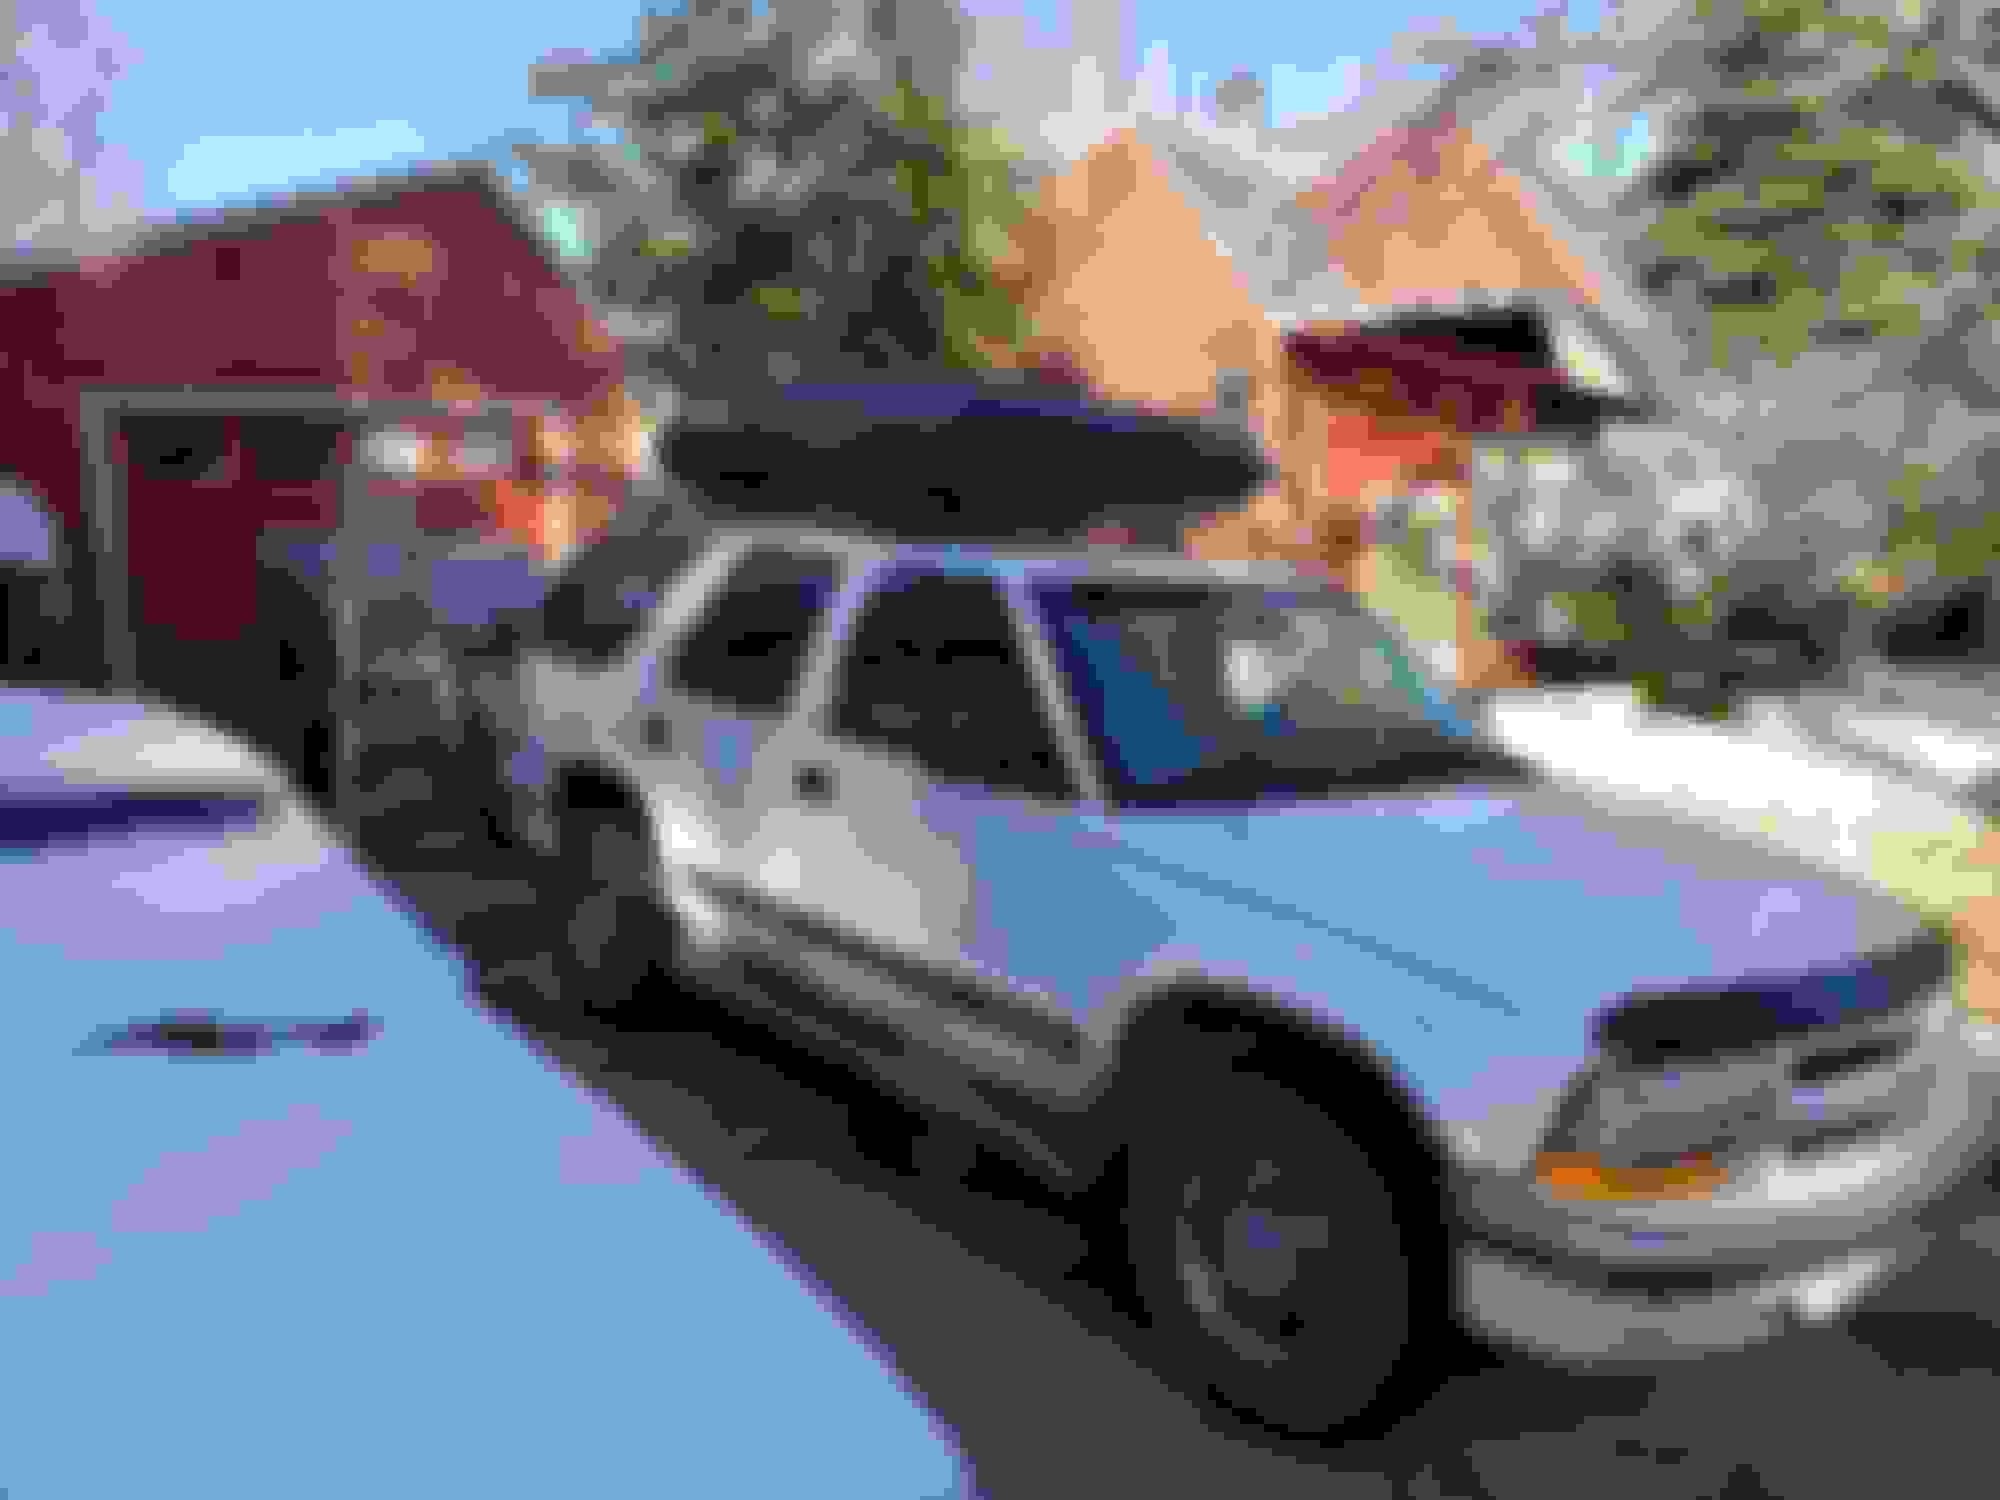
In a further attempt to delay having to get a bigger and newer truck, I picked up a used Yakima cargo box for the top of the Blazer so that I can haul around a bit more stuff. I paid $200 and I figured that is hell of a lot less than the $12k I'd need to get a decent preplacement (likely a 4Runner). The box and hardware I think are about 10 years old. I thought I could mount it directly to the cross bars but if I had there is no way I could have opened up the rear hatch. Instead I went ahead and mounted the Yakima cross bars. I gotta hand it to those engineers. The roof brackets fit perfectly and the adjustments were easy. They even hid the correct long handled hex wrench inside the cover for the roof brackets.
At the moment, I have my off-road recovery gear, the Bush Winch, ground anchors, bag of ropes, my new recovery tracks. This will free of lots of space in the back and I can have everything need to get un-stuck.
We'll have to see if I leave it on all year or if it becomes just a winter accessory. I'm sure the mileage will suffer a bit but I have my 82 Prelude for that.
Hi Christine,
I have the same exact Yakima cargo box and also have the issue with opening the rear glass. What cross bars did you get that allowed you to mount them more towards the front of the vehicle? I am looking to do the same as you. Thank you!
I have the same exact Yakima cargo box and also have the issue with opening the rear glass. What cross bars did you get that allowed you to mount them more towards the front of the vehicle? I am looking to do the same as you. Thank you!
Hi,
I had to do a bit of digging, but this is what I found.
The rack system is the Yakima Railgrab model. This is no longer available from Yakima, but I think you can find them on eBay and you can get some of the spare parts for these at Yakima.com. Just now hen I first looked up what rail system would our Blazers, it did not lead me to what I have and instead sent me to their TimberLine system. These look nice as they attach by going all around the rail although they are kind of expensive. (https://yakima.com/products/timberli...109.1705456518)
If you go to the support page and click on the Technical Lookup link, you can put in the information about your vehicle and then you can navigate to the railgrab system info.
So after digging a at Yakima.com and looking at my records, I confirmed that I have the Yakima Railgrab system with the round bar using the small sized claw to attach it to the factory rail. (See the attached instructions.) I then arranged the stock cross bars to help take any load of the Rocket box.
I've attached a picture and documents that I think could be useful.
It has been awhile since I've added to my build thread, but now I have time to report on the installation of a Red Head steering gear in my Blazer.
My original steering gear was getting loose with quite a bit of play in the steering wheel. It was quite noticeable when I was in the woods driving in the snow for hunting season. It felt like the truck had its own mind with regard to which way to go when the front tires got caught in a rut.
When looking at replacement gears, I first thought about trying to find a NOS one from GM but no luck. The next option was one from a place like Cardone. These were likely fine, but for the work it takes to install, I thought I'd pay a bit more for something better. This led me to Red Head (https://redheadsteeringgears.com/) and Blue Top (https://bluetopsteeringgears-com.3dcartstores.com/).
Both Red Head and Blue Top have gears for our Blazers and both rebuild their gears in a similar manner by machining out the grooves for the ball-bearings and then using the next size up in ball-bearings so to have minimal play in the gear. If I remember correctly I was told or read that Blue Top was started by someone who might have worked at Red Head.
I went with Red Head for a few reasons, mostly practical. Both sounded like they provided a good product at similar prices. What tipped the balance for me to Red Head was that I was able to pick up the gear (and drop off the core) personally as they have locations that I happened to be not too far out of my way (Auburn WA and Post Falls ID). Also, Red Head allows 60 days to get the core back to them instead of the 30 days by Blue Top. The total cost of the Red Head gear with sales tax was about $350.
While I was at it, I also replaced the power steering hoses.
Since the installation, I've put on about 700 miles on the gear that included a round-trip across the widest part of Washington state. It worked great. The steering is still not as crisp as that in my 82 Prelude or even my 68 Mustang. I attribute that to the large tires and the steering damper I installed.
Below is an outline of the basic steps, tools used, and hints and tricks I'd pass on to anyone doing a similar replacement. I'll attach pdfs of the service manual pages I used, but the overall steps are pretty straight forward.
The basic steps for the removal are the following:
Disconnect the pitman arm from the centerlink
Disconnect the hoses to the power steering gear
Loosen the three mounting bolts holding the steering gear to the frame rail
Remove the steering gear by rotating it and pulling forward. To facilitate its removal I removed the oil filter and the oil lines to the remote oil filter bracket.
Installation is the reverse of removal with these few caveats:
You will need a new seal for the remote oil cooler lines
Now is a good time to do an oil change and lube the rest of the suspension parts.
Getting the mounting bolt on the pitman arm though the hole on the centerlink is a pain. Also be sure that the surfaces of each are clean.
You should also clean the threads of the mounting bolts.
Post Installation:
Because the power steering hoses have been removed, the system must have the air removed. I was able to make an adapter so that I could put a vacuum on the power steering pump and remove air trapped in the system. I then followed the instructions for bleeding the system. (see attached)
Parts Used:
Steering gear: Read-Head #18510, three-turn, three mounting holes
O-rings for steering gear if new hoses not installed (came with steering gear)
Captured pair of O-rings/seal for remote oil cooler lines to remote oil filter assembly
Replacement PS hoses, including spare hose for bypass to PS fluid cooler (NAPA p/ns)
1/2� or 5/8� ID hose to use as rub-protection on hoses (scrap)
About one quart of power steering fluid was needed to top off the system when done
Special tools needed/used:
Torque wrench that is capable of 185 ft-lbs for the pitman arm to steering gear nut. I got a loaner from local auto parts store.
16mm = 5/8 flare nut crow foot with 3/8� drive breaker-bar for power steering pump pressure hose to power steering pump outlet fitting on the back of the power steering pump. Best would have been a flare-nut crow-foot with a longer lever arm so that ratchet wrench could have been attached directly to it. The ratchet wrench head was too wide to attached directly to the crow-foot, hence the use of the breaker bar. See pictures below
Pitman arm to centerlink puller
Pitman arm to steering gear puller
I purchased and used a J-42640 Steering Column Anti-Rotation Pin, but I don't think I needed it.
Large socket for pitman arm to steering gear nut: 33 mm (?)\
A Mity-Vac and modified sink drain stopper for bleeding the PS pump.
Set of stubby flare wrenches would have been useful, specifically 5/8� = 16 mm.
A couple pans for catching leaking fluid and lots of paper towels.
Suggestions:
I as able to remove pitman arm from center link with steering wheel locked in center position
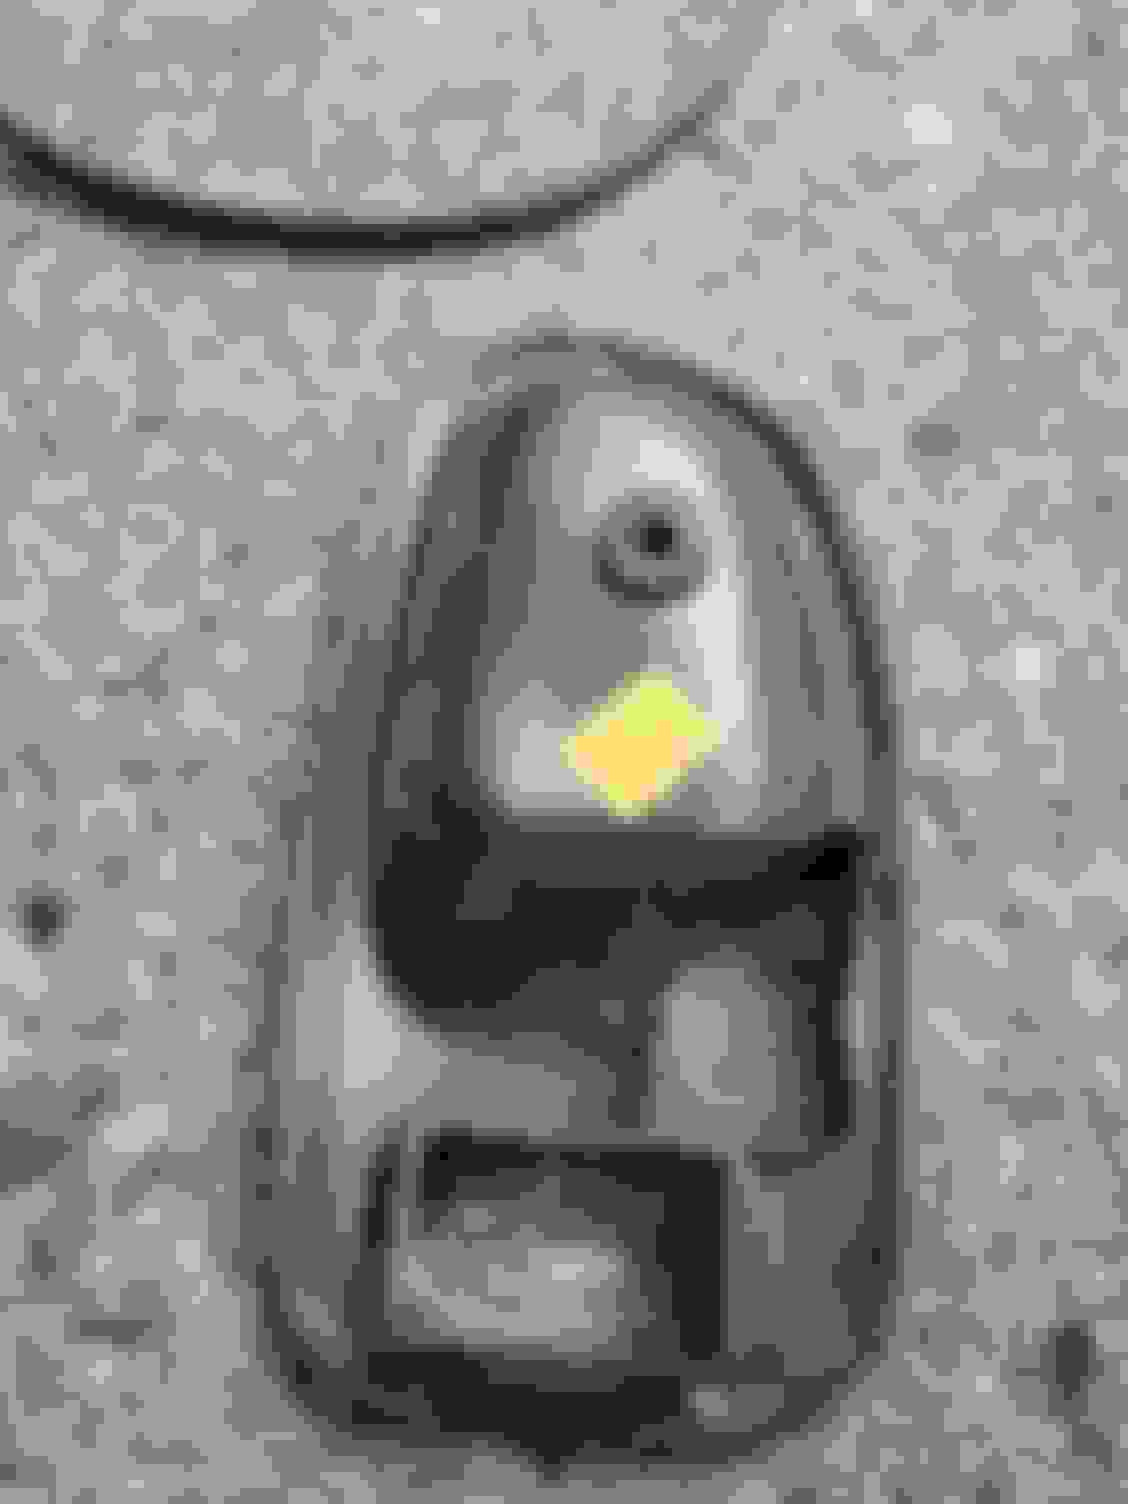
If lower intermediate shaft doesn�t slide up and back far enough, check if orange rubber collar on shaft overlaps lower lip of plastic cover over upper third of lower intermediate shaft. This had slipped on mine and didn't allow me to move it up and out of the way. (see picture below)
Trial fit power steering hoses to power steering pump to make sure threads are clean of paint. I had to chase the threads after the gear was installed.
If you have Flaming River u-joint for coupling to steering wheel shaft, drill the pilot hole for locking set screw before mounting steering gear. I was able to do this after installation but i it was harder to do.
If you have OEM style �rag-joint� coupler between steering gear and lower intermediate shaft, be very careful of alignment of splines as getting off by a spline or two would be easy and steering gear and steering wheel will not be centered. This is a good time to replace it.
Try not to let steering gear rotate while installing pitman arm. The required torque will cause it to rotate. Use a vice to hold the pitman arm if possible. The steering gear will be centered from Red-Head and you will want to keep that setting.
Removing oil filter and oil cooler hoses from remote oil filter will make getting gear in and out easier. (Good time to do oil change and suspension lubrication)
Use a power steering gear return hose that connects to pump that has the hose material pre-bent. There is not much room in the engine compartment so you'll want to use high-quality parts. I used NAPA but the return hose was basic straight hose clamped onto the solid part. The original had bends to it. The installation of this hose took some fiddling so that it was not kinked or twisted.
If using non-bent return hose that connects to pump, it very likely is long enough so that you can cut off enough to also have enough hose for power steering fluid cooler.
You will need 3 hose clamps for power steering hose (3/8� ID)
Follow advice in manual for bleeding PS pump
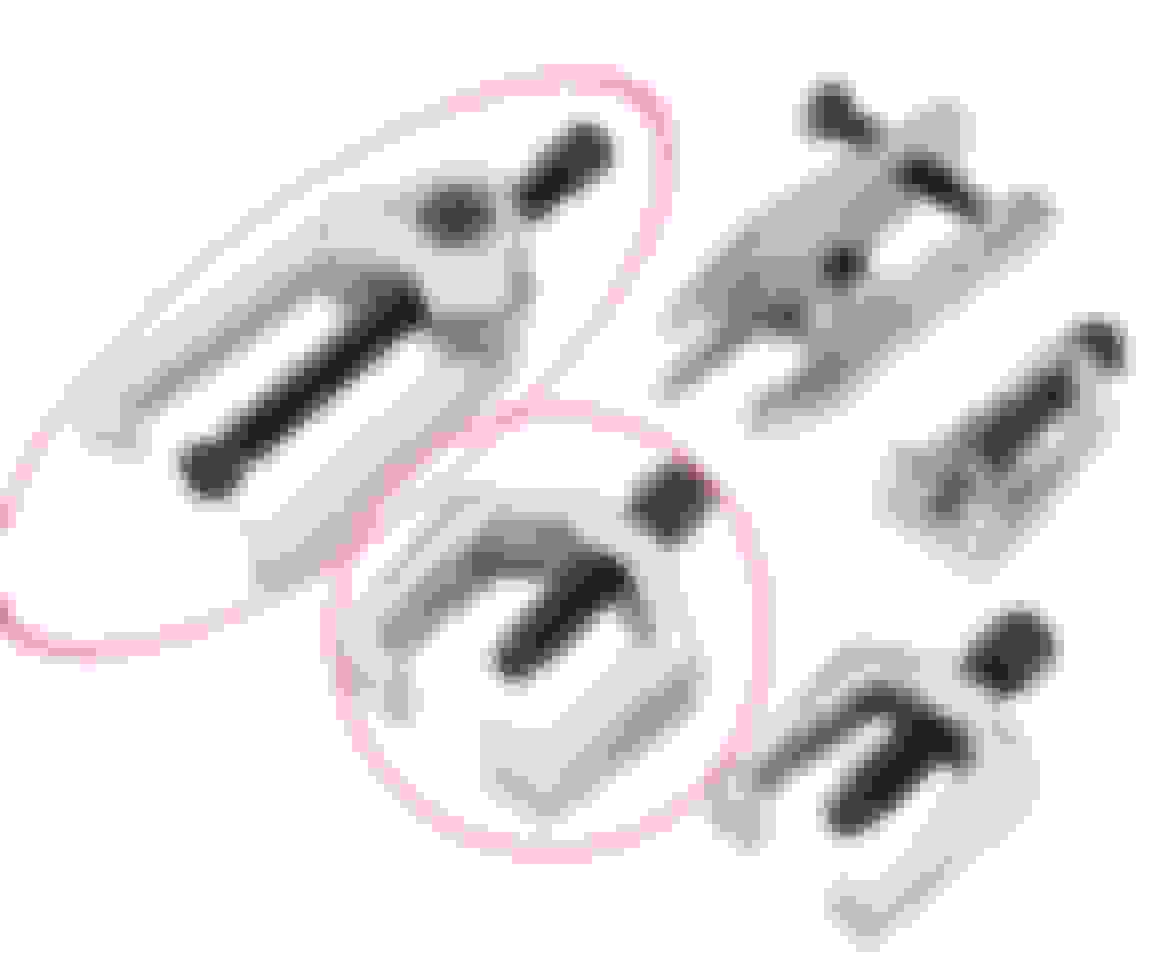
The tools used to disconnect the pitman arm from the centerlink (upper left) and to disconnect the pitman arm from the steering gear (center bottom)
The original alignment of the pitman arm to the old steering gear for future reference.
Picture from above of a 3/8 breaker bar and a 16mm crow-foot I needed to get the power steering hose detached from the back of the power steering pump.
Picture from below and from the front looking back of a 3/8 breaker bar and a 16mm crow-foot I needed to get the power steering hose detached from the back of the power steering pump.
The intermediate shaft showing the black plastic end piece and the orange rubber collar. On mine, the black piece had been pulled away and up the shaft from the steering gear and the lower lip no longer was inside the end of the rubber collar. This prevented me from sliding the intermediate shaft up and back. This picture shows the correct placement along the intermediate shaft.
The steering gear installed and about to attach the hoses. Be sure to chase or clean the threads on the steering gear to get rid of any accumulated paint. I had a hard time getting the fittings started and I was fearful of stripping the threads. The gear comes with a tag warning that the warrantee is voided if the adjustment bolt is changed. This is marked with a purple marker.
Evacuating the power steering reservoir with the Mity-Vac.
The modified tub stopper. The face facing the camera was placed over the top of the reservoir face down.
Cut-away steering gear at the Red Head steering office.
Display of steering gears. They also rebuild manual units.
Very nice write for something I really don't want to do ever. On the bright side, if I ever do need to to it I get to buy new tools. I don't have any of those open wrench things that fit on a breaker bar.
Very nice write for something I really don't want to do ever. On the bright side, if I ever do need to to it I get to buy new tools. I don't have any of those open wrench things that fit on a breaker bar.
Thanks!
It wasn't so bad after I figured out how to get the hose off the back of the pump and why the intermediate shaft was getting in the way.
I did the write-up to help others learn from my experience .
BTW, the job I want to avoid is replacing the fuel pump!
Fuel pump is a PITA but pretty straight forward. Just make sure whoever you lowering the tank with the jack knows how to do nice and easy. I'd like to say you can trust your dad, but when that tank lands on your chest full force with half a tank of fuel, it's not a lot of fun. Once I got my breath back, I was worried more about ripped fuel lines than broken ribs or my sternum.
Oh, and when that pump does go out, there is always at least a half of tank in it. Guaranteed!
I lost a speaker in my rear door and took the opportunity to do a bit of an upgrade to newer speakers.
What I learned was at least my 1999 4-door that certain 6.5" speakers can fit.
The critical issue is the diameter of the outer rim of the metal mounting frame for the speaker. It must be no more than 160 mm (6.3 in) diameter at the 12 o'clock position when mounted. If it extends beyond this point it will interfere with the molding for the armrest on the door panel. Furthermore, not all new speakers have mounting holes close to those on the original speaker. These are in a square pattern with a diameter of 138 mm (5.4 in).
I trial fit three speakers to see which would fit and which would sound better. For the electrical connections, I used alligator clips on test leads which allowed me to compare the original speaker that was still working to a new one.
These are the speakers I tried: Pioneer TS-601M, Sony XS-R16, Kenwood KFC-1666S. The first two were at Walmart and the last at Autozone. All were in stock locally.
Compared to the new ones, the original was quite mushy sounding at the low-end. The new ones all had more high-end thanks to tweeters that the original did not have.
The Pioneer ones did not fit at all with the metal frame too large to fit and none of the mounting holes close to lining up to the original ones. It could play notes as low as the original and sounded pretty good. Price: $55
The Sony ones fit perfectly with mounting holes exactly at the right place. These sounded much better than the original except for the low end not going as low as the original. Price: $50
The Kenwood ones fit with only a slight enlargement of the holes to extend them outward. My Dremel tool made short work of that. The low-end matched, as closely as I could tell, the original speaker but was much less mushy. Price: $33
A note about the speaker impedance:
When I took out the bad speaker I saw that it was marked as 9.5 ohms. Turns out using the new speakers which were all rated at 4 ohms sounded fine with the volume between the front and back about equal with the fader adjustment at its mid-point.
Now for pics: Measurement of the mounting hole spacing.
Thickness of rim of original speaker for determining the thickness of foam needed.
Total height measured to determine total depth of original speaker.
Measurement of cut-out necessary and that is in the speaker mount.
Diameter of the original speaker magnet.
The window switch showing the tab that has to be released to release the plug.
Looking down at the two screws in the door arm rest that must be removed. There is a small panel that hides these.
The inside door handle bezel. At the bottom is a catch that mates with a tab next to the lock mechanism.
The tab the catch on the door panel bezel engages.
Access to the inside of the door panel. This is a good time to clean it out.
The mounting frame for the speaker showing the speaker pig-tail.
The original pig tail is held in place by tab that is part of the OEM mounting frame.
The new pig-tail extension added to the original one. I used zip ties to gather up the extra wires so that they would not rattle. I also had to add one to where the pigtail emerged from the mounting frame as I accidently loosened it.
The inside of the door panel.
The new speaker mounted to the door.
The new speaker with the foam.
The foam I used to fill the gap between the speaker and the door panel.
Total height from mounting surface to top of foam.
The old still operating speaker showing how the top of the speaker is at the same height as the bottom of the door armrest.
A view showing how the top of the original speaker is at about the same level as the bottom of the door armrest.
The extended size of the speaker mounting hole. The unmodified one to the right and lower down is size it was before elongating.
A view showing how far out the hole enlargement needs to be.