
My small 96 Blazer build

Thread Starter
|
Super Moderator
Joined: Sep 2011
Posts: 4,459
From: Northern VA

So I have my efan installed finally! I still have a bit to do and I plan to change the shroud to a custom aluminum one just to make it look nice but for now its 100% functional!
I'll do a small write up but if you have questions feel free to ask and I will answer as best I can!
So to start this is what I used
Materials
1. Dual efan from 00' dodge intredpid
2. This controller
3. 1x36'" 1/16 thick aluminum v channel
4. Rivets
5. Various wire connectors and shrink tubing
6. 1 40amp relay
Tools
1. Jigsaw (any saw should work)
2. Rivet gun
3. Heat gun
4. Aluminum shears
5. Wire stripper/crimper
6. Bastard file
7. Measuring tape
8. Sharpie
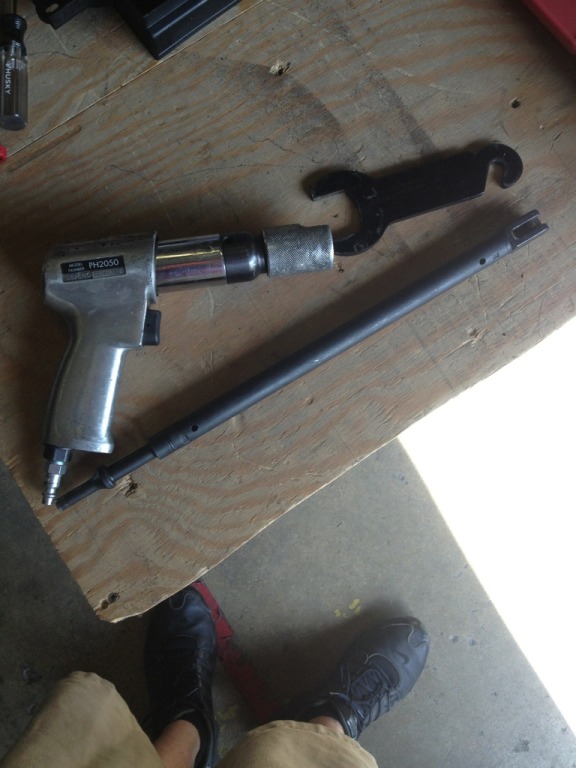
9. Air hammer and fan clutch removal tool
10. Socket set
To start you will need to remove the upper fan shroud followed by the fan clutch. I am lucky and have every tool known to man available to me by walking two doors down to a Porsche performance shop so I used this
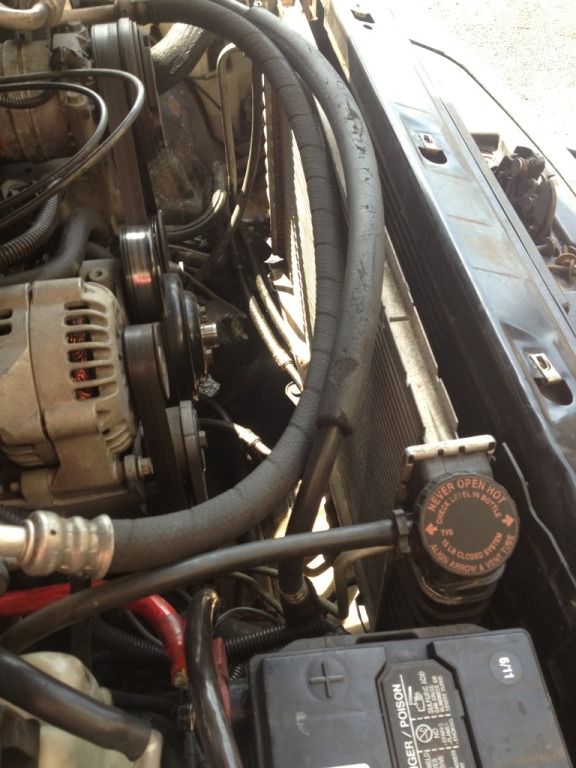
Then remove the lower shroud. Now you should have this laying on the ground.

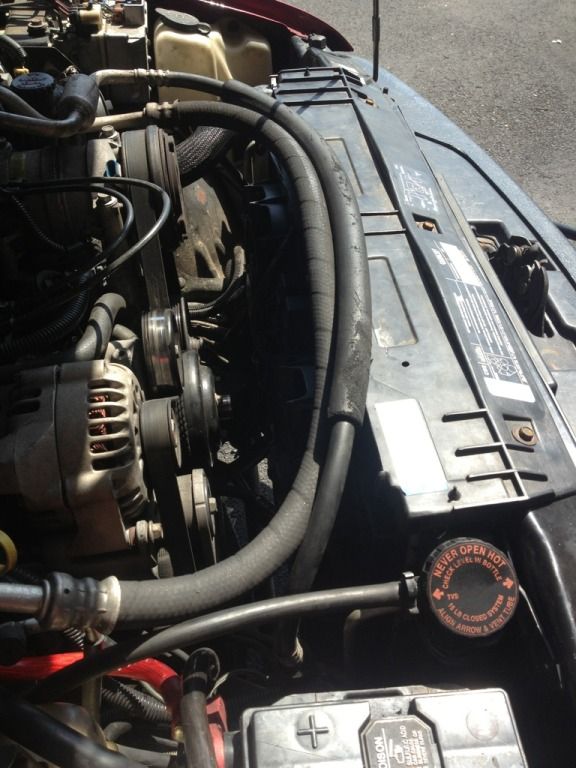
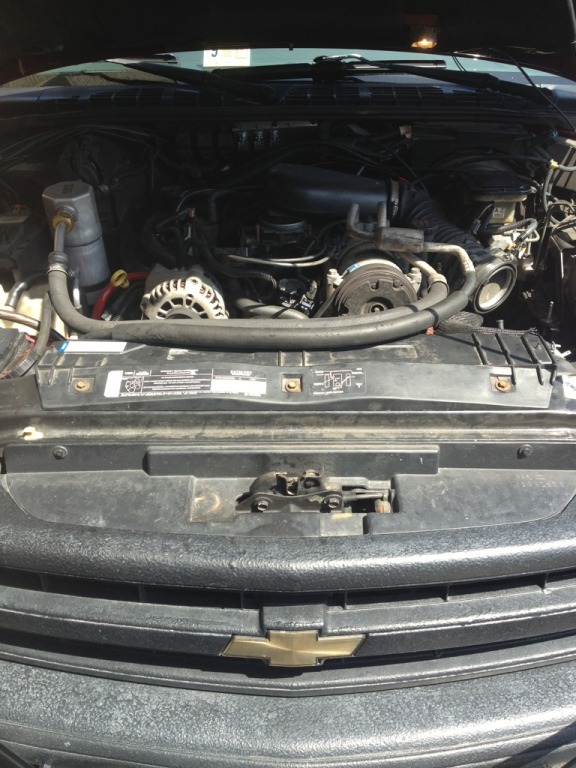
Your engine bay should look like this.
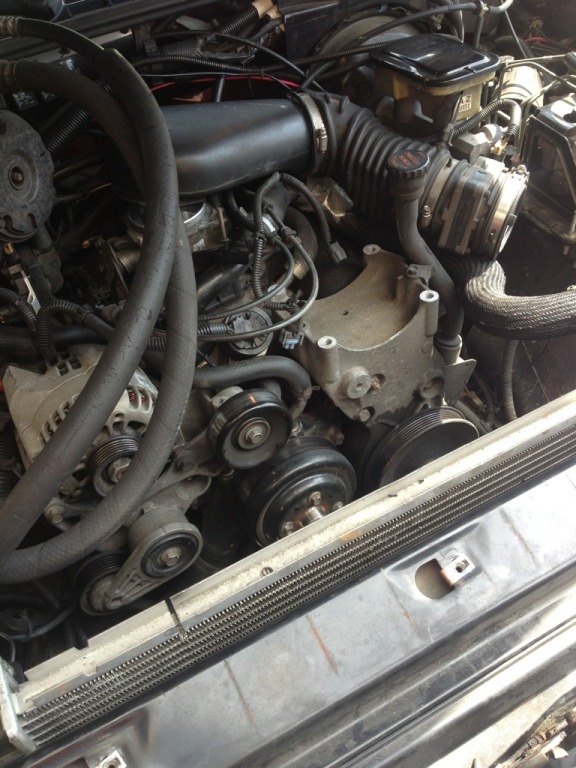
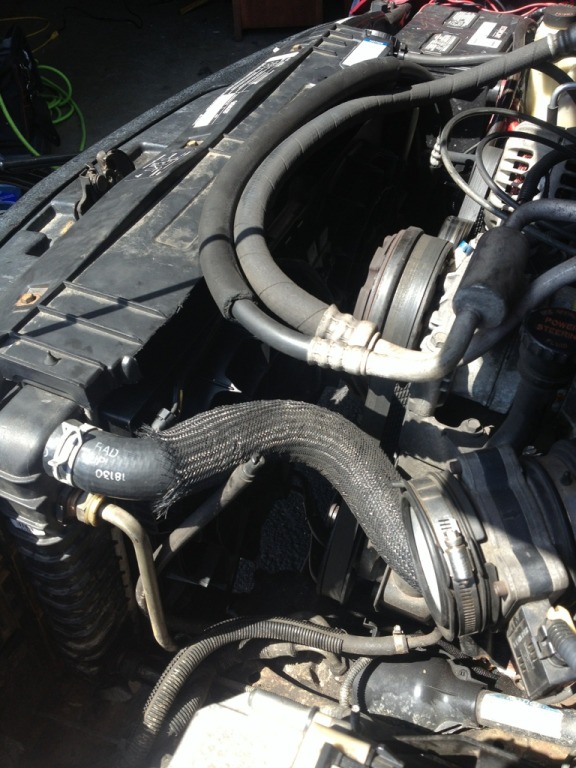
I moved the AC compressor out of the way so I didn't have to battle the hoses the entire time.
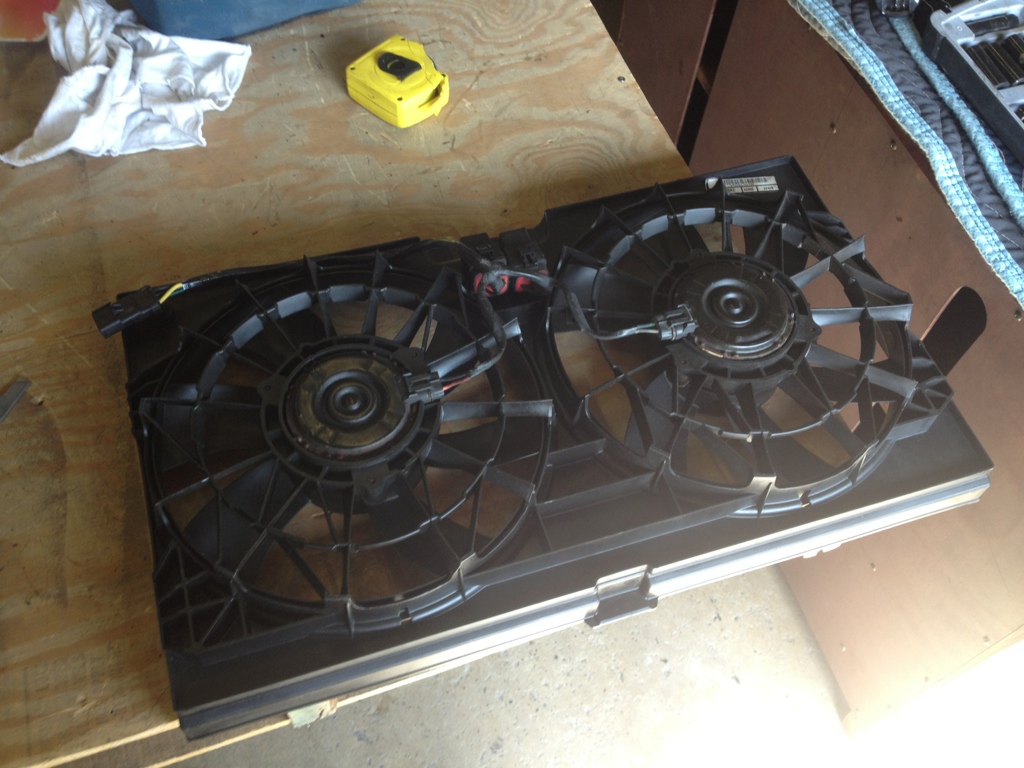
Now measure the radiator and transfer that to the fan. I had to cut all four ears off the fan to make it fit. I used a jigsaw for this but any saw should work.

Then I used the file to smooth out the cuts and take a little off each end just to make a better fit. I also remove the bottom tab from the fan. It should look like this at this point.

Now slide the fan in front of the radiator (it may be snug but it will go) and climb under the truck with your sharpie and mark the three mounting holes where you will be attaching the mounting tabs on the fan. I had to remove my skid plate to have access. Sorry no pic of this!
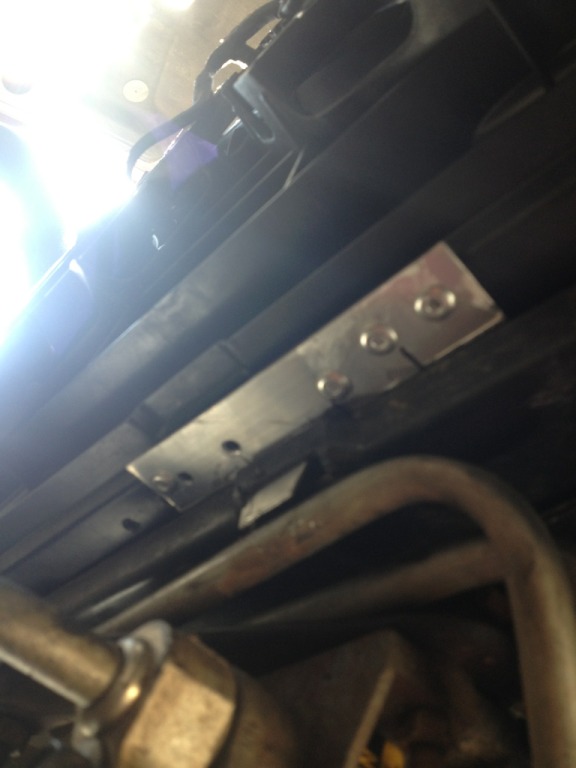
Now it is time to fab some tabs from the aluminum channel. I cut two 3" pcs and one 5" pcs for the center. Mark out a 1" tab on one side of the channel and use the shears to cut off the excess. For the 5" center pcs you will need to mark where the tab needs to be and cut accordingly (one side will be longer). Once all pcs are cut its time to drill some holes and rivet them to the fan in the locations you marked. It should look something like this when your finished.


Now its time to mount the fan. Just slide it in front of the rad like you did before and it should go right into place. I climbed under the truck again to make sure all the tabs went into the holes like this.

That's all for the bottom! To hold the fan to the rad I just bent up two pcs of the aluminum to make a clamp on the center tab of the fan and the lip of the rad. This is just a temp mount till I can get my new shroud completed. Then I also riveted two straps from the rad to the core support just to help hold the rad in place. I didn't take pics of this as it was temporary but if anyone wants pics let me know and I will get some.
I then cut the factory upper shroud to fit nicely on top of the rad and hide everything I just did lol! I looks like this for now. Not to bad I don't think but not permanent.
I didn't take pics of the rest but I can if anyone wants them.
Now its time for the wiring!! I already had a switch ran to the cab so I made life a bit easier for me but I'll give a quick rundown of the hookup.
If you pulled the factory connector with the fan (which you should have) this is way easy and the fan can be removed by simply unplugging the factory connector!
Step one find a ground and ground out both black wires on the fan along with the black wire from the controller. Then since I have my switch in the cab hooked to a "keyed" power source I spliced the yellow wire into the red power wire for the controller and ran that wire to the relay I already had mounted for the power to the controller. I did not use the AC override or the blue wire for the second fan so I cut them short and shrink wrapped the ends. Hook the orange wire from the controller to the green wire on the fan and that's it for the controller now you have low speed on both fans. For the high speed take the relay that you bought and wire it accordingly with the power going out to the yellow wire on the fans and the switch for the relay coming from the green wire on the AC compressor. Now you will have high speed on the fans as well when you turn the AC on.
Engine at set temp both fans turn on low.
AC turned on 1 fan turns on high.
Engine at set temp turn on AC both fans on high.
Any questions just ask!!
I'll do a small write up but if you have questions feel free to ask and I will answer as best I can!
So to start this is what I used
Materials
1. Dual efan from 00' dodge intredpid
2. This controller
3. 1x36'" 1/16 thick aluminum v channel
4. Rivets
5. Various wire connectors and shrink tubing
6. 1 40amp relay
Tools
1. Jigsaw (any saw should work)
2. Rivet gun
3. Heat gun
4. Aluminum shears
5. Wire stripper/crimper
6. Bastard file
7. Measuring tape
8. Sharpie
9. Air hammer and fan clutch removal tool
10. Socket set
To start you will need to remove the upper fan shroud followed by the fan clutch. I am lucky and have every tool known to man available to me by walking two doors down to a Porsche performance shop so I used this
Then remove the lower shroud. Now you should have this laying on the ground.
Your engine bay should look like this.
I moved the AC compressor out of the way so I didn't have to battle the hoses the entire time.
Now measure the radiator and transfer that to the fan. I had to cut all four ears off the fan to make it fit. I used a jigsaw for this but any saw should work.
Then I used the file to smooth out the cuts and take a little off each end just to make a better fit. I also remove the bottom tab from the fan. It should look like this at this point.
Now slide the fan in front of the radiator (it may be snug but it will go) and climb under the truck with your sharpie and mark the three mounting holes where you will be attaching the mounting tabs on the fan. I had to remove my skid plate to have access. Sorry no pic of this!
Now it is time to fab some tabs from the aluminum channel. I cut two 3" pcs and one 5" pcs for the center. Mark out a 1" tab on one side of the channel and use the shears to cut off the excess. For the 5" center pcs you will need to mark where the tab needs to be and cut accordingly (one side will be longer). Once all pcs are cut its time to drill some holes and rivet them to the fan in the locations you marked. It should look something like this when your finished.
Now its time to mount the fan. Just slide it in front of the rad like you did before and it should go right into place. I climbed under the truck again to make sure all the tabs went into the holes like this.
That's all for the bottom! To hold the fan to the rad I just bent up two pcs of the aluminum to make a clamp on the center tab of the fan and the lip of the rad. This is just a temp mount till I can get my new shroud completed. Then I also riveted two straps from the rad to the core support just to help hold the rad in place. I didn't take pics of this as it was temporary but if anyone wants pics let me know and I will get some.
I then cut the factory upper shroud to fit nicely on top of the rad and hide everything I just did lol! I looks like this for now. Not to bad I don't think but not permanent.
I didn't take pics of the rest but I can if anyone wants them.
Now its time for the wiring!! I already had a switch ran to the cab so I made life a bit easier for me but I'll give a quick rundown of the hookup.
If you pulled the factory connector with the fan (which you should have) this is way easy and the fan can be removed by simply unplugging the factory connector!
Step one find a ground and ground out both black wires on the fan along with the black wire from the controller. Then since I have my switch in the cab hooked to a "keyed" power source I spliced the yellow wire into the red power wire for the controller and ran that wire to the relay I already had mounted for the power to the controller. I did not use the AC override or the blue wire for the second fan so I cut them short and shrink wrapped the ends. Hook the orange wire from the controller to the green wire on the fan and that's it for the controller now you have low speed on both fans. For the high speed take the relay that you bought and wire it accordingly with the power going out to the yellow wire on the fans and the switch for the relay coming from the green wire on the AC compressor. Now you will have high speed on the fans as well when you turn the AC on.
Engine at set temp both fans turn on low.
AC turned on 1 fan turns on high.
Engine at set temp turn on AC both fans on high.
Any questions just ask!!
Last edited by rexmburns; Apr 10, 2013 at 10:32 AM.

nice write up rex looking great so far. id also like to do this mod but contimplating if its worth the mod or not. alot of ppl say the clutch fan works better and is always on. do u feel the fans cool it down more?do u feel some power gain and how much voltage does it take when its on?
BF Veteran
Joined: Jan 2008
Posts: 2,753
From: Southern, Alberta
Nicely done Rex. This is almost exactly what I've been planning to do next month. I've been researching and planning all winter. Spring is late this year and we're still dealing with below freezing temps here, so I have no motivation to work outside right now.
Thread Starter
|
Super Moderator
Joined: Sep 2011
Posts: 4,459
From: Northern VA
Gitch I think its worth it I have about $60 into it total and a day of work. Okiedoak was just here and we hooked up his scan tool and read the actual engine temps and just idling sitting still the truck would run a steady 199deg with the fans running on low. I shut the fans off and it jumped to 205 quick before I turned them back on and turned on the AC so the fans both came on high and it dropped to 197 in under a minute with the AC on high!! Oh and did I mention that was with the motor in direct sunlight and its 92 deg outside today!! I adjusted the fans with the scan tool so that they won't come on until 205 which is 10 deg higher than the tstat so they shouldn't have much of a need to run except during the hot summer days or in traffic. I have a decent volt drop to like 10 when they are on high and idling but I have been battling that forever! My volts drop when I put the windows down lol. AD244 is in the works!
El its defiantly worth it. If you have any questions feel free to ask whenever.
50 I haven't forgotten about you but I will take care of it tomorrow for you!
El its defiantly worth it. If you have any questions feel free to ask whenever.
50 I haven't forgotten about you but I will take care of it tomorrow for you!