Project: Broken Driveline begins
#11
 05-01-2015, 08:25 PM


I just traded the rims/tires and front seats/center console for a brand new strapon impact!!!

He drove the friggin truck to my house too! Okay back to the project.
Wildbill, thank you very much for the oil filter line pics. I did order a pioneer spin-on adapter with bolts also. I hate using two adapters but there isnt a bolt on 90* kit ive found yet. When i do ill get one and share the info.
Currently stripping down the 2nd gen with my new impact in the rain. Still working on pulling that cast diff. Not much left in my way besides rain.
I also scored a t50 torx and he warrantied out some of my gearwrench rachets. Kickass trade day for sure.
#12
05-01-2015, 08:27 PM
GOOD NEWS: Wife made my favorite: Home made meatloaf, mashed potatoes, and buttered brussel sprouts!

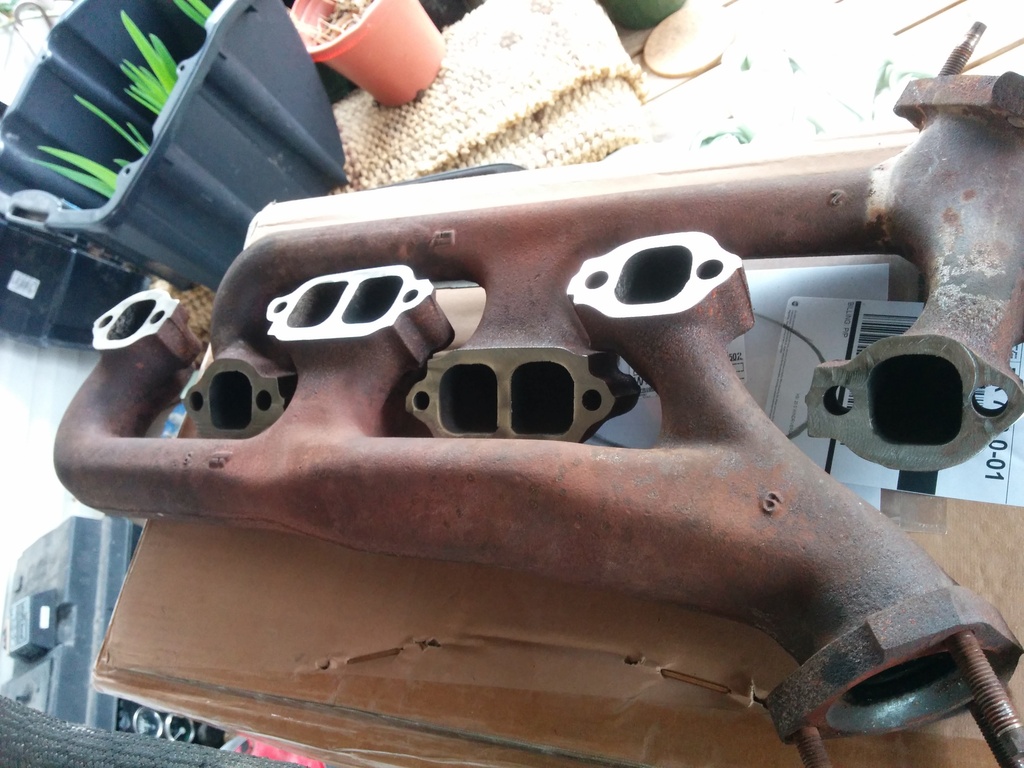
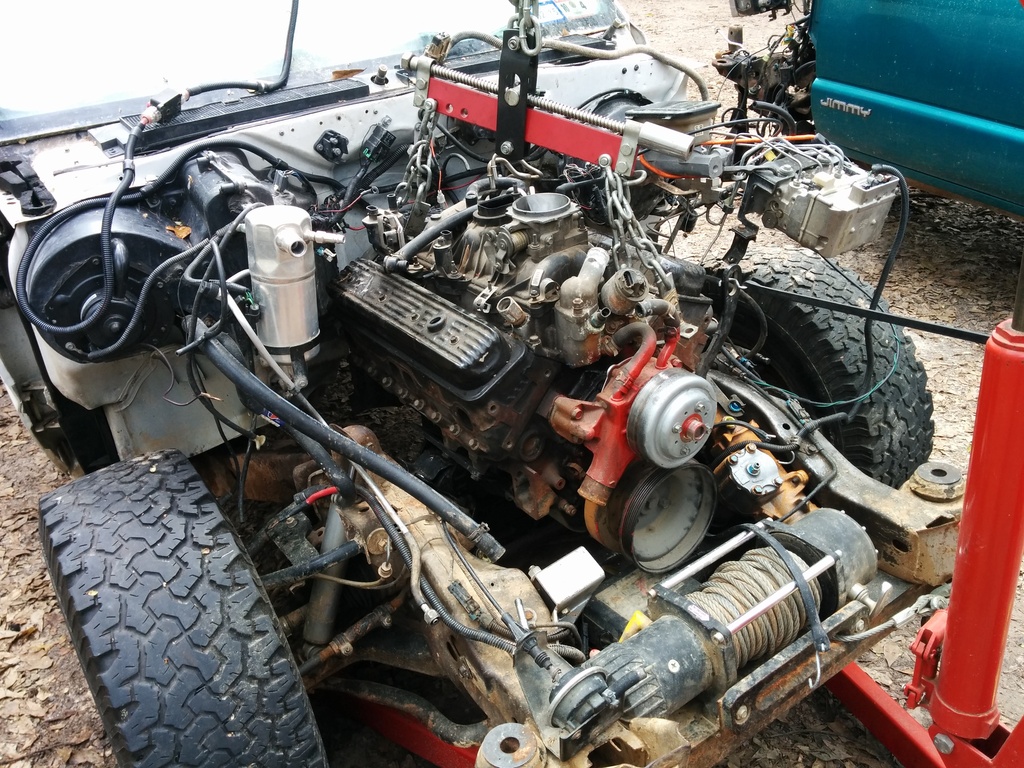
Now for the bad news. The oil cooler threaded adapter I ordered is wrong.I picked up the manifolds from the machine shop. Mocked them up. Drivers side hits the body where the egr portion is. The drivers side hits the steering shaft. The drivers side is huge. The passenger side might work. No amount of milling will make the DS fit on a 1st gen. Based on the body differences between my 1st gen 94 and my 2nd gen 96, I'm guessing the 2nd gen won't have an issue so hopefully I can sell them on the classifieds to someone doing the easiest v8 swap (4.3 96+ to 5.7 96+) ever.


My life would be a lot easier if I didn't love the boxy 1st gen's so much.
The stock oil pan will never clear my front diff with the rough country 2.5 inch lift. The lift only drops the diff down about 3/4 of an inch. It's just not 4 inches.
I'm using the 2wd adapter plates with 2.8 mounts, I don't want my engine jammed into the passenger side nor do I intend on touching my HVAC box or body. I'm focusing my mangling almost exclusively on the manifolds. I need to buy a proper o2 removal tool, my performance tool one is absolute garbage. All it does is spread out and slip over to the next set of splines.
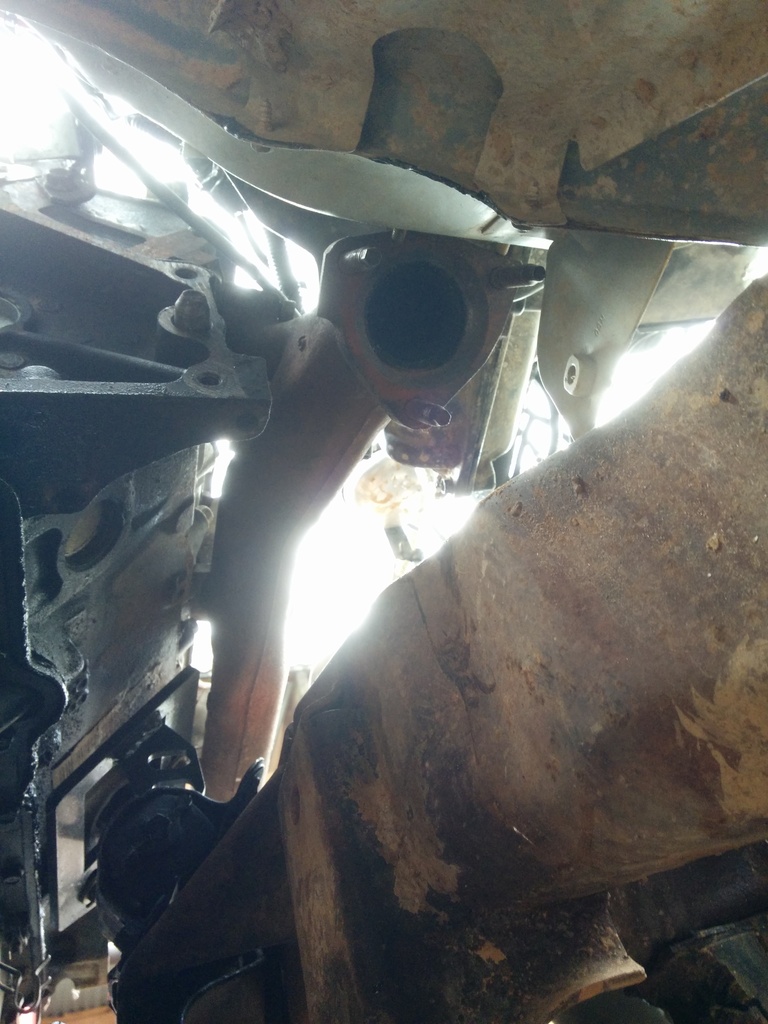
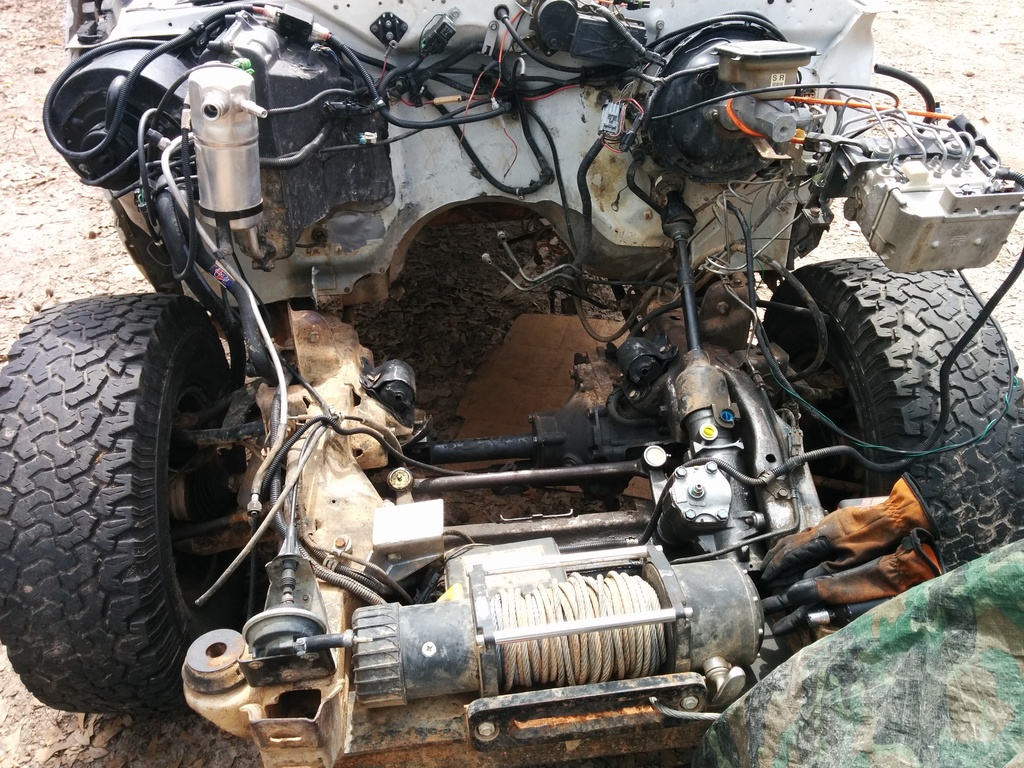
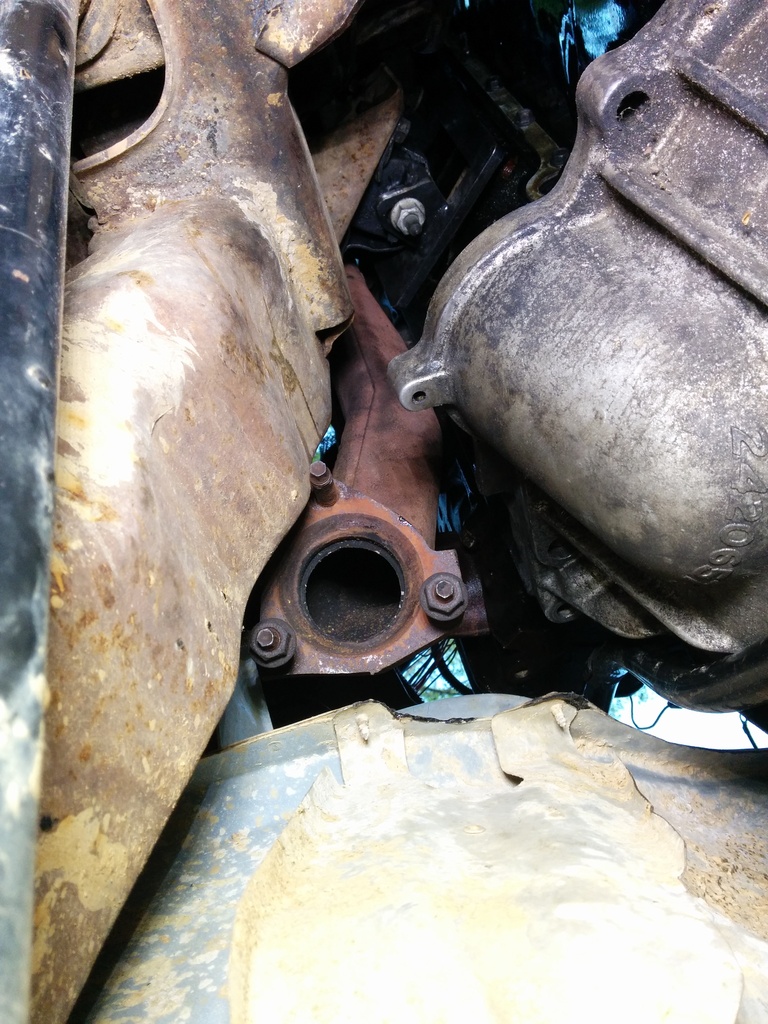
Pulled my broken front diff. Based on the loud explosion sound and no more 4x4 I fully expected a sheared side gear as this is a "common issue". Well I've got 270k abused miles and this is my first failure so I kind of wonder what the hell common failures are.


Now for the bad news. The oil cooler threaded adapter I ordered is wrong.I picked up the manifolds from the machine shop. Mocked them up. Drivers side hits the body where the egr portion is. The drivers side hits the steering shaft. The drivers side is huge. The passenger side might work. No amount of milling will make the DS fit on a 1st gen. Based on the body differences between my 1st gen 94 and my 2nd gen 96, I'm guessing the 2nd gen won't have an issue so hopefully I can sell them on the classifieds to someone doing the easiest v8 swap (4.3 96+ to 5.7 96+) ever.
My life would be a lot easier if I didn't love the boxy 1st gen's so much.
The stock oil pan will never clear my front diff with the rough country 2.5 inch lift. The lift only drops the diff down about 3/4 of an inch. It's just not 4 inches.
I'm using the 2wd adapter plates with 2.8 mounts, I don't want my engine jammed into the passenger side nor do I intend on touching my HVAC box or body. I'm focusing my mangling almost exclusively on the manifolds. I need to buy a proper o2 removal tool, my performance tool one is absolute garbage. All it does is spread out and slip over to the next set of splines.
Pulled my broken front diff. Based on the loud explosion sound and no more 4x4 I fully expected a sheared side gear as this is a "common issue". Well I've got 270k abused miles and this is my first failure so I kind of wonder what the hell common failures are.
#13
05-01-2015, 08:28 PM
I have no intention of converting to a floor shifter or a cable shifter like the 2nd gens. I purchased a LH camaro 305 tbi manifold. Will pursue the RH if it fits well.
The oil filter adapters I purchased will not work with my goals so that kind of sucked. You were right about that wildbill. I've emailed hamburger performance for their adapter P/N 3329 as it's basically designed just like the stock 4.3 adapter so I can go straight into the 4.3 hardlines. http://www.summitracing.com/parts/ham-3329
I hope to maintain the stock transmission location, so I suppose you would call the "neutral" engine position.
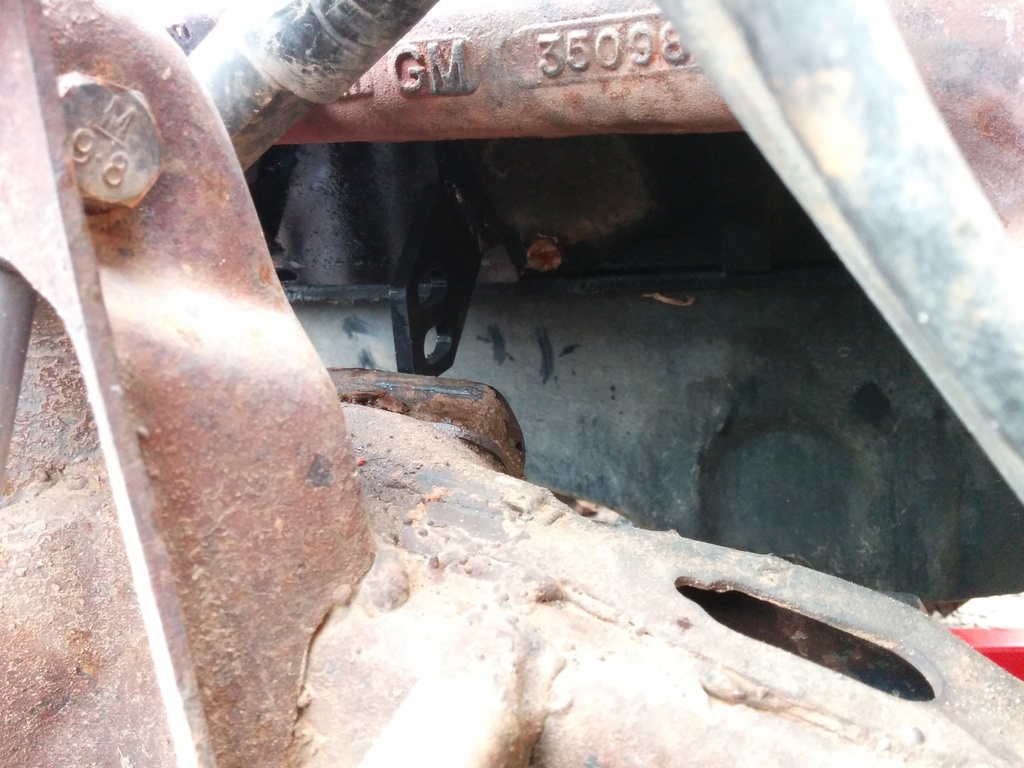
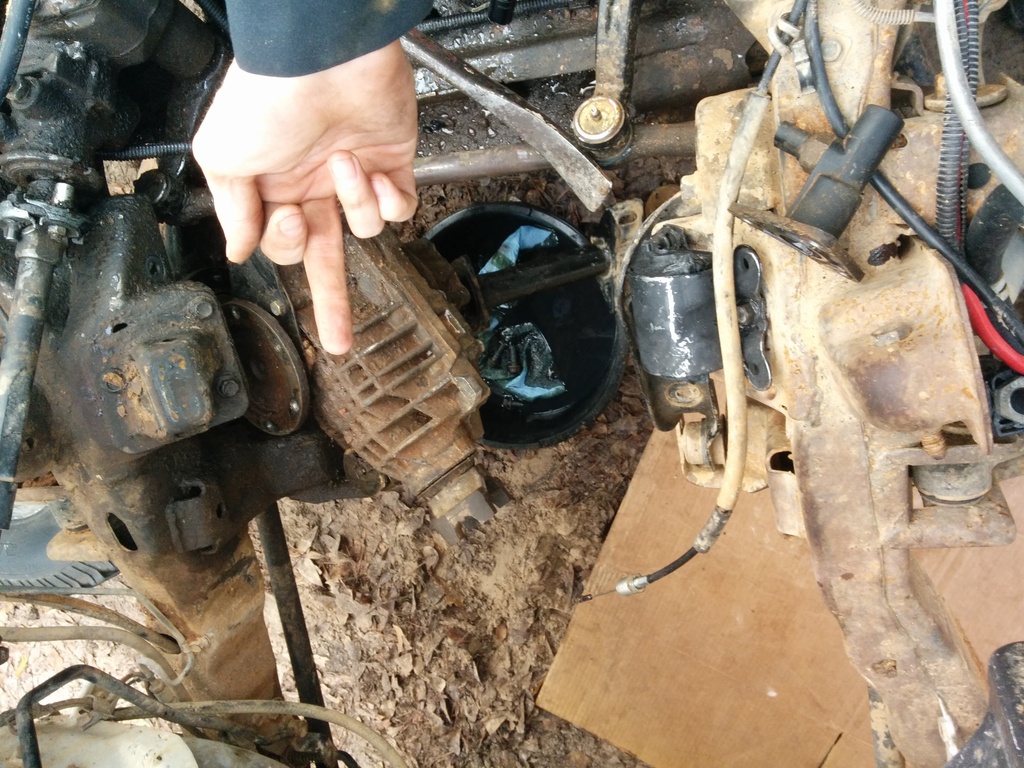
I pulled my cast iron front diff today, pulled the axle tube off and inspected the internals. Everything appears perfect. The splines show no damage/twisting and the engagement gear is in excellent shape. The fluid was a golden brown. Ooh and it has a DRAIN PLUG!!!
I went ahead and went through the aluminum 01 front diff I bought a while back, cleaned her up, resealed, and assembled everything. Gonna toss her on classifieds among a bunch of other parts. Looks like I'm a few hundred behind on the project.
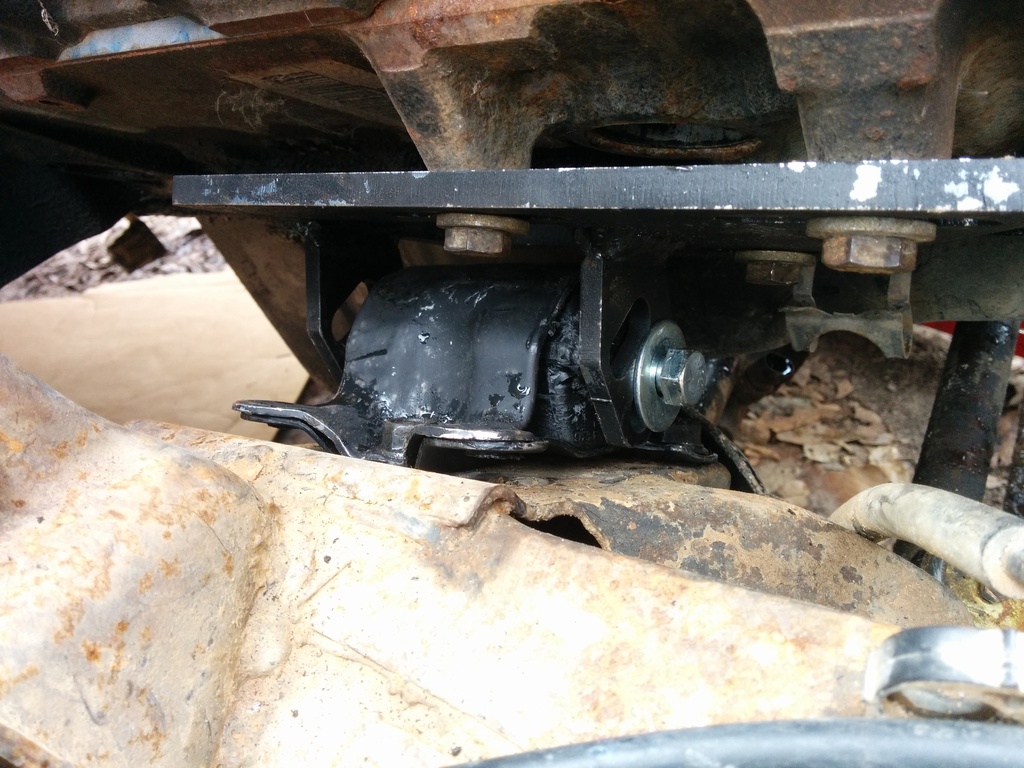
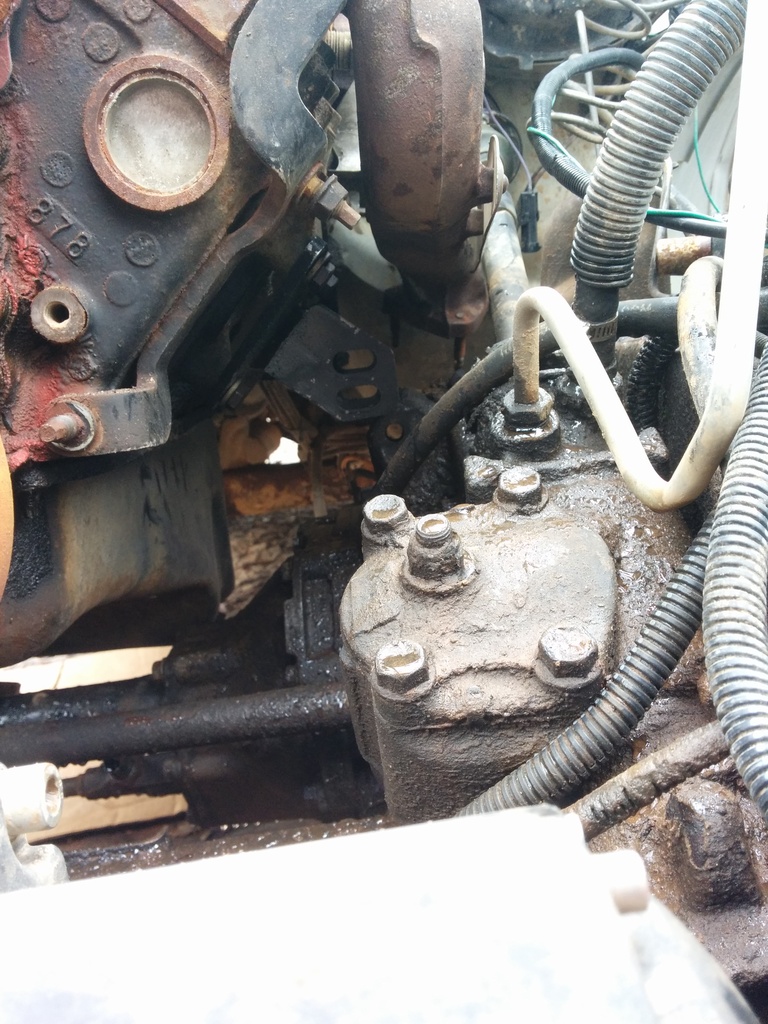
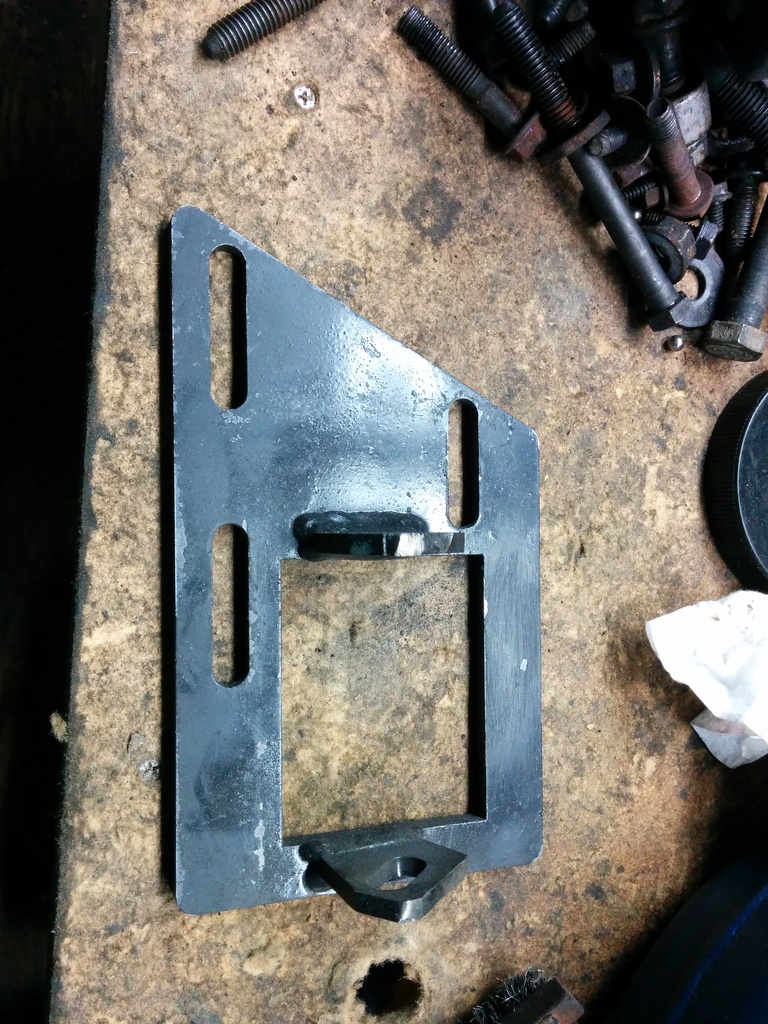
While I had my original diff removed I pulled the DS 4.3 mount and installed the 2.8 clam shells. The original bolts that hold the 4.3 mounts on are too large on the single bolt side of the 2.8 mounts so I used some slightly smaller diameter bolts I had on hand. I also can't figure out how the hell to remove the manual trans from the engine. I pulled every bell housing bolt and the trans is not moving anywhere. I left it on the jack overnight while I do research on the issue.
The tcase came out without issue, fluid's great. I'm going to use this tcase because it doesn't use the front prop shaft that requires greasing.
I haven't really done anything towards the swap. I'm just trying to generate some doll hairs to finance the next steps.
The oil filter adapters I purchased will not work with my goals so that kind of sucked. You were right about that wildbill. I've emailed hamburger performance for their adapter P/N 3329 as it's basically designed just like the stock 4.3 adapter so I can go straight into the 4.3 hardlines. http://www.summitracing.com/parts/ham-3329
I hope to maintain the stock transmission location, so I suppose you would call the "neutral" engine position.
I pulled my cast iron front diff today, pulled the axle tube off and inspected the internals. Everything appears perfect. The splines show no damage/twisting and the engagement gear is in excellent shape. The fluid was a golden brown. Ooh and it has a DRAIN PLUG!!!
I went ahead and went through the aluminum 01 front diff I bought a while back, cleaned her up, resealed, and assembled everything. Gonna toss her on classifieds among a bunch of other parts. Looks like I'm a few hundred behind on the project.
While I had my original diff removed I pulled the DS 4.3 mount and installed the 2.8 clam shells. The original bolts that hold the 4.3 mounts on are too large on the single bolt side of the 2.8 mounts so I used some slightly smaller diameter bolts I had on hand. I also can't figure out how the hell to remove the manual trans from the engine. I pulled every bell housing bolt and the trans is not moving anywhere. I left it on the jack overnight while I do research on the issue.
The tcase came out without issue, fluid's great. I'm going to use this tcase because it doesn't use the front prop shaft that requires greasing.
I haven't really done anything towards the swap. I'm just trying to generate some doll hairs to finance the next steps.
#14
05-01-2015, 08:29 PM
Alright, I haven't really done much directly to the project though I've started sorting out my suburbanshed. Got all of the parts that are for sure going into my Jimmy placed inside of the jimmy with the seats folded down. I put all of the dirty for sure parts in the suburbanshed, and all of the random bits of uncertanty there as well as items I'm selling. This leaves the 2nd gen Jimmy which I'm putting all of the "useless crap" into.
I got the new gearbox warrantied out today at advance. Bought it in 2011 and it's been leaking out of the input shaft since 2012. Bought a new moog pitman arm. My power performance arm is bad and I can't find the receipt so that cost me $60 bucks. Installed her and she's looking groovy. (I hate cleaning/painting, can you tell?)

Installed the donor suburbans 1 touch power steering gearbox into the wifes tahoe. It's just absolutely amazing.
Done with power steering crap, I cleaned the hell out of my truck, there is no escape for mud in that front crossmember.
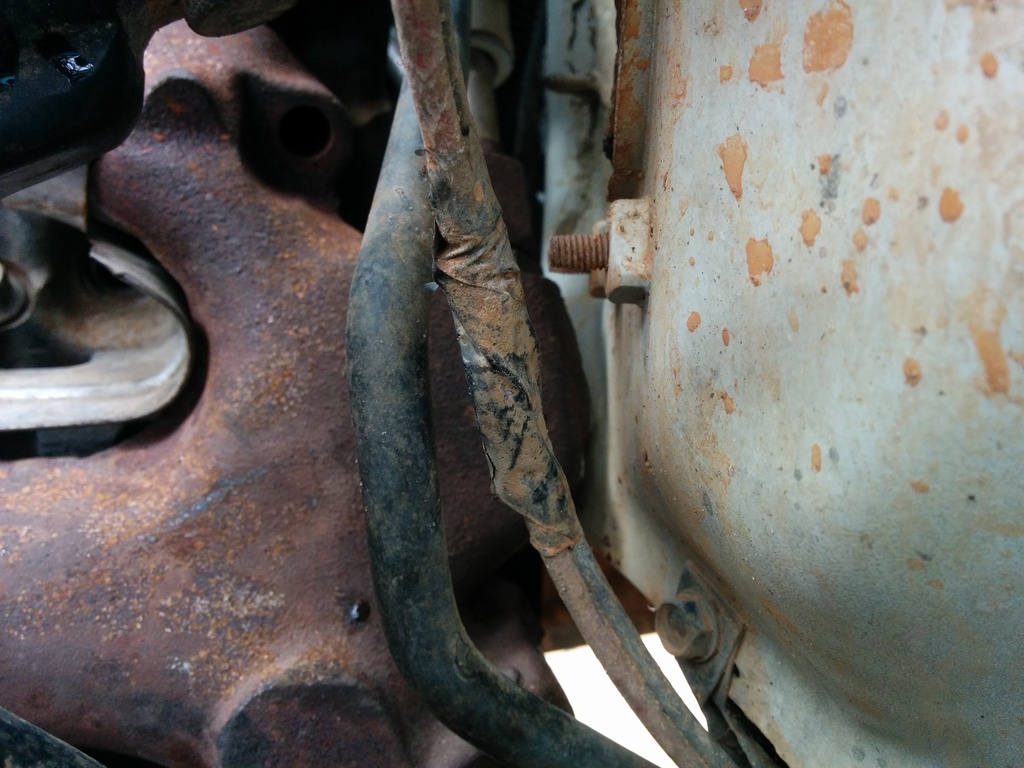
Got my fuel lines ready to bolt on. It was pretty damned simple. The 4.3 cpi hard lines terminate at a 90* angle with the pressure line on the drivers side and the return line on the passengers side. The 96+ vortec has pressure/return opposite. I just pulled a few of the metal line clamps that were unbolted off of the hoses, and just flipped which side each was on then put the metal clippies back in place. Now that solves the left/right mixup. The next challenge was the angle. The 96+ vortec fuel lines on the intake run at a 45* angle so I grabbed the 2nd gens donor fuel line from the intake. hand threaded the pressure/return line into it, mocked up the position and with some random hand tools gently persuaded that 90* into a 45* angle. I'm sure I'll have to bump/twist/curse when the engines in place but I'm confident enough now to call that done.
I've been contemplating some basic electrical system goals:
Run as much stock GM stuff as I can.
Stock relay center
I want connectors to segment off entire portions of the harness for maintenance. This just means add connectors later when I can afford them. I realize this adds to electrical design complexity in regards to the addition of points of failure. I feel that the tradeoffs are well worth the risk.
Firewall bulkhead for electrical accessories. Something to run my current mods through and with room to accommodate future mods.
I currently use weatherpack connectors for my projects however I'd like to find connectors (or a company) that are suitable for use inside of the vehicle. I don't want the unnecessary weatherproofing bulkiness for say the pillar pod wiring.
Thinking about running the transmission electrical connector routing with the transfer case wiring or do I run them in separate looms side by side?
The donor and my 2nd gen have fuel tank pressure sensors. I like this because it lets you know if you have a fault in the tank, like a hole from rust or damage. I plan on swapping the 2nd gen tank and sending unit (which accomodates the pressure sensor) but my sending unit is old school metal threaded fittings. The 2nd gen is this fancy schmancy plastic crap. How do I proceed? Is there a way to install the pressure sensor into my existing sending unit or tank? I refuse to just "tune it out" with a tuner I cannot afford.
I got the new gearbox warrantied out today at advance. Bought it in 2011 and it's been leaking out of the input shaft since 2012. Bought a new moog pitman arm. My power performance arm is bad and I can't find the receipt so that cost me $60 bucks. Installed her and she's looking groovy. (I hate cleaning/painting, can you tell?)
Installed the donor suburbans 1 touch power steering gearbox into the wifes tahoe. It's just absolutely amazing.
Done with power steering crap, I cleaned the hell out of my truck, there is no escape for mud in that front crossmember.
Got my fuel lines ready to bolt on. It was pretty damned simple. The 4.3 cpi hard lines terminate at a 90* angle with the pressure line on the drivers side and the return line on the passengers side. The 96+ vortec has pressure/return opposite. I just pulled a few of the metal line clamps that were unbolted off of the hoses, and just flipped which side each was on then put the metal clippies back in place. Now that solves the left/right mixup. The next challenge was the angle. The 96+ vortec fuel lines on the intake run at a 45* angle so I grabbed the 2nd gens donor fuel line from the intake. hand threaded the pressure/return line into it, mocked up the position and with some random hand tools gently persuaded that 90* into a 45* angle. I'm sure I'll have to bump/twist/curse when the engines in place but I'm confident enough now to call that done.
I've been contemplating some basic electrical system goals:
Run as much stock GM stuff as I can.
Stock relay center
I want connectors to segment off entire portions of the harness for maintenance. This just means add connectors later when I can afford them. I realize this adds to electrical design complexity in regards to the addition of points of failure. I feel that the tradeoffs are well worth the risk.
Firewall bulkhead for electrical accessories. Something to run my current mods through and with room to accommodate future mods.
I currently use weatherpack connectors for my projects however I'd like to find connectors (or a company) that are suitable for use inside of the vehicle. I don't want the unnecessary weatherproofing bulkiness for say the pillar pod wiring.
Thinking about running the transmission electrical connector routing with the transfer case wiring or do I run them in separate looms side by side?
The donor and my 2nd gen have fuel tank pressure sensors. I like this because it lets you know if you have a fault in the tank, like a hole from rust or damage. I plan on swapping the 2nd gen tank and sending unit (which accomodates the pressure sensor) but my sending unit is old school metal threaded fittings. The 2nd gen is this fancy schmancy plastic crap. How do I proceed? Is there a way to install the pressure sensor into my existing sending unit or tank? I refuse to just "tune it out" with a tuner I cannot afford.
#15
05-01-2015, 08:30 PM
Hammering on my sheet steel makes me cringe. I have a 1" body lift and have no intentions of hammering stuff. The stock harness entry point is both on the drivers and passenger side tucked well behind inner fenders. I like those locations. Keeps splash and heat away. Also I like everything concealed out of sight. There is a 3rd entry point towards the inner firewall beneath the hvac box. I might end up using one of those rubber plug things from the help section but I have a weatherpack firewall bulkhead electrical connector somewhere that I'd like to toss in there if it clears.
I use the ATRA-4l60 rebuild guide. It's a pdf written incredibly well with excellent pictures. You can google it and probably find it for free. I found that out after I bought mine.
Alright, on to todays events. I'd like to preface this by saying this is by no means a guide on how YOU can rebuild a transmission. This is my 21st transmission, I'm an amateur hobbyist, I have no formal training. If my info helps you, then by all means enjoy it.
My goal is to swap tailshafts on my 99 donor burbs trans. I'm also going to do some redneck shift kit stuff. I'm not looking for racey shifts, I just want to feel every shift as firm.
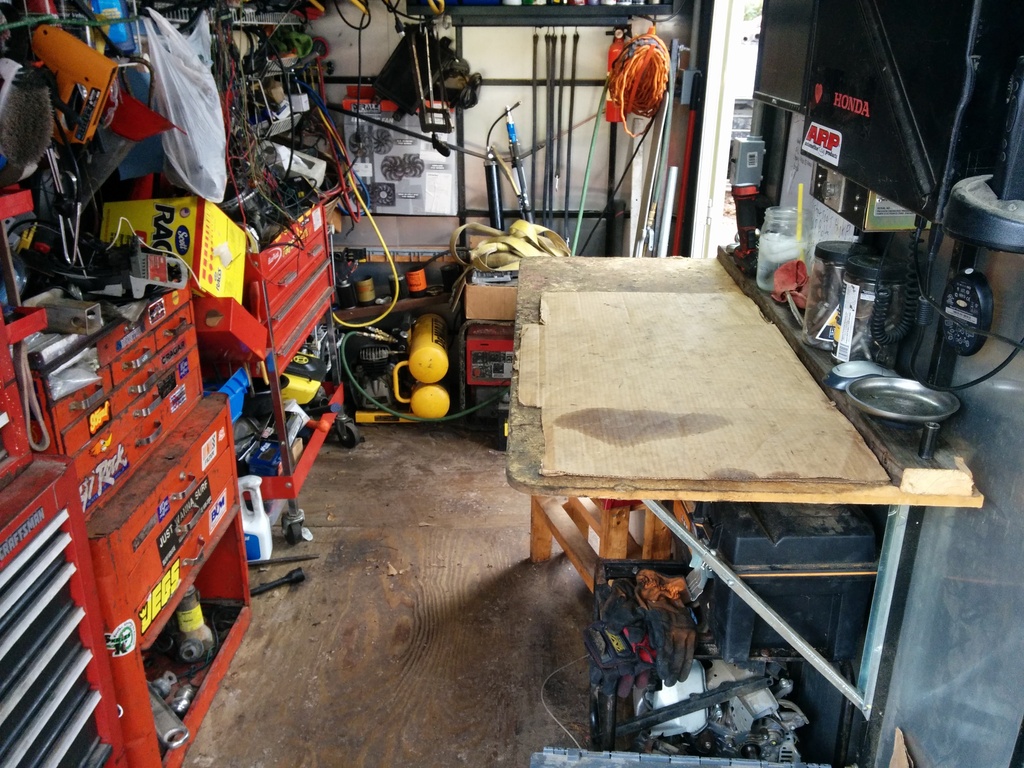
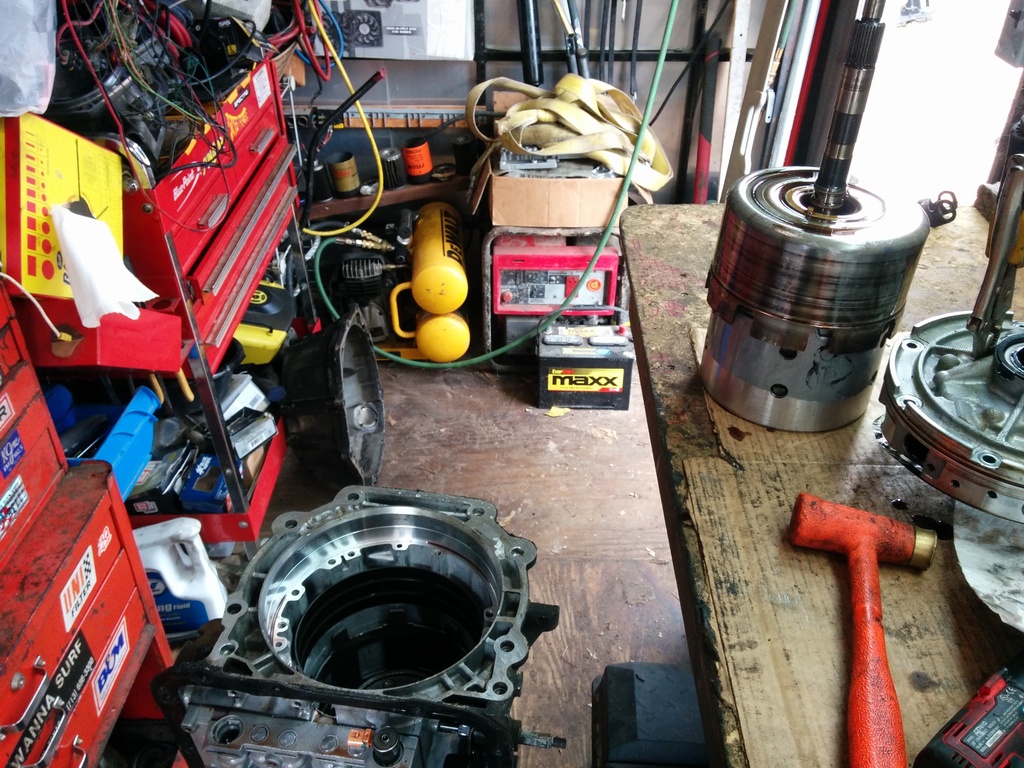
First thing I did was clear out a space on my bench. I use cardboard from a box to help minimize the mess fluid likes to make.
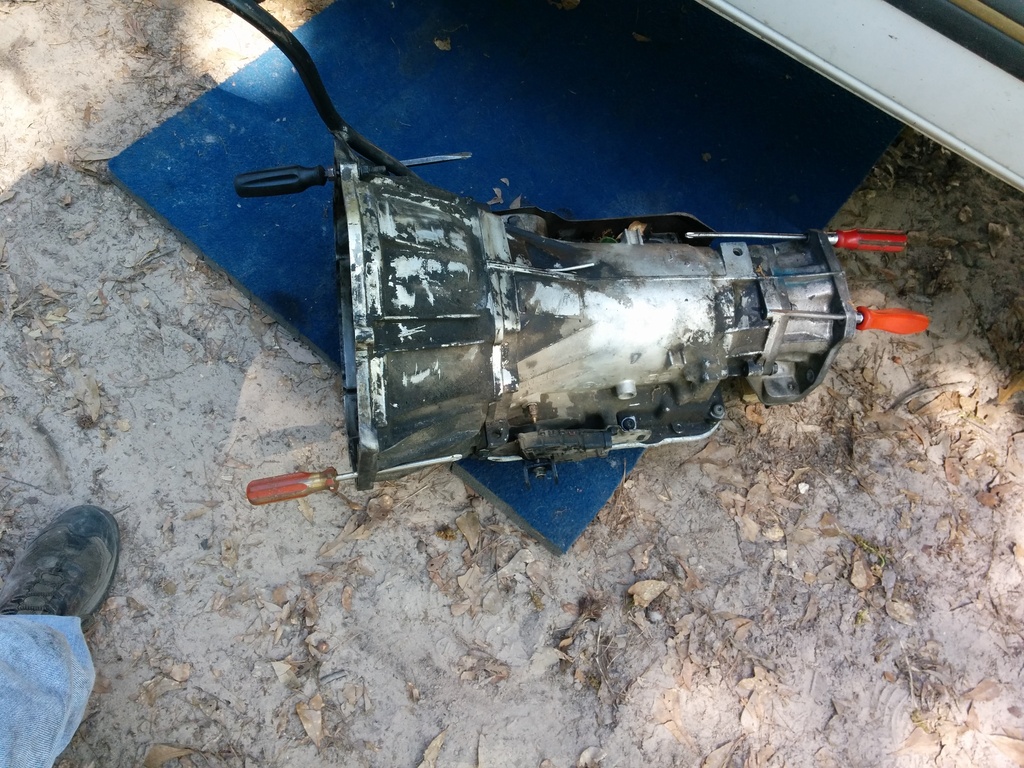
The donor sitting outside on the ground where I left her the day she was pulled. Leaving in the dipstick tube and converter keeps almost all of the water out. The tailshaft is still an open cavity but I saw no water in there when I drained everything.

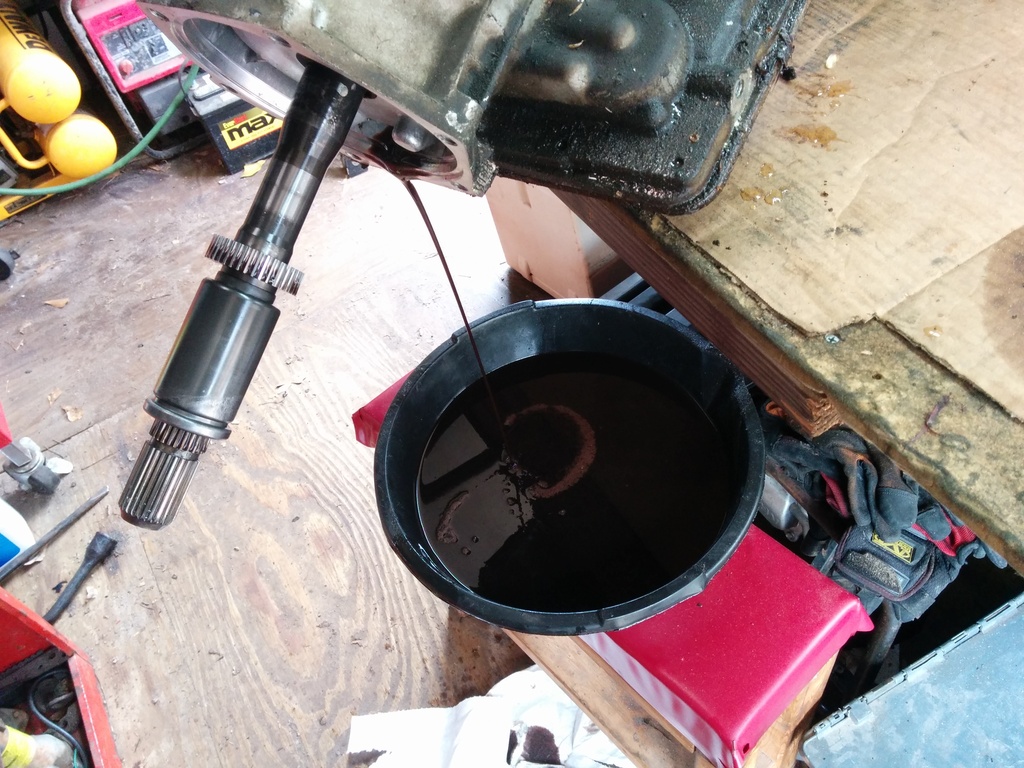
This transmission has the deep pan but no drain plug which is dumb. I have a stock gm deep pan with drain plug (which is the best pan IMO) on my 94 trans. I had to come up with a creative way to drain the purple fluid in this trans (we will find out why it's purple as we disassemble)
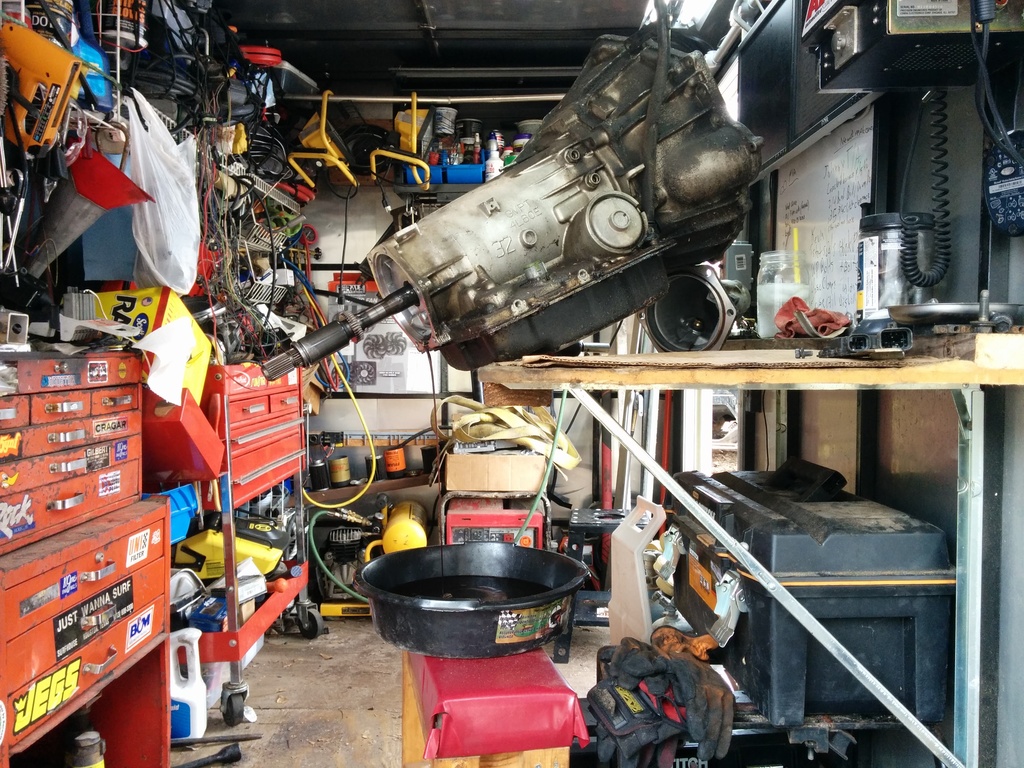
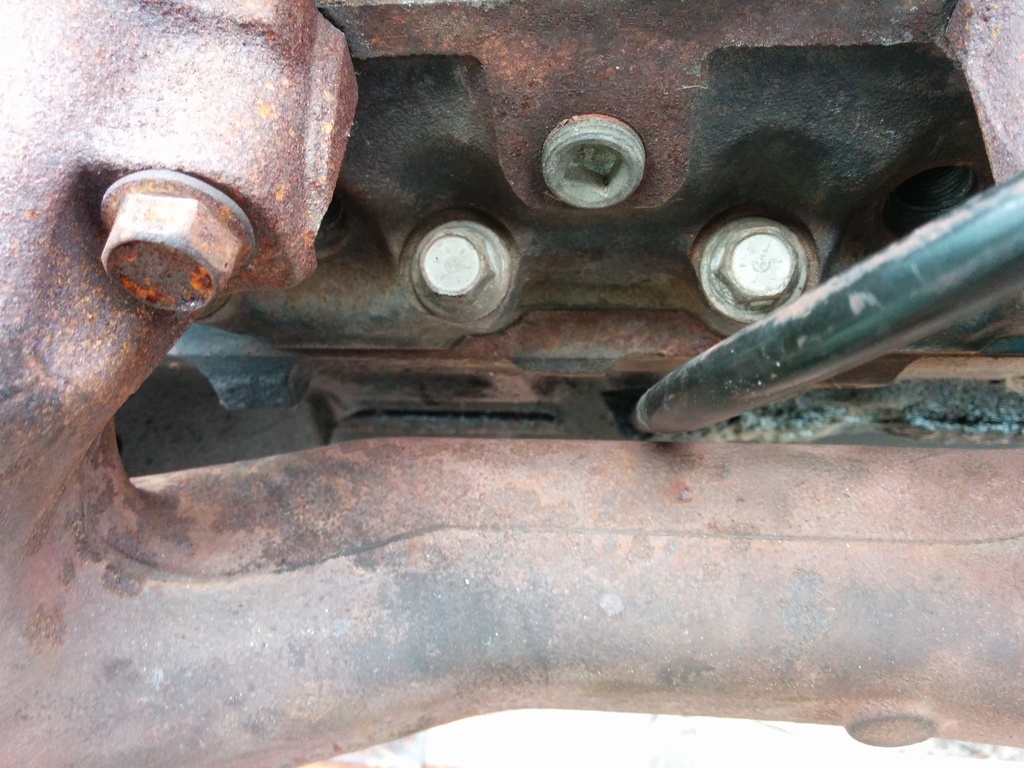
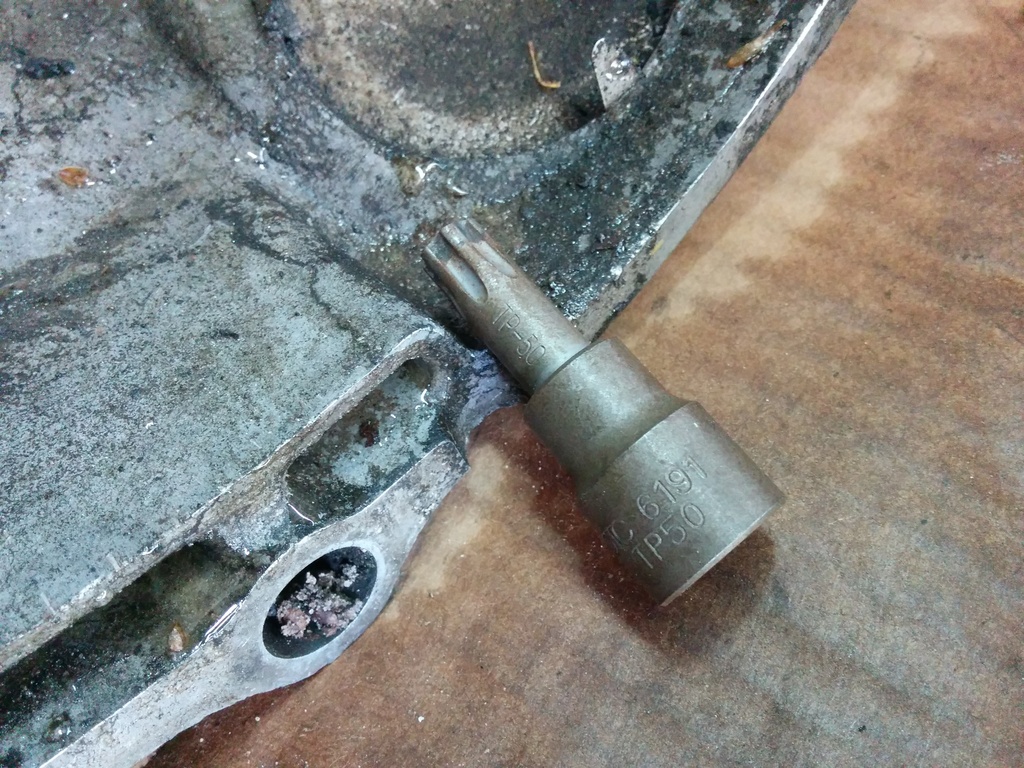
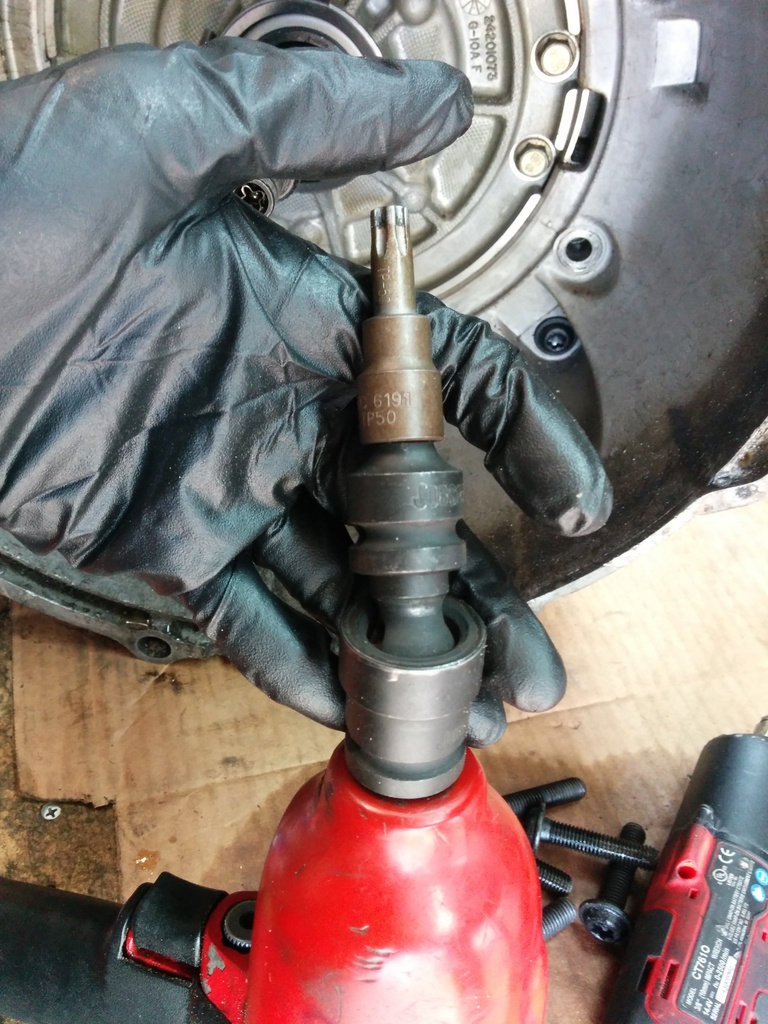
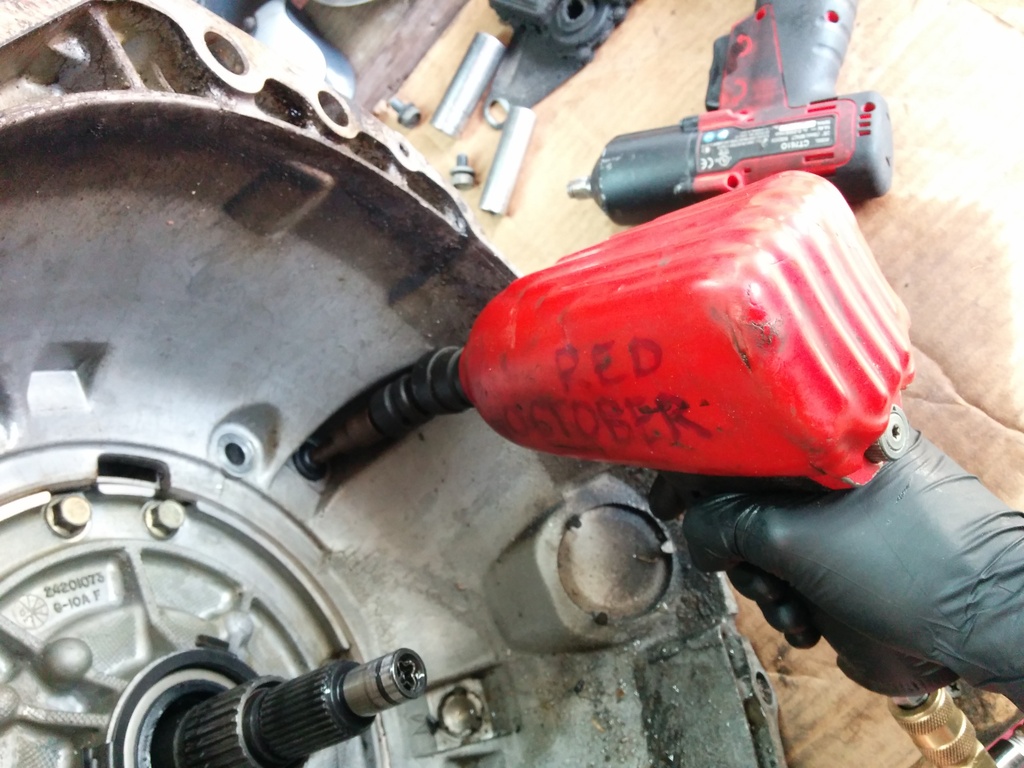
Alright, the fluids all drained out. (well not really, each component hides iirc 27 gallons per part and all you can do is get it all over your clothes and any nice tools you have around) Now because I'm fancy with a 2 piece transmission case I'm going to remove my bellhousing. The only real purpose of removing the bellhousing is because it can get in the way. My entire shop is inside of a 14 foot cargo trailer and the bell hits you in the hips when you walk by to get that damned universal socket you forgot. DO NOT USE A TORX BIT!!! It will PROBABLY destroy the bolt AND your tool. You need to buy a fancy schmancy bit called a "torx plus" and the size is a 50. Don't get a ****ty one. Get a good one, you need a good one because you need to use something similar to the Red October to remove the bolts. Electric impacts are neat and all but this is work that grows chest hair. If you carefully inspect the photos below you will see the red october with a 1/2 impact swivel from tractor supply and a 1/2 to 3/8 impact adapter coupled finally to the tp50. You will need the swivel or an extension to reach the 2 outer bolts. I'm poor and can't afford an impact extension.


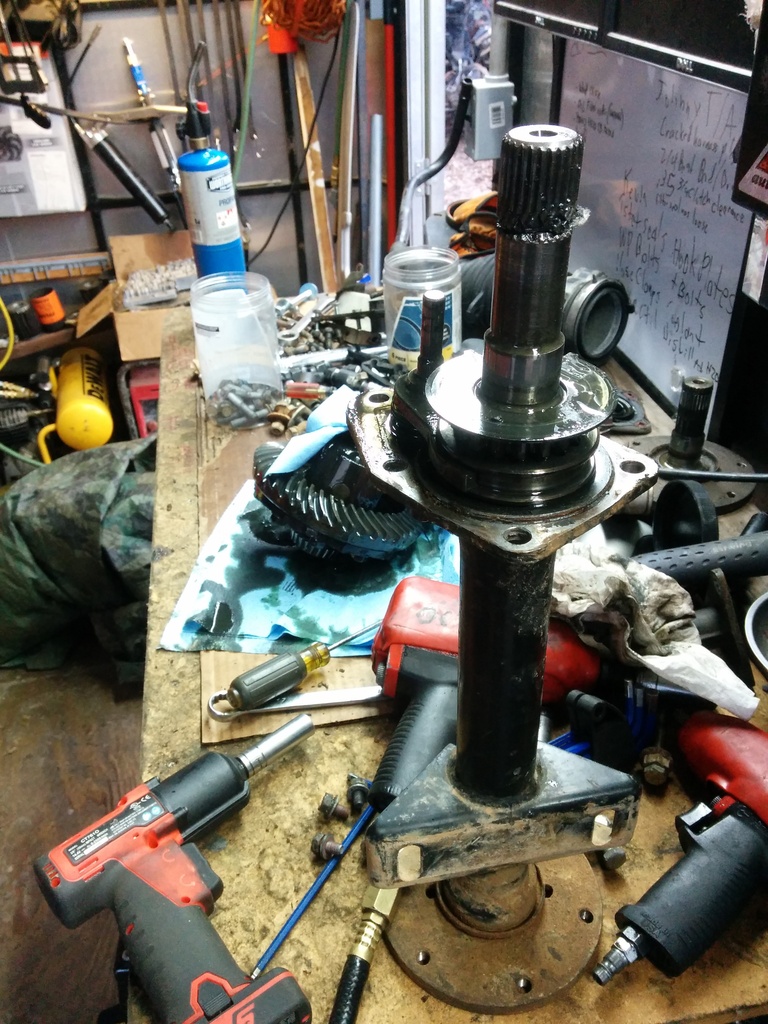
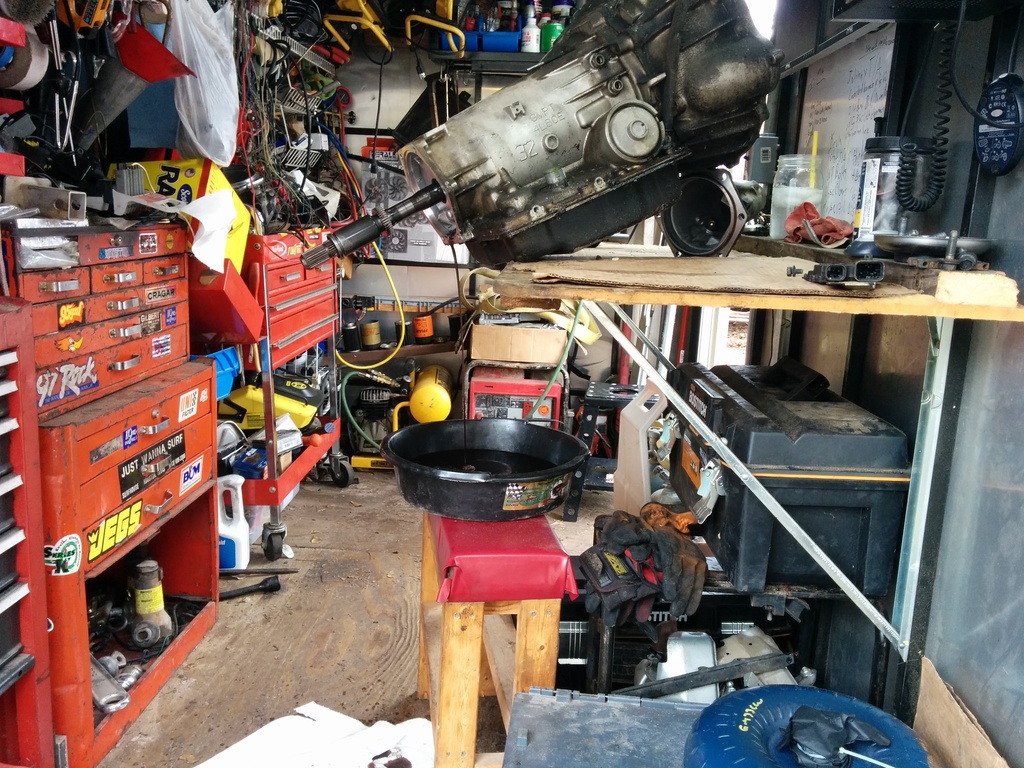
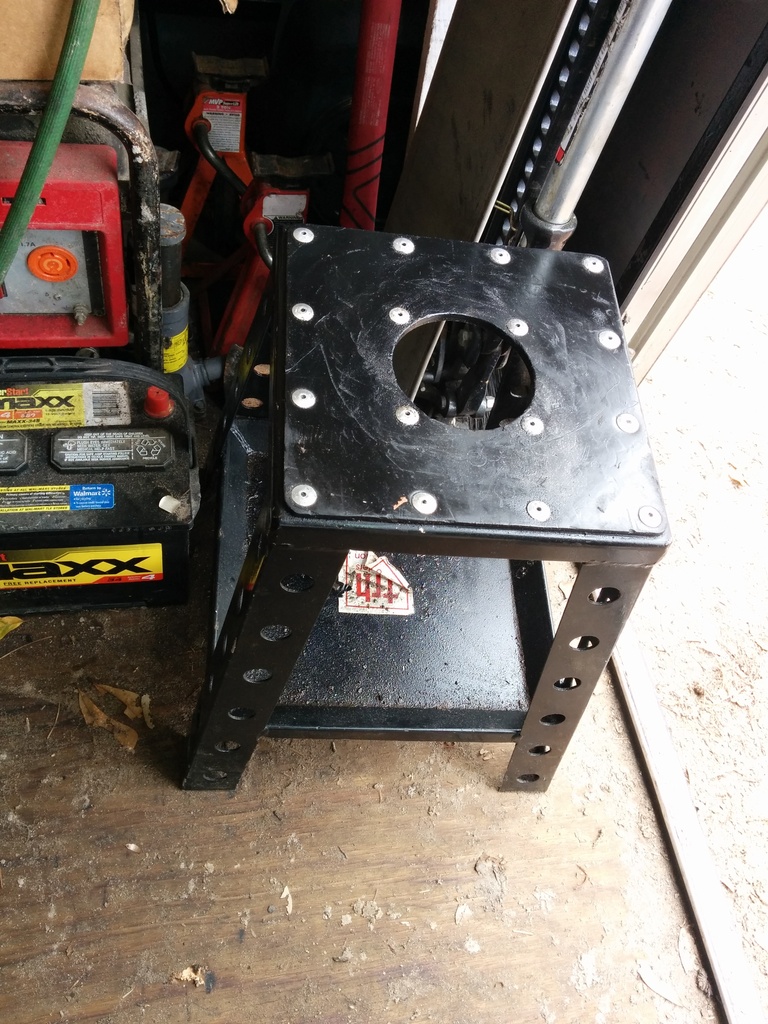
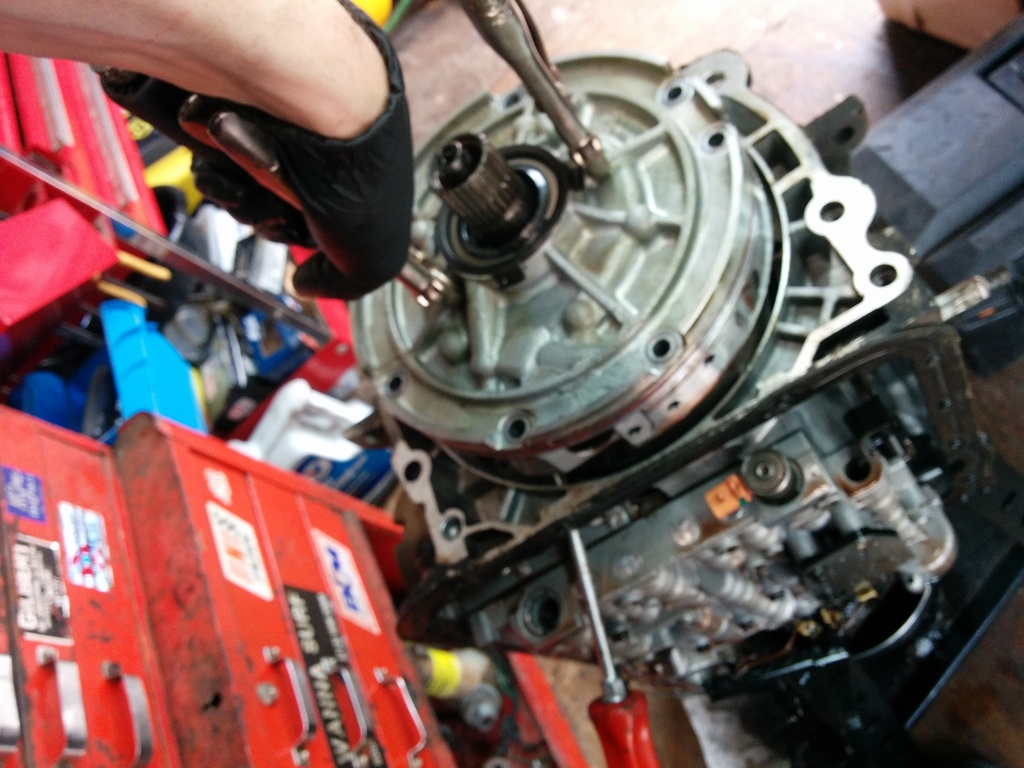
Alright, the bellhousings off, the fluids drained. Now I get out my stainless steel cookware that I paid 2 dollars for at a garage sale at my neighbors house filled with random sockets. Grab your dirt bike stand. Everyone has a dirtbike stand right? I have an awesome story behind how I got mine. I only tell that story in person though. Now, what's awesome about the dirt bike stand is it's strong as hell and has a huge hole in the middle with a shelf on the bottom for my stainless bowl to catch the 27 gallons that are about to come out. It's also deep enough to fit a 2wd shaft. Now, I'm 6'1" and 130 lbs. 4l60e's are relatively rediculously heavy. Go eat some spinach, and grab that trans, stick her output shaft into the hole. That was hard, go take a break, watch a tv show on netflix and eat lunch. Tell your wife shes a badass. She probably is.

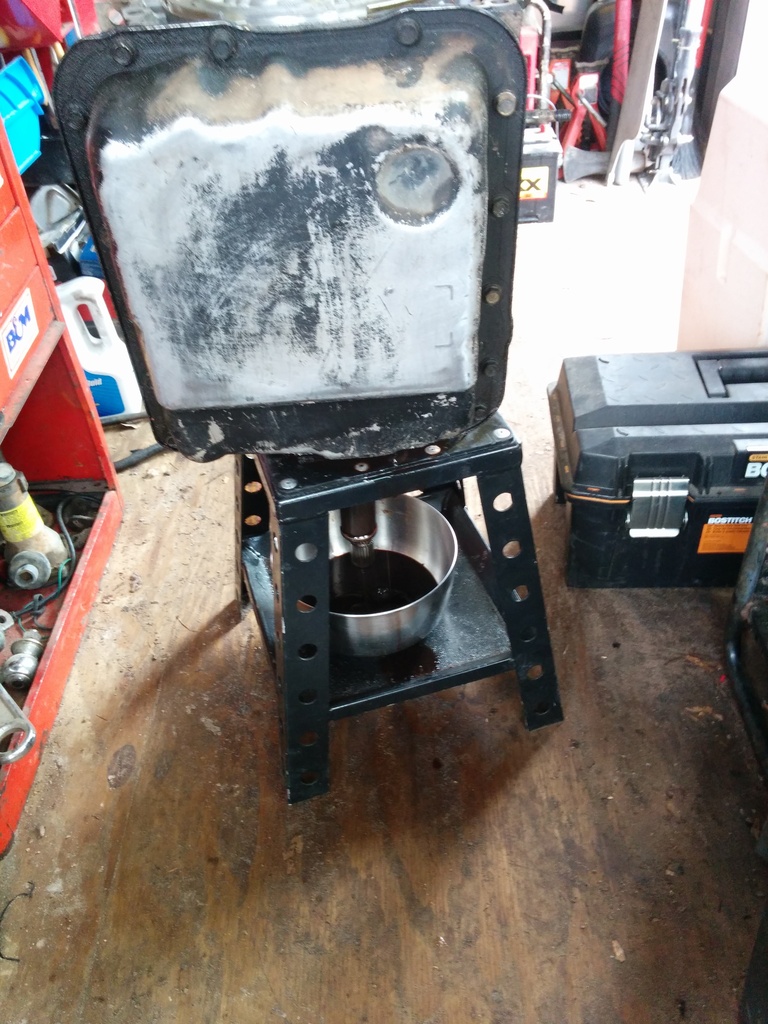
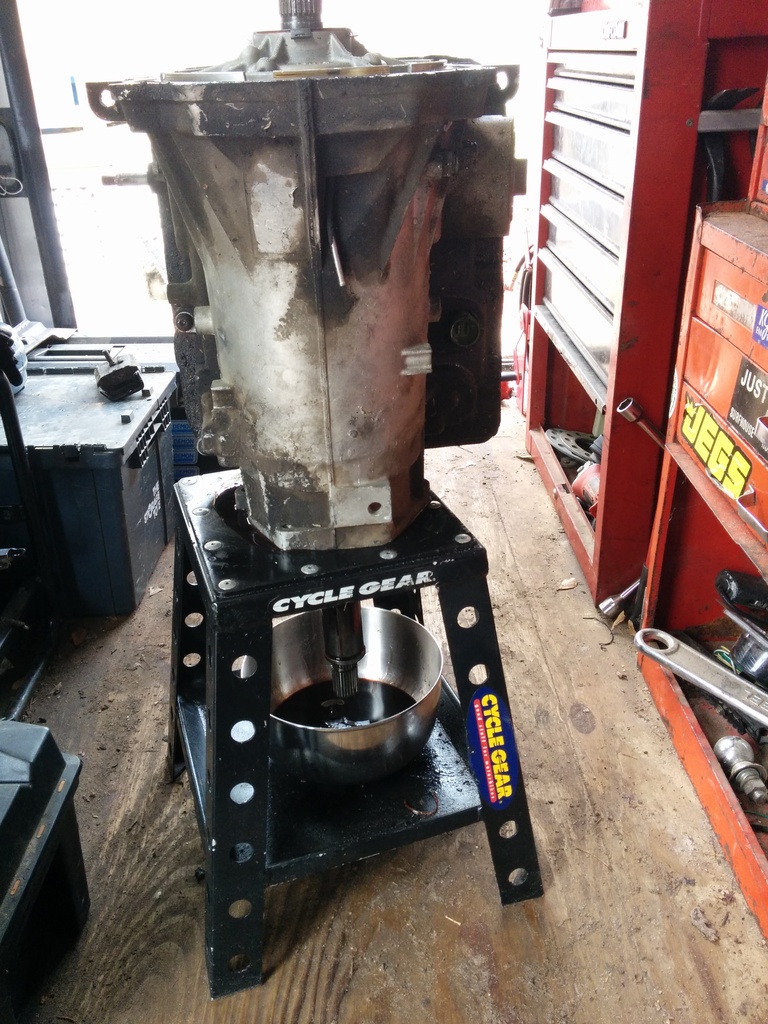
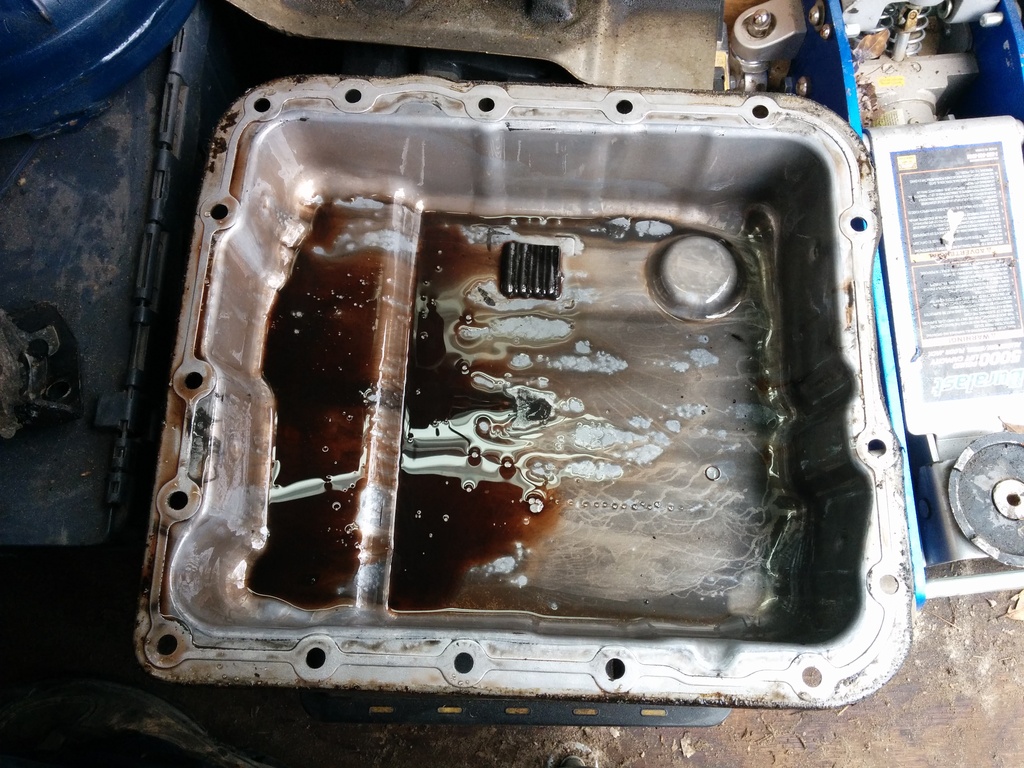
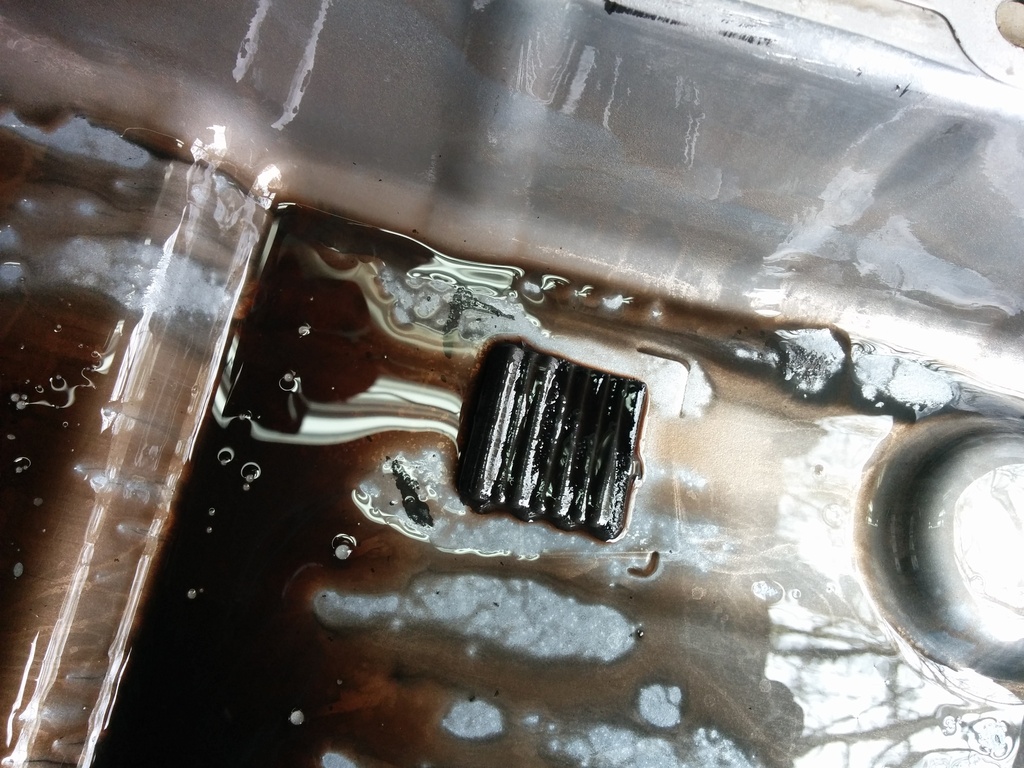
Trans is on the stand. Now it's about to look like Kill Bill in your shop. Grab that cute little 3/8 electric impact. Slap a 13mm deep on her. Pull the pan bolts. Leave the top one, yank the rest. Now keep 1 hand on the pan, 1 hand on the impact, pull the last bolt out. Drop everything on the floor. Thats usually what I do. Gently tilt the top of the pan away from the case to try and keep as many gallons of blood you can in the pan and the rest falls down on the stand and not on your brand new Vasque shoes you saved up pennies for. Stick the pan on the bench, inspect the remaining contents. The magnet is always going to be a little hairy. It's normal. Now for fluid colors. If the fluids black or purple like mine, whip out the wallet. Parts will be bad. If it's pink, you probably thought you could fix a bad trans with a fluid flush. Excellent. Whip out that wallet, and probably a credit card since you are about to drain and RECYCLE 50 bucks in fluid. You bastards better recycle. It's not hard. Now that the pans off, pull the filter and throw it in the trash. It's bad. If the pans off, the filters bad. It's physics.

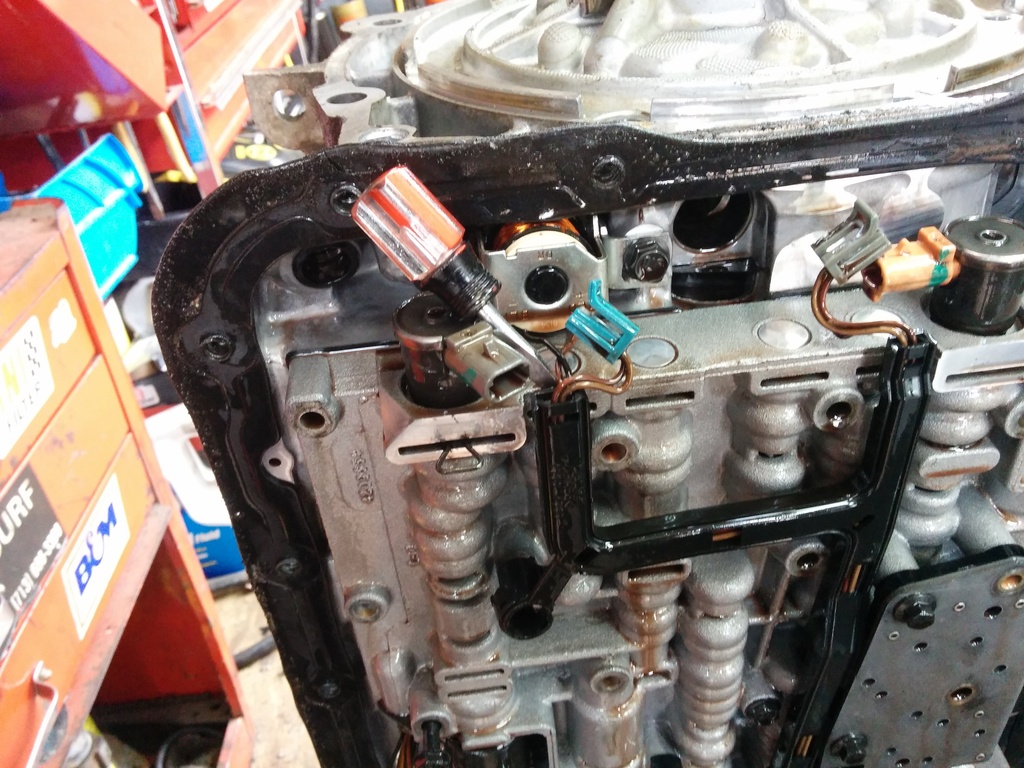
Next step, we need the harness out of the way. Namely the lockup solenoid. It's jammed into the pump. We need to remove the pump to get to the goodies. Here I've already attached my amateur hour front pump removal tool. They are Vice Grip brand vice grips. I think the generic term is "locking pliars". The pwm solenoid is in the way of removing the lockup solenoid. Theres a clippie in the channel beneath it you need to remove. I got this trick bottle cap opener but if your wife didn't find you one in the lowes parking lot then you can just use a regular flathead screwdriver. If you can't see the clip, spin the solenoid around right round like a record. Use a flashlight. 2 10mm bolts hold the lockup solenoid into the pump. If the electrical harness clippies break off, go buy a brand new harness. The plastic was cooked. Not a bad time to install a trans cooler too.

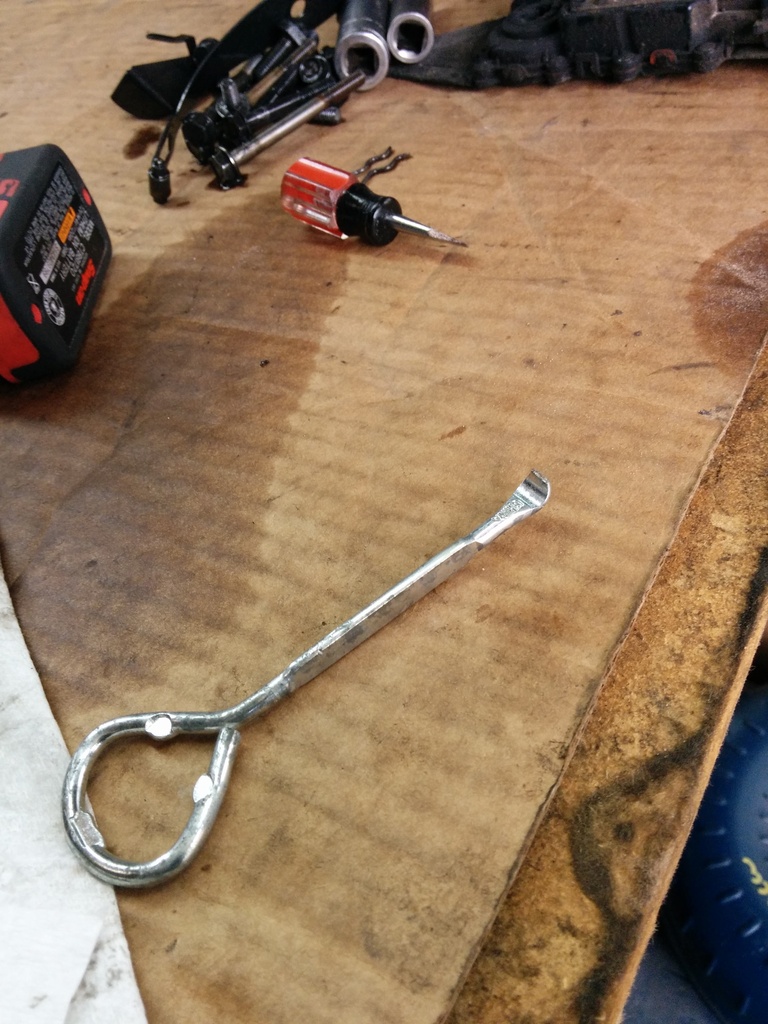
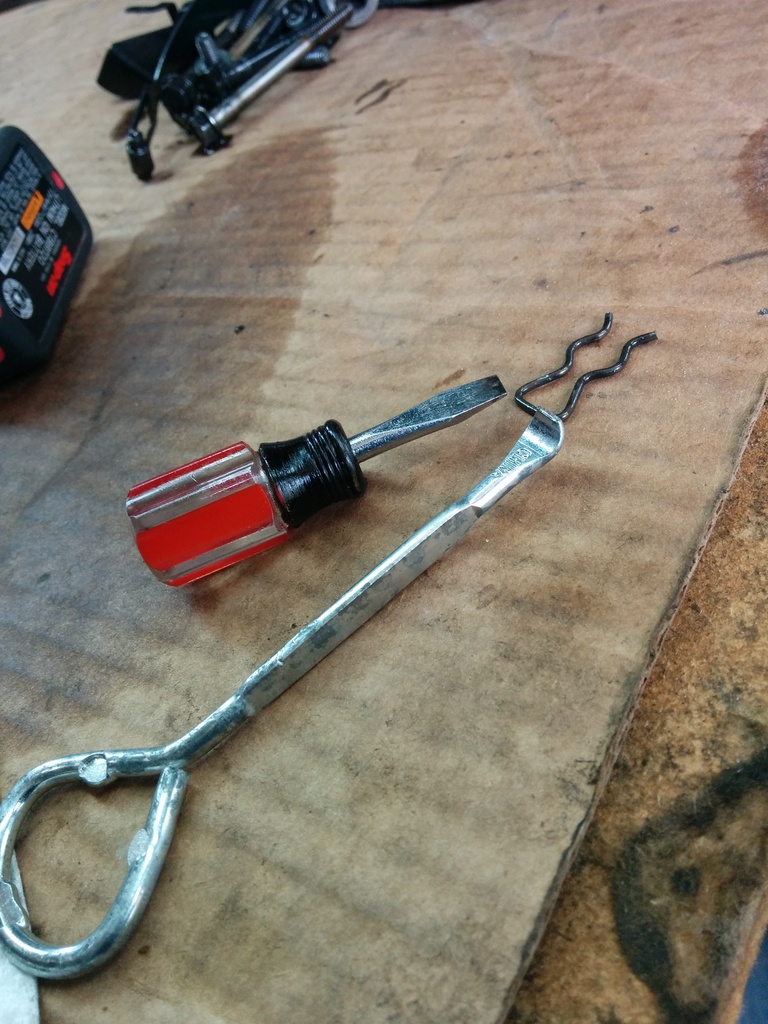

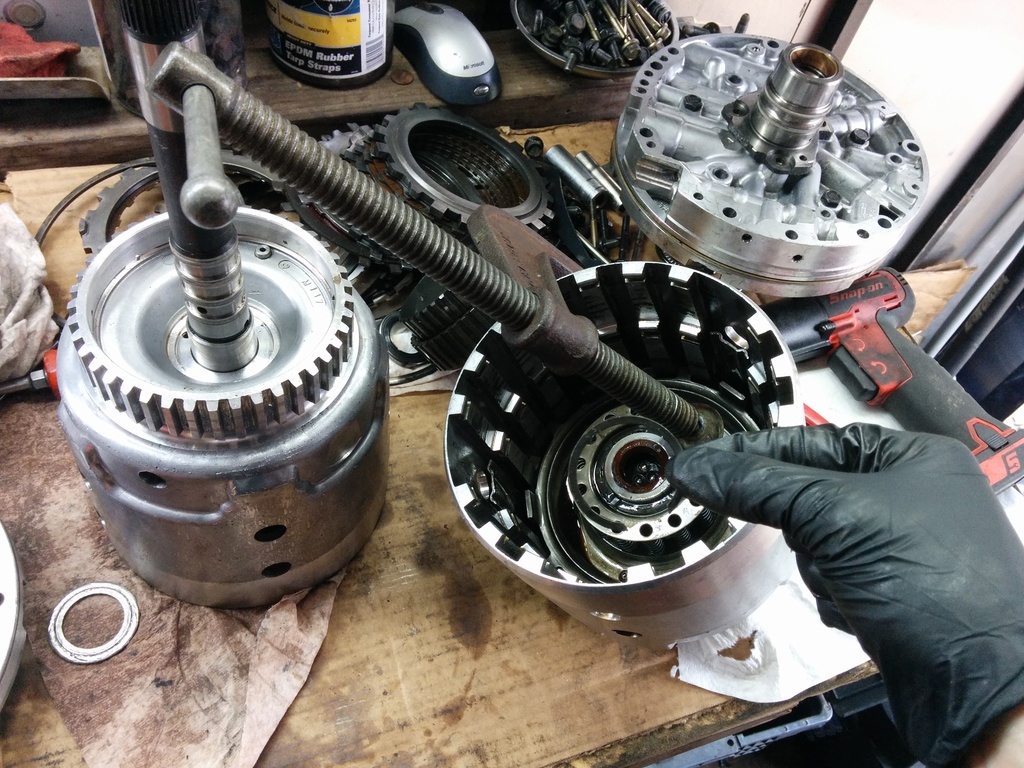
Now for the pump removal. I was at the junkyard in north houston and saw this red handled screw driver on the fan shroud of a GMT400 pickup. About 30 minutes later walking by it was still there. I figured what the hell, someone forgot it. Tossed it in my bag and away I went. The red color made me think it was some cheap chinese crap but it was pretty big. My buddy is a big snap on guy and told me I found a fourty dollar screw driver. Damn good score. Stick that strapon screw driver in between the pump and the transmission and pry the pump up. It helps to have a friend pull the vice grips up while you are prying.


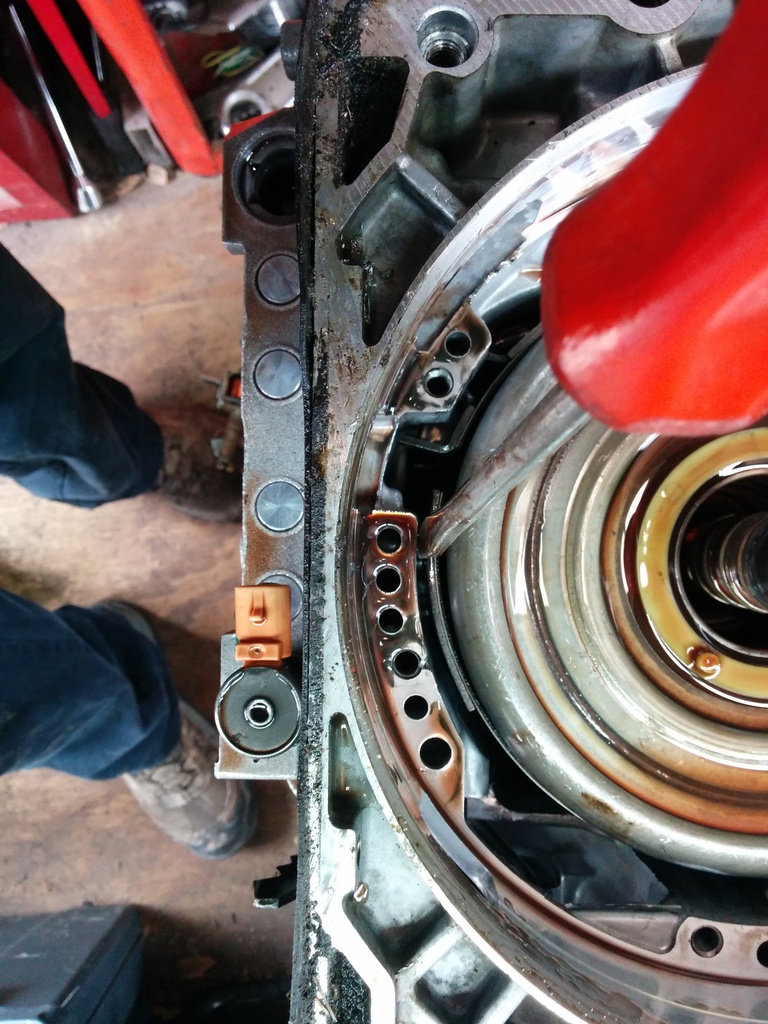
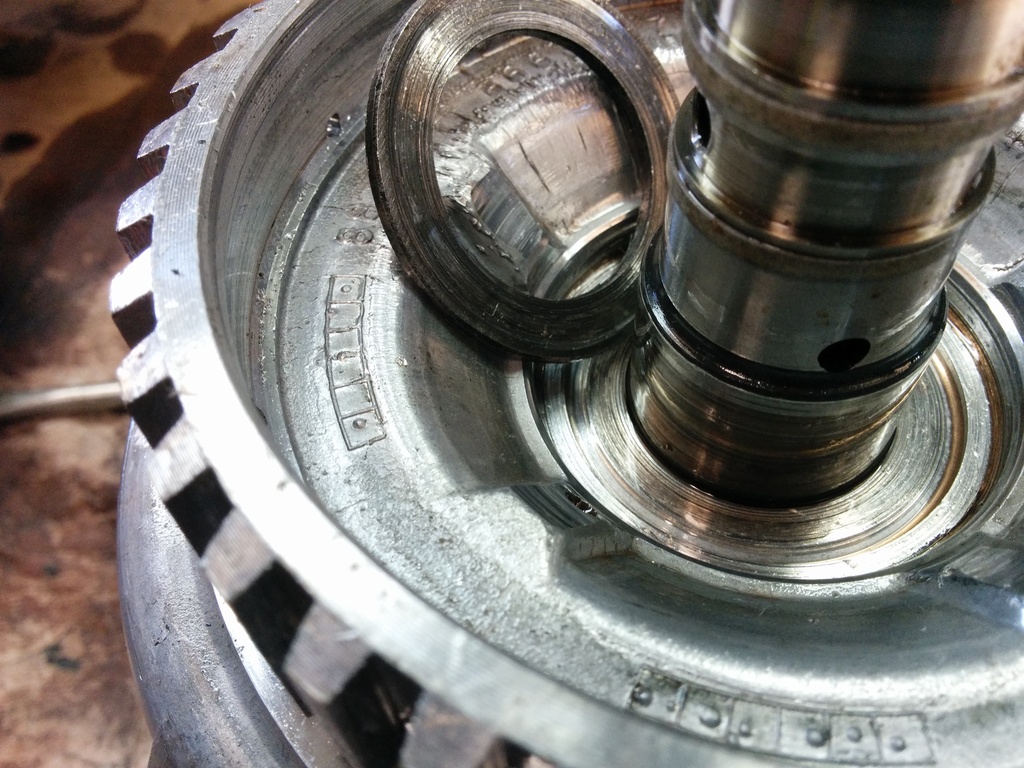
Alright, the pumps on the bench, lets pop the band anchor pin off of the band with that free strapon screw driver. This opens up the band so you can pull the drum clean out of the case. I wasn't thumbing for a ride, the image needs to rotate 90* anticlockwise. Strange things started happening tearing into this trans. First part:when you remove the reverse input drum, a snap ring shouldn't fall out onto the bench. Mines probably ruined.
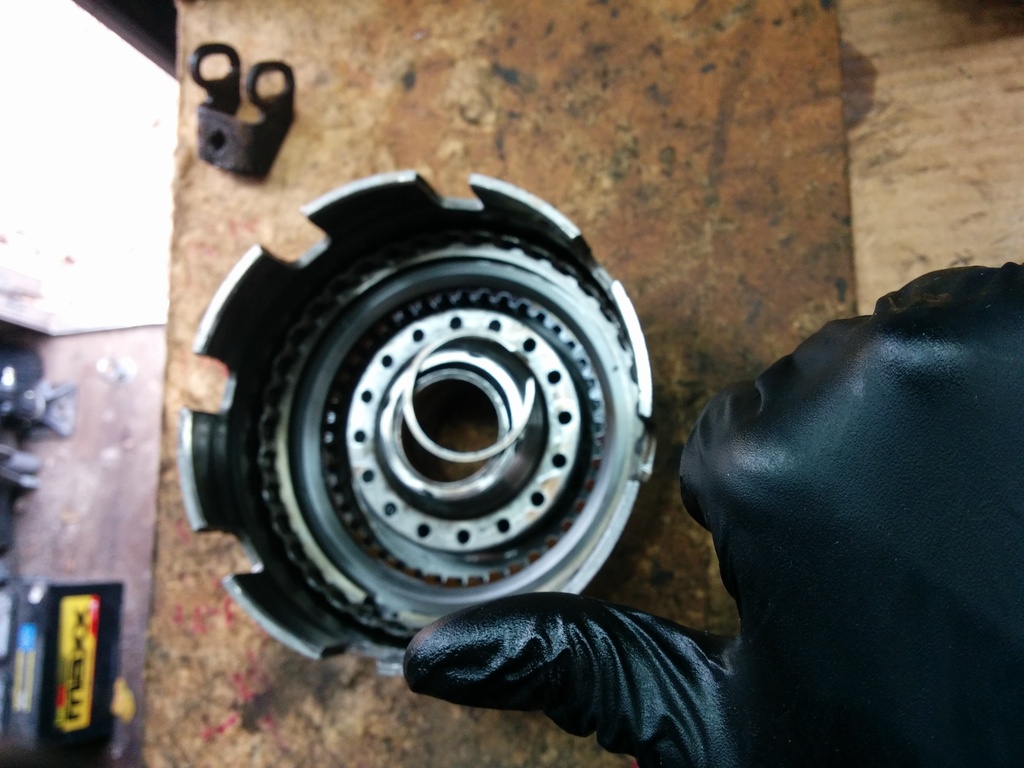
Now why the hell was the reverse drum snap ring off? Well it appears the last jackass to work on this transmission installed the input drum thrust bearing backwards. We all make mistakes. This ruined the reverse input drum, input drum, selective thrust washer, thrust bearing, reverse input drum clutches, entire pump, stator support. Jesus Christ.

To help work on the input drum, use a paddle bit slightly larger in diameter to your input drum and drill a hole into your workbench. It's awesome. (use compressed air to clean out the assy every time you insert/remove. MDF does not belong inside of a transmission.)

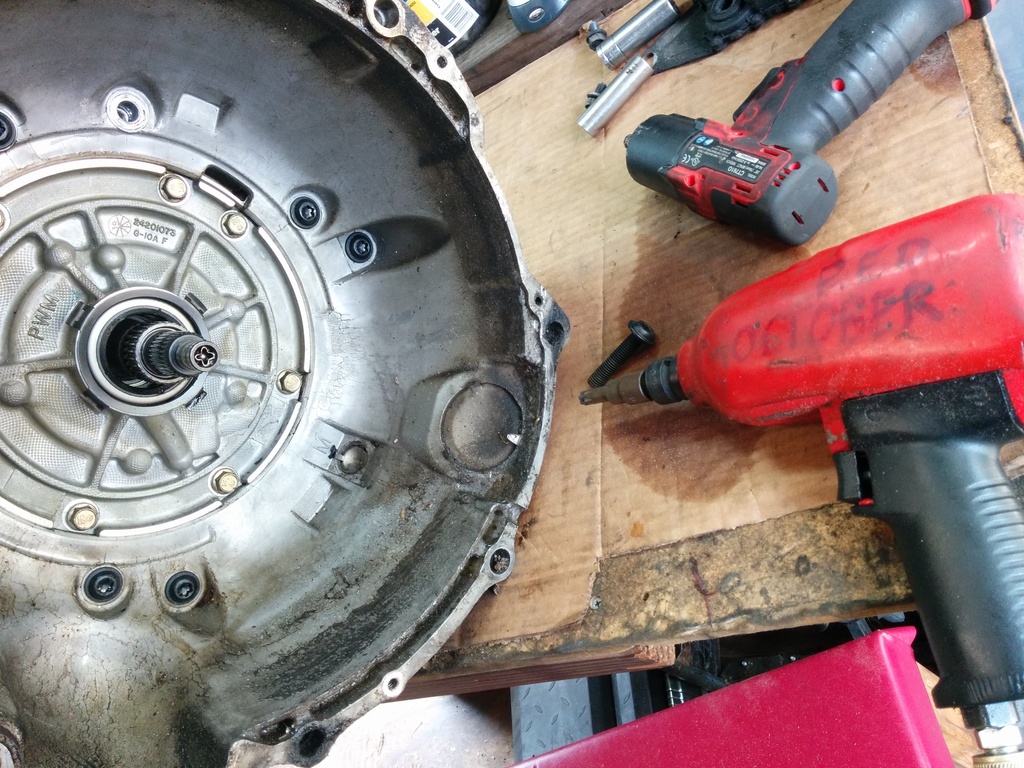
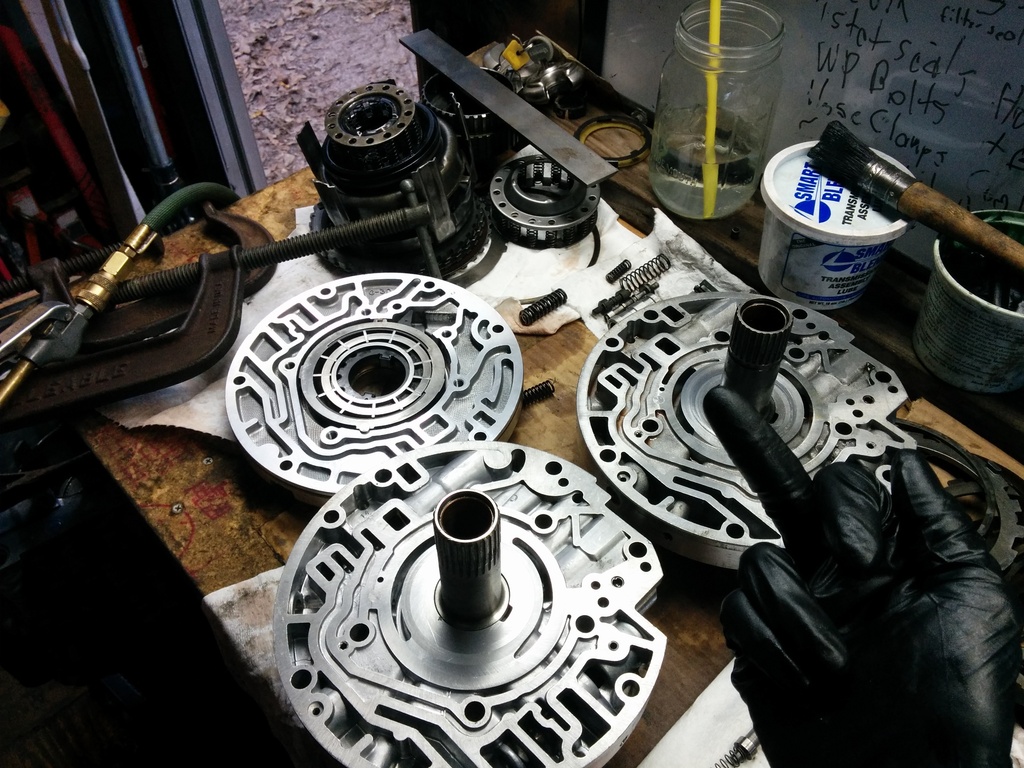
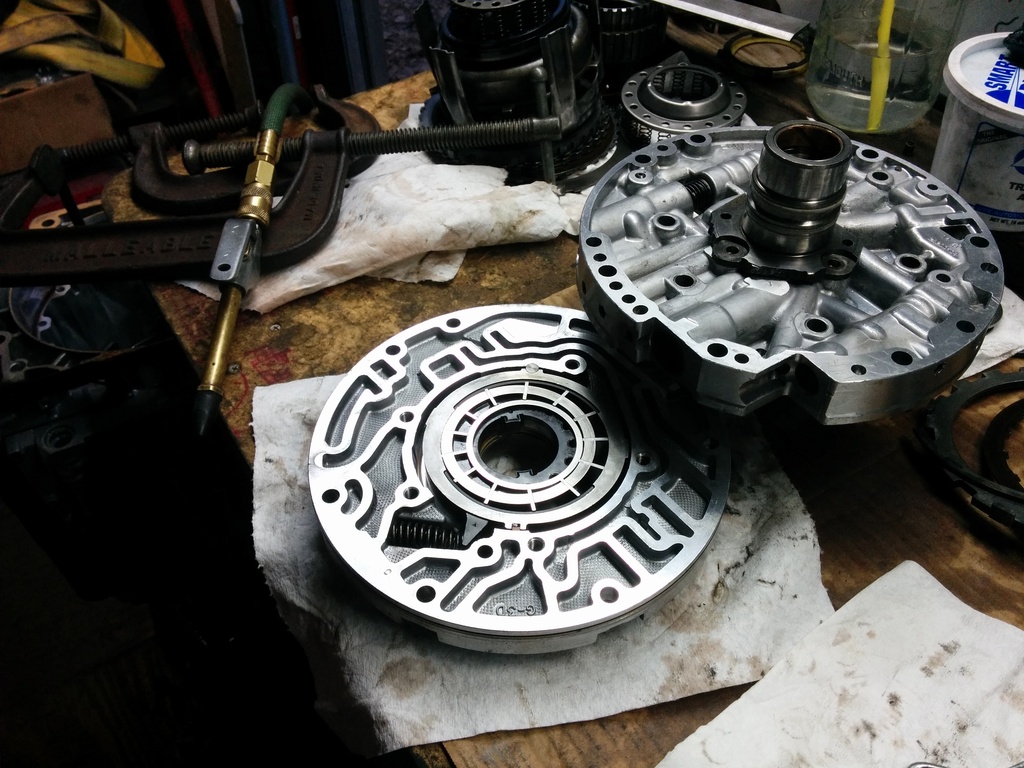
To get into the front pump, use a 13mm impact and pull the 5 bolts off. the halves will separate and you can get inside where the magic happens. Or in my case, the carnage:
Well that was an hour of work and 2 hours of writing.
Alright, 2nd half of the day. Went to a "Habitat for Humanity ReSale" about 15 miles south of me. It's like if you went to a home depot and the entire store was on clearance. They had some 20A hospital grade leviton receptacles for 4 bucks. The box looked distressed but damn, thats cheap! Got there with 5 minutes to close. Going back tomorrow. I saw an electrical section I need to exploit.
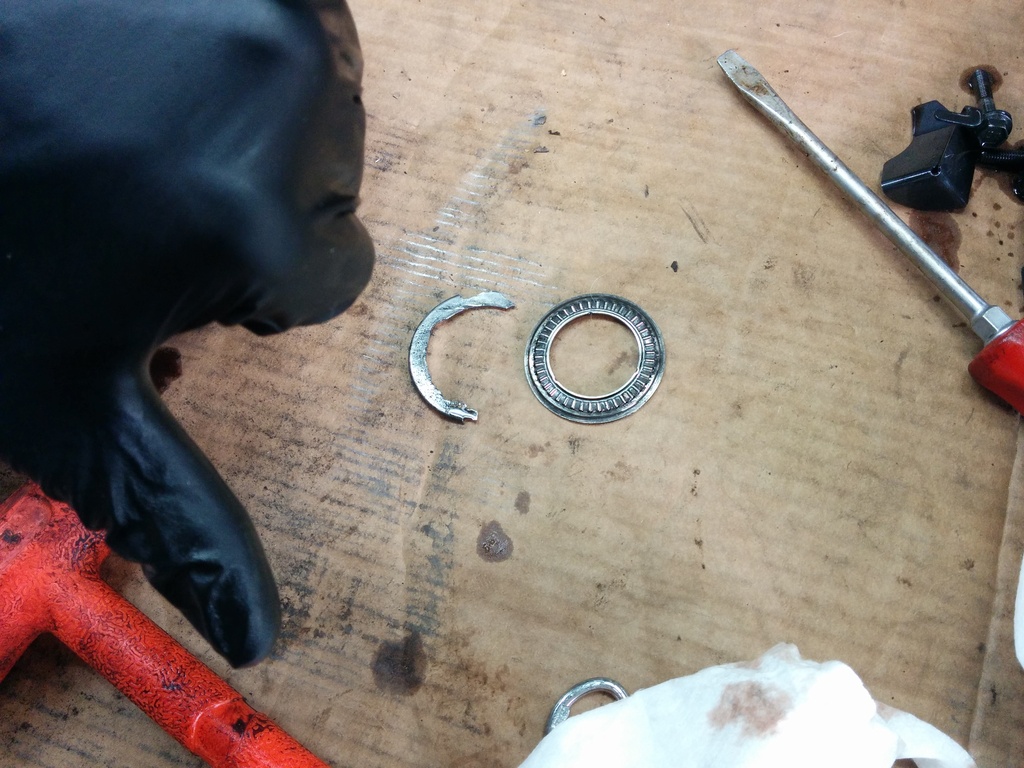
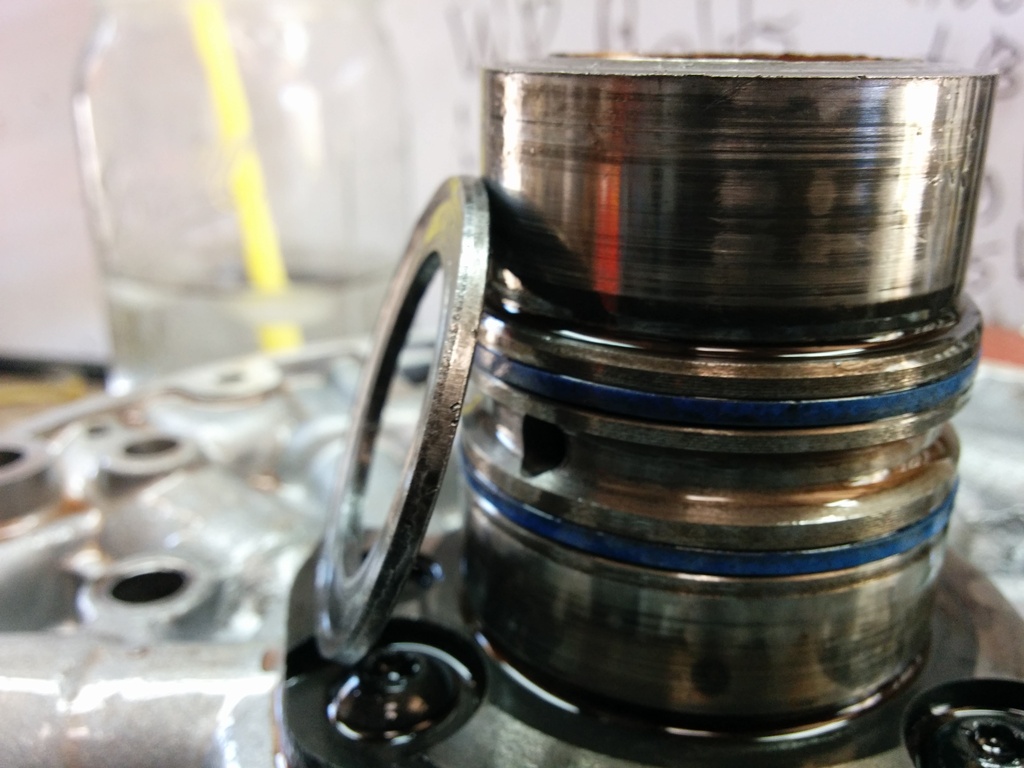
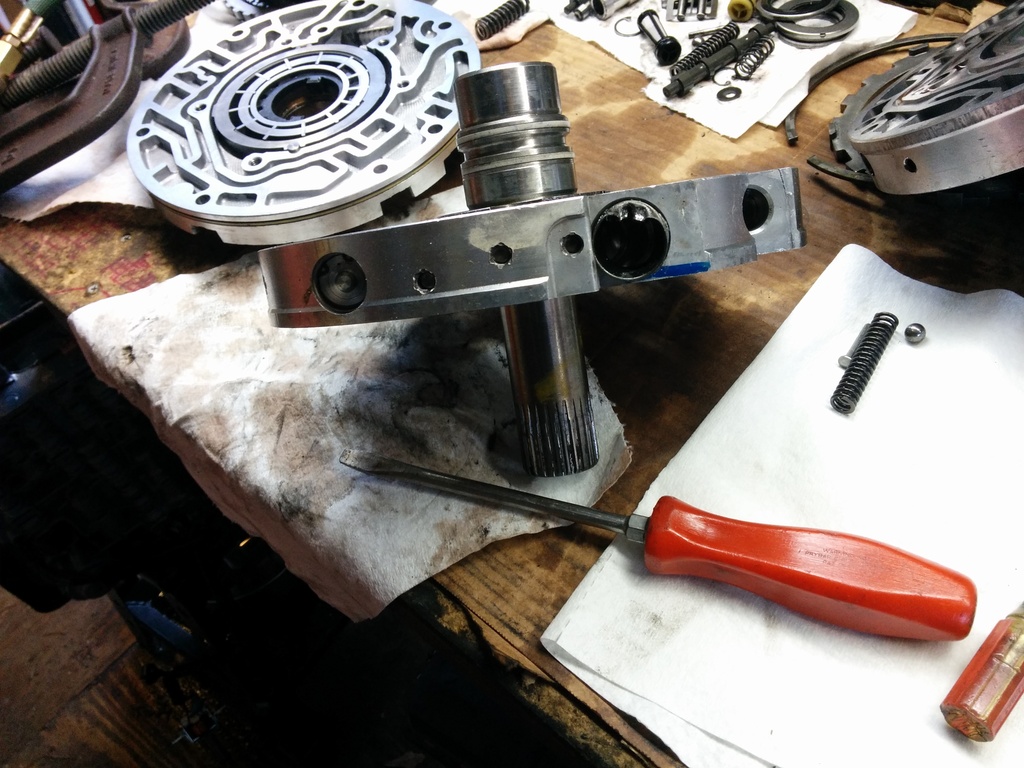
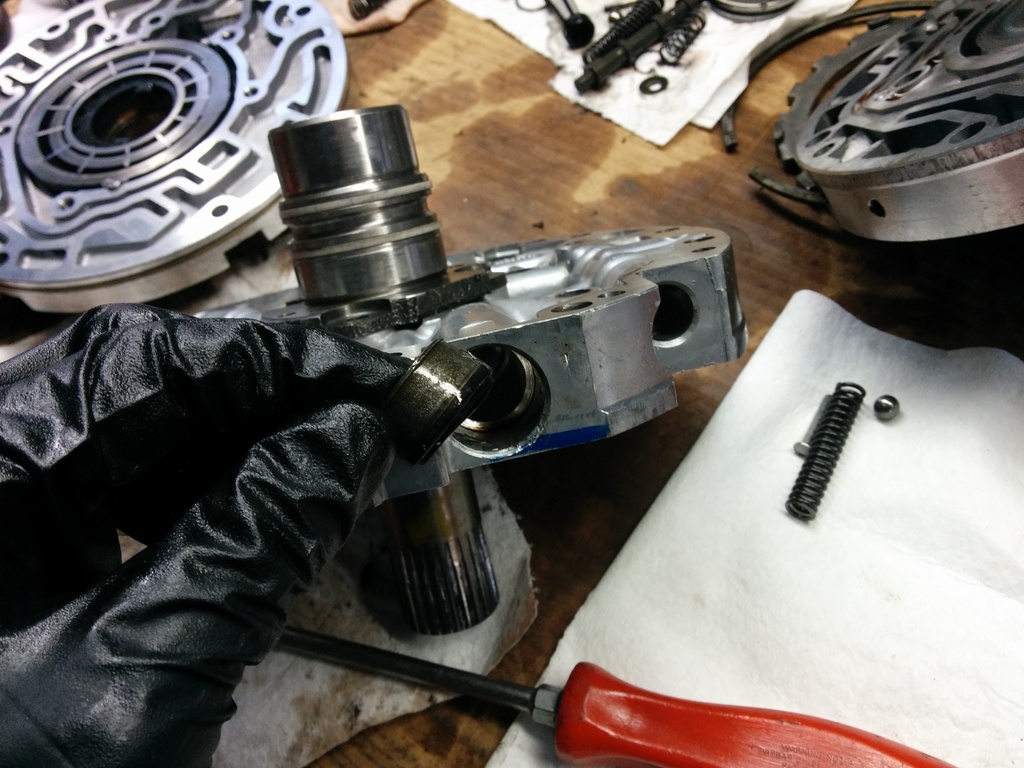
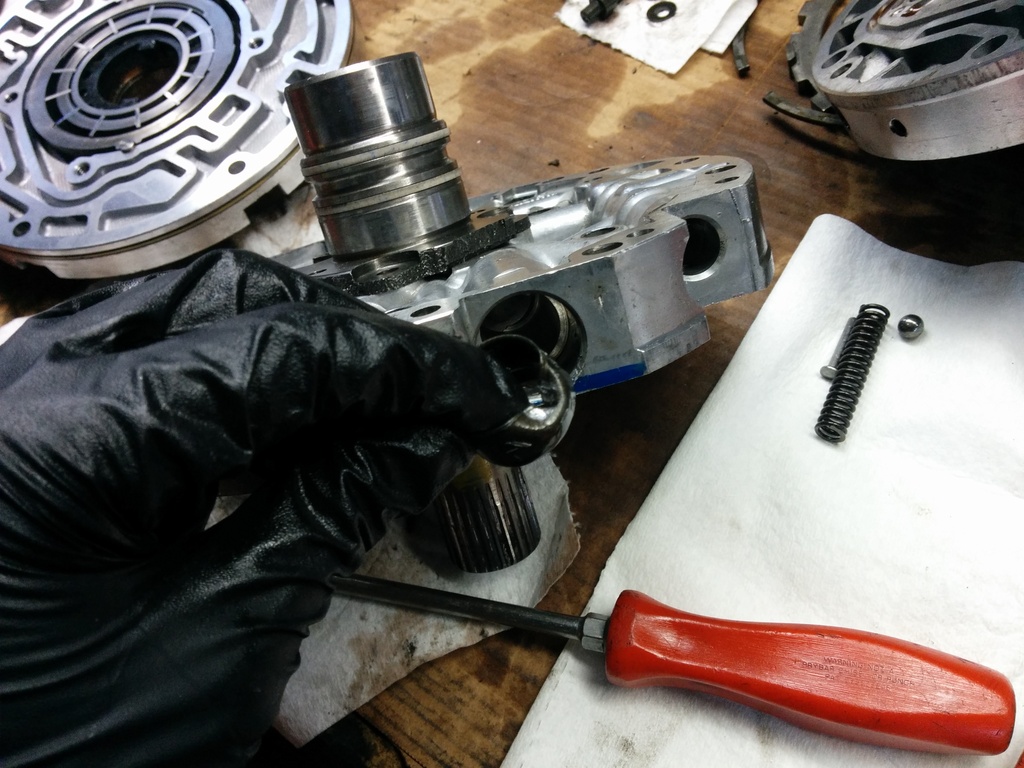
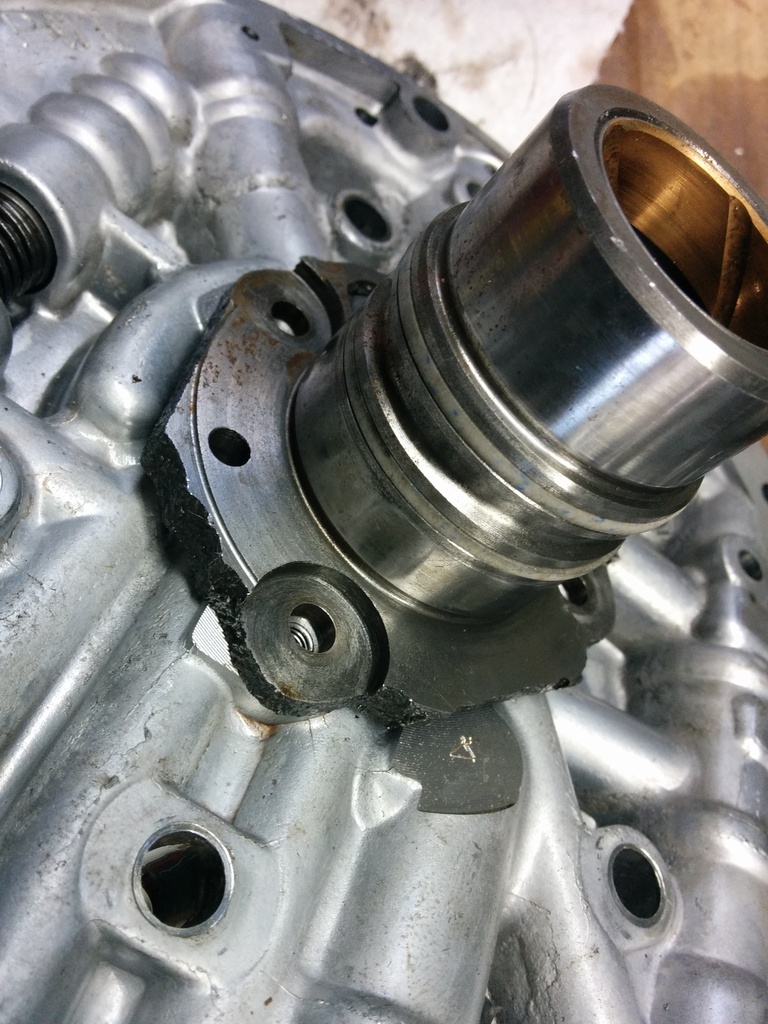
At this point in the trans I started reading the book a lot. Measuring clutches and such. The next photo is of my finders keepers strapon screw driver. I did not use the screw driver as a punch with a hammer. Just like the instructions say. So just make sure that you don't use your screw driver as a punch with a hammer because thats exactly how I didn't remove the converter seal from the pump. (Use the rubber side, otherwise gloveless you will make your tools into cheese graters)


Using my parking lot snap ring assist tool and some large c clamps I removed the input drum snap ring holding 1 of 3 springs of death in place.
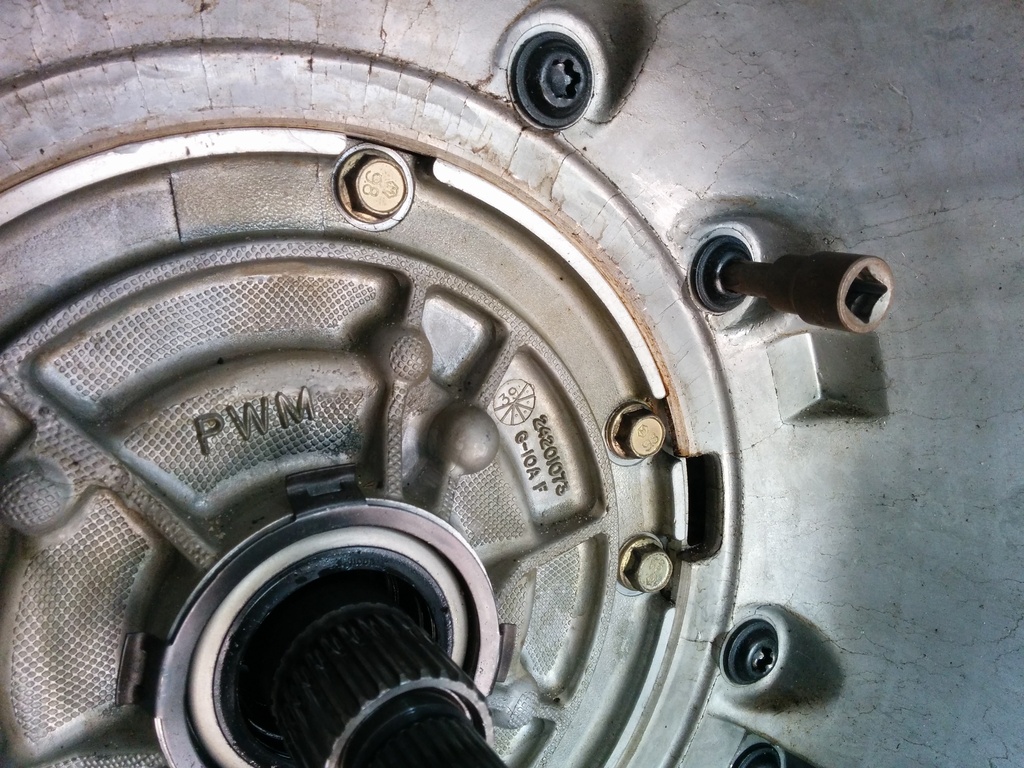
Now we get into the front pump. The goal here is to check the beating heart of the trans. Make sure the pump is not more than 1 piece. Also read the manual. Theres measurements to be taken with a straight edge and feeler gauges. My pump was trashed. It looked like someone put ooh I dunno, half of a thrust washer into it. Aluminum always loses. This put me in a tricky dilemma. My donor rebuilt trans is of a 1994 vintage and lacks the PWM pump I need for the 99. Now I do have a 96 pwm pump spare so I cracked her open and what do I find? It's a 10 vane. Damn. Heres where features erode function. The 13 vane is allegedly weaker than the 10 vane pump. I'm told the 13vane is done because of the hella fancy lockup strategy the 98+ uses. It essentially is never in full lockup I suppose you get a smoother flow of fluid with the higher volume of vanes. So an analogy: 4l60e and 700r4 lockup until 1995 was like a standard light switch. Lockup on or lockup off. Then GM designed this failure prone mechanism called "pwm". It works more like a dimmer switch. Theres on/off and theres the in between stuffs. This is supposed to keep you in lockup longer, keep the trans temps lower, and save fuel economy at the expense of lockup converter fatigue.
The on/off converter clutches from the 700r era is called a "paper" clutch. Now I don't know if it's really paper but whatever. When they introduced the pwm lockup they had to strengthen the converter clutch so it was made out of carbon something or other. THEN the 98 full on fancy lockup came out and they made the clutch out of woven carbon fiber iirc.
Well that was a helluva tangent. SO my 13vane pump is crap, my 10 vane pump is magical. If it fails it's just me pissed at myself so I did what any poor person does. I took the 13vane pump ring, stuck in the 10 vane pumps... vanes, added the 3 best from the 13vane and stuck all of that into the 1996 pump housing. I measured everything and it all clears so I might get lucky.


I use the ATRA-4l60 rebuild guide. It's a pdf written incredibly well with excellent pictures. You can google it and probably find it for free. I found that out after I bought mine.
Alright, on to todays events. I'd like to preface this by saying this is by no means a guide on how YOU can rebuild a transmission. This is my 21st transmission, I'm an amateur hobbyist, I have no formal training. If my info helps you, then by all means enjoy it.
My goal is to swap tailshafts on my 99 donor burbs trans. I'm also going to do some redneck shift kit stuff. I'm not looking for racey shifts, I just want to feel every shift as firm.
First thing I did was clear out a space on my bench. I use cardboard from a box to help minimize the mess fluid likes to make.
The donor sitting outside on the ground where I left her the day she was pulled. Leaving in the dipstick tube and converter keeps almost all of the water out. The tailshaft is still an open cavity but I saw no water in there when I drained everything.
This transmission has the deep pan but no drain plug which is dumb. I have a stock gm deep pan with drain plug (which is the best pan IMO) on my 94 trans. I had to come up with a creative way to drain the purple fluid in this trans (we will find out why it's purple as we disassemble)
Alright, the fluids all drained out. (well not really, each component hides iirc 27 gallons per part and all you can do is get it all over your clothes and any nice tools you have around) Now because I'm fancy with a 2 piece transmission case I'm going to remove my bellhousing. The only real purpose of removing the bellhousing is because it can get in the way. My entire shop is inside of a 14 foot cargo trailer and the bell hits you in the hips when you walk by to get that damned universal socket you forgot. DO NOT USE A TORX BIT!!! It will PROBABLY destroy the bolt AND your tool. You need to buy a fancy schmancy bit called a "torx plus" and the size is a 50. Don't get a ****ty one. Get a good one, you need a good one because you need to use something similar to the Red October to remove the bolts. Electric impacts are neat and all but this is work that grows chest hair. If you carefully inspect the photos below you will see the red october with a 1/2 impact swivel from tractor supply and a 1/2 to 3/8 impact adapter coupled finally to the tp50. You will need the swivel or an extension to reach the 2 outer bolts. I'm poor and can't afford an impact extension.
Alright, the bellhousings off, the fluids drained. Now I get out my stainless steel cookware that I paid 2 dollars for at a garage sale at my neighbors house filled with random sockets. Grab your dirt bike stand. Everyone has a dirtbike stand right? I have an awesome story behind how I got mine. I only tell that story in person though. Now, what's awesome about the dirt bike stand is it's strong as hell and has a huge hole in the middle with a shelf on the bottom for my stainless bowl to catch the 27 gallons that are about to come out. It's also deep enough to fit a 2wd shaft. Now, I'm 6'1" and 130 lbs. 4l60e's are relatively rediculously heavy. Go eat some spinach, and grab that trans, stick her output shaft into the hole. That was hard, go take a break, watch a tv show on netflix and eat lunch. Tell your wife shes a badass. She probably is.
Trans is on the stand. Now it's about to look like Kill Bill in your shop. Grab that cute little 3/8 electric impact. Slap a 13mm deep on her. Pull the pan bolts. Leave the top one, yank the rest. Now keep 1 hand on the pan, 1 hand on the impact, pull the last bolt out. Drop everything on the floor. Thats usually what I do. Gently tilt the top of the pan away from the case to try and keep as many gallons of blood you can in the pan and the rest falls down on the stand and not on your brand new Vasque shoes you saved up pennies for. Stick the pan on the bench, inspect the remaining contents. The magnet is always going to be a little hairy. It's normal. Now for fluid colors. If the fluids black or purple like mine, whip out the wallet. Parts will be bad. If it's pink, you probably thought you could fix a bad trans with a fluid flush. Excellent. Whip out that wallet, and probably a credit card since you are about to drain and RECYCLE 50 bucks in fluid. You bastards better recycle. It's not hard. Now that the pans off, pull the filter and throw it in the trash. It's bad. If the pans off, the filters bad. It's physics.
Next step, we need the harness out of the way. Namely the lockup solenoid. It's jammed into the pump. We need to remove the pump to get to the goodies. Here I've already attached my amateur hour front pump removal tool. They are Vice Grip brand vice grips. I think the generic term is "locking pliars". The pwm solenoid is in the way of removing the lockup solenoid. Theres a clippie in the channel beneath it you need to remove. I got this trick bottle cap opener but if your wife didn't find you one in the lowes parking lot then you can just use a regular flathead screwdriver. If you can't see the clip, spin the solenoid around right round like a record. Use a flashlight. 2 10mm bolts hold the lockup solenoid into the pump. If the electrical harness clippies break off, go buy a brand new harness. The plastic was cooked. Not a bad time to install a trans cooler too.
Now for the pump removal. I was at the junkyard in north houston and saw this red handled screw driver on the fan shroud of a GMT400 pickup. About 30 minutes later walking by it was still there. I figured what the hell, someone forgot it. Tossed it in my bag and away I went. The red color made me think it was some cheap chinese crap but it was pretty big. My buddy is a big snap on guy and told me I found a fourty dollar screw driver. Damn good score. Stick that strapon screw driver in between the pump and the transmission and pry the pump up. It helps to have a friend pull the vice grips up while you are prying.
Alright, the pumps on the bench, lets pop the band anchor pin off of the band with that free strapon screw driver. This opens up the band so you can pull the drum clean out of the case. I wasn't thumbing for a ride, the image needs to rotate 90* anticlockwise. Strange things started happening tearing into this trans. First part:when you remove the reverse input drum, a snap ring shouldn't fall out onto the bench. Mines probably ruined.
Now why the hell was the reverse drum snap ring off? Well it appears the last jackass to work on this transmission installed the input drum thrust bearing backwards. We all make mistakes. This ruined the reverse input drum, input drum, selective thrust washer, thrust bearing, reverse input drum clutches, entire pump, stator support. Jesus Christ.
To help work on the input drum, use a paddle bit slightly larger in diameter to your input drum and drill a hole into your workbench. It's awesome. (use compressed air to clean out the assy every time you insert/remove. MDF does not belong inside of a transmission.)
To get into the front pump, use a 13mm impact and pull the 5 bolts off. the halves will separate and you can get inside where the magic happens. Or in my case, the carnage:
Well that was an hour of work and 2 hours of writing.
Alright, 2nd half of the day. Went to a "Habitat for Humanity ReSale" about 15 miles south of me. It's like if you went to a home depot and the entire store was on clearance. They had some 20A hospital grade leviton receptacles for 4 bucks. The box looked distressed but damn, thats cheap! Got there with 5 minutes to close. Going back tomorrow. I saw an electrical section I need to exploit.
At this point in the trans I started reading the book a lot. Measuring clutches and such. The next photo is of my finders keepers strapon screw driver. I did not use the screw driver as a punch with a hammer. Just like the instructions say. So just make sure that you don't use your screw driver as a punch with a hammer because thats exactly how I didn't remove the converter seal from the pump. (Use the rubber side, otherwise gloveless you will make your tools into cheese graters)
Using my parking lot snap ring assist tool and some large c clamps I removed the input drum snap ring holding 1 of 3 springs of death in place.
Now we get into the front pump. The goal here is to check the beating heart of the trans. Make sure the pump is not more than 1 piece. Also read the manual. Theres measurements to be taken with a straight edge and feeler gauges. My pump was trashed. It looked like someone put ooh I dunno, half of a thrust washer into it. Aluminum always loses. This put me in a tricky dilemma. My donor rebuilt trans is of a 1994 vintage and lacks the PWM pump I need for the 99. Now I do have a 96 pwm pump spare so I cracked her open and what do I find? It's a 10 vane. Damn. Heres where features erode function. The 13 vane is allegedly weaker than the 10 vane pump. I'm told the 13vane is done because of the hella fancy lockup strategy the 98+ uses. It essentially is never in full lockup I suppose you get a smoother flow of fluid with the higher volume of vanes. So an analogy: 4l60e and 700r4 lockup until 1995 was like a standard light switch. Lockup on or lockup off. Then GM designed this failure prone mechanism called "pwm". It works more like a dimmer switch. Theres on/off and theres the in between stuffs. This is supposed to keep you in lockup longer, keep the trans temps lower, and save fuel economy at the expense of lockup converter fatigue.
The on/off converter clutches from the 700r era is called a "paper" clutch. Now I don't know if it's really paper but whatever. When they introduced the pwm lockup they had to strengthen the converter clutch so it was made out of carbon something or other. THEN the 98 full on fancy lockup came out and they made the clutch out of woven carbon fiber iirc.
Well that was a helluva tangent. SO my 13vane pump is crap, my 10 vane pump is magical. If it fails it's just me pissed at myself so I did what any poor person does. I took the 13vane pump ring, stuck in the 10 vane pumps... vanes, added the 3 best from the 13vane and stuck all of that into the 1996 pump housing. I measured everything and it all clears so I might get lucky.
#16
05-01-2015, 08:31 PM
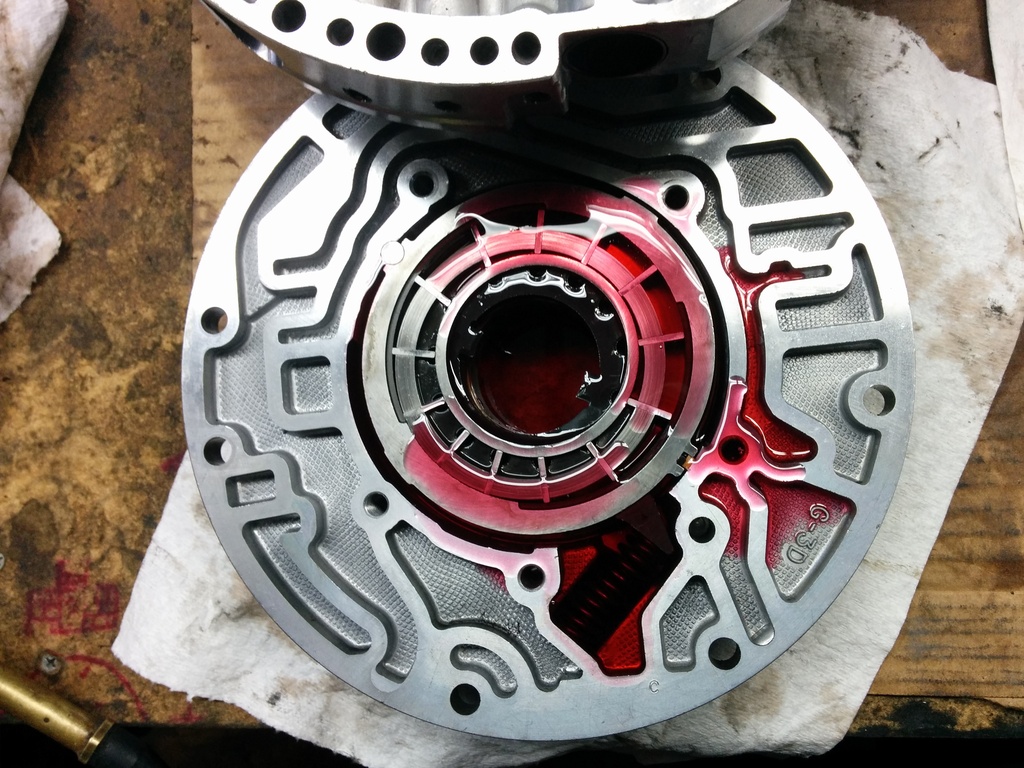
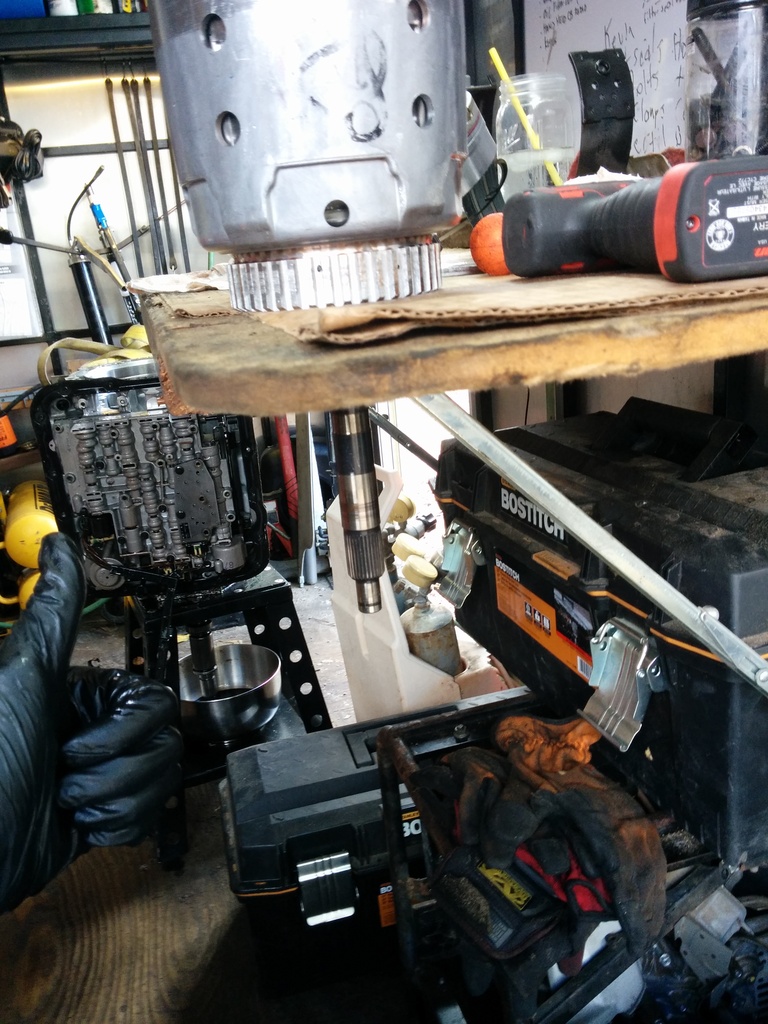
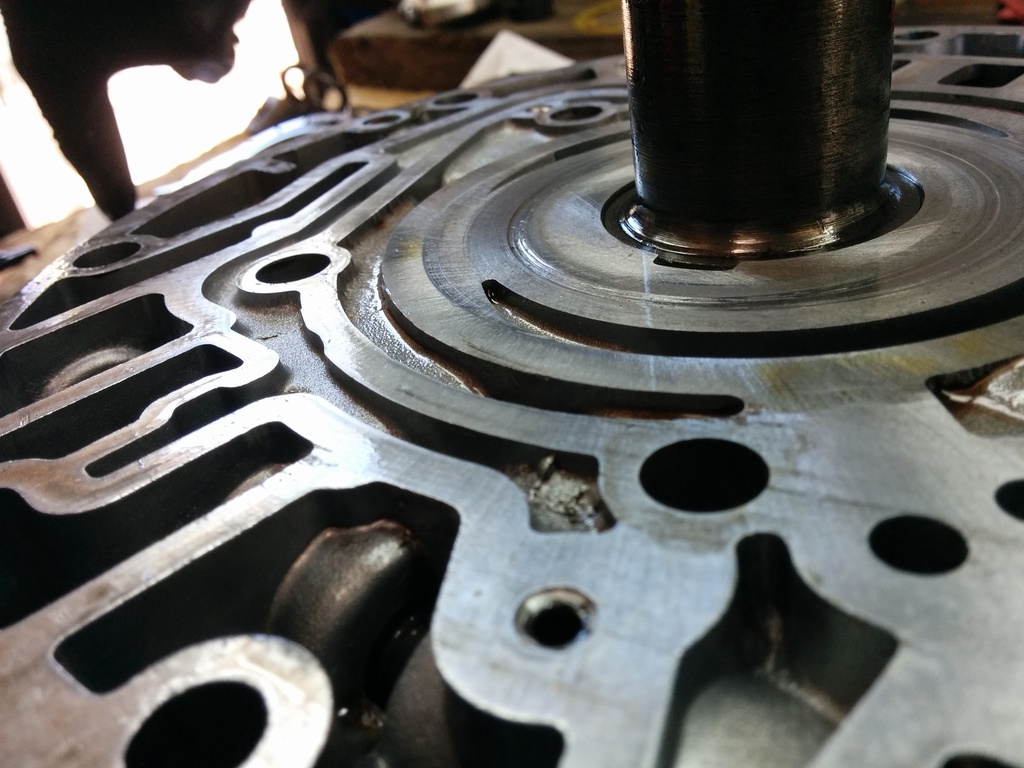
So you are supposed to fill the pump with fluid then reassemble. Well this one time (my first time) I put the front pump seal in between the pump halves. I DIDNT READ THE MANUAL. Boy was that a stupid mistake. You are supposed to put the front pump seal between the pump body and the transmission case. That was 1 transmission r/r I won't soon forget. Anyhow here is an ignorant kill bill moment. I poured fluid into the pump. Well I realized I poured fluid into the hole where the pump bolts go. Don't want fluid in there so as you can see, theres an air nozzle virtually shouting at me. Slow motion 110psi into the bolt hole at full force. Sometimes theres little blow-off valves built into our lives that say GO TAKE A SANDWICH BREAK STAT!
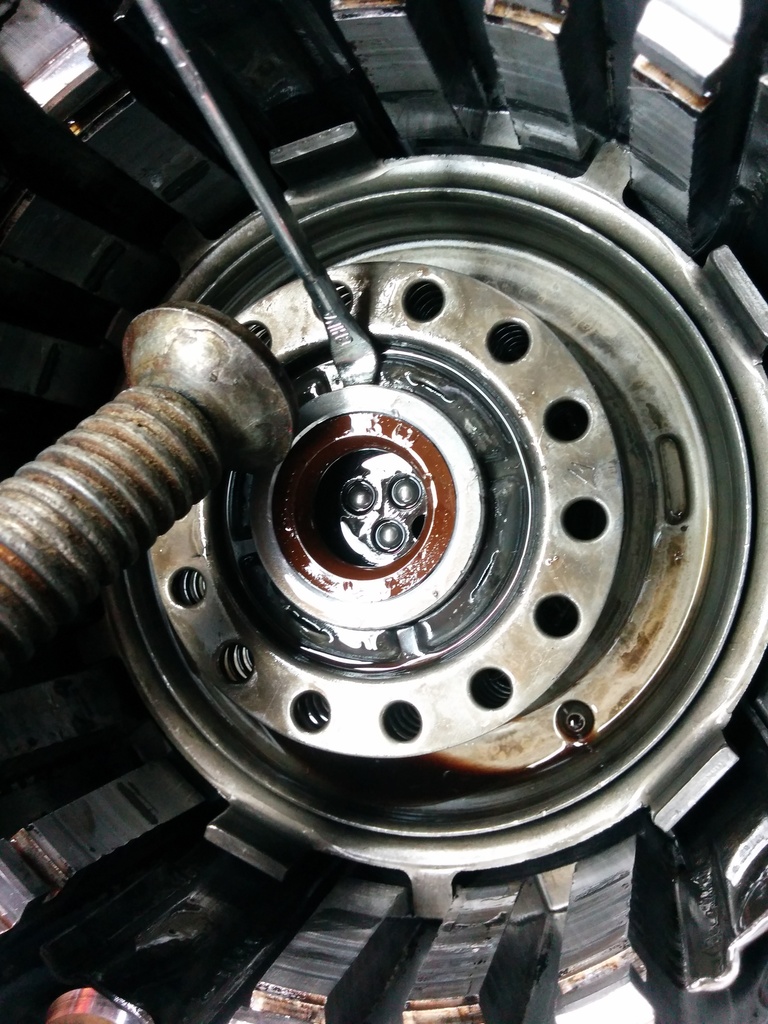
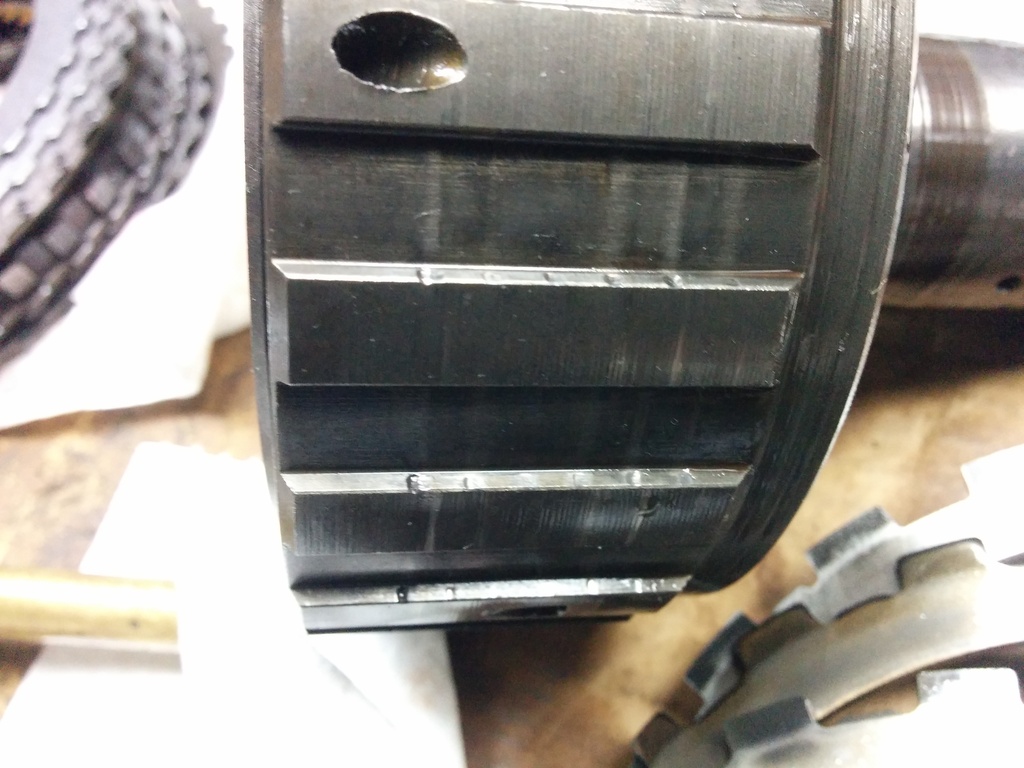
In the following images you can see the reverse input drum clutch pack. If the snap ring breaks you can kiss the clutches goodbye. They are next to some used ones I have on hand. The picture after that is the front planetary. I was looking at the nubs that the 3/4 clutches use to lock onto the front planet like wtf where did they go. I look at the planetary and you can see the gouging the clutches did. I went ahead and set them aside for another used set I have in good shape. Now I noticed some slight wear on my new used 3/4 clutches too so what I did was A: replace the worn part with a spare I had on hand, and B: align the clutches so that the unworn side faces the thrust side of the front planetary. This will basically reset the wear pattern for the clutches and should extend their lives. They measured at .035inches. My book says .060 is the ideal target with .030-.072 within range. I'm not sure why they err on the side of loose but I do not have the ability to adjust the slack anyhow.

Well here is my stack of parts, I'm closing up shop for the night, showering off the blood, typing this up, and hopefully selling some stuff on the classifieds. Need some trans parts!
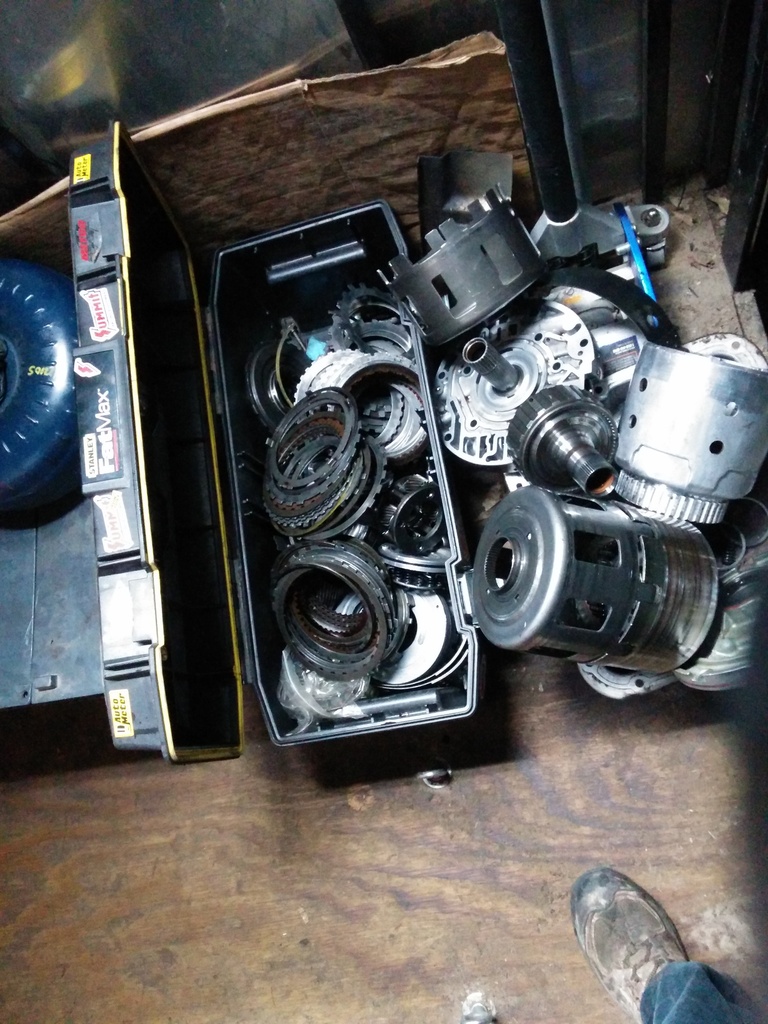
Tomorrow I'll rip into my 94 trans for the beast sunshell and my delco 5 pinion planetary. Might have better clutches too.

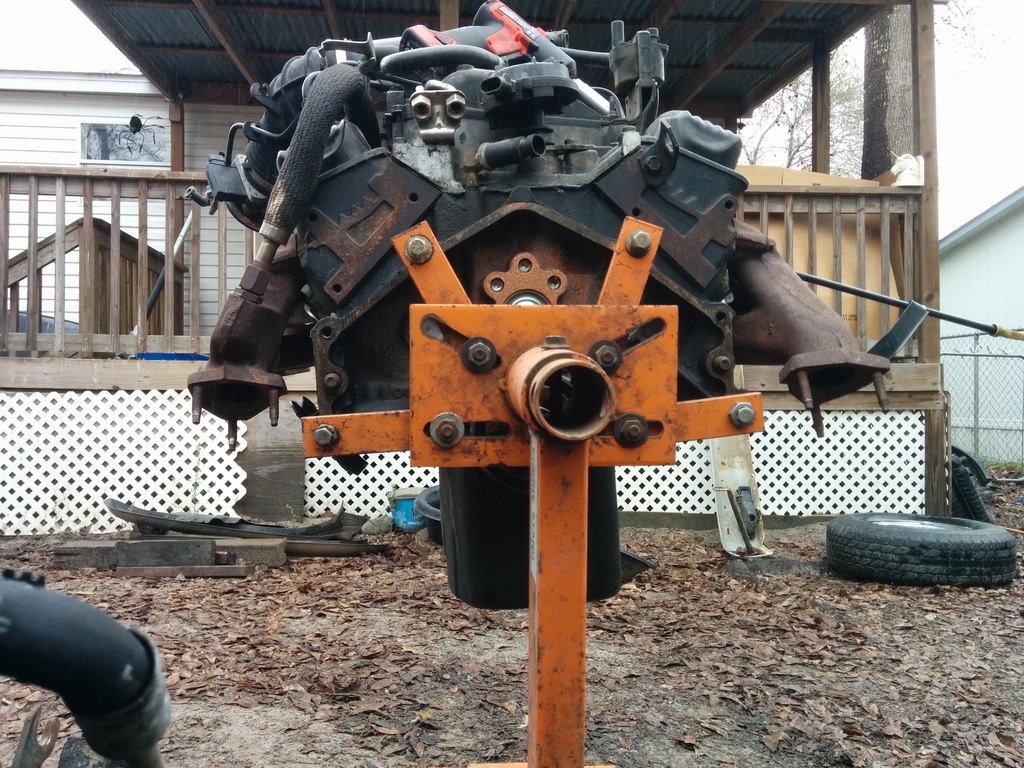
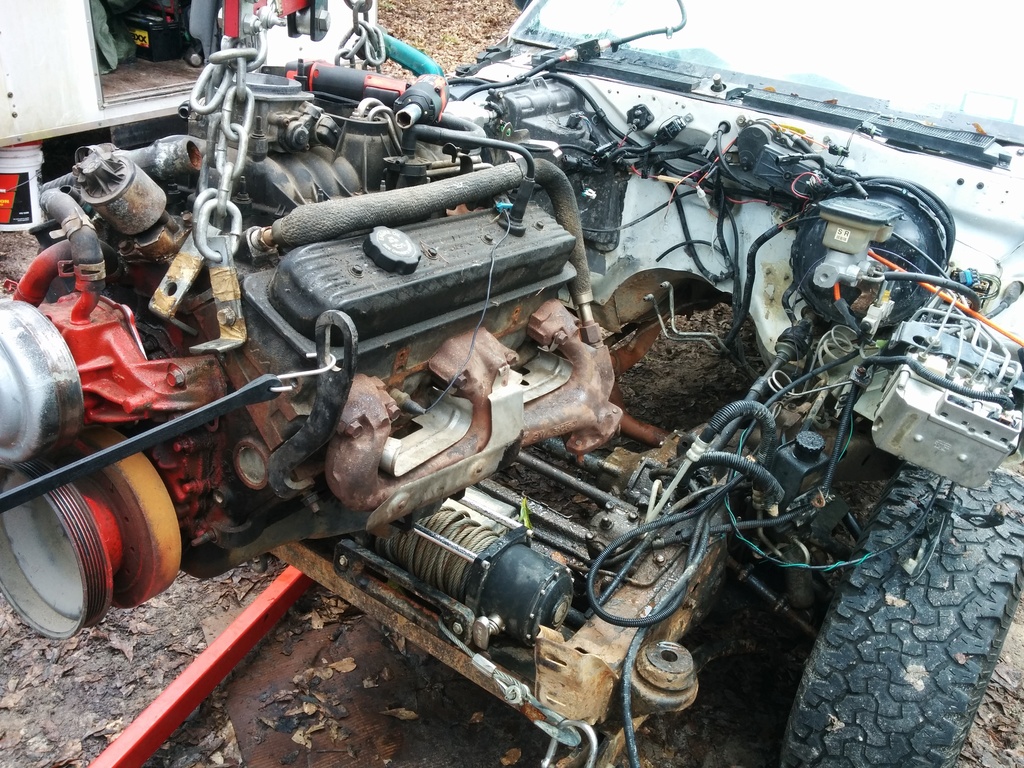
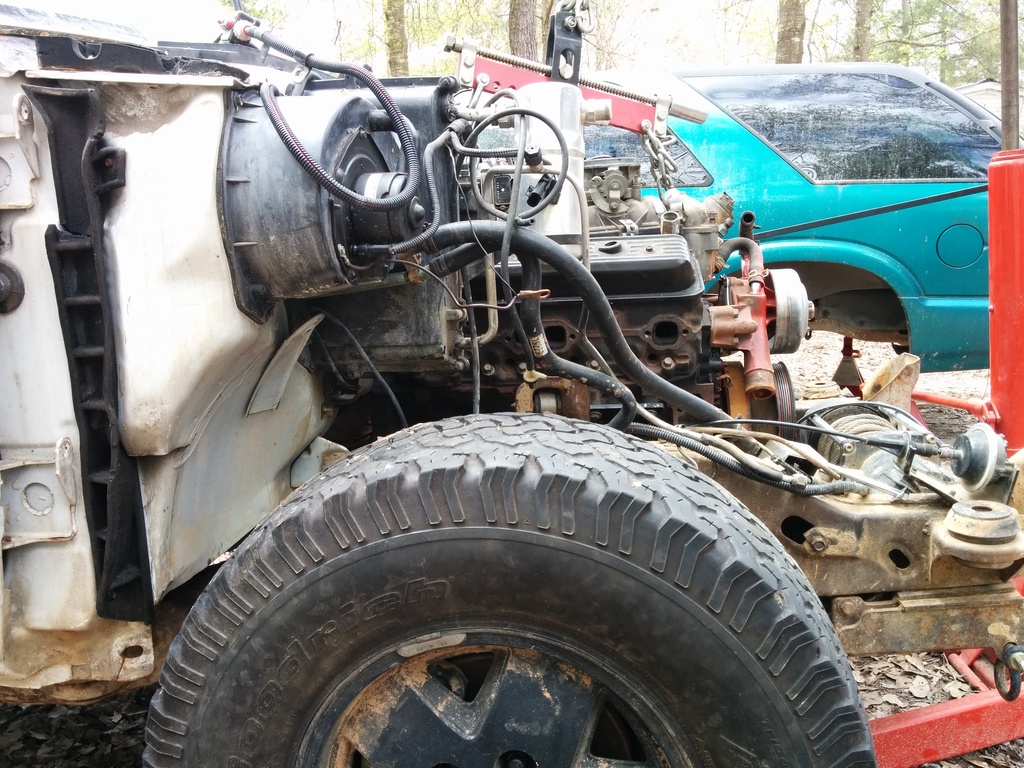
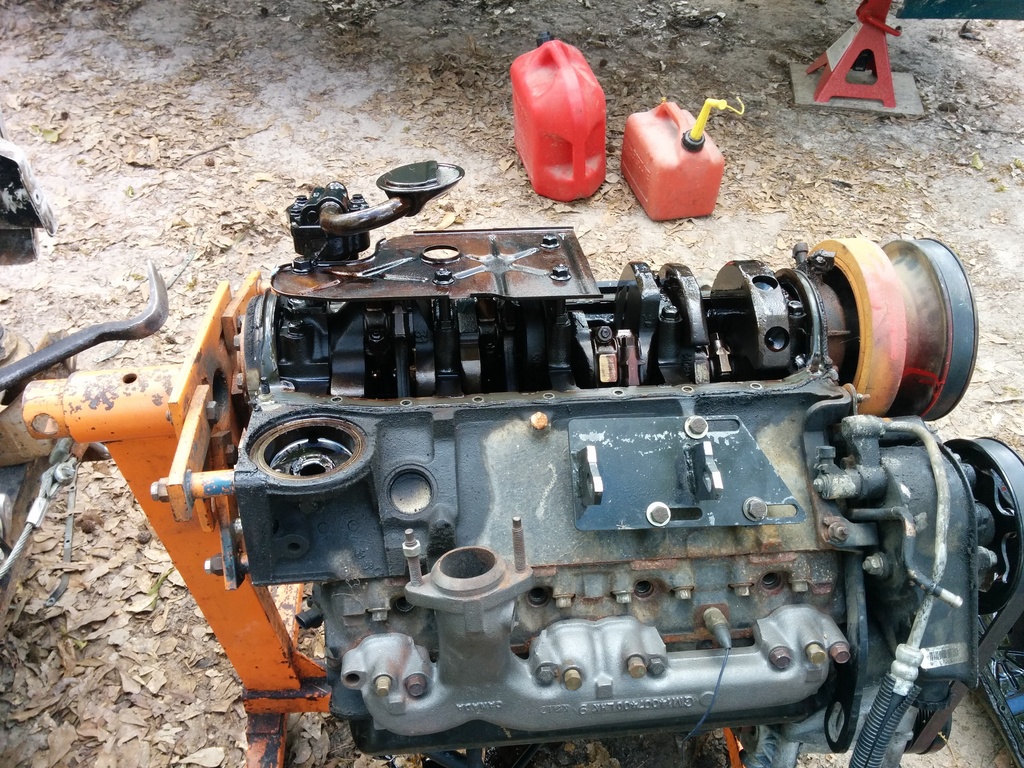
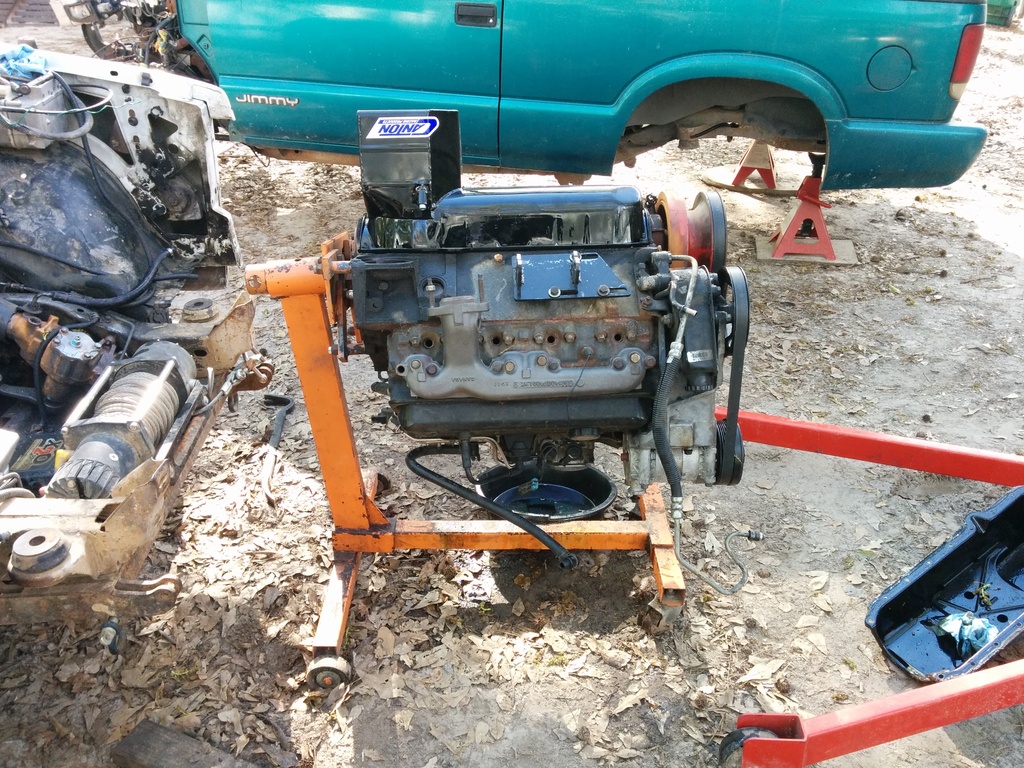
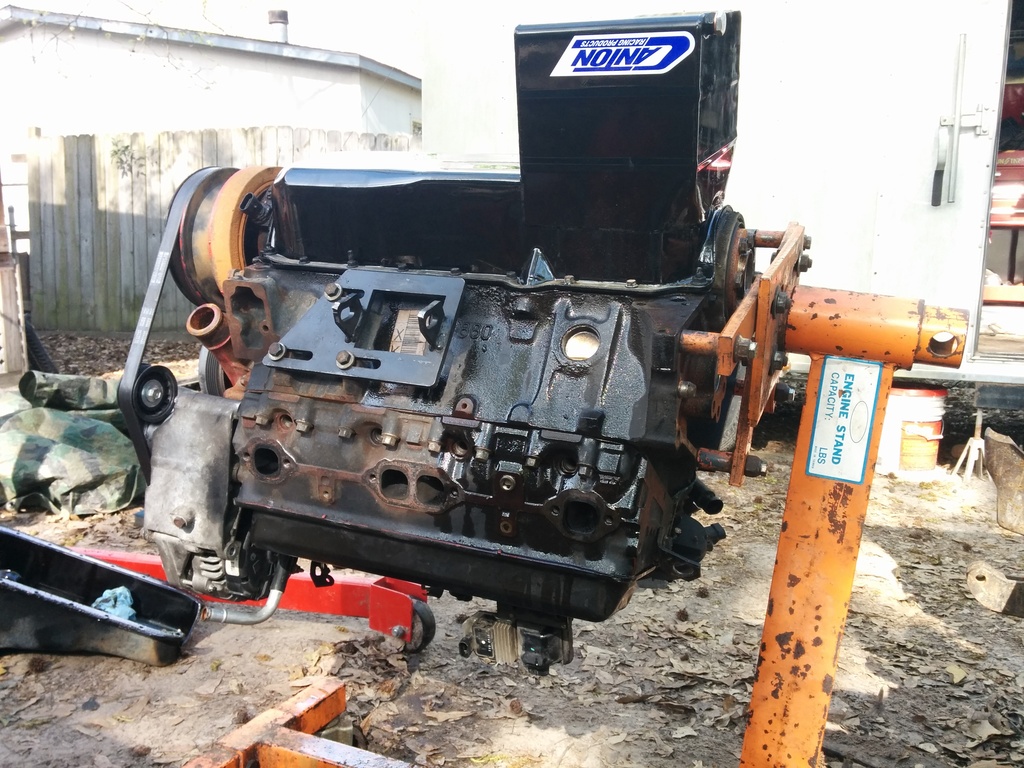
So I haven't updated despite working solid since my last post. I just got my camaro LH manifold in the mail and was test fitting the engine into the bay. I work in a sandy dirt yard and my 5 hens use the "scorched earth" method of finding snacks so it is a barren wasteland out here. I have to use my wifes tahoe to push my Jimmy forward inching it along as I work the engine into the bay.
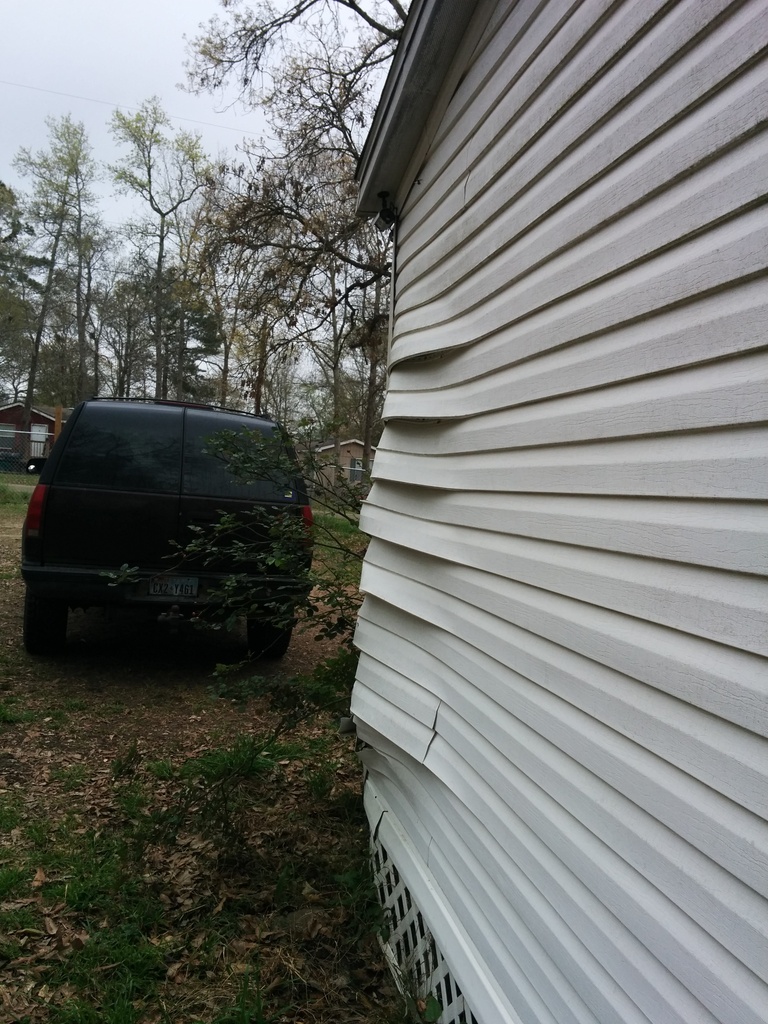
The sadness of a poor man indeed. Anyhow I say Hey beautiful wife, mind bringing the tahoe around so I can test fit this manifold? She hops in the truck, I walk around to the side of the house to open up the gate and watch in horror as she gets into the truck, starts it, puts it in reverse, releases the parking brake then screams and runs out of the tahoe. It rolls back as I yell HIT THE BRAKES. Half a second later it smashes in the corner of my house.
My rage-o-meter is bouncing off of the limiter, I walk over and yell at her to move and go inside and make sure the house isn't on fire from electrical as she has just pulled a Kool-Aid man into our spare bedroom in a location I know electrical exists. As I'm yelling I say "there was a ****ing roach wasn't it".
I almost nailed it. A bumblebee went into her ear as she released the parking brake. My anger lowered rapidly as I recalled nearly taking out a bus stop worth of kids when one of those southern flying **** roaches decided to start crawling up my pants leg while driving in the rain.
So I spent the rest of that day repairing my house, which btw **** VINYL SIDING. She split the 2 stacked 2x6 beams that make up the corner post of the house, wiped out an electrical junction, backer board, half our rose bush, and the vinyl siding corner piece. The tahoe has no damage besides rose bush goo on the impact strip. Ooh and I got it all on surveillance cameras.

So back to happy things, I GOT MY LH MANIFOLD IN!!! woo hoo it looks awesome. Gonna dump from the collector to a 90* it would appear above the diff then follow standard routing. Instead of a y pipe it will just run parallel with the RH manifold into hopefully the suburbans stock catalytic converters modified to fit where my single 4.3 cat resides currently then finally dumping 2-1 into my thrush stainless muffler and out the rear via 3" mandrel down pipe.
So I don't have an answer for the RH manifold yet, I'm hoping I can fit my angle milled vortec manifold there because I'm not liking this "offset hole" crap I'm reading about on other swaps. Evidently the camaro manifold has a wider bolt to the head in the back that my vortec heads lack which creates an exhaust leak.
I also finished converting/rebuilding my suburban transmission. Waiting on the ac delco converter input shaft seal in the mail. Using the 3/4 clutches it already had and robbed a bunch of good used clutches/steels from my collection. This trans has LOTS of bad parts inside of it. I'm glad I went through it now.
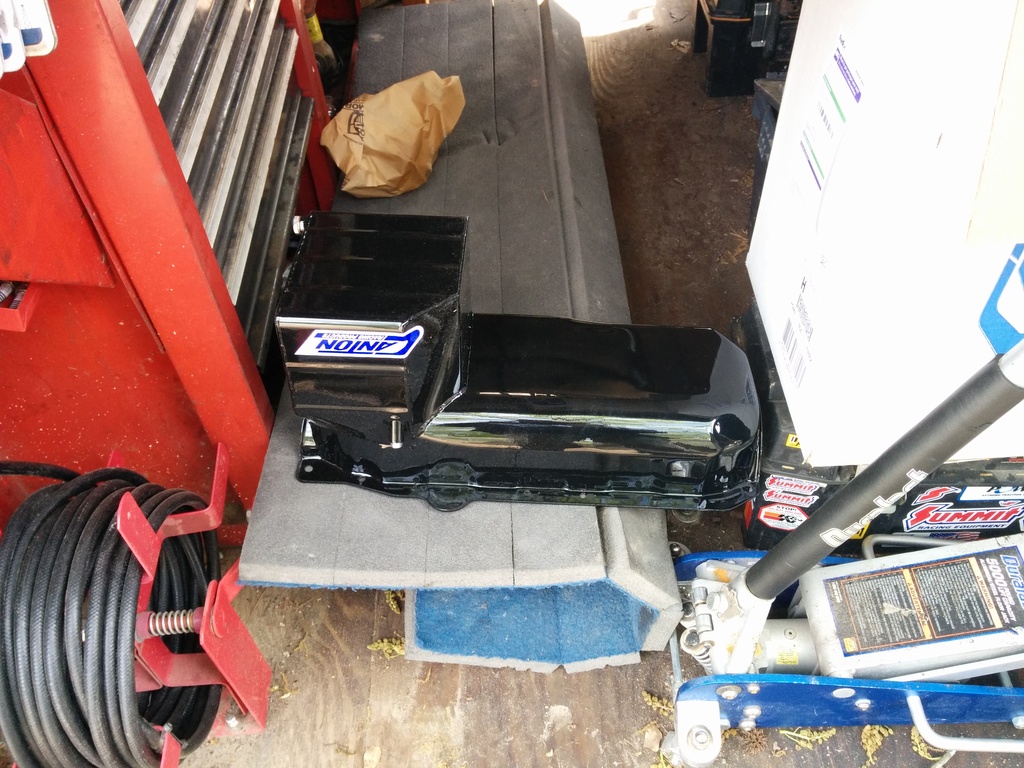
So I guess once I can set the engine into the bay with exhaust manifolds that will clear I'm almost ready to knock out my wiring! Ooh and that leaves the oil cooler adapter unsolved as of yet. Well damn. Ooh and that fancy schmancy canton oil pan I can't afford yet.


#17
05-01-2015, 08:32 PM
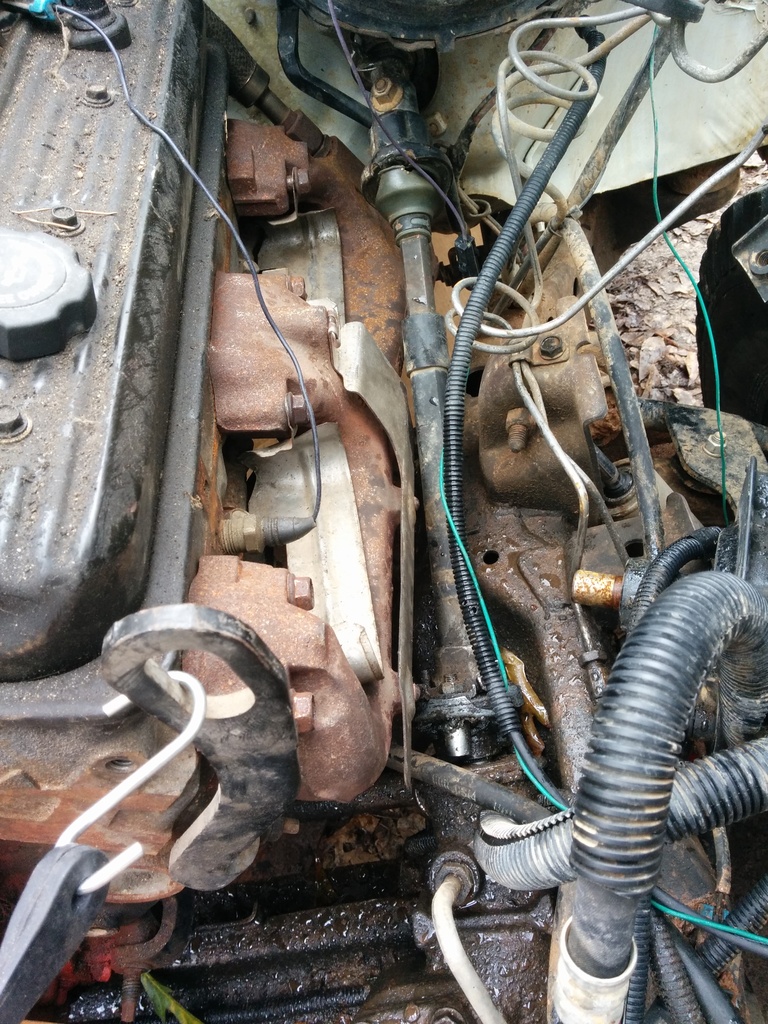
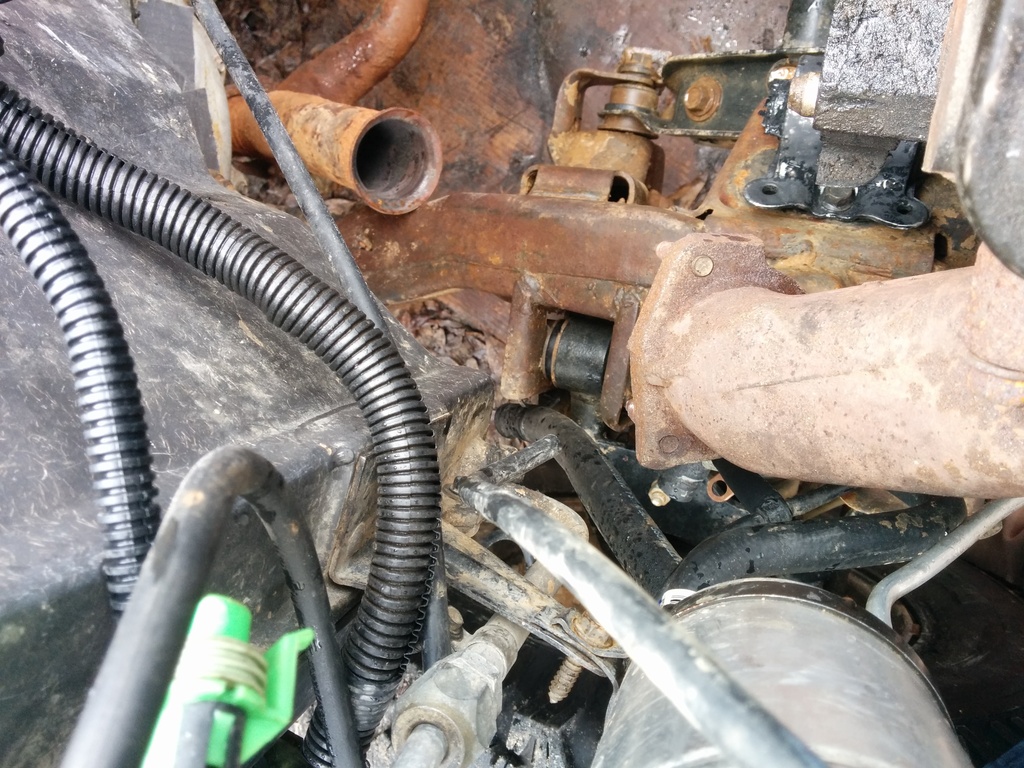
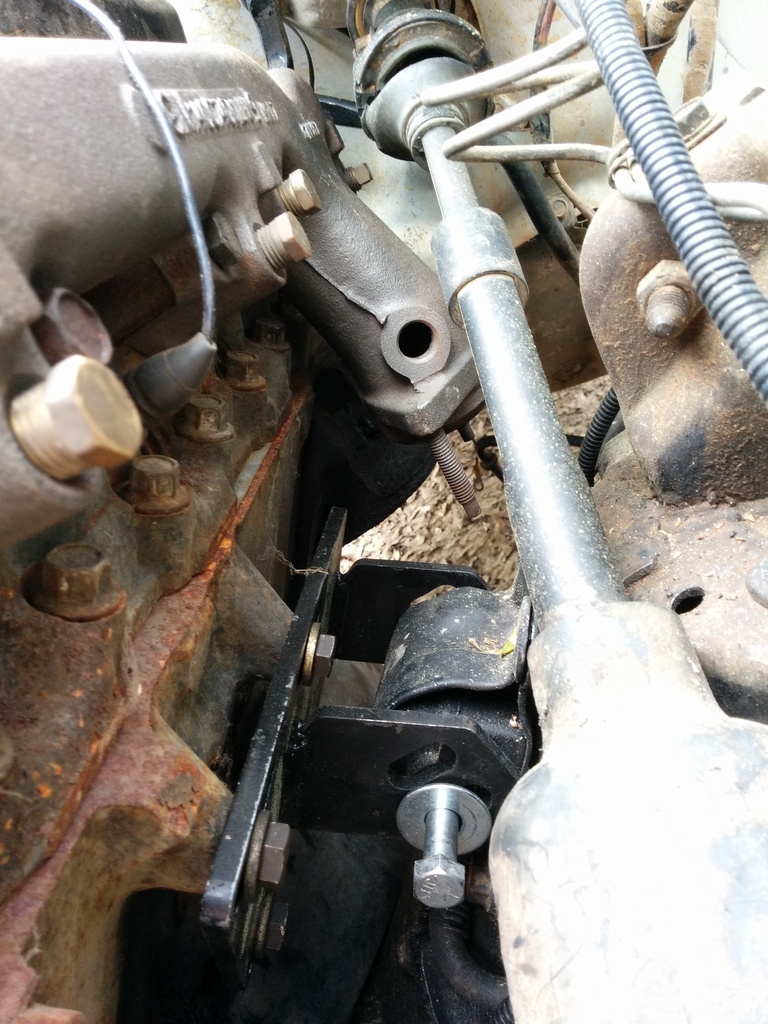
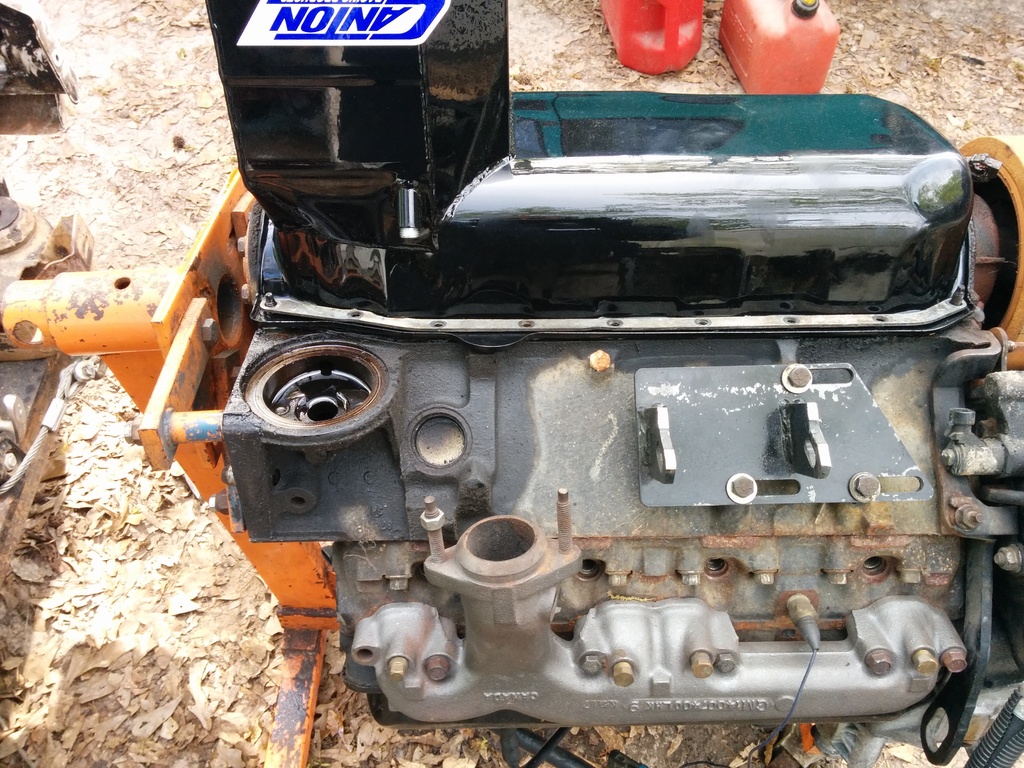
Alright, using a large rachet strap and some yelling I was able to maneuver the engine into position. The camaro manifold fits absolutely fantastic. I don't see any issues with my column shifter or the steering shaft. The largest concern is with the exhaust shop routing a collector after the flange above the diff. If they can pull that off I think they can handle the vortec manifold on my passenger bank as well. I did have to grind off the square bits of the top of the manifold as they hit my valve cover. I also am not particularly excited at the prospect of having the exhaust roasting my valve cover gaskets however they are pretty simple to replace if that becomes an issue.
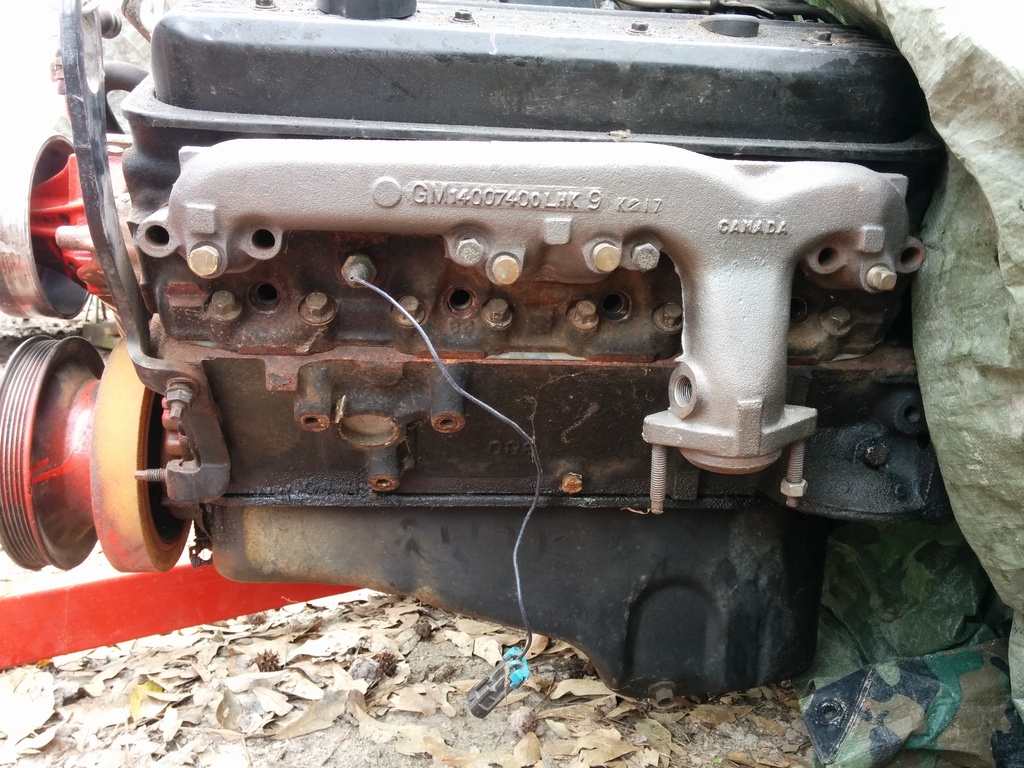
Scored this brand new GM manifold on ebay for 50 shipped!


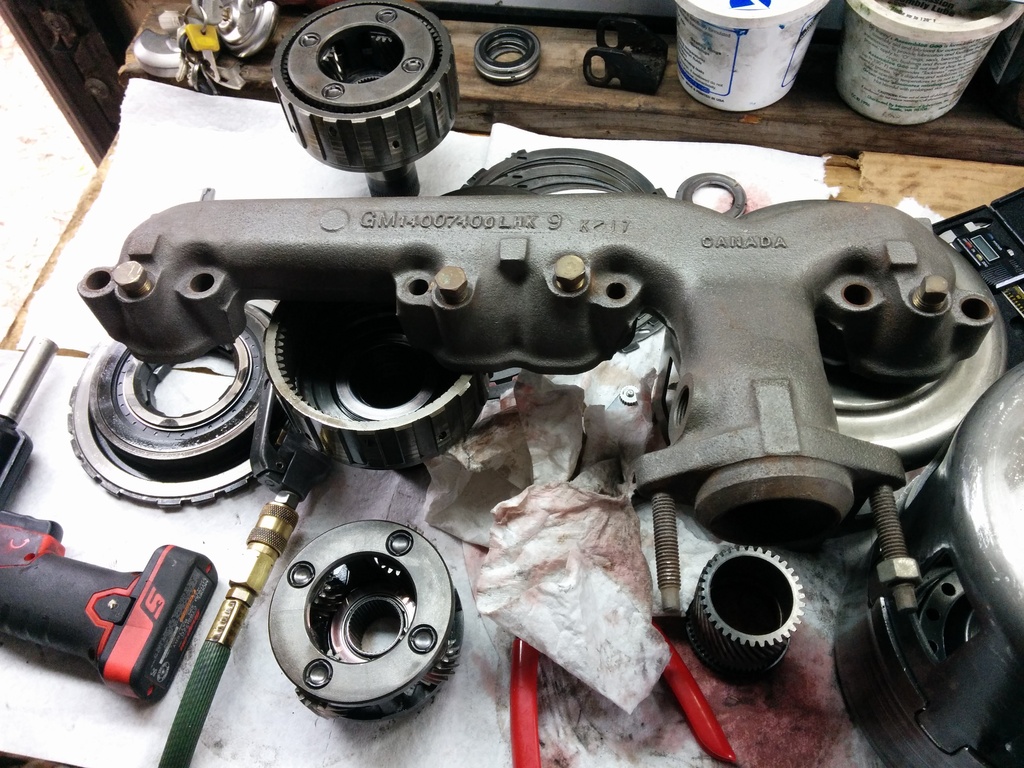

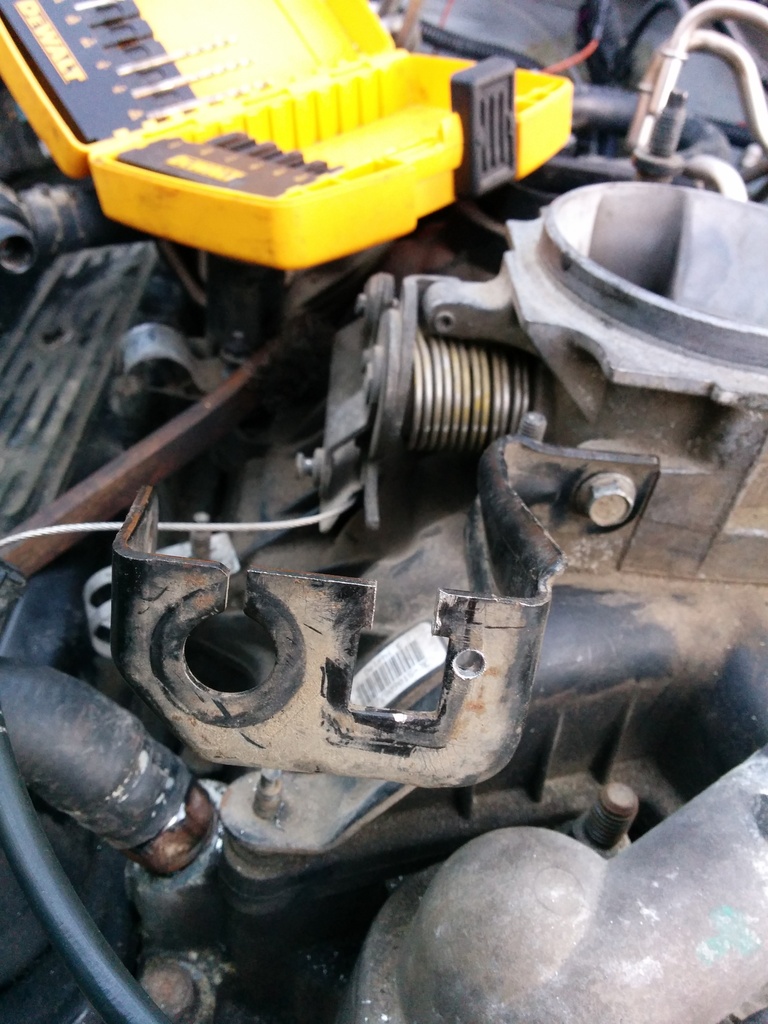
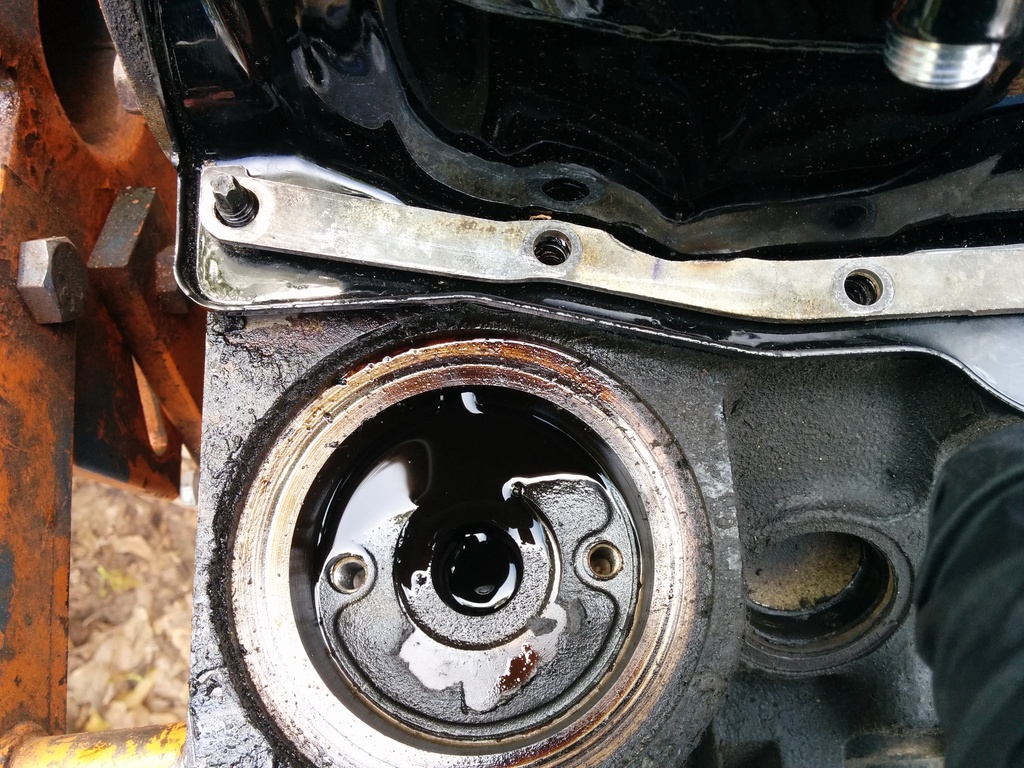
Did the easiest v6 to v8 conversion step there is: Remove the heater hose fitting from the v8 with a 33mm socket, place it in the nearest scrap pile. Use the correct tap to chase the threads in the intake. (If you have worked on a few 96-99 vortec v6/v8 you have probably had to ez out the old pewter heater hose nipple, I sure as hell have) Once the threads are clean and happy, use compressed air and blow all of that metal into the engine like my dumbass did. (she will earn her flush) Pull the stock 4.3 heater hose fitting, use a wire wheel on your bench grinder or if you are poor like me, use a metal brush and clean them threads! Dab some permatex thread sealant, install to HAND ft lbs and celebrate.
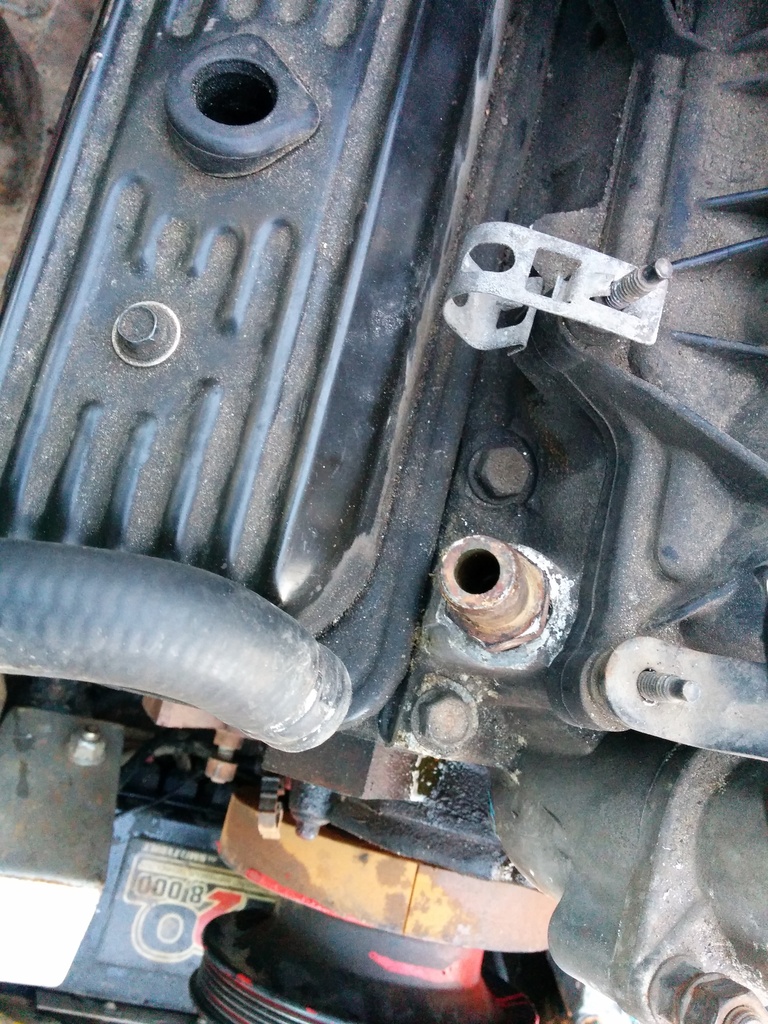

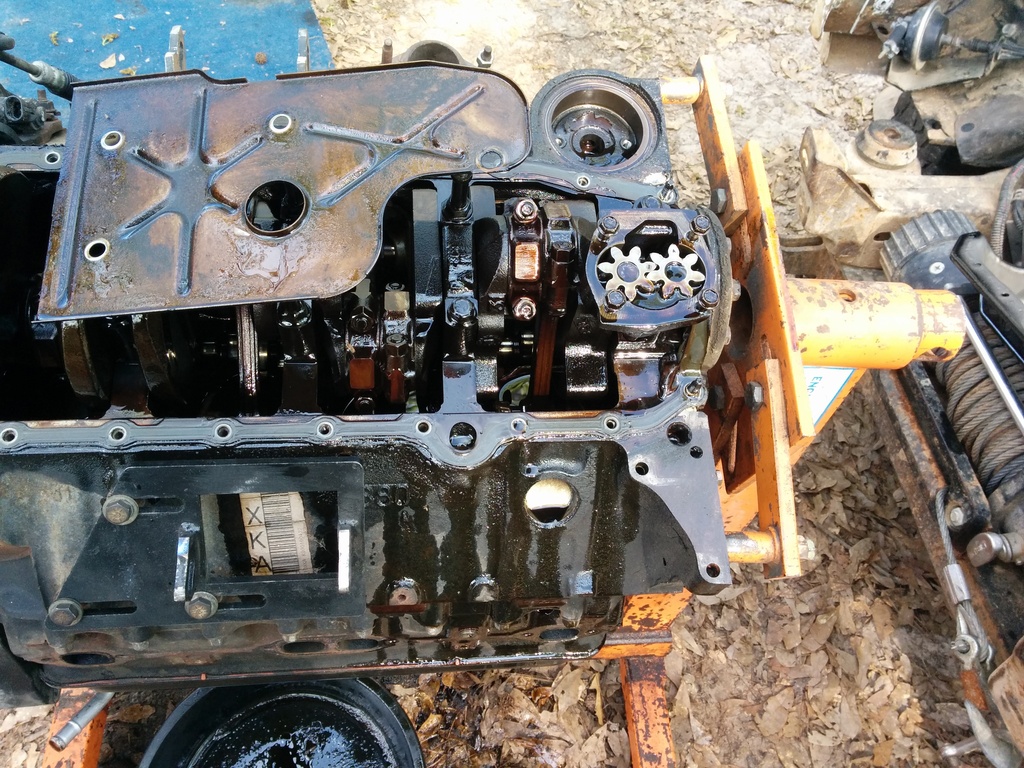
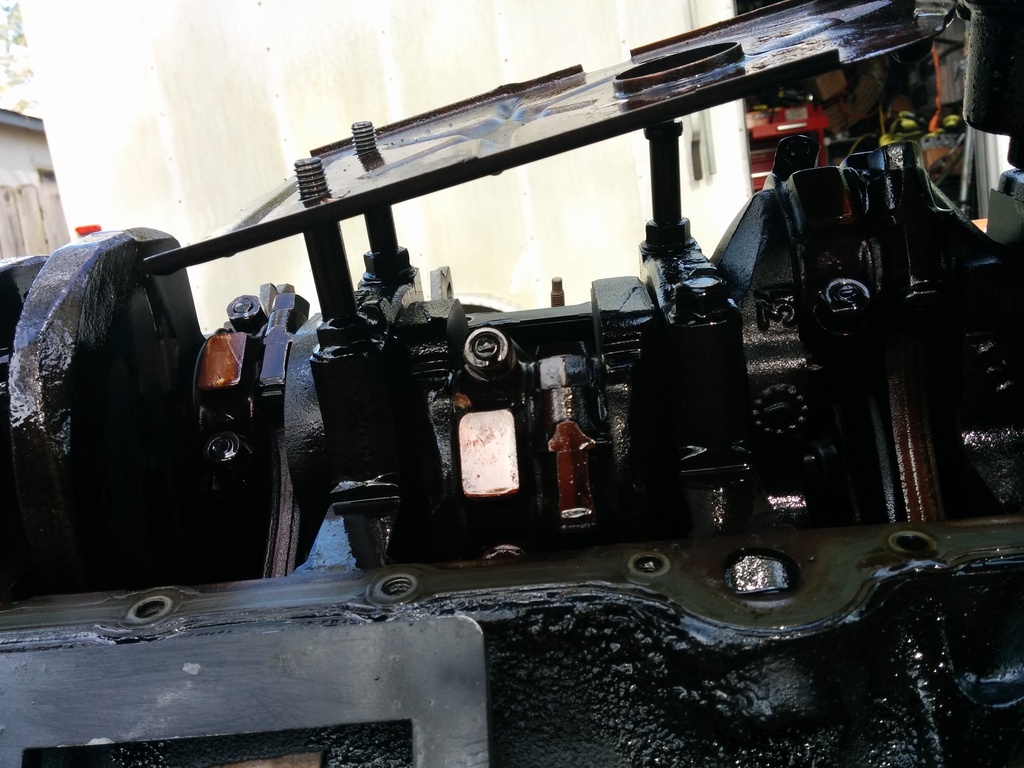
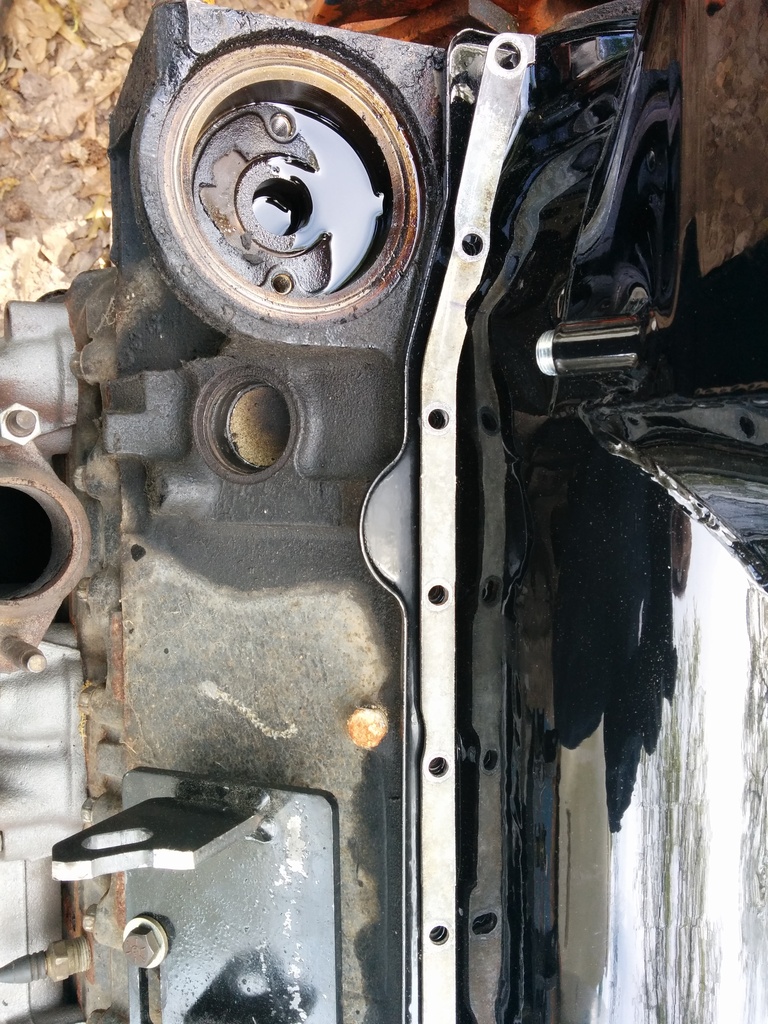
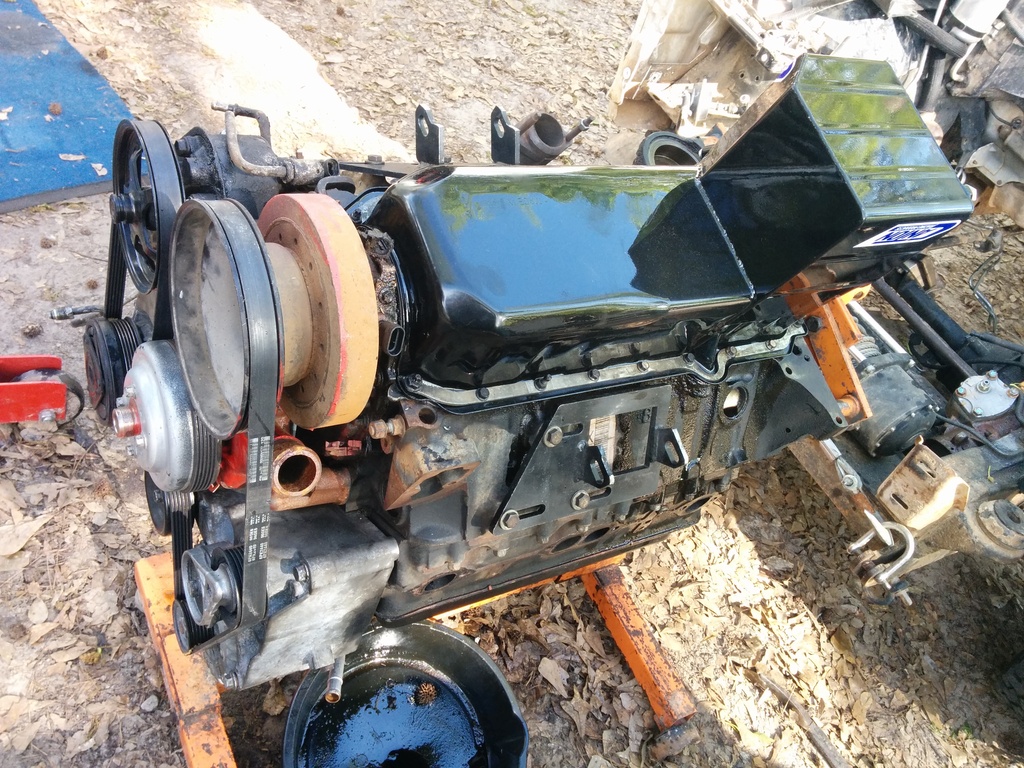
I then mocked up the engine mounts better. The oil pan does not clear my front diff despite having the rough country 2.5" lift. Even at the top mounts the pan interferes. If you were to have a v8 mount which looks to me like another .5 to 1 inch of clearance I doubt you would clear the diff. I'm just going to have to buy the canton pan. My front timing cover and pan gasket obviously leak already so there is that.

Ran my stock 4.3 cpi throttle cable to the v8 intake using the v8 intake throttle cable assy. Pretty simple mod to get r done. Used my grinder, until the slit cleared the plastic snap. Once that was done I used a sharpie to drill the plastic snap piece that locks it into place. Used a 1/8 bit as a pilot hole because I broke the tip off of my 5/32 bit that matched the size of the plastic snap lock thing. Slid it into place and it locked perfectly. My cable was in the truck when I bought it at 150K It's got 273k and I've not replaced it. It probably has some stretch about it. Which makes the fit PERFECT. Any looser and I'd have to mangle the bracket to lengthen up the cable which sounds not fun. The throttle pedal feels perfect throughout her travel from 0-100% verified with wife in the drivers seat.

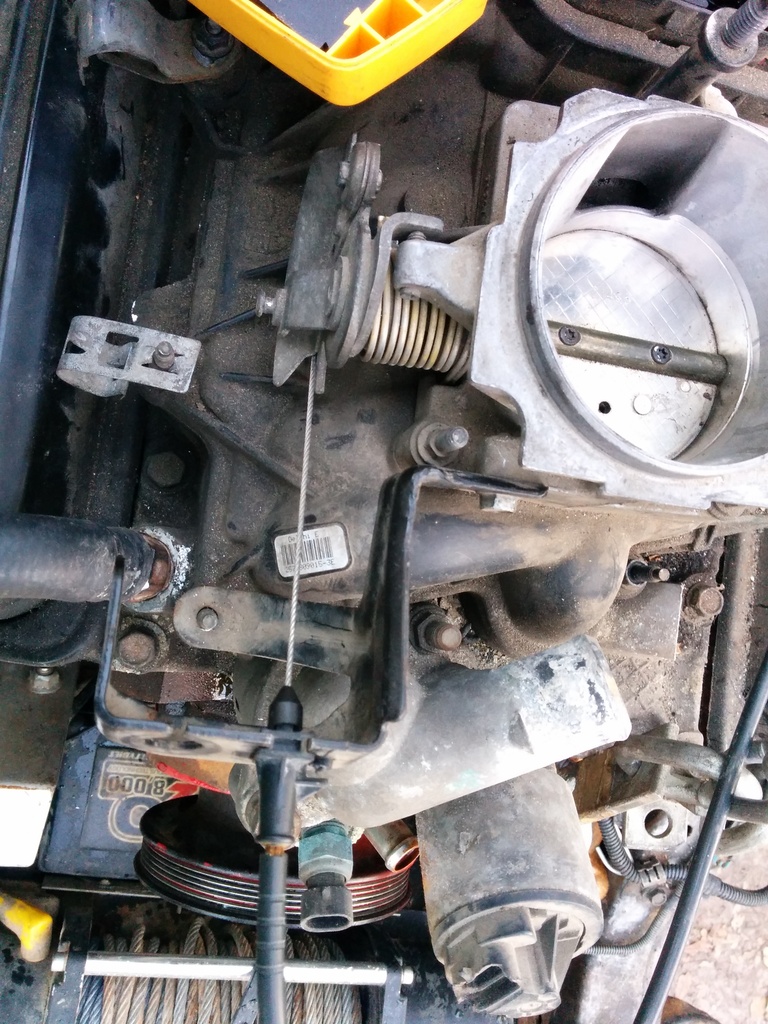
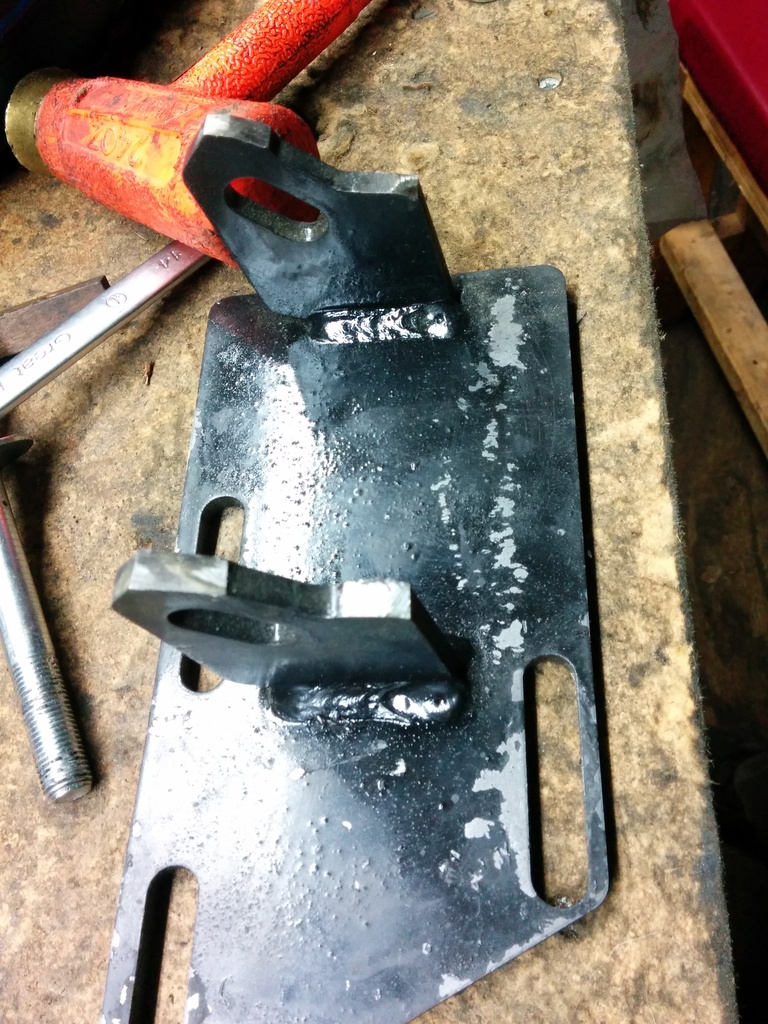
I took the mount brackets to the grinder and removed the high mount option. You can't use the low mount option without grinding it off, otherwise the mount plate just hits the frame.


Neighbor has a 99 suburban that has a p1870 code, bad front right speed sensor, and misfire on #6. Might be able to finagle pan $$ for the labor. I just hate setting the precedent to my neighbors that I will fix their cars. Too bad I don't have any spare 96/97 valve bodies lying around. Although I read the sonnax mega spring is supposed to help band-aid the slip, I might charge to install that.
Scored this brand new GM manifold on ebay for 50 shipped!
Did the easiest v6 to v8 conversion step there is: Remove the heater hose fitting from the v8 with a 33mm socket, place it in the nearest scrap pile. Use the correct tap to chase the threads in the intake. (If you have worked on a few 96-99 vortec v6/v8 you have probably had to ez out the old pewter heater hose nipple, I sure as hell have) Once the threads are clean and happy, use compressed air and blow all of that metal into the engine like my dumbass did. (she will earn her flush) Pull the stock 4.3 heater hose fitting, use a wire wheel on your bench grinder or if you are poor like me, use a metal brush and clean them threads! Dab some permatex thread sealant, install to HAND ft lbs and celebrate.
I then mocked up the engine mounts better. The oil pan does not clear my front diff despite having the rough country 2.5" lift. Even at the top mounts the pan interferes. If you were to have a v8 mount which looks to me like another .5 to 1 inch of clearance I doubt you would clear the diff. I'm just going to have to buy the canton pan. My front timing cover and pan gasket obviously leak already so there is that.
Ran my stock 4.3 cpi throttle cable to the v8 intake using the v8 intake throttle cable assy. Pretty simple mod to get r done. Used my grinder, until the slit cleared the plastic snap. Once that was done I used a sharpie to drill the plastic snap piece that locks it into place. Used a 1/8 bit as a pilot hole because I broke the tip off of my 5/32 bit that matched the size of the plastic snap lock thing. Slid it into place and it locked perfectly. My cable was in the truck when I bought it at 150K It's got 273k and I've not replaced it. It probably has some stretch about it. Which makes the fit PERFECT. Any looser and I'd have to mangle the bracket to lengthen up the cable which sounds not fun. The throttle pedal feels perfect throughout her travel from 0-100% verified with wife in the drivers seat.
I took the mount brackets to the grinder and removed the high mount option. You can't use the low mount option without grinding it off, otherwise the mount plate just hits the frame.
Neighbor has a 99 suburban that has a p1870 code, bad front right speed sensor, and misfire on #6. Might be able to finagle pan $$ for the labor. I just hate setting the precedent to my neighbors that I will fix their cars. Too bad I don't have any spare 96/97 valve bodies lying around. Although I read the sonnax mega spring is supposed to help band-aid the slip, I might charge to install that.
#18
05-01-2015, 08:33 PM
Youtube of my house being attacked by a GMT400
Had a kickass productive day today.
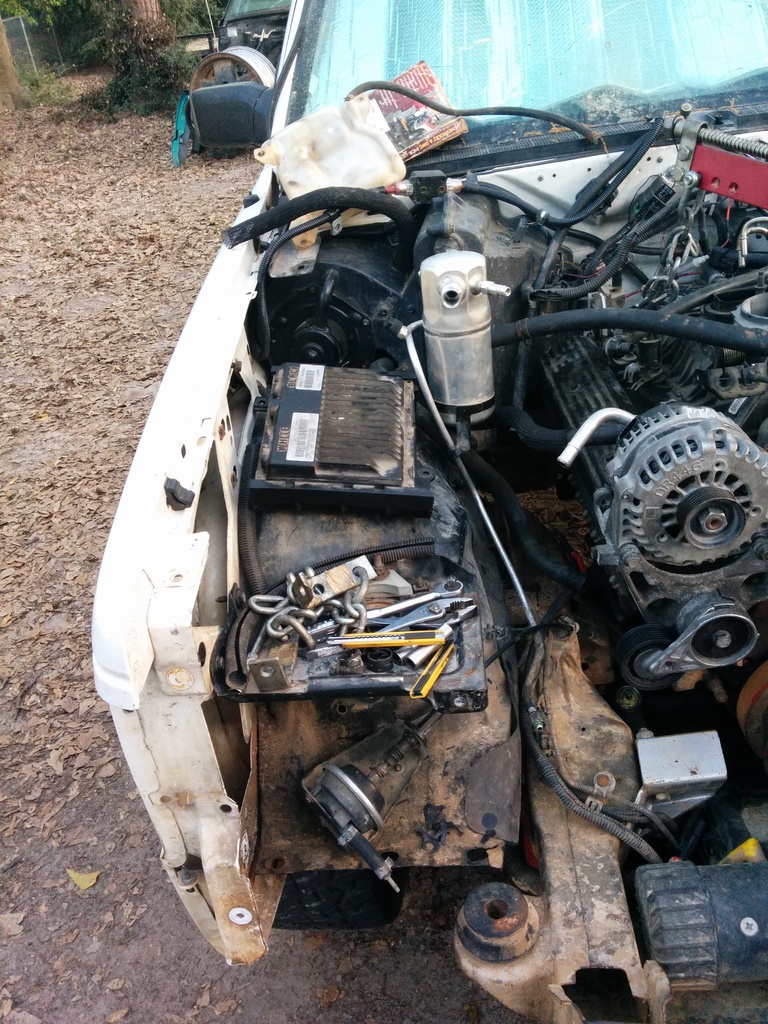
Mounted the 99 black box pcm up where the reservoir goes. Not sure how to attack a new reservoir but its' just a bottle with a tube in it. Can't be hard can it?
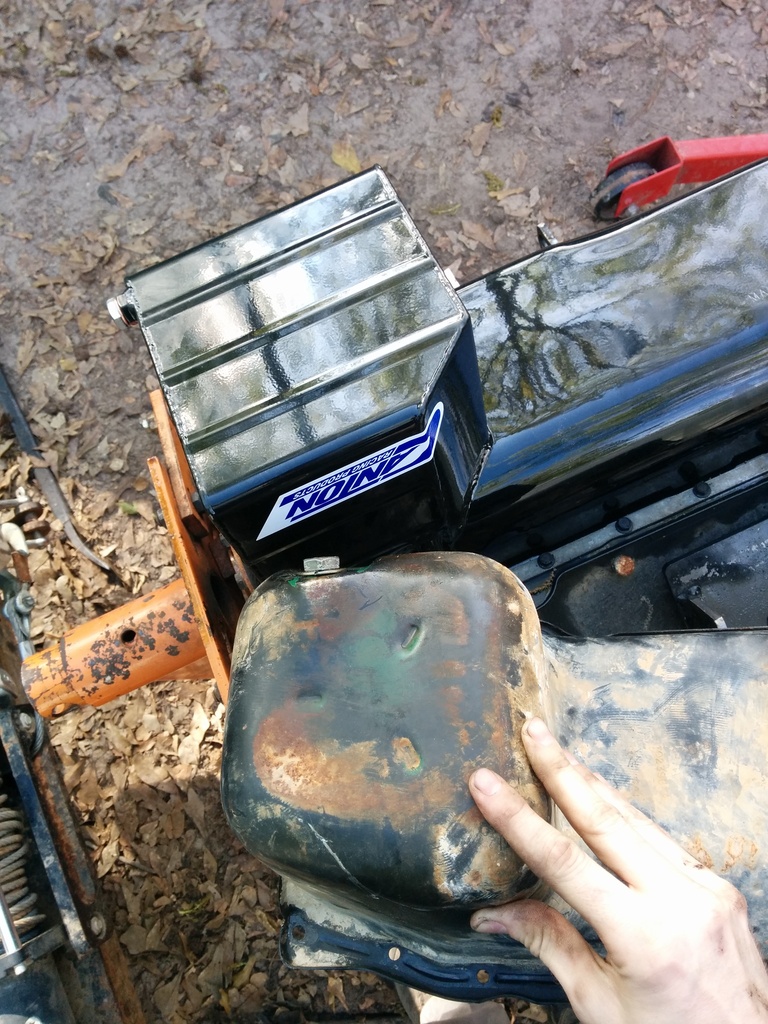
Canton pan is in! I hope this part helps guide some people on installing with this pan. I've already run into MANy issues.
You will need the canton pickup tube if you have a vortec v8. The stock pickup interferes with the pan.
Dipstick tube. Trying to drive the stock dipstick tube into my pan goes full stop. I think it hits the crank scraper. Plug the stock block (use a 4l60e 3/4 accumulator cup plug and rtv) and buy their 60 dollar dipstick setup. My stock 5.7 tube was broken from the start although it would have worked perfectly if I had clearanced the scraper. Damnit.
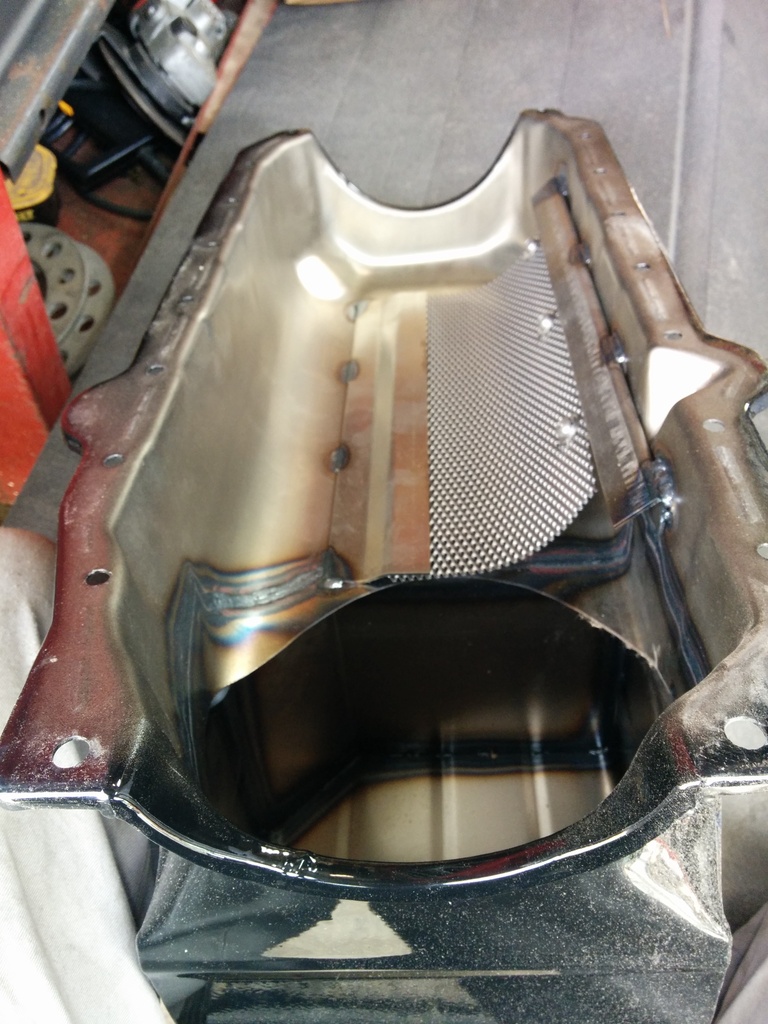
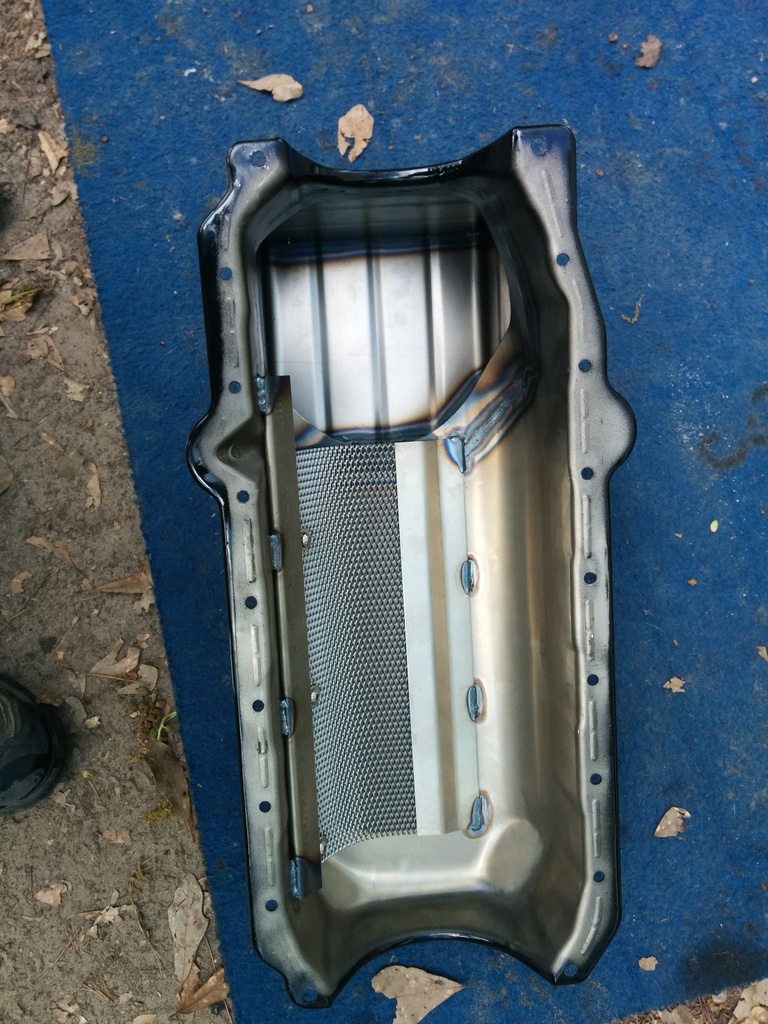
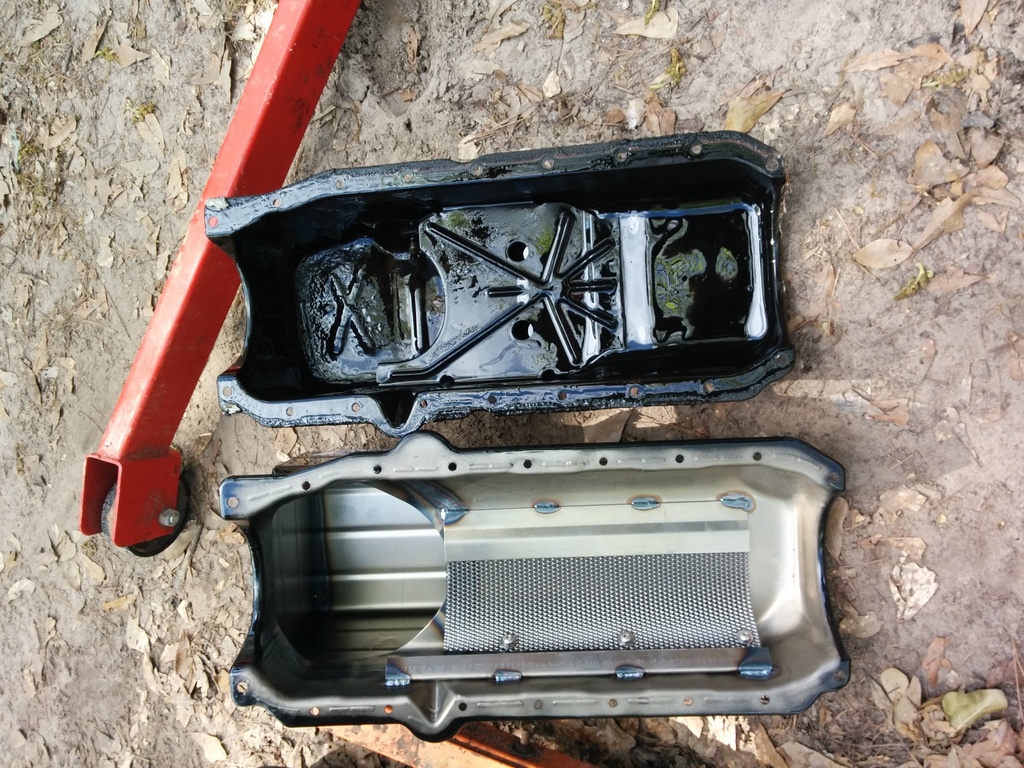
The 5.7 windage tray won't fit with the canton pan.

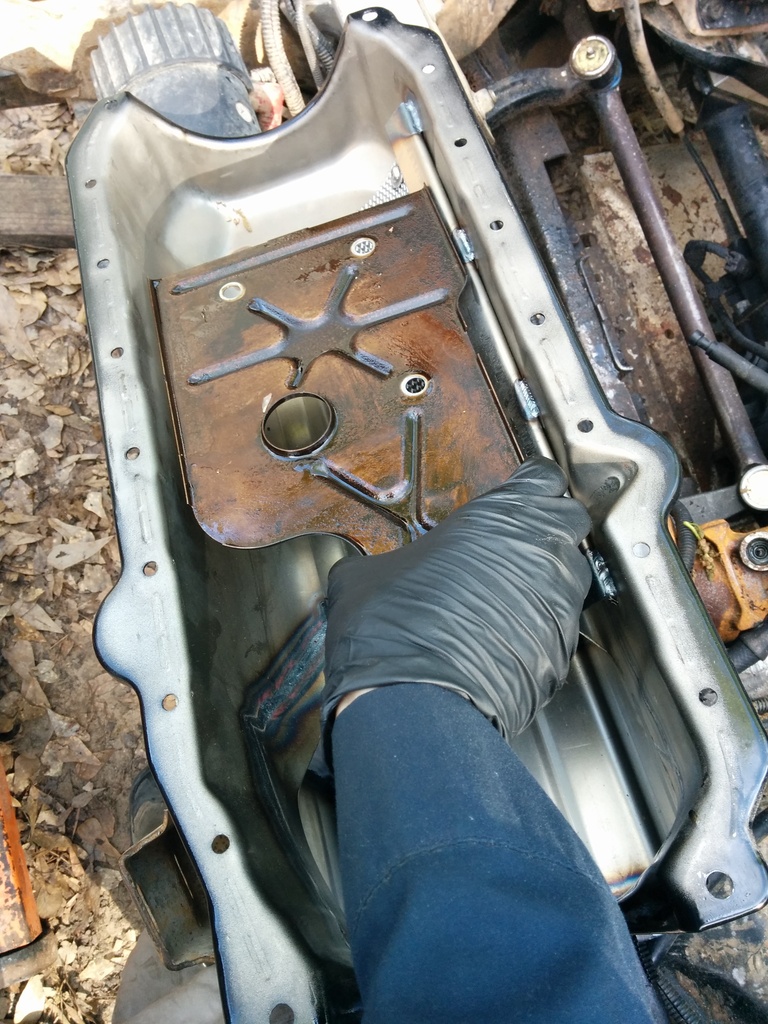
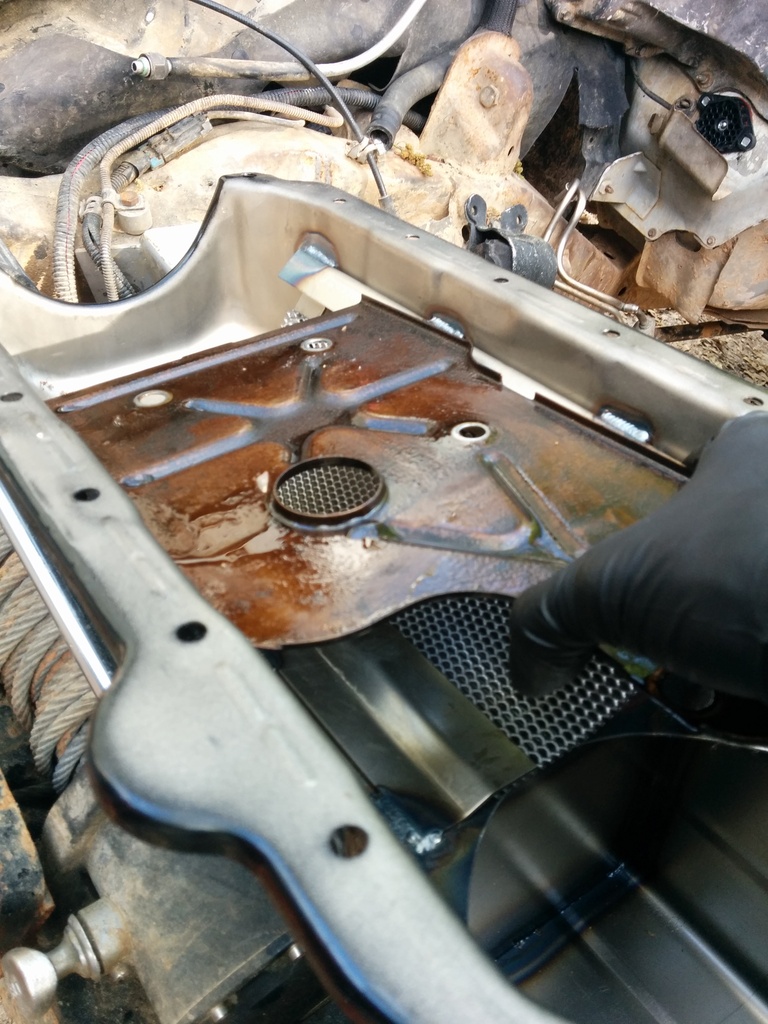
I'm pretty sure we need to use the stock pan rails. Well Canon failed to mention that the drivers side won't fit without clearancing it with a grinder.

I forgot to drain the engine oil first before flipping it over. The first startup will be fun. Mosquitoes should be out by then so at least I have that.
Had a kickass productive day today.
Mounted the 99 black box pcm up where the reservoir goes. Not sure how to attack a new reservoir but its' just a bottle with a tube in it. Can't be hard can it?
Canton pan is in! I hope this part helps guide some people on installing with this pan. I've already run into MANy issues.
You will need the canton pickup tube if you have a vortec v8. The stock pickup interferes with the pan.
Dipstick tube. Trying to drive the stock dipstick tube into my pan goes full stop. I think it hits the crank scraper. Plug the stock block (use a 4l60e 3/4 accumulator cup plug and rtv) and buy their 60 dollar dipstick setup. My stock 5.7 tube was broken from the start although it would have worked perfectly if I had clearanced the scraper. Damnit.
The 5.7 windage tray won't fit with the canton pan.
I'm pretty sure we need to use the stock pan rails. Well Canon failed to mention that the drivers side won't fit without clearancing it with a grinder.
I forgot to drain the engine oil first before flipping it over. The first startup will be fun. Mosquitoes should be out by then so at least I have that.
#19
05-01-2015, 08:34 PM
My pictures are getting a bit out of hand. I got the transmission and transfer case installed today with my wifes help. I work on dirt on the ground with no shade. Jacks are useless. Damn glad I have a truck tho.
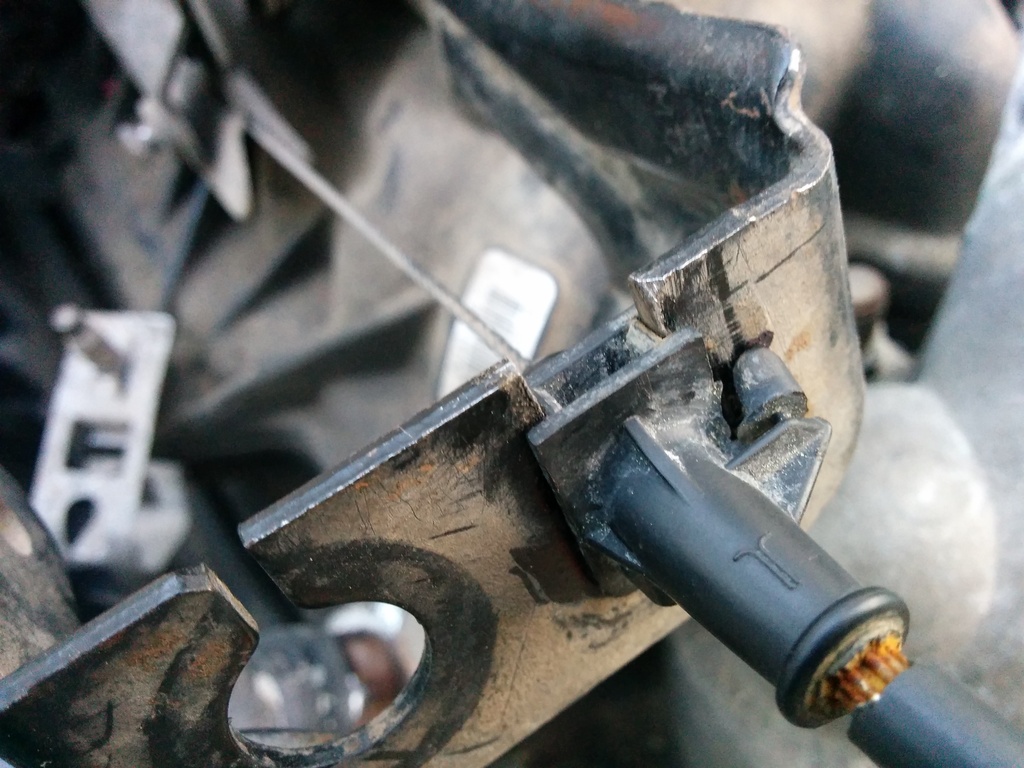
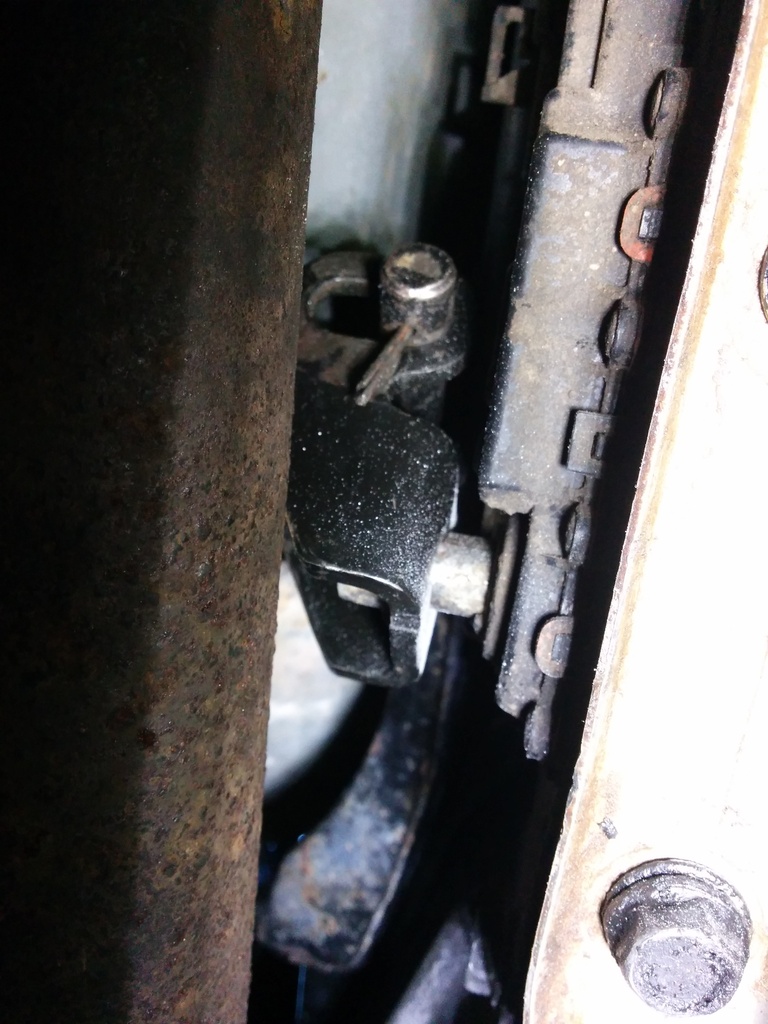
Ran into a BUNCH of little dramas but nothing a little yelling and a grinder won't solve. Firstly the suburban trans has these little "ears" on the left and right sides of the case. Had to grind off the one on the drivers side because it was interfering with my fancy tcase support brace that goes from just above the encoder motor to the bellhousing upper mount. Heres a pic of the passenger side thats going to get ground off as well. (It hits my passenger brace)

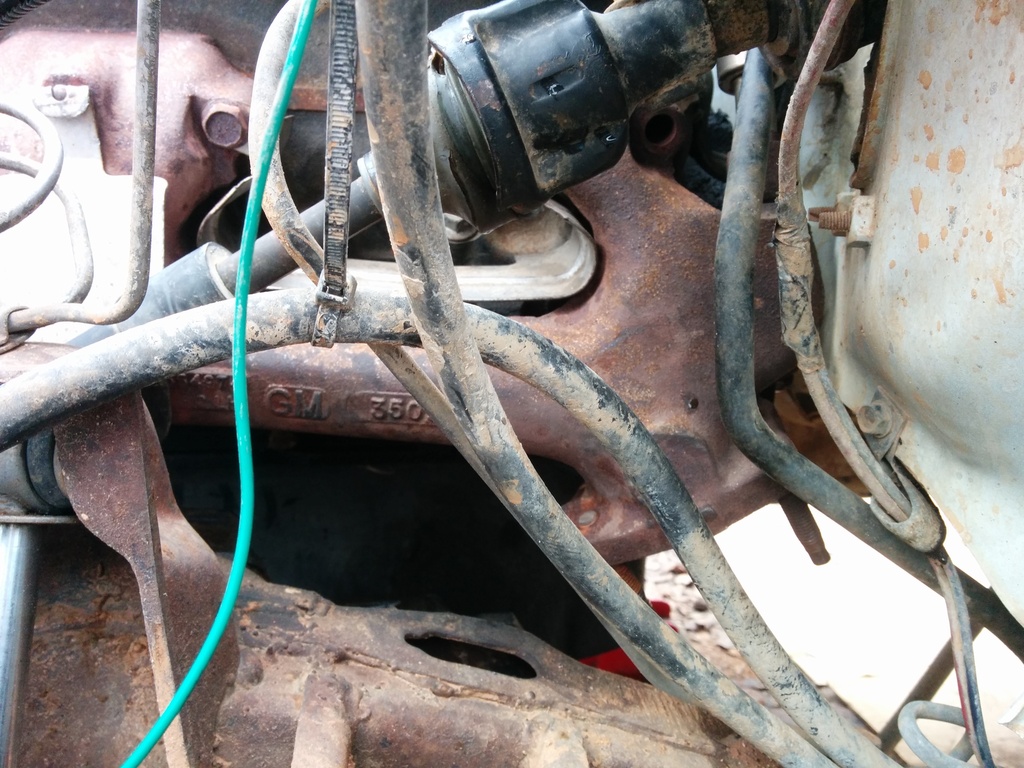
Stuck in the 4.3 transmission dipstick tube and it completely interferes with the vortec's coil. Tried to mount the suburban dipstick tube with no success as it hit the firewall.
Decided to install the front and rear driveshafts. The front shaft was too short and the rear too long. I quickly hopped from beneath the truck to confirm my hope: the engine is slid about an inch rearward. I used a prybar against the tcase and pushed the engine forward to the maximum the mounts will allow. This made the driveshafts line up perfectly. Then I mounted up the rear crossmember that supports the trans. That was a fight. The engine still really should move forward about 1/4 of an inch but appears to be in an acceptable position.
Anyhow, the pan is 1/32 of an inch above the centerlink and riding on the front differential albeit just slightly as confirmed by reducing pressure via the jack. If I had not had the RC 2.5 lift this would never have cleared anything as my diff is dropped down 3/4 of an inch if not more. The 1" body lift does make life significantly easier. Anything taller is a waste and lower would suck. I'm going to install some 1/4 washers between the mount plates to the block on both sides to raise the engine. I've ground down my mount adapters as the upper location is still too damned high for my taste. I feel that 1/4 of an inch lift is all I'll need and if I need more I can always add a washer or 3 between each plate.
The 96+ range switch makes my shift detent lever wide enough to hit my damned front driveshaft. It stops me from placing the truck into park. I'm hoping the 1/4 inch engine lift will bring the driveline up enough that it will clear and if not I'll get out the grinder. I have noticed that newer prop shafts are much thinner than the one I have so if it rubs too much I may just buy a new shaft.
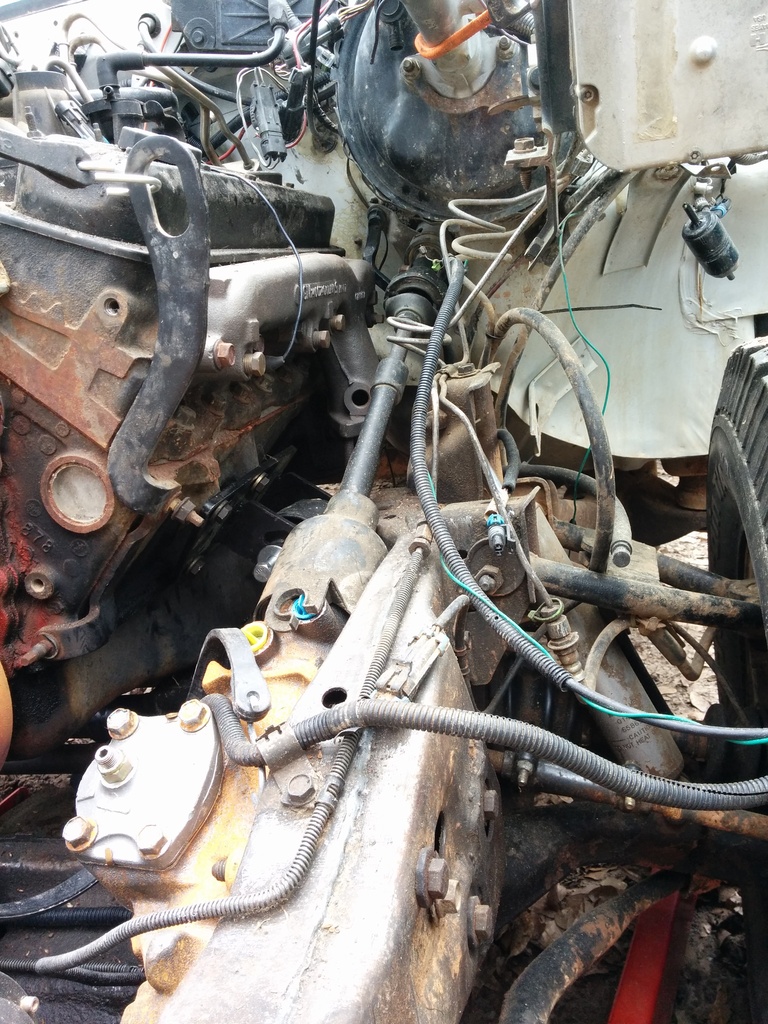
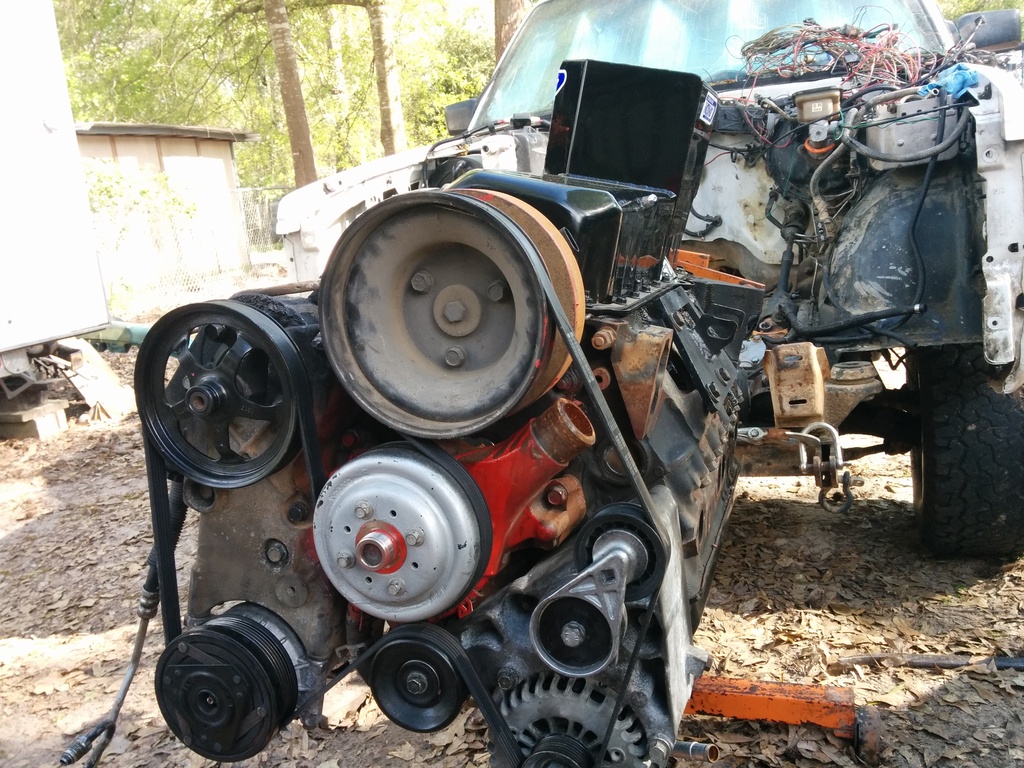
Here is how my camaro manifold looks. (Cramped but functional)

And here is how the milled vortec passenger manifold looks. Still have about 1/4 of an inch to move the engine more towards the driver to clear the passenger manifold and the 1/4 inch lift the engine is getting should make it clear.
Transmission carry handles:
Cadillac Pimpin power steering pully

My first completed wiring circuit:
Ran into a BUNCH of little dramas but nothing a little yelling and a grinder won't solve. Firstly the suburban trans has these little "ears" on the left and right sides of the case. Had to grind off the one on the drivers side because it was interfering with my fancy tcase support brace that goes from just above the encoder motor to the bellhousing upper mount. Heres a pic of the passenger side thats going to get ground off as well. (It hits my passenger brace)
Stuck in the 4.3 transmission dipstick tube and it completely interferes with the vortec's coil. Tried to mount the suburban dipstick tube with no success as it hit the firewall.
Decided to install the front and rear driveshafts. The front shaft was too short and the rear too long. I quickly hopped from beneath the truck to confirm my hope: the engine is slid about an inch rearward. I used a prybar against the tcase and pushed the engine forward to the maximum the mounts will allow. This made the driveshafts line up perfectly. Then I mounted up the rear crossmember that supports the trans. That was a fight. The engine still really should move forward about 1/4 of an inch but appears to be in an acceptable position.
Anyhow, the pan is 1/32 of an inch above the centerlink and riding on the front differential albeit just slightly as confirmed by reducing pressure via the jack. If I had not had the RC 2.5 lift this would never have cleared anything as my diff is dropped down 3/4 of an inch if not more. The 1" body lift does make life significantly easier. Anything taller is a waste and lower would suck. I'm going to install some 1/4 washers between the mount plates to the block on both sides to raise the engine. I've ground down my mount adapters as the upper location is still too damned high for my taste. I feel that 1/4 of an inch lift is all I'll need and if I need more I can always add a washer or 3 between each plate.
The 96+ range switch makes my shift detent lever wide enough to hit my damned front driveshaft. It stops me from placing the truck into park. I'm hoping the 1/4 inch engine lift will bring the driveline up enough that it will clear and if not I'll get out the grinder. I have noticed that newer prop shafts are much thinner than the one I have so if it rubs too much I may just buy a new shaft.
Here is how my camaro manifold looks. (Cramped but functional)
And here is how the milled vortec passenger manifold looks. Still have about 1/4 of an inch to move the engine more towards the driver to clear the passenger manifold and the 1/4 inch lift the engine is getting should make it clear.
Transmission carry handles:
Cadillac Pimpin power steering pully
My first completed wiring circuit:
#20
05-01-2015, 08:35 PM
To keep my camera clean (which is my nexus 5 phone) I park that bastard at the top of my toolbox where nothing is ever placed. I then stop everything Im doing and go wash my hands then take pictures. Its not ideal because I often stop everything Im doing and frequently lose track of my focus. I however have learned that it will all be worth it in the end from other projects Ive done.
I also realize that my specific v8 swap is rather out of the ordinary both in parts used and end goals. Seems that most swaps done with proper fuel injection are relegated to 2nd gens. 1st gens get carbs and huge exhaust systems. While the difference between models is minimal from the outside, it is quite significant internally both mechanically and electronically.
I dunno wtf the deal is with the phpbb settings but Im a grown man using Chrome. Perhaps they haven't tested it outside of the blue e.
I just make sure to copy my posts into google keep before attempting a submission. I decided to post my build log here because this community is far better than s10forum or syty.net in terms of concentration of asswipes. So far I havent run into any "you need to do it my way if you aren't retarded" or " I HOPE YOU BREAK YOUR FRONT DIFF BOOST LAUNCHING" like I ran into during my supercharger build. Half of a build log helps others, the other half helps the builder so its a give/get relationship no doubt.
Anyways Ive got a 99 suburban to tame today, should be getting paid around next week to finance my next and hopefully final engine pull/reinstall for front timing cover, timing set, oil pan gasket, pickup tube, and hopefully my old 4.3 dipstick tube after i clearance the pans crank scraper.
Im so close to hearing her run!!!