
Project: Broken Driveline begins


Thread Starter
|
New Member
Joined: Dec 2009
Posts: 91

Originally Posted by wildBill83
What made you chose IFS with a lift over SaS?
I envy your cast iron front diff...
I envy your cast iron front diff...
We did several trails out in moab with a friends FJ before the lift and 31's and I did just splendid. The only difference I could see with his tires were 2 times I had to get out and put 3 nearby rocks beneath my front tires to climb over ledges. Otherwise the tires were just trying to climb up a vertical wall as their were too short to grab the ledge.
Most of the trail riding I've done doesn't require a massive lift or huge tires, just a skilled driver, driving carefully and considerately. I also really enjoy how low-pro my truck looks. I want to keep the thieves at bay. Noone wants to break into a 94 jimmy these days. The bumpers I'm wanting might lure some in but I'm working on designing that part in too!
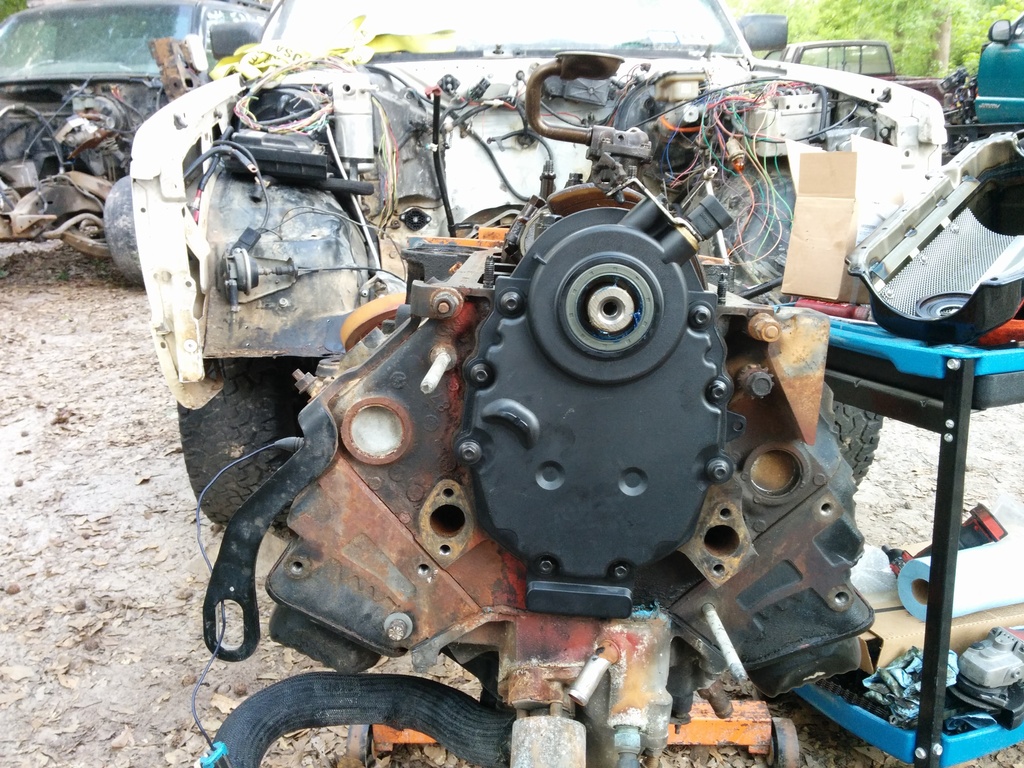
Okay so today I felt tired all day. Got my air cleaner finished. While back I hit the JY looking to change air cleaner assy for my supercharger and bought 5 different setups. I ended up cutting one up into an angle and that tightly fit over the maf and stock 4.3 cpi air cleaner box. I'm hoping it looks OE. I don't want any special appearances under this hood.
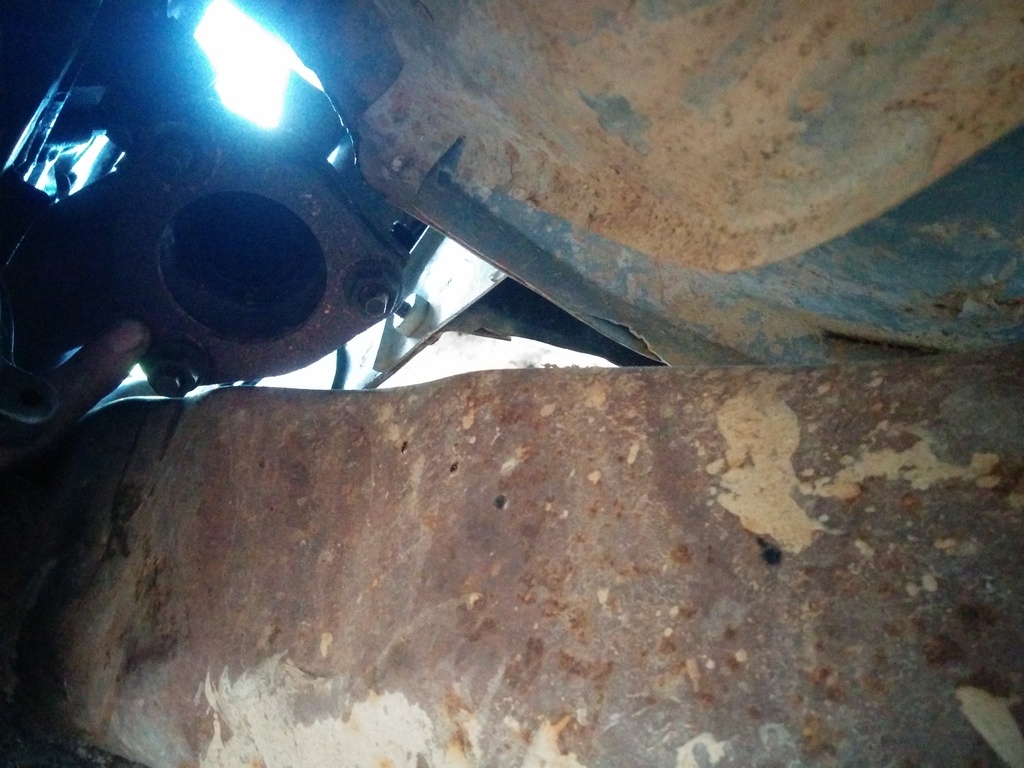
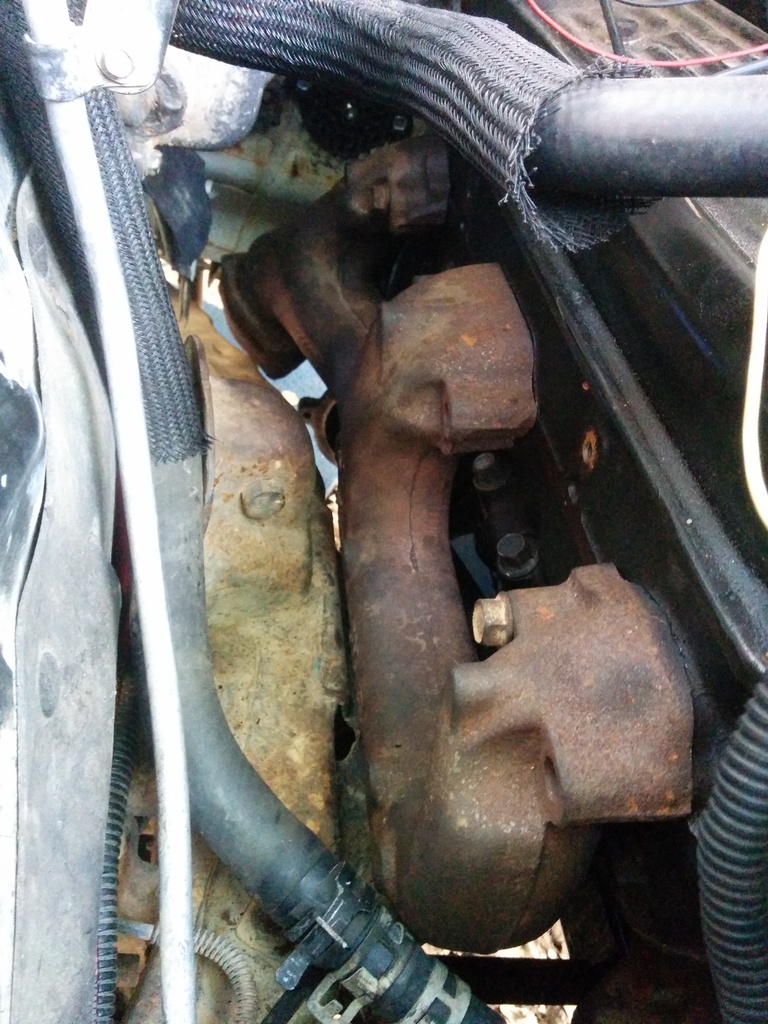
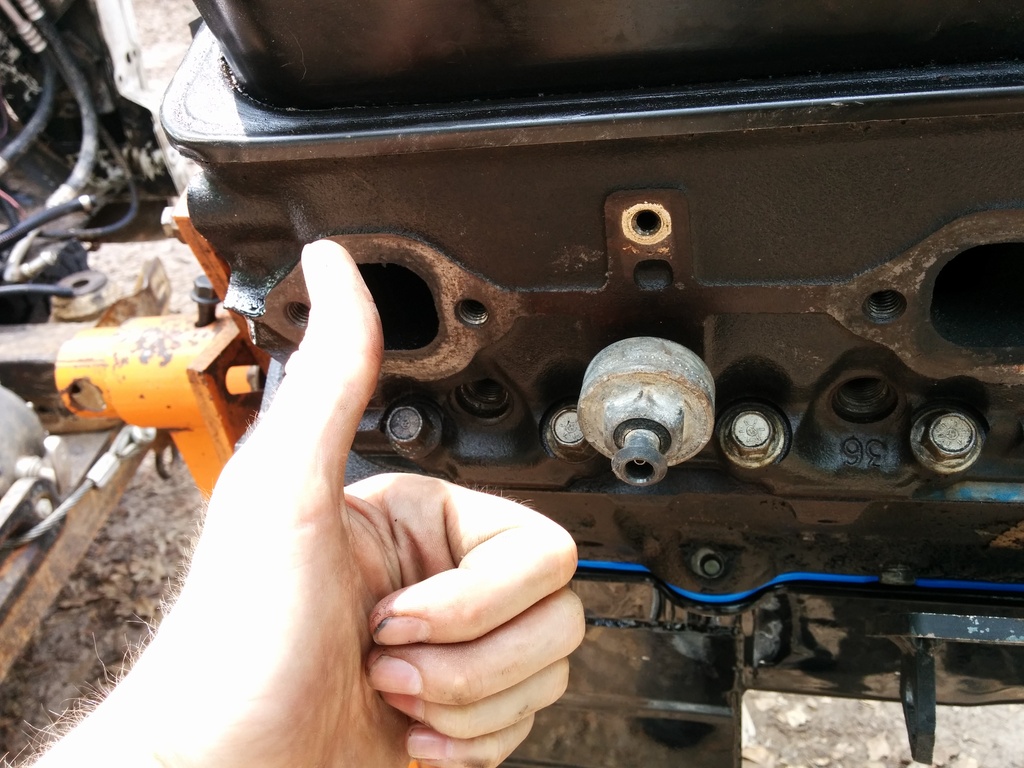
The milled passenger vortec manifold will need another 1/8 milled off to clear the frame. So in total 1/4 off of the bottom and 0 on the top should make a vortec passenger manifold clearance the framerail. The drivers side is mission impossible. It's just way too damned wide. This is with the engine in the center position however the new issue I have is clearance with my park pawl hitting the front driveshaft. I'm going to clearance it with a grinder. If that won't do it, I'll just buy the smaller diameter front prop shaft I've seen around on ebay. Should work just fine by grinding though. This issue is caused by the 4l60e range switch that makes the shift pawl sit almost 3/4 of an inch wider.
Then theres the whole "powertrane motion separate from the chassis and frame that I'll have to contend with once shes on the road. I can't wait to have those problems!
Thread Starter
|
New Member
Joined: Dec 2009
Posts: 91
Simple update today. Ordered the oil cooler adapter from ebay with 6 months no interest. I keep maxing out my $600 paypal credit as I can afford to pay it down and buy more parts.
http://www.summitracing.com/parts/ha...-size/5-7l-350
http://www.summitracing.com/parts/fr...5-bl/overview/
http://www.summitracing.com/parts/sum-2200076b
170 bucks in fancy aluminum to make the stock 4.3 oil cooler setup work.
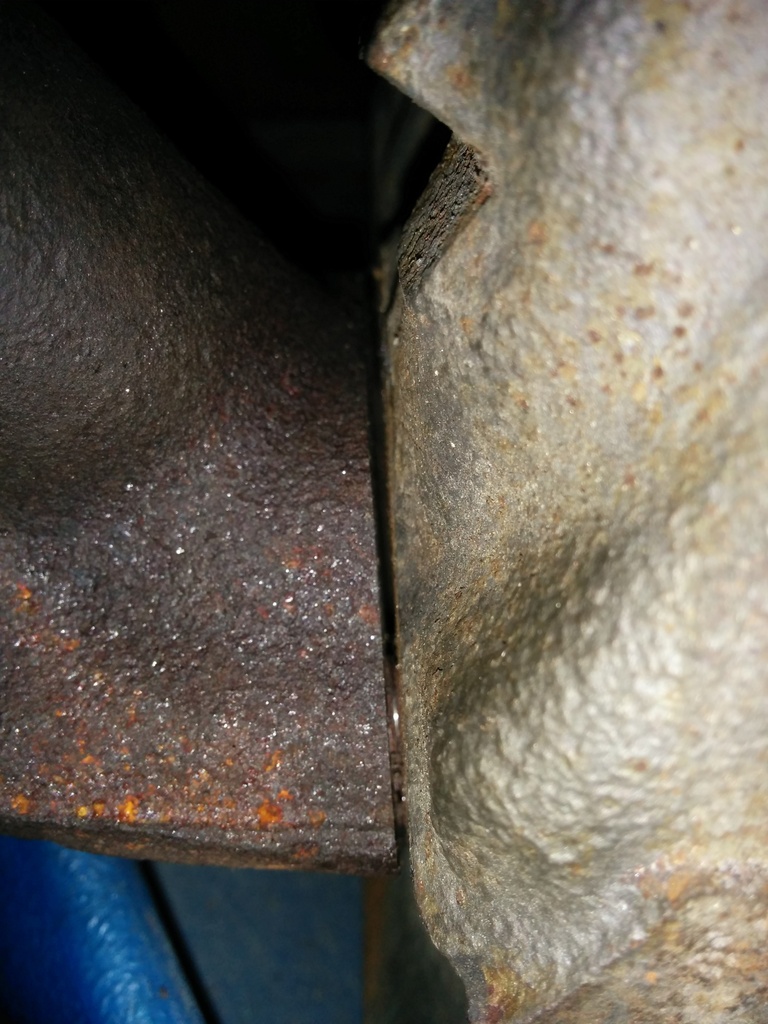
Passenger manifold is at machineshop for another 1/8 milled off. The lower flange stud hits the frame if you wiggle the motor and the nuts would never clear. That 1/8 milling should bring the manifold to damn near into the block, bring that stud out enough to clear with space for the nut and not smack the frame. Once thats confirmed I'm celebrating my *** right over to the exhaust shop to see how bad the damage will be for them to go from 2 manifolds to 2 cats to a y pipe joined into a single stainless thrush muffler.
Then I'm going to have them weld in bungs for 4 o2 sensors. Going to run my wideband somewhere, not sure if I want to simulate bank 1 or 2 or just run 5 o2's. Seems a little excessive and space consuming. Not even sure the stock drivers side o2 on the manifold will clear a sensor with the steering shaft there. That will suck because it's a really neat spot otherwise.
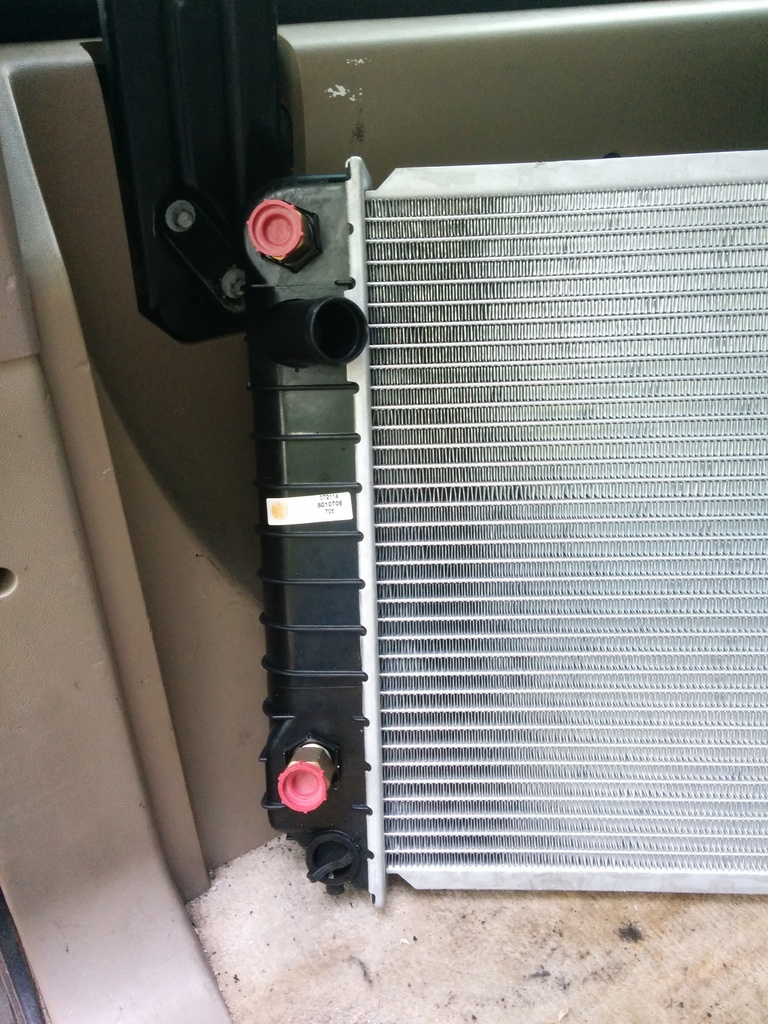
Ordered the 3/4 to 5/8 aluminum coolant fitting to make my heater core hook up to the new dual stage thermostat the vortec brings to the table. Then I need to find a nipple to cap the heater hose outlet on my 4.3 radiator to complete the cooling system.
Not much progress directly, just research and ebay/craigslist it seems lately.
http://www.summitracing.com/parts/ha...-size/5-7l-350
http://www.summitracing.com/parts/fr...5-bl/overview/
http://www.summitracing.com/parts/sum-2200076b
170 bucks in fancy aluminum to make the stock 4.3 oil cooler setup work.
Passenger manifold is at machineshop for another 1/8 milled off. The lower flange stud hits the frame if you wiggle the motor and the nuts would never clear. That 1/8 milling should bring the manifold to damn near into the block, bring that stud out enough to clear with space for the nut and not smack the frame. Once thats confirmed I'm celebrating my *** right over to the exhaust shop to see how bad the damage will be for them to go from 2 manifolds to 2 cats to a y pipe joined into a single stainless thrush muffler.
Then I'm going to have them weld in bungs for 4 o2 sensors. Going to run my wideband somewhere, not sure if I want to simulate bank 1 or 2 or just run 5 o2's. Seems a little excessive and space consuming. Not even sure the stock drivers side o2 on the manifold will clear a sensor with the steering shaft there. That will suck because it's a really neat spot otherwise.
Ordered the 3/4 to 5/8 aluminum coolant fitting to make my heater core hook up to the new dual stage thermostat the vortec brings to the table. Then I need to find a nipple to cap the heater hose outlet on my 4.3 radiator to complete the cooling system.
Not much progress directly, just research and ebay/craigslist it seems lately.
Thread Starter
|
New Member
Joined: Dec 2009
Posts: 91
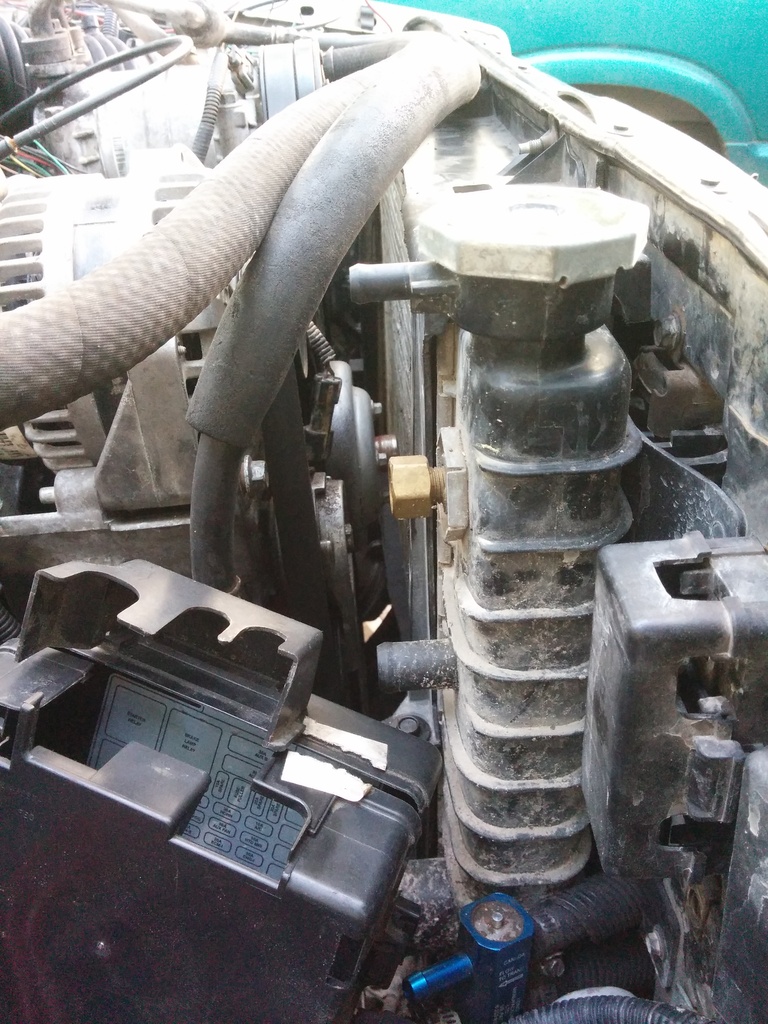
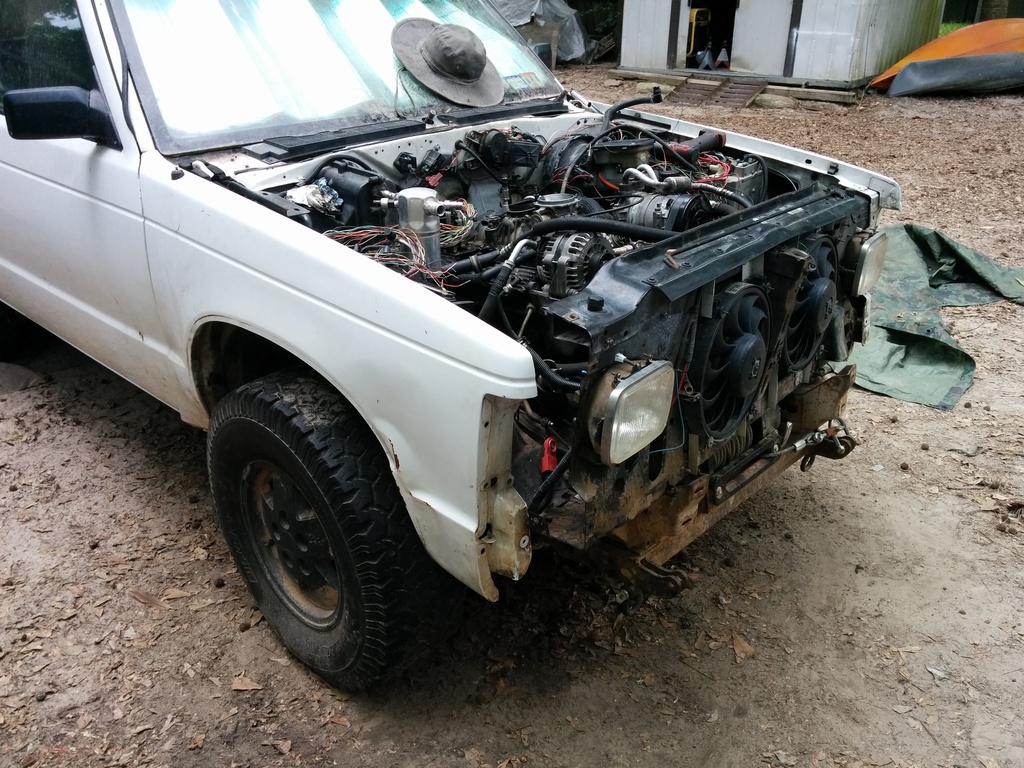
Did some more electrical routing and went ahead and tossed the core support back on for mockup purposes. The water pump clears the rad by roughly 1/2 inch. This is with the engine in the "stock" position. I didn't want to mod driveshafts. (and still don't)
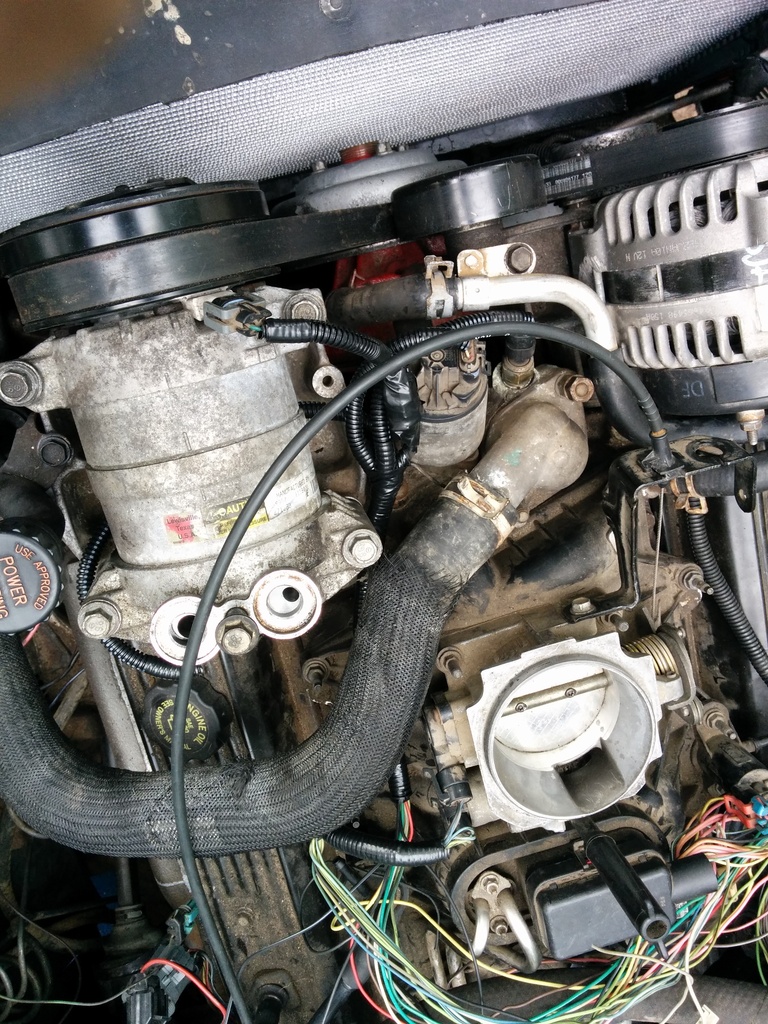
Got my wideband bolted into the camaro manifolds o2 sensor port. The wideband is smaller than a standard v8 o2 sensor so that rocked. I'm going to attempt to use the widebands narrowband simulation to feed the ecu for that bank however if that doesn't work I'll just go to the muffler shop and have them toss in another sensor. I really don't want to do that though. 5 o2 sensors is lame.
The ac lines look like they will route alright but I'm not so sure they won't hit the damned hood when I close it! I don't see much opportunity for persuasion in there either.
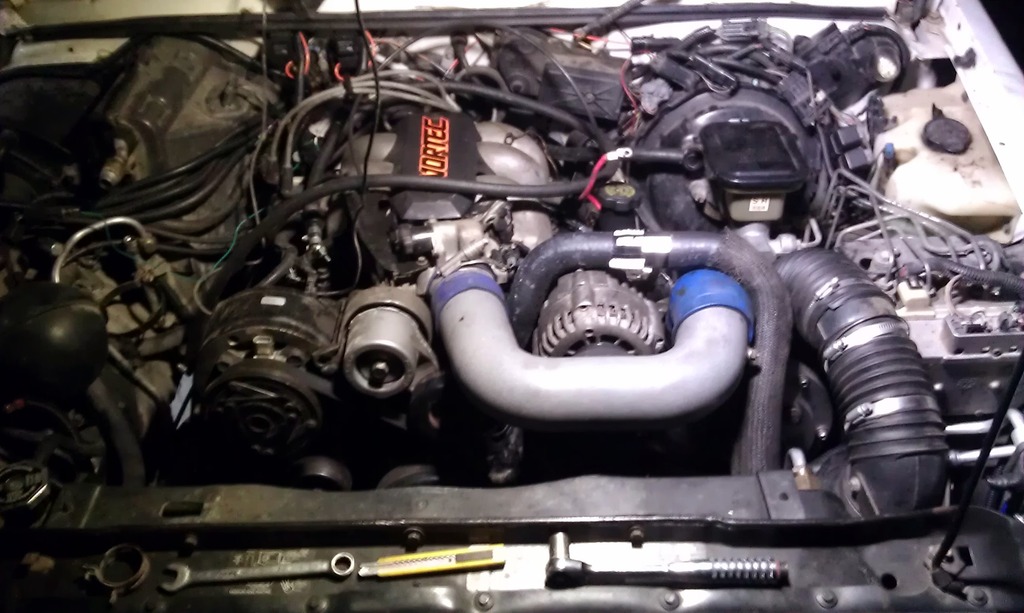
Ooh and my home made air cleaner elbow FITS LIKE A GLOVE!!! I really think it looks ugly and stock. I hated the blue hoses that the supercharger came with:


Got my wideband bolted into the camaro manifolds o2 sensor port. The wideband is smaller than a standard v8 o2 sensor so that rocked. I'm going to attempt to use the widebands narrowband simulation to feed the ecu for that bank however if that doesn't work I'll just go to the muffler shop and have them toss in another sensor. I really don't want to do that though. 5 o2 sensors is lame.
The ac lines look like they will route alright but I'm not so sure they won't hit the damned hood when I close it! I don't see much opportunity for persuasion in there either.
Ooh and my home made air cleaner elbow FITS LIKE A GLOVE!!! I really think it looks ugly and stock. I hated the blue hoses that the supercharger came with:
Thread Starter
|
New Member
Joined: Dec 2009
Posts: 91
How indeed!
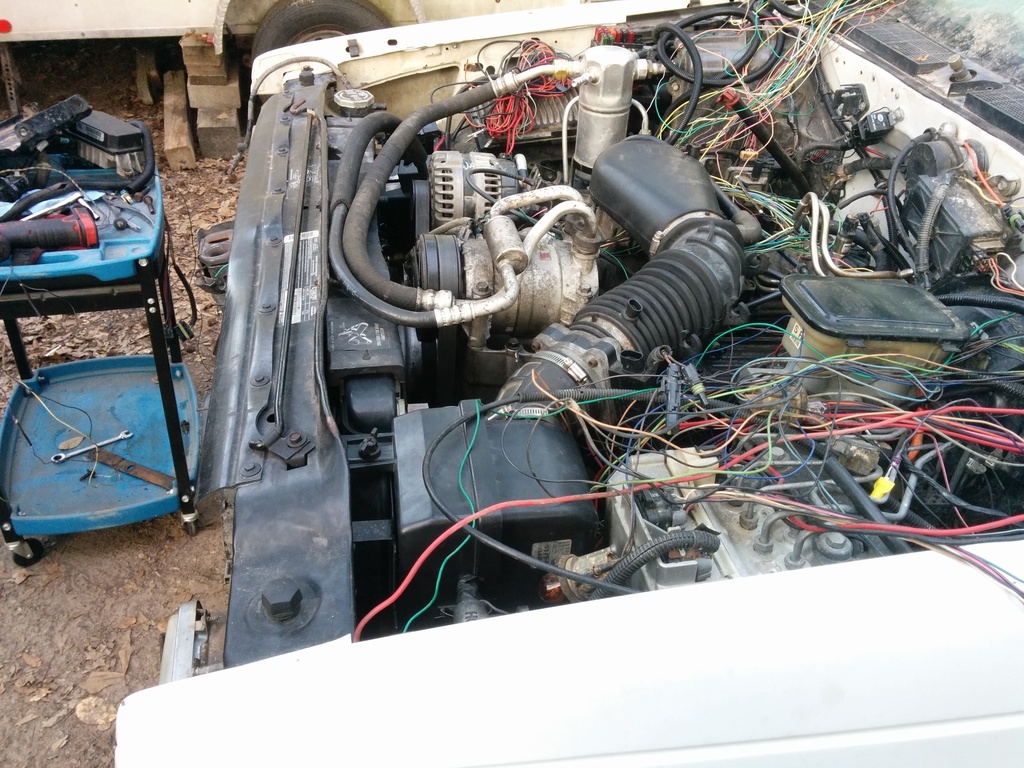
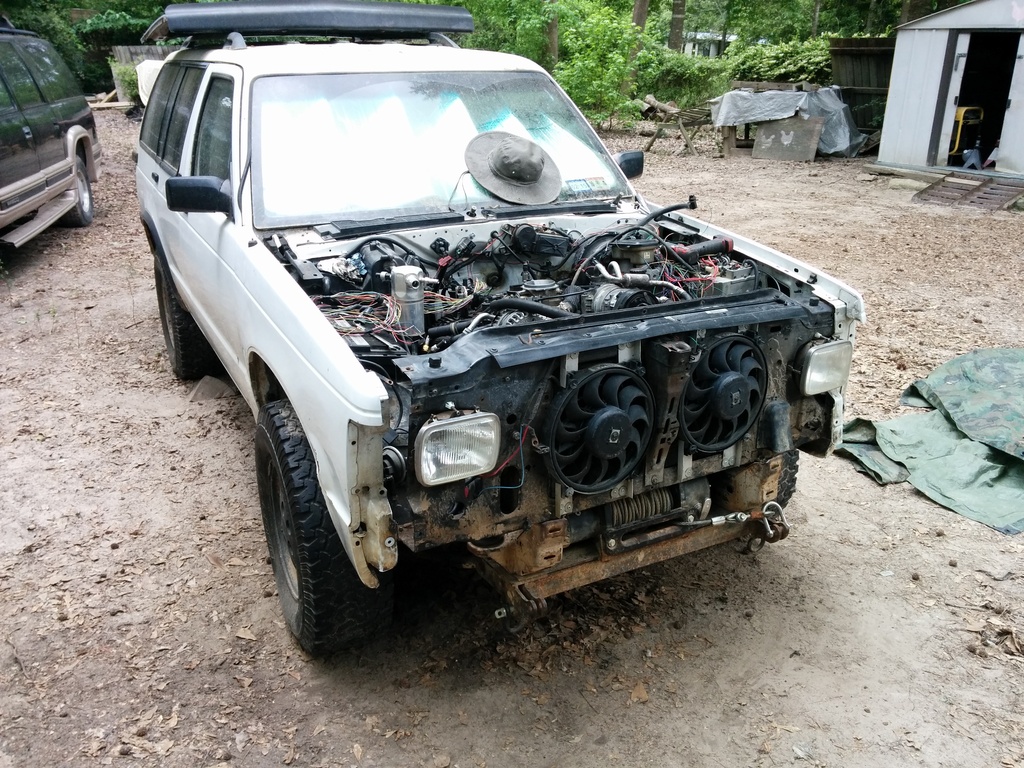
My fenders are only using a few bolts to hold them on. I just needed to have them inplace to get wiring mocked up and wasn't sure if they would come back off. I slid the core support into the LH fender, then spread them apart to fit the RH side in. Once that's complete I lifted it up and slid in the 1" body lift spacers.
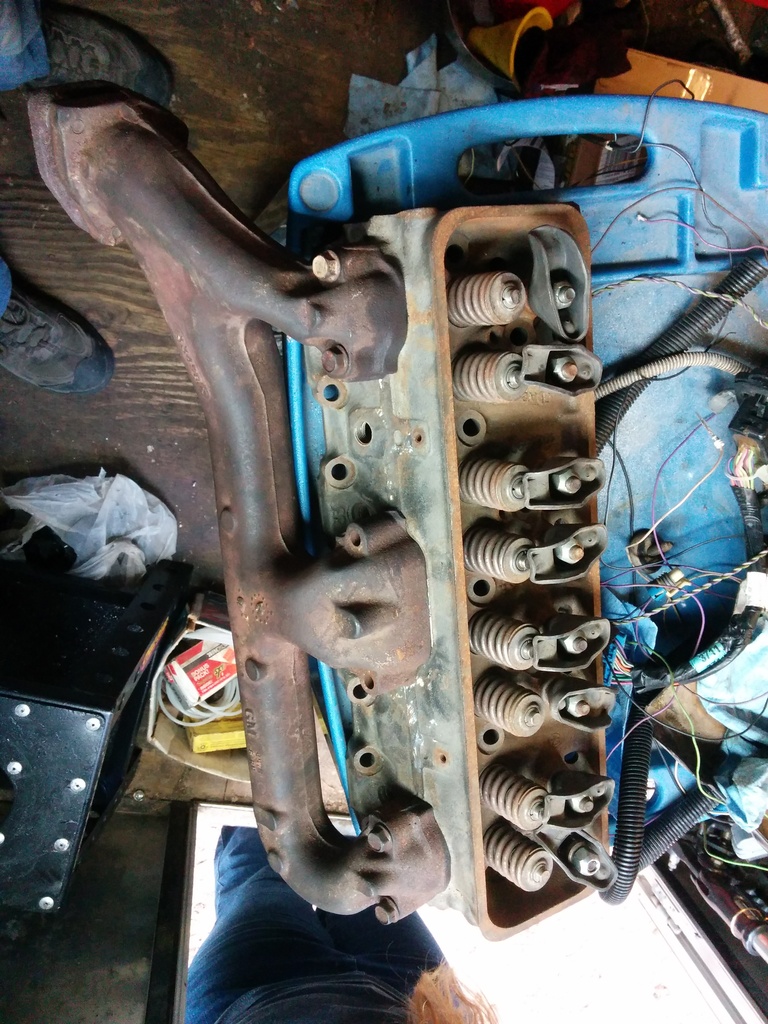
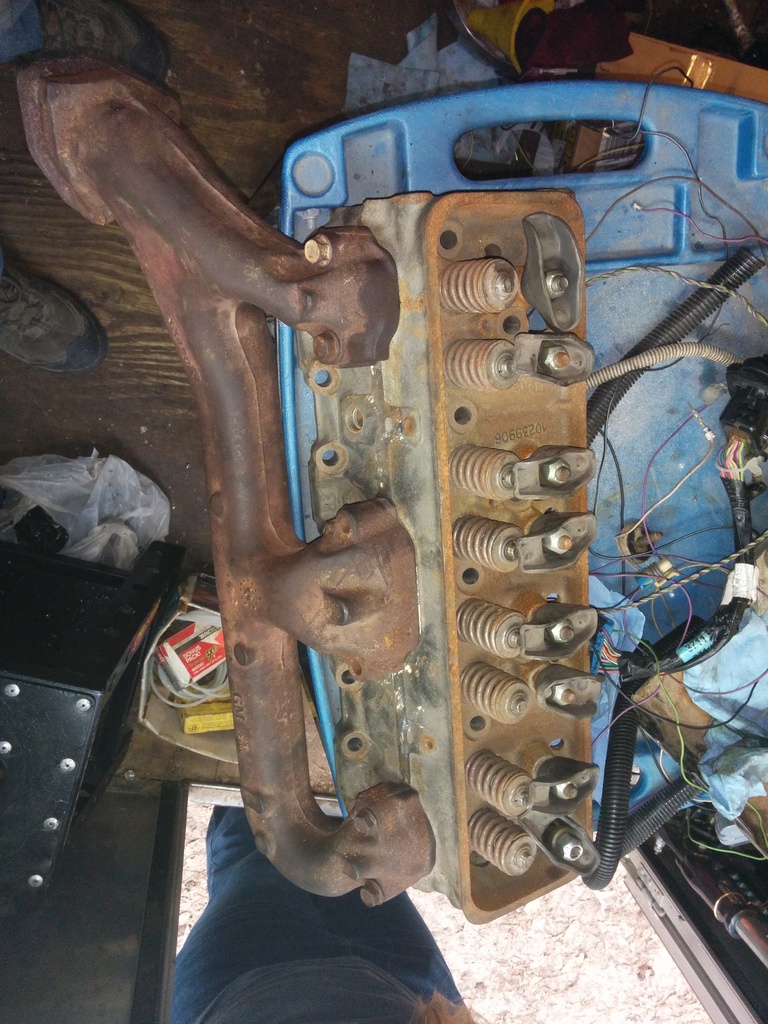
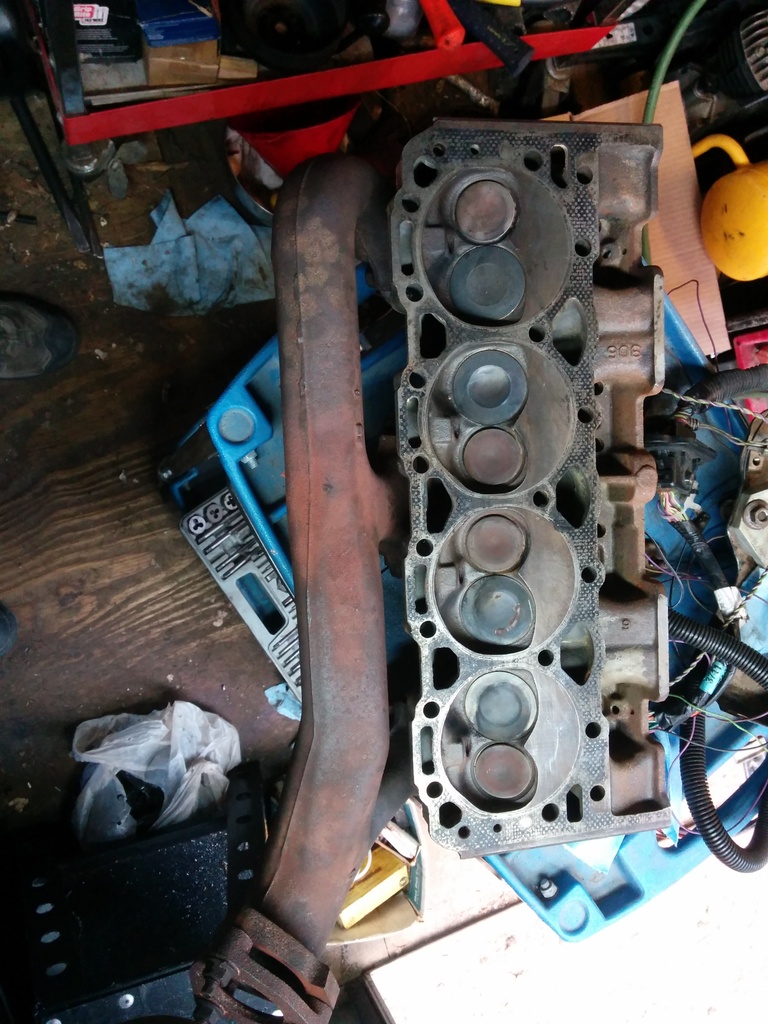
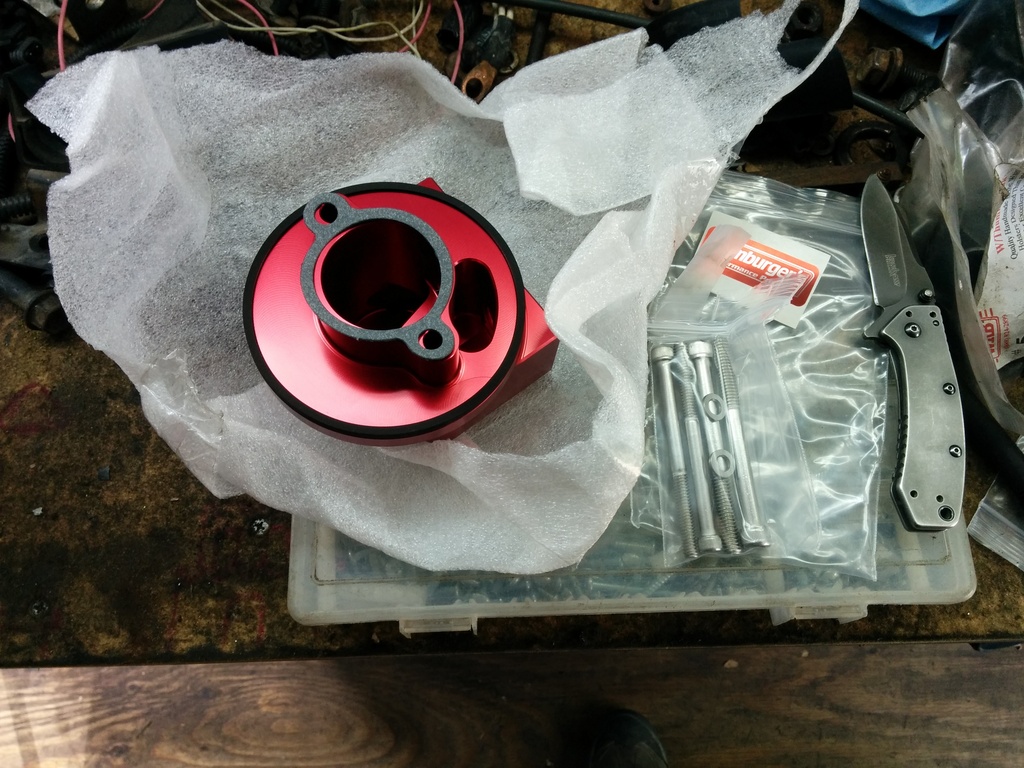
Got a bunch of little things taken care of today. Picked up the manifold from the machine shop. Total meat was 5/16 removed from the bottom of the manifold 0 at the top. This gives stellar clearance. Milling alone however is not enough. Now that the exhaust is milled I have a gap at the bottom of the ports because the bolt holes through the flanges are now at an angle from having the flange angle changed. I'm going to drop the manifold back off at the machine shop. (I'm 8 hours debted to the machine shop so far.) Get them to either A: enlarge the diameter of the bolt holes or B: match the holes relative to the new flanges angle. I barely speak engineer or machinist so bear with me (I got pics of course). I'm sending the manifold to them with a vortec head so they can see exactly what I'm dealing with and how to make it right. Hopefully they have them back in a few days because the exhaust is ready FOR THE EXHAUST SHOP!!!!
Once the exhaust shop is done, I'll haul *** back home and start wiring everything up. By the time the exhaust guys get done I should have already R/R the engine completing that portion of the build and just focus on electrical. My financial situation means I can't afford ANY extra shenanigans. Hopefully the hamburgers racing adapter bolts right in with no sass and I can bolt up the stock oil cooler lines. Toss in the trans lines and route them all pretty like like I had before. I'm going with the snap in lines on the 99 because I always hated getting a line wrench up there to remove them. Never have an issue getting those snap fittings in and out though.
I'm hoping to have my first test drive by this time next week which gives me 2 days to panic stress and make my trip deadline and coincidentally marks the 2 month date since I began this project.

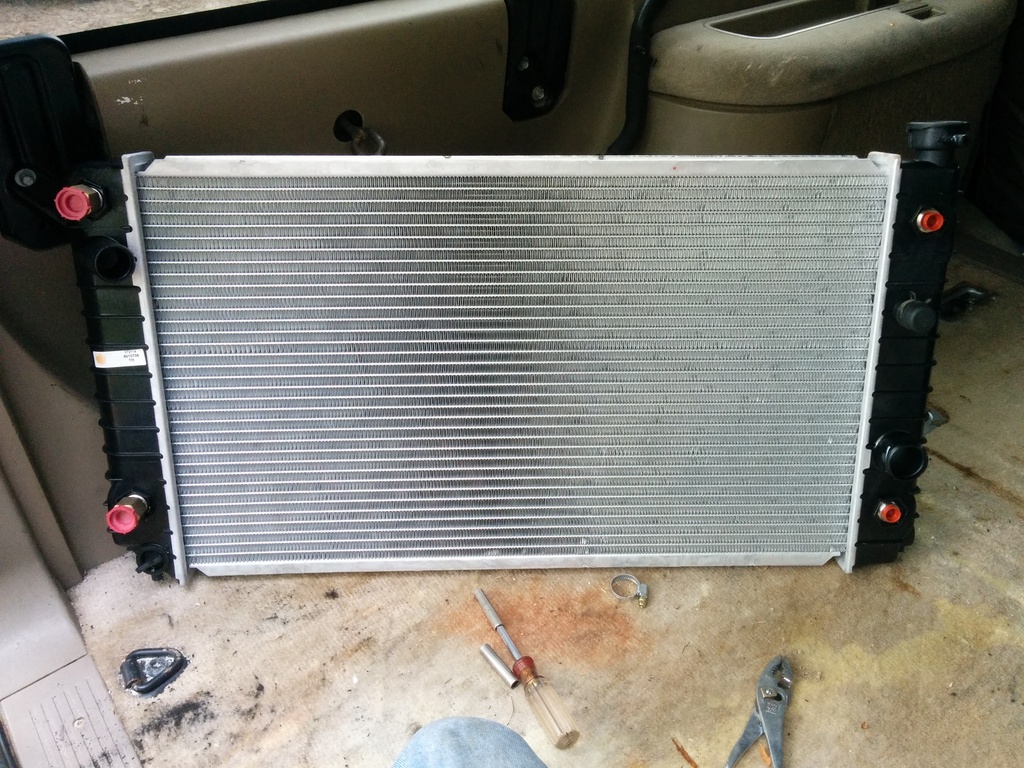
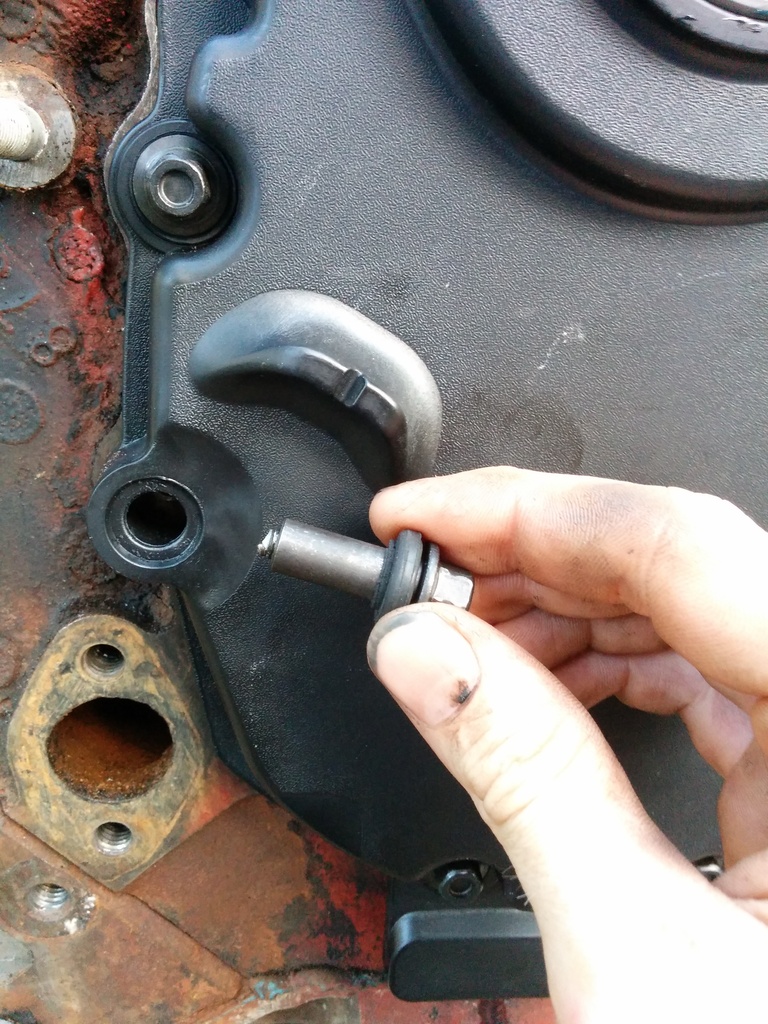
Got my radiator warranteed out! That gives me a free cap for the heater hose bypass. I removed the stainless clamp and installed a gm spring clamp. <---- A fun point of contention to argue...

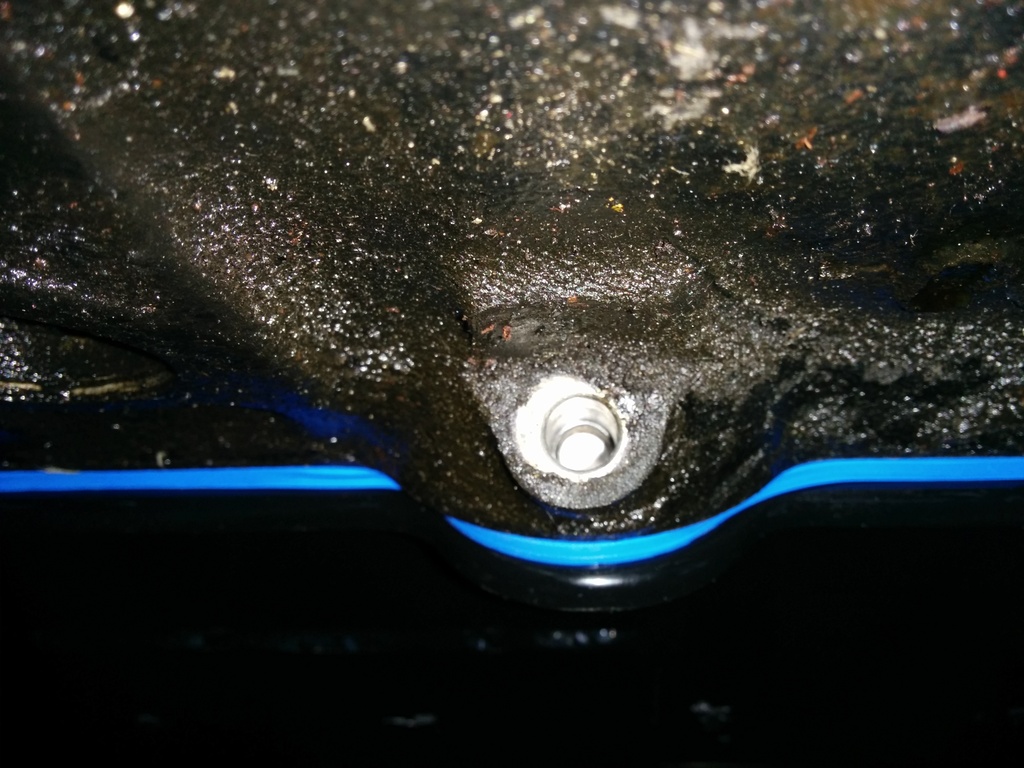
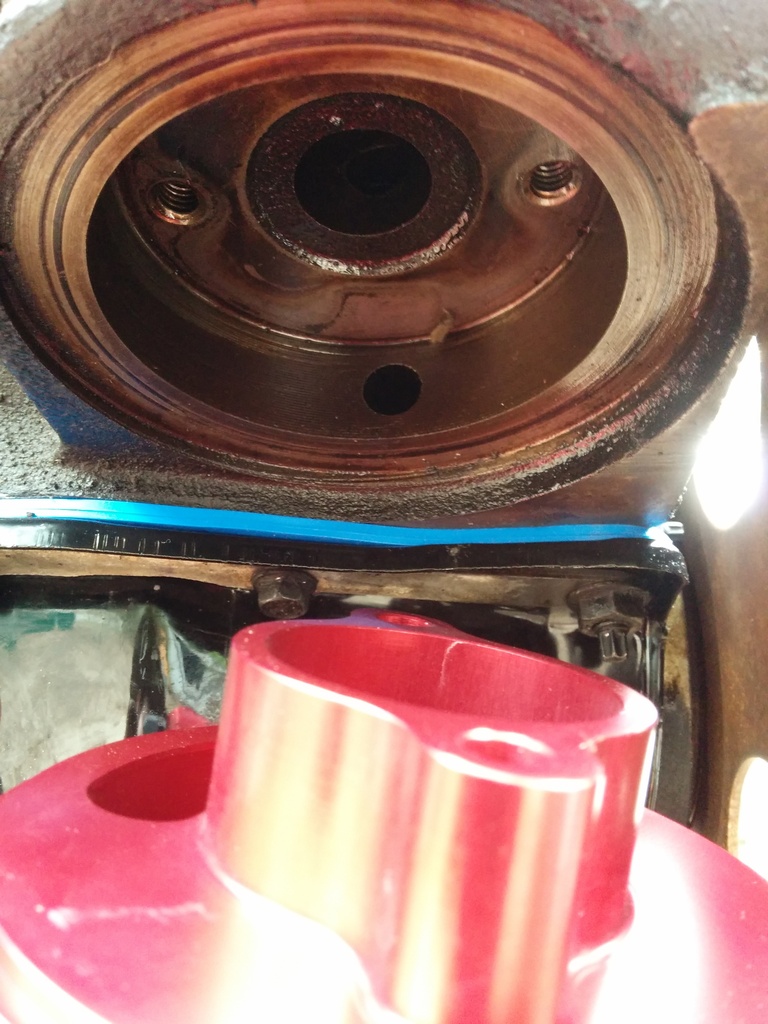
What the hell is the secret to this bunghole design:


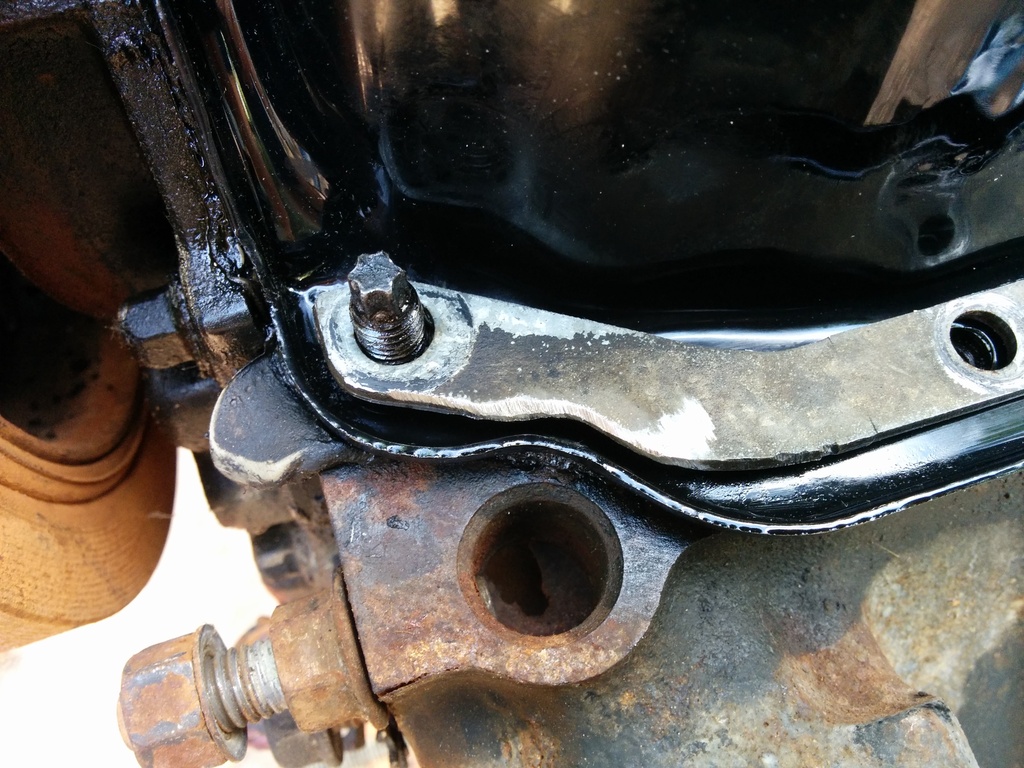
The instructions are pretty clear with where to lay the bead. They provided some blue water pump rtv but... this is an oil pan gasket... So wtf? Should I just substitute the instructions with some of my ULTRA BLACK!!!???
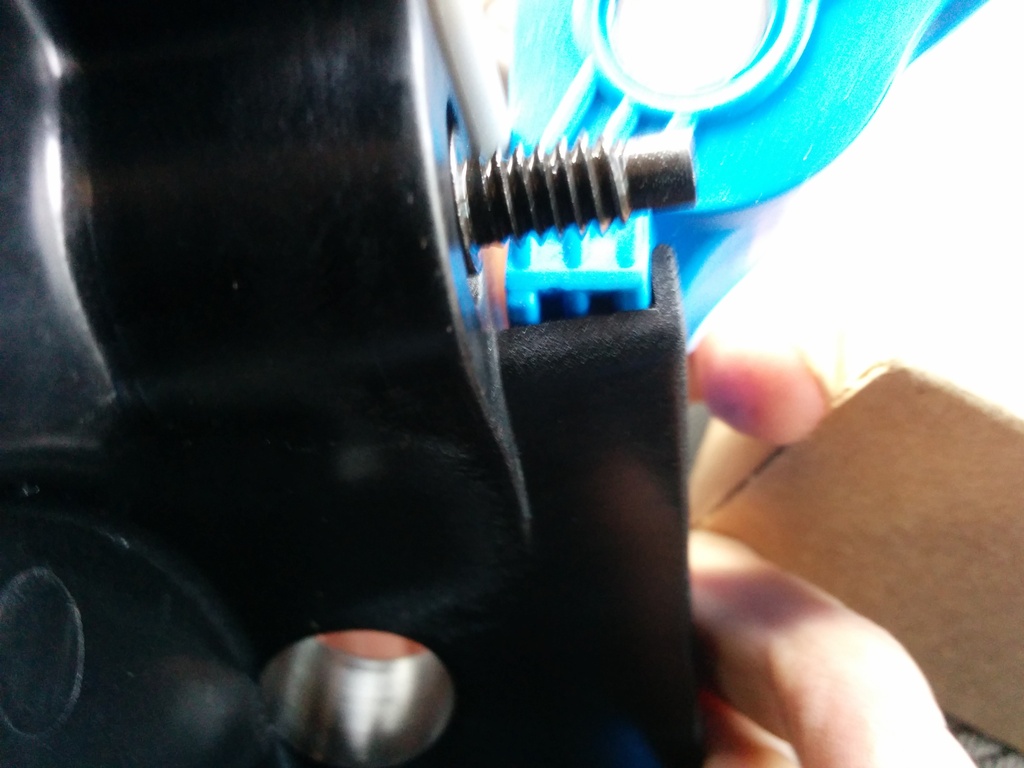
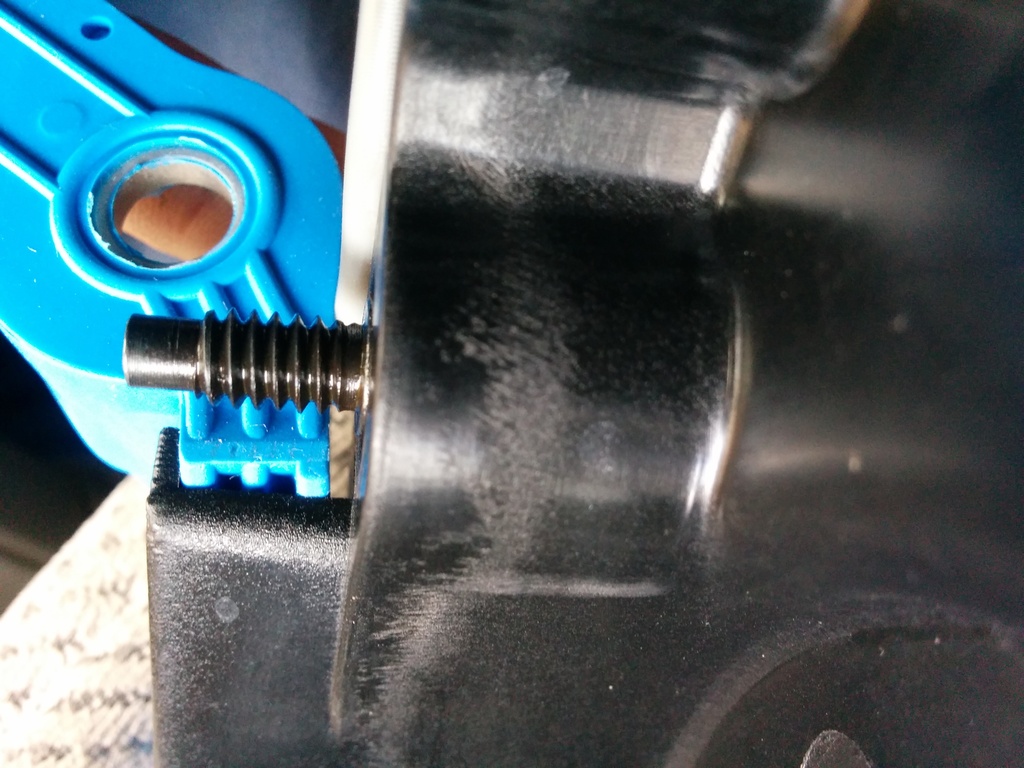
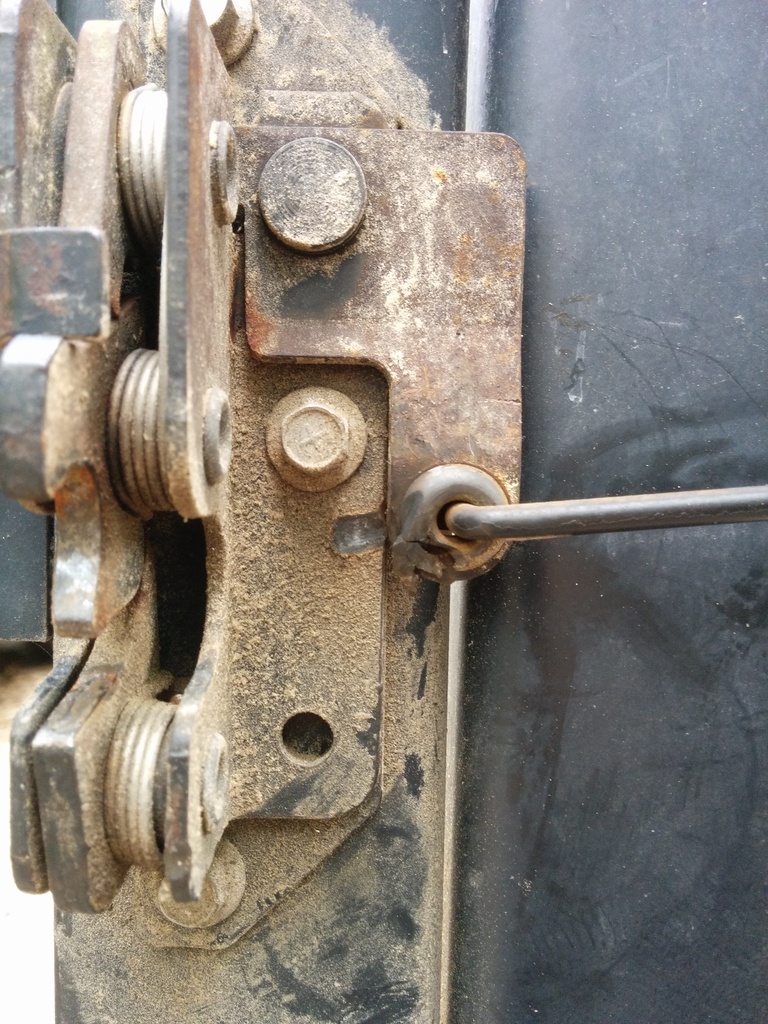
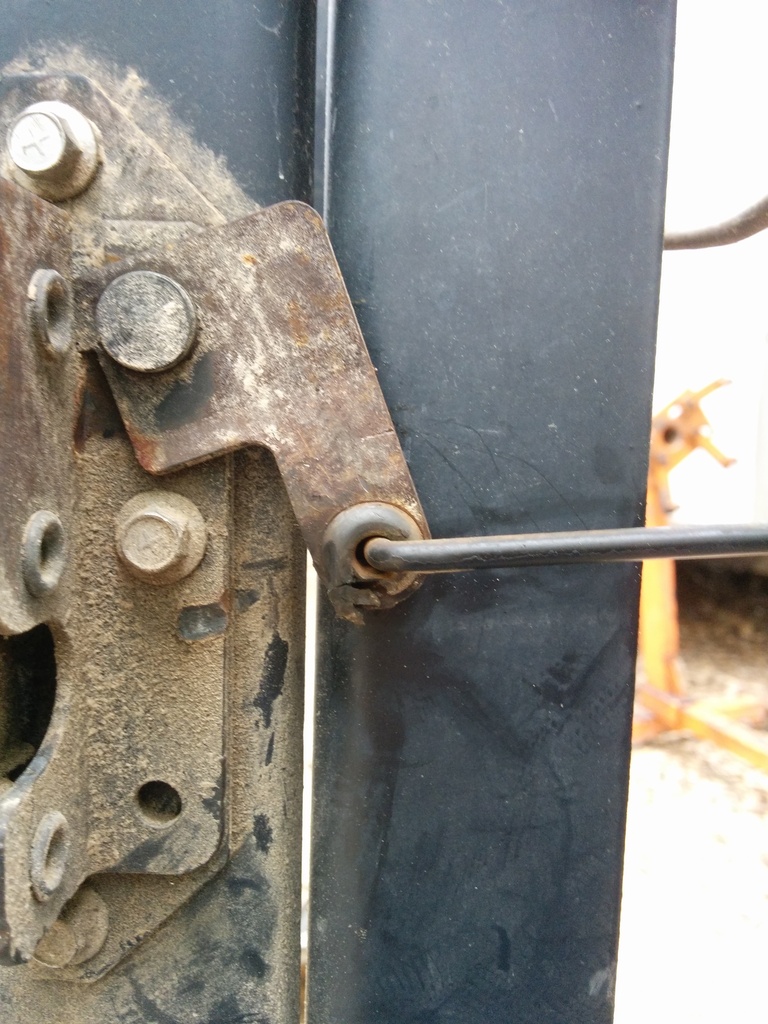
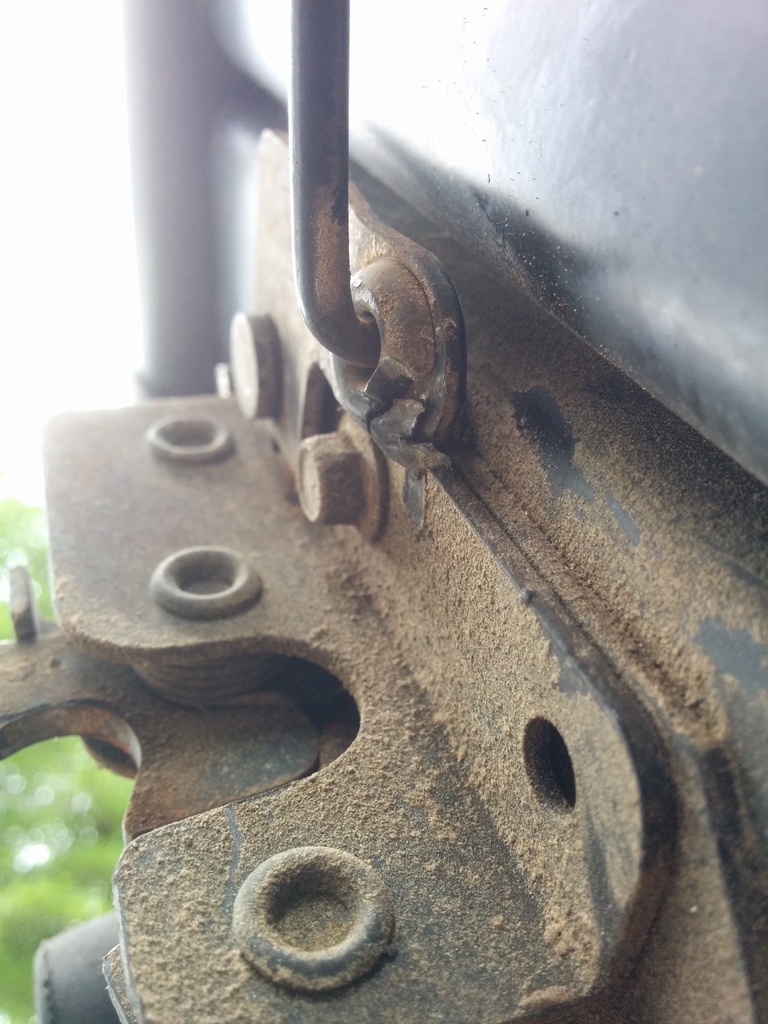
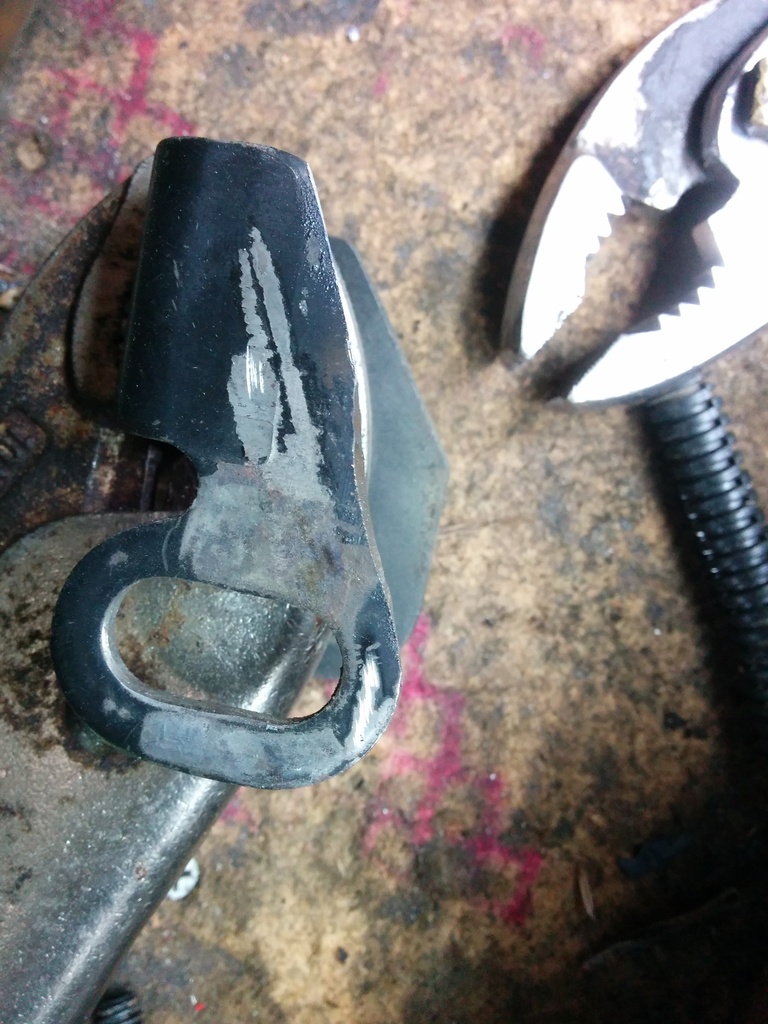
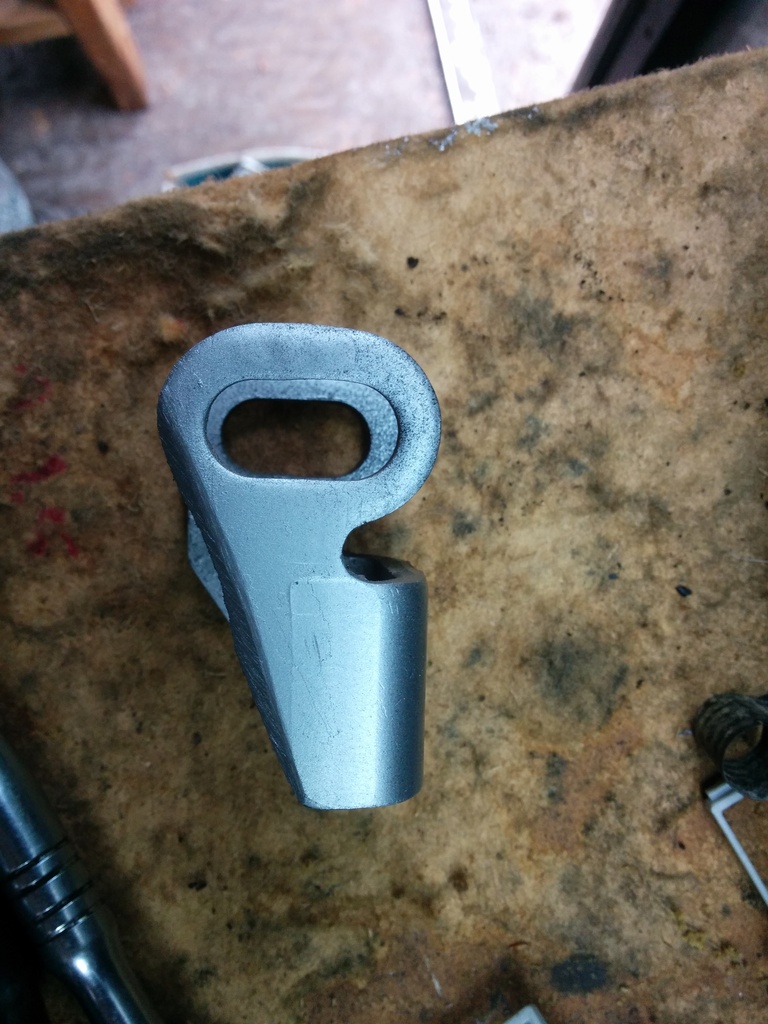
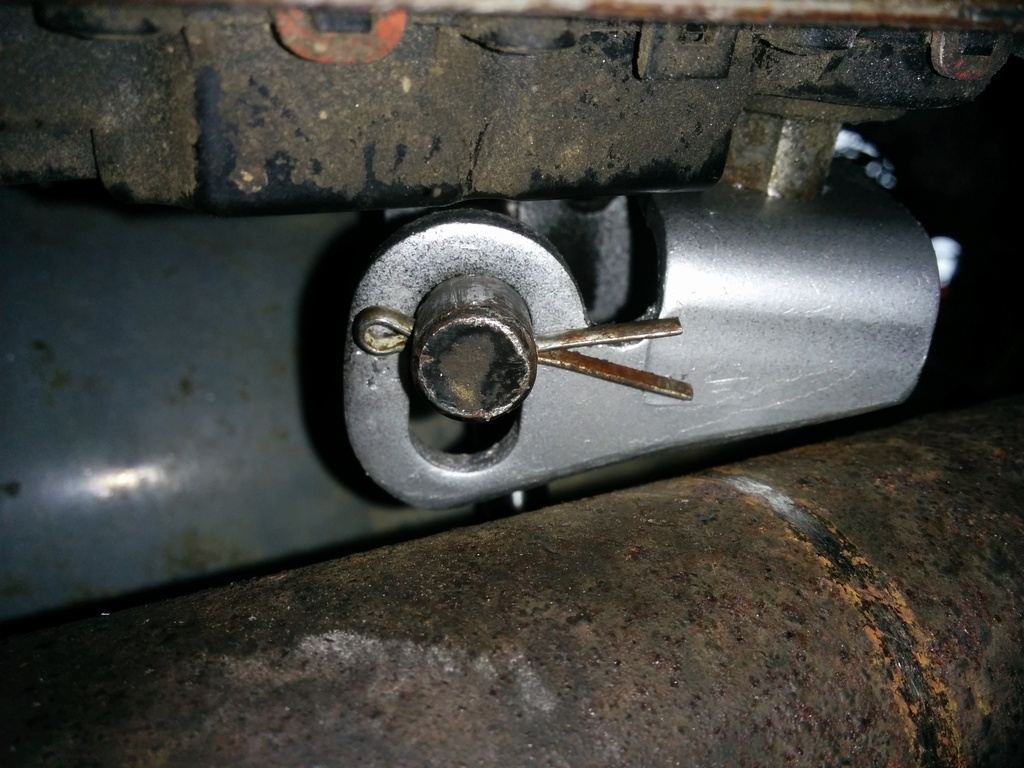
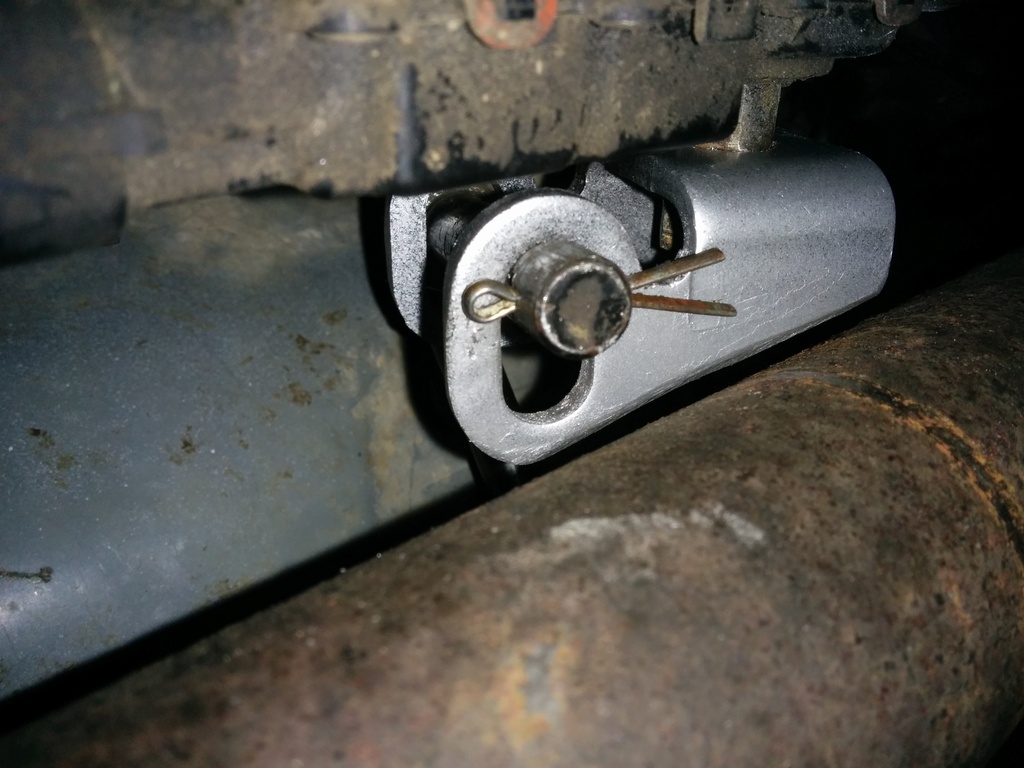
Finally I spent about an hour figuring out my nearly worthless spare tire holder on the rear. I've always had issues getting the latch to work with mine and most of my friends have issues with theirs, just compensate by slamming the hell out of the gate. This causes the sheet metal in the tailigate to fatigue and crack. My last tailgate was cracked completely in half on the inner steel and all of the reinforcement brackets. What I realized was happening is the mark you see in the first picture just beneath the bolt in the center of the photo the Oklahoma shaped piece of metal hinge that hte release mechanism attaches to has closed too far. This places the plastic circular bushing in the path of the latch mechanism when closing it which prevents it from locking up properly. Force helps compensate which explains the damage you can see just beneath the bolt on the right side. The solution was simple: Just use a hammer/punch and smack the latch back far enough so that when you release the handle it stops where mine is.
I skipped a day of updates so here they are:
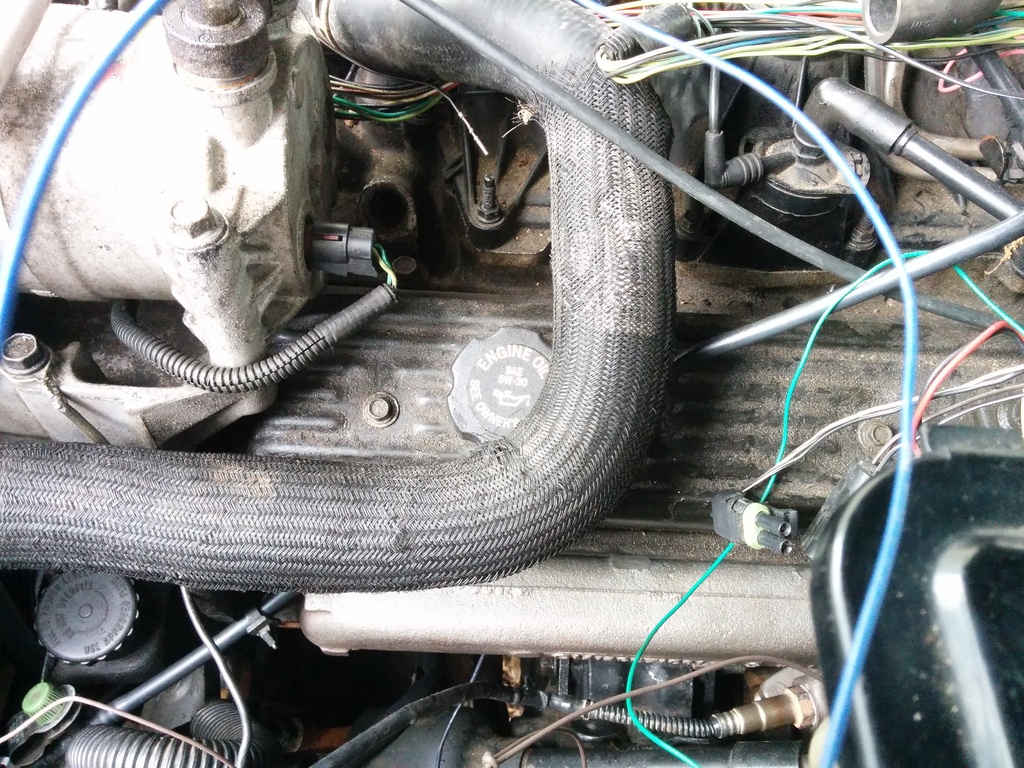
Started working on cooling hoses. The upper rad hose from my stock 4.3 is a perfect fit.
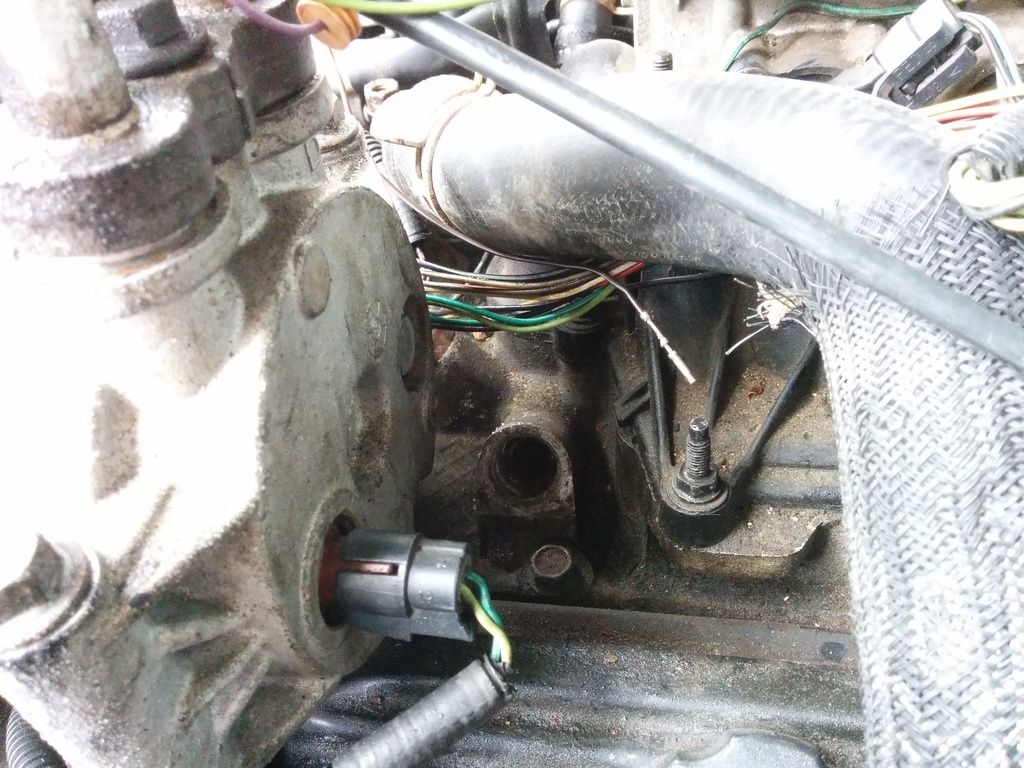


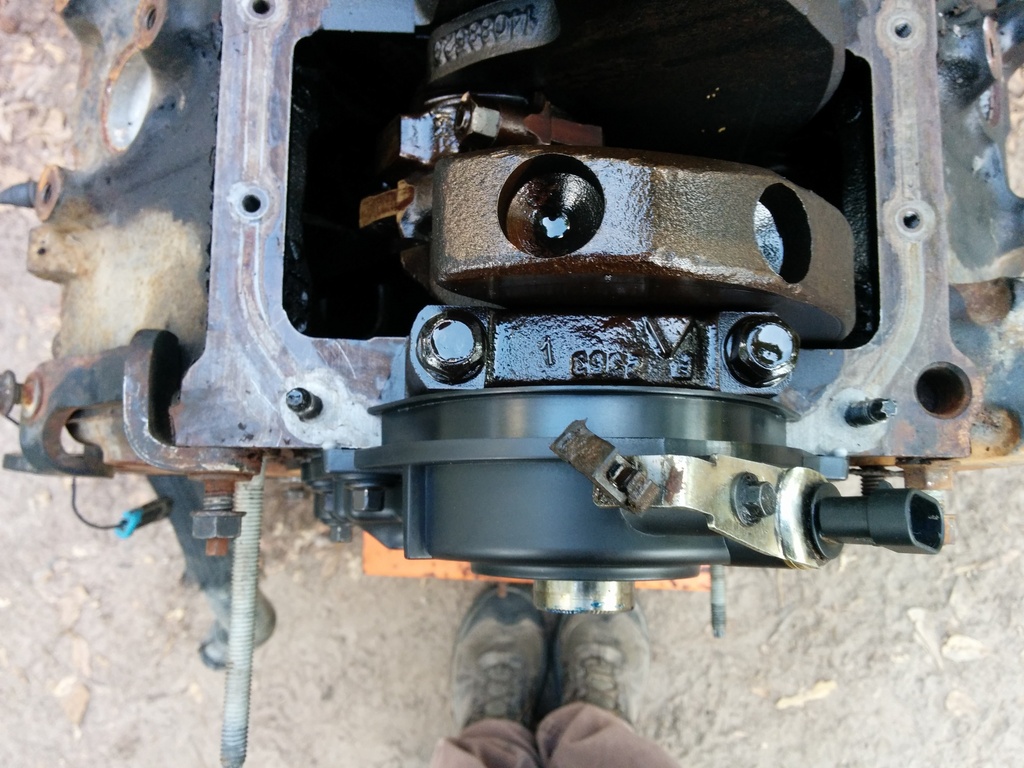
The parking pawl issue: Caused by the range selector switch on the 96+ transmission. By being wider it hits the front differential when going into park and is pretty damned close in reverse and drive. I used the good ol s10 blazer v8 swap tool of choice and did some customizing. Notching out the part that contacts the shifter fixed everything. My engine is in the middle position.


My fenders are only using a few bolts to hold them on. I just needed to have them inplace to get wiring mocked up and wasn't sure if they would come back off. I slid the core support into the LH fender, then spread them apart to fit the RH side in. Once that's complete I lifted it up and slid in the 1" body lift spacers.
Got a bunch of little things taken care of today. Picked up the manifold from the machine shop. Total meat was 5/16 removed from the bottom of the manifold 0 at the top. This gives stellar clearance. Milling alone however is not enough. Now that the exhaust is milled I have a gap at the bottom of the ports because the bolt holes through the flanges are now at an angle from having the flange angle changed. I'm going to drop the manifold back off at the machine shop. (I'm 8 hours debted to the machine shop so far.) Get them to either A: enlarge the diameter of the bolt holes or B: match the holes relative to the new flanges angle. I barely speak engineer or machinist so bear with me (I got pics of course). I'm sending the manifold to them with a vortec head so they can see exactly what I'm dealing with and how to make it right. Hopefully they have them back in a few days because the exhaust is ready FOR THE EXHAUST SHOP!!!!
Once the exhaust shop is done, I'll haul *** back home and start wiring everything up. By the time the exhaust guys get done I should have already R/R the engine completing that portion of the build and just focus on electrical. My financial situation means I can't afford ANY extra shenanigans. Hopefully the hamburgers racing adapter bolts right in with no sass and I can bolt up the stock oil cooler lines. Toss in the trans lines and route them all pretty like like I had before. I'm going with the snap in lines on the 99 because I always hated getting a line wrench up there to remove them. Never have an issue getting those snap fittings in and out though.
I'm hoping to have my first test drive by this time next week which gives me 2 days to panic stress and make my trip deadline and coincidentally marks the 2 month date since I began this project.
Got my radiator warranteed out! That gives me a free cap for the heater hose bypass. I removed the stainless clamp and installed a gm spring clamp. <---- A fun point of contention to argue...
What the hell is the secret to this bunghole design:
The instructions are pretty clear with where to lay the bead. They provided some blue water pump rtv but... this is an oil pan gasket... So wtf? Should I just substitute the instructions with some of my ULTRA BLACK!!!???
Finally I spent about an hour figuring out my nearly worthless spare tire holder on the rear. I've always had issues getting the latch to work with mine and most of my friends have issues with theirs, just compensate by slamming the hell out of the gate. This causes the sheet metal in the tailigate to fatigue and crack. My last tailgate was cracked completely in half on the inner steel and all of the reinforcement brackets. What I realized was happening is the mark you see in the first picture just beneath the bolt in the center of the photo the Oklahoma shaped piece of metal hinge that hte release mechanism attaches to has closed too far. This places the plastic circular bushing in the path of the latch mechanism when closing it which prevents it from locking up properly. Force helps compensate which explains the damage you can see just beneath the bolt on the right side. The solution was simple: Just use a hammer/punch and smack the latch back far enough so that when you release the handle it stops where mine is.
I skipped a day of updates so here they are:
Started working on cooling hoses. The upper rad hose from my stock 4.3 is a perfect fit.
The parking pawl issue: Caused by the range selector switch on the 96+ transmission. By being wider it hits the front differential when going into park and is pretty damned close in reverse and drive. I used the good ol s10 blazer v8 swap tool of choice and did some customizing. Notching out the part that contacts the shifter fixed everything. My engine is in the middle position.
Thread Starter
|
New Member
Joined: Dec 2009
Posts: 91
Dropped off the manifold at the machine shop for (hopefully) the last time. The manifold clears with the engine in the same position the 4.3 was in. I didn't move it up/down/left ORRrrr right. Angle milling changes the fastener holes and where the head of the fastener holds the manifold down so now that the 5/16 milling off of the bottom and 0 on the top is final, they are going to clearance the bolt holes and where the bolt heads go so it should be sass free.
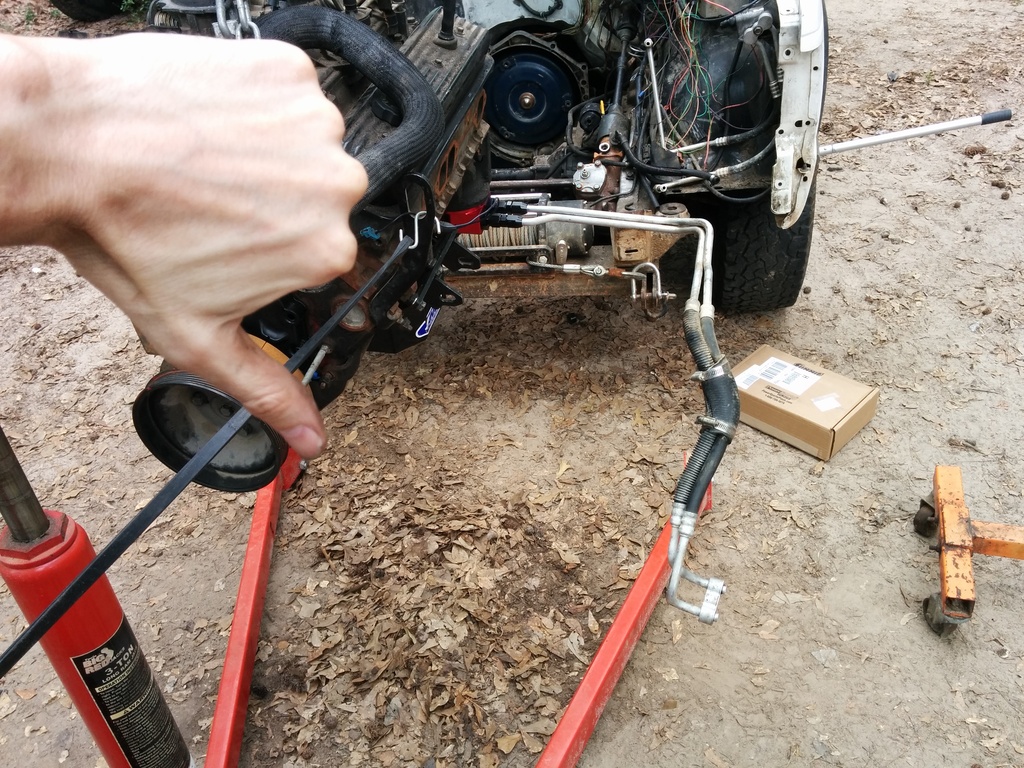
I can't be certain how my wiring will be until the exhaust is in position so I've done most of what I can. I pulled the engine back out today to install what could have been the biggest hold up, the pickup tube. The 4.3 pickup tube was perfect. Don't waste your money, just reuse the 4.3 tube. It's an inch from the bottom of the pan and clears the canton pan flawlessly. Once that was done I installed the felpro pan gasket, gm performance parts single roller timing set, and timing cover. Well I ordered the wrong timing cover from rockauto. I got the one with no sensor hole. Damnit! So I hit oreilly and grabbed a dorman. Of course one of the bolts broke off inside of the block.
I couldn't make the stock dipstick tube work with the crank scraper in the new pan and the angle milled manifold and still clear everything comfortably so I used a plug from a transmission rebuild kit and plugged the O.E. dipstick tube. Ordered the canton racing tube, hopefully it gets here before I drive cross country...
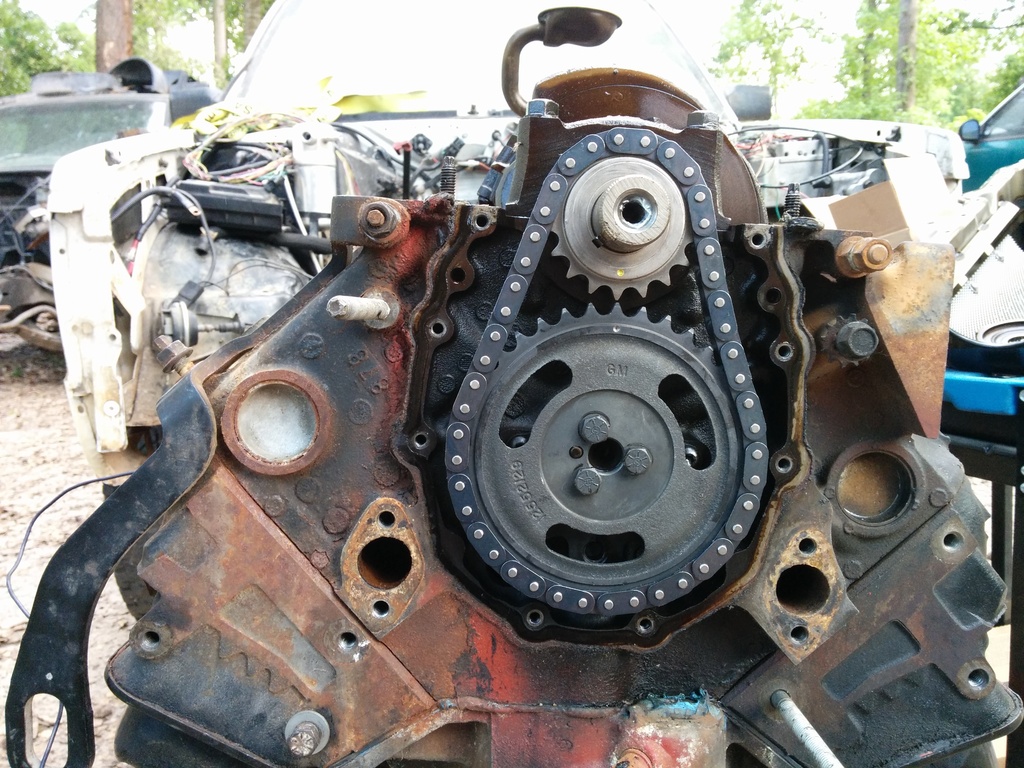
Single roller gm performance timing set is pretty sweet:


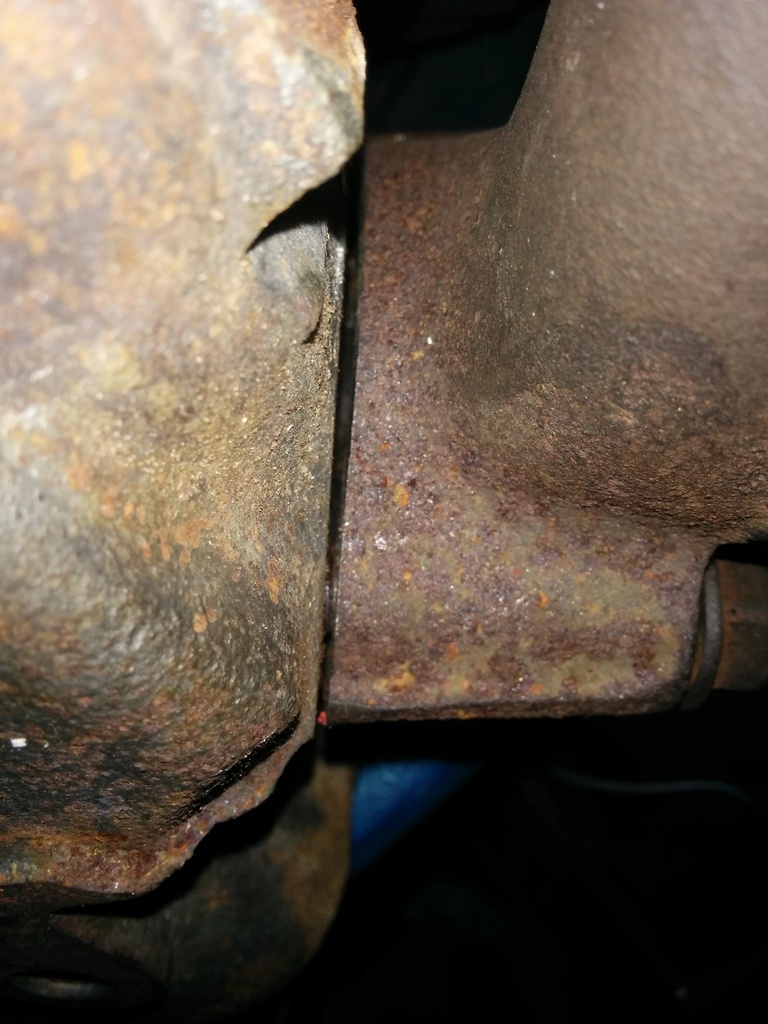
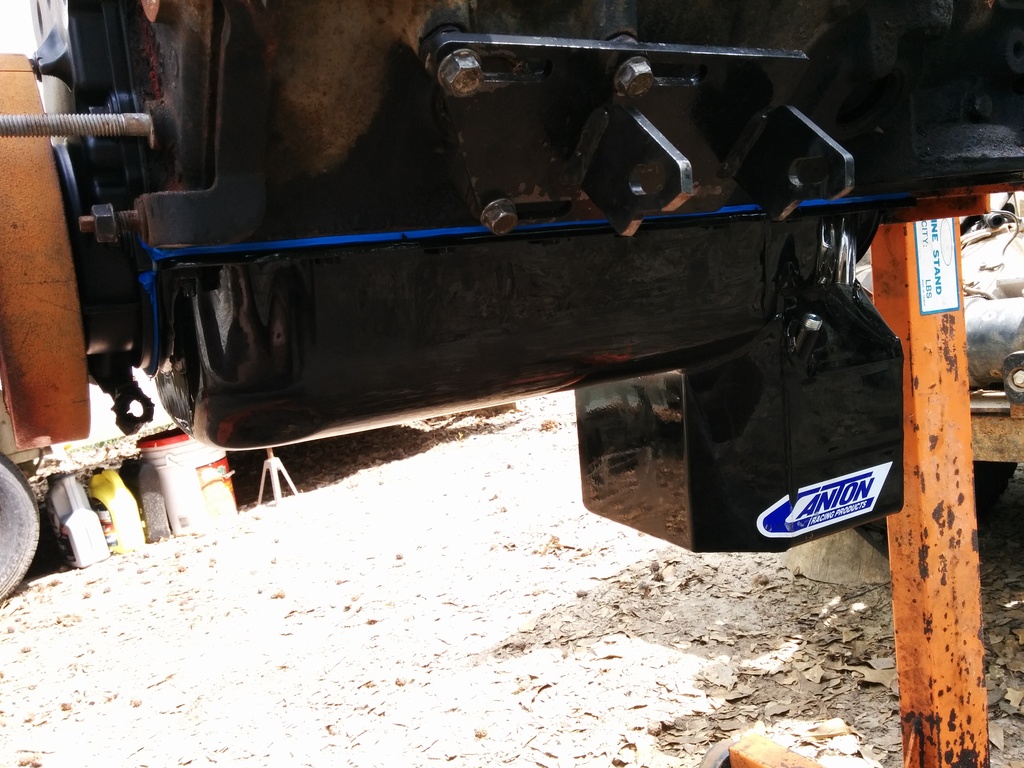
I had to use the grinder here, the brace was hitting the pan there. I also had to grind further on the opposite side because it was still interfering with the pan.

Got my spare mounted/balanced for 8 dollars. Some crappy 31/10.50/15. Nothing fancy.
I can't be certain how my wiring will be until the exhaust is in position so I've done most of what I can. I pulled the engine back out today to install what could have been the biggest hold up, the pickup tube. The 4.3 pickup tube was perfect. Don't waste your money, just reuse the 4.3 tube. It's an inch from the bottom of the pan and clears the canton pan flawlessly. Once that was done I installed the felpro pan gasket, gm performance parts single roller timing set, and timing cover. Well I ordered the wrong timing cover from rockauto. I got the one with no sensor hole. Damnit! So I hit oreilly and grabbed a dorman. Of course one of the bolts broke off inside of the block.

I couldn't make the stock dipstick tube work with the crank scraper in the new pan and the angle milled manifold and still clear everything comfortably so I used a plug from a transmission rebuild kit and plugged the O.E. dipstick tube. Ordered the canton racing tube, hopefully it gets here before I drive cross country...

Single roller gm performance timing set is pretty sweet:


I had to use the grinder here, the brace was hitting the pan there. I also had to grind further on the opposite side because it was still interfering with the pan.


Got my spare mounted/balanced for 8 dollars. Some crappy 31/10.50/15. Nothing fancy.
Thread Starter
|
New Member
Joined: Dec 2009
Posts: 91
I ordered my pan powdercoated black from summit for 239 out the door. I didn't want the pickup tube/dipstick because I wasn't sure if I would want/need them.
Today was going awesome until the oil filter adapter arrived, then it turned into WELLLL SHIIIIIIIIT
Why was I even born? TO KEEP SUMMIT RACING PROFITABLE THATS WHY!
So the solution is to spend countless millions of dollars getting those lines back to how the stock lines routed. My departure date is just 8 days away and I kind of need to be able to start the truck when playing with the wiring. The oil system on this truck has been the single most challenging part for me personally. Everything else was pretty simple. If it was complex I just go grab the grinder.
I am using the 99 suburban trans lines and they fit like a glove. A glove you have to bend... but just a little above the front differential axle shaft.
Today was going awesome until the oil filter adapter arrived, then it turned into WELLLL SHIIIIIIIIT

Why was I even born? TO KEEP SUMMIT RACING PROFITABLE THATS WHY!
So the solution is to spend countless millions of dollars getting those lines back to how the stock lines routed. My departure date is just 8 days away and I kind of need to be able to start the truck when playing with the wiring. The oil system on this truck has been the single most challenging part for me personally. Everything else was pretty simple. If it was complex I just go grab the grinder.
I am using the 99 suburban trans lines and they fit like a glove. A glove you have to bend... but just a little above the front differential axle shaft.
Thread Starter
|
New Member
Joined: Dec 2009
Posts: 91
I am going to install my pioneer thread on oil filter adapter to the block and hit Oreilly for a really short filter. Will fix the oil filter crap later and I'll try and return this really sexy crafted hamburger block adapter. Gonna have to do some cleaning to make her pretty enough to get my money back on.
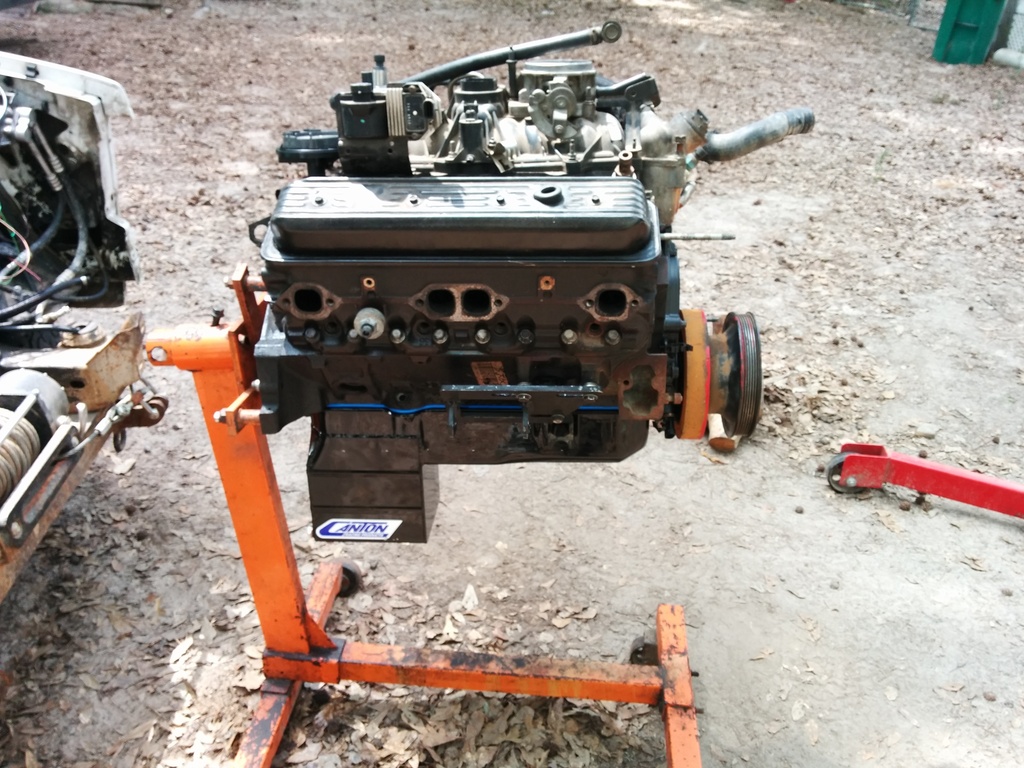
REREREnstalled the engine today for hopefully the next 50k miles. I think thats a reasonable life expectancy.
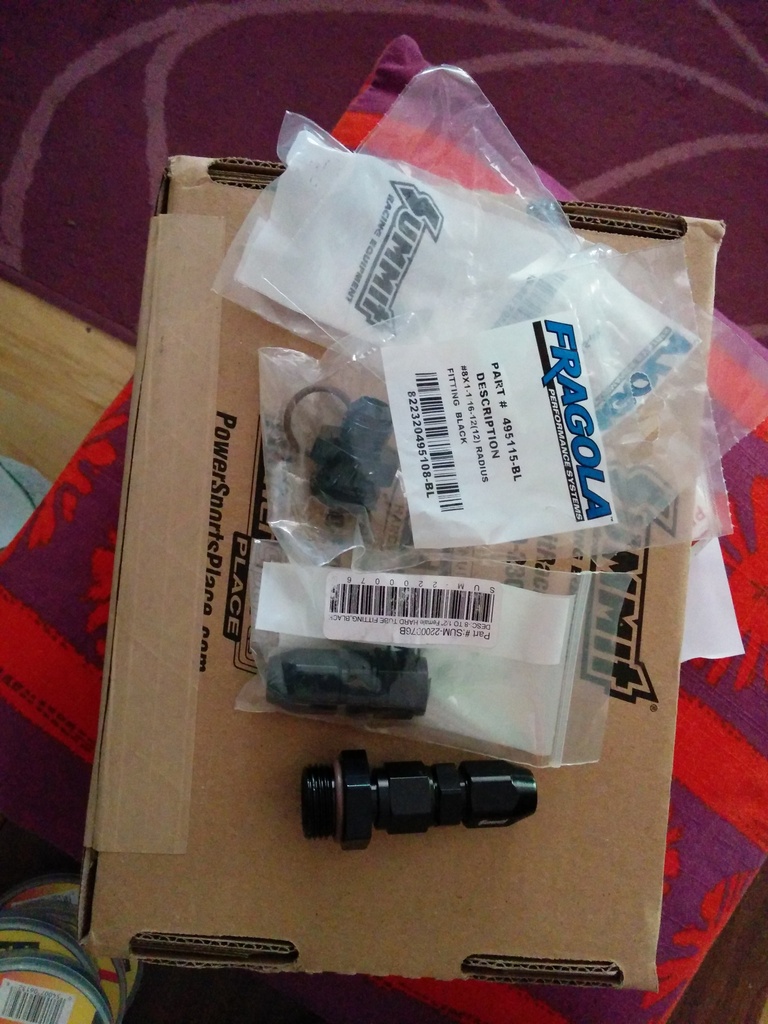
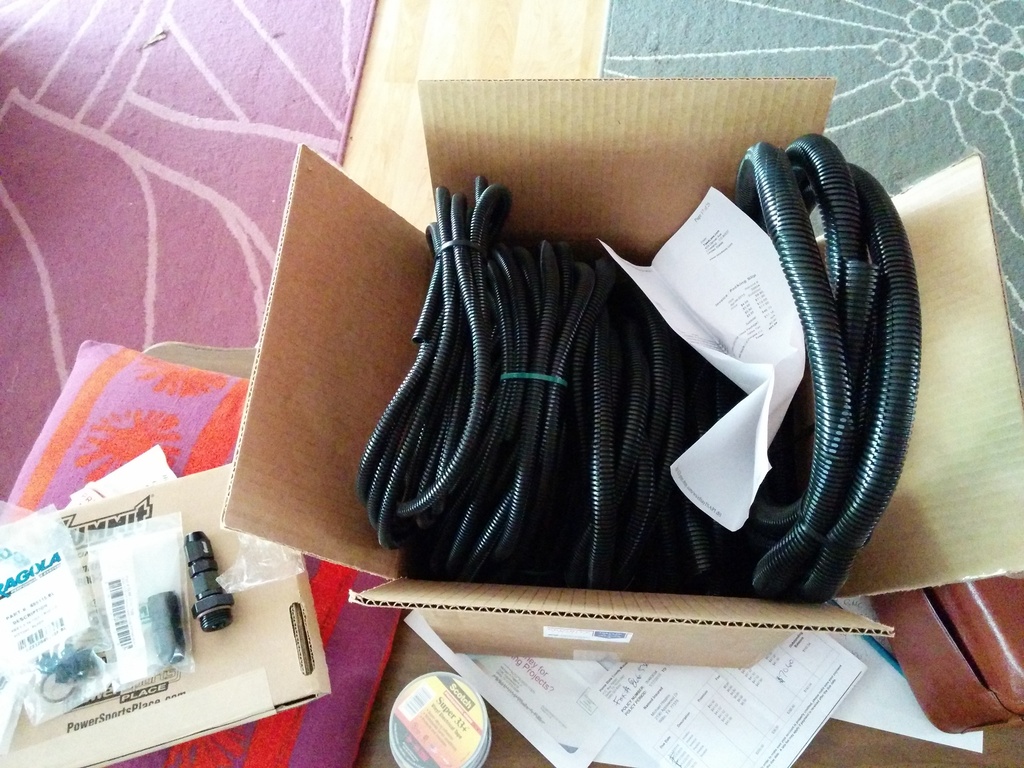
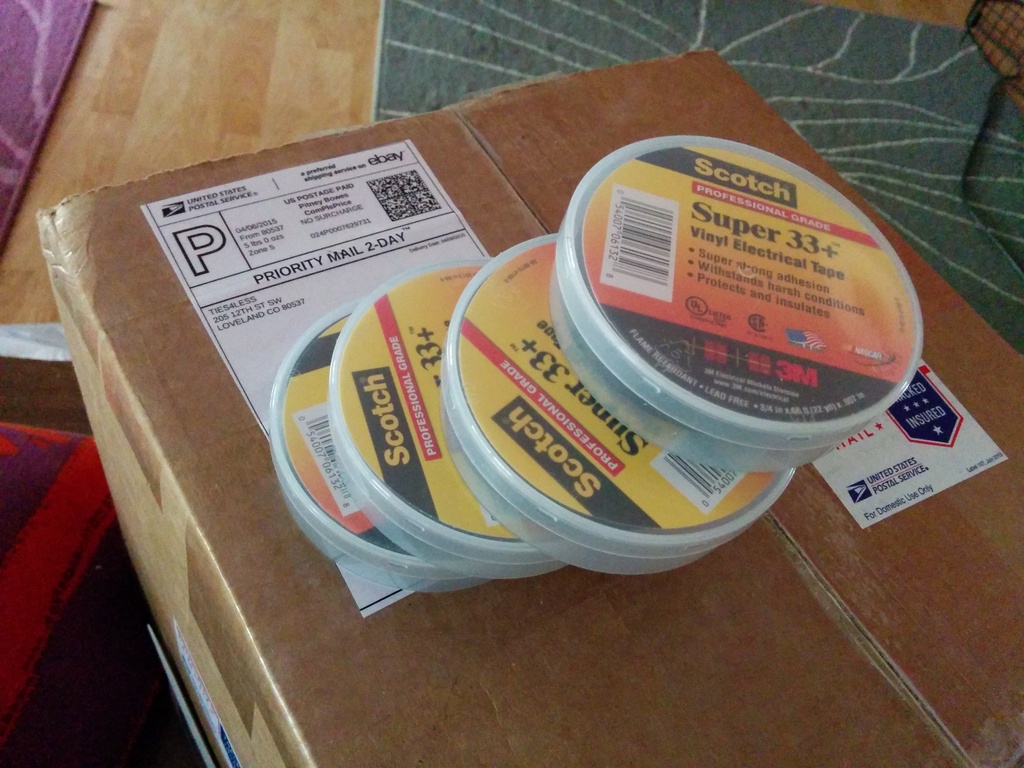
Oil filter adapter fittings arrived a few hours before the tragedy that is the oil filter adapter. Also got about 200 feet of varying lengths of high quality nylon corrugated split loom and super 33+ electrical tape. This stuff is priced insanely high but it's absolutely the best electrical tape I've used for underhood applications.
Traded a customer computer repair for a full body massage. Stuck the table in the middle of my living room. It was my first time and it was pretty awesome. Except my sinus infection. That part was lame. I need this project to be done with. I'm starting to get burned out. I think my next engine swap will be an atc90 engine into my atc70. She needs a little more grunt and low range capability. It would be nice to have a 2 day motor swap project instead of 2 months.


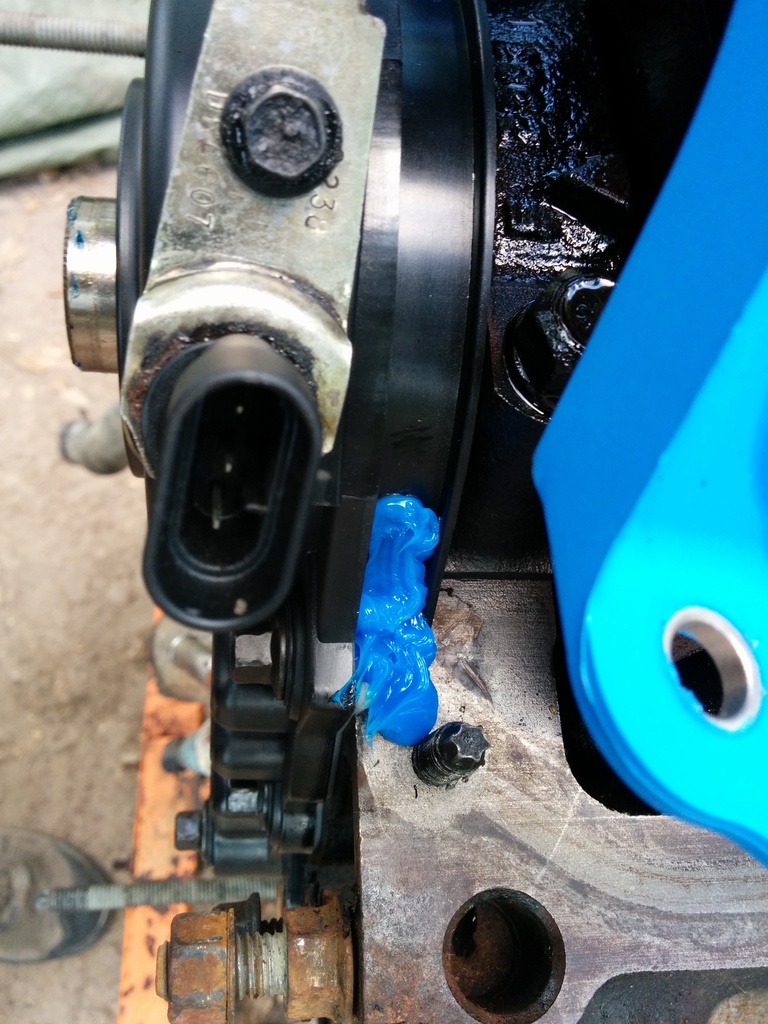
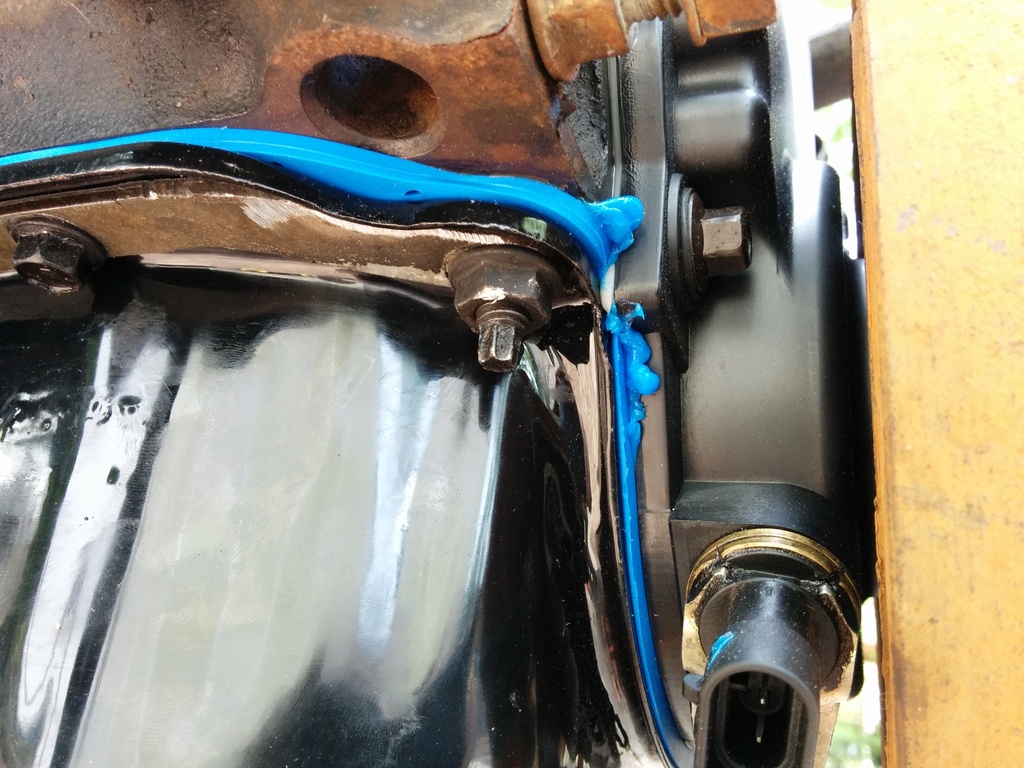
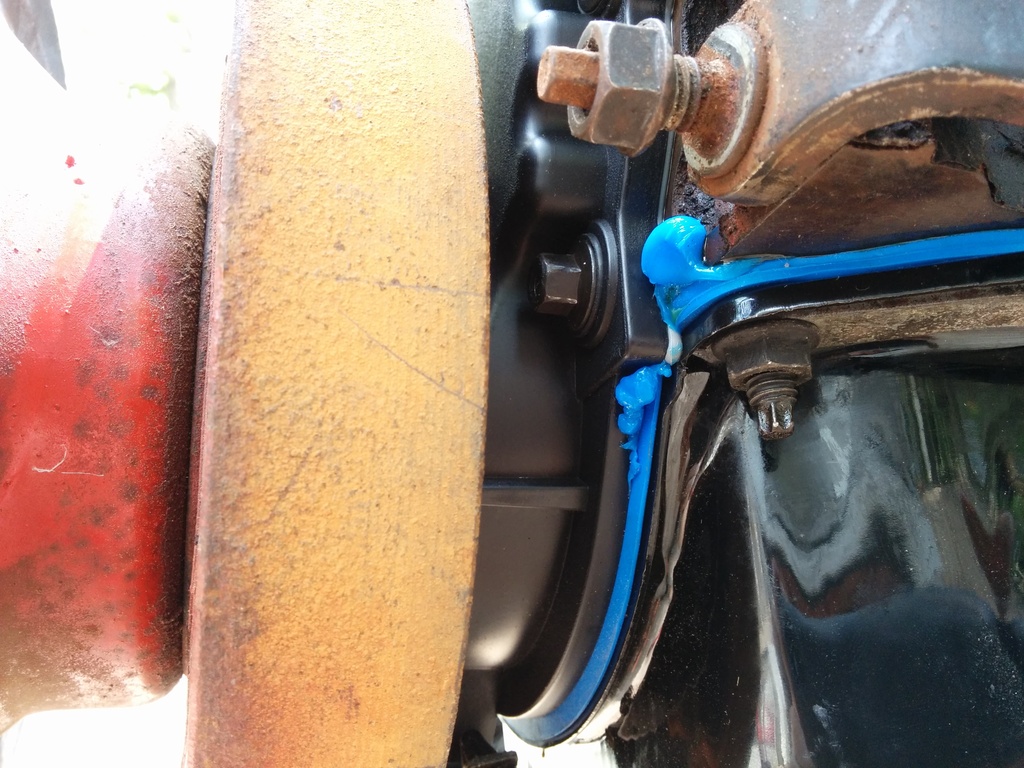
Got blue rtv coming out of those 3mm holes this front timing cover design neglects to seal off on it's own.

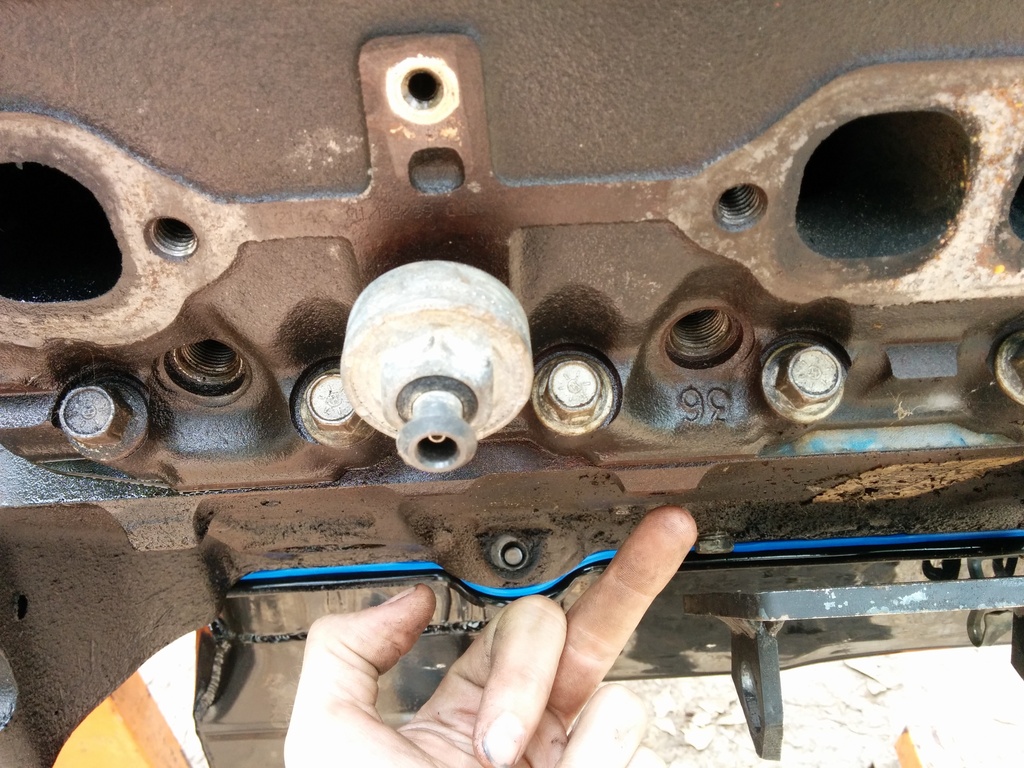
Factory dipstick tube hole blocked by the canton pan.

Removed the head plug and installed my old 4.3 knock sensor. I hope it works/fits.
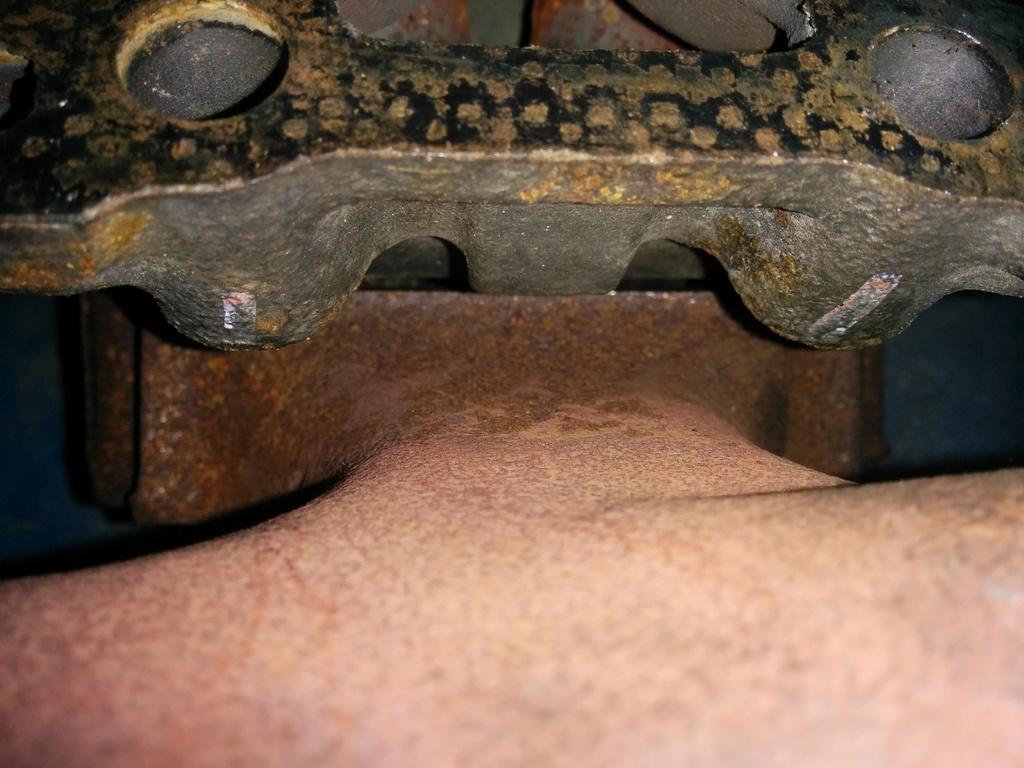
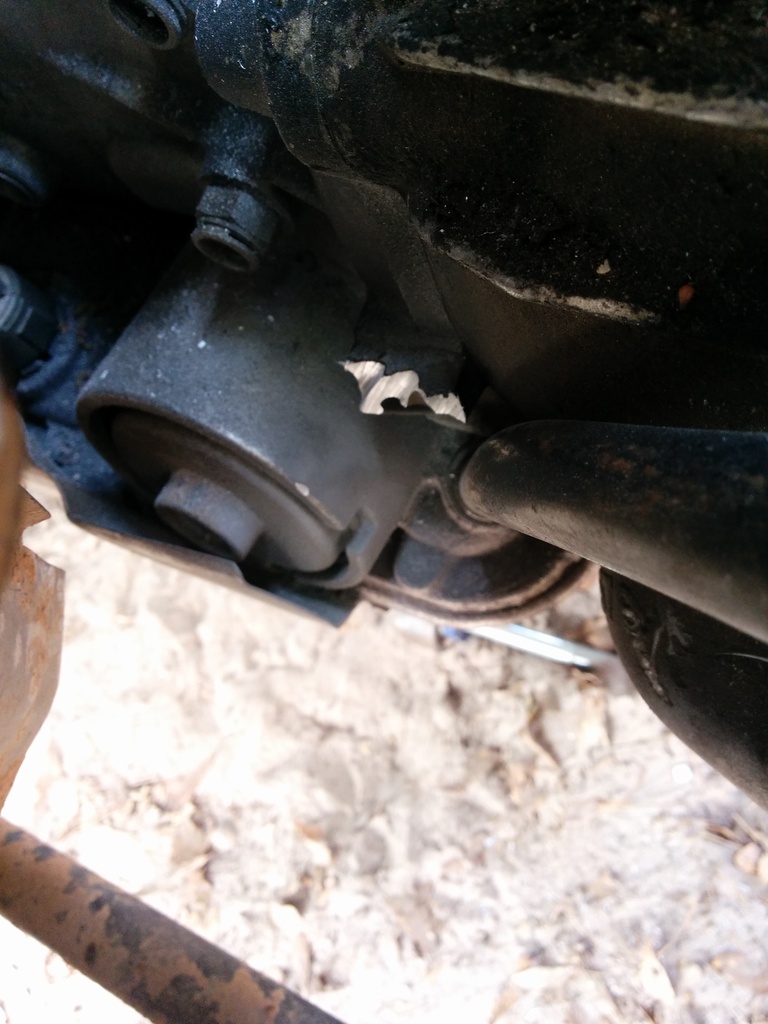
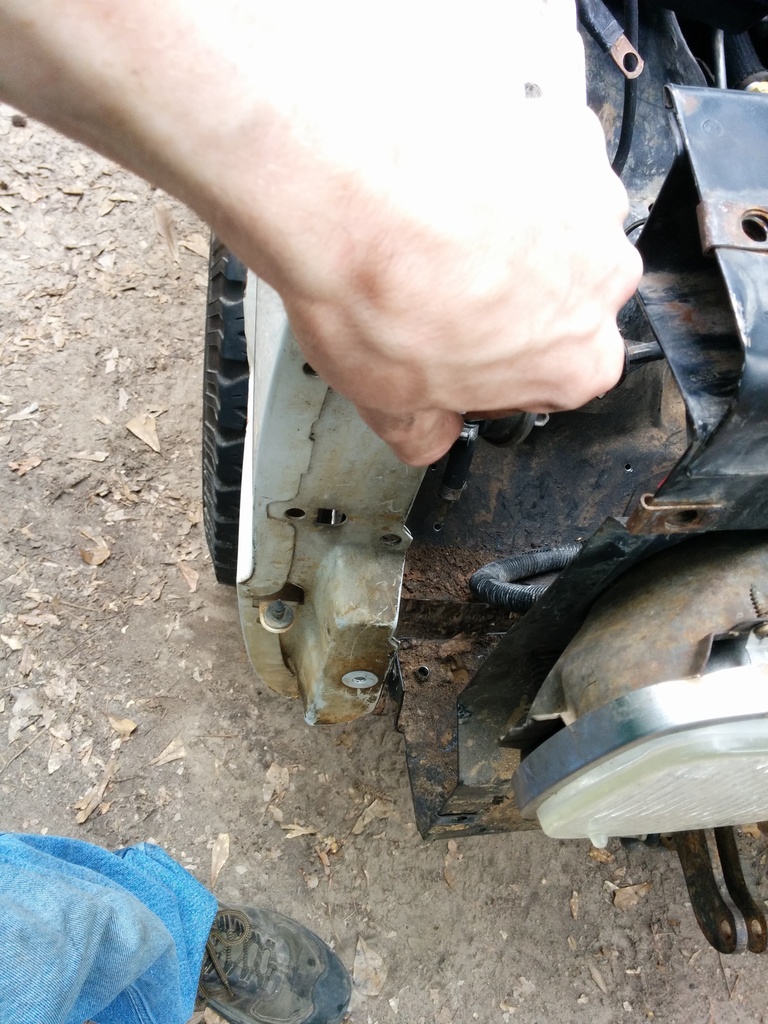
Spent an hour grinding the ear off of the transmission to accomodate my passenger side brace.

I failed to do some basic checks like... check trans cooler line clearance. So that was a waste. Brace was removed.


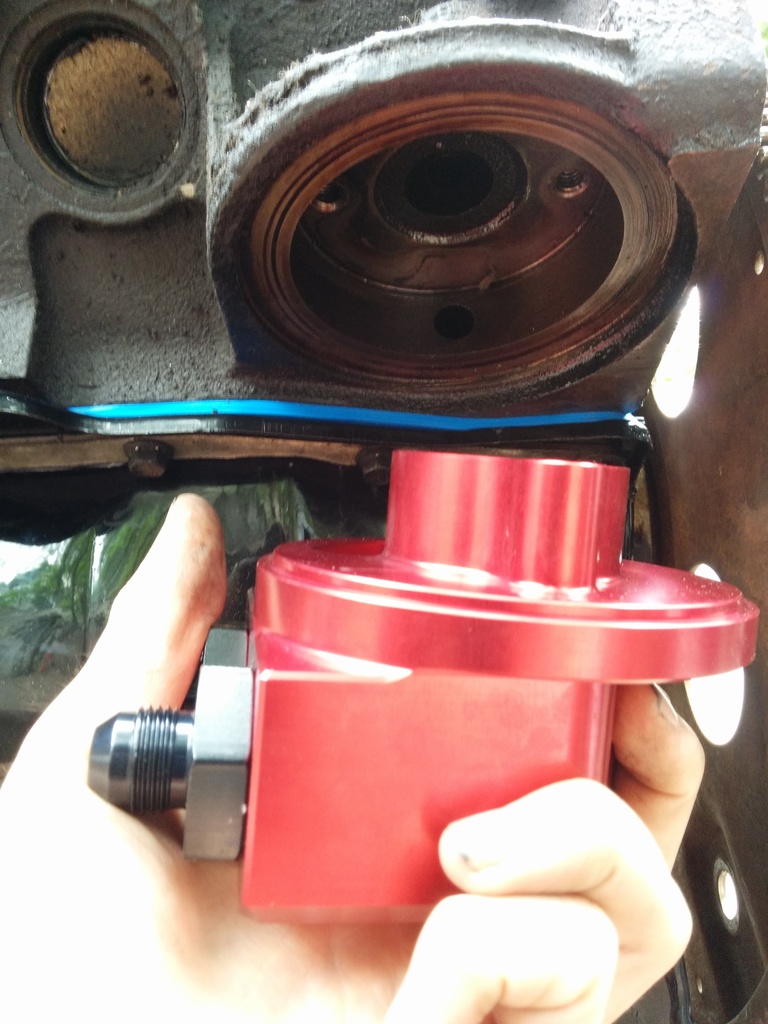
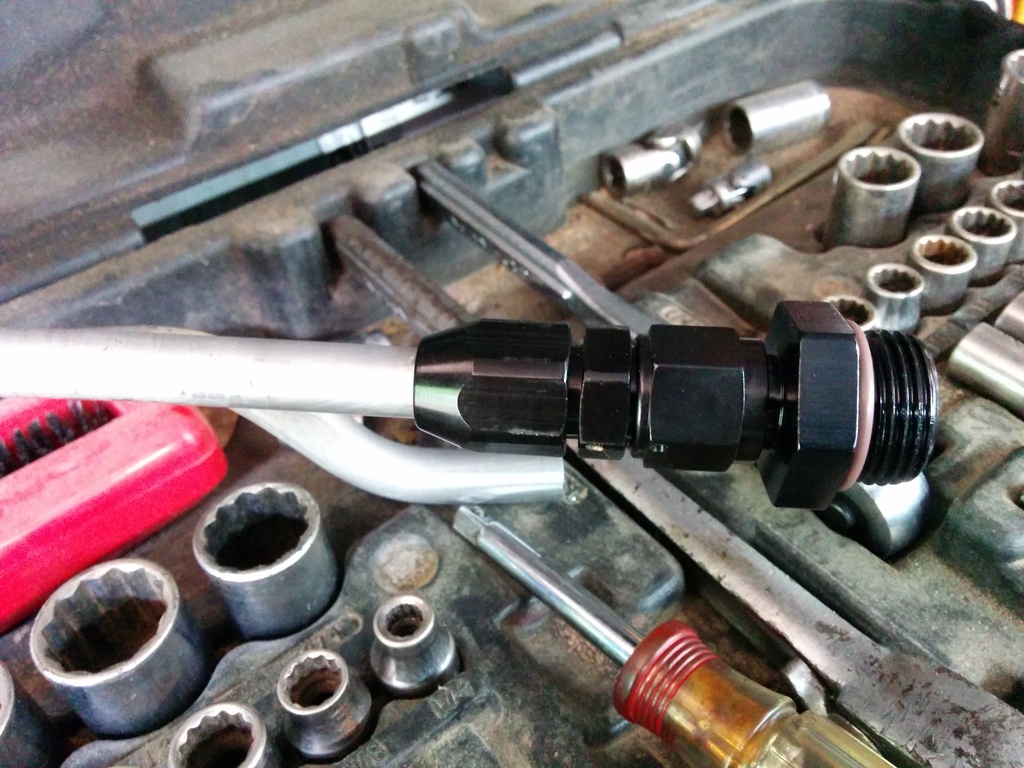
My excitement, I couldn't even make it into the shop to see what 130 bucks worth of aluminum feels like.


DAMN
Lines probably won't fit routed like this

REREREnstalled the engine today for hopefully the next 50k miles. I think thats a reasonable life expectancy.
Oil filter adapter fittings arrived a few hours before the tragedy that is the oil filter adapter. Also got about 200 feet of varying lengths of high quality nylon corrugated split loom and super 33+ electrical tape. This stuff is priced insanely high but it's absolutely the best electrical tape I've used for underhood applications.
Traded a customer computer repair for a full body massage. Stuck the table in the middle of my living room. It was my first time and it was pretty awesome. Except my sinus infection. That part was lame. I need this project to be done with. I'm starting to get burned out. I think my next engine swap will be an atc90 engine into my atc70. She needs a little more grunt and low range capability. It would be nice to have a 2 day motor swap project instead of 2 months.


Got blue rtv coming out of those 3mm holes this front timing cover design neglects to seal off on it's own.


Factory dipstick tube hole blocked by the canton pan.

Removed the head plug and installed my old 4.3 knock sensor. I hope it works/fits.

Spent an hour grinding the ear off of the transmission to accomodate my passenger side brace.

I failed to do some basic checks like... check trans cooler line clearance. So that was a waste. Brace was removed.


My excitement, I couldn't even make it into the shop to see what 130 bucks worth of aluminum feels like.


DAMN

Lines probably won't fit routed like this

Thread Starter
|
New Member
Joined: Dec 2009
Posts: 91
I am going to install my pioneer thread on oil filter adapter to the block and hit Oreilly for a really short filter. Will fix the oil filter crap later and I'll try and return this really sexy crafted hamburger block adapter. Gonna have to do some cleaning to make her pretty enough to get my money back on.
REREREnstalled the engine today for hopefully the next 50k miles. I think thats a reasonable life expectancy.
Oil filter adapter fittings arrived a few hours before the tragedy that is the oil filter adapter. Also got about 200 feet of varying lengths of high quality nylon corrugated split loom and super 33+ electrical tape. This stuff is priced insanely high but it's absolutely the best electrical tape I've used for underhood applications.
Traded a customer computer repair for a full body massage. Stuck the table in the middle of my living room. It was my first time and it was pretty awesome. Except my sinus infection. That part was lame. I need this project to be done with. I'm starting to get burned out. I think my next engine swap will be an atc90 engine into my atc70. She needs a little more grunt and low range capability. It would be nice to have a 2 day motor swap project instead of 2 months.

Got blue rtv coming out of those 3mm holes this front timing cover design neglects to seal off on it's own.


Factory dipstick tube hole blocked by the canton pan.
Removed the head plug and installed my old 4.3 knock sensor. I hope it works/fits.

Spent an hour grinding the ear off of the transmission to accomodate my passenger side brace.
I failed to do some basic checks like... check trans cooler line clearance. So that was a waste. Brace was removed.

My excitement, I couldn't even make it into the shop to see what 130 bucks worth of aluminum feels like.
DAMN

Lines probably won't fit routed like this
REREREnstalled the engine today for hopefully the next 50k miles. I think thats a reasonable life expectancy.
Oil filter adapter fittings arrived a few hours before the tragedy that is the oil filter adapter. Also got about 200 feet of varying lengths of high quality nylon corrugated split loom and super 33+ electrical tape. This stuff is priced insanely high but it's absolutely the best electrical tape I've used for underhood applications.
Traded a customer computer repair for a full body massage. Stuck the table in the middle of my living room. It was my first time and it was pretty awesome. Except my sinus infection. That part was lame. I need this project to be done with. I'm starting to get burned out. I think my next engine swap will be an atc90 engine into my atc70. She needs a little more grunt and low range capability. It would be nice to have a 2 day motor swap project instead of 2 months.
Got blue rtv coming out of those 3mm holes this front timing cover design neglects to seal off on it's own.
Factory dipstick tube hole blocked by the canton pan.
Removed the head plug and installed my old 4.3 knock sensor. I hope it works/fits.
Spent an hour grinding the ear off of the transmission to accomodate my passenger side brace.
I failed to do some basic checks like... check trans cooler line clearance. So that was a waste. Brace was removed.
My excitement, I couldn't even make it into the shop to see what 130 bucks worth of aluminum feels like.
DAMN
Lines probably won't fit routed like this
Thread Starter
|
New Member
Joined: Dec 2009
Posts: 91
Originally Posted by bikerzed
uhlhazard - first off, awesome thread. Though you really should add a warning to the thread title for 56k users. I've got high speed cable internet and it still takes some time to load all the pics. 
I've got a question concerning your oil filter adapter issues. If you took something like this (link below), and bolted it to the original filter adapter, would that fit/clear? And would the 4.3 oil lines thread into the 350 adapter?
http://www.summitracing.com/parts/prm-1204
Sorry for the thread jack, and good luck getting it finished on time. :thumbup:
Now on to today's agenda.
Oil filter: "solved".
transmission: done
transfer case: done
power steering: done
water pump: done
drive shafts: done
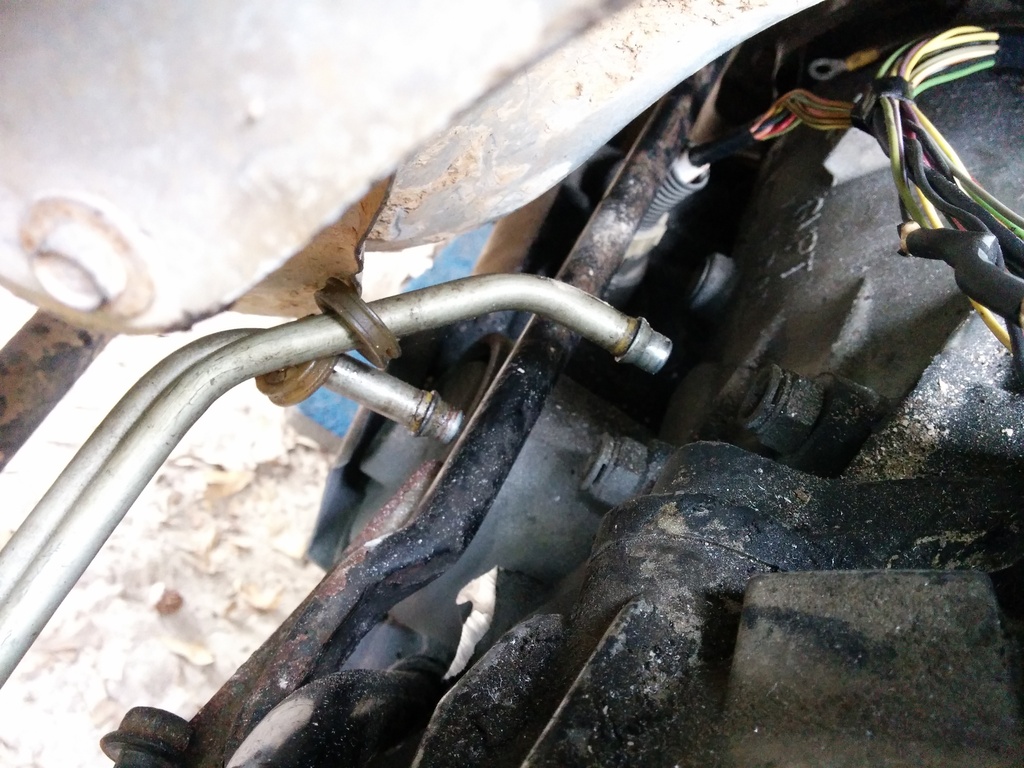
fuel hard lines: bleak
transmission lines: promising
cooling lines: done
I didn't get many pictures up today. Lots of work getting knocked out I promise.
Instead of panic spending my life savings I just went to oreilly and put on an oil filter. They sold me the wix. I said " its too damned big". It was. Sorta.
Got the WIX installed, scored the hell out of the paint against hte front driveshaft that the filter will hit if it is rotated. (so no 4x4 with this filter). I then was like "this solution is ****". Opened up chrome, my 63 research tabs fire up and I happen to land on a picture of an HT383E engine block with the cutest little oil filter.


I did some more research and found out that filter is called the PF454 and is a bolt-on to my v8 block. It's a good inch shorter than the wix and gives me 3/4 of an inch from the front diff. Awesome.
Then I clearanced the water pump until I hit the shaft. I hope the engine doesn't move forward 1/2". That would suck to the tune of about 140 bucks, and a gallon of coolant. And a tow. And shame. Then $$$ for a mercruiser pump.


Thread Starter
|
New Member
Joined: Dec 2009
Posts: 91
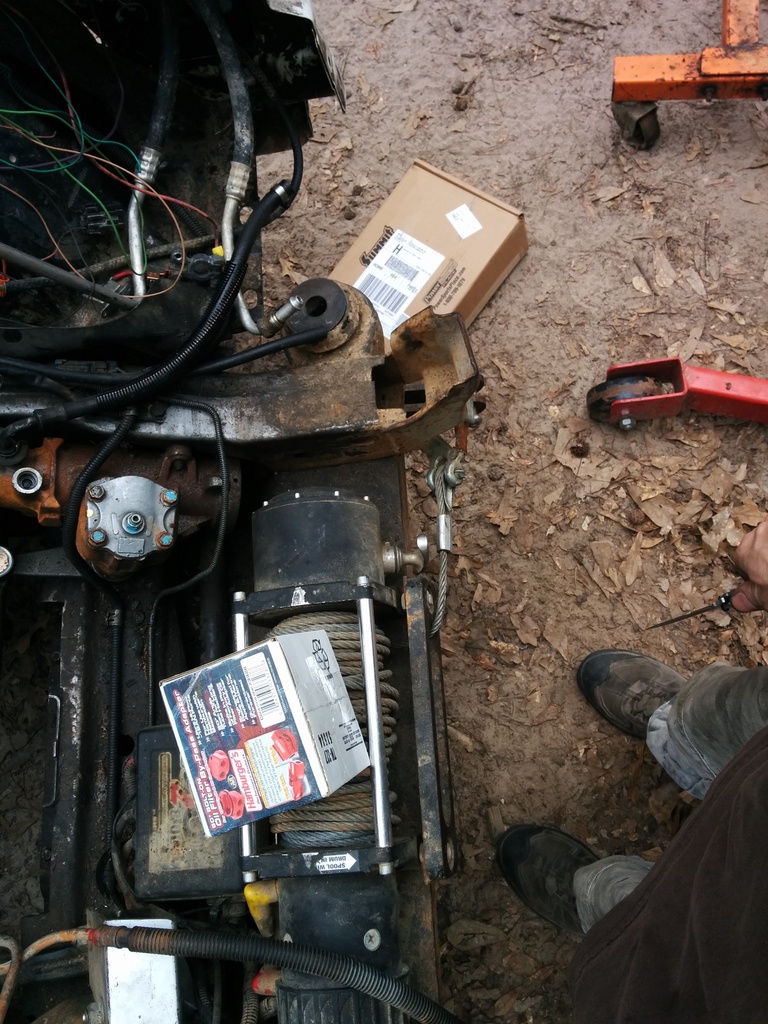
Heres how I loaded up the core support with the inner/outer fenders installed:
Wedge it in. I'm pretty sure if you have just looked at the pictures in my build log that I'm not a guy that gives a ford about appearances.
Heres an hour of work doing electrical:
Ran the wiring from the compressor clutch, sensor on the back of the compressor housing, egr, coolant temp sender and harness ground to thermo housing. I terminated the wrap at the junction where the tps and iac valves join and the map/iat for the intake.
What I'm doing is using super 33+ electrical tape starting with 2 wraps then going down the wiring covering the entire surface of the wires in tape. I then toss in the high temp nylon split corrugated tubing and tape each end. On the inner harnesses I tape the tubing as well since it helps shape any bends in corners and adds another layer of protection to the setup.
Tomorrow I'd like to have my core support wiring done. (mostly lights) The headlights will be a pain in the *** because I have 190 watt hella h4 bulbs in e code housings that will melt the stock harness in short order. Helps to be in a rush.
Ooh and finally I wrangled the fuel system in check!
Engine oil is primed. Wiring is intimidating. Working steady. Back to you Diane.
Missed the deadline. Machine shop gave me the manifold 2 days before I had to leave. Brought it home, prepped hte Jimmy loaded up the trailer and got to the exhaust shop 30 minutes before they closed. Picked her up the next day (yesterday) brought her home and started working on wiring.
Once the exhaust was installed it's going to be damn near impossible to remove that oil filter. Next few thousand miles will give me time to drive my baby and setup the remote oil filter/cooler adapter utilizing the stock v8 adapter and lines with a cap on the bottom to plug the existing filter port and just bypass to the remote one.
Wiring isn't so hard as figuring out where to put everything. I'm trying like hell to run everything in a single loom and still accomodate ease of removal of the harness by placing connectors EVERYWHERE. I want to be able to unbolt this harness from the vehicle if necessary.
Not having a deadline is awesome. I made a facebook and spent about 2 hours watching dumbass videos and read probably 30 comments of people whining.
Then I decided to get back to work. Got my 4x4 system done, it's autonomous from the rest of the truck. I have no idea how to tell the computer if it's in 4 lo or 4 hi. It might not even work since the donors a 2wd.
Got the evap system all routed and installed to my stock evap canister. I plugged off the vacuum line. I'll be nervously watching that to be sure if it's working or not. I have no clue if my retrofit will suffice.
Tomorrow is postcat o2 and precat passenger bank. It's going to be some work.
Not a lot of pictures, just a lot of reading diagrams and double/triple checking everything.
Got a VIDEO OF IT RUNNING!!!
Albeit for about 1 second but still IT RAN FOR A SECOND!!! The passlock is fighting me. I wish I had measured the resistance of the lock cylinder before I had gutted the power train. I'm researching how this garbage works now and will do my best to get it knocked out tomorrow. I need to do some 2hi burnouts in my street!
https://www.facebook.com/10000948360...7795664879874/
https://www.facebook.com/10000948360...7796684879772/


Wedge it in. I'm pretty sure if you have just looked at the pictures in my build log that I'm not a guy that gives a ford about appearances.
Heres an hour of work doing electrical:

Ran the wiring from the compressor clutch, sensor on the back of the compressor housing, egr, coolant temp sender and harness ground to thermo housing. I terminated the wrap at the junction where the tps and iac valves join and the map/iat for the intake.
What I'm doing is using super 33+ electrical tape starting with 2 wraps then going down the wiring covering the entire surface of the wires in tape. I then toss in the high temp nylon split corrugated tubing and tape each end. On the inner harnesses I tape the tubing as well since it helps shape any bends in corners and adds another layer of protection to the setup.
Tomorrow I'd like to have my core support wiring done. (mostly lights) The headlights will be a pain in the *** because I have 190 watt hella h4 bulbs in e code housings that will melt the stock harness in short order. Helps to be in a rush.
Ooh and finally I wrangled the fuel system in check!

Engine oil is primed. Wiring is intimidating. Working steady. Back to you Diane.
Missed the deadline. Machine shop gave me the manifold 2 days before I had to leave. Brought it home, prepped hte Jimmy loaded up the trailer and got to the exhaust shop 30 minutes before they closed. Picked her up the next day (yesterday) brought her home and started working on wiring.
Once the exhaust was installed it's going to be damn near impossible to remove that oil filter. Next few thousand miles will give me time to drive my baby and setup the remote oil filter/cooler adapter utilizing the stock v8 adapter and lines with a cap on the bottom to plug the existing filter port and just bypass to the remote one.
Wiring isn't so hard as figuring out where to put everything. I'm trying like hell to run everything in a single loom and still accomodate ease of removal of the harness by placing connectors EVERYWHERE. I want to be able to unbolt this harness from the vehicle if necessary.
Not having a deadline is awesome. I made a facebook and spent about 2 hours watching dumbass videos and read probably 30 comments of people whining.
Then I decided to get back to work. Got my 4x4 system done, it's autonomous from the rest of the truck. I have no idea how to tell the computer if it's in 4 lo or 4 hi. It might not even work since the donors a 2wd.
Got the evap system all routed and installed to my stock evap canister. I plugged off the vacuum line. I'll be nervously watching that to be sure if it's working or not. I have no clue if my retrofit will suffice.
Tomorrow is postcat o2 and precat passenger bank. It's going to be some work.
Not a lot of pictures, just a lot of reading diagrams and double/triple checking everything.
Got a VIDEO OF IT RUNNING!!!
Albeit for about 1 second but still IT RAN FOR A SECOND!!! The passlock is fighting me. I wish I had measured the resistance of the lock cylinder before I had gutted the power train. I'm researching how this garbage works now and will do my best to get it knocked out tomorrow. I need to do some 2hi burnouts in my street!
https://www.facebook.com/10000948360...7795664879874/
https://www.facebook.com/10000948360...7796684879772/