
Slow but steady build


Thread Starter
|
Beginning Member
Joined: Sep 2013
Posts: 12

I finally got around to getting to work on the Blazer! Over the course of about two weeks, I was able to get my sound system upgraded. It will be followed eventually by a moderate lift, new wheels and tires, and last but not least a complete reworking of the exterior to get rid of dents and a paint job to go with it (Arizona is not kind to paint at all). I have included some photos of the just-about complete stereo equipment. All I was after was better sound and a clean installation. I think on both counts, I have succeeded.

Kenwood Excelon KDC-X697 (Sorry for the night photos)
It had everything I needed, and I have always liked the amount of control available through the Excelon line. The main feature I wanted was the rear usb input, as having a cable coming out of the front of the receiver does not fit with the 'clean' look for which I was going. Plays Spotify through the lightning cable from my iPhone great, and the installation was a piece of cake. Crutchfield is always recommended for anyone out there looking for true customer service.

While taking apart the dash, I figured I would put white gauge overlays in as well. I ordered these from whitegauges.net, and have used their stuff on three cars now with good results. They're just overlays, so complete disassembly of the gauge cluster was not required. They just slip over the needles and are applied like an Invisibleshield on a phone. Much better to look upon, especially during the day.

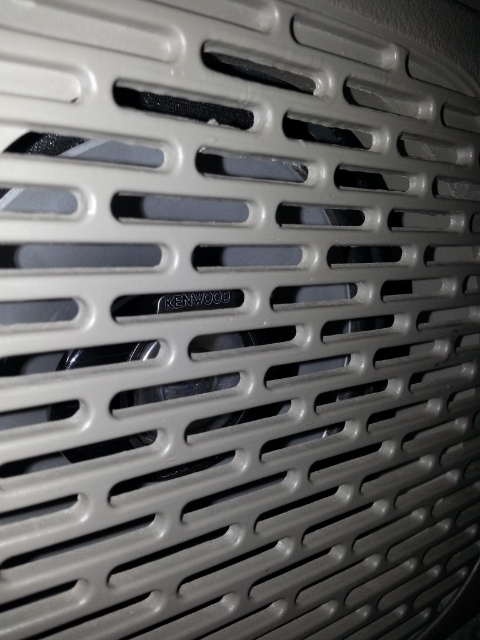
Front component in the door. Kenwood KFC-P709PS. If you look really closely, the diamond pattern can be seen through the grate. These sound fantastic, especially for the price. Installation was fairly simple, with the tweeters mounted in the factory dash location.

There were a few casualties suffered by the Blazer during installation, with the dash speaker covers being the most obvious. Not as obvious: the dozens of door panel clips that had to be replaced after removal. Arizona summers are destroyers of anything plastic! The dash is getting a cover soon, so I'm not even going to worry about ordering replacements. The tweeters will be covered up soon enough. Wiring the passenger side was simple: remove stock tweeter, drop glove box out of the way, drop wires from new Kenwood through the opening, and feed wire through to the door to attach to the woofer. The driver's side gave me issues because I could not locate the opening coming from the door behind the dash that led to the opening above. I ended up cutting the factory speaker wire before the bass blocker and connecting the new one directly to those (the Kenwoods have crossovers built into the tweeter wiring).
Rear 3-way Kenwoods. These were in the front doors as installed by the previous owner. The stock rear speakers were blown to the point that I had to fade the sound all the way to the front with the stock setup. Moving these to the back gives a much fuller sound all around, and it lets my kids actually hear the music.

If you look closely, you can see the Kenwood in the opposite door. The wire running along the floor is the remote amp control, which is the only visible wire in the entire install. It's annoying, but was the only route available for the kit from JL Audio. Also, if I ever want to upgrade my bass package, it is easily removed. My kids are great though. Their request was, "Daddy, can you bring the rock and roll to the back seat too?" Yes, yes I can.

Last but definitely not least, the JL Powerwedge Max. JL is always conservative with their power ratings, and this setup is a prime example. That cover came with it; the amp and all wires are completely covered by an aluminum shell.

For a 10" sub, this sounds fantastic, and is more than enough for my needs. I'm pretty much past the days of squeezing four 12"s into a Civic, and half the time I'm in the car with my kids anyway. It can crank when it needs to crank, which is all I was looking for after all.
I still have some clean up to do underneath the back seat, as the wires are simply zip-tied together at this point. I still need to get in there and throw some wire wrap around it to keep it safe and away from any moving parts when the seat is folded. I can take photos if anyone needs them of the under hood area. Installation was a piece of cake, as there is a grommet to use in the passenger footwell and routing through and around the a/c stuff is straightforward.
Overall I'm really pleased with the system. I know it will be asked so I'll go ahead and answer now: price. I purchased the JL sub/amp combo on craigslist (before I had even purchased the Blazer!) in August or September for $125. I bought the head unit on a Black Friday deal on Crutchfield for $109 + $15 for installation supplies. I picked up the front components two weeks before Christmas during a 50% sale on amazon, which Best Buy matched at $65. A $20 amp install kit later, and I had everything I needed. The gauges were $20, but weren't really included in my audio budget. The audio side of it was a grand total of $335. Most importantly, it just sounds good.
Kenwood Excelon KDC-X697 (Sorry for the night photos)
It had everything I needed, and I have always liked the amount of control available through the Excelon line. The main feature I wanted was the rear usb input, as having a cable coming out of the front of the receiver does not fit with the 'clean' look for which I was going. Plays Spotify through the lightning cable from my iPhone great, and the installation was a piece of cake. Crutchfield is always recommended for anyone out there looking for true customer service.

While taking apart the dash, I figured I would put white gauge overlays in as well. I ordered these from whitegauges.net, and have used their stuff on three cars now with good results. They're just overlays, so complete disassembly of the gauge cluster was not required. They just slip over the needles and are applied like an Invisibleshield on a phone. Much better to look upon, especially during the day.
Front component in the door. Kenwood KFC-P709PS. If you look really closely, the diamond pattern can be seen through the grate. These sound fantastic, especially for the price. Installation was fairly simple, with the tweeters mounted in the factory dash location.
There were a few casualties suffered by the Blazer during installation, with the dash speaker covers being the most obvious. Not as obvious: the dozens of door panel clips that had to be replaced after removal. Arizona summers are destroyers of anything plastic! The dash is getting a cover soon, so I'm not even going to worry about ordering replacements. The tweeters will be covered up soon enough. Wiring the passenger side was simple: remove stock tweeter, drop glove box out of the way, drop wires from new Kenwood through the opening, and feed wire through to the door to attach to the woofer. The driver's side gave me issues because I could not locate the opening coming from the door behind the dash that led to the opening above. I ended up cutting the factory speaker wire before the bass blocker and connecting the new one directly to those (the Kenwoods have crossovers built into the tweeter wiring).
Rear 3-way Kenwoods. These were in the front doors as installed by the previous owner. The stock rear speakers were blown to the point that I had to fade the sound all the way to the front with the stock setup. Moving these to the back gives a much fuller sound all around, and it lets my kids actually hear the music.
If you look closely, you can see the Kenwood in the opposite door. The wire running along the floor is the remote amp control, which is the only visible wire in the entire install. It's annoying, but was the only route available for the kit from JL Audio. Also, if I ever want to upgrade my bass package, it is easily removed. My kids are great though. Their request was, "Daddy, can you bring the rock and roll to the back seat too?" Yes, yes I can.
Last but definitely not least, the JL Powerwedge Max. JL is always conservative with their power ratings, and this setup is a prime example. That cover came with it; the amp and all wires are completely covered by an aluminum shell.
For a 10" sub, this sounds fantastic, and is more than enough for my needs. I'm pretty much past the days of squeezing four 12"s into a Civic, and half the time I'm in the car with my kids anyway. It can crank when it needs to crank, which is all I was looking for after all.
I still have some clean up to do underneath the back seat, as the wires are simply zip-tied together at this point. I still need to get in there and throw some wire wrap around it to keep it safe and away from any moving parts when the seat is folded. I can take photos if anyone needs them of the under hood area. Installation was a piece of cake, as there is a grommet to use in the passenger footwell and routing through and around the a/c stuff is straightforward.
Overall I'm really pleased with the system. I know it will be asked so I'll go ahead and answer now: price. I purchased the JL sub/amp combo on craigslist (before I had even purchased the Blazer!) in August or September for $125. I bought the head unit on a Black Friday deal on Crutchfield for $109 + $15 for installation supplies. I picked up the front components two weeks before Christmas during a 50% sale on amazon, which Best Buy matched at $65. A $20 amp install kit later, and I had everything I needed. The gauges were $20, but weren't really included in my audio budget. The audio side of it was a grand total of $335. Most importantly, it just sounds good.

Thread Starter
|
Beginning Member
Joined: Sep 2013
Posts: 12
I had all the speakers hooked up before the sub for about a week, and the components made a huge difference. Well worth the upgrade. They come with a bunch of different mounting options for the tweeters, so putting them in the door would be a piece of cake for anyone without the factory dash tweeter mounting plate.

Thread Starter
|
Beginning Member
Joined: Sep 2013
Posts: 12
This was the best one I got last night. The flash washed out everything, and this was as close as I could get without it. The orange glow is out of balance in the photo. Its not nearly as bad in person. It seemed like all my phone wanted to pick up was the orange from the needles sorry. The brightness of the gauges overall is about 85% of what they were before the overlays, which can be fixed with led's if I ever wanted to. I never had the gauges on full brightness before anyway because I always found it distracting, so having them dimmed all the way up now works just fine. I'll try a video or a different camera and see if I can do any better.


Thread
Thread Starter
Forum
Replies
Last Post
Patton
2nd Generation S-series (1995-2005) Tech
2
Mar 19, 2012 09:35 PM
Denominator
Engine & Transmission
25
Oct 13, 2010 01:33 PM
gmyoyo
2nd Generation S-series (1995-2005) Tech
4
Nov 7, 2005 02:42 AM