
HOW-TO: Add rims in Photoshop (Basic)

Thread Starter
|
BF Veteran
Joined: Feb 2007
Posts: 3,335


Adding rims is a lot easier than it looks, and even easier if you pick a rim that's already in a similar angle to the picture you're chopping.
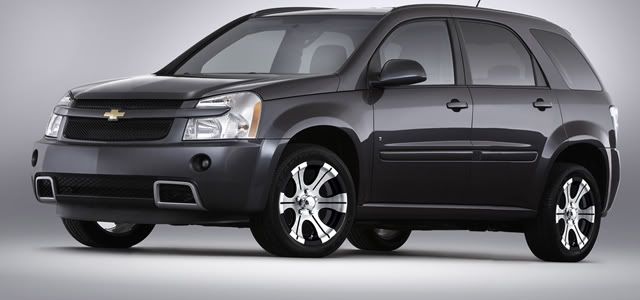
1. Find a vehicle. For this HOW-TO we'll use an Equinox from netcarshow.com.

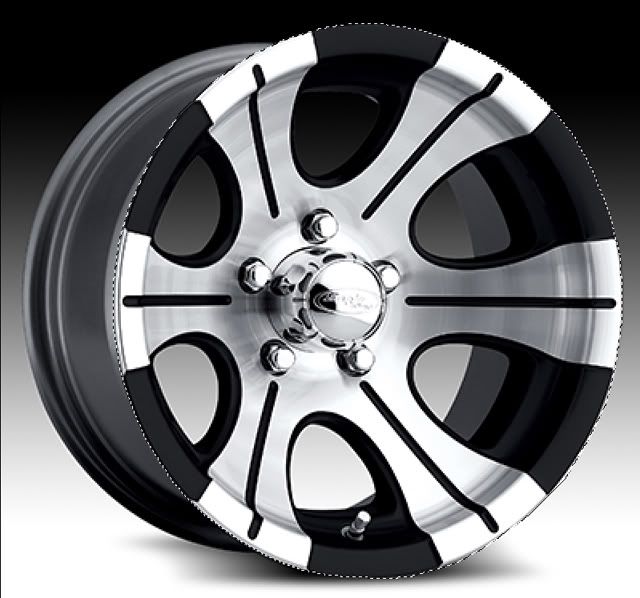
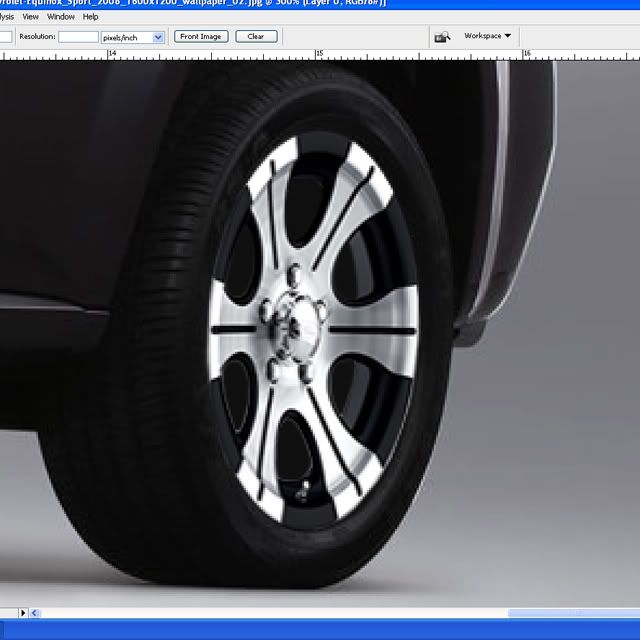
2. Find a rim to use at the same or a similar angle as the the picture you're editing. We'll be using the Eagle Alloy Series 135.

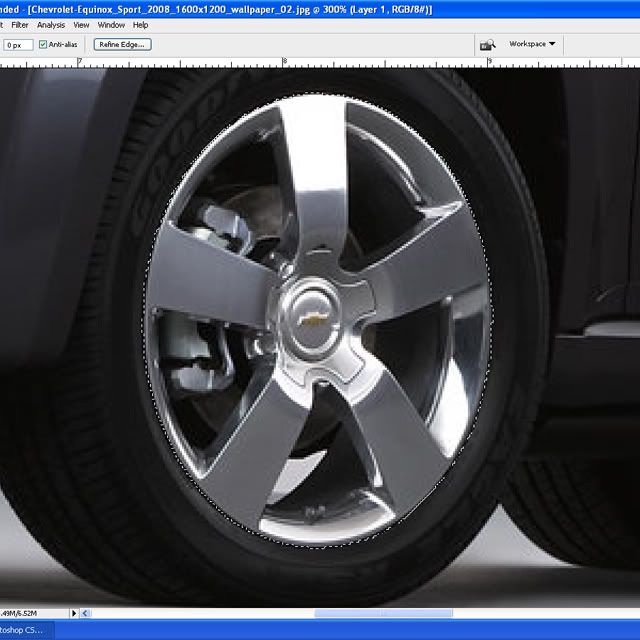
3. You'll want to first select the face of the rim using whatever tool you prefer. I like to zoom in 2-300x and use the polygonal lasso. After you have this selection, press Shift+Control+I or Select Menu>Inverse. Hit delete to get rid of everything outside of the circle you just made.
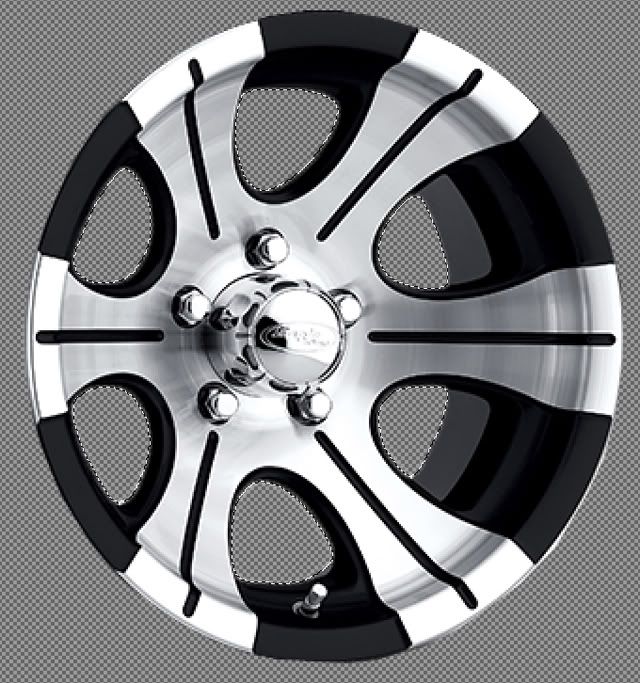
4. Select the areas between the spokes and delete them as well. This will come in handy later if you want to put rotors behind the rim to make it more realistic looking.
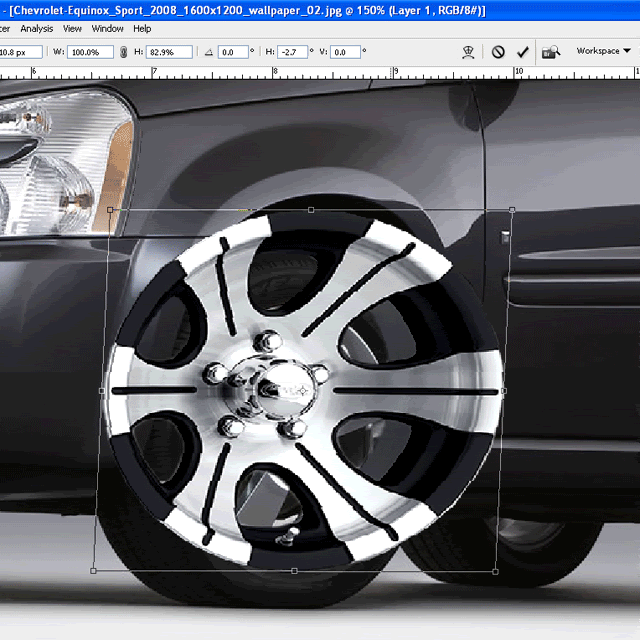
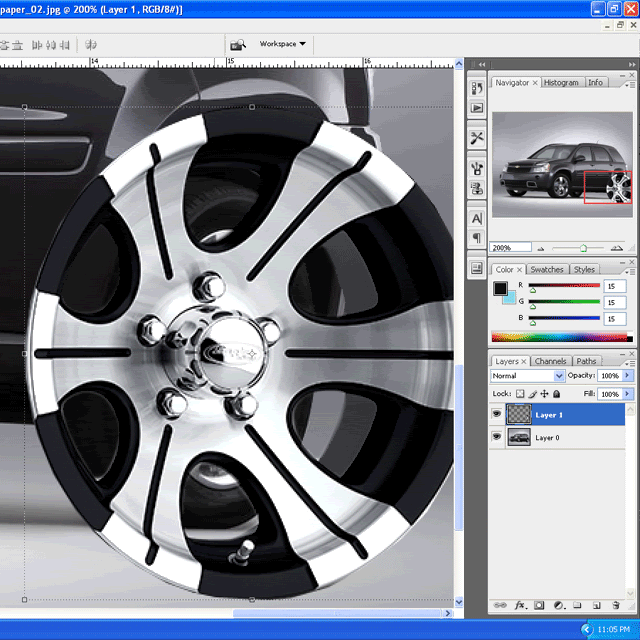
5. Bring your rim layer into your original picture. Make sure the layer is selected and right click in the middle crosshair/circle looking thing or push Control+T to bring up Free transform controls. Select distort.
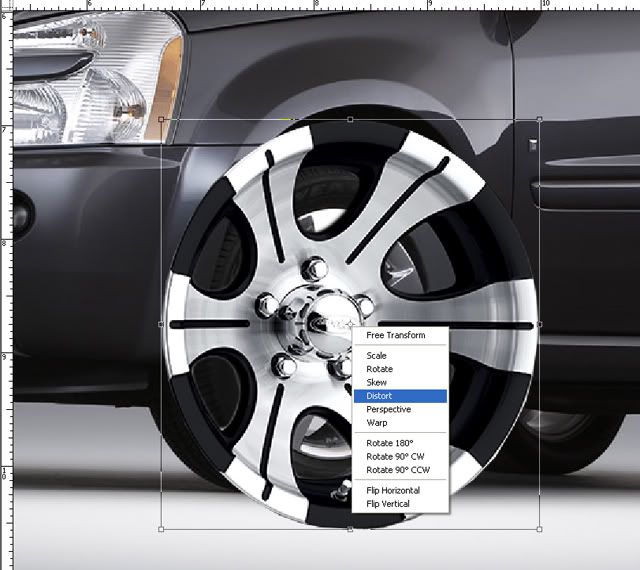
6. Grab one of the anchor points and begin to line the rim layer up with the wheel on the original picture as in this animation. Use the original rim as a guide for the rim you're adding.
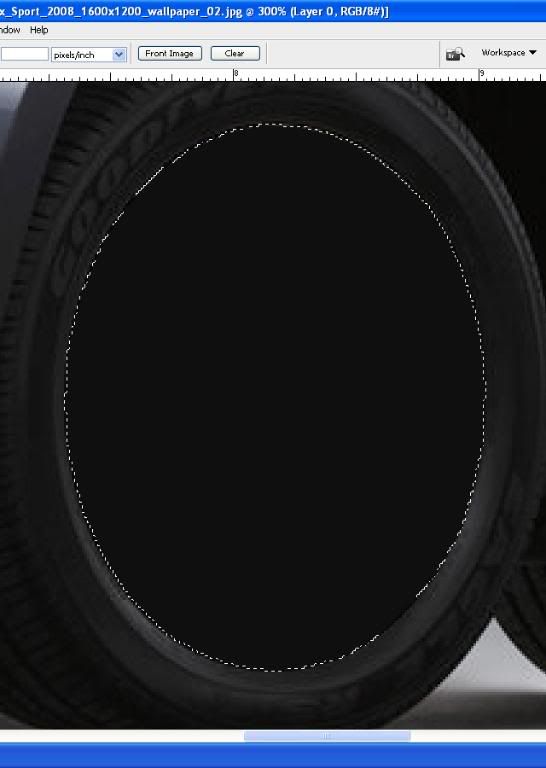
7. "BUT WAIT! You can still see the OLD rim behind the NEW rim!" Patience grasshopper. Select the rim of the original picture using whatever method you're comfortable with. I used 2-300x zoom and polygonal lasso again.
Using the eyedropper, pick a color that's behind the rim in the original pic. You may use plain black if you would like.
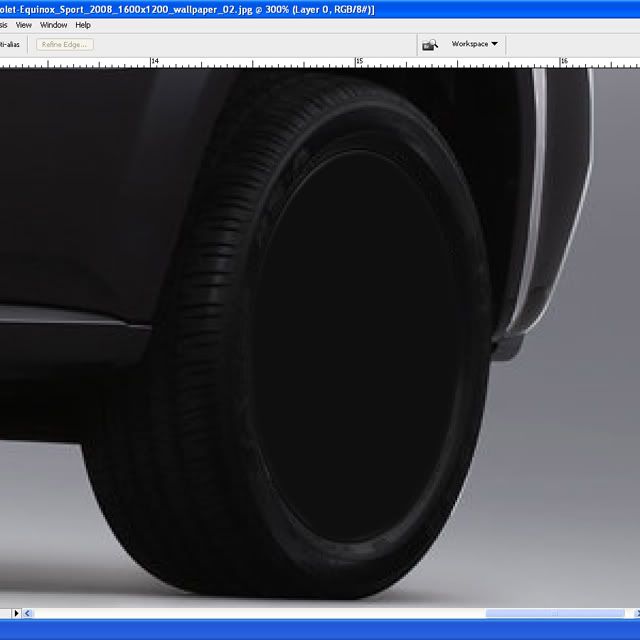
8. Then with the original picture layer selected press Shift+F5 or click Edit Menu>Fill to fill your selection with the color of your choice.
9. Now place the new rim layer over top and Voila!

10. Repeat the process for the rear wheel.
11. Finished.
A couple extras:
-Sometimes if you want a deep dish rim you will have to adapt the rear wheel (in this instance) to achieve that look.
-Unless you're also dropping/slamming the vehicle so you can't see them, you will have to match the rims on the opposite side as well so you don't have aftermarket on one side and stock on the other.
Any questions/comments/tips or tricks of your own please feel free to add.
1. Find a vehicle. For this HOW-TO we'll use an Equinox from netcarshow.com.
2. Find a rim to use at the same or a similar angle as the the picture you're editing. We'll be using the Eagle Alloy Series 135.
3. You'll want to first select the face of the rim using whatever tool you prefer. I like to zoom in 2-300x and use the polygonal lasso. After you have this selection, press Shift+Control+I or Select Menu>Inverse. Hit delete to get rid of everything outside of the circle you just made.
4. Select the areas between the spokes and delete them as well. This will come in handy later if you want to put rotors behind the rim to make it more realistic looking.
5. Bring your rim layer into your original picture. Make sure the layer is selected and right click in the middle crosshair/circle looking thing or push Control+T to bring up Free transform controls. Select distort.
6. Grab one of the anchor points and begin to line the rim layer up with the wheel on the original picture as in this animation. Use the original rim as a guide for the rim you're adding.
7. "BUT WAIT! You can still see the OLD rim behind the NEW rim!" Patience grasshopper. Select the rim of the original picture using whatever method you're comfortable with. I used 2-300x zoom and polygonal lasso again.
Using the eyedropper, pick a color that's behind the rim in the original pic. You may use plain black if you would like.
8. Then with the original picture layer selected press Shift+F5 or click Edit Menu>Fill to fill your selection with the color of your choice.
9. Now place the new rim layer over top and Voila!
10. Repeat the process for the rear wheel.
11. Finished.
A couple extras:
-Sometimes if you want a deep dish rim you will have to adapt the rear wheel (in this instance) to achieve that look.
-Unless you're also dropping/slamming the vehicle so you can't see them, you will have to match the rims on the opposite side as well so you don't have aftermarket on one side and stock on the other.
Any questions/comments/tips or tricks of your own please feel free to add.


New Member
Joined: Dec 2009
Posts: 51
From: Upstate, NY
Well you can do it that way, or just find another picture of another vehicle and take the wheels from that. The only problem doing it the way you showed it is that the wheel appears flat ( no dimension) and shows no brakes, just all black in the back ( doesn't appear realistic).


Thread
Thread Starter
Forum
Replies
Last Post
PaulO2288
Steering, Suspension & Drivetrain
2
Apr 21, 2011 12:25 AM