
Making my own 6 inch shackles.


To create a 1 inch lift on the back I'm fabricating a pair of shackles with a 6 inch hole to hole distance. (OEM distance is about 4 inch.)
I took some pictures that i want to share with you all.
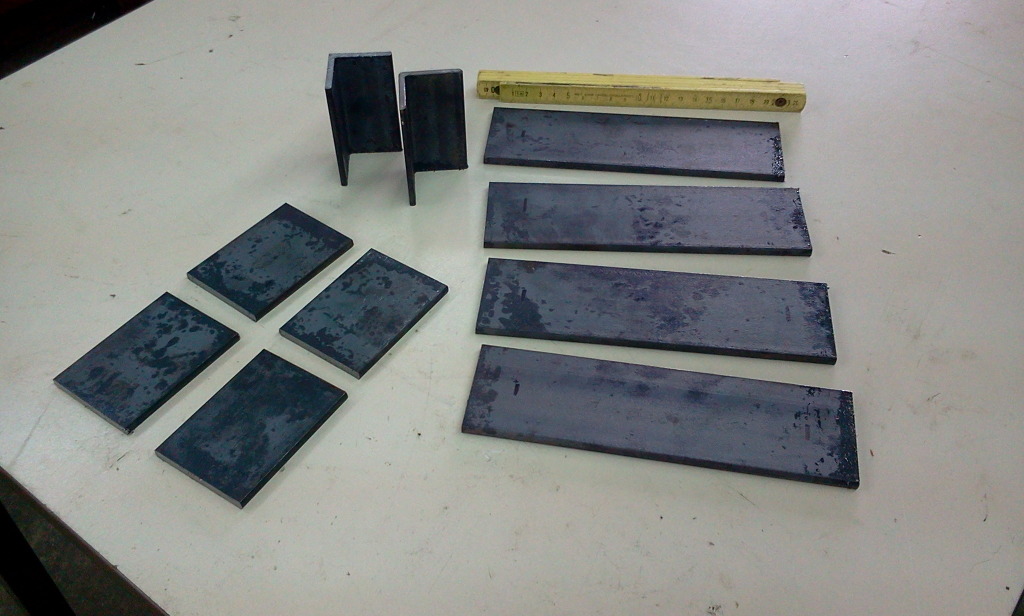
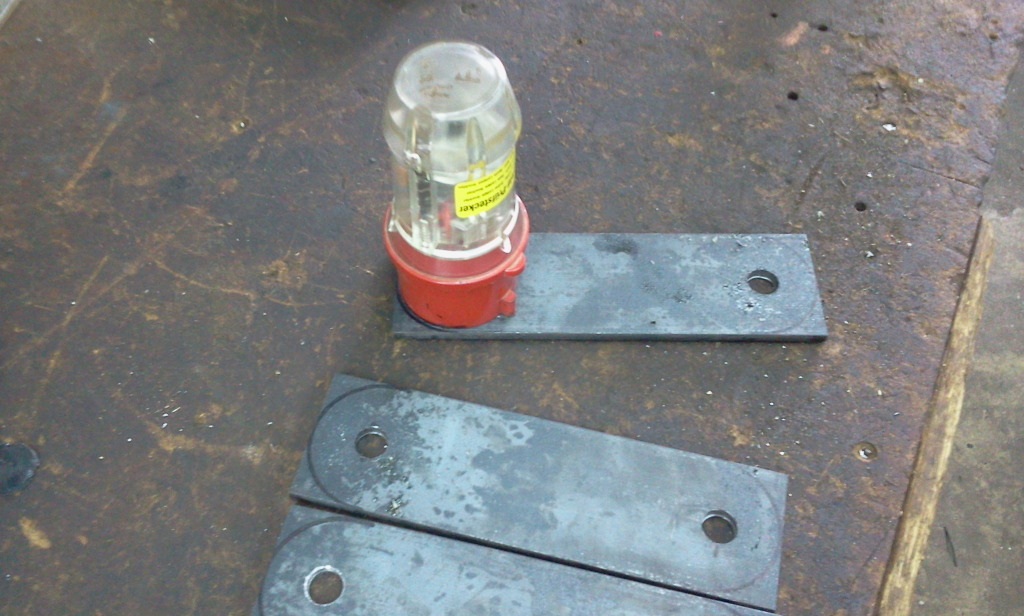
This is the material i'm starting with.
4 pieces of steel 6mm by 60mm by 200mm
2 pieces of steel 6mm by 60mm by 82mm (there are 4 on the pic. but i use 2)
2 pieces of steel "L"profile 5mm by 30mm by 30mm
Set the center of the holes at 150mm distance of eacother with a centerpoint.
Drilling a 6mm pilot hole to help center the large drill.
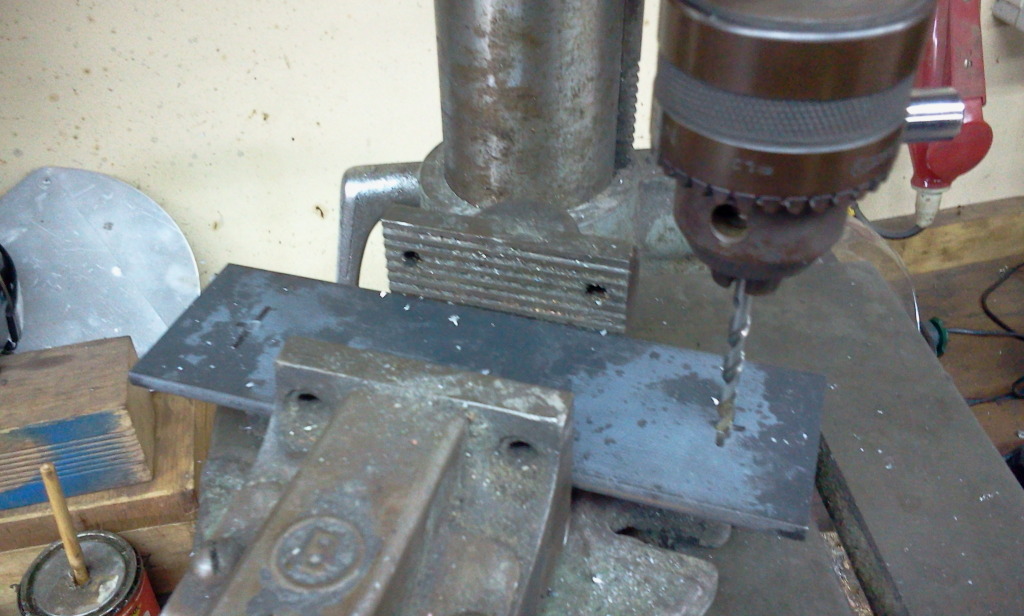
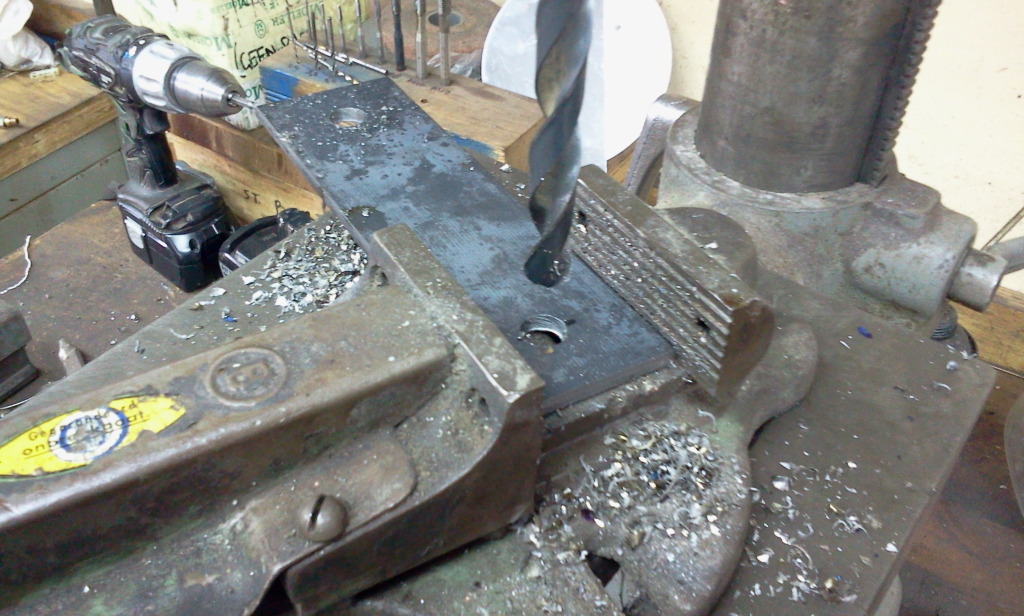
Then drill the 14mm holes.
Drawing the lines to round off the edges. I used a 16amp ce-form plug but a paint can will do as well.
After playin around with an angle grinder and a stationairy belt sanding machine.
Notice that one corner is not cut, that's because the bridge is coming right there.
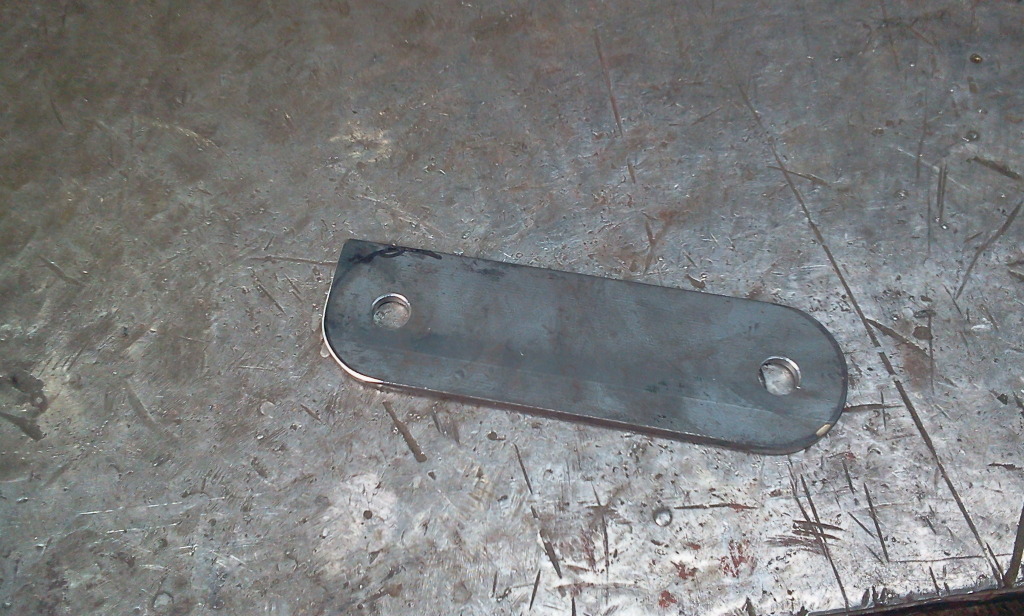
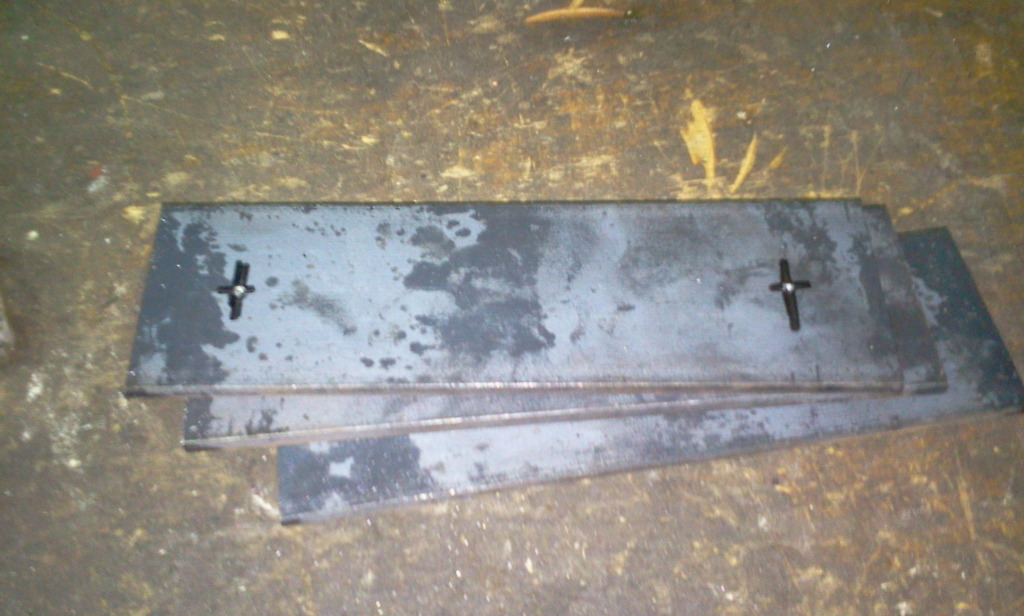
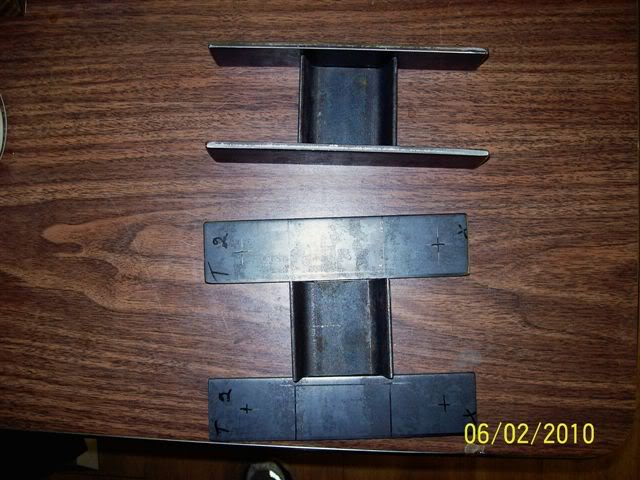
This is how it's going to be when i'm finished.
The L-profile is placed right in the middle of the length for strength and to prevent the shackle from reversing under the car.

They are going to be welded next week and i will post some before and after pics when i put them under my car.
I took some pictures that i want to share with you all.
This is the material i'm starting with.
4 pieces of steel 6mm by 60mm by 200mm
2 pieces of steel 6mm by 60mm by 82mm (there are 4 on the pic. but i use 2)
2 pieces of steel "L"profile 5mm by 30mm by 30mm
Set the center of the holes at 150mm distance of eacother with a centerpoint.
Drilling a 6mm pilot hole to help center the large drill.
Then drill the 14mm holes.
Drawing the lines to round off the edges. I used a 16amp ce-form plug but a paint can will do as well.
After playin around with an angle grinder and a stationairy belt sanding machine.
Notice that one corner is not cut, that's because the bridge is coming right there.
This is how it's going to be when i'm finished.
The L-profile is placed right in the middle of the length for strength and to prevent the shackle from reversing under the car.
They are going to be welded next week and i will post some before and after pics when i put them under my car.
BF Veteran
Joined: Sep 2008
Posts: 2,522
From: Winnipeg, Manitoba

They look good! The rounding of the corners really makes them look professional. Are you going to TIG or MIG weld them? I suggest TIG because it's cleaner, no spatter, should be great looking welds & is very strong. I hope you have checked for clearence with that flat bar at the top.
They look oddly familiar lol, although I didn't take the time to round the corners but I did get them powder coated.
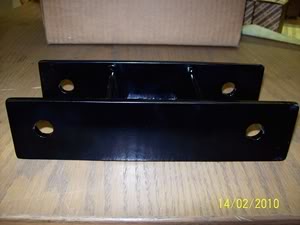
Mine are all 1/4" materials well.
As a footnote & I probably don't have to mention this but make sure you have tight fitting bolts installed before they get tacked together so the bolt holes line up when you install the shackels.
They look oddly familiar lol, although I didn't take the time to round the corners but I did get them powder coated.
Mine are all 1/4" materials well.
As a footnote & I probably don't have to mention this but make sure you have tight fitting bolts installed before they get tacked together so the bolt holes line up when you install the shackels.
Last edited by Rottidog; Aug 19, 2012 at 01:11 PM.
@Rottidog:
Thanks, I think they're going to be tig welded.
That piece of pipe you see on the last pic. is my dummy for keeping the sides spaced when welding. (i have 2 of those). the only problem is that those 14mm bolts are hard to get so i might end up getting them out of my truck before the shackles are going to be welded.
Or i have to make an alignment pin myself and then clamp the parts together when welding.
For the clearance, i don't think that it will give me any trouble �ause my sides are 60mm and OEM sides are 50mm with 55mm at the bridge so that the center of the hole is 30mm away from the bridge.
I like the powdercoating on yours, i think i'll spraypaint mine with underbody protectant paint.
I'll try to make some pics with every step.
Last edited by the DJ; Aug 19, 2012 at 03:12 PM.
Super Member
Joined: Sep 2010
Posts: 1,485
From: Lynnwood WA
When i make mine i will just bolt the two plates to the truck where they need to be then weld the support plate on while its on the truck. Then i dont gotta worry about the alignment.
They look very professional tho!
They look very professional tho!
BF Veteran
Joined: Sep 2008
Posts: 2,522
From: Winnipeg, Manitoba
I wonder how many blazers/jimmy's are in The Netherlands lol.
I woudn't want to pay shipping to North America.
But they are really nice looking.
I woudn't want to pay shipping to North America.
But they are really nice looking.
@97cherryblazer: when you're going to weld them while they are bolted to the truck make shure to disconnect the battery to prevent the electronics from frying.
The idea of welding on the spot is good though.
But i'm making them at work and i plan to put them undet the car at home.
The idea of welding on the spot is good though.
But i'm making them at work and i plan to put them undet the car at home.
As for the amount of Blazers, Jimmy's in NL, there are quite a lot of S10 Blazers for sale 2nd hand, Jimmy's are not well known
BF Veteran
Joined: Sep 2008
Posts: 2,522
From: Winnipeg, Manitoba
@97cherryblazer: when you're going to weld them while they are bolted to the truck make shure to disconnect the battery to prevent the electronics from frying.
The idea of welding on the spot is good though.
But i'm making them at work and i plan to put them undet the car at home.
The idea of welding on the spot is good though.
But i'm making them at work and i plan to put them undet the car at home.
Start hitting them NOW with the penetrating oil & daily too.
Be prepared to get new bolts & bushings or have them on hand 'just in case'.
If you haven't already, I'd search around in here about their removal & issues/fixes people have had.
Super Member
Joined: Sep 2010
Posts: 1,485
From: Lynnwood WA
See i was worried about that too when i was working on my bumper while it was on my truck and everyone told me i was stupid and electronics wouldnt get fried because the current only goes from point A to point B and if there is nothing electrical in that path its fine. I still disconnected the battery just in case. Glad im not alone on that thought lol