2nd Gen 4dr Rear Tire Mount: Long term results?
#1
Hi all,
I am very intrigued by adding a swing away spare tire rack on my 4dr 1999 Blazer. However, I'm wondering about how well the attachment of the hinges to the body fair in the long term.
I'm guessing that on the 2dr's there is some reinforcement for the attachment points for the bolts for both the hinges and the tailgate bracket.
Specifically,
Thanks!
I am very intrigued by adding a swing away spare tire rack on my 4dr 1999 Blazer. However, I'm wondering about how well the attachment of the hinges to the body fair in the long term.
I'm guessing that on the 2dr's there is some reinforcement for the attachment points for the bolts for both the hinges and the tailgate bracket.
Specifically,
- How did you attach the hinges?
- How did you attach the tailgate bracket?
- How long ago did you do the mod?
- How well has the attachment system you used fair over the years and miles?
- What lessons have you learned about dong the mod?
- What would you do differently if you could do it again?
Thanks!
#4
Line up, drill holes, send a bolt through, and tighten! It's really that easy 
Same answer as before
About 6 months ago now
Perfectly well, not a single issue what-so-ever
You loose a little rear view mirror visibility out of the back window, but it's not like the rear view is rendered useless; I'm the type that uses side mirrors mostly anyhow. You have to release and swing out the tire EVERY TIME you want to get into the back, even if you just want to open the back window... Can get annoying sometimes, but it's not something that makes me regret installing it, just something I didn't know going into it (I figured the glass could at least be opened without swinging the tire out).
The one thing I wish I would have done before installing it is to sand it or scuff it up and repaint it... Granted nothing is really stopping me from pulling it apart and repainting it now, other than my lake of motivation lol, just wish I would have done it before final installation.
As some other side-notes:
-Don't bother getting any of the hardware from the donor vehicle. I did, and ended up not using any of it. I ended up just buying all new stainless bolts, nuts, and washers, and mounted everything with them. Get some LARGE flat/fender washers for the inside where the nut will be to spread the load out. You don't really have to get all fancy making a metal support bracket or anything, some large flat washers will do just fine.
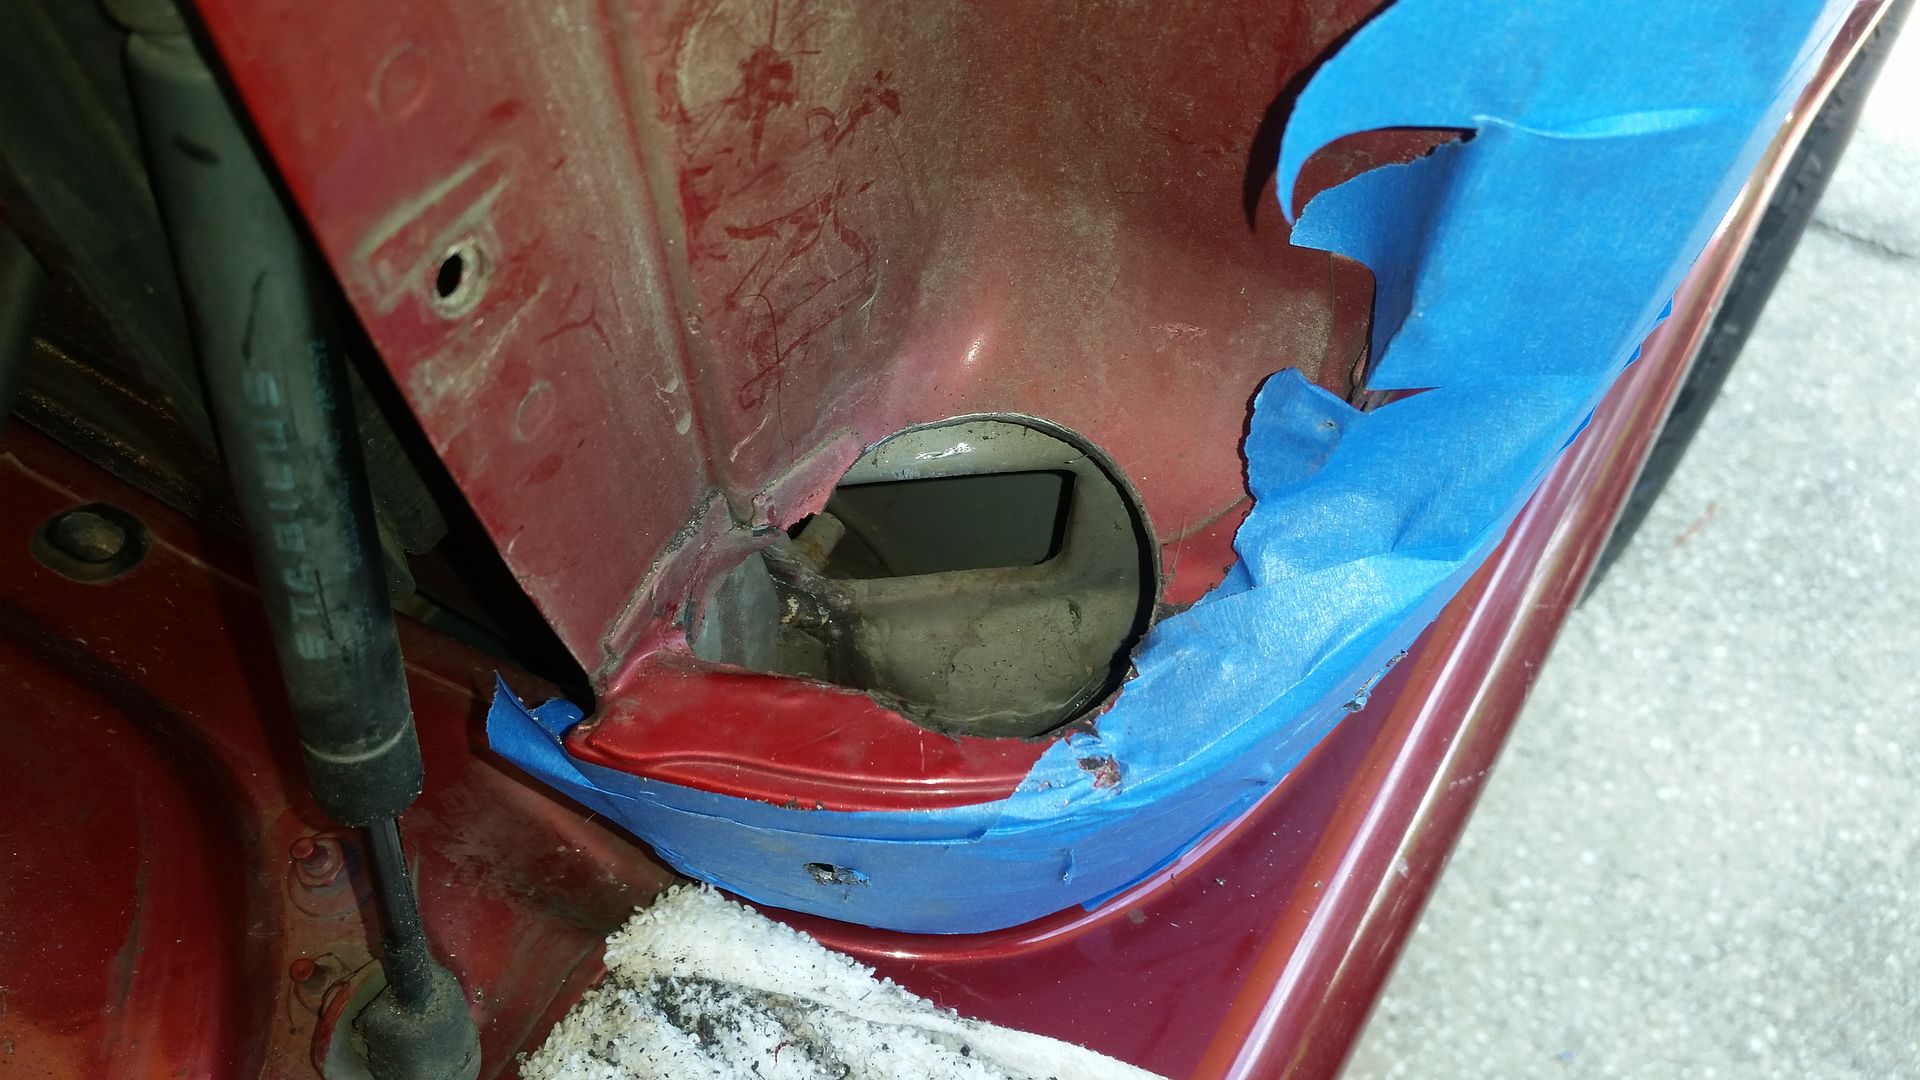
-I drilled an extra hole with a hole saw under the tail light to get to the lower two rear most bolts to install the nuts. This is the ONLY extra cutting/drilling I did besides drilling the holes for the bolts. The rest I could reach without much issue.
-Get a wheel lock to put on your spare, especially if it's a nice aftermarket wheel and/or mud terrain or all terrain tire. Being in plane sight, it's an easy target for thieves... Granted a locking lug nut wont stop a determined thief, it may at least make them take longer, maybe even change their mind...
-Once's installed, run a bead of black silicone around the bracket where it meets the body, to seal up between the bracket and body to prevent the weather from getting down into the holes you drilled to mount it.
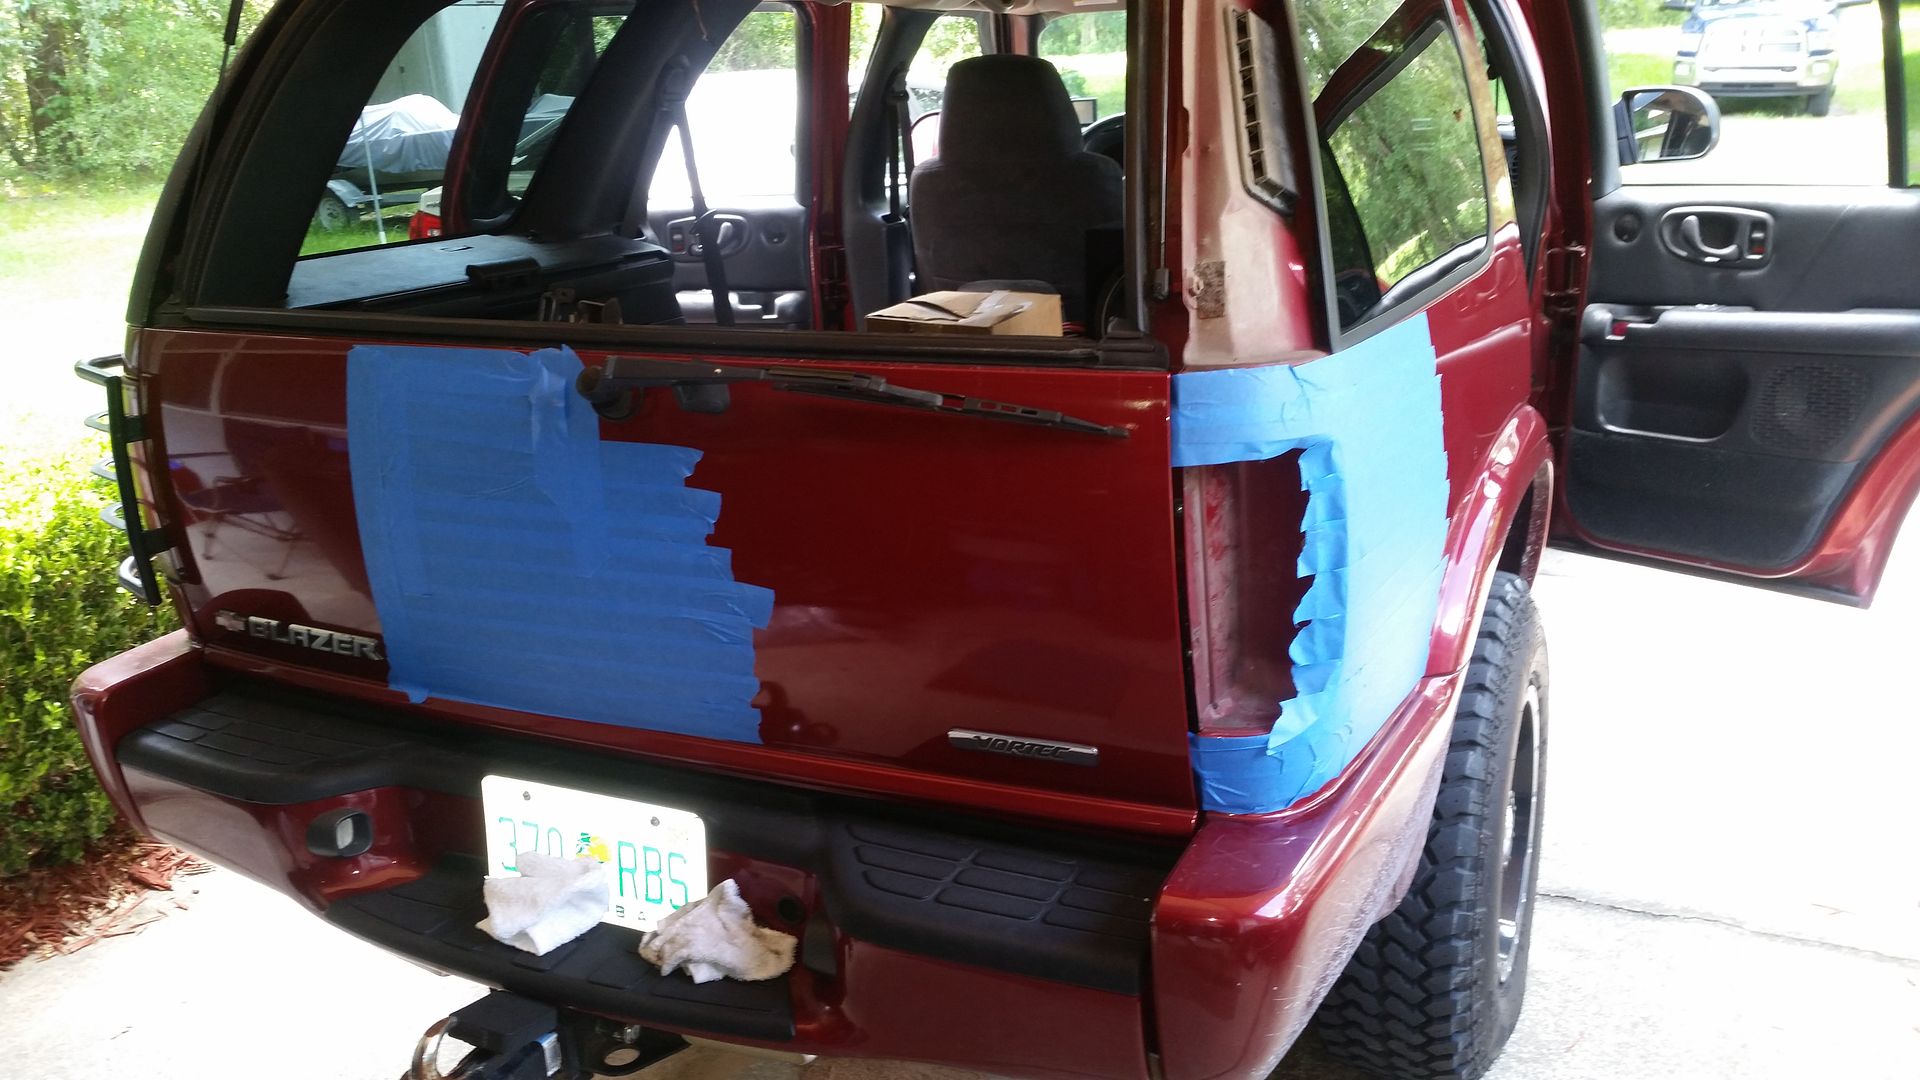
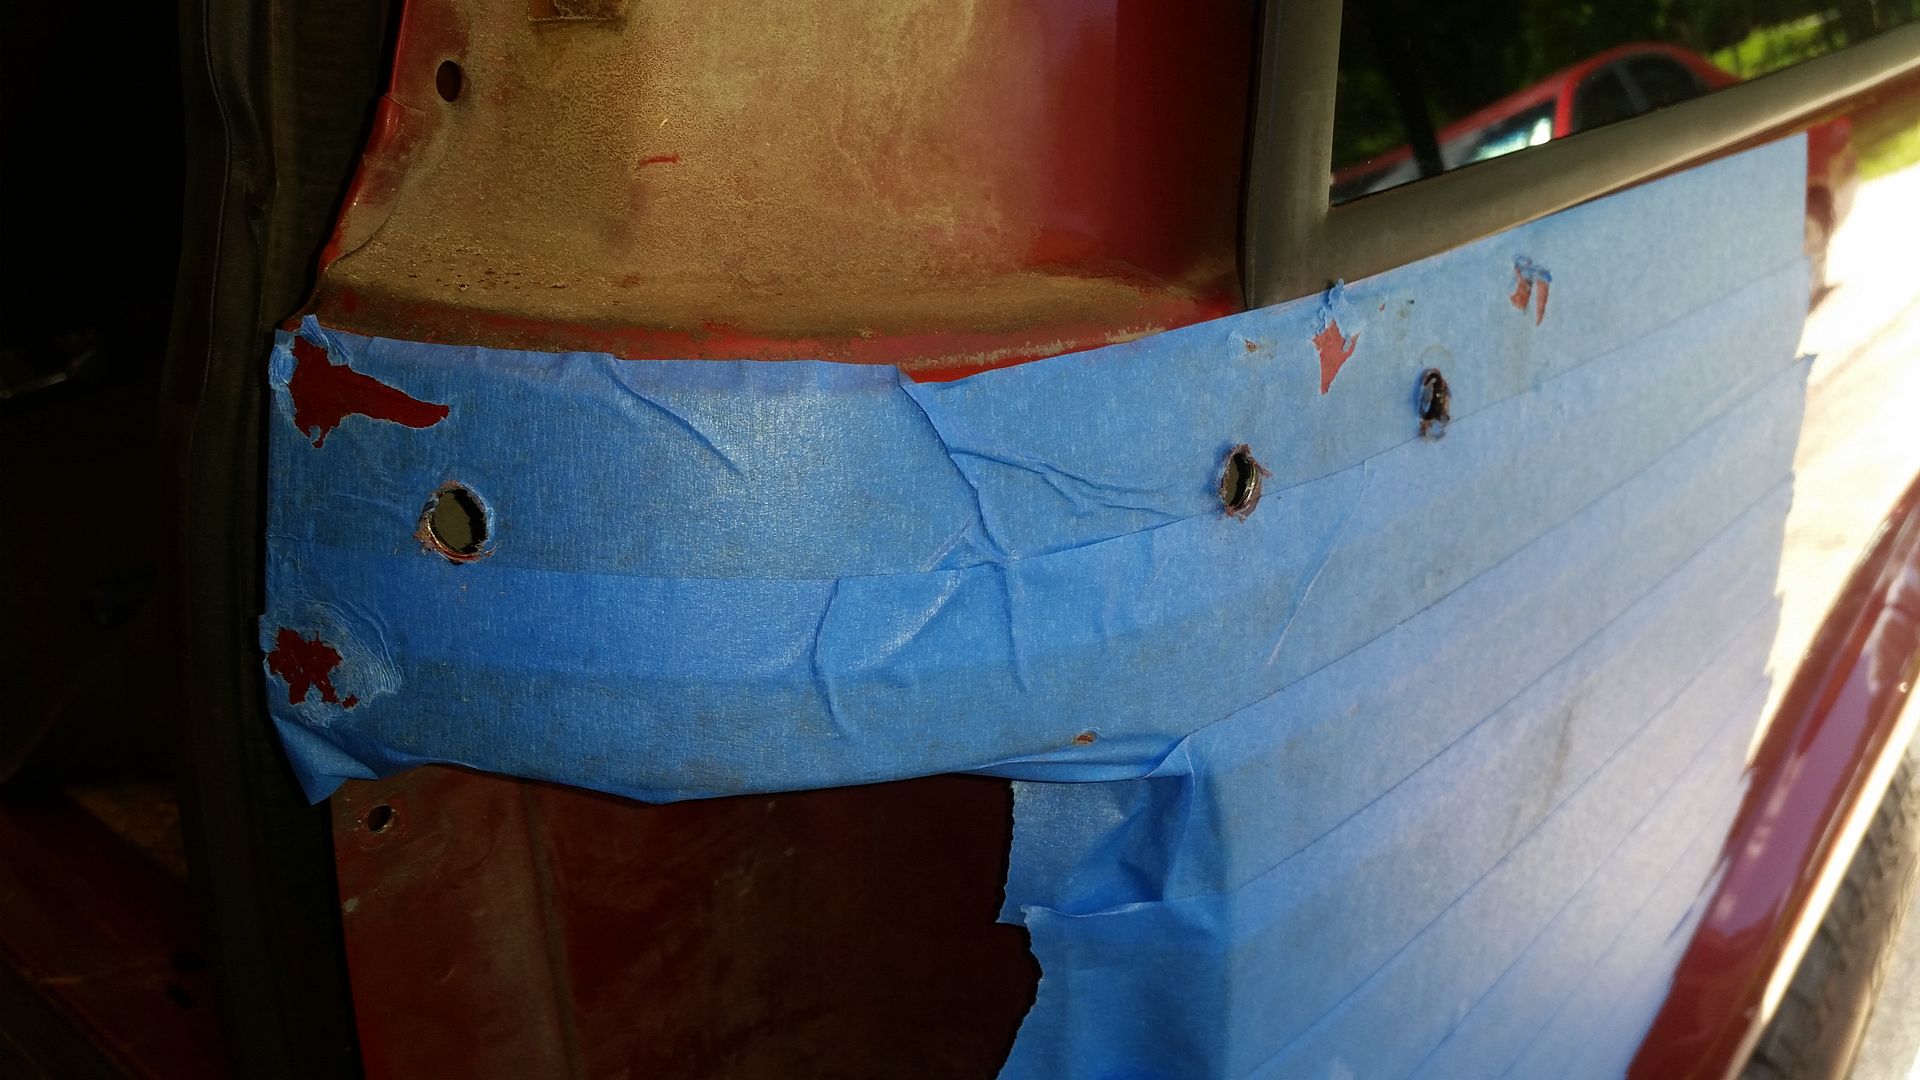
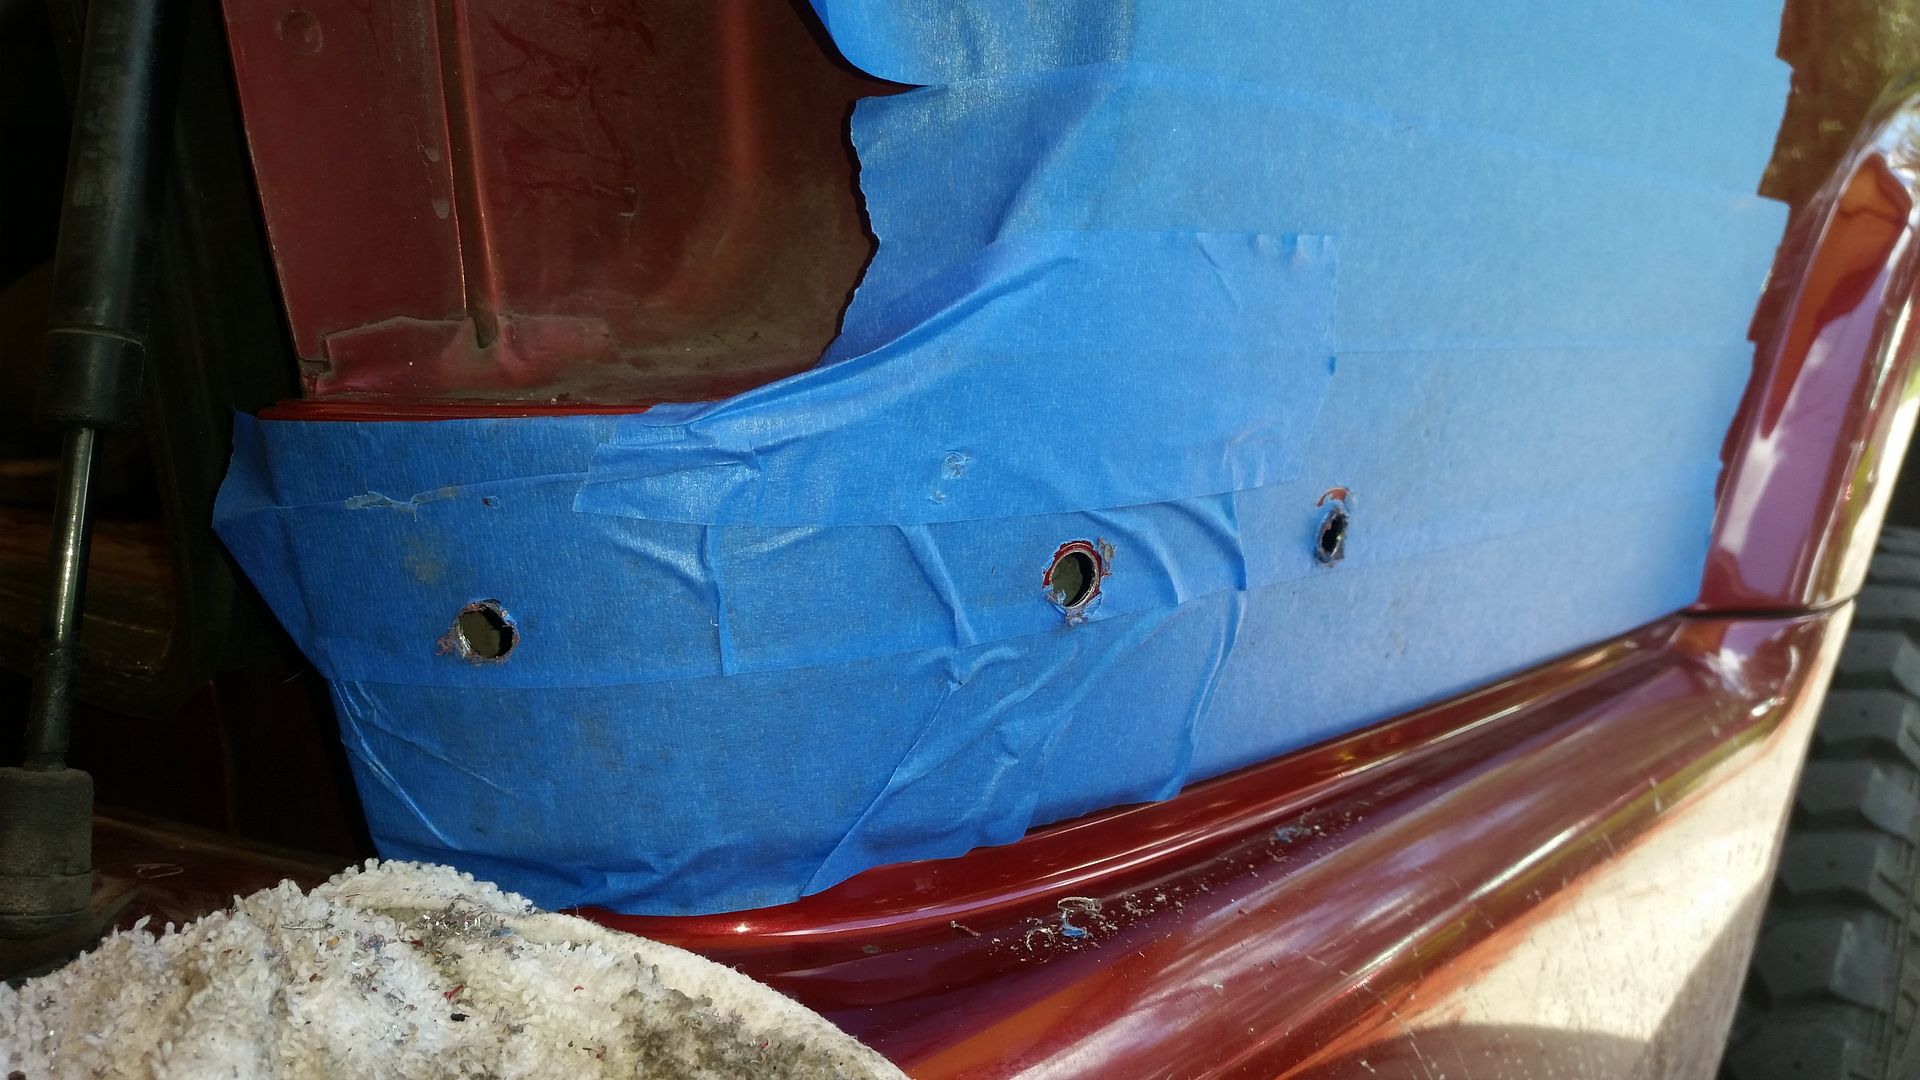
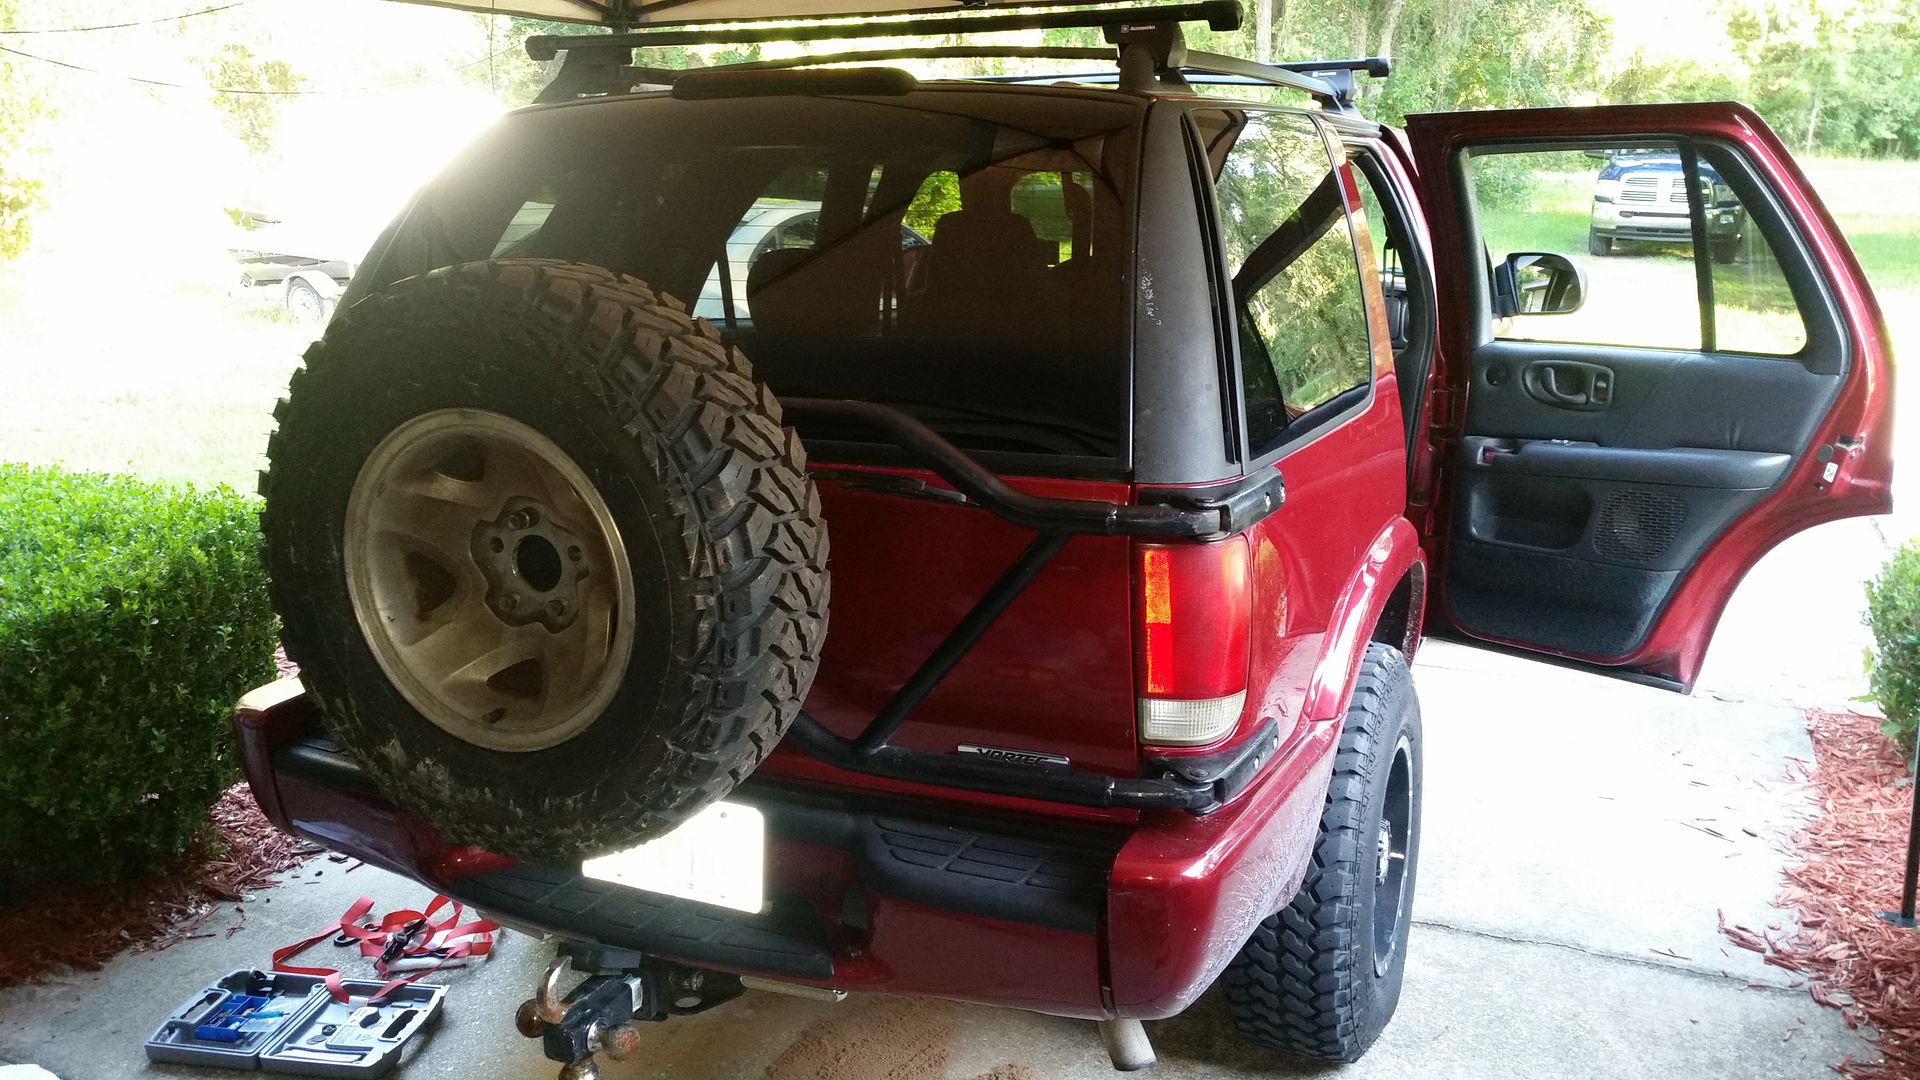
-Use painter's tape over the area where the side brackets will go and on the tailgate where the bracket will go, take some ratchet straps, and hang the entire assembly from the roof rack cross rails to get everything lined up. Mark your holes in the tape where you need to drill, then pull everything back down and make your holes. This will keep you from fighting and holding everything up, and keep you from scratching the hell out of your paint in the process lol.
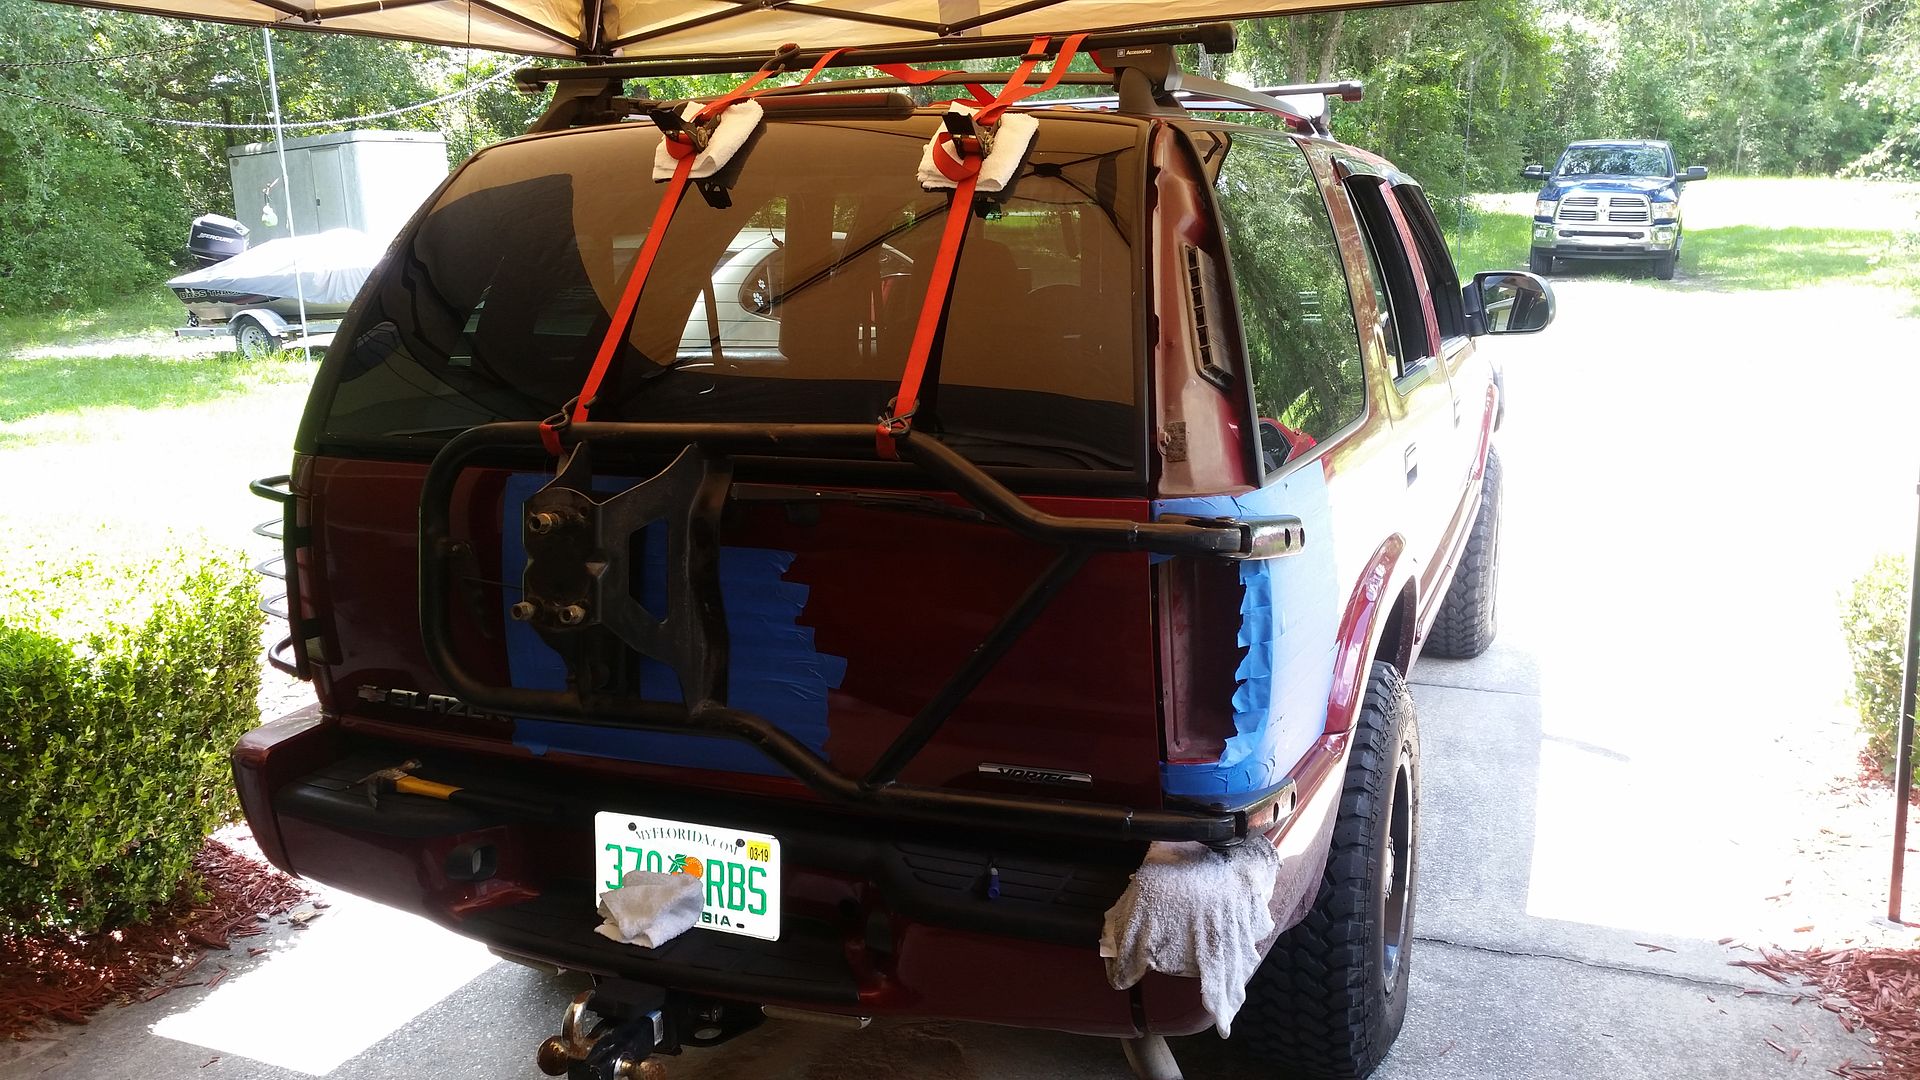
-When lining everything up, TAKE YOUR TIME! Step back and take a look at it from a distance. Make sure the carrier sits level with the tailgate and back window. Make sure the side brackets are evenly spaces above and below the tail light. Same "measure twice cut once" theory, only "line up twice, drill once" lol.
-Be ready to GUT the passenger side rear interior to get in behind the quarter panel to get everything together. This will honestly take more time than mounting the carrier...
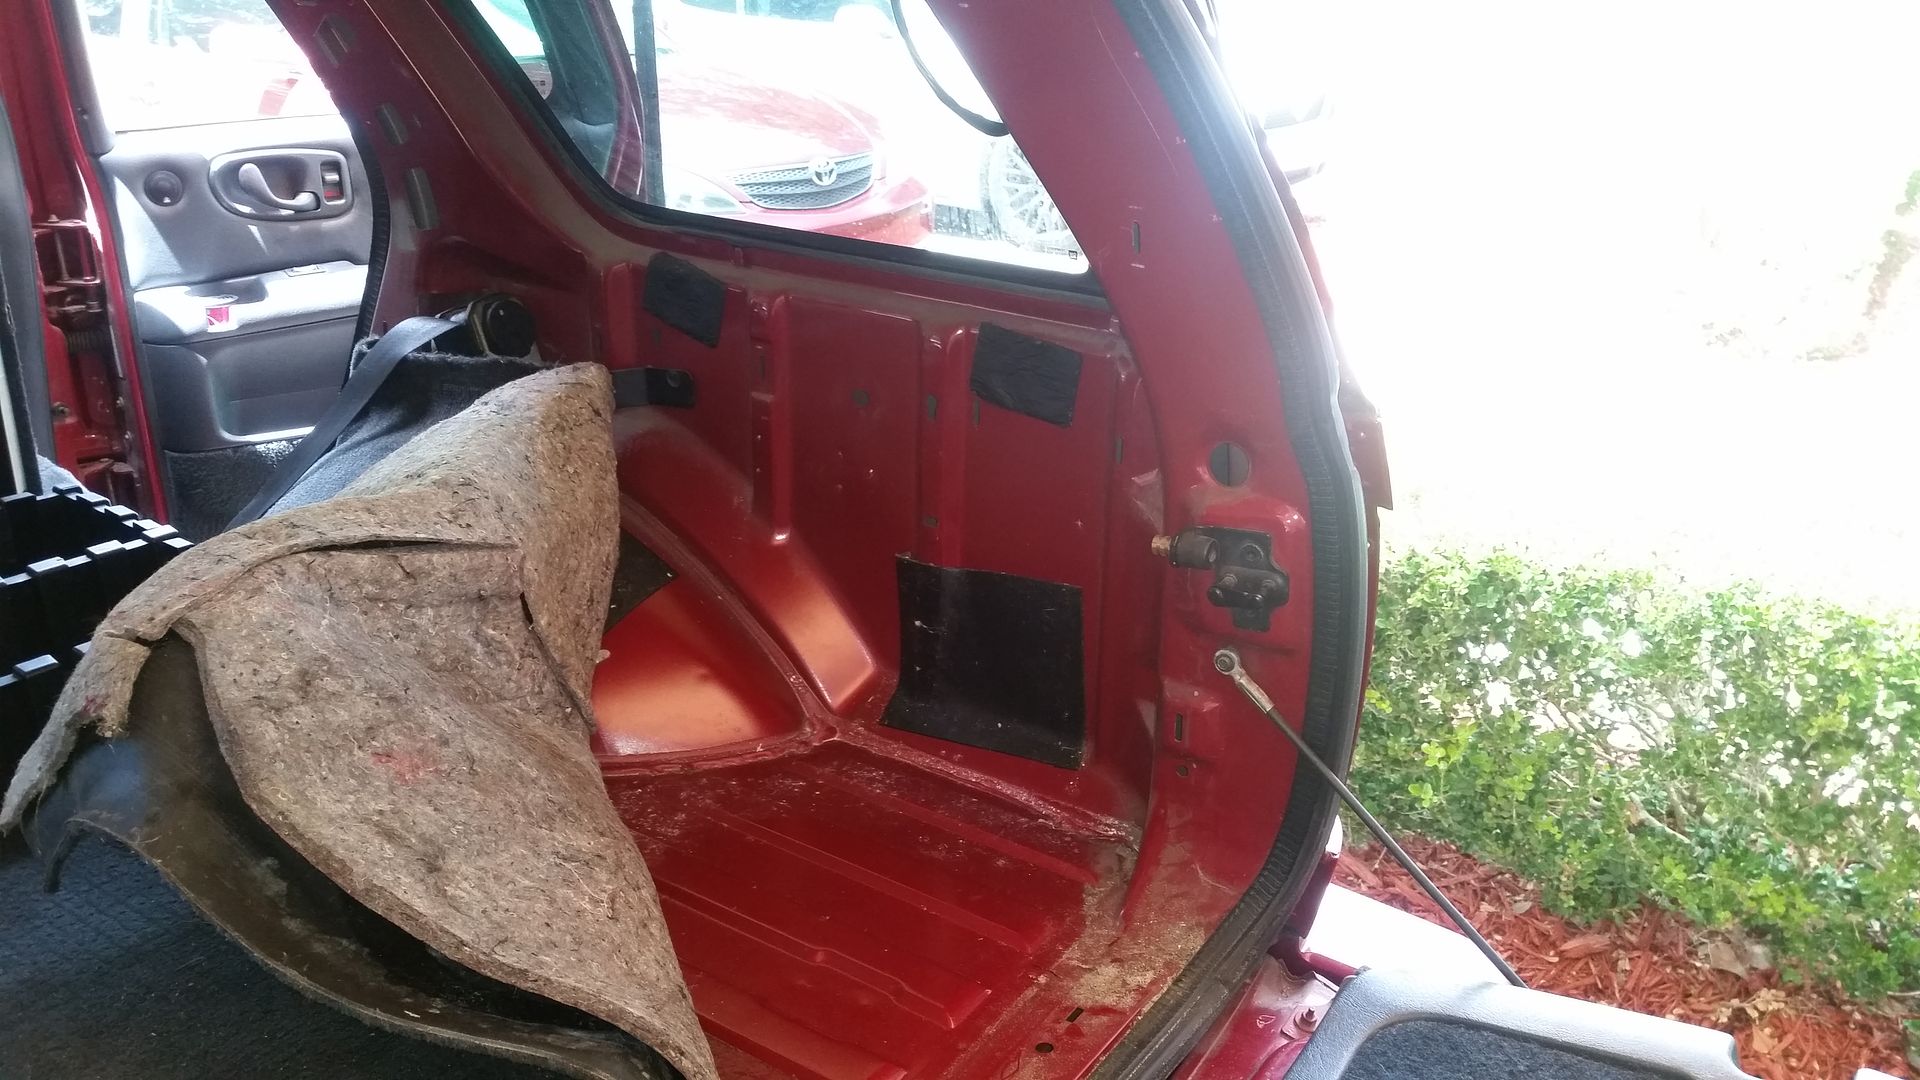
-Don't rush it, and don't overthink it! Like mentioned about, take the time to make sure everything lines up, get a second set of eyes on it even if you can, before you drill that first hole into your quarter panel. And the quarter skin on these Blazers is actually pretty thick, it takes a good amount of force to warp them, and you're spreading the load out across 6 bolts, so unless you hang off of and/or stand on and jump on the spare tire, there's not a lot of risk of warping and bending the sheet metal.
-Get a matching wheel for it. Makes all the difference in the world

Same answer as before
About 6 months ago now
You loose a little rear view mirror visibility out of the back window, but it's not like the rear view is rendered useless; I'm the type that uses side mirrors mostly anyhow. You have to release and swing out the tire EVERY TIME you want to get into the back, even if you just want to open the back window... Can get annoying sometimes, but it's not something that makes me regret installing it, just something I didn't know going into it (I figured the glass could at least be opened without swinging the tire out).
The one thing I wish I would have done before installing it is to sand it or scuff it up and repaint it... Granted nothing is really stopping me from pulling it apart and repainting it now, other than my lake of motivation lol, just wish I would have done it before final installation.
As some other side-notes:
-Don't bother getting any of the hardware from the donor vehicle. I did, and ended up not using any of it. I ended up just buying all new stainless bolts, nuts, and washers, and mounted everything with them. Get some LARGE flat/fender washers for the inside where the nut will be to spread the load out. You don't really have to get all fancy making a metal support bracket or anything, some large flat washers will do just fine.
-I drilled an extra hole with a hole saw under the tail light to get to the lower two rear most bolts to install the nuts. This is the ONLY extra cutting/drilling I did besides drilling the holes for the bolts. The rest I could reach without much issue.

-Get a wheel lock to put on your spare, especially if it's a nice aftermarket wheel and/or mud terrain or all terrain tire. Being in plane sight, it's an easy target for thieves... Granted a locking lug nut wont stop a determined thief, it may at least make them take longer, maybe even change their mind...
-Once's installed, run a bead of black silicone around the bracket where it meets the body, to seal up between the bracket and body to prevent the weather from getting down into the holes you drilled to mount it.
-Use painter's tape over the area where the side brackets will go and on the tailgate where the bracket will go, take some ratchet straps, and hang the entire assembly from the roof rack cross rails to get everything lined up. Mark your holes in the tape where you need to drill, then pull everything back down and make your holes. This will keep you from fighting and holding everything up, and keep you from scratching the hell out of your paint in the process lol.


-When lining everything up, TAKE YOUR TIME! Step back and take a look at it from a distance. Make sure the carrier sits level with the tailgate and back window. Make sure the side brackets are evenly spaces above and below the tail light. Same "measure twice cut once" theory, only "line up twice, drill once" lol.
-Be ready to GUT the passenger side rear interior to get in behind the quarter panel to get everything together. This will honestly take more time than mounting the carrier...

-Don't rush it, and don't overthink it! Like mentioned about, take the time to make sure everything lines up, get a second set of eyes on it even if you can, before you drill that first hole into your quarter panel. And the quarter skin on these Blazers is actually pretty thick, it takes a good amount of force to warp them, and you're spreading the load out across 6 bolts, so unless you hang off of and/or stand on and jump on the spare tire, there's not a lot of risk of warping and bending the sheet metal.


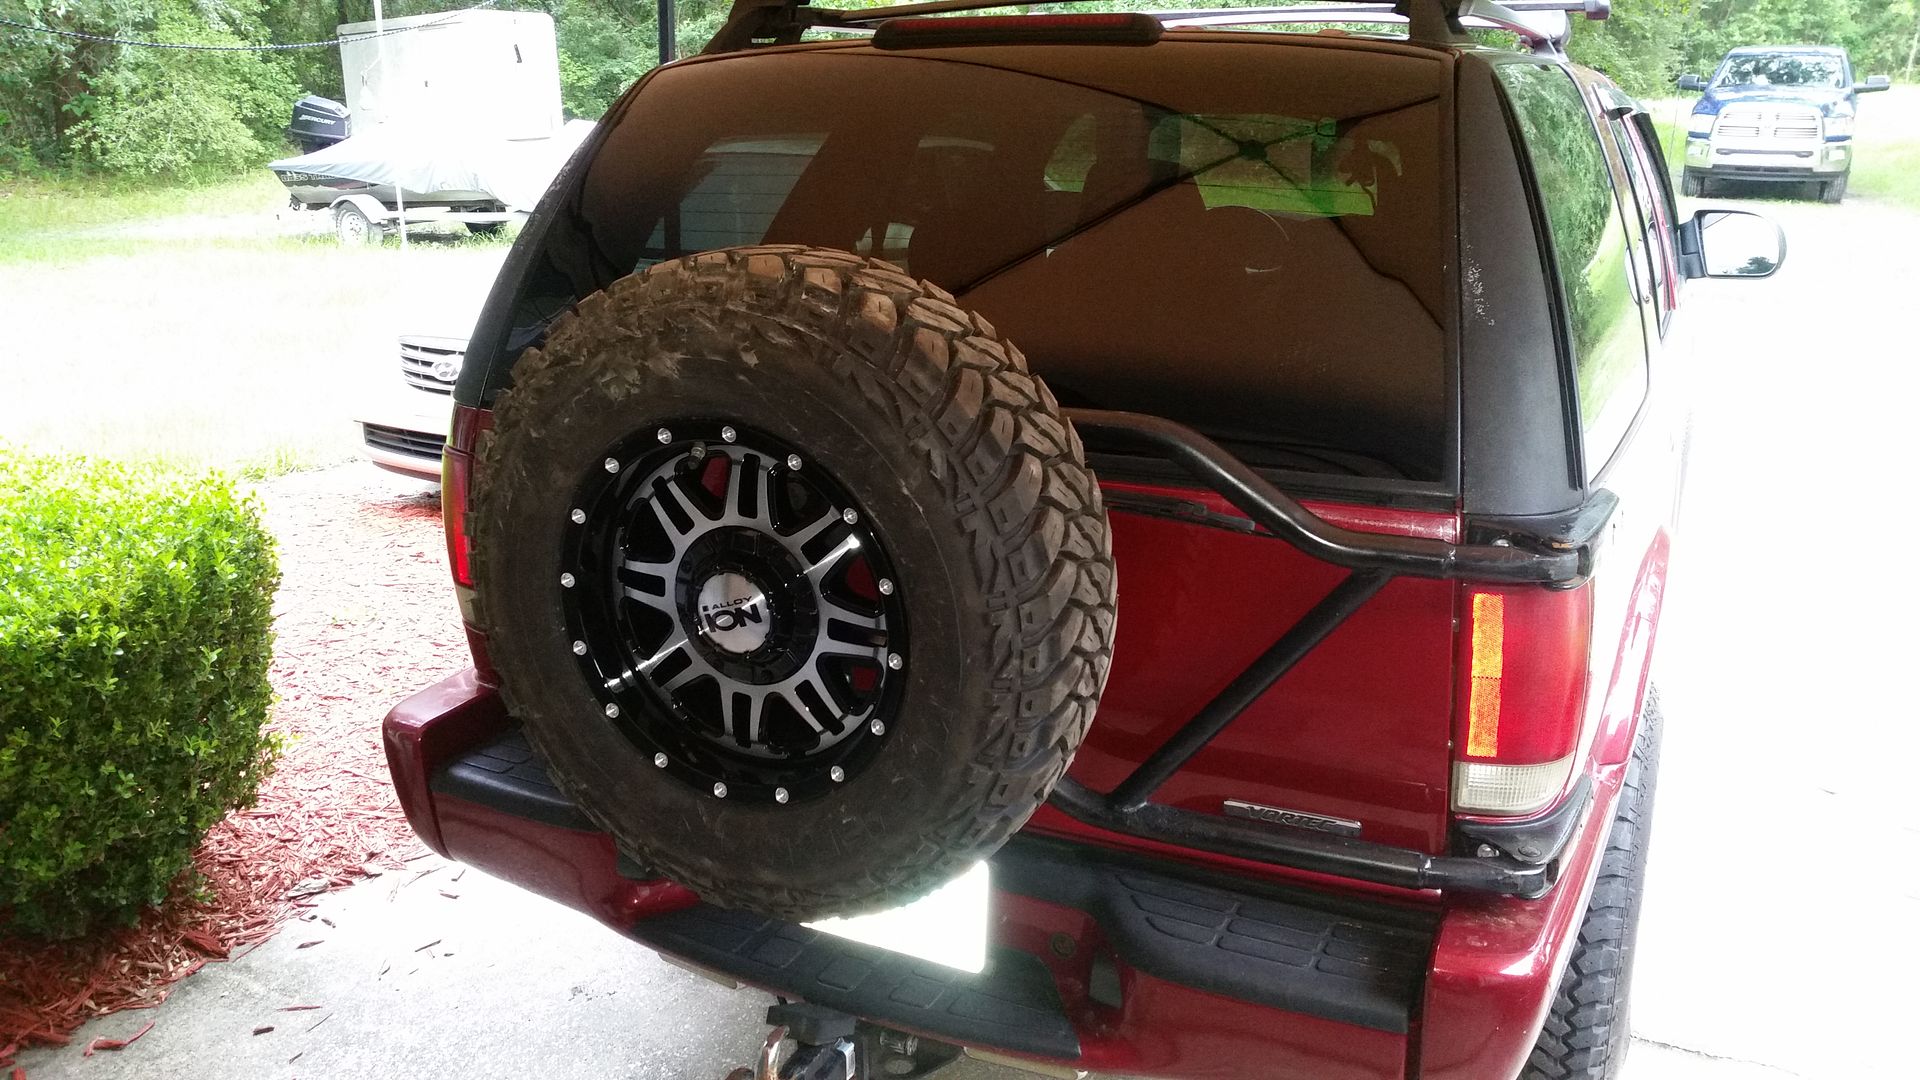
-Get a matching wheel for it. Makes all the difference in the world


Last edited by blazen_red_4x4; 12-13-2017 at 06:53 PM.
#6
blazen_red_4x4 this is great! Thanks so much.
I will add I have seen elsewhere where someone did not get the elevation quite right and had difficulty with getting the tail-light back in.
I am still a bit concerned about the durability the mounting through the rear quarter panel and would like to hear from someone who did this from a few year ago. However, you did mention that the metal there is pretty thick so that helps putting my mind at ease a bit already.
#7
Beautiful writeup! This helps a bunch, thanks dude.
I think if you use large washers, maybe even two per bolt, you should be fine. That's my plan.
I am still a bit concerned about the durability the mounting through the rear quarter panel and would like to hear from someone who did this from a few year ago. However, you did mention that the metal there is pretty thick so that helps putting my mind at ease a bit already.
#8
https://www.3m.com/3M/en_US/company-...3241847&rt=rud


