multiswitch install 99 blazer
#1
OK, so obviously my multiswitch went out, sooo i went and bought a new one.
here we go, now i have no tech names for this stuff, i just know "a" went to "a" and "b" went to "b"
1. disconnect battery ...pulled airbag fuse (just in case)
2. removed the dash panels covering the radio, gauges and so on.
3. removed the lower dash panels below steering wheel and above the brake/gas pedals.
4. ok, the fun part...to remove the tilt handle if you have one..just pull and it will pop right out.
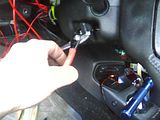
5. ok the cover for the column behind the steering wheel has (3) screws holding it in place (2) on the bottom t25 torx and the third looks like so
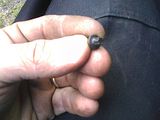
it is hidden up behind ignition switch in underside of upper panel.
now of course to get to the third screw you need to remove the bottom panel...i found it easy to tilt the wheel all the way up and then gently work the bottom panel out. then get that third screw behind ignition and then work the upper portion of the cover off. i found that the upper portion needed a little more convincing then the bottom portion to come off but it will.
6. now at this point you should be seeing something like this.
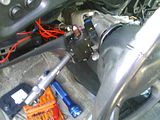
now the actual multiswitch has (2) small torx head screws (bolts) holding it in place t25...the one on top is pretty easy. the other is just behind the left side of the steering wheel.
i found that a little custom tool work makes it pretty slow and simple...
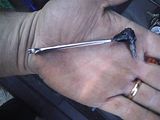
craftsman has nothing on me
and applied like so...
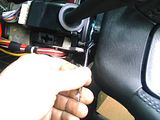
*********watch where you connections come from***********
7.so now the wiring (fun part) i found there where several zip ties holding the wires together so we need to carefully clip them and untangle the bundle running under the column.
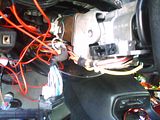
ignore the red wires....some custom crap on my end.
8.now the two main connection coming off the multiswitch run to a block just to bottom left of the column...disconnect the block and there is a clip on each connection for the harness on each side of the block. gently separate them and slide them out. the other two smaller connectors for the multiswitch run over the column and to the right side of the column
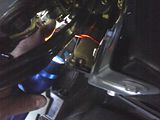
sorry not the best pic...the bottom of pic is the floor/pedals if that helps.
9. now by this point you should have found the (4) connections and started swapping out. for the new blazer goodness you bought.
10. reassembly is pretty straight forward just back out the way you came in...just watch that small torx behind the steering wheel..start it by hand and slow and sure she will go in.
any questions or comments... i.e. what the h3ll is he saying. fire away.
as always i am no service tech, just a guy that needed to fix his daily driver/super fly blazer
here we go, now i have no tech names for this stuff, i just know "a" went to "a" and "b" went to "b"
1. disconnect battery ...pulled airbag fuse (just in case)
2. removed the dash panels covering the radio, gauges and so on.
3. removed the lower dash panels below steering wheel and above the brake/gas pedals.
4. ok, the fun part...to remove the tilt handle if you have one..just pull and it will pop right out.

5. ok the cover for the column behind the steering wheel has (3) screws holding it in place (2) on the bottom t25 torx and the third looks like so

it is hidden up behind ignition switch in underside of upper panel.
now of course to get to the third screw you need to remove the bottom panel...i found it easy to tilt the wheel all the way up and then gently work the bottom panel out. then get that third screw behind ignition and then work the upper portion of the cover off. i found that the upper portion needed a little more convincing then the bottom portion to come off but it will.
6. now at this point you should be seeing something like this.

now the actual multiswitch has (2) small torx head screws (bolts) holding it in place t25...the one on top is pretty easy. the other is just behind the left side of the steering wheel.
i found that a little custom tool work makes it pretty slow and simple...

craftsman has nothing on me
and applied like so...

*********watch where you connections come from***********
7.so now the wiring (fun part) i found there where several zip ties holding the wires together so we need to carefully clip them and untangle the bundle running under the column.

ignore the red wires....some custom crap on my end.
8.now the two main connection coming off the multiswitch run to a block just to bottom left of the column...disconnect the block and there is a clip on each connection for the harness on each side of the block. gently separate them and slide them out. the other two smaller connectors for the multiswitch run over the column and to the right side of the column

sorry not the best pic...the bottom of pic is the floor/pedals if that helps.
9. now by this point you should have found the (4) connections and started swapping out. for the new blazer goodness you bought.
10. reassembly is pretty straight forward just back out the way you came in...just watch that small torx behind the steering wheel..start it by hand and slow and sure she will go in.
any questions or comments... i.e. what the h3ll is he saying. fire away.
as always i am no service tech, just a guy that needed to fix his daily driver/super fly blazer
Last edited by warthogdriver; 03-30-2010 at 10:11 PM.
Thread
Thread Starter
Forum
Replies
Last Post
bobby099
Engine & Transmission
2
03-08-2012 01:43 PM
LuvMyTJ
Paint, Body, & Interior
17
04-22-2010 10:59 PM
aris_unlimited
Engine & Transmission
2
06-20-2007 05:07 AM


