99 Blazer LT Evaporator Core Replacement
#1
 01-21-2016, 06:01 PM

Join Date: Jan 2014
Location: Portland, Oregon
Posts: 28

Couldn't find any details on this year with climate control and wanted to list the steps I took to make the replacement easy, though time consuming. The GM manual says to remove dash first. You do not need to do this unless you want to remove the entire evaporator core black 2 piece case. This procedure removes the right half of the case and makes easy access to the core. I am not going to be real detailed here, but should provide the general level of effort needed. A GM manual helped me tons, recommend it.
Have a shop evacuate AC system (mine had no refrig in it at all from the leak)
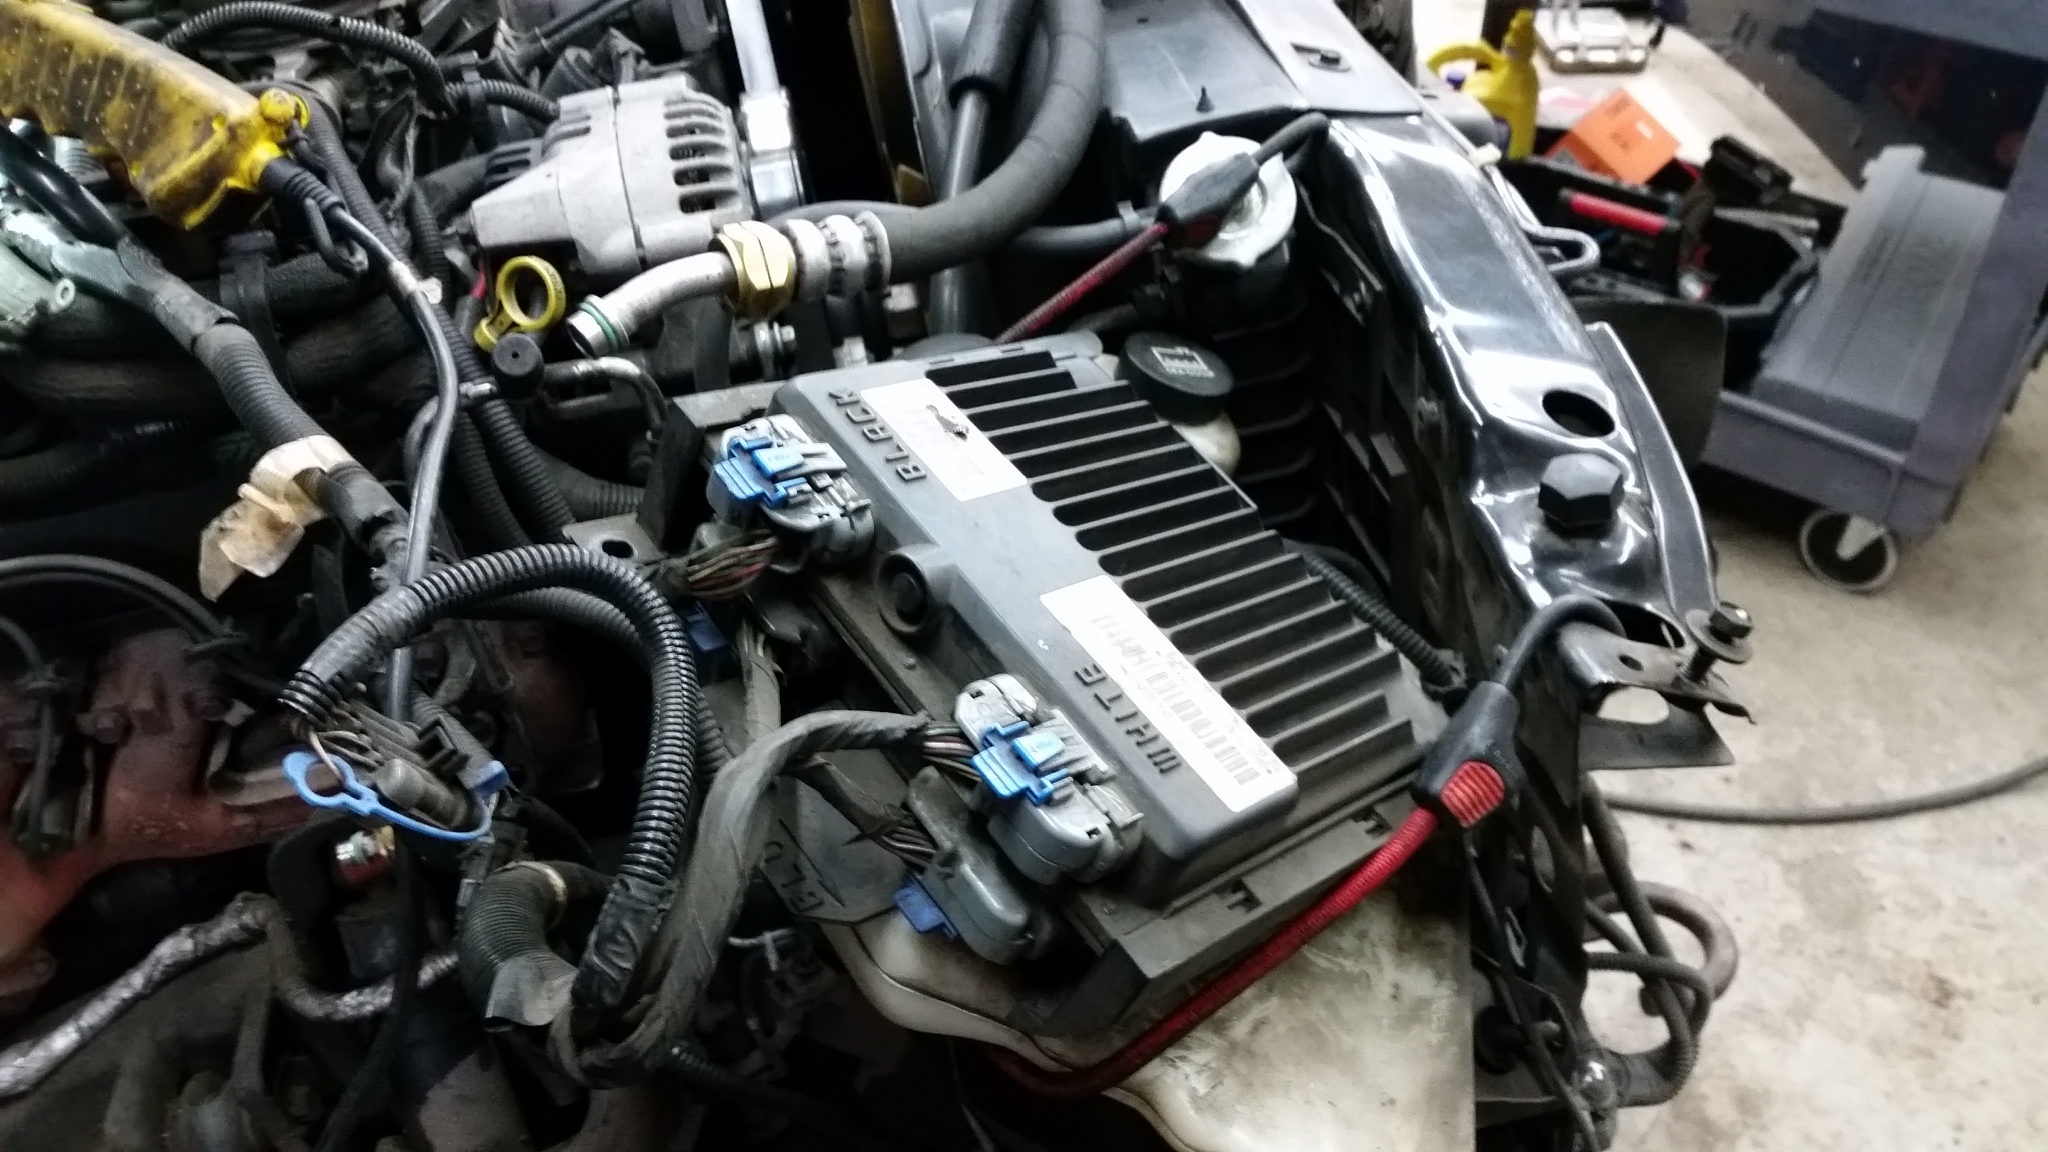
Remove Hood bolt plastic covers on cowel, wiring, 2 hood bolts and Hood.
Remove front right headlight (2 black straps hold it in place)
Remove plastic front grille that snaps into place.
Remove 6 bolts that hold Bumper and Bumper.
Jack up and remove right front wheel.
Remove battery
Remove nuts that hold Overflow bottle and VCM to wheelhouse.
Bungy cord OF bottle and VCM to radiator.(do not unplug VCM, one less thing to go wrong)
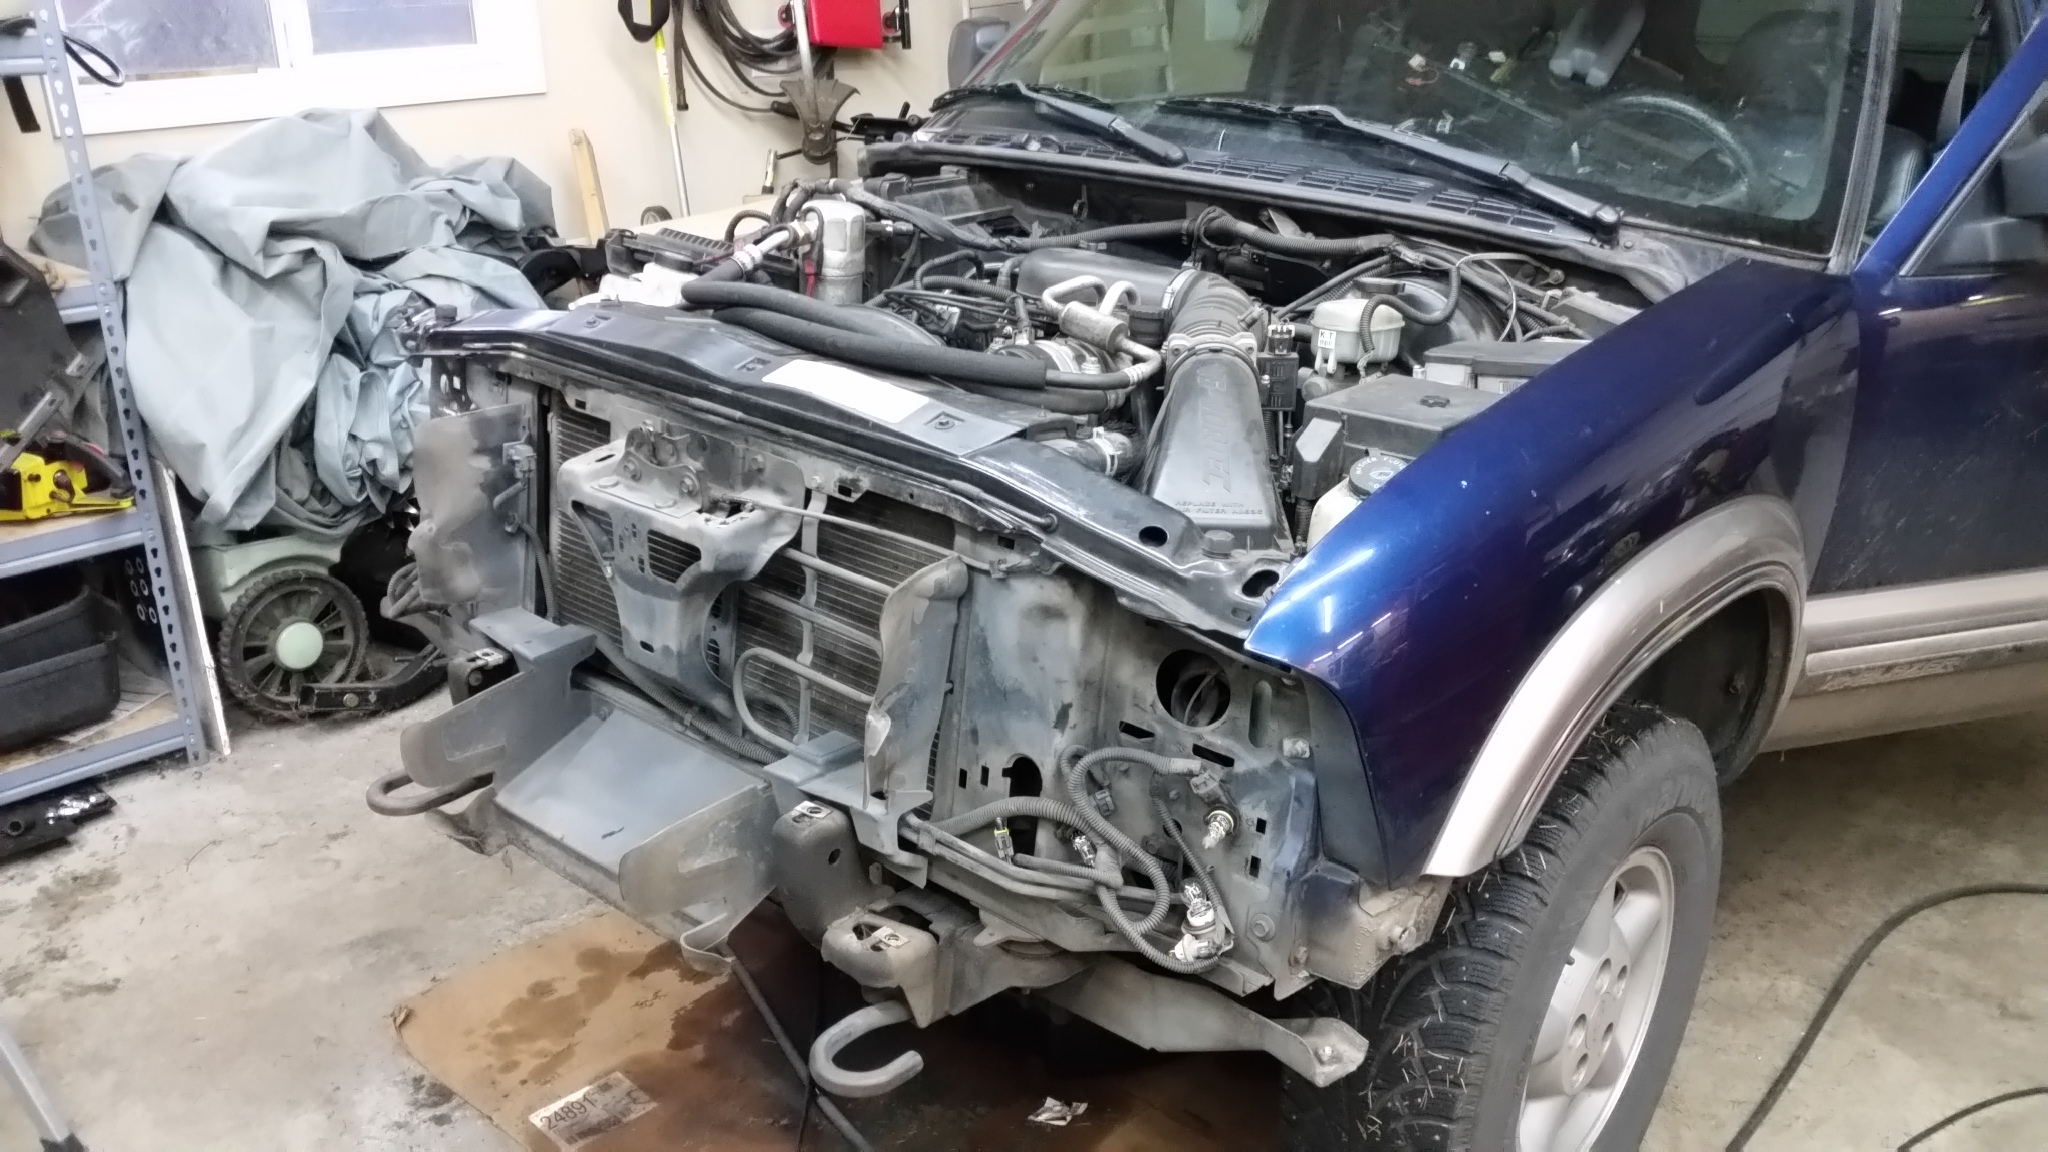
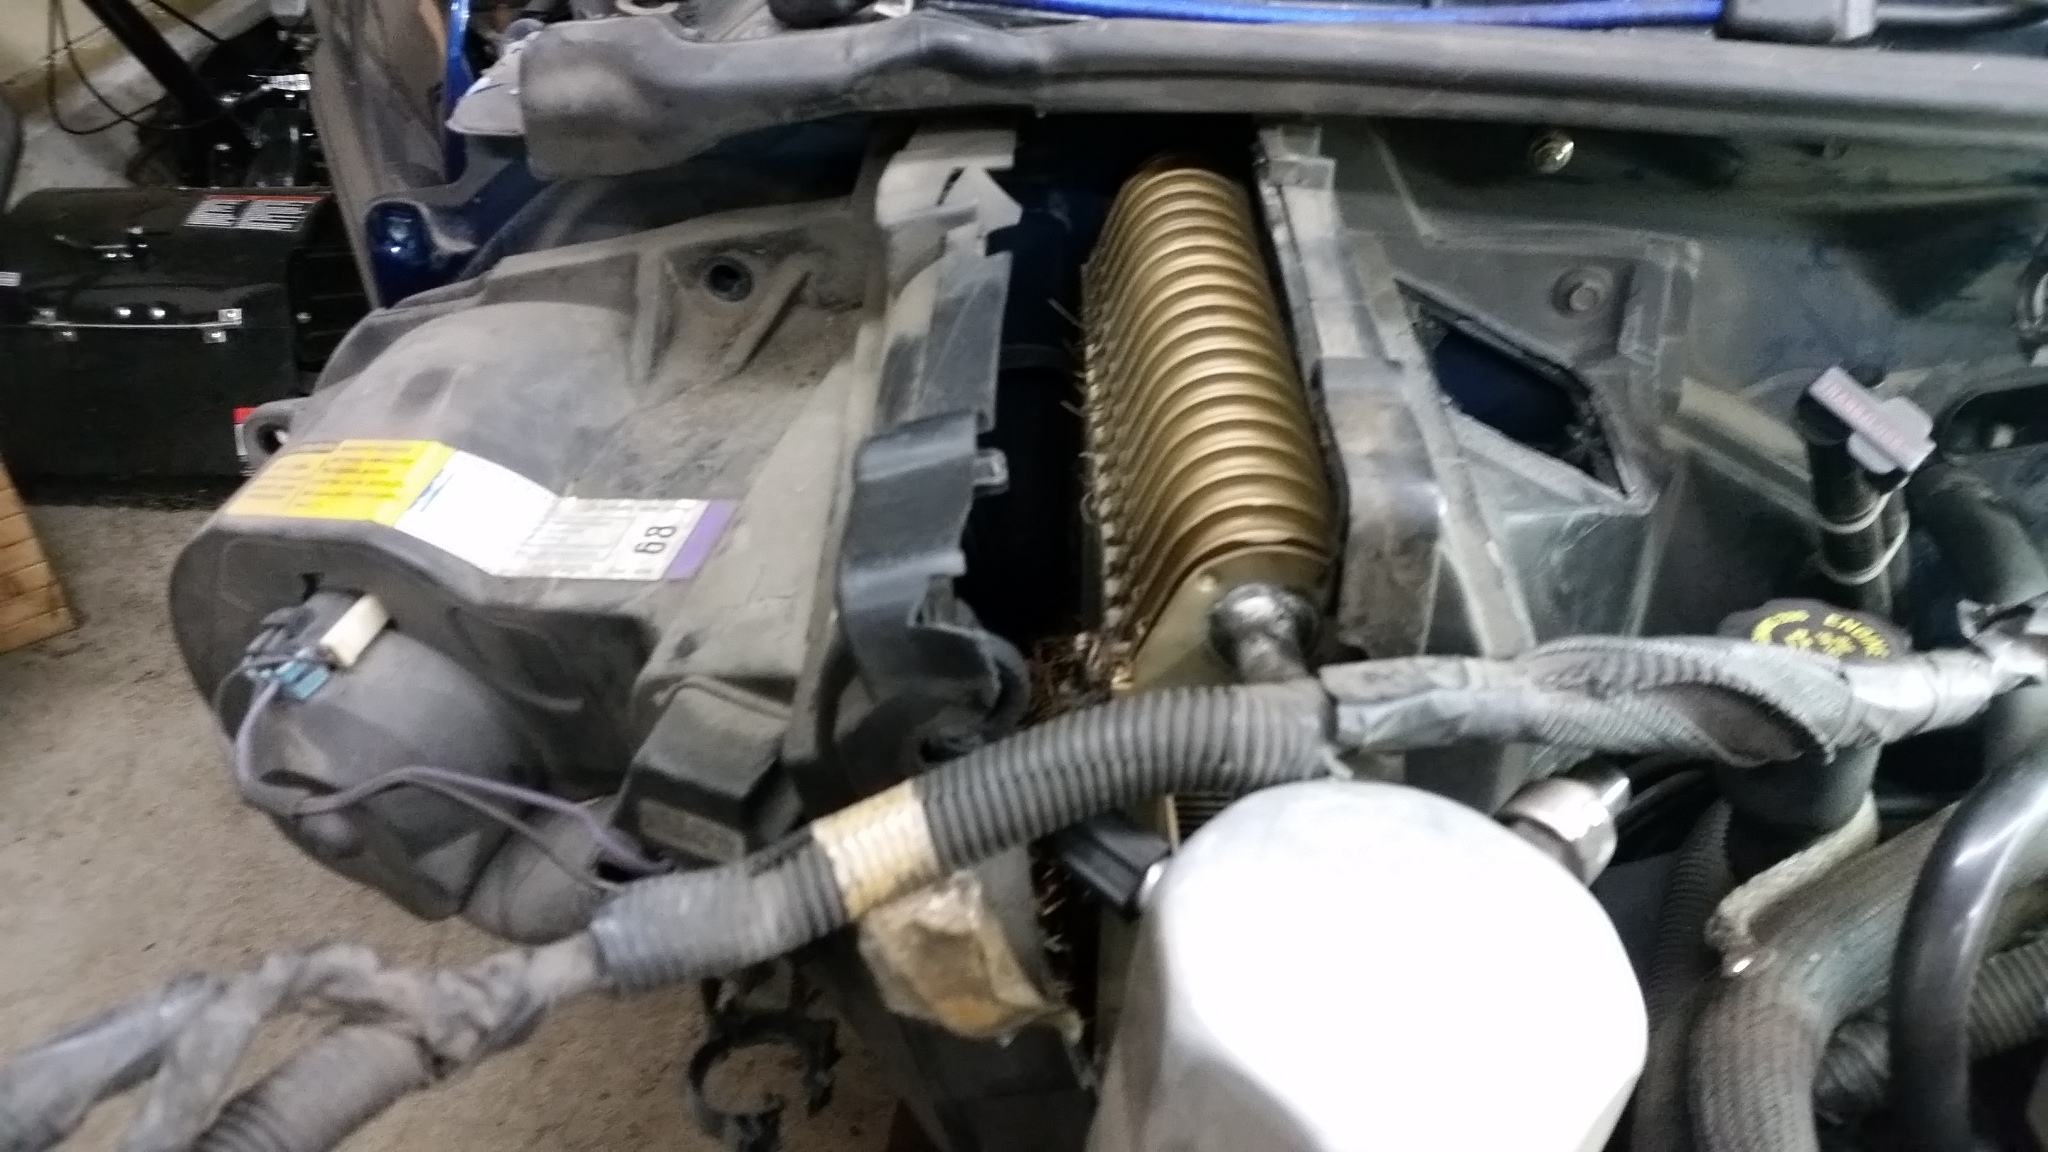
Remove right Wheelhouse metal.
Remove Horn wiring plug.
unplug antenna cable near evap case.
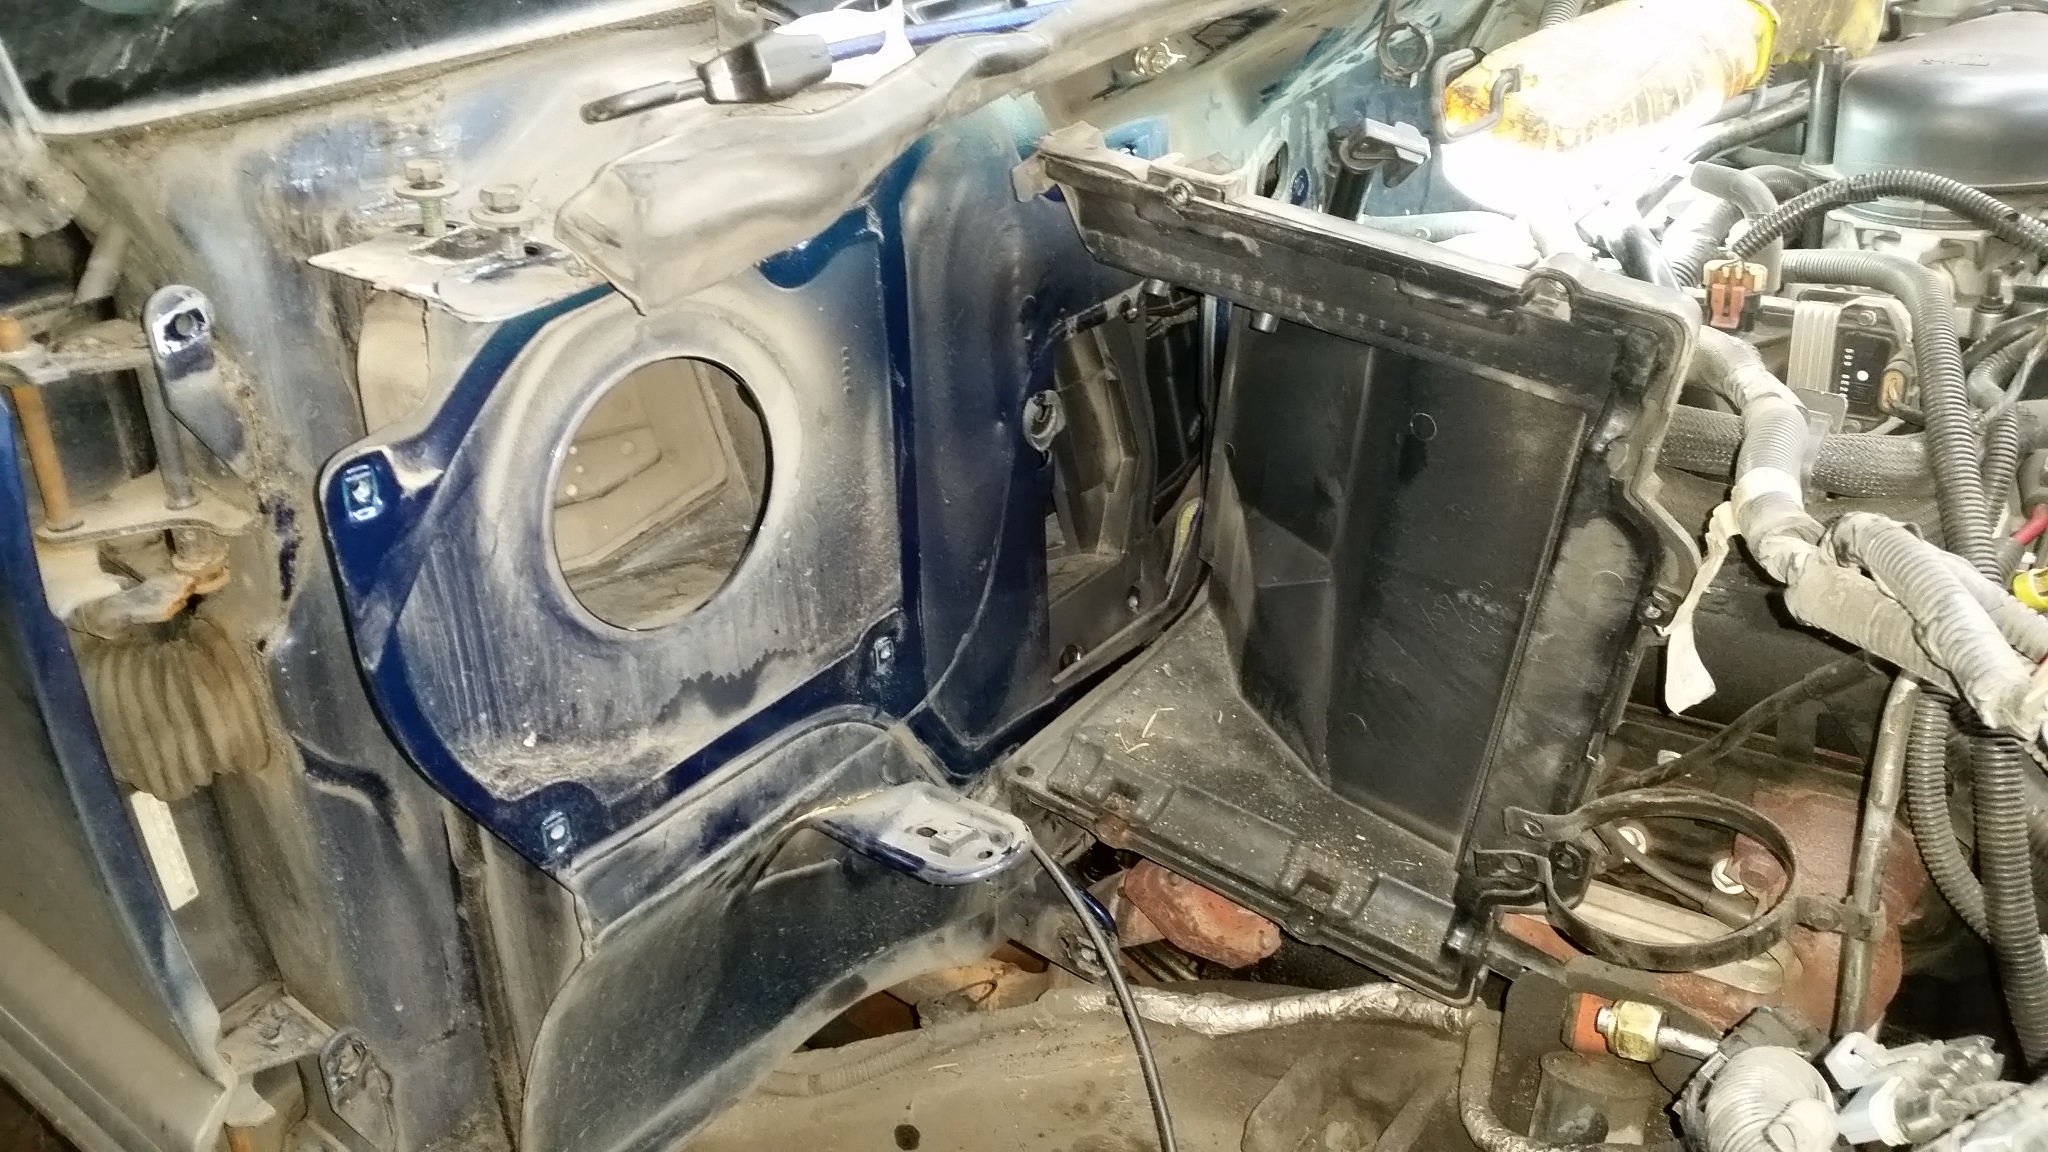
Remove bolts that hold right fender and remove fender.
Remove all the bolts that hold black evaporator case to firewall
Remove the 2 lower nuts that hold evaporator case to firewall (important that just the nuts come off, do not turn the heater box studs)
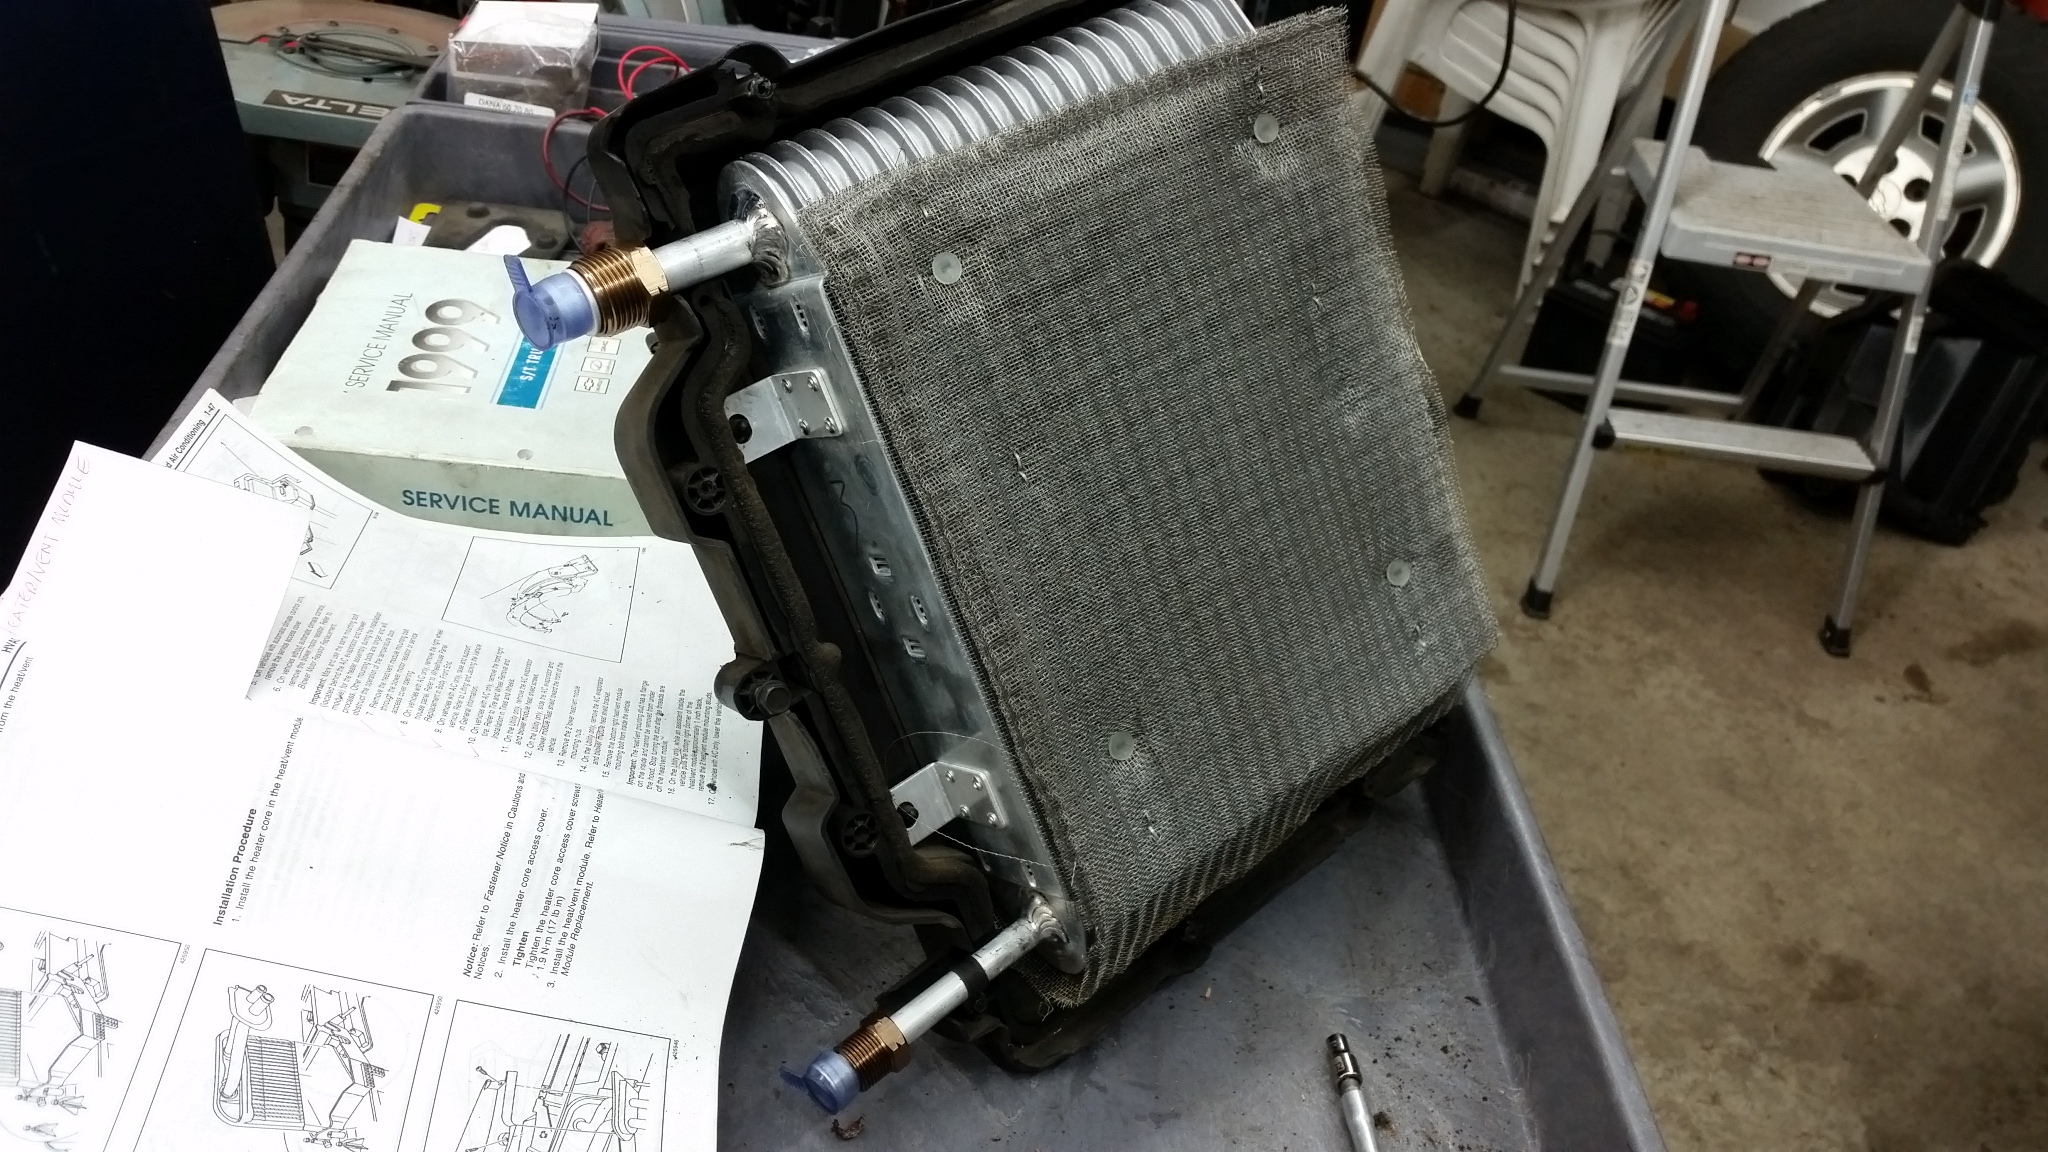
Remove all the screws that hold the 2 piece case together.
Remove right side case, left half can not be removed because of the heater box studs, but will be nice and loose.
Remove lower AC line from bottom of evaporator.
Remove accumulator.
Pop out evaporator core.
Remove old metal screen from old Evap and clean and install on new Evap
Install new orifice tube in bottom line of Evap (Came loose with new Evap)
Replace any AC line o-rings involved.
Install new Evap in case (I reused all the old mounting rubber inside the Evap case)
Put back together!
Visit other threads on charging the AC system.
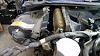
A few photos


Have a shop evacuate AC system (mine had no refrig in it at all from the leak)
Remove Hood bolt plastic covers on cowel, wiring, 2 hood bolts and Hood.
Remove front right headlight (2 black straps hold it in place)
Remove plastic front grille that snaps into place.
Remove 6 bolts that hold Bumper and Bumper.
Jack up and remove right front wheel.
Remove battery
Remove nuts that hold Overflow bottle and VCM to wheelhouse.
Bungy cord OF bottle and VCM to radiator.(do not unplug VCM, one less thing to go wrong)
Remove right Wheelhouse metal.
Remove Horn wiring plug.
unplug antenna cable near evap case.
Remove bolts that hold right fender and remove fender.
Remove all the bolts that hold black evaporator case to firewall
Remove the 2 lower nuts that hold evaporator case to firewall (important that just the nuts come off, do not turn the heater box studs)
Remove all the screws that hold the 2 piece case together.
Remove right side case, left half can not be removed because of the heater box studs, but will be nice and loose.
Remove lower AC line from bottom of evaporator.
Remove accumulator.
Pop out evaporator core.
Remove old metal screen from old Evap and clean and install on new Evap
Install new orifice tube in bottom line of Evap (Came loose with new Evap)
Replace any AC line o-rings involved.
Install new Evap in case (I reused all the old mounting rubber inside the Evap case)
Put back together!
Visit other threads on charging the AC system.
A few photos

Thread
Thread Starter
Forum
Replies
Last Post
Eric D
2nd Generation S-series (1995-2005) Tech
40
08-12-2020 05:04 PM
ComputerNerdBD
2nd Generation S-series (1995-2005) Tech
1
08-08-2013 10:11 PM
99bblazer99
2nd Generation S-series (1995-2005) Tech
0
07-04-2012 04:13 PM
mattj3773
2nd Generation S-series (1995-2005) Tech
1
04-20-2010 09:25 AM