
so you want a tire carrier on your 4 door?? - DISCUSSION THREAD

BF Veteran
Joined: May 2007
Posts: 2,713
From: Chicago, IL


I started on mine today, didn't finish. Hopefully I can finish it up tomorrow. I have to go back to the hardware store and get some shorter bolts. For anyone considering this, I highly recommend recruiting help lol. I have 2 herniated discs in my back and they're letting me know about it right now.
I think for now, I'm just going to use big washers against the inside panel to see how it holds up. If it feels weak or seems like there's a good possibility for damage, then I might drill through the interior wall and add the plate like closer and warthog did.
Last edited by mdehoogh; Mar 17, 2011 at 11:59 PM.
Starting Member
Joined: Jan 2011
Posts: 111
From: southern Indiana
Mine seemed pretty solid with out the flat bar on the inside. It didn't flex or anything... I just put it there for extra insurance because my wife uses my blazer also. So you never know what'll happen . I'd suggest toe put alittle touch up paint around the bare metal where you drillrd the hole before you bolt it on. And also I put black gasket maker silicone between and around the mounts to help keep moisture from getting in.
Junior Member
Joined: Jul 2009
Posts: 374
From: SE Oklahoma
I'm using a flat bar for extra support. A guy I went to school with has a fabrication shop a couple blocks from me. I scrounged up a 1/4" x 1 34" bar to use. I'm going to need to cut some better access holes to get to some of the bolts. Also, I had this really good idea to keep from scratching the blazer while wrestling around with the carries. I used masking tape. Unfortunately, I used dollar store masking tape and now it won't come off very easily. It even took a little paint with it
I feel like such a dumbass lol.
I feel like such a dumbass lol.
BF Veteran
Joined: May 2007
Posts: 2,713
From: Chicago, IL
After several hours of cutting out access holes and struggling to get all the appropriate washers and nuts threaded on the inside, I'm stuck trying to come up with a way to tighten everything down.
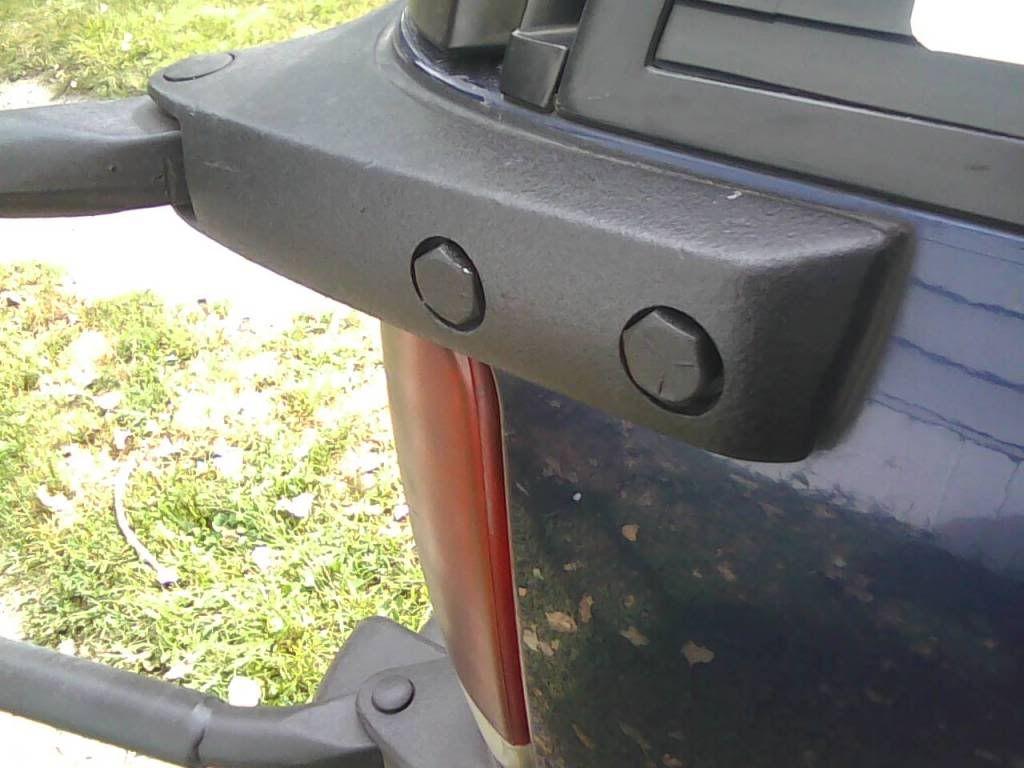
To use warthog's pic:

The countersunk hole isn't large enough to get a socket around and the heads on the bolts I used don't stick out long enough to get a good grip with a wrench. I know others have used the same type of bolts so it must be possible. Didn't think I'd have a problem on the outside of it... lol
Any ideas how to get at it?
To use warthog's pic:
The countersunk hole isn't large enough to get a socket around and the heads on the bolts I used don't stick out long enough to get a good grip with a wrench. I know others have used the same type of bolts so it must be possible. Didn't think I'd have a problem on the outside of it... lol
Any ideas how to get at it?

Starting Member
Joined: Jan 2011
Posts: 111
From: southern Indiana
It doesn't take much to hold that end of the bolts. I used an open end wrench. But I used the very end of it to get ahold of the bolt head. Once I got it snug the bolt head stayed tight as I tightened the nuts on the inside. Anoter idea would be to grind a slit with a dremel in the head so that you can hold it with a flat-head screwdriver. It is possible to tighten them though.
And do you understand why I used so many washers now. LOL! It's a PITA to get my hands in those tiny areas to get the nuts on. I used my dremel and cut some of the openings bigger so I could get my hands in there. But even I lost more than a few nuts and washers in the process. I just takes patience.
And do you understand why I used so many washers now. LOL! It's a PITA to get my hands in those tiny areas to get the nuts on. I used my dremel and cut some of the openings bigger so I could get my hands in there. But even I lost more than a few nuts and washers in the process
BF Veteran
Joined: May 2007
Posts: 2,713
From: Chicago, IL
I spent forever getting this thing on and even had to bail on a friends St.Pats day party in hopes of trying to get it done tonight. I got the truck at least drivable so I can make it to work tomorrow morning (I had it hanging with tow straps and barely bolted on). I reversed the two back bolts since they were impossible to try and get washers on.
I never found a good way to really tighten down the four side bolts but the dremel notch sounds like it should work. I didn't drill through both panels so I kept dropping/losing nuts and washers and probably spent a half hour per bolt trying to get everything lined up.
To anyone attempting this, you will need a LOT of patience (small hands would really help as well)
the mostly-finished product:
Junior Member
Joined: Jul 2009
Posts: 374
From: SE Oklahoma
Looks good man.
I found a way that might help some in getting washers and nuts into very tricky areas. I used a shallow socket and put the nut in it. I taped the washers onto the end of the socket, securely so they won't fall off, but not so secure that I would have trouble getting my socket back then I got the nut started. Worked pretty well for me. In a couple of spots, I had trouble getting the socket and extension lined up to start them on the bolt. I used a large pair of surgical clamps to hold the socket at the angle needed.
I'm still working on mine, I didn't get to work on it yesterday.
Matt, can you do me a favor? Take a picture of how close your carrier comes to the wiper arm. Also, can you take a picture showing how the spare lines up with the blazer? Mine seems like it will be pointing slightly to the left. The Blazer it came off of wasn't wrecked in the rear, and the carries doesn't look bent, so maybe they're all that way?
Last edited by s14sh3r; Mar 18, 2011 at 09:34 AM.
BF Veteran
Joined: May 2007
Posts: 2,713
From: Chicago, IL
Matt, can you do me a favor? Take a picture of how close your carrier comes to the wiper arm. Also, can you take a picture showing how the spare lines up with the blazer? Mine seems like it will be pointing slightly to the left. The Blazer it came off of wasn't wrecked in the rear, and the carries doesn't look bent, so maybe they're all that way?
With the latch and everything installed, the tire seems to be straight and the wiper works. The glass won't open without popping the carrier open about a half inch though which kinda sucks.