
Altoncustomtech's 2001 Jimmy = slow audio build

Thread Starter
|
Senior Member
Joined: Oct 2010
Posts: 931
From: Monroe City, IN

Small updates. FINALLY started to run wires for this thing and not easily in this tight spaced and cramped little truck. It's so difficult to get to certain things that I'm driving it around with the passenger side compartment/armrest removed and both back seats unbolted until everything is ran. I don't want to have to remove/install that stuff over and over. So far not much is ran due to the fact it's taken more time to figure out exactly where and how it's going to run than actually doing it. Drivers side speaker wire is the only one that's completely done. The RCA's, remote wire and passenger side speaker wires are starting to get in tho. I got the holes for the power wire entry into the cabin drilled yesterday and the fuse holders mounted as well. I got a couple of pics of the RCA's and passenger speaker wires getting bundled to be ran and the fuse holders to post up. Some progress is better than no progress and the more of some progress I can make the sooner it will be done!!
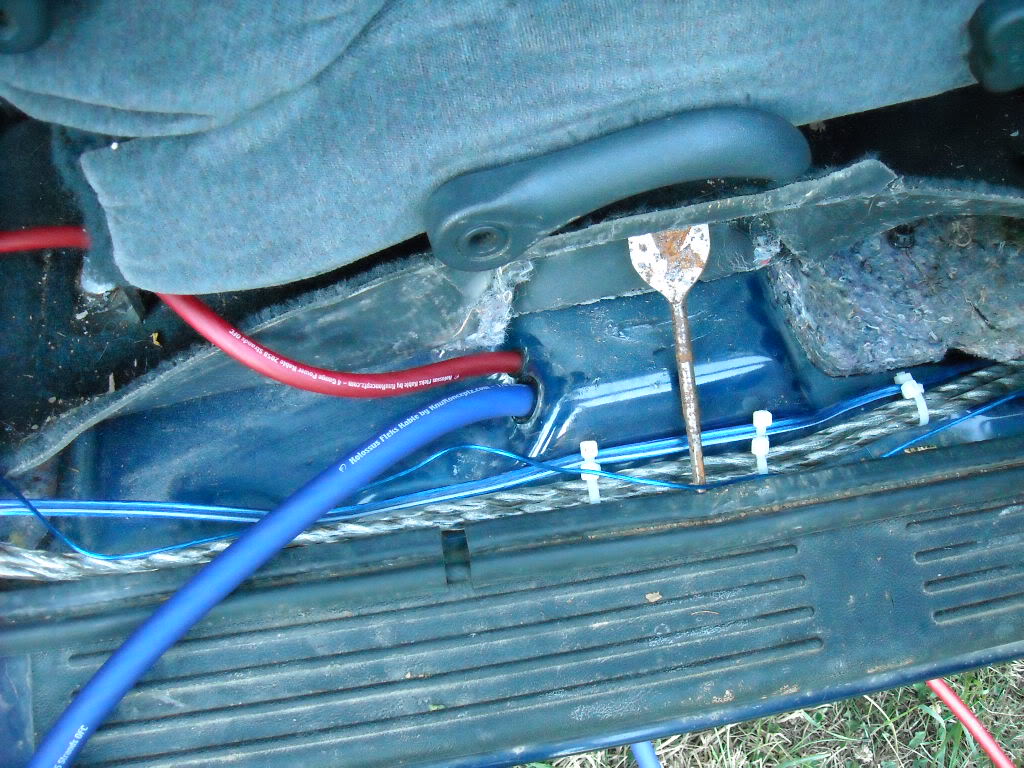
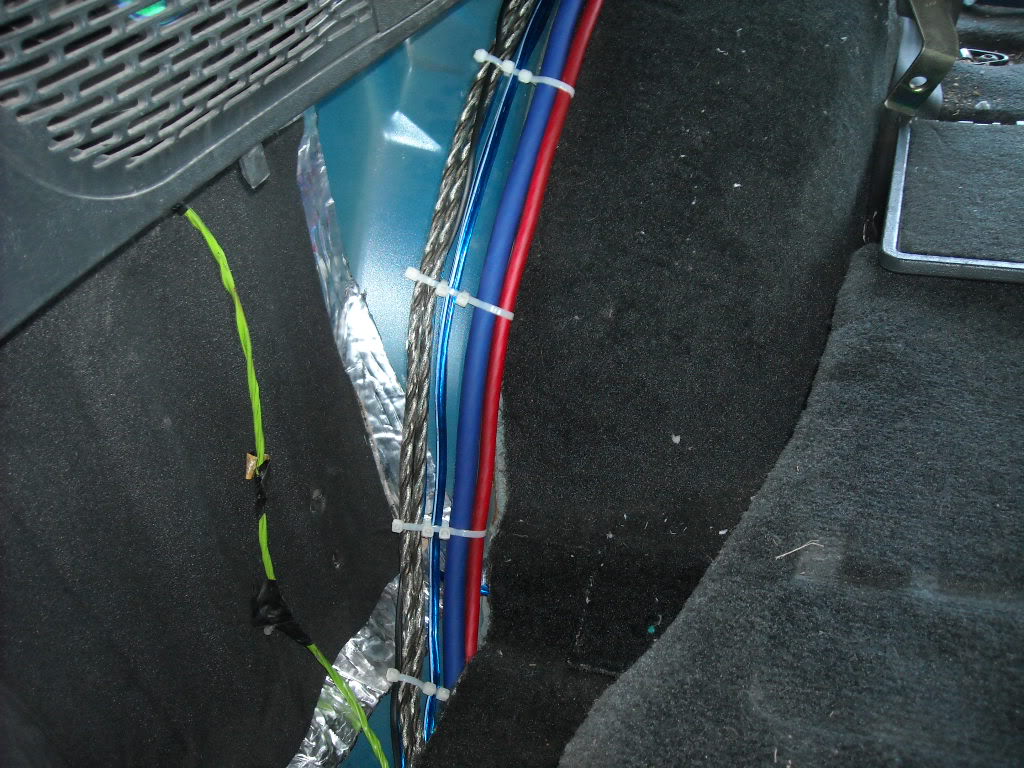
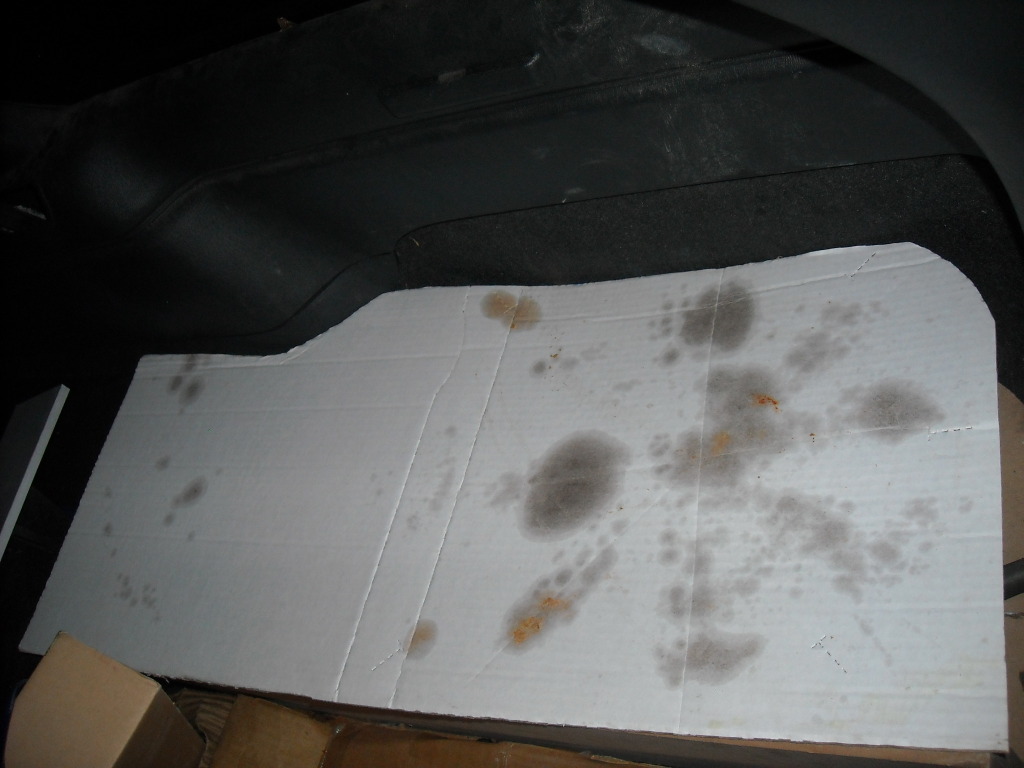
Here's the passenger side of the truck as I mentioned before. Using the zip ties in this manner helps to keep things bundled and spaced. A cheap easy solution.
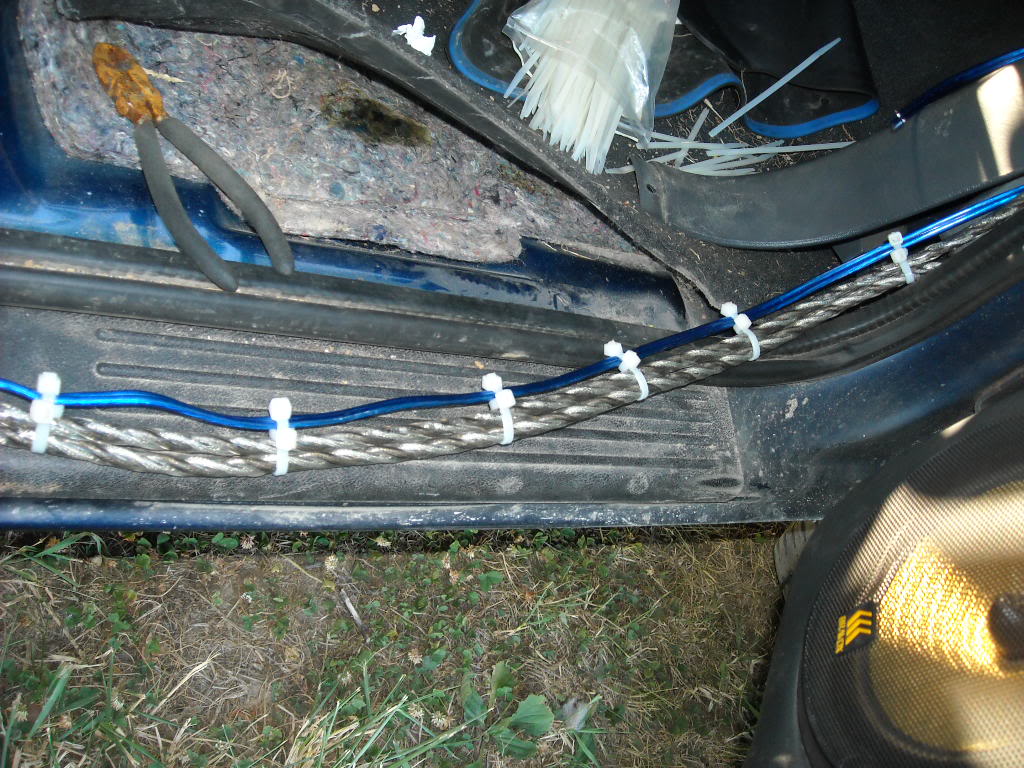
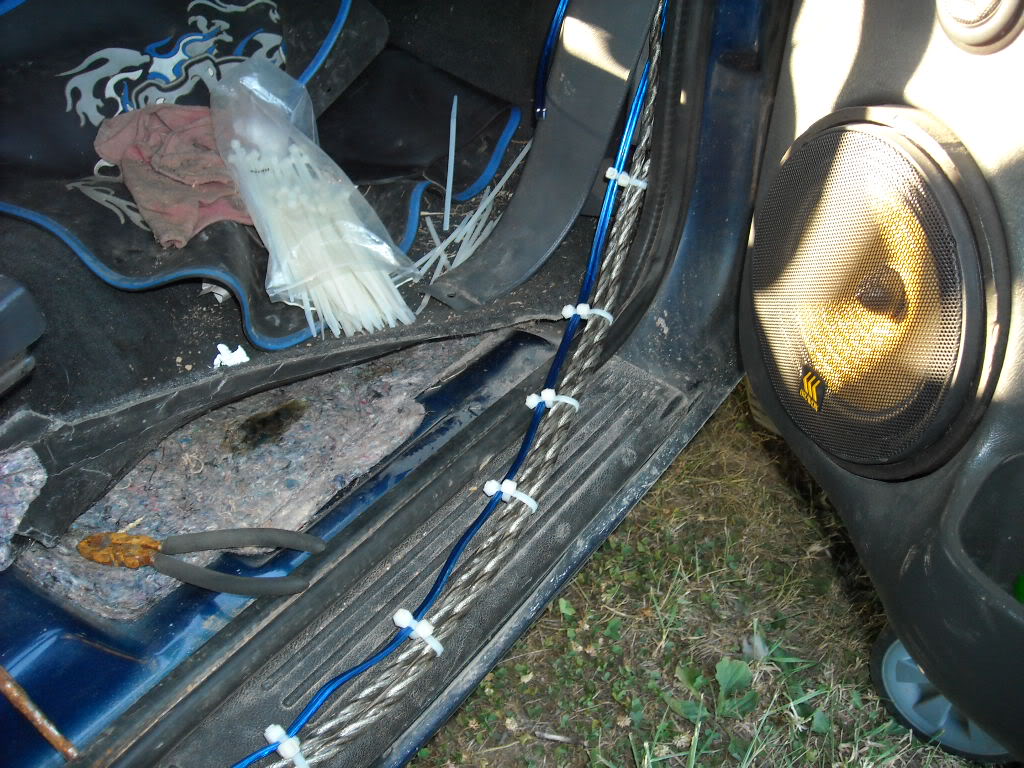
I found an old license plate from my DRZ and bent it for this job. If I were doing this install for someone else I would have found a better looking solution. Personally I don't really care as long as it doesn't look like complete crap and functions well.
That's it for now, hopefully things continue to work out as they have and I'll get a little done each day after work for awhile. Once the wires are ran I can begin on the amp rack, which should go fairly quickly.
Here's the passenger side of the truck as I mentioned before. Using the zip ties in this manner helps to keep things bundled and spaced. A cheap easy solution.
I found an old license plate from my DRZ and bent it for this job. If I were doing this install for someone else I would have found a better looking solution. Personally I don't really care as long as it doesn't look like complete crap and functions well.
That's it for now, hopefully things continue to work out as they have and I'll get a little done each day after work for awhile. Once the wires are ran I can begin on the amp rack, which should go fairly quickly.
Thread Starter
|
Senior Member
Joined: Oct 2010
Posts: 931
From: Monroe City, IN
I'm glad the ball is rolling on this thing again. I'm really looking forward to showing it off at some of the later shows this year. I think anyone that listens to it is going to completely flip when they find it's only a single 10.
On that note, wire runs are completed and it's time to start building the amp rack.
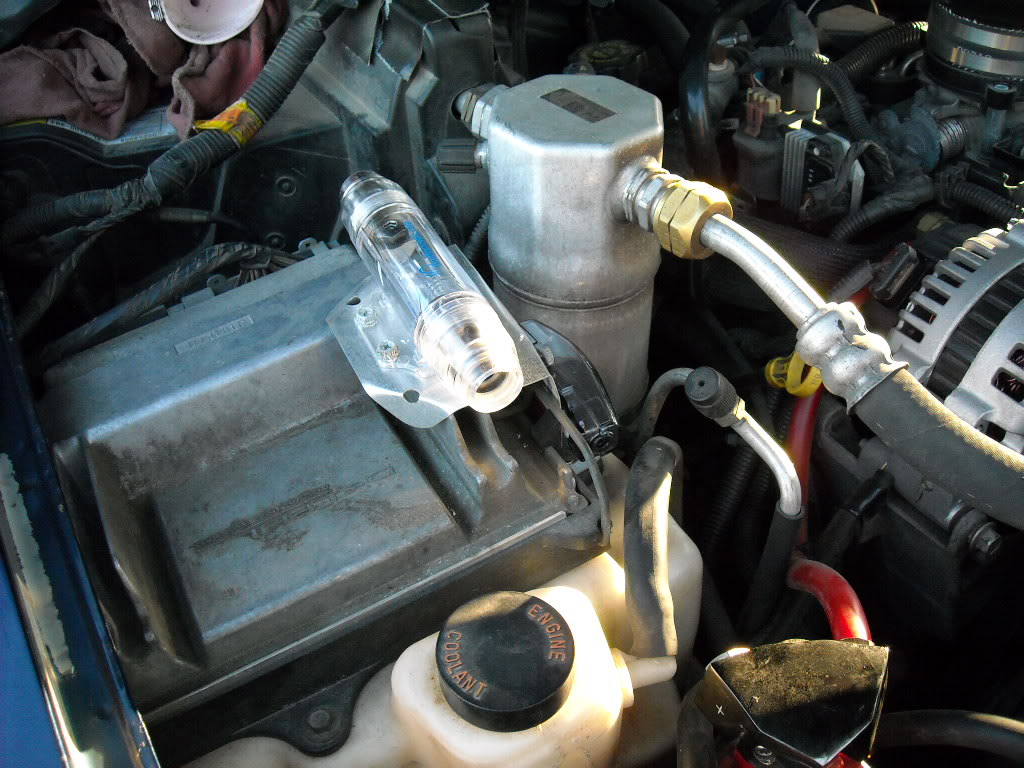
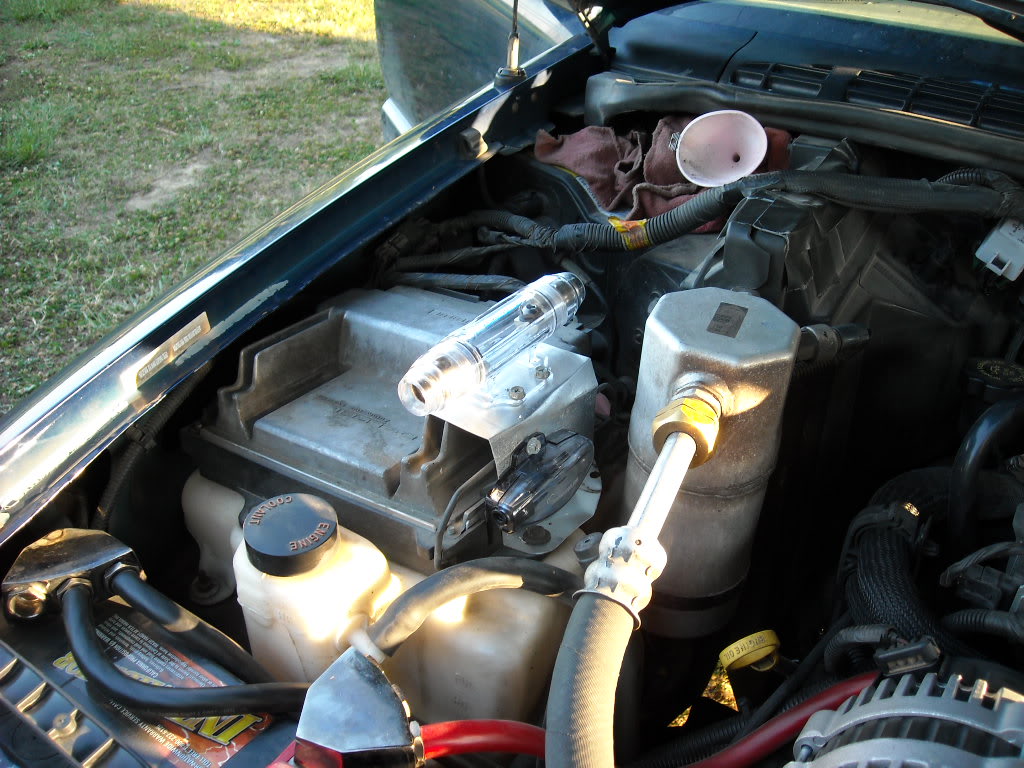
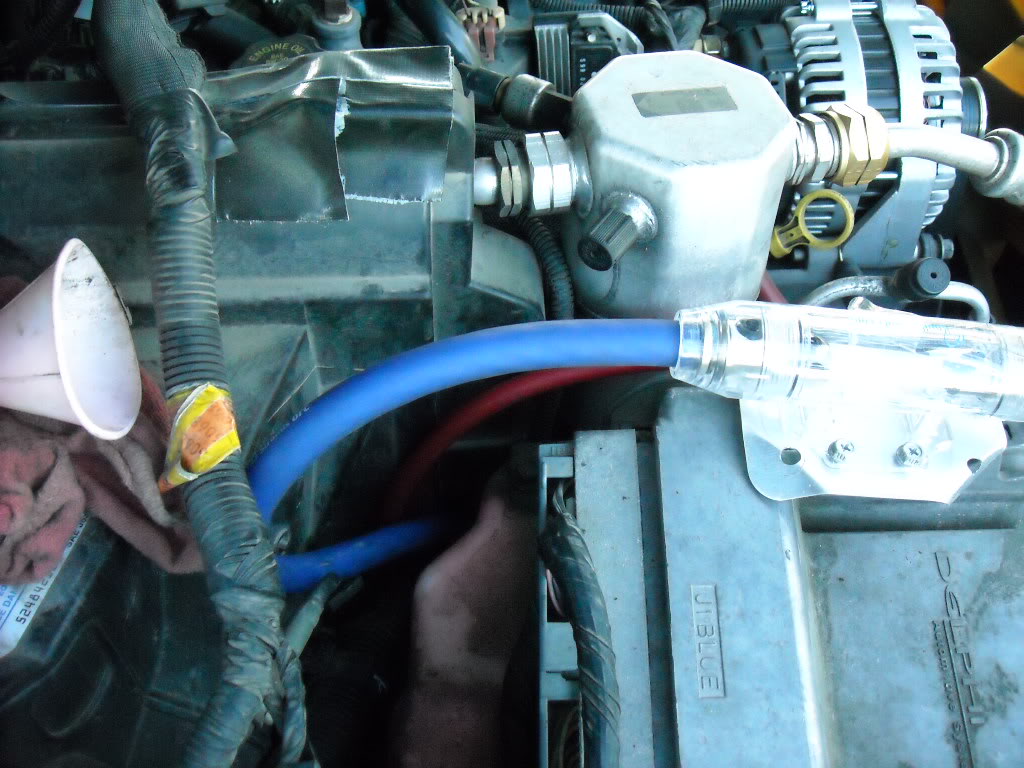
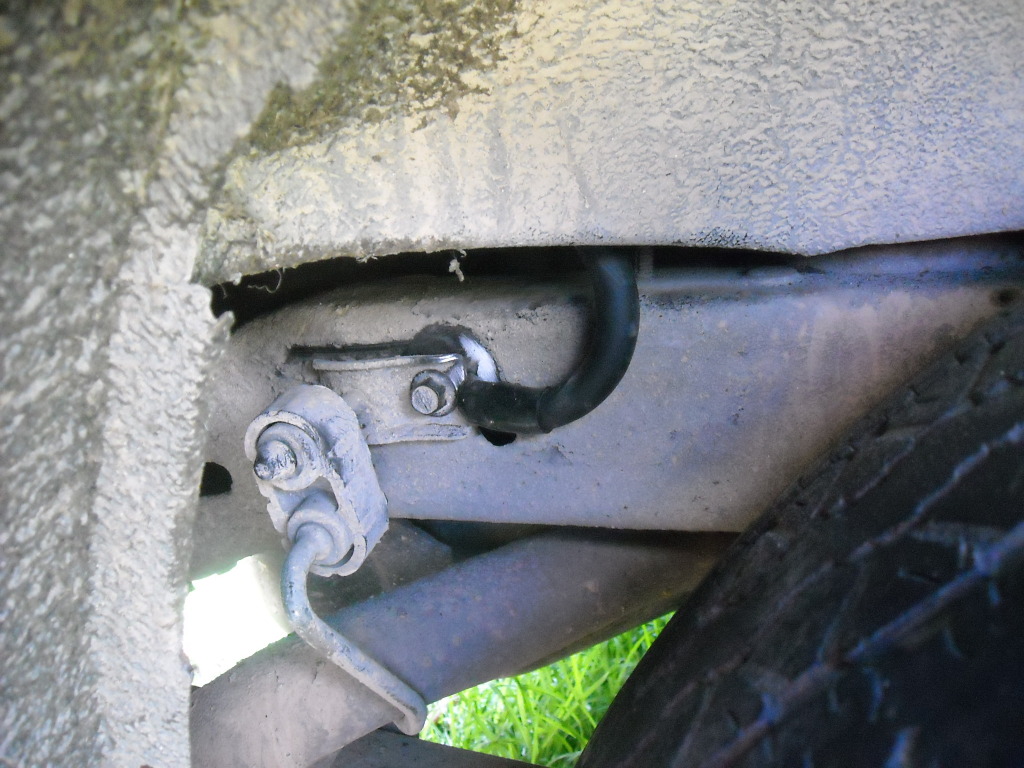
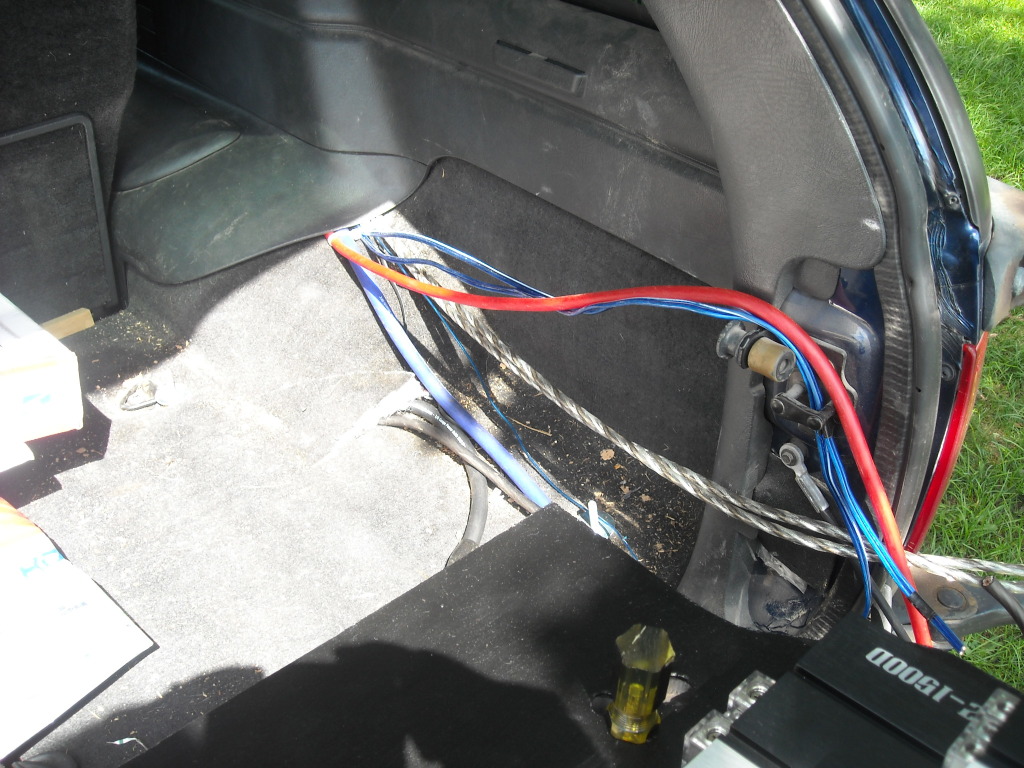
Here's the power wires coming out of their respective holes and grommets. The angle on that part of the sheet metal will make it much easier to get the wires and carpet to lay down as they should.
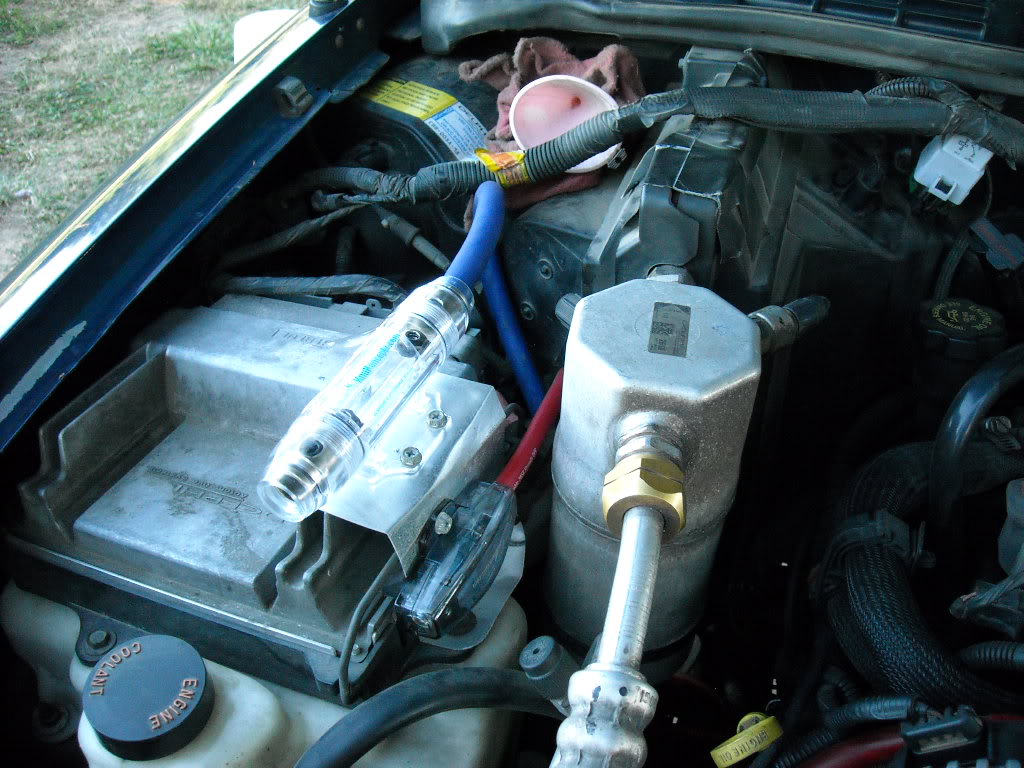
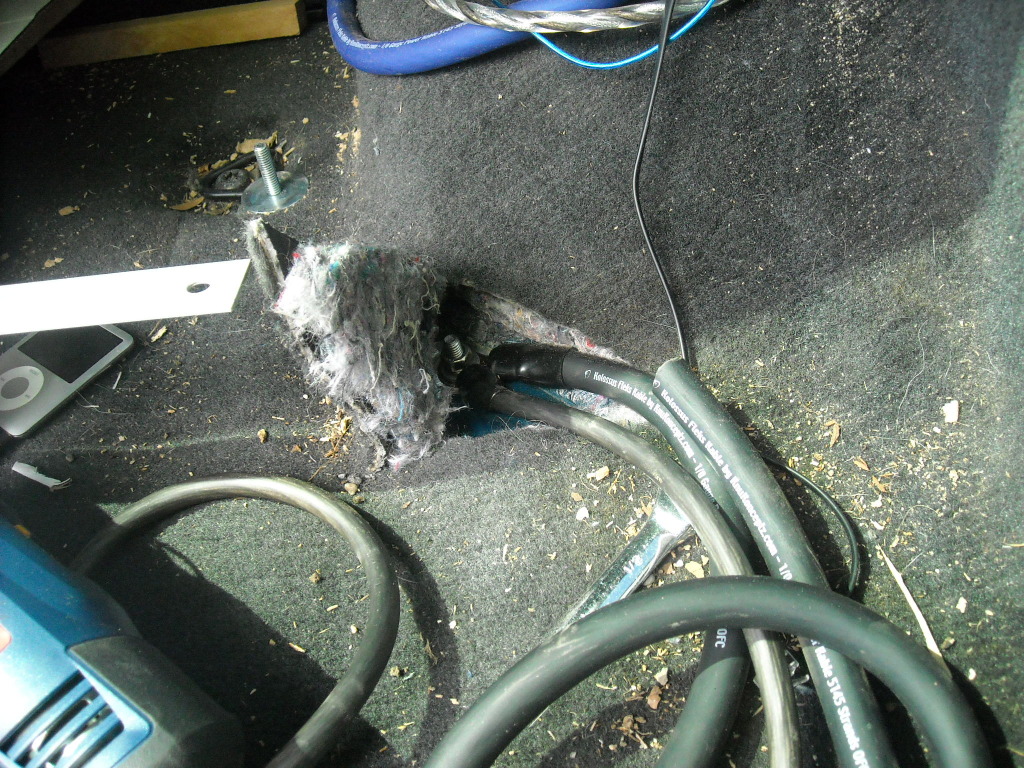
Here's the wires coming up to the fuse holders. Yes, there's a bit of excess there, but that's only so I have the give/play for inserting the fuse. Both wires go down in between the fender well and AC lines and follow the frame back to the point where they come up through the sheet metal. These trucks really make that part much easier than I would have imagined.
Here's the wires all tucked away under the carpet there. Worked out pretty good.
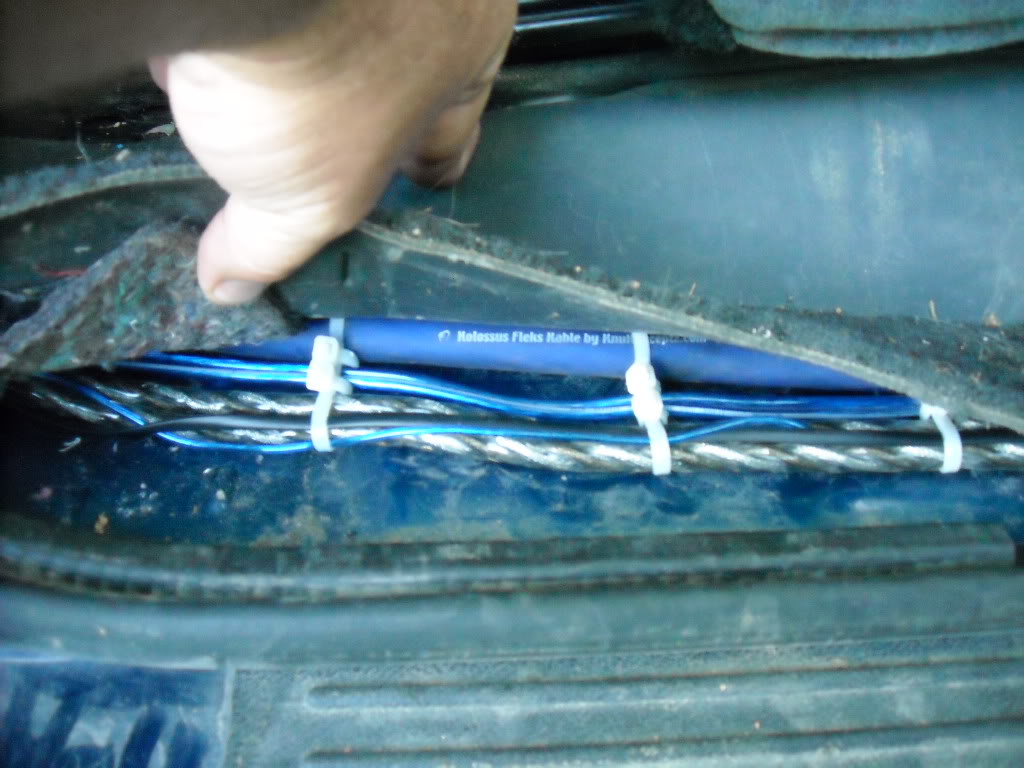
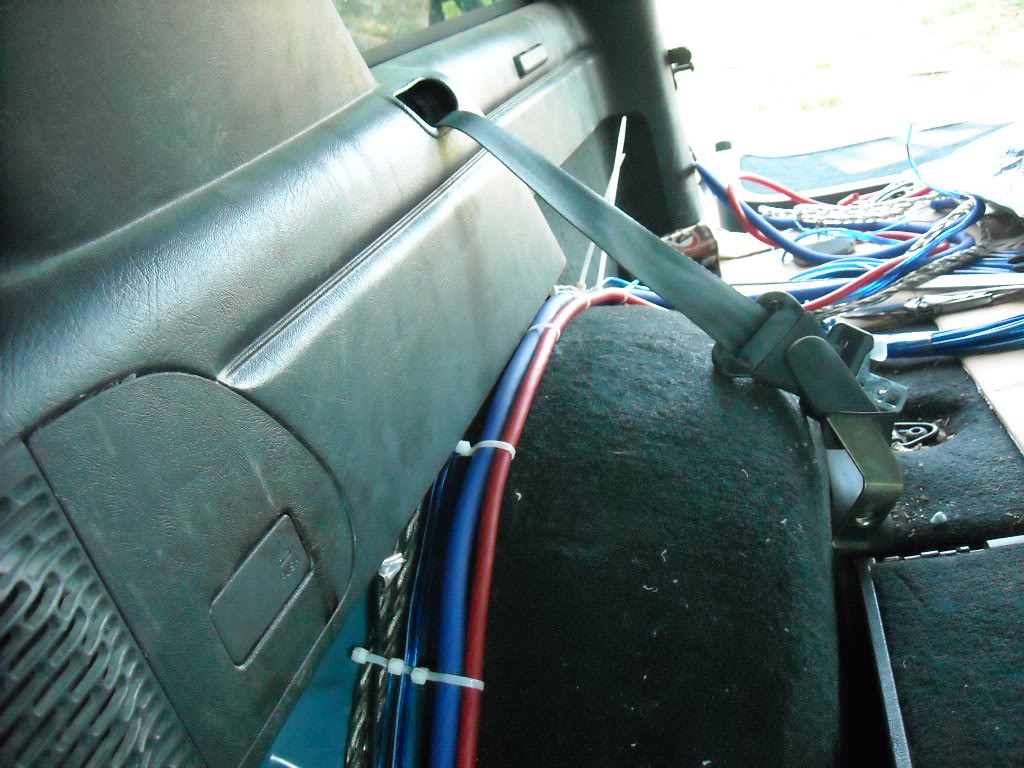
Here's the wire bundle making it's way to the back. I went right up on the wall/rear fender well of the truck so it will all hide nicely under that part of the interior.
Finally, I chose this mounting location for the remote gain **** for two reasons. One, it keeps it hidden so that strange fingers aren't tempted to play with it. Two, that little LED is brighter than hell and I couldn't find a good location anywhere else that it wouldn't be shining right up at me. It should work out pretty good there tho.

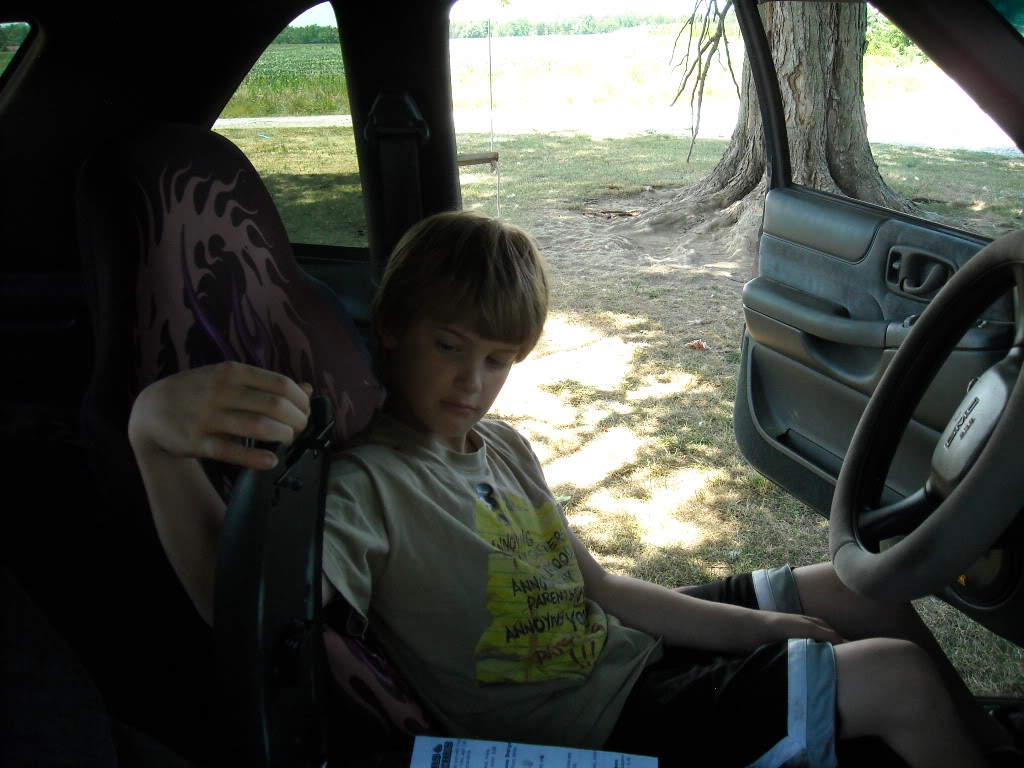
AND MY PARTNER IN CRIME!!! My son Austin, who some may remember, recognize from the pictures of the build of the enclosure for the van. He's got a great deal of interest in all this stuff and the older he gets, the more he's interested and understanding everything I explain to him as we're doing this. I had him taking the dash apart to get to the wires on the HU to run the RCA's and remote power wire, had him helping me with the remote gain ****, and he helped run the power wires up to the engine compartment. He's a hell of helper to have!
On that note, wire runs are completed and it's time to start building the amp rack.
Here's the power wires coming out of their respective holes and grommets. The angle on that part of the sheet metal will make it much easier to get the wires and carpet to lay down as they should.
Here's the wires coming up to the fuse holders. Yes, there's a bit of excess there, but that's only so I have the give/play for inserting the fuse. Both wires go down in between the fender well and AC lines and follow the frame back to the point where they come up through the sheet metal. These trucks really make that part much easier than I would have imagined.
Here's the wires all tucked away under the carpet there. Worked out pretty good.
Here's the wire bundle making it's way to the back. I went right up on the wall/rear fender well of the truck so it will all hide nicely under that part of the interior.
Finally, I chose this mounting location for the remote gain **** for two reasons. One, it keeps it hidden so that strange fingers aren't tempted to play with it. Two, that little LED is brighter than hell and I couldn't find a good location anywhere else that it wouldn't be shining right up at me. It should work out pretty good there tho.
AND MY PARTNER IN CRIME!!! My son Austin, who some may remember, recognize from the pictures of the build of the enclosure for the van. He's got a great deal of interest in all this stuff and the older he gets, the more he's interested and understanding everything I explain to him as we're doing this. I had him taking the dash apart to get to the wires on the HU to run the RCA's and remote power wire, had him helping me with the remote gain ****, and he helped run the power wires up to the engine compartment. He's a hell of helper to have!
Thread Starter
|
Senior Member
Joined: Oct 2010
Posts: 931
From: Monroe City, IN
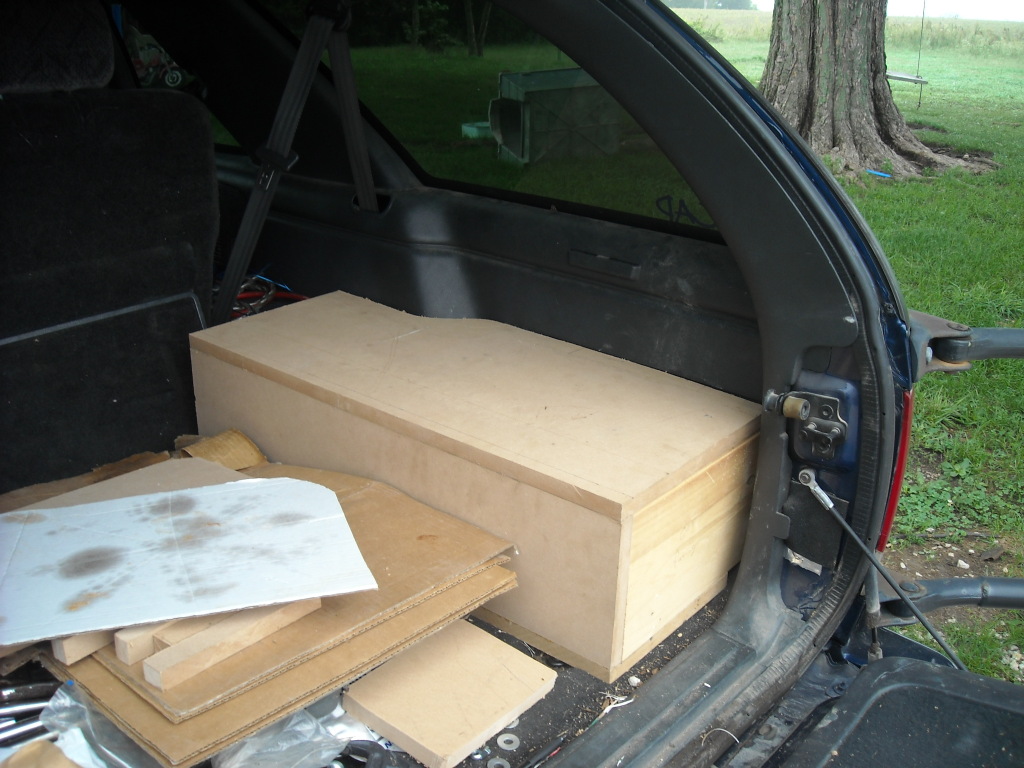
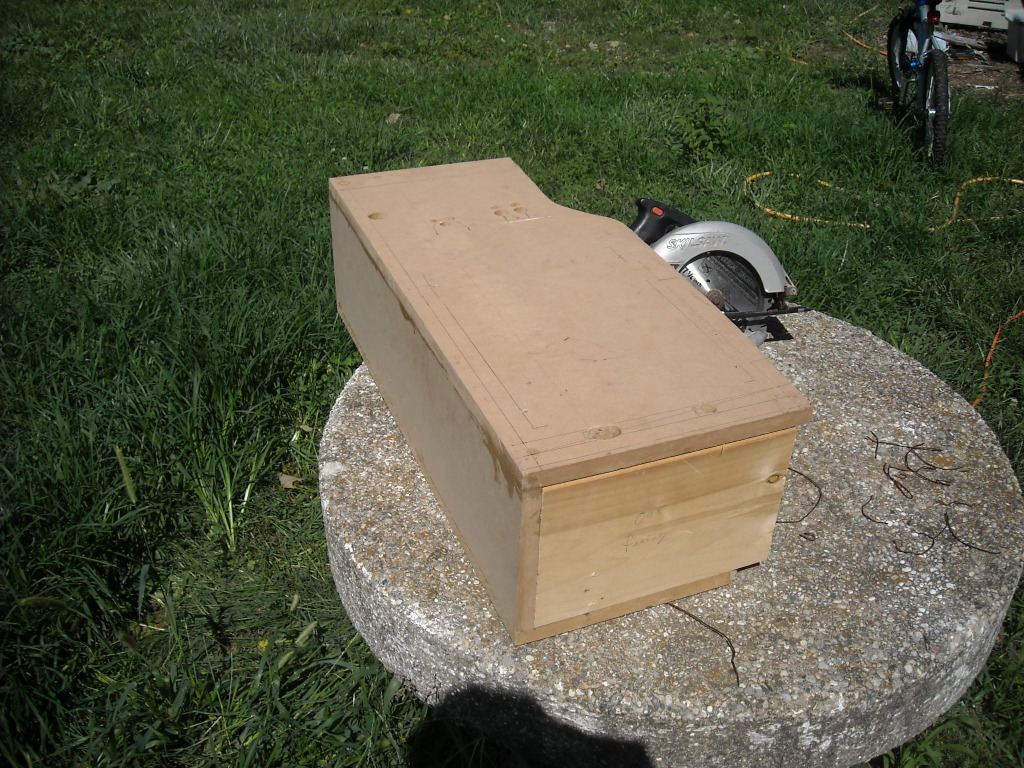
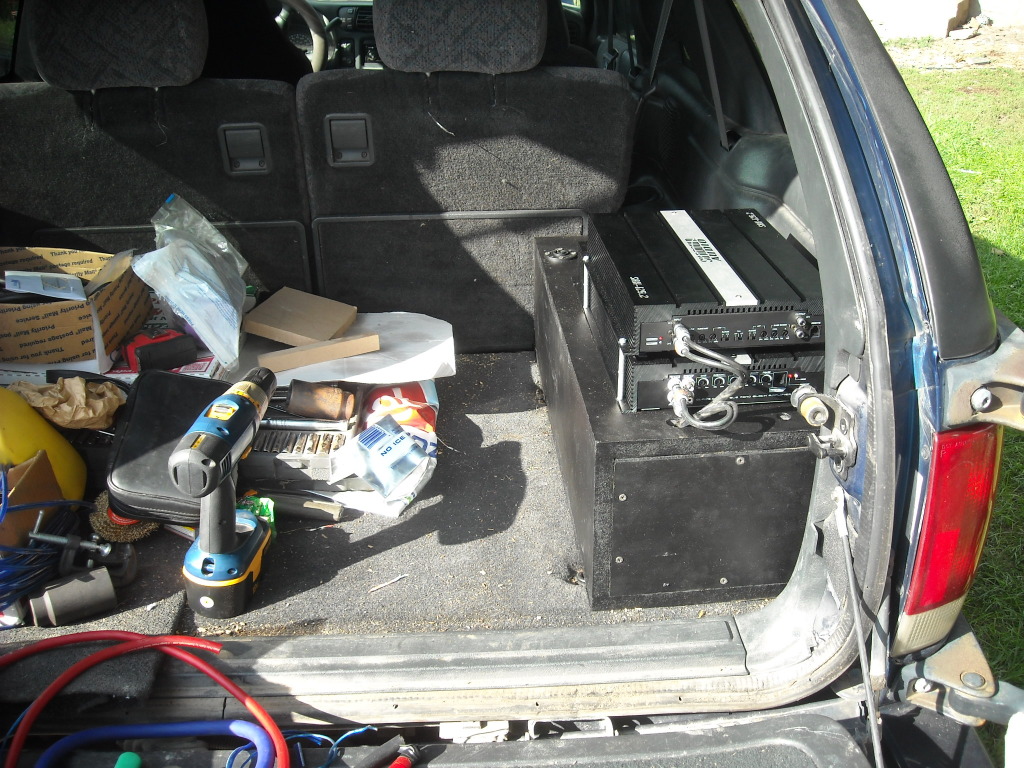
Okay, so I FINALLY got started on the amp rack this week while taking a little vacation time (when the wife isn't screwing it up that is). I'm down now to getting all the holes for the wires to pass through to the amps drilled, then I can do the final assembly and get the bedliner applied. After that it's as easy as installation, lol.
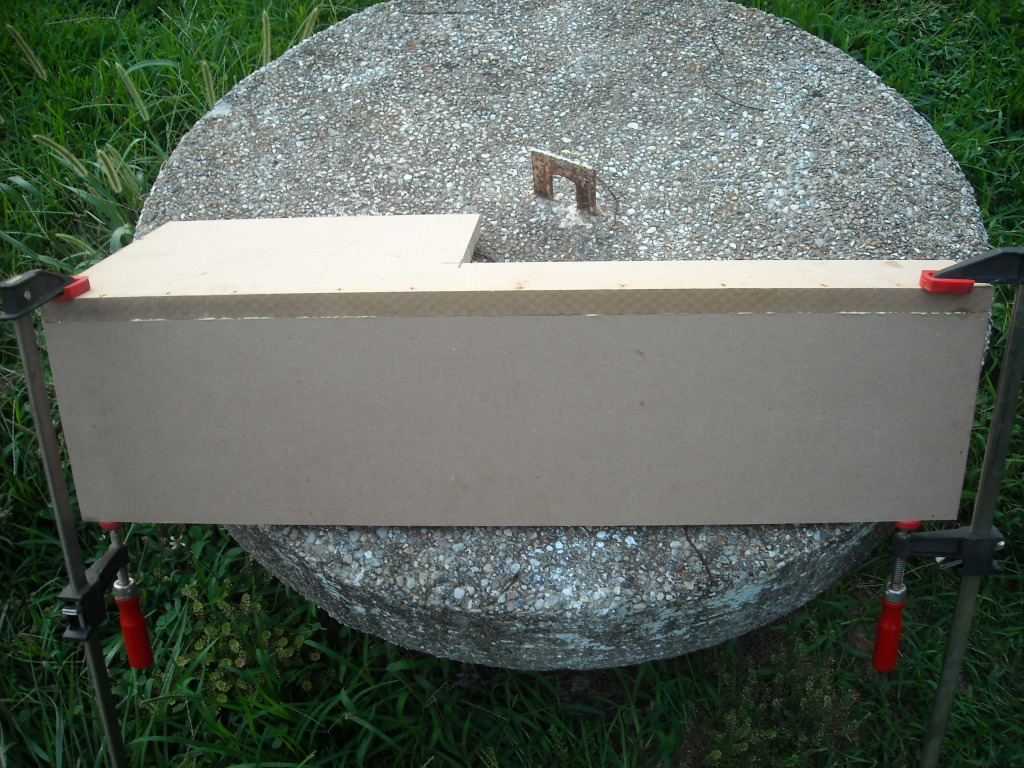
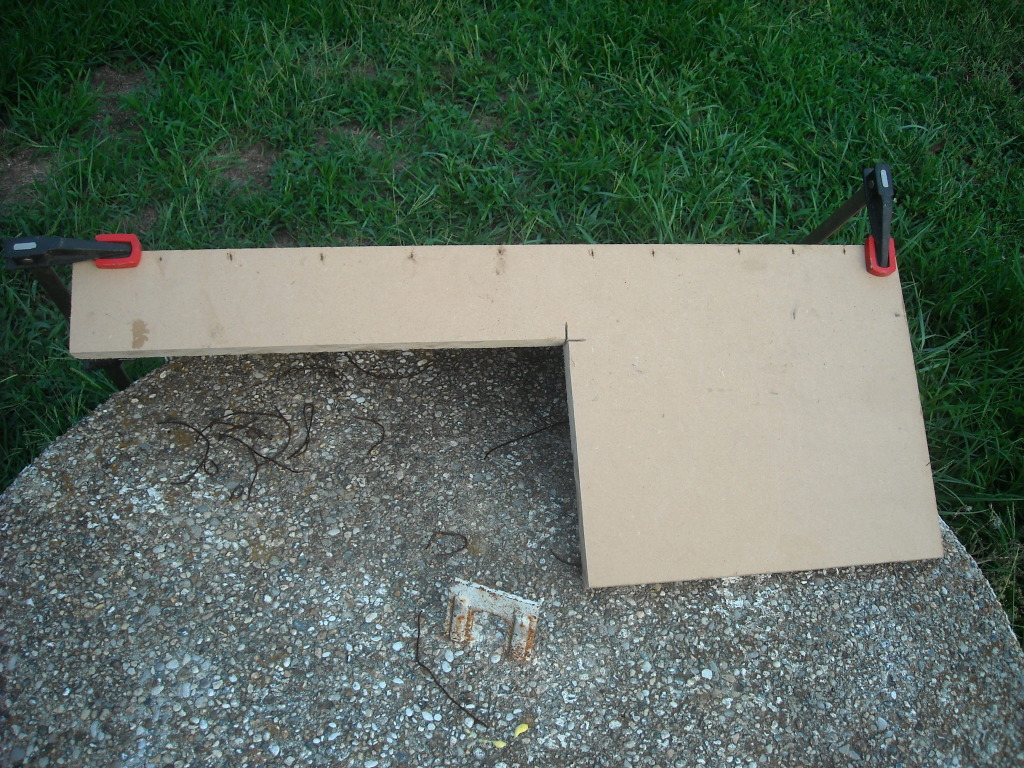
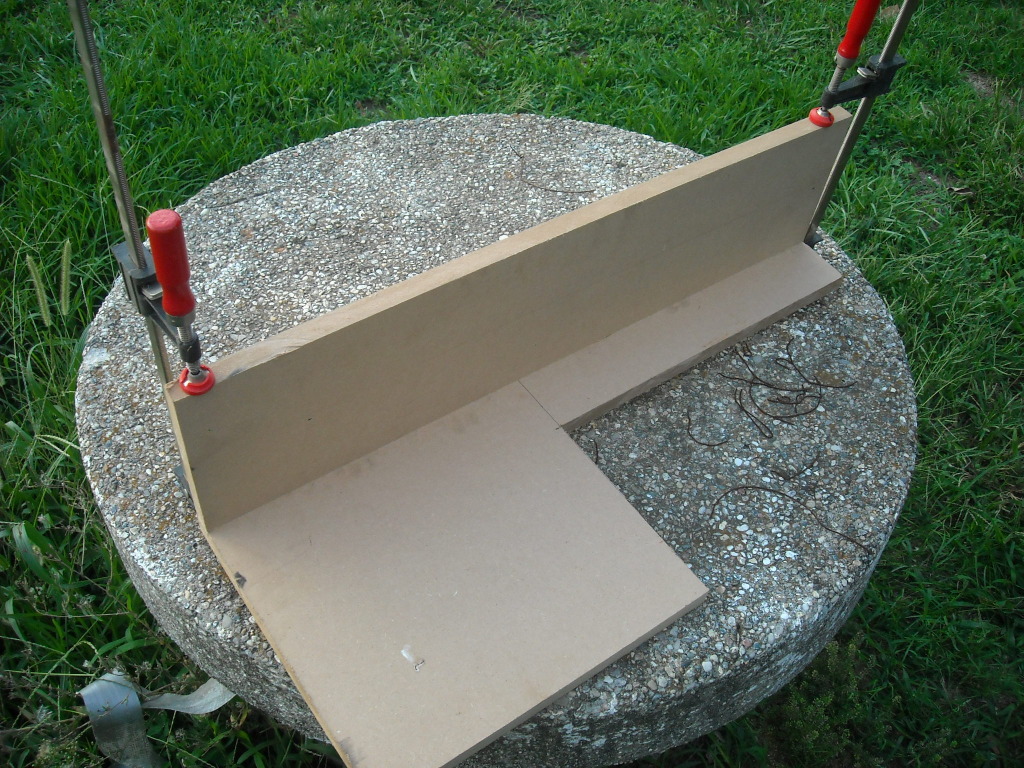
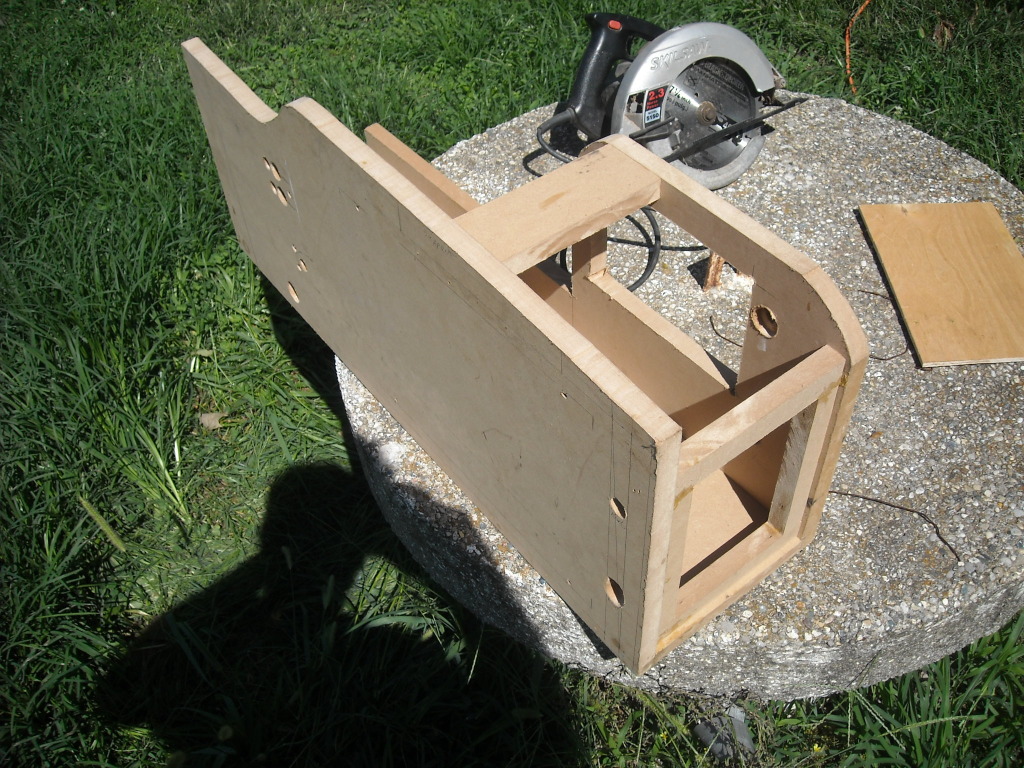
Here I've got the bottom and side cut out and getting them assembled. Total length for the rack is just shy of 30" and it's 8.75" tall.
Here's the picture of the mounting. I drilled 3 carriage bolts through from the bottom and put nuts and washers on them to compress the carpet. Then used a washer and a wing nut to secure the rack to the floor.
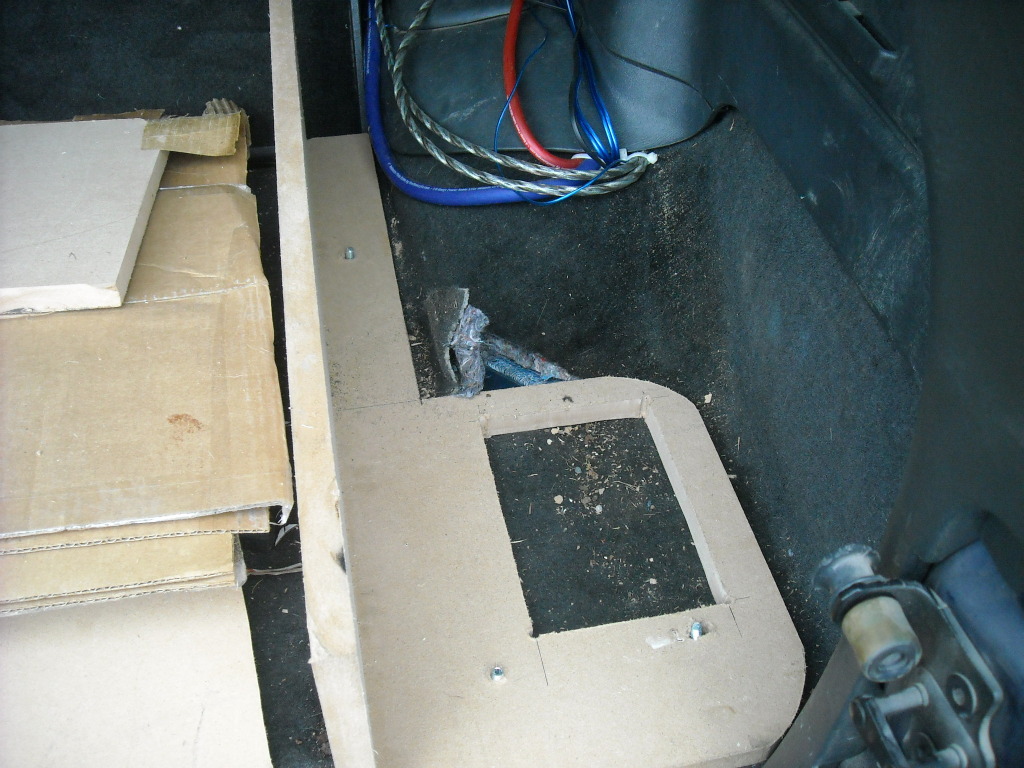
Here I've cut out a template for the top of the amp rack to follow the side of the interior.
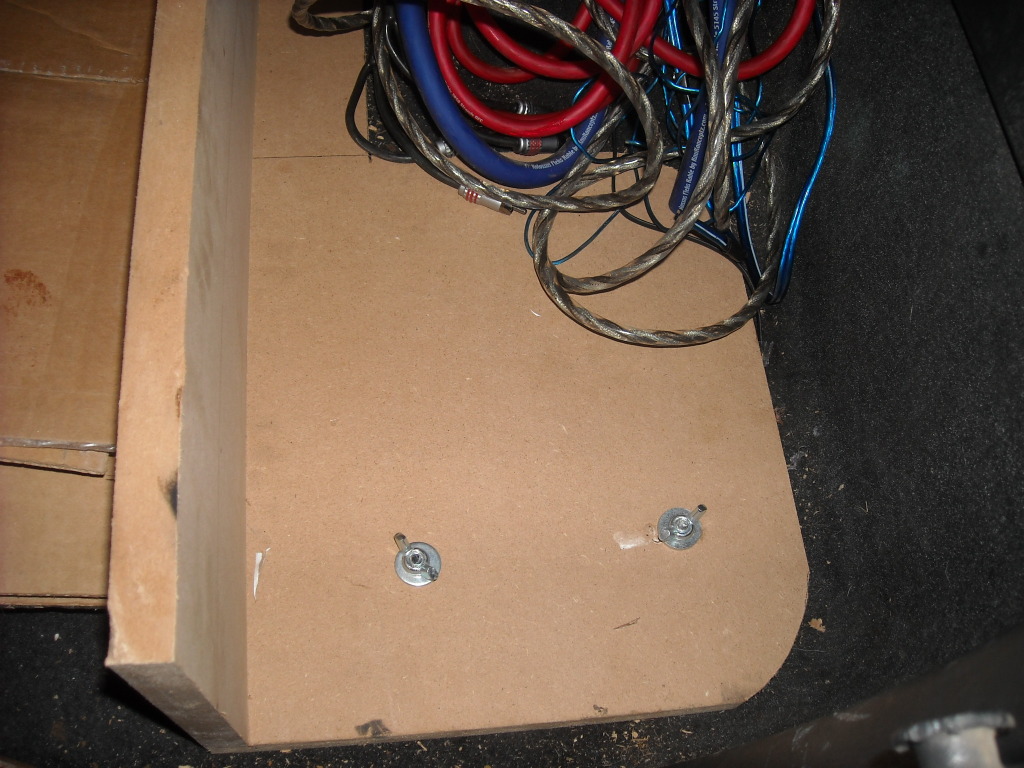
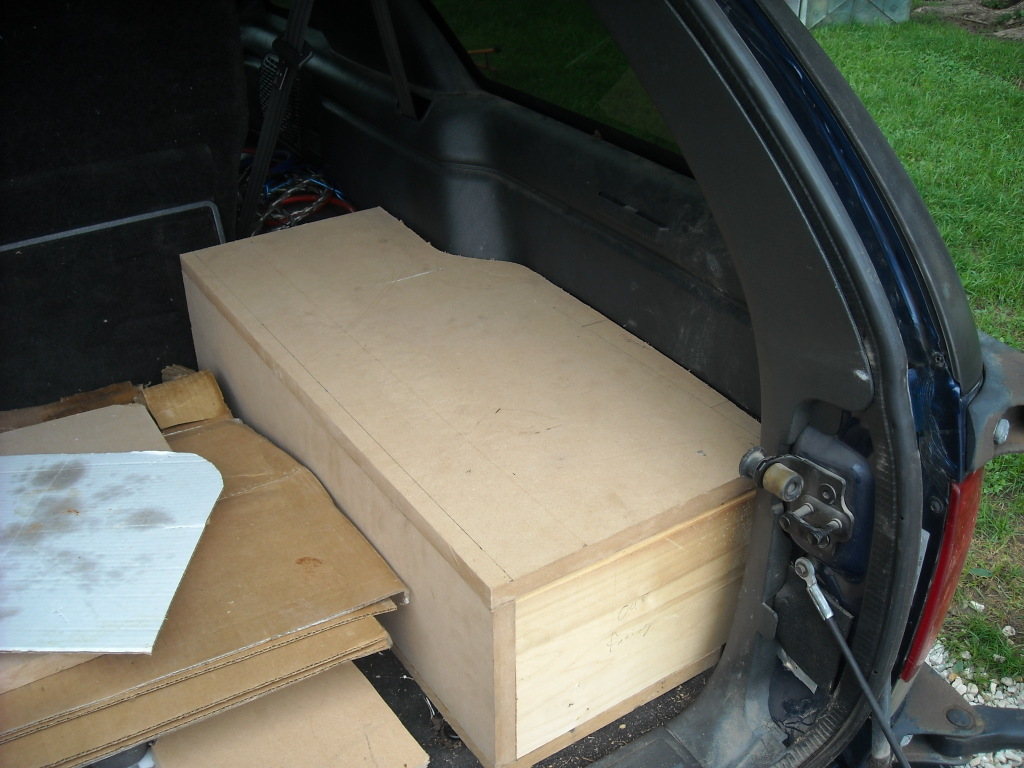
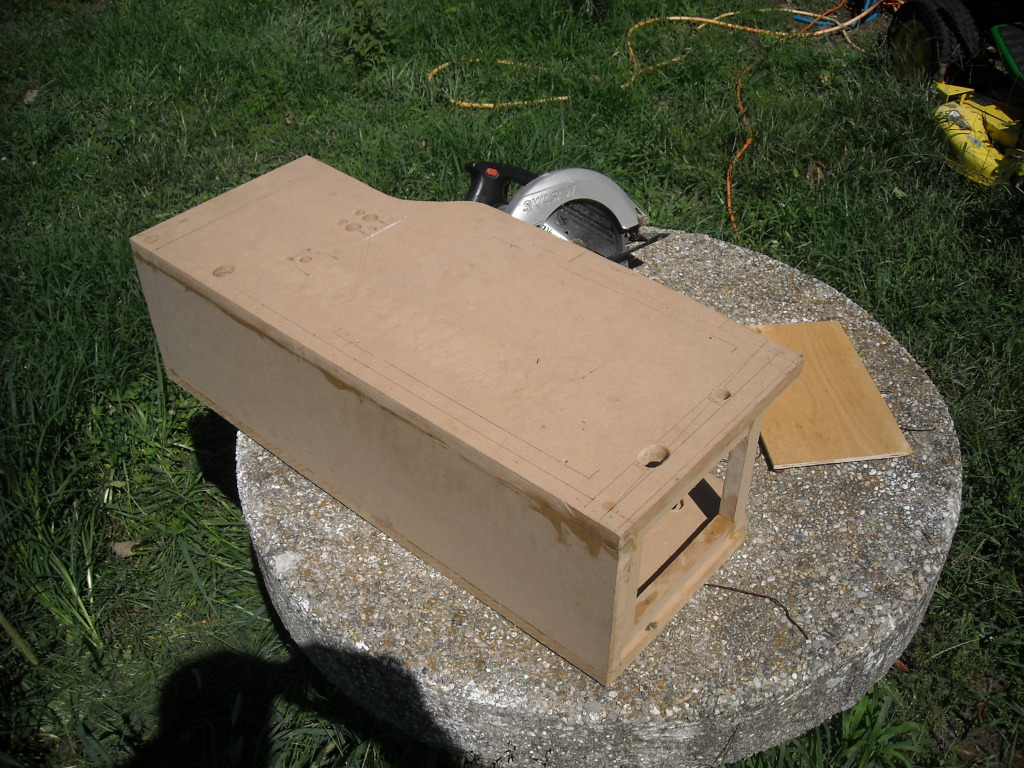
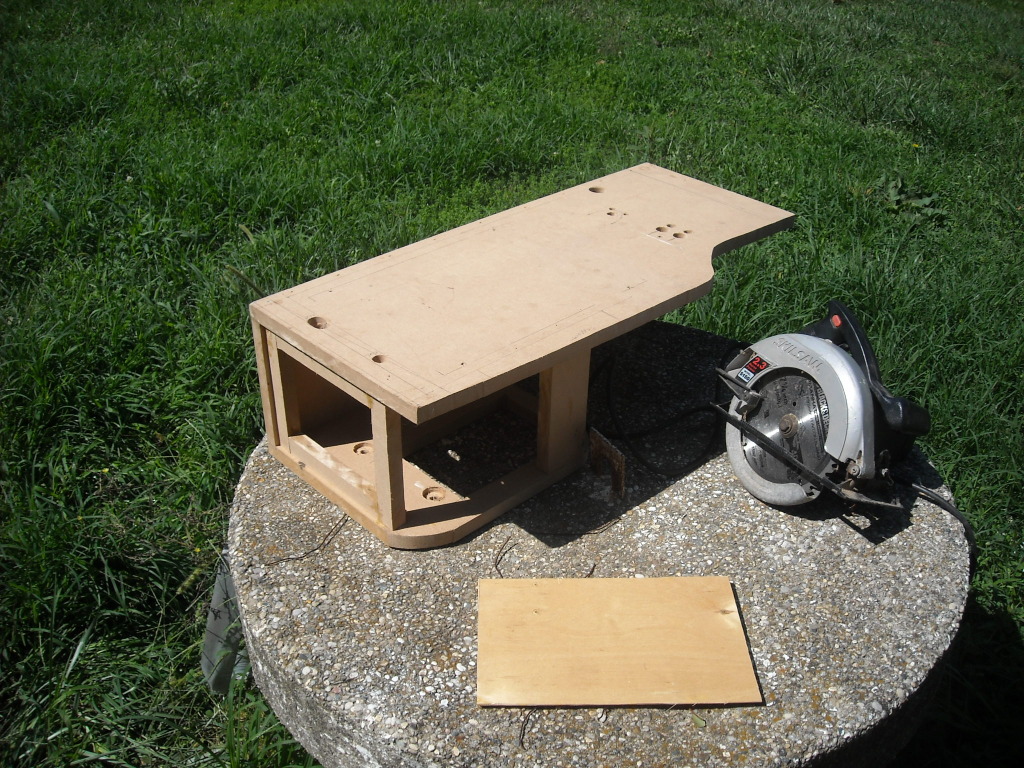
Here's the amp rack sitting in place with the cut out for the XSPower XP950 battery for the rear.
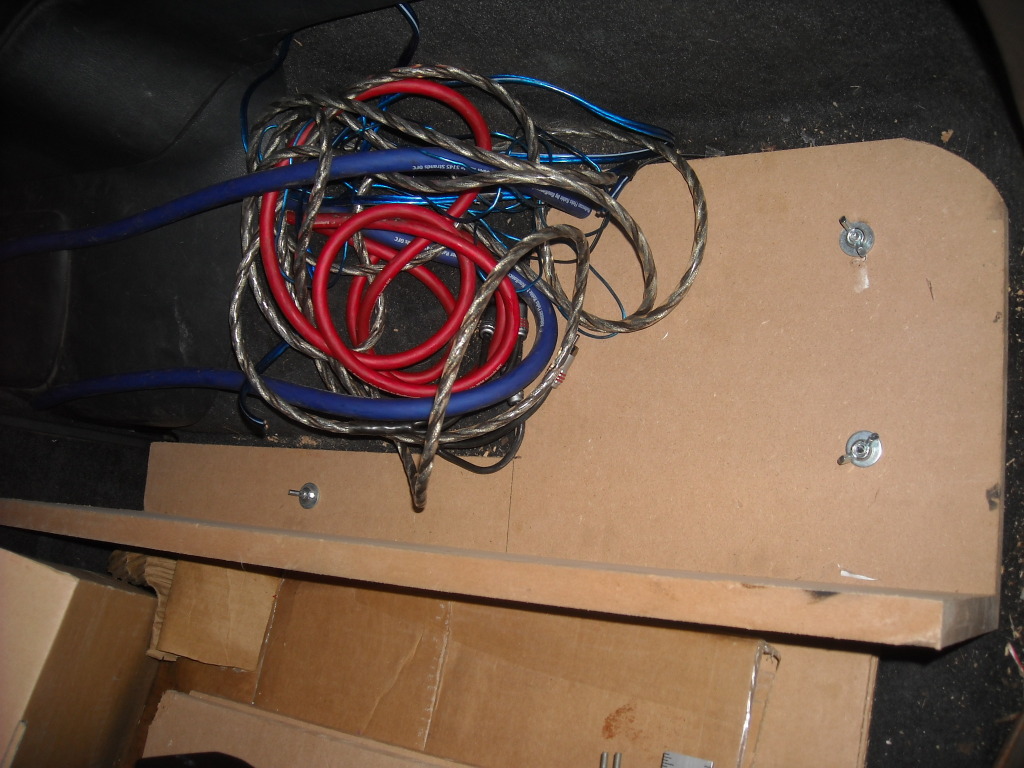
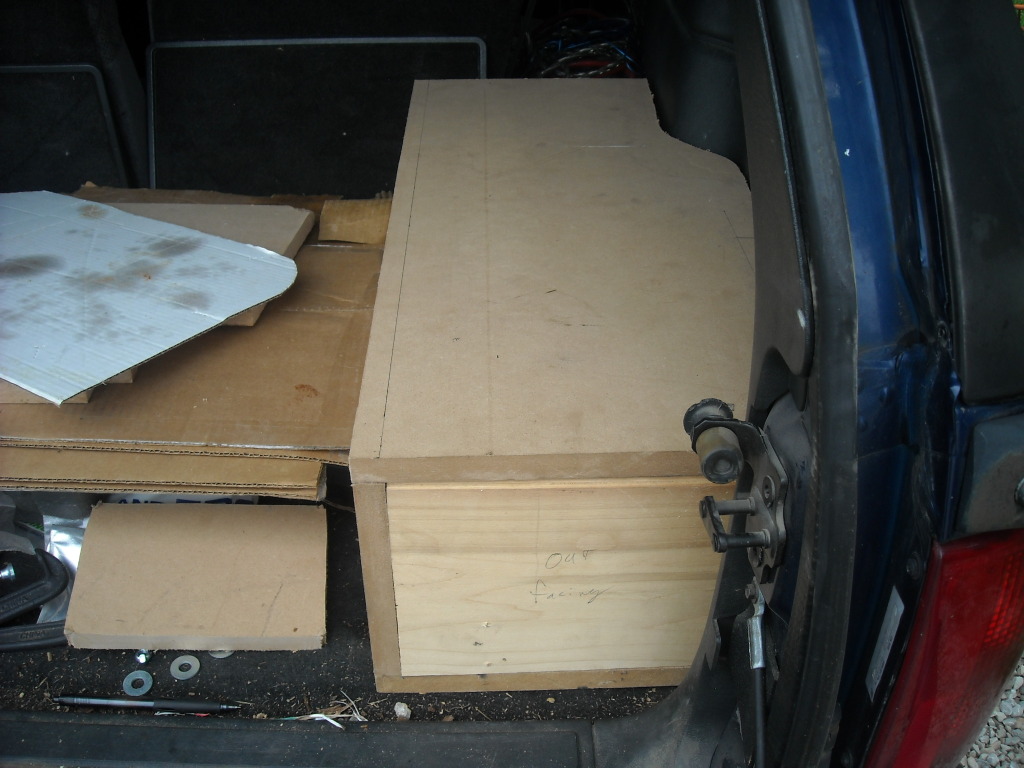
Finally here's the top and access door cut out and the amp rack mocked together to ensure everything fits snug together and looks like I had planned. Came out fairly close so far.
Hopefully I'll get it done and installed before the end of the weekend so I can see what these Bravox components can do with some real power applied.
Here I've got the bottom and side cut out and getting them assembled. Total length for the rack is just shy of 30" and it's 8.75" tall.
Here's the picture of the mounting. I drilled 3 carriage bolts through from the bottom and put nuts and washers on them to compress the carpet. Then used a washer and a wing nut to secure the rack to the floor.
Here I've cut out a template for the top of the amp rack to follow the side of the interior.
Here's the amp rack sitting in place with the cut out for the XSPower XP950 battery for the rear.
Finally here's the top and access door cut out and the amp rack mocked together to ensure everything fits snug together and looks like I had planned. Came out fairly close so far.
Hopefully I'll get it done and installed before the end of the weekend so I can see what these Bravox components can do with some real power applied.
Thread Starter
|
Senior Member
Joined: Oct 2010
Posts: 931
From: Monroe City, IN
I love their wire, all of it. Even the speaker wire seems to be a little oversize, which is a great thing, you're getting what you pay for. I've used all their wire, OFC, CCA, all their RCA's, etc. and haven't been disappointed yet.
Beginning Member
Joined: Aug 2012
Posts: 28
I see you placed your fuse holder under the hood in the same place I did. Great minds think alike. 
Also-- nice job on the sound deadening. Most people overlook that and wonder why they hear the exhaust and clutch fan over the radio. I did the same thing to my doors and side walls. I would LOVE to hit the floorboards with Dynamat Extreme too. It works wonders!
NICE WORK! Your components look BEEFY! (subs and doors)
**** my only criticism would be to hide your crossovers instead of bolting them where they may get kicked or bumped into on the "kickpanels". I mounted mine on the back wall of each side cubby. Easy to get to and out of the way.
Also-- nice job on the sound deadening. Most people overlook that and wonder why they hear the exhaust and clutch fan over the radio.
I did the same thing to my doors and side walls. I would LOVE to hit the floorboards with Dynamat Extreme too. It works wonders! NICE WORK! Your components look BEEFY! (subs and doors)
**** my only criticism would be to hide your crossovers instead of bolting them where they may get kicked or bumped into on the "kickpanels". I mounted mine on the back wall of each side cubby. Easy to get to and out of the way.
Last edited by 6781camaro; Sep 9, 2012 at 06:46 PM.
Thread Starter
|
Senior Member
Joined: Oct 2010
Posts: 931
From: Monroe City, IN
Thanks man, it's nice having someone comment in detail. As for the crossovers, it's an, to each his own kind of thing. I actually kinda like having them there where they're visible for two reasons. First is it helps aid the explanation of what a component set is and how it works to the local kids. Second is that it leaves them handy to play with as I'm still changing phases on the tweeters/mids to get the sound exactly like I want. I appreciate the criticism tho and I'll likely hide them at a later date when I know I'm done playing with things for sure.
Thread Starter
|
Senior Member
Joined: Oct 2010
Posts: 931
From: Monroe City, IN
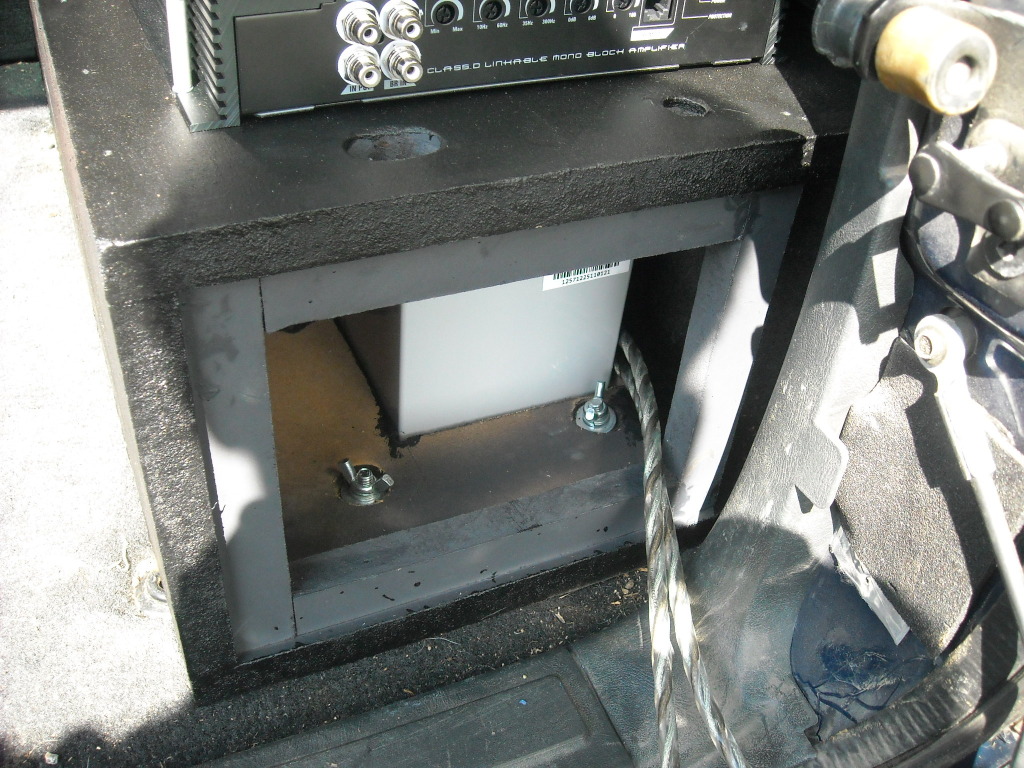
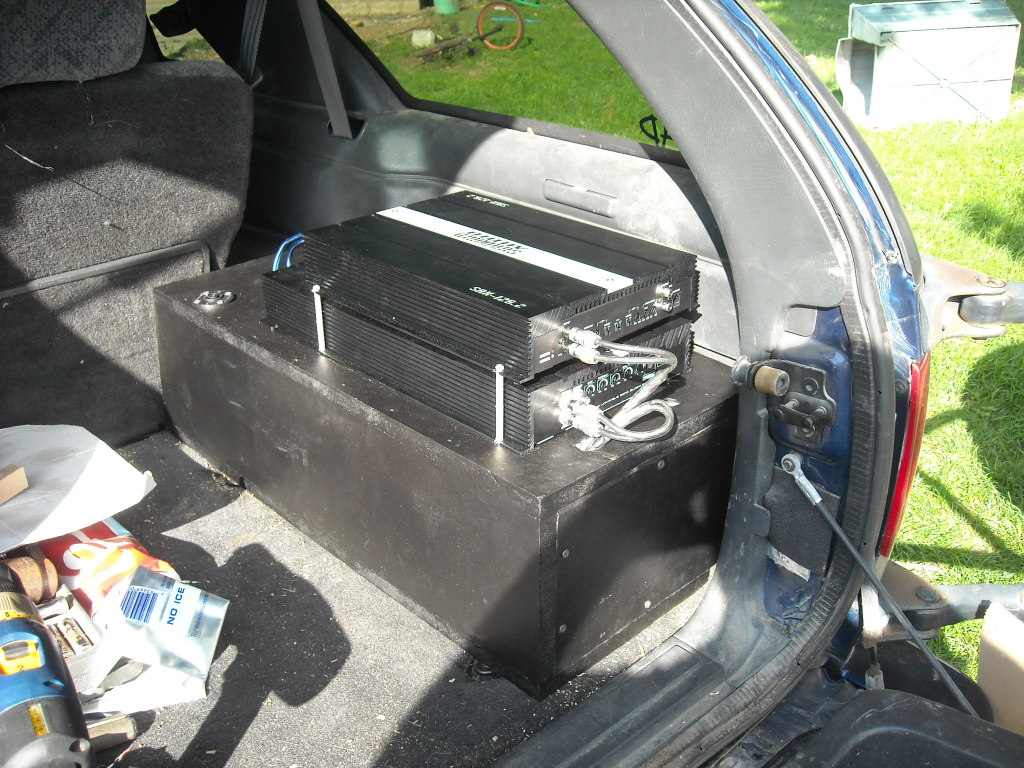
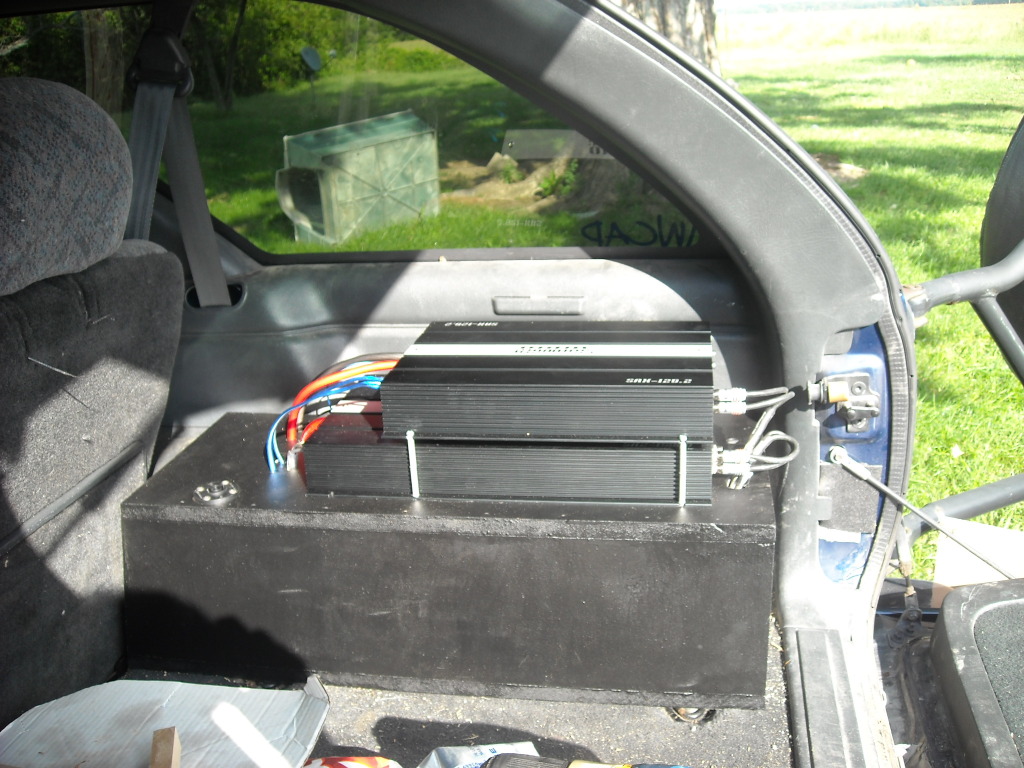
Okay, the amp rack is done, installed and the 125.2 is running the Bravox components like the clean powerhouse I expected it to be. Those components have been well worth the modest price I paid for them while using them on the HU and with the amp running them that is even more evident. I have A LOT of tuning to do yet with the new found power, but so far the difference is exactly what I expected. Although I do have to say that the internal amp on the HU is definitely a powerful little chip and ran the Bravox's quite well considering the low power. As for the amp rack, I'm quite pleased with how it turned out except for a few little things, nothing big enough to really bother me, I just know I could have done better with it. On to the pictures.
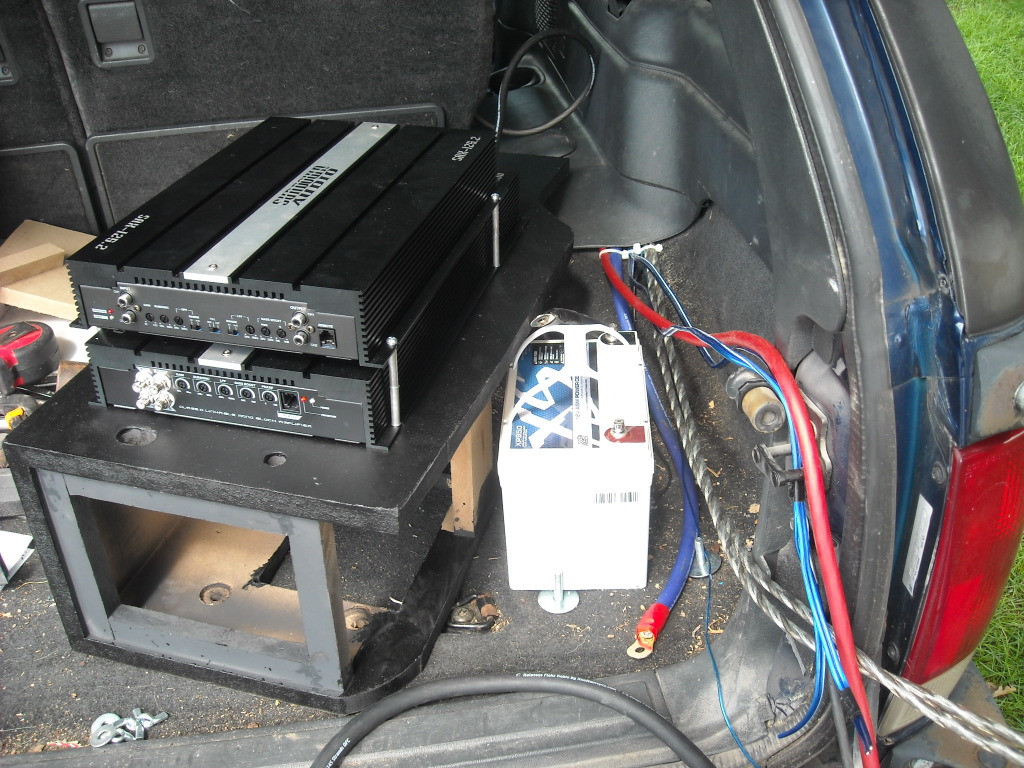
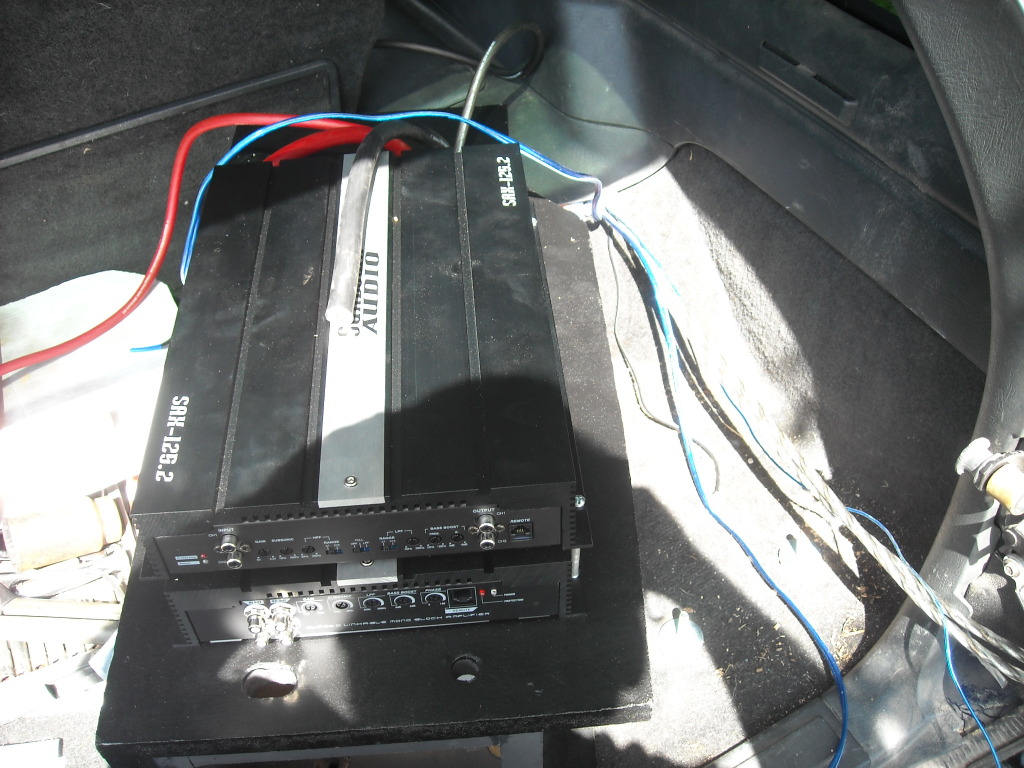
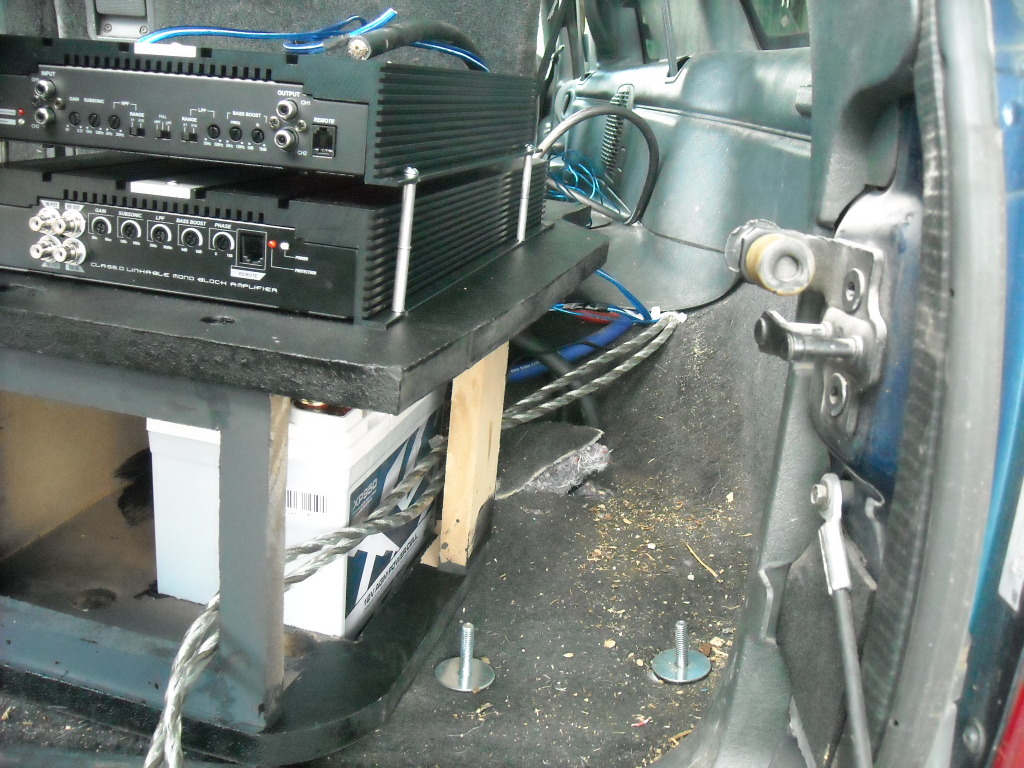
Here's the pics of the final assembly. Went together just like it was supposed to.
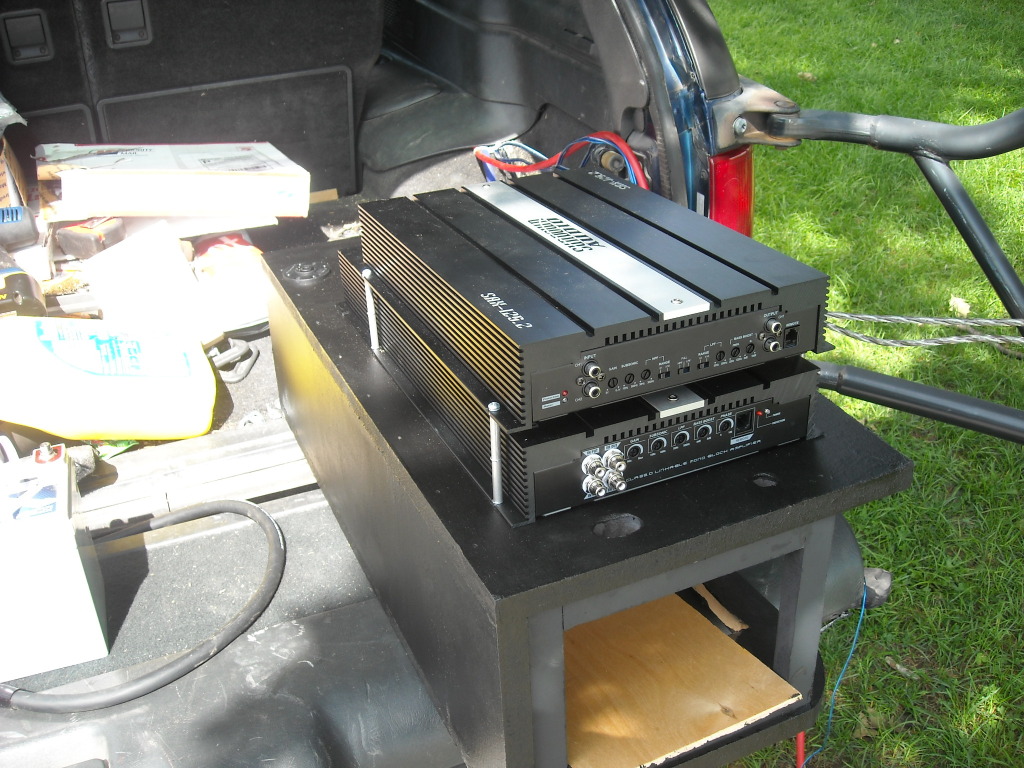
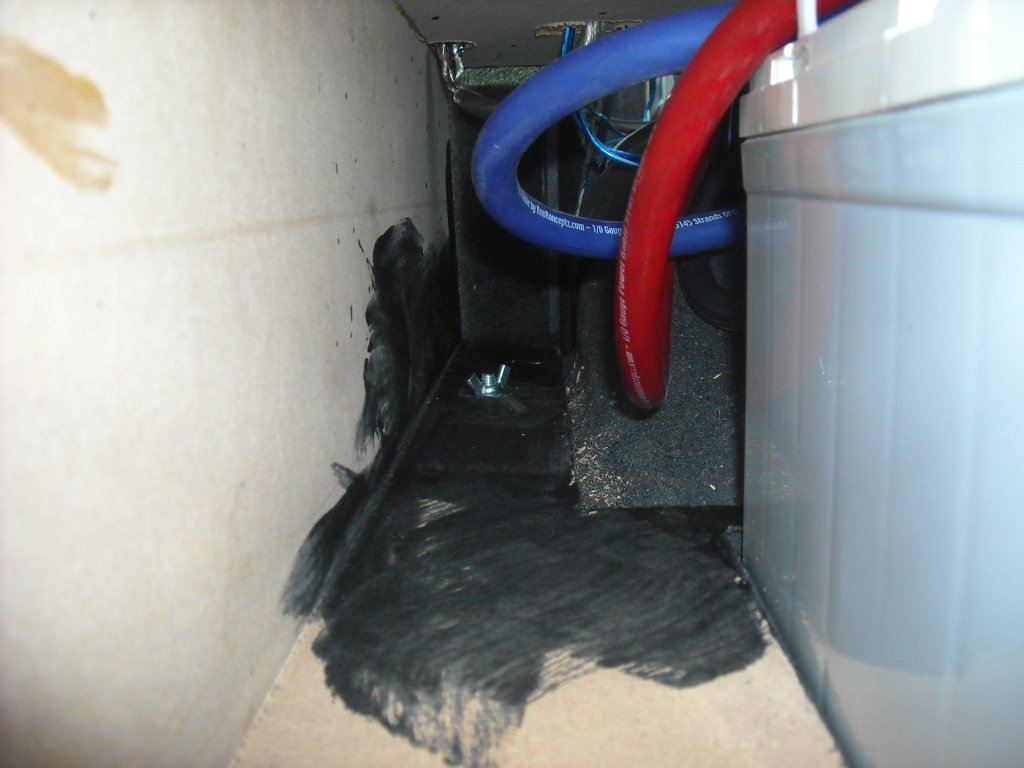
Here's a couple of pictures of the ground for the battery and 125.2. I bolted the grounds to the floor with a cable running to the frame. I also covered that bracket on the frame and where the cable bolts to the bottom of the floor with the bedliner I used on the amp rack to keep the connections clean and prevent rust but didn't figure it was picture worthy.
The pics jump right to the installation at this point. I just didn't see the need to include everything in between. Here you can see the amps mounted on the rack with the bedliner all done on it. This is one of my little **** ups from getting in a hurry that I'm hating. I got my router with roundover bit laid out and ready to go before I applied the bedliner but got in such a hurry that I completely spaced picking it up and using it. So none of the edges or corners are rounded like they were supposed to be. I figure if something ever happens and I have to redo something I'll do it then and refinish the bedliner on it.
Got the cables all pulled out straight and ready for it to go in.
Here's the XP950 sitting ready to be connected and installed.
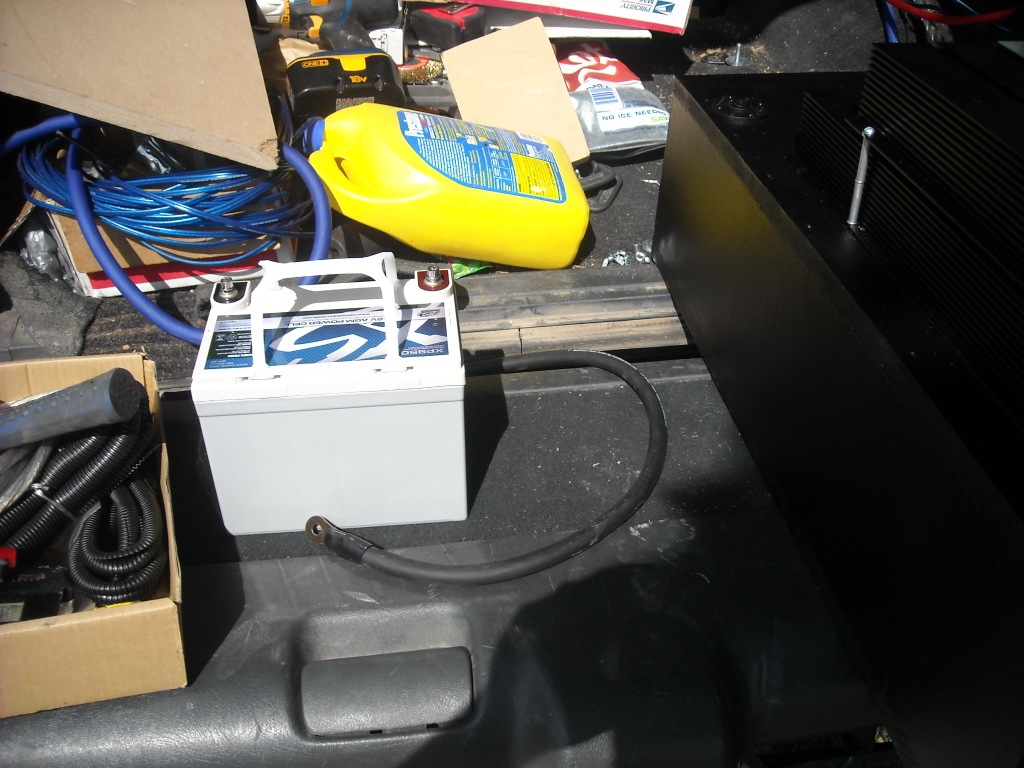
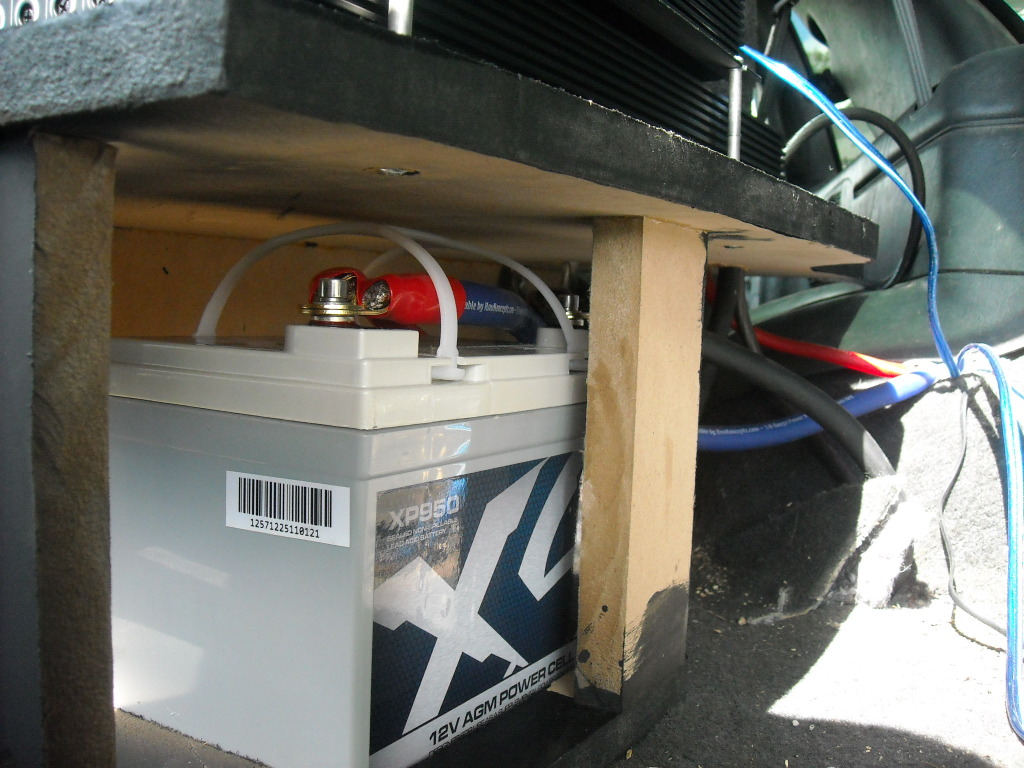
Got the battery connected and set in place in the rack. Everything was measured so closely that I won't have to worry about it going ANYWHERE in there.
Getting all the wires and cables pulled up through the board and laid in place.

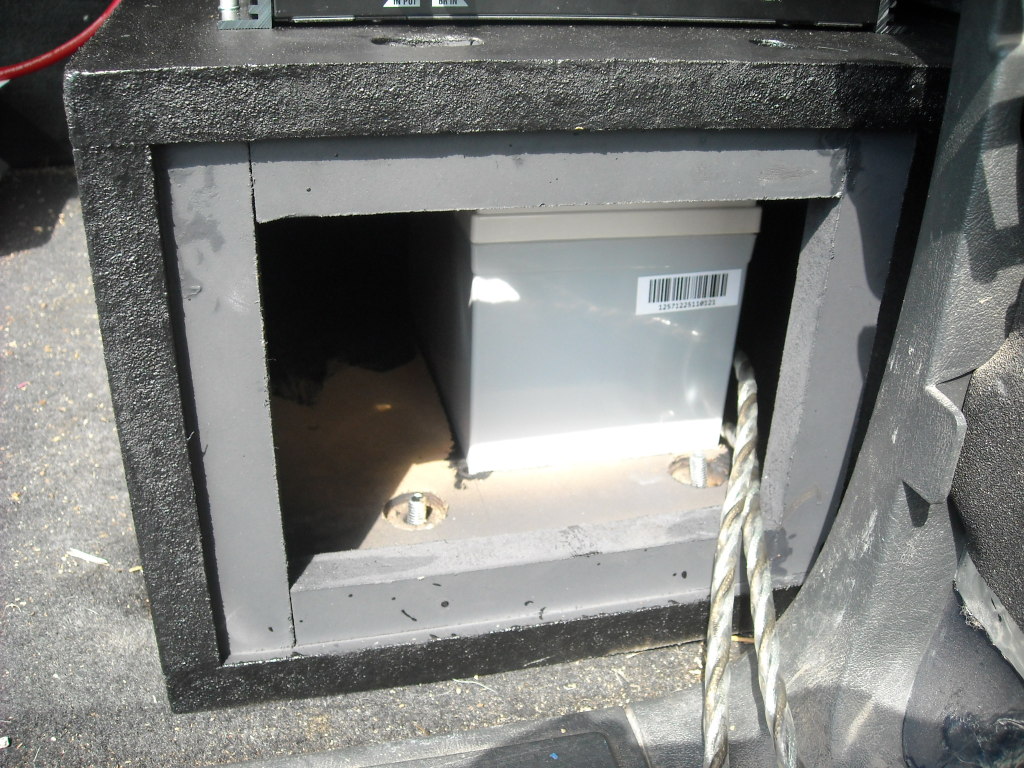
Here's the rack set in place over the carriage bolts. As you can see with the bolts and wing nuts holding it I shouldn't have to worry about the rack going anywhere and it makes it quite easy to remove again if needed. The last one is a bit of a reach, but again, everything was measured so well that my arm still easily fits in there to get to it.
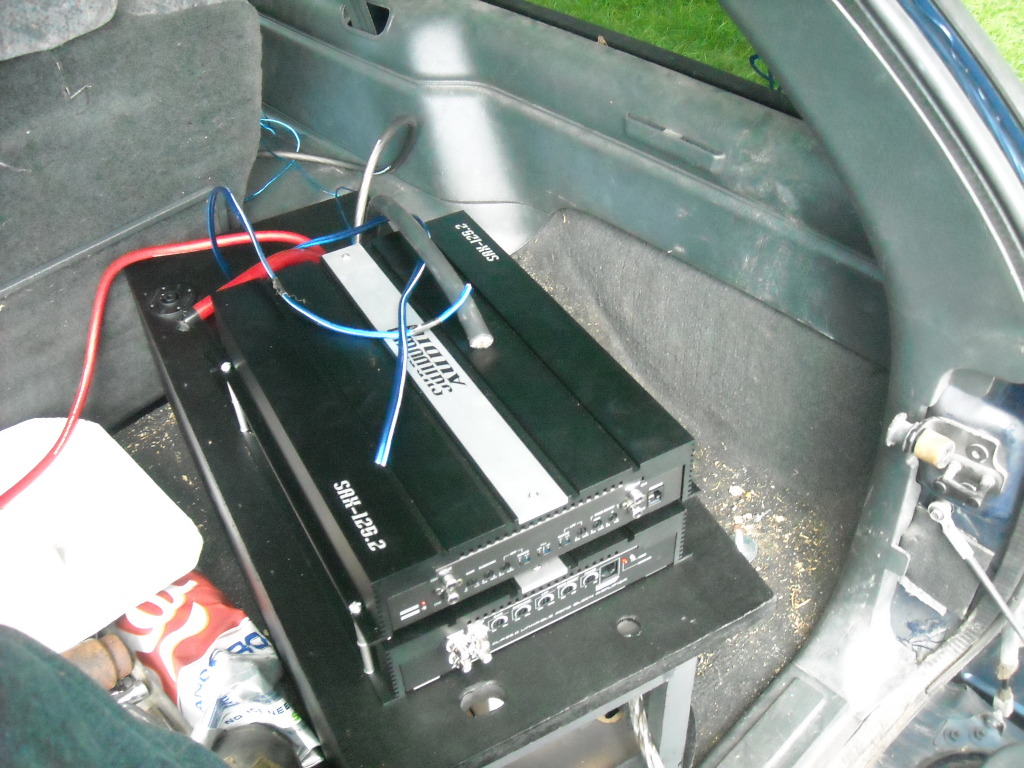
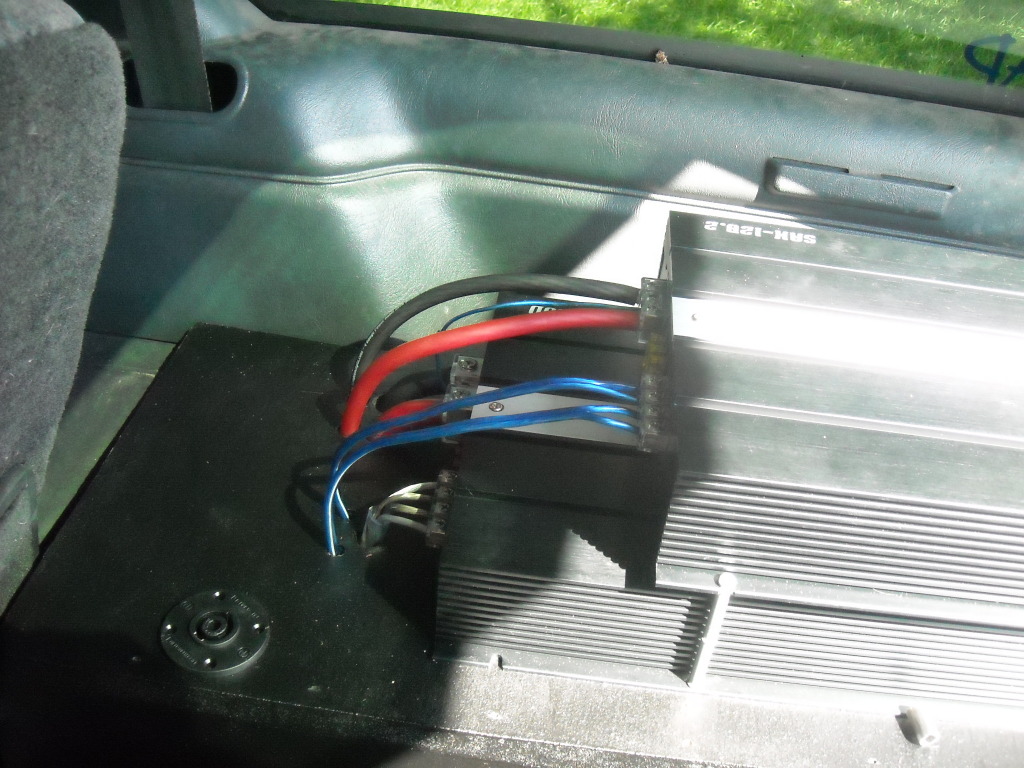
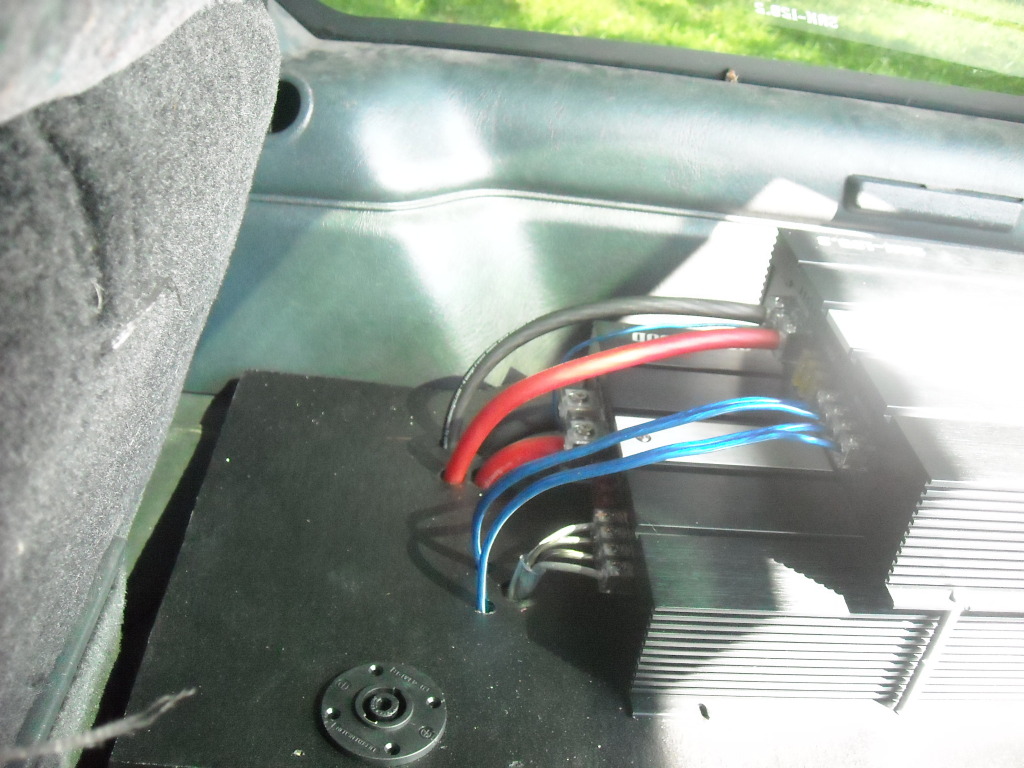
Got the wires pulled up and connected to the amps.
The power wires connected to the front battery.

And lastly the finished product. The things that annoy me with it finished is that the top board of the rack isn't as close to the side of the truck as I had planned, even though it was just right on the test fit it somehow came out with about a 3/8" gap. Not bad, but it shouldn't have been that far off. The other thing, if you notice the empty hole on the back of the rack there, is that the remote **** wire ended up being about 8" too short to reach the 1500. Easily remedied with a phone wire extension cable, but still annoying. So, besides the lack of rounded edges, the gap and the short wire it pretty well came out like I planned.
Onto the enclosure build!!!
Here's the pics of the final assembly. Went together just like it was supposed to.
Here's a couple of pictures of the ground for the battery and 125.2. I bolted the grounds to the floor with a cable running to the frame. I also covered that bracket on the frame and where the cable bolts to the bottom of the floor with the bedliner I used on the amp rack to keep the connections clean and prevent rust but didn't figure it was picture worthy.
The pics jump right to the installation at this point. I just didn't see the need to include everything in between. Here you can see the amps mounted on the rack with the bedliner all done on it. This is one of my little **** ups from getting in a hurry that I'm hating. I got my router with roundover bit laid out and ready to go before I applied the bedliner but got in such a hurry that I completely spaced picking it up and using it. So none of the edges or corners are rounded like they were supposed to be. I figure if something ever happens and I have to redo something I'll do it then and refinish the bedliner on it.
Got the cables all pulled out straight and ready for it to go in.
Here's the XP950 sitting ready to be connected and installed.
Got the battery connected and set in place in the rack. Everything was measured so closely that I won't have to worry about it going ANYWHERE in there.
Getting all the wires and cables pulled up through the board and laid in place.
Here's the rack set in place over the carriage bolts. As you can see with the bolts and wing nuts holding it I shouldn't have to worry about the rack going anywhere and it makes it quite easy to remove again if needed. The last one is a bit of a reach, but again, everything was measured so well that my arm still easily fits in there to get to it.
Got the wires pulled up and connected to the amps.
The power wires connected to the front battery.
And lastly the finished product. The things that annoy me with it finished is that the top board of the rack isn't as close to the side of the truck as I had planned, even though it was just right on the test fit it somehow came out with about a 3/8" gap. Not bad, but it shouldn't have been that far off. The other thing, if you notice the empty hole on the back of the rack there, is that the remote **** wire ended up being about 8" too short to reach the 1500. Easily remedied with a phone wire extension cable, but still annoying. So, besides the lack of rounded edges, the gap and the short wire it pretty well came out like I planned.
Onto the enclosure build!!!