When you click on links to various merchants on this site and make a purchase, this can result in this site earning a commission. Affiliate programs and affiliations include, but are not limited to, the eBay Partner Network.
Sounds that you've got that problem licked. I, too, have made it so the tranny/engine won't overheat when towing here in Colorado over the passes. I bought a 2001 Chevy 2500HD with the Alison/Duramax combo. The truck doesn't even know I'm towing my camper over passes above 10,000 feet. My Blazer would do it but I was pretty much limited to going about 25-30 mph with the rpms at 2500-3000. Never did over heat but I did have the windows down would turn the heat on full blast if temps started getting a bit high for comfort.
Sounds that you've got that problem licked. I, too, have made it so the tranny/engine won't overheat when towing here in Colorado over the passes. I bought a 2001 Chevy 2500HD with the Alison/Duramax combo. The truck doesn't even know I'm towing my camper over passes above 10,000 feet. My Blazer would do it but I was pretty much limited to going about 25-30 mph with the rpms at 2500-3000. Never did over heat but I did have the windows down would turn the heat on full blast if temps started getting a bit high for comfort.
Thanks, the peace of mind the cooling system has given me is wonderful.
You also reminded me that I did have the AC on too!
I obviously wouldnt need the upper control arms so I could just resell those but I'm currently shopping for a kit that sells every other compnent, open to suggestions.
Awesome, thats the one I was looking at as well as the following when I redo my suspension and steering.
...
I obviously wouldnt need the upper control arms so I could just resell those but I'm currently shopping for a kit that sells every other compnent, open to suggestions.
Also, did you swap your spindles out?
Spindles? Are you referring to the steering knuckles and front wheel bearings? If so, then no. Those were stock. I have had to replace each of the front bearings once over the course of owning the truck the last 12 years.
As for my upper control arms, I added the RC upper control arms from their 2.5" lift. The only other RC part I added was the later addition of the steering stabilizer.
When I get my truck in the garage for its fall preventative maintenance soon, I'll be taking a look again at the suspension height to see if perhaps I might want to install new torsion bar keys to help with the front end height adjustment. At the moment the stock ones have their adjustment bolts screwed all the way in.
I've been meaning to do this mod for quite a while now. It was a bit more involved than I expected, that was more of my own doing due to my attempt to make the install as stock-looking as possible.
The key part is GM 15990293; "Lamp Assembly, Underhood (Reel Type)."
I learned that there are a few versions of these, I could not find one in my go-to "U-Pull" yard, and that those for sale on eBay are often damaged! (see below for what to look for when buying one)
If you want to buy one of these for yourself, be sure it has the retaining mechanism and mounting holes that are placed where we would need them. I found one by someone on eBay who refurbishes these and tests them. He also adds back a magnet on the base of the light that is often lost. You will also want to make sure you get the pig-tail electrical connection too as although you can get the proper connectors, it adds another step.
For the bulbs, I discovered that it is hard to find LED bulbs that have the LEDs enclosed. I wanted this for at least the original under-hood light since it is exposed to the elements (sort of).
For my install, I decided to try for an installation that was as stock-ish as possible. This required me to get a new connector for the lamp body, the GM style wire loom retainers, and modify the power connector for the 12V supply that is for the original lamp.
1 Metri-Pack 150 female, 16 ga crimp connector (this was for creating a splice at the plug for the light 12V supply)
67 LED Light Bulb - (12) SMD LED Tower - BA15S Base (from SuperBrightLEDs.com)
1156 LED Boat and RV Light Bulb w/ Stock Cover - 36 SMD LED Tower - BA15S Retrofit - 290 Lumens (from SuperBrightLEDs.com)
Metri-Pack 150.2 Series Connector Set 2 Way Female with Terminals 2 Pack (eBay)
Steps:
Locating the new light:
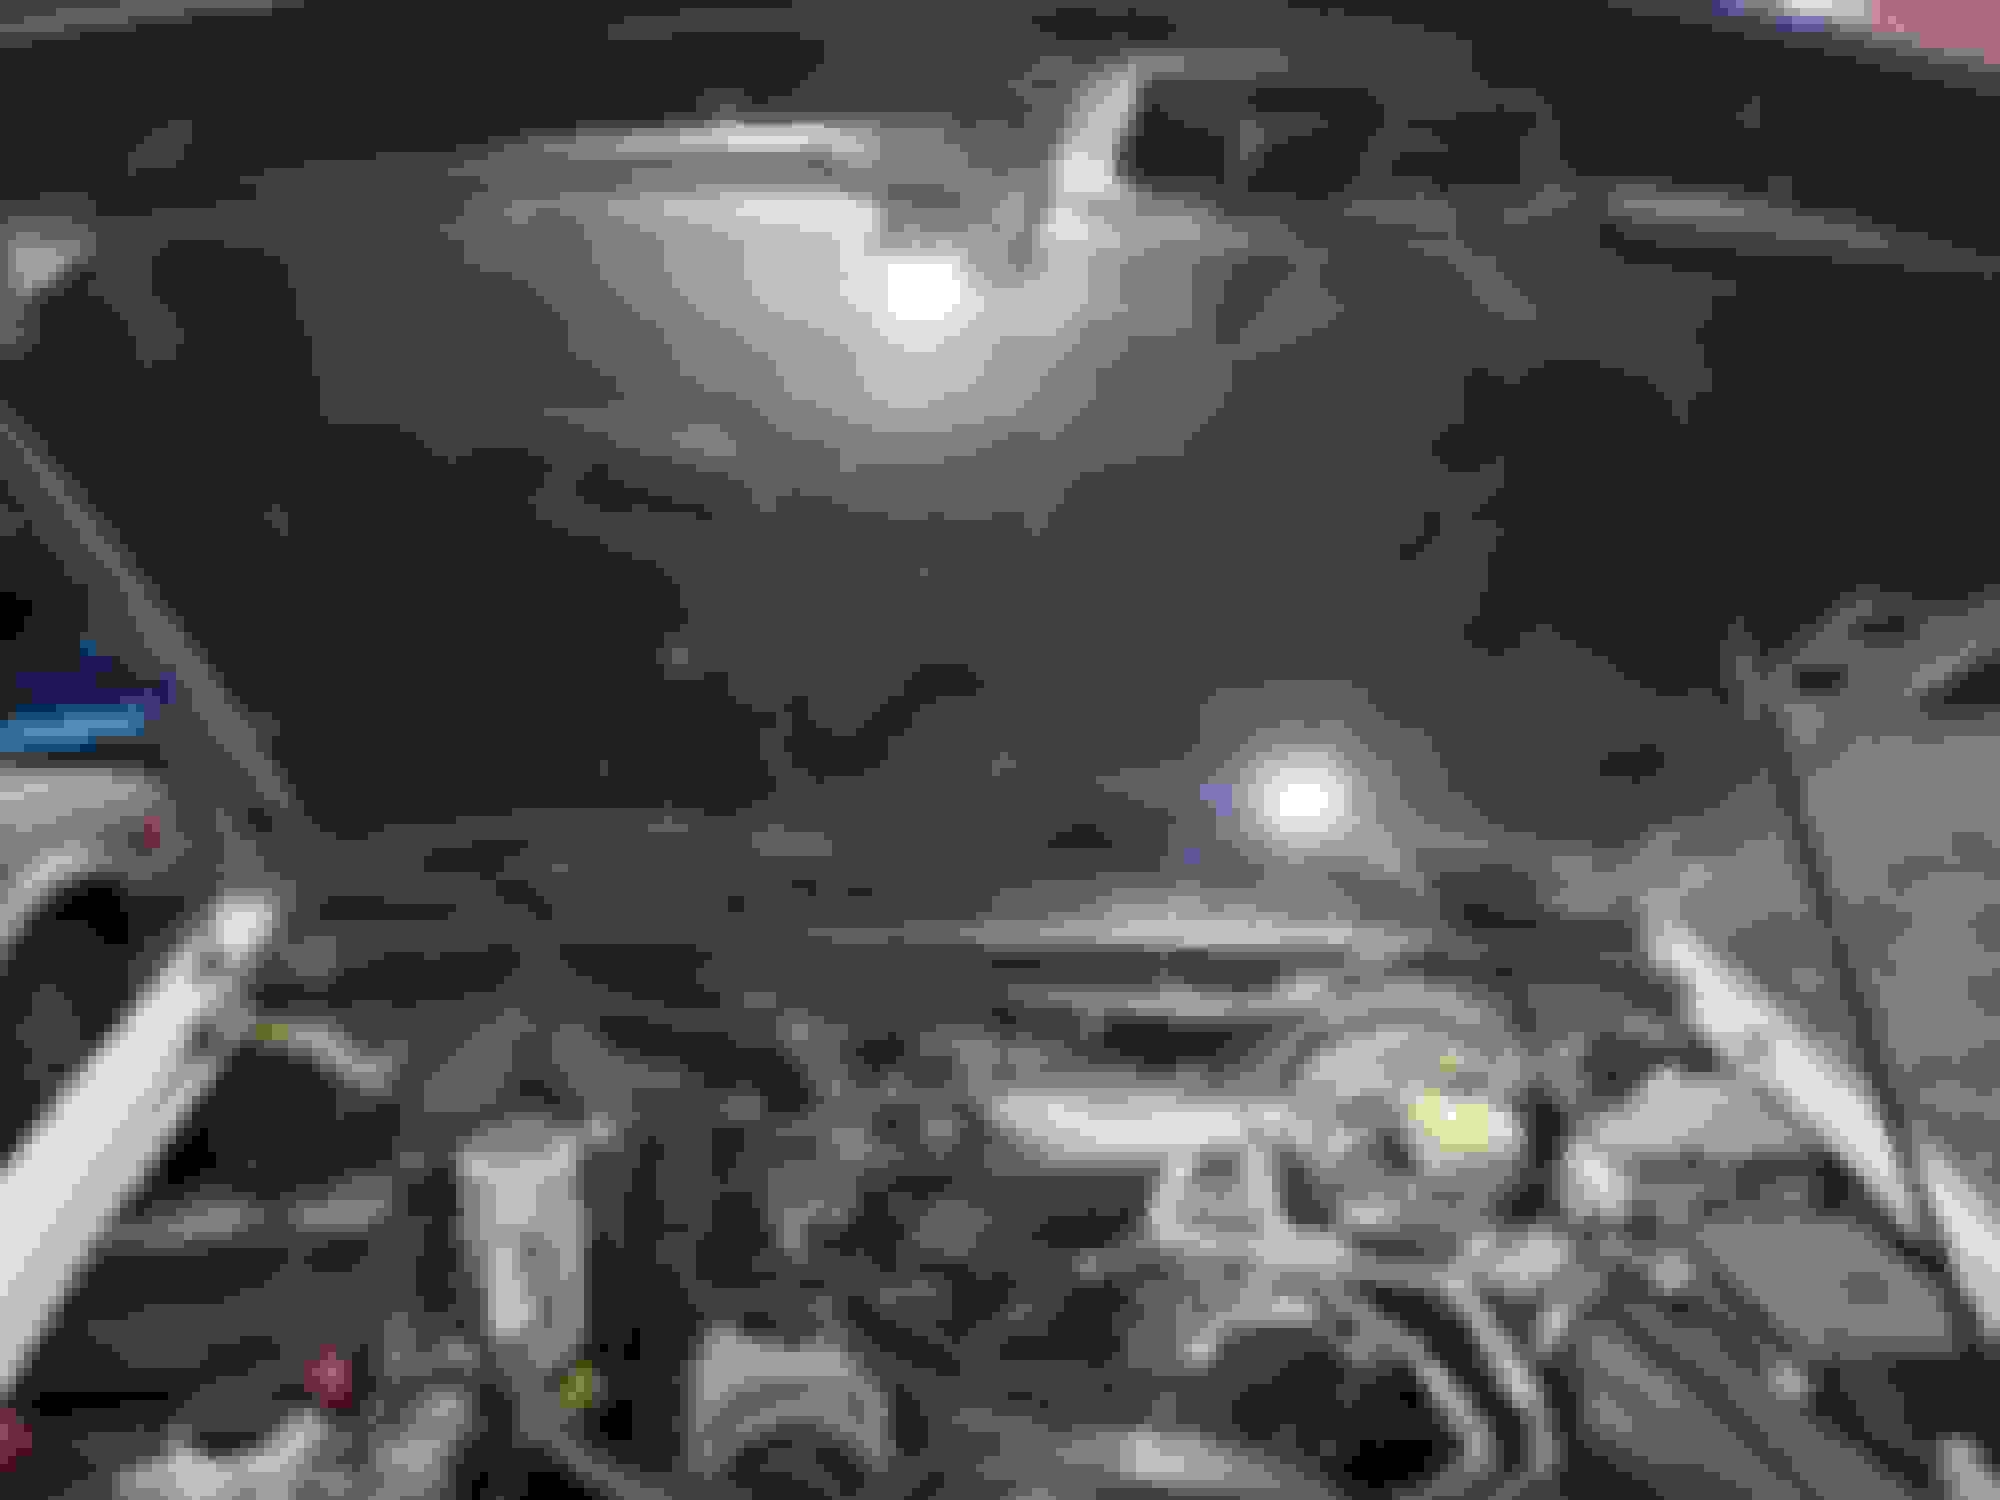
With our crowded engine compartments, locating the light properly was something I didn't want to get wrong. What turned out to be a great location was between the AC evaporator can and where the air supply snorkel attaches to the throttle-body. This also turned out to be where there was a raised portion of the hood reinforcement so that I could drill and screw into the sheet metal without worrying about hitting the underside of the outer hood skin.
With the location outlined with painters tape, I placed the new light and used my hand-punch to create holes for the mounting screw locations. My light assembly came with the original mounting screws so I used those. They were a fine threaded self drilling type. I still created a pilot hold for each screw. Not all of these lights have the same mounting screw locations. See below for the style I used and the locations I used. As you can see I was able to get it horizontal.
I drilled and screwed in one screw at a time to ensure I kept all the mounting holes aligned, The hood insulation complicates this a bit. After drilling the holes, I used a utility knife to cut a bit of the insulation out so that the built-in standoffs at the new light mounting points would be in contact with the metal to keep it from moving after being screwed into place.
Splicing the power supply:
This is where I made it hard on myself. I wanted the installation to look as OEM as possible. This required creating a whole new wire harness for the new light. This is where the Metri-Pack 150.2 two-way plug came in. I also purposely got orange primary wire to be consistent with the other wiring in the truck. Then I had to disassemble the plug for the original under-hood light to have both the 12V wires for the original and new light come from it. I already had some Metri-Pack 150 connectors from some other work I did for my truck so I didn't need to order any new parts. I also got some wire loom cover/tubing and then the GM style loom brackets to hold everything in place.
I attempted to make it so that the power to the new light was also switched by the mercury switch that controls the original under-hood light. After disassembling it, I found that there was no way to tap into this. So the new light has 12V to it at all times.
Pictures with details: The final installation of new light.
Close up of new light and wiring harness.
The new light with the light removed and mounted to underside of hood.
Approximate mounting position of new light outlined in red.
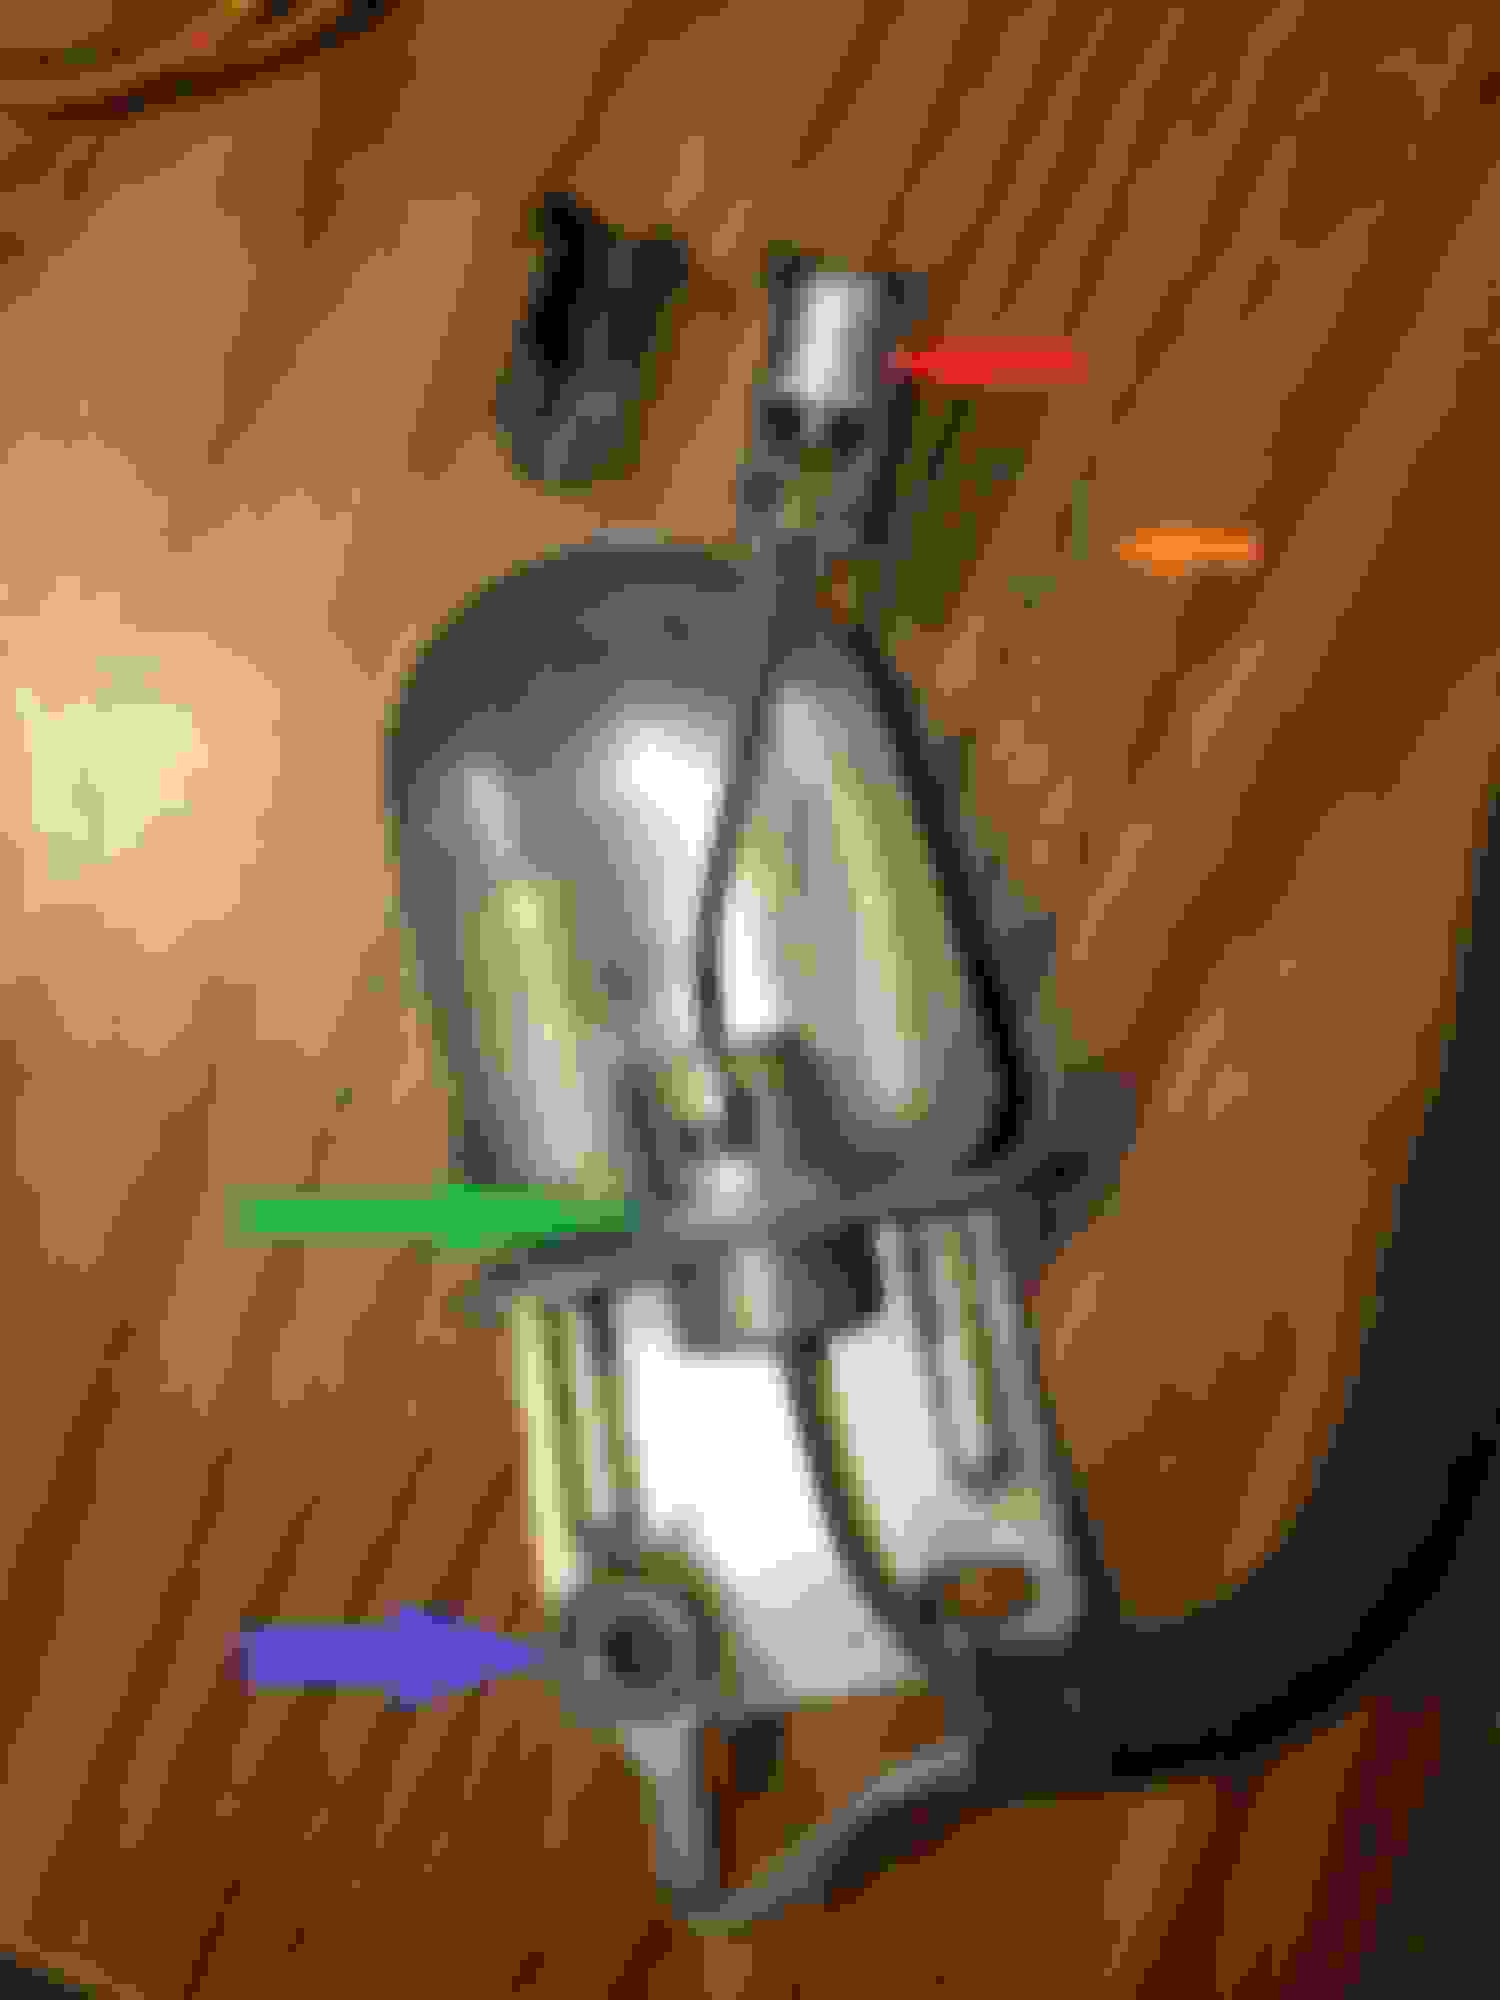
Anatomy of the OEM under-hood light:
The mercury switch is the silver capsule marked by the red arrow. It is enclosed in a two-piece plastic body that is pushed down from the top of the bulb socket in which there is a spring (green arrow). The two-piece plastic body is held together and kept from pushed out by the spring by the C-clip (orange arrow).
I discovered that the ground connection (blue arrow) was not very good. I decided to improve it by filing away some of the oxidation on the back and adding a bit of solder. I had to use my butane torch to get it hot enough to have the solder stick to the metal.
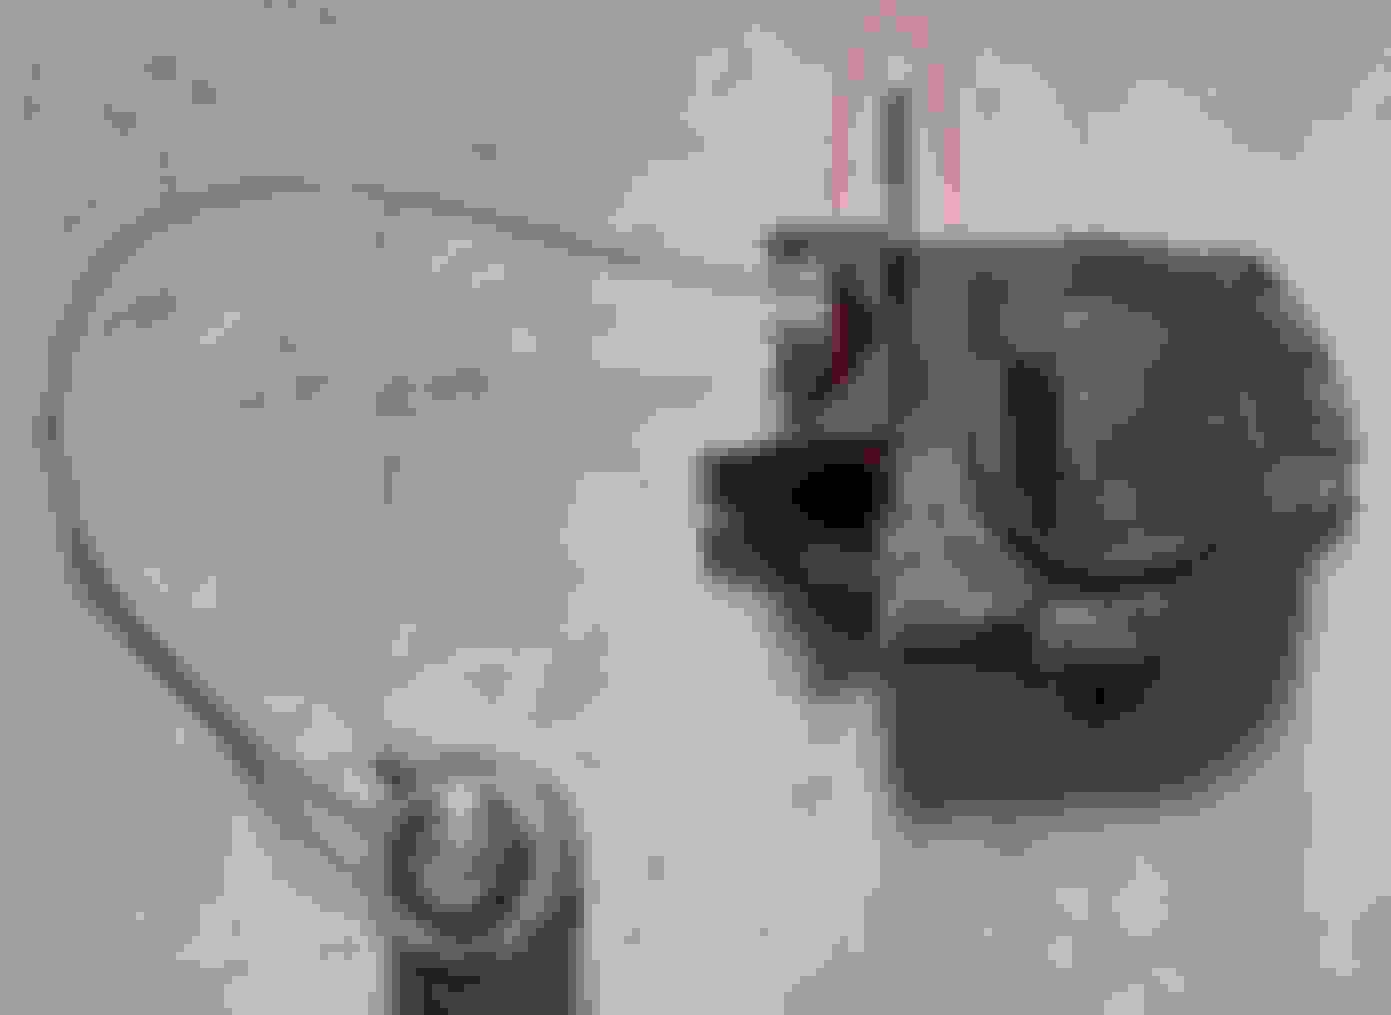
Top view of light.
The red oval shows that swing-away retaining clip that is often broken off on the lights that are for sale on eBay.
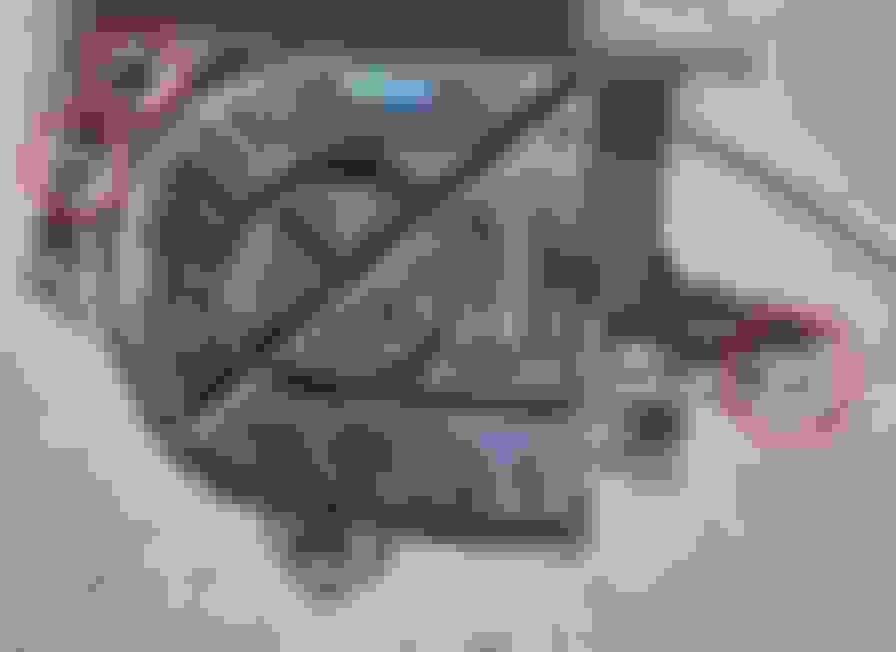
The mounting holes I used. Not all of these lights have these at these positions. Have quite a few from which to choose makes the mounting much easier.
Last edited by christine_208; 10-11-2022 at 12:08 AM.

 07-29-2022, 06:54 PM