Upper and Lower K5 Ball Joint Rivets: What do the pros do?
#11
 05-29-2012, 08:47 PM


Chevy dropped the "K5" moniker after 1988. Notice how on 1989-1991 Blazer's the "K5 Blazer" badge is not on the front fenders.
#12
05-30-2012, 03:21 AM

Chevy dropped the "K5" moniker after 1988. Notice how on 1989-1991 Blazer's the "K5 Blazer" badge is not on the front fenders.
EDIT: Wikipedia offers the answer: K1500 Blazer. Glamorous. Though they also imply it's still somehow a K5 by lumping it in that page.
I guess I'm just going to pony up and get an IR 118MAX, which seems like it should be able to take care of business. I figure I'll just sell it back on eBay if it doesn't make my life better in a way the ole' Harbor Freight model doesn't, and not have spent too much on the experiment in the end. If the difference is anything like the difference between my cheap HF impact gun and my good one, it might make all the difference in the world.
If that doesn't work, I guess it's back to hand waving and speaking in tongues. I'll let you know what happens.
Last edited by RyanBiggs; 05-30-2012 at 04:57 AM. Reason: more info
#13
06-19-2012, 04:31 AM
Hey just an update: I got the new air hammer in a couple of weeks ago, but at about the same time took on a bunch of new work and have been working a bunch of 12-hour-plus days lately. So the ol' Blazer project has kind of been shoved onto the back burner, and I've only had about half an hour to play with my new toy.
The IR tool immediately appears more substantial, with a longer stroke, bigger hammer puck, and better piston sealing than the HR. I'm attaching a comparison photo.
In practice, the difference is not as dramatic as I might have hoped, but substantial. The thing has a discernably stronger kick. It still took a good deal of work, but once I got a good jig set up to support the upper arms without backing against the ball joint housing, I was able to drive the ball joint off slowly but surely by alternating between the rivets. The rivets were sticking to the ball joint housing and it definitely wanted to push the whole joint off the arm, as opposed to neatly knocking out the rivets.
The big lower arm rivets are still holding fast, though with the IR hammer, the metal around the edge of the rivet I was working on was starting to deform in a way that suggests it was starting to think about moving when I ran out of time to mess with it. That was a week ago, and I've hardly had a spare moment since. But I'll be working on it more soon and will let you know what happens. Maybe some more work and some more heat will let me finally get those moving.
So, in summary, the better air hammer wasn't the slam dunk I hoped it would be, but definitely is an improvement and may be sufficient given some more patience and swearing. Or maybe I really need the $300 model! Stay tuned for what I end up doing about those big lower rivets.
The IR tool immediately appears more substantial, with a longer stroke, bigger hammer puck, and better piston sealing than the HR. I'm attaching a comparison photo.
In practice, the difference is not as dramatic as I might have hoped, but substantial. The thing has a discernably stronger kick. It still took a good deal of work, but once I got a good jig set up to support the upper arms without backing against the ball joint housing, I was able to drive the ball joint off slowly but surely by alternating between the rivets. The rivets were sticking to the ball joint housing and it definitely wanted to push the whole joint off the arm, as opposed to neatly knocking out the rivets.
The big lower arm rivets are still holding fast, though with the IR hammer, the metal around the edge of the rivet I was working on was starting to deform in a way that suggests it was starting to think about moving when I ran out of time to mess with it. That was a week ago, and I've hardly had a spare moment since. But I'll be working on it more soon and will let you know what happens. Maybe some more work and some more heat will let me finally get those moving.
So, in summary, the better air hammer wasn't the slam dunk I hoped it would be, but definitely is an improvement and may be sufficient given some more patience and swearing. Or maybe I really need the $300 model!
Stay tuned for what I end up doing about those big lower rivets.

#15
12-21-2012, 05:04 PM

Hi guys! I have a third-hand 1994 K5 with a ton of miles and a totally original suspension. One of the upper ball joints was utterly shot, and the control arm bushings all looked awful. And, the thing handled like a garbage barge. So, I naively figured I'd drop the control arms out of there and replace all the bits.
Holy hell. Who-knows-how-many hours with an air hammer and a drill later, I have 2 of the 6 upper ball joint rivets out, and none of the 8 big lowers. I started by knocking the heads off the rivets with a chisel. I can get the upper rivets out by center drilling them and punching them out with the air hammer, but drilling the little pilot holes in that hard steel without a drill press is agonizingly slow even with fancy cobalt bits. I've drilled a couple of the 1/2 inch or so lower rivets out to 3/8 inch and have been afraid to go bigger both because (1) I'm afraid my holes aren't centered enough to avoid putting elongated holes in the control arm if I try to drill the things out completely and (2) any bigger and I won't be able to get a good bite with the air hammer punch. But they aren't budging. And I haven't even gotten around to really thinking about the bushings. Not to mention, one of the lower arms is still stuck stubbornly on the torsion bar.
I know this is a big headache even for a shop, but surely they don't spend 20 hours on this job. What would a pro do about this? Am I missing a magic ingredient -- torch? better air hammer? (I have the Harbor Freight special, so maybe that's part of my problem.) It'd be worth putting some cash into better tools to make this hellish job a little easier. Suggestions?
#16
12-22-2012, 01:01 AM
I dont think the propane torch is going to provide enough heat to expand the metal around the rivet. Also, what size air compressor are you using? You can have the best tools in the world but if your air compressor isnt up to the job of supplying the proper amount and the proper psi then you are just wasting your time. For all the work you have put into this, have you looked at possibly getting new control arms with the joints already in? They are readily available in most parts stores for the Chevy IFS front ends, and a popular items with shops too. In the past selling parts commercially to shops large to small, the generally replace the whole control arms. Not all, but alot, and for no other reason than what you are running into now.
#17
12-22-2012, 01:32 PM
ive done probably about 20 of these over the years, and have tried all the meathods you guys described and then some. for me the most easiest way to get them out is just drill them. itll take you about a hour or a little more to get all 8 rivits out of the way but it just seems to be the safest simplist way to go about it.
take out your new ball joint and look at the bolt holes on it, now find a drill bit that barely fits in it and set that one aside. center punch the top of the rivets and start with a small bit, not to small dont want it to break off in there (which happens to me lol) and drill them through. they are crappy metal and drill pretty easily. once you work up to the big drill bit you can use a hammer and a chisel to knock the heads off or a air hammer then knock out whats remaining of the rivets and tap the ball joint out
one guy i used to work with just air chisel the heads off then the bottoms off, air chisel the arm area open and then beat the ball joint out. kinda quicker if you want to listen to a air hammer for 30 minutes
#18
12-23-2012, 03:49 AM
Hey guys,
Thanks for the follow up replies -- I should have posted again here myself. Yeah, I did indeed end up drilling the rivets out. Afterwards it was clear that once the rivets were pressed in, they just had too big of steps in them where the ball joint housing forging meets the control arm sheet metal stampings to be able to drive them out.
I first took them to a friend who works in a machine shop for advice. He was originally going to use a mill to drill the things out, which would have been pretty slick, but he got fed up trying to find a way to mount the arms securely at the right angle. So he went after one of the arms with a grinder and pneumatic hand drill, and got the rivets out pretty cleanly. Then I did the other arm, probably starting with too big a bit for a non-pro. My job didn't look nearly as pretty, but was good enough not to tear things up too bad.
Thinking that rivet metal was harder than it really was, I think originally I was using (maybe) too much oil and drilling too slow when I tried to drill the things out before, which made it seem like it was going to take forever. The pneumatic drill helped a lot compared to my puny electric hand drill as well.
Mossyoaksilverado: Yeah if I had to do it all over, I might just buy the assembled arms like you suggest! But I wanted to install some Energy Suspension bushings in the thing which I had already bought, plus the warm fuzzy feeling of knowing I did things The Hard Way.
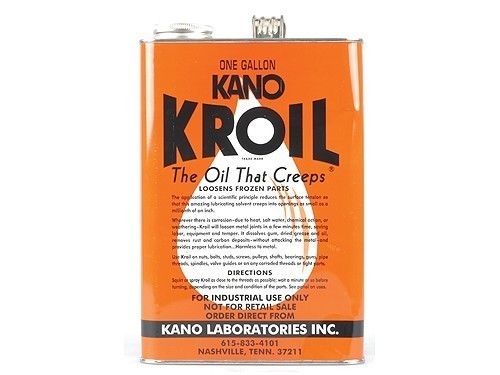
By the way, the trick to get the second very-stuck-to-the-torsion-bar arm free turned out to be soaking the thing with Kroil (a fancy/expensive penetrating oil) several times, heating the hex the torsion bar slides into with my puny propane torch for about 20 minutes, and then really going to town with a 4 pound sledge. Very satisfying once it was finally off!
Thanks for the follow up replies -- I should have posted again here myself. Yeah, I did indeed end up drilling the rivets out. Afterwards it was clear that once the rivets were pressed in, they just had too big of steps in them where the ball joint housing forging meets the control arm sheet metal stampings to be able to drive them out.
I first took them to a friend who works in a machine shop for advice. He was originally going to use a mill to drill the things out, which would have been pretty slick, but he got fed up trying to find a way to mount the arms securely at the right angle. So he went after one of the arms with a grinder and pneumatic hand drill, and got the rivets out pretty cleanly. Then I did the other arm, probably starting with too big a bit for a non-pro. My job didn't look nearly as pretty, but was good enough not to tear things up too bad.
Thinking that rivet metal was harder than it really was, I think originally I was using (maybe) too much oil and drilling too slow when I tried to drill the things out before, which made it seem like it was going to take forever. The pneumatic drill helped a lot compared to my puny electric hand drill as well.
Mossyoaksilverado: Yeah if I had to do it all over, I might just buy the assembled arms like you suggest! But I wanted to install some Energy Suspension bushings in the thing which I had already bought, plus the warm fuzzy feeling of knowing I did things The Hard Way.
By the way, the trick to get the second very-stuck-to-the-torsion-bar arm free turned out to be soaking the thing with Kroil (a fancy/expensive penetrating oil) several times, heating the hex the torsion bar slides into with my puny propane torch for about 20 minutes, and then really going to town with a 4 pound sledge. Very satisfying once it was finally off!

Thread
Thread Starter
Forum
Replies
Last Post
bswitz
Steering, Suspension & Drivetrain
0
05-30-2010 09:23 AM
ChoochCharlie
1st Generation S-series (1983-1994) Tech
8
04-14-2008 06:24 AM