
How to fix broken center console
#1
 05-10-2013, 12:38 AM


The other day the center console in my 2001 Blazer decided to finally break free. The bolts holding it on at the rear were still good but the main bolt at the front ripped free of the plastic tray itself. I've seen this happen before on Blazers owned by some of my friends; it commonly happens when larger people get in or out by putting their weight on the armrest. In my case it took 13 years to finally happen but yeah, it snapped.
The dealership only offers the advice of "replace the whole console" but I refuse to fork out that kind of money for something that can be easily fixed.
Tools:
1) Painters tape
2) Scissors
3) Rubbing alcohol
4) Liquid resin ( Alumilite )
5) Drill and drillbits
6) Shotglass
7) PAM cooking spray
Step one - Remove the center console
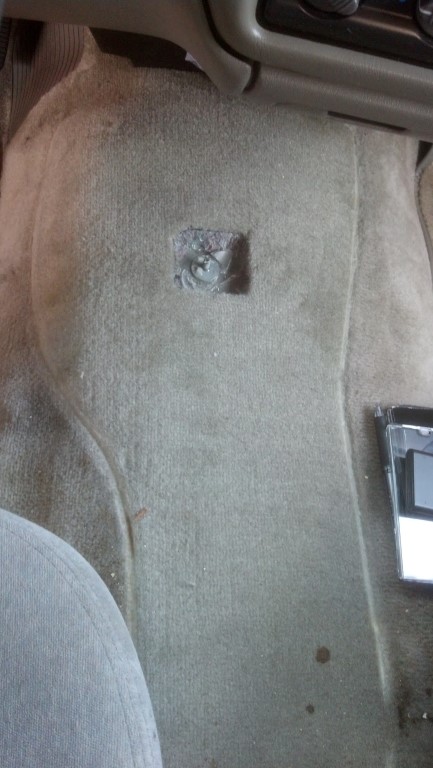
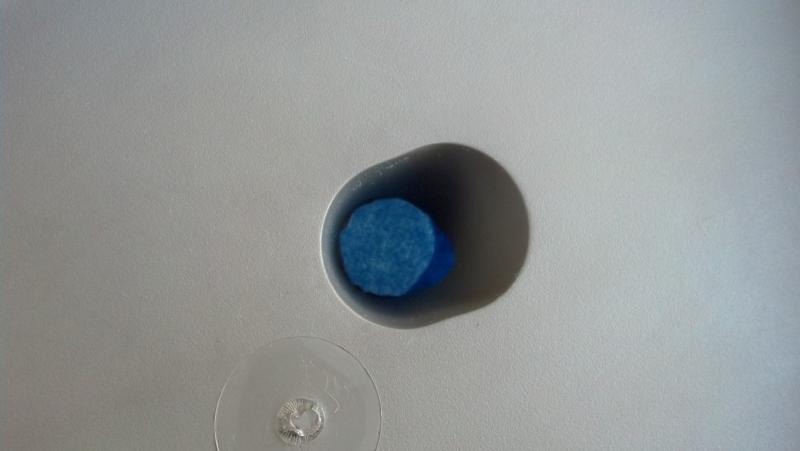
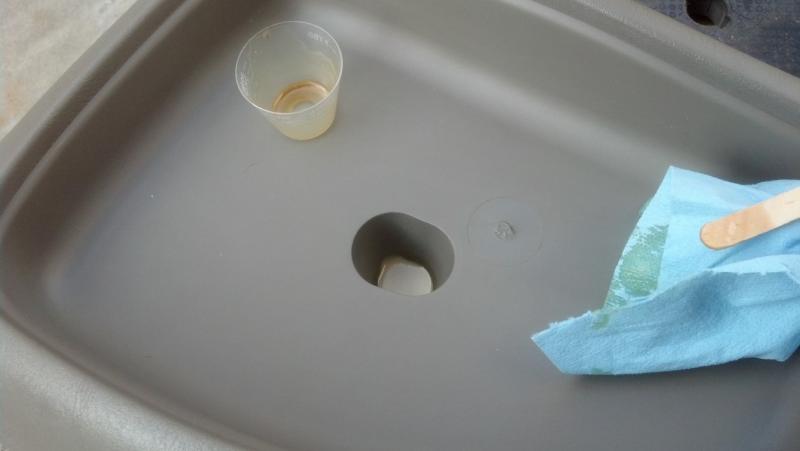
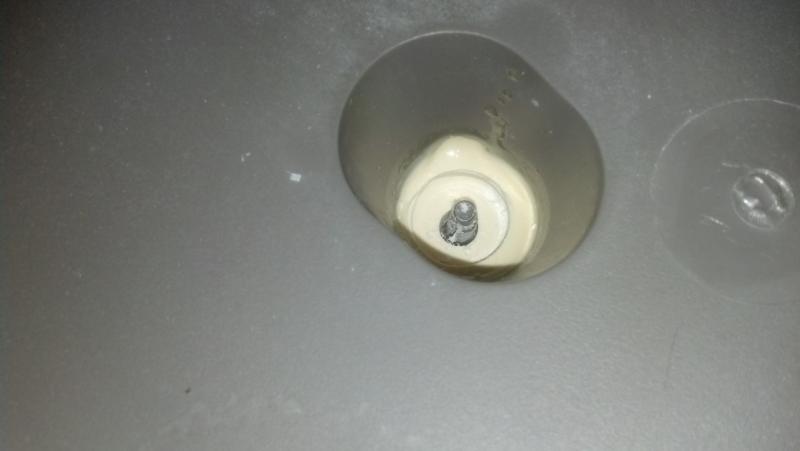
Assess the damage.
Yes, that's definitely a hole where there shouldn't be one.
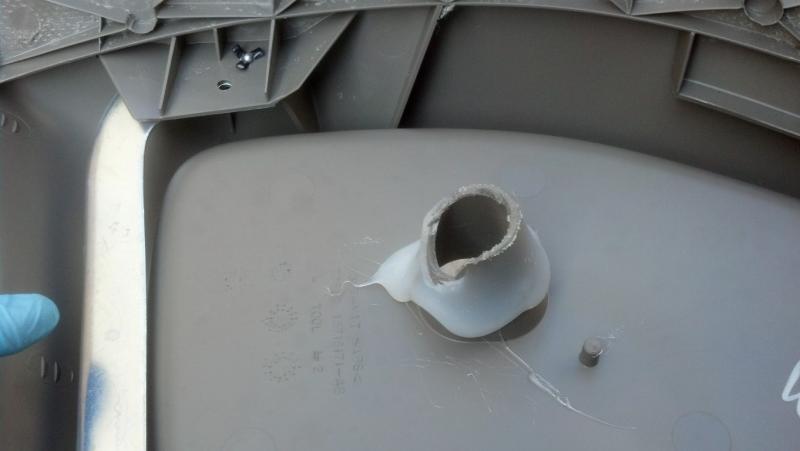
Clean the glue off. Whoever did this at the factory sure didn't hold back on whatever this crap is.

Also sand down the interior of the opening and maybe the broken edges too. It should have a rough surface that will allow for what we're about to do to stick. A smooth surface may not adhere. Use alcohol to clean once you're done sanding.
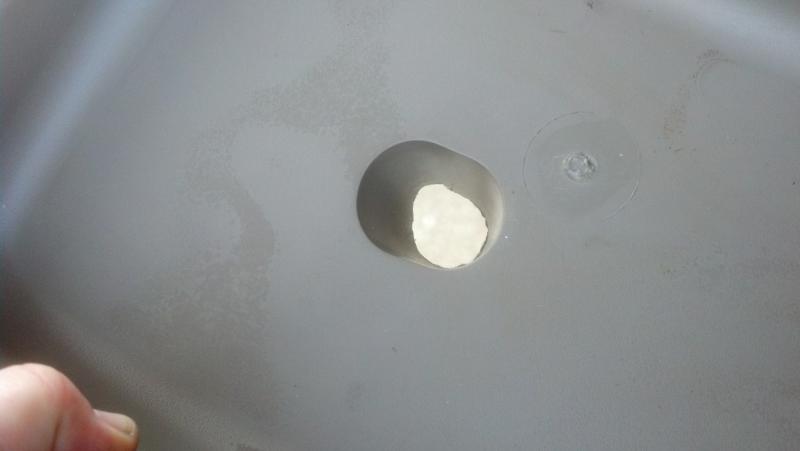
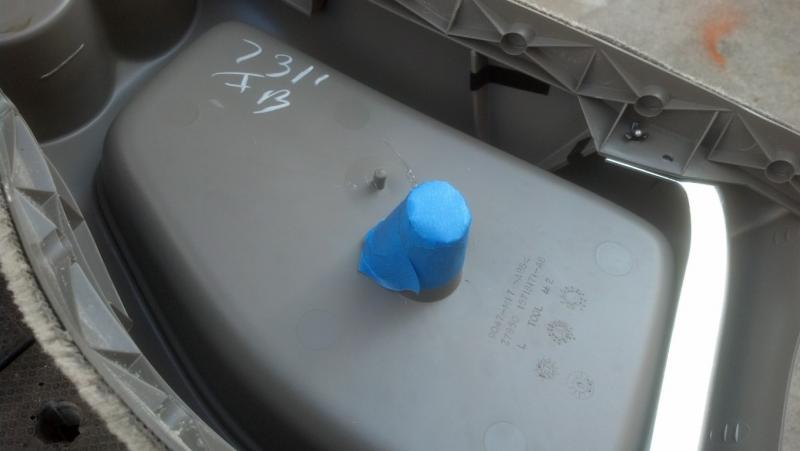
Use painters tape to rebuild the exterior wall of what used to be the plug. Cut a separate piece to put on the bottom and cut little tabs to fold flat and form a water-tight seal.
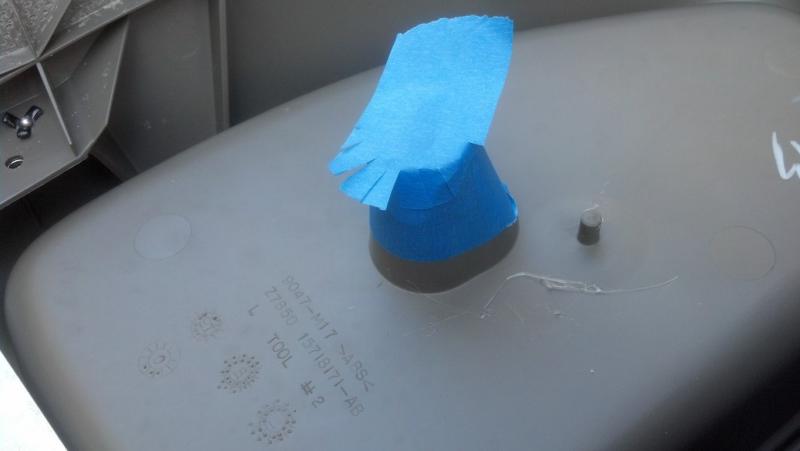
When done, it should look like this:
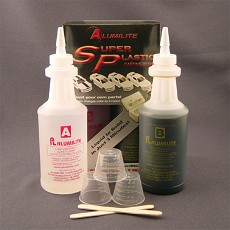
This next part is a bit disjointed. I keep containers of Alumilite A & B resin mixture around the house. If it's one thing I learned from John Malkovich's character in the movie "In The Line of Fire" it's that I need to always be ready to make something out of plastic. For those of you who are "too good to sit around the house writing a manifesto all day", you can probably purchase this at any model and hobby shop, the sort of place that sells RC planes. It's usually around $35-40 and looks like this:
Mix up about 2 ounces of this stuff and pour it into the hole. It will heat up to about 200 degrees and become solid in about 20-30 seconds.
In my list of tools I said a shotglass but the flexible plastic cup that comes with this liquid resin kit works nicely. Spray the outside with PAM cooking spray to make sure the resin doesn't stick to the edges then insert it into the opening. This will push the levels of liquid resin down ( so that it doesn't dry too high ) and it also forces the resin up the sides of the inner walls. This will fill in the sides if ( as was my case ) the break continues up one of the side walls.
In my particular case I didn't shove it down far enough so the resin dried a little high. For the sake of a walkthrough I shouldn't admit to a mistake but yeah, I blew it. My solution was to drill the hole that would have allowed the post to fit through, and then dremel a larger hole around it to accommodate the locknut.

Seat the console back into the truck, make sure the post comes through...
Put the nut on and clamp it down...
...and reinstall the three fasteners at the back of the armrest.
Done.
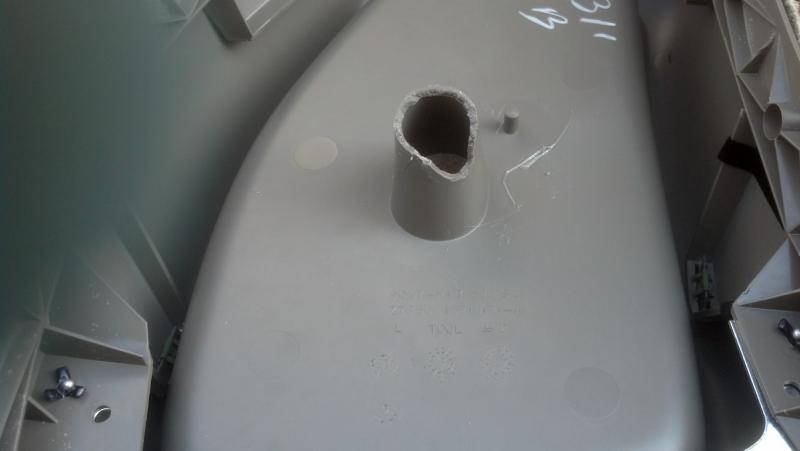
Depending on where your post-hole breaks and how badly it looks, you may opt to drill small holes all over the wall of the remaining piece that sticks out. Imagine this as swiss cheese:
This way, when you tape it up and pour the resin it will seep into the holes and bond better to become a plug incapable of accidentally slipping off later. For the most part, it won't ever slip because it bonds at a high heat and becomes one with the original plastic, but for all I know you'll be leaning on it once more and eventually break it again.
Have fun.
The dealership only offers the advice of "replace the whole console" but I refuse to fork out that kind of money for something that can be easily fixed.
Tools:
1) Painters tape
2) Scissors
3) Rubbing alcohol
4) Liquid resin ( Alumilite )
5) Drill and drillbits
6) Shotglass
7) PAM cooking spray
Step one - Remove the center console

Assess the damage.

Yes, that's definitely a hole where there shouldn't be one.

Clean the glue off. Whoever did this at the factory sure didn't hold back on whatever this crap is.

Also sand down the interior of the opening and maybe the broken edges too. It should have a rough surface that will allow for what we're about to do to stick. A smooth surface may not adhere. Use alcohol to clean once you're done sanding.

Use painters tape to rebuild the exterior wall of what used to be the plug. Cut a separate piece to put on the bottom and cut little tabs to fold flat and form a water-tight seal.

When done, it should look like this:


This next part is a bit disjointed. I keep containers of Alumilite A & B resin mixture around the house. If it's one thing I learned from John Malkovich's character in the movie "In The Line of Fire" it's that I need to always be ready to make something out of plastic. For those of you who are "too good to sit around the house writing a manifesto all day", you can probably purchase this at any model and hobby shop, the sort of place that sells RC planes. It's usually around $35-40 and looks like this:
Mix up about 2 ounces of this stuff and pour it into the hole. It will heat up to about 200 degrees and become solid in about 20-30 seconds.

In my list of tools I said a shotglass but the flexible plastic cup that comes with this liquid resin kit works nicely. Spray the outside with PAM cooking spray to make sure the resin doesn't stick to the edges then insert it into the opening. This will push the levels of liquid resin down ( so that it doesn't dry too high ) and it also forces the resin up the sides of the inner walls. This will fill in the sides if ( as was my case ) the break continues up one of the side walls.
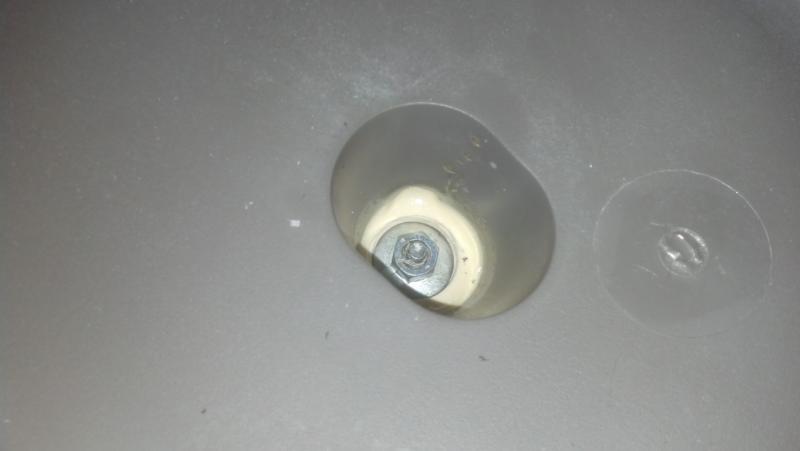
In my particular case I didn't shove it down far enough so the resin dried a little high. For the sake of a walkthrough I shouldn't admit to a mistake but yeah, I blew it. My solution was to drill the hole that would have allowed the post to fit through, and then dremel a larger hole around it to accommodate the locknut.

Seat the console back into the truck, make sure the post comes through...

Put the nut on and clamp it down...

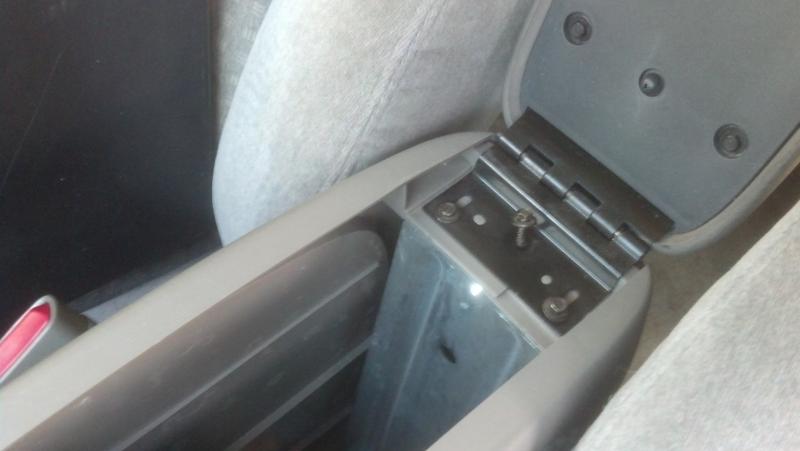
...and reinstall the three fasteners at the back of the armrest.

Done.
Depending on where your post-hole breaks and how badly it looks, you may opt to drill small holes all over the wall of the remaining piece that sticks out. Imagine this as swiss cheese:
This way, when you tape it up and pour the resin it will seep into the holes and bond better to become a plug incapable of accidentally slipping off later. For the most part, it won't ever slip because it bonds at a high heat and becomes one with the original plastic, but for all I know you'll be leaning on it once more and eventually break it again.
Have fun.

#4
05-10-2013, 04:30 PM
Great write up. Let us know how it holds up in the future. Another thing that could be used is JB weld, that stuff is strong as can be.
#5
05-11-2013, 06:30 PM
I've never had any positive stories about JB weld. Liquid resin is pure liquid plastic. I've made things with it 15+ years ago that are still in use on my truck today. It withstands high temps and high stress with no fractures or changes in properties. It's a liquid duplicate of the source material, nothing could be a more perfect match at the chemical engineering level.

#7
05-11-2013, 08:45 PM
I see where you are coming from now, since this duplicates the source material. I have had amazing luck with jb weld in many instances.
I was just thinking since the source material broke, I would think the duplicate material would as well, but if its thick enough (looks like the original mounting location was not that think) Then it will hold up much, much better.
Thanks again for the write up.
I was just thinking since the source material broke, I would think the duplicate material would as well, but if its thick enough (looks like the original mounting location was not that think) Then it will hold up much, much better.
Thanks again for the write up.

Thread
Thread Starter
Forum
Replies
Last Post
matthewp
Paint, Body, & Interior
4
04-04-2021 09:16 PM
mr.vls
1st Generation S-series (1983-1994) Tech
0
04-04-2010 05:11 PM