
Tutorial on painting bowtie??? 98+ years only

Thread Starter
|
Starting Member
Joined: Jan 2010
Posts: 151
From: Socal, CA

Just did my bowtie today, and figured I'd make a tutorial out of the process.
If anybody thinks I should put more pics, say so, and I will add.
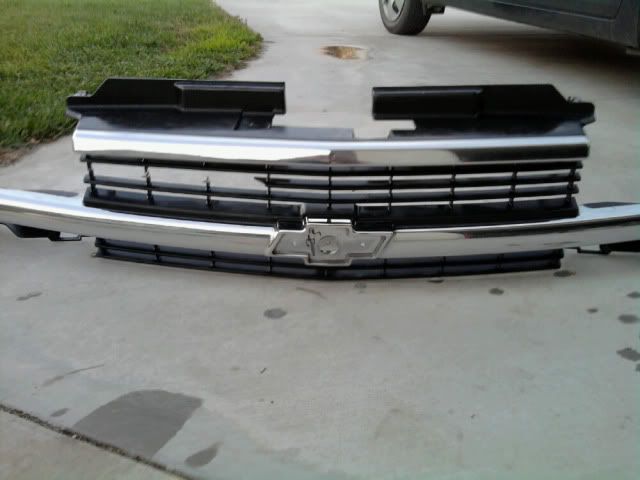
First pop open hood, to get a better working area with the grill and etc.
Okay, now you will need to pop the grill off, grasp grill around the chrome trim in the middle and apply pressure while pulling harder until popping out(grill in the 98 models has metal clips that just pop in and out).
here's the clips:
 be careful not to pull on the slotted area of the grill as these break VERY easily.
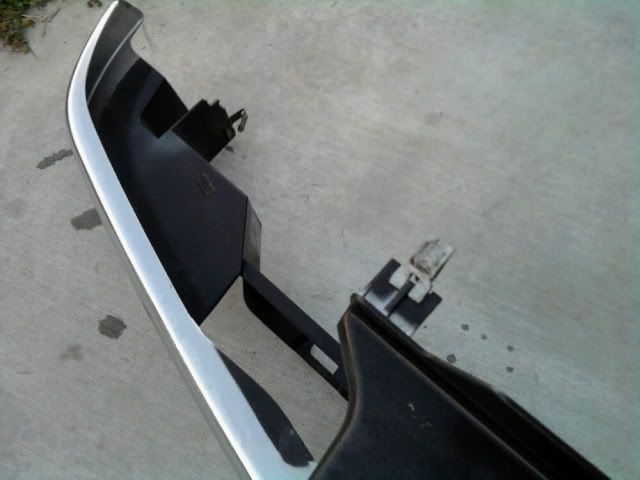
Now when you remove the grill, DO NOT, try to pull it off completly!
The blinkers and fog lights have wires that are very short and are prone to being ripped out. So to avoid this, once grill is popped off, lay it against your body or something to prop it up with. Remove wires to the lights or twist and pop out the lights.
I found that the blinker lights you can twist and pop out, but the fog lights need the wires removed from the back of them which they simply pop out.
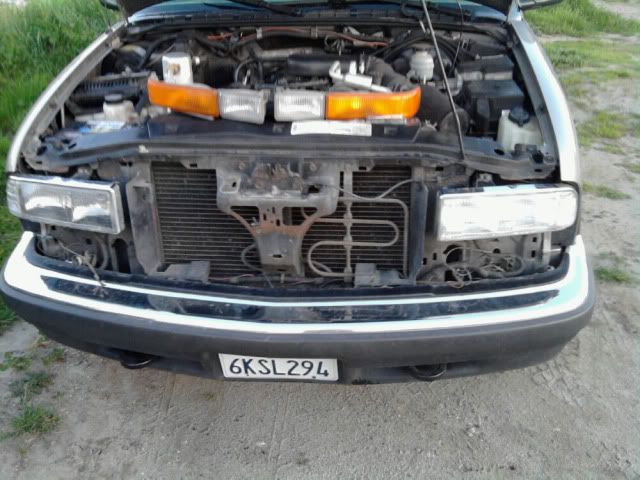
Now you should have the grill completely removed. Like so:
Now the bowtie has two nuts which can be removed by either a ratchet (which i did not have the right size), or any type of clawed pliers (not recommended). I used electricians pliers. Worked fine.
NOTE: be carefull not to grab them to hard as they are very prone to bending and are a soft metal.
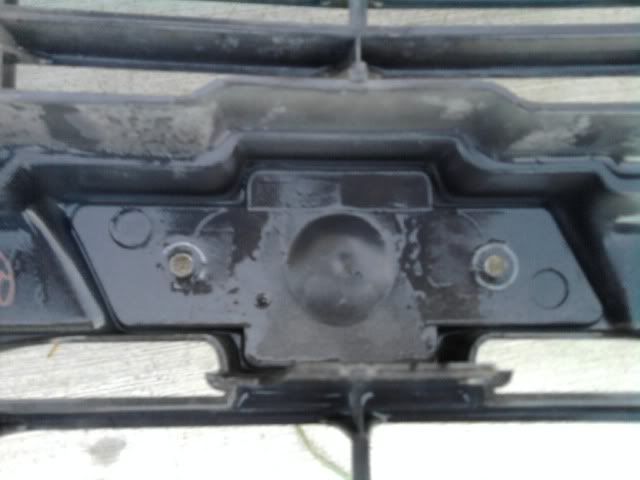
this is what you should have after removal:
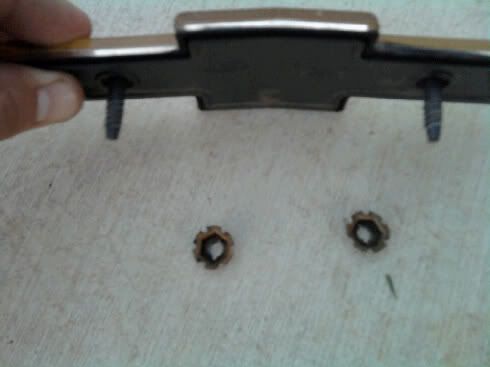
back of the grill bowtie encasing
Now you have your bowtie. Make sure to place the nuts somewhere you wont damage or misplace/lose them! Preferably a ziploc baggy
Now on to painting. This is a matter of personal opinion and what you like, black, red, blue, white, just to name some colors.
OPTIONS before painting, any one of these can work as others have done.
1. Remove gold film from the bowtie with a form of adhesive remover and razor, with slight sanding afterwards.
2. Sand original bowtie to remove scratches, blemishes, etc.
3. Prime then paint bowtie
4. Just straight out paint to desired color, what I did
Now for how many coats, and to clear coat or not?
the more lightly coated coats of mixtures of paint to clear coat, the better off you will be, but anything more than 4 coats would be overkill in my opinion.
On mine I simply needed 2 coats of paint, and one clear that I will doing tomorrow.
No clear coat=flat look/ashy or foggy
Clear coat=shiny or pearly look
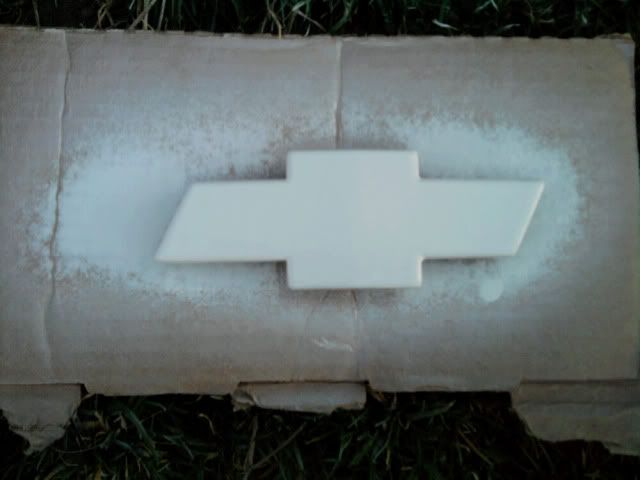
Picture with 2 coats of paint, prior to clear coat:
DO not soak, and give plenty of time for drying in-between coats. Be PATIENT.
ALSO, do this on a level surface, so either place the bowtie into a foam block (HIGHLY RECOMMENDED) or place into a cardboard piece. If not you will face uneven runny paint!
Now with finished painted bowtie, bolt back into grill, also without over tighting the nuts. You will know when tight enought because they will start to scratch into the back of the grill.
Process for Re-Insertion for Grill.
1. Pop blinkers/foglights back into grill
2. Hold grill/ prop up against, and re-insert light bulbs and wires into the light sockets.
!IMPORTANT STEP!
3. Make sure all wires are away from clips, and insert the grill from the BOTTOM clips to the TOP clips in that order or you will have a fun time popping the grill in and out to get it to fit.
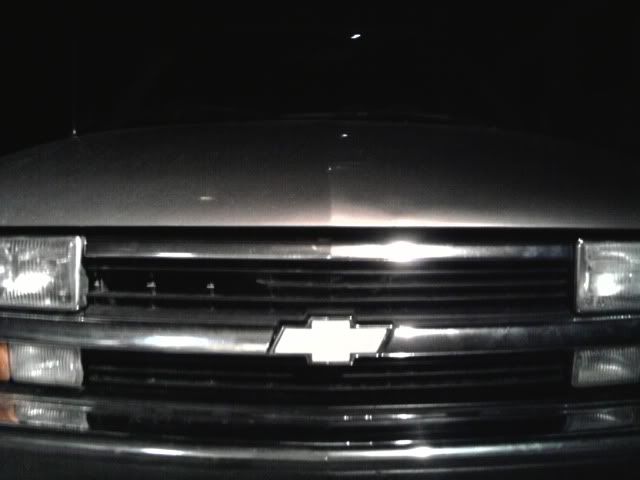
Mine after completion. p.s, idk how my grill broke. but it's been like that for awhile.
Now you should have a finished custom bowtie to your own style and liking.
Total time about 1 and a half to 2 hours.
Also, same process for painting the grill.
Thanks for reading and I hope this helps
(I was afraid of over-spray on the car, so thats what this thread was intended for, the careful diy'er, but you can also do this all with the grill still on the vehicle)
If anybody thinks I should put more pics, say so, and I will add.
First pop open hood, to get a better working area with the grill and etc.
Okay, now you will need to pop the grill off, grasp grill around the chrome trim in the middle and apply pressure while pulling harder until popping out(grill in the 98 models has metal clips that just pop in and out).
here's the clips:
Now when you remove the grill, DO NOT, try to pull it off completly!
The blinkers and fog lights have wires that are very short and are prone to being ripped out. So to avoid this, once grill is popped off, lay it against your body or something to prop it up with. Remove wires to the lights or twist and pop out the lights.
Now you should have the grill completely removed. Like so:
Now the bowtie has two nuts which can be removed by either a ratchet (which i did not have the right size), or any type of clawed pliers (not recommended). I used electricians pliers. Worked fine.
NOTE: be carefull not to grab them to hard as they are very prone to bending and are a soft metal.
this is what you should have after removal:
back of the grill bowtie encasing
Now you have your bowtie. Make sure to place the nuts somewhere you wont damage or misplace/lose them! Preferably a ziploc baggy
Now on to painting. This is a matter of personal opinion and what you like, black, red, blue, white, just to name some colors.
OPTIONS before painting, any one of these can work as others have done.
1. Remove gold film from the bowtie with a form of adhesive remover and razor, with slight sanding afterwards.
2. Sand original bowtie to remove scratches, blemishes, etc.
3. Prime then paint bowtie
4. Just straight out paint to desired color, what I did
Now for how many coats, and to clear coat or not?
the more lightly coated coats of mixtures of paint to clear coat, the better off you will be, but anything more than 4 coats would be overkill in my opinion.
On mine I simply needed 2 coats of paint, and one clear that I will doing tomorrow.
Picture with 2 coats of paint, prior to clear coat:
ALSO, do this on a level surface, so either place the bowtie into a foam block (HIGHLY RECOMMENDED) or place into a cardboard piece. If not you will face uneven runny paint!
Now with finished painted bowtie, bolt back into grill, also without over tighting the nuts. You will know when tight enought because they will start to scratch into the back of the grill.
Process for Re-Insertion for Grill.
1. Pop blinkers/foglights back into grill
2. Hold grill/ prop up against, and re-insert light bulbs and wires into the light sockets.
!IMPORTANT STEP!
3. Make sure all wires are away from clips, and insert the grill from the BOTTOM clips to the TOP clips in that order or you will have a fun time popping the grill in and out to get it to fit.
Mine after completion. p.s, idk how my grill broke. but it's been like that for awhile.
Now you should have a finished custom bowtie to your own style and liking.
Total time about 1 and a half to 2 hours.
Also, same process for painting the grill.
Thanks for reading and I hope this helps
(I was afraid of over-spray on the car, so thats what this thread was intended for, the careful diy'er, but you can also do this all with the grill still on the vehicle)
Senior Member
Joined: Jun 2009
Posts: 741
From: Tampa, Fl
Very good! Only thing I have to add is a tip for anyone wanting to paint the chrome strip on the grille. As I discovered this past weekend, that needs to be sanded and primed. BTW- is your bowtie white? Looks freaking killer!
BF Veteran
Joined: May 2009
Posts: 4,772
From: Halifax, NS, Canada

Sooo you didn't sand or prime your bowtie first? I don't see that lasting very long if not. I'd recommend to anyone doing it be sure to sand, and then prime (I did 2 coats of primer) any paint job first. That way it will last a hell of a lot longer and you can be sure it will bond properly.
Other then that good pics. It's really a straight forward mod, but thats for the tutorial!
Other then that good pics. It's really a straight forward mod, but thats for the tutorial!

Thread Starter
|
Starting Member
Joined: Jan 2010
Posts: 151
From: Socal, CA
no I didn't sand or prime.
This was just the first time I had painted anything on the car.
And sanding and priming would ensure a good lasting color.
I just went out and did it with what I had.
Like it was stated in the thread. There are multiple ways of doing this with them all working, it just depends on the person doing it and what exactly they want to do.
Thanks again you guys

Thread
Thread Starter
Forum
Replies
Last Post
BigBlackBlazer
Paint, Body, & Interior
12
Jun 9, 2014 07:44 PM