When you click on links to various merchants on this site and make a purchase, this can result in this site earning a commission. Affiliate programs and affiliations include, but are not limited to, the eBay Partner Network.
Buggered some threads hitting the wrong spot and seal installment issues
What's the best way to hit a seal into place? I couldn't get it in so I told my buddy to try who tried hammering the yolk in hope it would evenly and flatly install the seal but ended up being not so lucky. At the angle he was hitting, it seemed it was hitting the side but actually hit the middle. I'm assuming thread files will fix this? but really how do you get these d**n seals in?
That's pretty buggered up and is going to take some work to fix. I have a lot of large sockets and other stuff to choose from for seating seals but some can be trough.
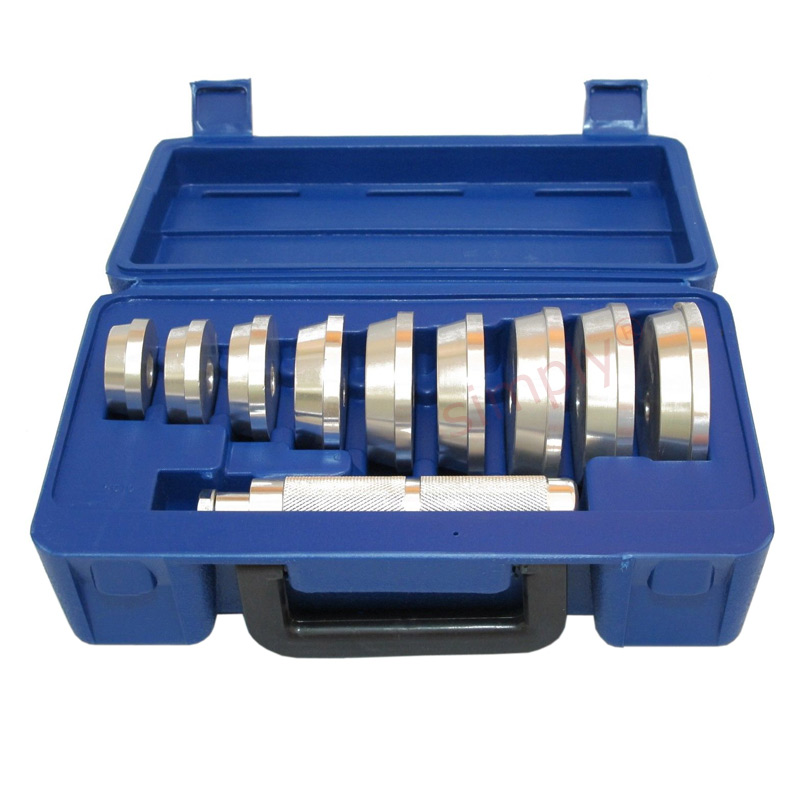
Sockets can work but I've borrowed from the local autoparts store (Autozone) this tool in the picture below. You attach the disk you need to the metal handle and then hit the other end of the handle with a hammer.
I've only ever used this on the front output shaft cover seal and the output bearing on the front diff.
For axle seals that sit flush with the surface, I've used a piece of wood. But this tool below would be required for a seal that is recessed in a housing.
As for your threads, yes, I would think a file with a triangle cross section could work. A Dremel tool might be easier though if you are careful not to take too much away. If the nut sits below where the threads are still good, I would think you should be fine.
In a pinch, sometimes you can put a sacrificial nut on the stud you want to hit with a hammer. This way the threads are protected and if the nut is hit, the blow is distributed on all of the threads with minimal if any damage being caused.
I would grind off the bump created by the hammer, then use a thread file to repair the threads as well as possible. It's a little tedious, but it works.
To drive in that seal, you need a socket or some kind of pipe (exhaust tubing?) that fits over the end of the pinion and fits the driving surface of the seal.
Thank you guys for all your responses, I've ordered a set of files and my buddy is bringing his grinder and dremel and we'll attempt to grind off the bad part and use the files! I also have a big thread chaser that might work? What do y'all think? Would it be possible to repair the first thread and throw the big thread chaser on there? (It's the correct size as well)
Hmmm - seals should not take too much force to be put in. Not sure what you have been trying to achieve by hammering the output shaft. The yoke sits on the output shaft on a spline. It requires a puller to be removed from the tranny/transfer case to have access to the seal (Simmerring on the shaft).
Proper repair requires the ring to be removed, the shaft checked for wear at the sealing (may require a repair sleeve). The groove where the seal sits needs to be clean of rust and debris but can only be brushed at best. Now do that without throwing dirt and debris into the tranny/transfer case. Usually I do clean it all around before removing the seal. Also to pry the seal will need attention and ingenuity to come up with a proper tool.
To put seals in will require (what the above posters have mentioned) a proper setting tool. It has to exert it's pressure around the stell outer diameter ring. Any dent i.e. when using a punch will damage the ring. Seat it oblique and it may get distorted. If you have the proper tool and the proper seal size it will hammer on with light to medium blows with a 1 lbs plastic hammer. If I need a special ring I'll make one on a lathe, but that requires access to such tools and a piece of aluminium round stock.
The damaged thread can be repaired as suggested. For the future I would strongly recommend never to hit any axle shafts. It may damage the roller bearings or ball bearings inside the gearbox or axle. If you see an axle like that with a center hole and 45 degree chamfering it means two things. The axle may be ground and is a precision part or the center is there because removal requires a puller and installer to work on it.
You put the seal on a tool like this one and drive it into the housing with a hammer. Note how the pinion shaft goes up inside of the tool. Good luck on straightening those threads out. Don't let your "Buddy" help anymore. He's not!
Myself, I just drive the seal flush a little bit at a time with a small hammer into a light smear of RTV on the mating surfaces. Everything scrupulously clean first. This technique takes some practice.

 07-11-2020 | 09:23 PM