LOG IN
REGISTER
Forums
Announcements
Forum Notice
New Member Area
General
General Chat
The Lounge
Builds
Off Roading
Sights N Sounds
Street N Strip
The Chop Shop
Shows & Clubs
Mechanical & Maintenance
General Tech Help
Engine & Transmission
Lighting & Electrical
Steering, Suspension & Drivetrain
Modifications
Performance & Brainstorming
Tires and Wheels
Audio/Video Electronics
Paint, Body, & Interior
Suspension Tech
Detailing
Chevy Blazer Classifieds
Member Group And Special Buys
Absolutely Free!!!
PRIVATE For Sale / Trade Classifieds
Private 'Wanted' Classifieds
Online Auctions & Listings
The Site
Website Problems and Suggestions
Marketplace
Vendor Directory
Become a Vendor
New Posts
Tools
Car Payment Calculator
Tire Rim Calculator
Recalls
Technical Service Bulletins (TSBs)
Members List
Live Feed
Gallery
View Dark Mode
Please register or login to enable Dark Mode.
Log In
Register
Threads
Google
Threads
Posts
Advanced
Dark Mode
Please register or login to enable Dark Mode.
Log In
Forgot your Password?
By logging into your account, you agree to our
Terms of Use
and
Privacy Policy
, and to the use of cookies as described therein.
Recent
Commented
Albums
My Pictures
My Post Pictures
christine_208
October 15, 2017
759
3
Sort:
Most Recent
Default
Most Recent
After
0
2018/08/12 10:20:06
christine_
Before
0
2018/08/12 10:19:50
christine_
After
0
2018/08/11 15:17:36
christine_
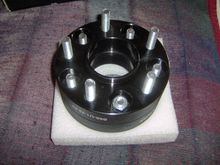
Got 8.5 full turns of the nut on the stud. Otherwise studs and nuts just a bit recessed in the spacer.
0
2018/08/11 15:17:20
christine_
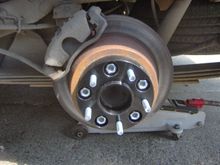
Installed on the wheel. Spacer centered on axle hub and wheel centered on spacer hub nicely.
0
2018/08/11 15:17:05
christine_
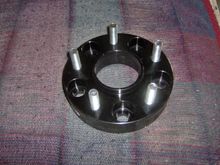
Berfore
0
2018/08/11 15:16:41
christine_
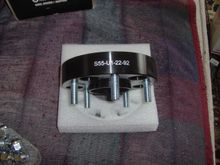
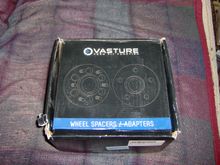
Vasture brand. Only one I could find on eBay that had an anodized finish
0
2018/08/11 15:16:22
christine_
0
2018/08/10 13:07:11
christine_
0
2018/08/10 13:06:49
christine_
0
2018/08/10 13:06:17
christine_
0
2018/08/10 13:05:53
christine_
0
2018/08/10 13:05:35
christine_
0
2018/08/10 13:05:05
christine_
0
2018/08/10 13:04:35
christine_
0
2018/08/10 13:04:09
christine_
0
2018/08/10 13:03:49
christine_
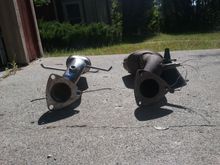
Top view of converters showing the incorrect placement of the bung for the O2 sensor on the Ultra Exhaust converter that would prevent the converter from being installed if the O2 sensor were in place.
0
2018/07/26 10:59:18
christine_
Muffler end view showing the incorrect placement of the bung for the O2 sensor on the new cat converter (on left).
0
2018/07/26 10:59:13
christine_
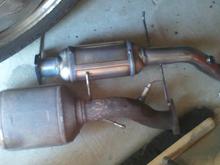
Underside of cats; new on left, old on right. Note how the O2 sensor needs to come out of the pipe to the side.
0
2018/07/26 10:57:58
christine_
0
2018/07/19 15:14:33
christine_
Top side facing camera, forward end to the left. Note the misplacement of the fitting for the O2 sensor.
0
2018/07/19 12:27:09
christine_
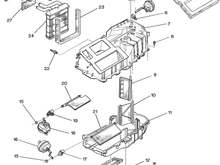
The evaporator is on the left and the heater core is in the upper center part of the picture. The blend door is identified with the cyan arrow and the pivot axle for the blend door is identified with the yellow line.
0
2018/07/17 09:35:50
christine_
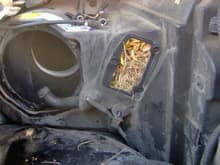
Looking down into the access panel. The evaporator is on the left and the heater core is top center. The door is the vertical panel
0
2018/07/17 09:33:50
christine_
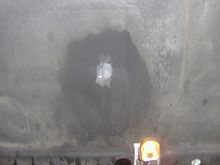
The access door is circled in red and the top of the evaporator is indicated in green. The view is looking back towards the fire-wall on the passenger side.
0
2018/07/17 09:32:14
christine_
2000 Vac diagram for HVAC system
0
2018/07/15 15:35:57
christine_
Older design on left, newer on right.
0
2018/06/28 09:00:12
christine_
Older design on left, newer on right.
0
2018/06/28 08:59:57
christine_
0
2018/06/24 10:35:16
christine_
0
2018/06/24 10:35:06
christine_
0
2018/06/24 10:34:53
christine_
My 1968 Mustang. One family car, originally a 2v-289, now 4v-289 with dual exhaust. AT, PS, no-AC.
0
2018/04/27 14:08:23
christine_
The needles pulled out from the blower motor cavity
0
2018/04/16 09:59:11
christine_
Blower motor out and the temperature control module removed
2
2018/04/16 09:58:41
christine_
0
2018/04/06 23:32:34
christine_
0
2018/04/01 21:26:04
christine_
0
2018/04/01 10:12:13
christine_
1999 Auto HVAC Schematic
0
2018/03/31 23:07:58
christine_
1999 Auto HVAC Schematic
0
2018/03/31 23:07:17
christine_
0
2018/03/31 23:04:09
christine_
from: http://www.fixya.com/tags/pcm_location/cars/chevrolet/blazer
0
2018/03/18 19:39:55
christine_
First
Page
17 of 19
Last
Go To
Page
1
...
13
14
15
16
17
18
19
17 of 19
Go To
GO
Go to page
of 19
pages
1
...
13
14
15
16
17
18
19