Blazer Forum - Chevy Blazer Forums
  • LOG IN
  • REGISTER
  • Forums
    • Announcements
      • Forum Notice
      • New Member Area
    • General
      • General Chat
      • The Lounge
      • Builds
      • Off Roading
      • Sights N Sounds
      • Street N Strip
      • The Chop Shop
      • Shows & Clubs
    • Mechanical & Maintenance
      • General Tech Help
      • Engine & Transmission
      • Lighting & Electrical
      • Steering, Suspension & Drivetrain
    • Modifications
      • Performance & Brainstorming
      • Tires and Wheels
      • Audio/Video Electronics
      • Paint, Body, & Interior
      • Suspension Tech
      • Detailing
    • Chevy Blazer Classifieds
      • Member Group And Special Buys
      • Absolutely Free!!!
      • PRIVATE For Sale / Trade Classifieds
      • Private 'Wanted' Classifieds
      • Online Auctions & Listings
    • The Site
      • Website Problems and Suggestions
  • Marketplace
    • Vendor Directory
    • Become a Vendor
  • New Posts
  • Tools
    • Car Payment Calculator
    • Tire Rim Calculator
    • Recalls
    • Technical Service Bulletins (TSBs)
    • Members List
    • Live Feed
  • Gallery
  • View Dark Mode
    • Please register or login to enable Dark Mode.
  • Log In
  • Register
Blazer Forum - Chevy Blazer Forums
    • Threads
      • Advanced
Dark Mode

Please register or login to enable Dark Mode.

Log In

Forgot your Password?

By logging into your account, you agree to our Terms of Use and Privacy Policy, and to the use of cookies as described therein.
  • Recent
  • Commented
  • Albums
  • My Pictures

My Post Pictures

christine_208
October 15, 2017
 756
 3
Sort:
Default
  • Default
  • Most Recent
0 2025/07/26 22:46:04 christine_
View from underneath showing the 1-ton idler arm upgrade. I had to route the supplemental transmission cooler lines between the top if it and the bottom of the fan shroud. I added lengths of scrap heater hose to protect the hoses from rubbing.
0 2025/07/26 22:47:22 christine_
Another view of the extra transmission cooling lines. The slivery metal strap is what I had used to secure the lower fan shroud with the earlier ECP radiator. I likely didn't need it but it was easier to reuse than remove.
0 2025/07/26 22:48:15 christine_
Another view from above of the pass. side hose routing for the transmission cooler.
0 2025/07/26 22:46:29 christine_
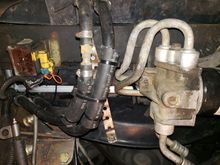
View from below showing my supplemental transmission cooler lines. In the far left of the radiator you can see where I used a zip tie to secure the bottom fan shroud to the bottom of the radiator using a hole in the radiator frame, I did this at the center and on the driver side. too.
0 2025/07/26 22:46:56 christine_
View looking up and a bit forward showing how to access the petcock from the front end of the front right wheel well.
0 2025/07/26 22:48:41 christine_
0 2025/07/26 22:49:03 christine_
Picture of the engine side of the radiator as soon as I unpacked it. It only came with the connectors  for the oil-cooler. I was able to swap the old ones for the transmission cooler.
Picture of the engine side of the radiator as soon as I unpacked it. It only came with the connectors for the oil-cooler. I was able to swap the old ones for the transmission cooler.
0 2025/07/26 23:00:32 christine_
Front, grille-facing side, of the radiator.
0 2025/07/26 23:00:59 christine_
View looking up along the long extension as I was reinstalling the block plug.
0 2025/07/26 23:22:50 christine_
The view from low behind the front brake caliper. The open hole where the plug goes in the block can be seen in the lighted area. The front end of the left-side torsion bar is in the foreground.
0 2025/07/26 23:23:31 christine_
View looking down showing a view of the long extension used to get at the block plug. The trouble-light is resting on the upper control arm.
0 2025/07/26 23:23:53 christine_
0 2025/07/26 23:24:13 christine_
The view from low behind the front brake caliper. The open hole where the plug goes in the block can be seen in the lighted area.
0 2025/07/26 23:23:06 christine_
0 2025/07/26 23:33:16 christine_
View looking up and towards the front.
0 2025/07/27 22:47:43 christine_
Fluid that has leaked onto the cross-member.
0 2025/07/27 22:46:37 christine_
View looking towards back towards propeller shaft.
0 2025/07/27 22:47:02 christine_
The height above the top of the taper to the hole on the old Moog ball joint.
0 2025/07/30 11:35:22 christine_
The installed new Mevotech ball joint with the cotter pin hole too high to engage the nut castellations.
0 2025/07/30 11:35:35 christine_
The Mevotech and Moog ball joints side-by-side.
0 2025/07/30 11:36:09 christine_
The height above the top of the taper to the hole on the Mevotech ball joint.
0 2025/07/30 11:36:36 christine_
0 2025/08/05 23:34:22 christine_
The outer race for the cv joint that is integral with the outer axle shaft.
0 2025/08/05 23:35:54 christine_
Side view of the inner race.
0 2025/08/05 23:36:35 christine_
0 2025/09/09 20:48:47 christine_
0 2025/09/09 20:49:50 christine_
The raw data from the accelerometer showing the vibrations.
0 2025/10/12 00:24:07 christine_
The frequency of the vibrations. The frequencies are in terms of the expected frequency of vibration of the driveshaft. The main peaks line up with these indicating that the vibrations are not with the wheels.
0 2025/10/12 00:24:16 christine_
0 2025/10/25 08:23:47 christine_
0 2025/10/25 08:26:14 christine_
0 2026/01/04 17:03:13 christine_
0 2026/01/17 11:49:19 christine_
This view is looking to the outward direction on the driver's side of the rear of the engine compartment. Reservoir has the yellow diagonal stripes and the vacuum hose to it has the blue stripe on it.
0 2026/02/06 17:42:54 christine_
0 2026/04/12 21:13:34 christine_
Spent .22 LR cartridge casings used as knobs.
0 2026/04/20 15:37:45 christine_
First
Page
19 of 19
Last
Go To
Page
  • 1
  • ...
  • 13
  • 14
  • 15
  • 16
  • 17
  • 18
  • 19
19 of 19
Go To GO
Go to page of 19 pages
  • 1
  • ...
  • 13
  • 14
  • 15
  • 16
  • 17
  • 18
  • 19

Top
Blazer Forum - Chevy Blazer Forums
  • Contact Us
  • FAQ
  • Archive
  • Advertising
  • Cookie Policy
  • Privacy Statement
  • Terms of Service
  • Your Privacy Choices
  • Manage Preferences

© 2026 MH Sub I, LLC dba Internet Brands


When you click on links to various merchants on this site and make a purchase, this can result in this site earning a commission. Affiliate programs and affiliations include, but are not limited to, the eBay Partner Network.