
Jamaroon's ZR2


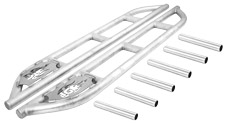
Trail gear sliders for a 4 Runner. They come with 3 pieces of tubing that you weld to the sliders and I got the mounting plates for the frame side as well so I can bolt them on.
They come in 3 lengths, 58" (what I bought), 67" & 78". The 58" are pretty much perfect length for a ZR2 Blazer but are too short for a normal 2 door (because of the ZR2 flares they don't need to be as long).
Toyota, Suzuki Samurai, and Jeep Off Road Parts
They come in 3 lengths, 58" (what I bought), 67" & 78". The 58" are pretty much perfect length for a ZR2 Blazer but are too short for a normal 2 door (because of the ZR2 flares they don't need to be as long).
Toyota, Suzuki Samurai, and Jeep Off Road Parts
pricing is on their website...
You'll have to measure to see what length you would need. You might have to order a set that's longer than what you need and shorten them to the right length.
You'll have to measure to see what length you would need. You might have to order a set that's longer than what you need and shorten them to the right length.
Blaz came over Saturday and Monday evening and I worked on it last night and tonight on my own to finish up installing the inverter.
Started by finding a place to mount the fuse. Decided to mount it to the bottom of the battery tray. Tried mounting it at a bit of an angle first, but it hit the inner fender so we had to change it.


Attached the 1/0 wire to the fuse.

Re-installed the battery tray

Ran the wire along the frame

Drilled holes for the wire to go through and installed the rubber grommet

Installed the relay under the floor, I wanted to install it inside but there was no room to put it anywhere that was easy to get too without completely disassembling the interior panels.


Crimped and shrink wrapped the wire


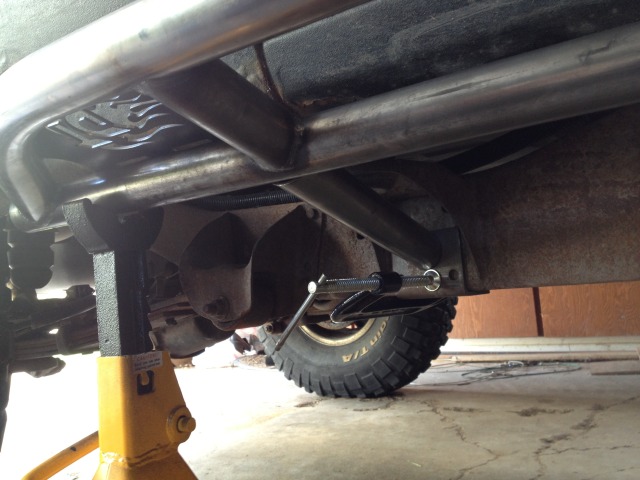
This shows the power and ground 1/0 cables coming through the floor and the small white wire is the relay power wire. It runs to the dash fuse block and is only powered when the ignition is in the run position.

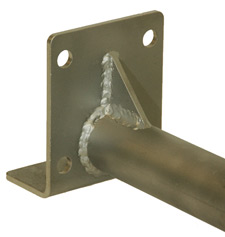
Ran the ground to the frame and attached it using the exhaust hanger bolt. Also put the relay ground into the same terminal, that�s what the smaller black wire is for.

Then we tested to make sure everything was working with the inverter, powered the drill just fine. Went to try the little air compressor that was the whole reason for the inverter install and the damn thing won�t turn on anymore.

Then I installed some mounting bolts using some threaded inserts

Cut some holes in the carpet for the bolts and wires, connected everything and re-installed all the interior panels. Also vacuumed the carpet and wiped down the panels. This is the cleanest it�s been in a long time lol.

I figured out why the compressor wasn�t working.

I had enough wire left over to do the Big 3 upgrade, so I did that and hooked up the inverter power wire onto a brand new battery.
Grounds running to the frame:

All hooked up:

Compressor running off of inverter

And this is all that is left over from a 25� Roll of wire

Started by finding a place to mount the fuse. Decided to mount it to the bottom of the battery tray. Tried mounting it at a bit of an angle first, but it hit the inner fender so we had to change it.


Attached the 1/0 wire to the fuse.

Re-installed the battery tray

Ran the wire along the frame

Drilled holes for the wire to go through and installed the rubber grommet

Installed the relay under the floor, I wanted to install it inside but there was no room to put it anywhere that was easy to get too without completely disassembling the interior panels.


Crimped and shrink wrapped the wire


This shows the power and ground 1/0 cables coming through the floor and the small white wire is the relay power wire. It runs to the dash fuse block and is only powered when the ignition is in the run position.

Ran the ground to the frame and attached it using the exhaust hanger bolt. Also put the relay ground into the same terminal, that�s what the smaller black wire is for.

Then we tested to make sure everything was working with the inverter, powered the drill just fine. Went to try the little air compressor that was the whole reason for the inverter install and the damn thing won�t turn on anymore.
Then I installed some mounting bolts using some threaded inserts

Cut some holes in the carpet for the bolts and wires, connected everything and re-installed all the interior panels. Also vacuumed the carpet and wiped down the panels. This is the cleanest it�s been in a long time lol.

I figured out why the compressor wasn�t working.

I had enough wire left over to do the Big 3 upgrade, so I did that and hooked up the inverter power wire onto a brand new battery.
Grounds running to the frame:

All hooked up:

Compressor running off of inverter
And this is all that is left over from a 25� Roll of wire

Last edited by Jamaroon; May 15, 2013 at 11:35 PM.
I love my Blazer!
Everything performed flawlesly on the weekend, the inverter worked perfectly, the locker worked perfectly. Conquered every obstacle I tried.
Just thought I'd share that little update lol.
Everything performed flawlesly on the weekend, the inverter worked perfectly, the locker worked perfectly. Conquered every obstacle I tried.
Just thought I'd share that little update lol.
Thanks! Although I consider it more of a dual purpose than trail rig.
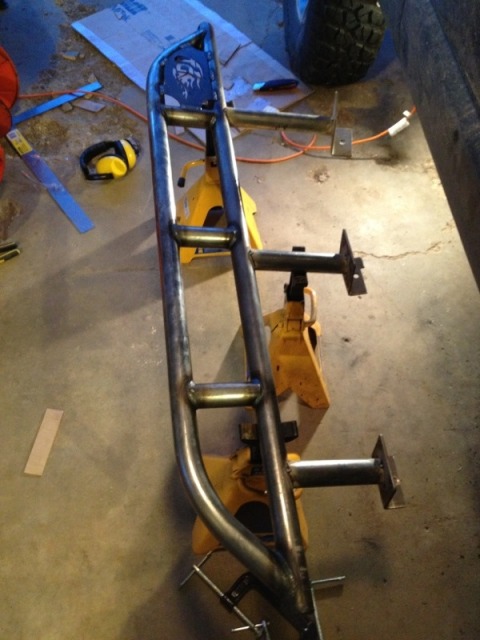
Got some work done on the sliders on sat.
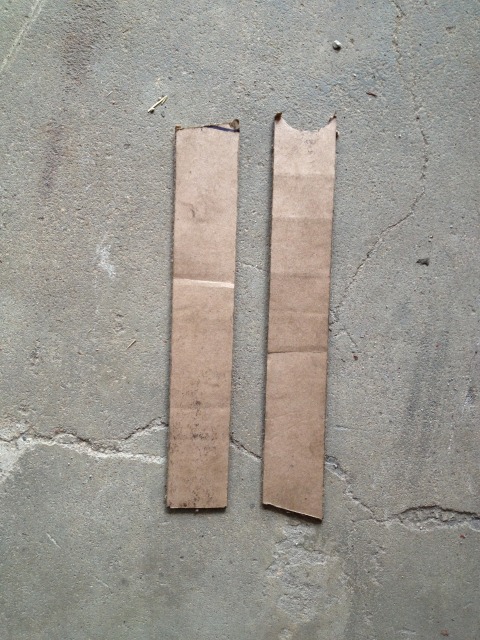
The back leg has a compound angle do I made two cardboard templates, one for the up-down angle and one for the left-right angle.
Transferred that to the tube basically freehand then cut it close with the angle grinder and finished it off with the bench grinder.
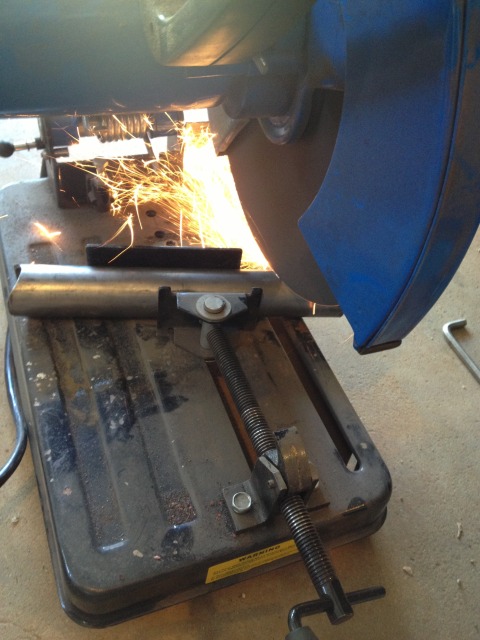
The middle leg only has one angle to deal with so it was a lot easier to do and I could use the chop saw for that one.
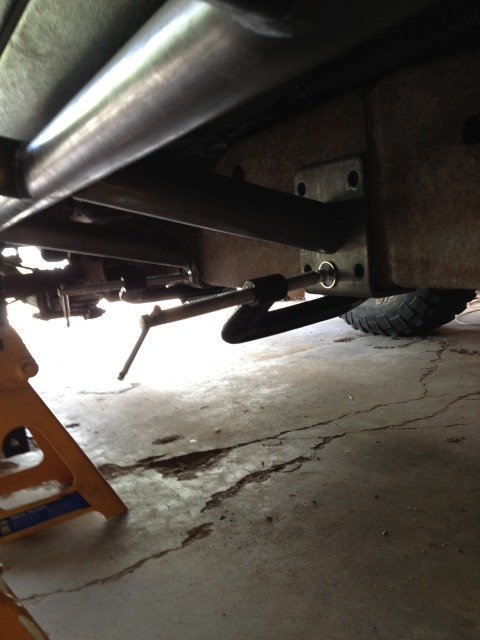
Got the last piece cut for the pass side and tacked them all in. Already figured out I need to move the front one. I didn't check the clearance on the back side of the frame
Yesterday I was able to get the front leg moved, and that's where I'm at now. Really hoping that the other side will be symmetrical
Got some work done on the sliders on sat.
The back leg has a compound angle do I made two cardboard templates, one for the up-down angle and one for the left-right angle.
Transferred that to the tube basically freehand then cut it close with the angle grinder and finished it off with the bench grinder.
The middle leg only has one angle to deal with so it was a lot easier to do and I could use the chop saw for that one.
Got the last piece cut for the pass side and tacked them all in. Already figured out I need to move the front one. I didn't check the clearance on the back side of the frame
Yesterday I was able to get the front leg moved, and that's where I'm at now. Really hoping that the other side will be symmetrical
Last edited by Jamaroon; Jun 3, 2013 at 12:18 PM.


