
My small 96 Blazer build

I just went with this cause it was cheap and matches pretty close. I have no complaints besides when they roled it I had one spot with a small crease but once I stretched and glued it it went away without issue. It stretched around and over the curves and egdges really well to. 1 yard was all I needed for the back.
Thread Starter
|
Super Moderator
Joined: Sep 2011
Posts: 4,459
From: Northern VA

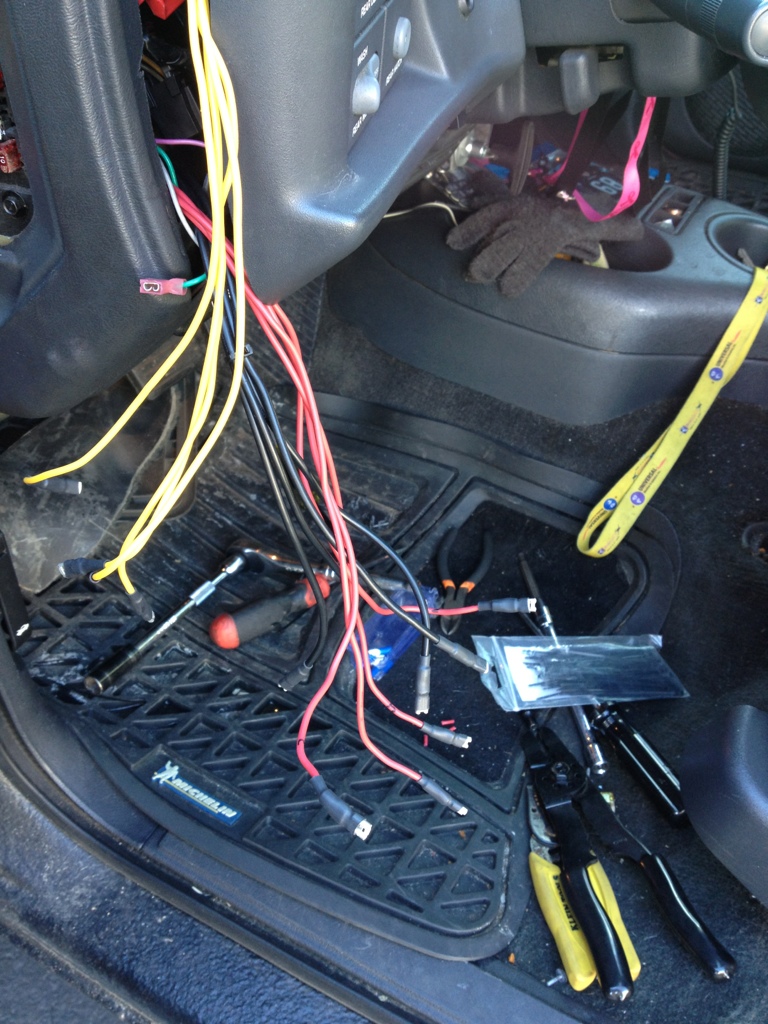
Well its only taken me most of the week working on it here and there but I finally have all of my wiring complete!! I made a total of 6 wire harnesses for the project but it was well worth it cause everthing is nice and tidy and looks nice. I didn't get pics of all the harnesses I made cause it was cold and I didn't even think to take pics
We will start with the switches I suppose.

And then I also restretched and fixed the top of the switch panel so it looks better. This is with all the wires attached and tucked away

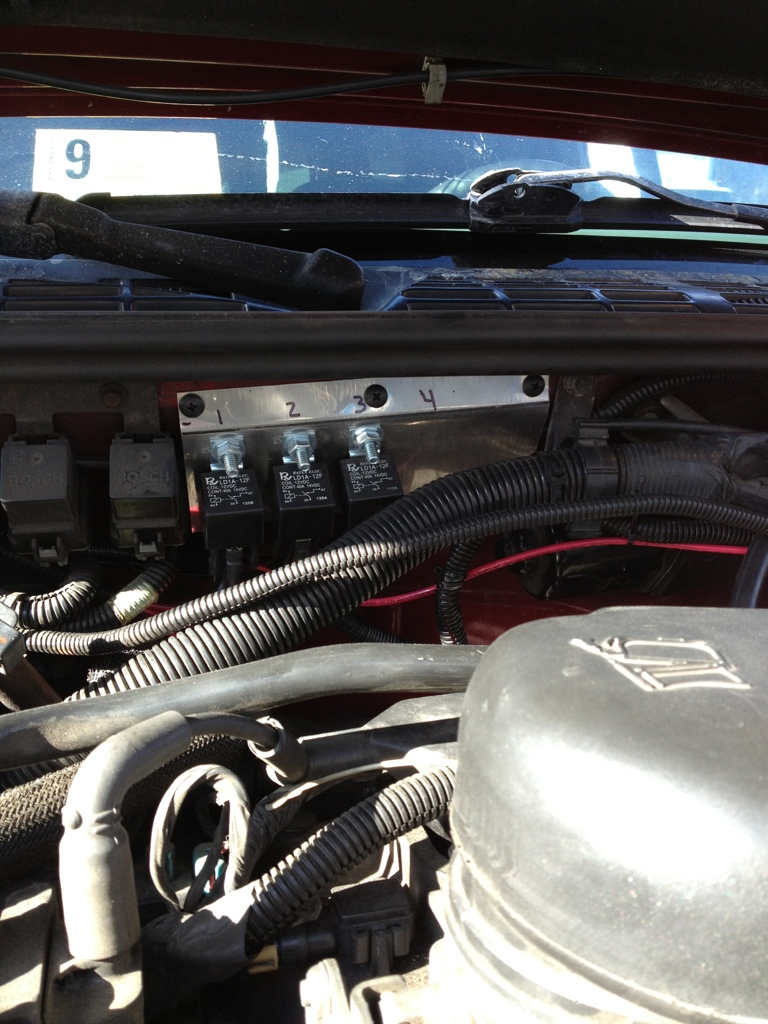
Then under the hood I made up a small spot to mount some relays and keep them out of the way. They are all wired and all I have to do is run one power wire to the relay and whatever I connect to it and I'm done for the additional two relays I am going to add one more relay I just didn't have one at the time but it will be coming and the wiring is already there from the swtich for it as well.
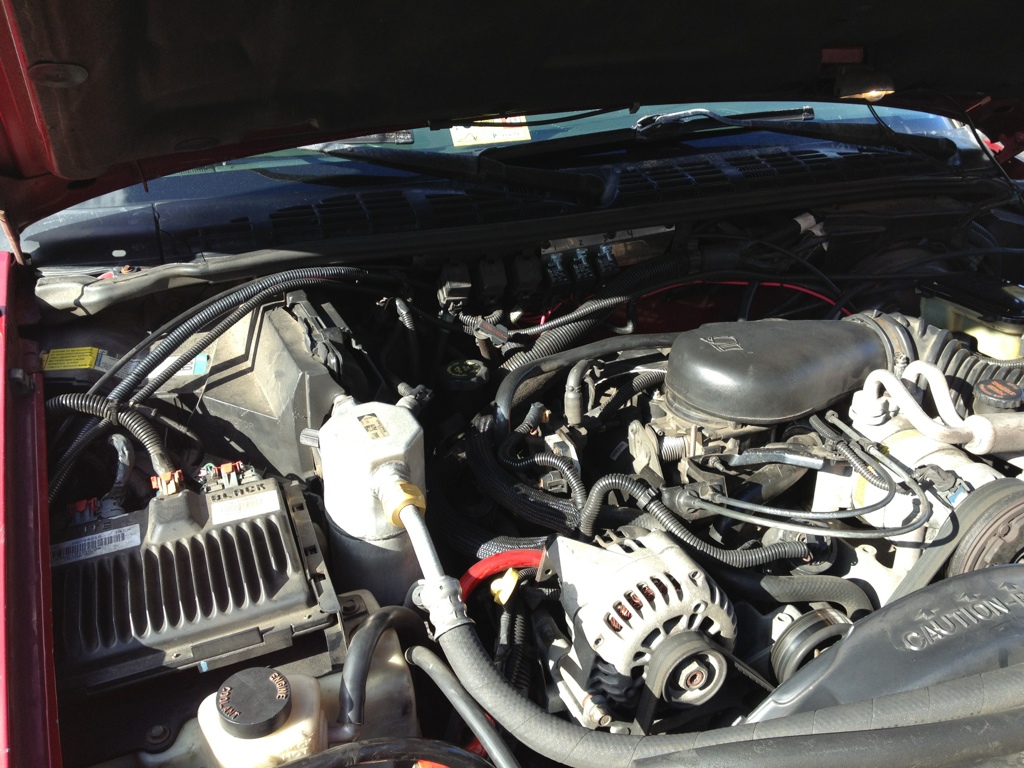
And heres a shot of the whole engine bay after everything is wrapped and cleaned up
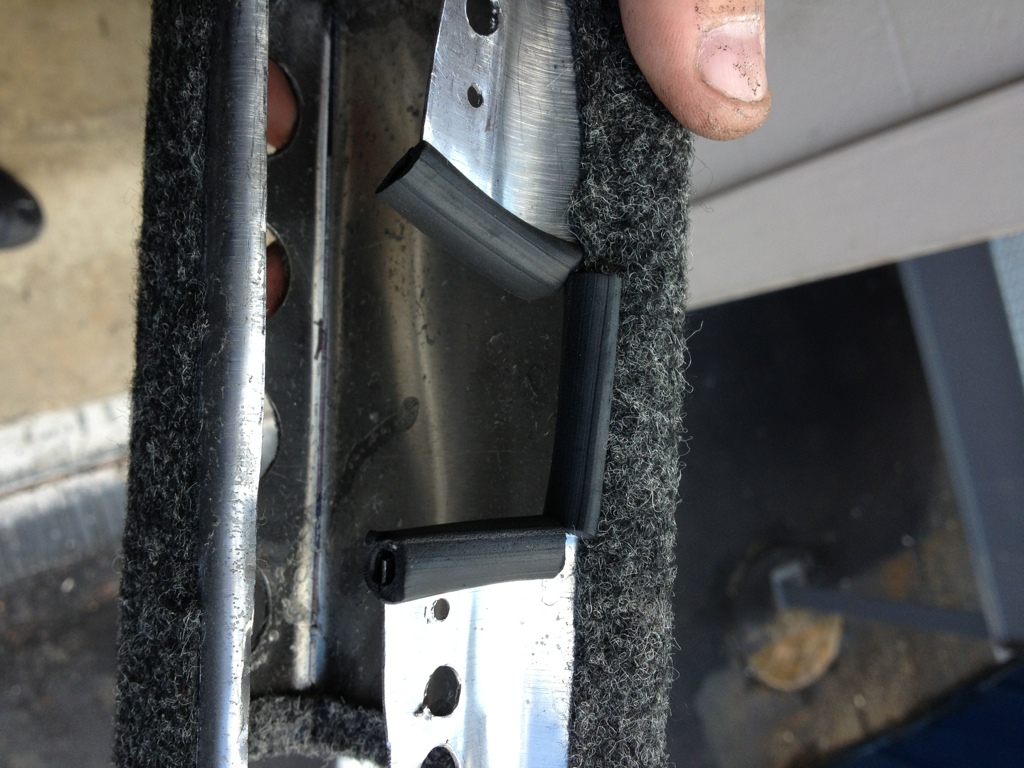
Then on the roof I ran the wires through a hole I drilled under the support leg for the factory roof rack so that no wires would be running through doors and looking out of place. I decided to use "2 flat" connectors on everything cause they serve their purpose and they were only $3 a piece at Advance Auto.
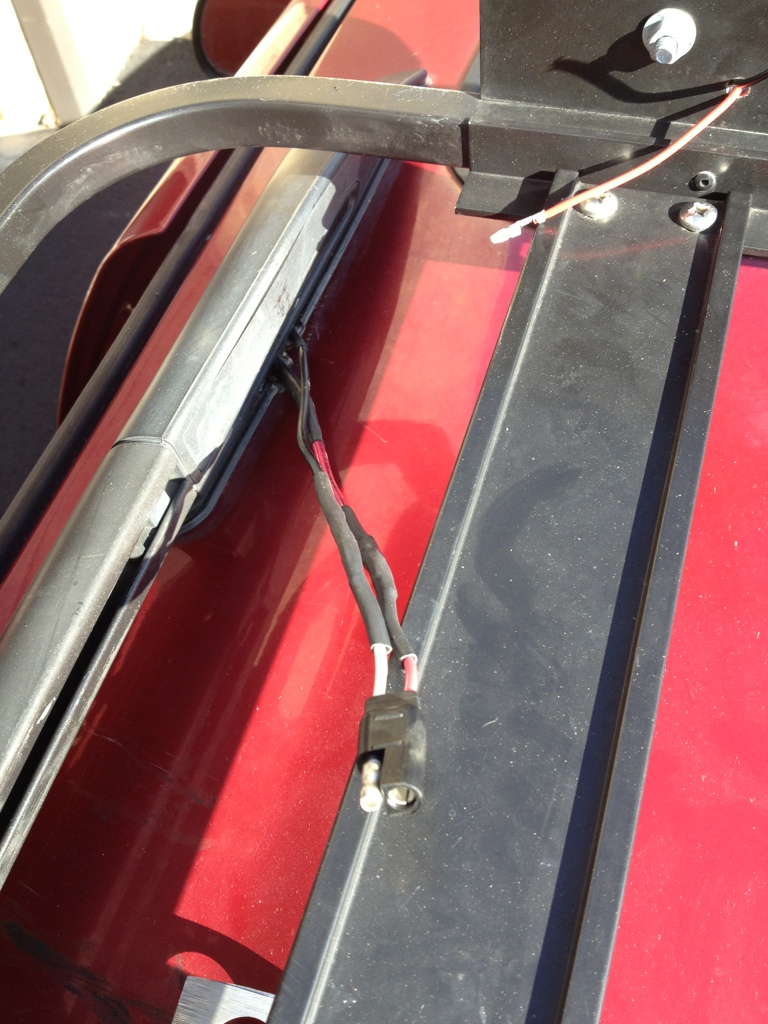
I used the same connectors for all of the lights as well so now it is set up that I can remove my enitre roof rack by just unplugging one connector or I can remove lights individually if necessary.
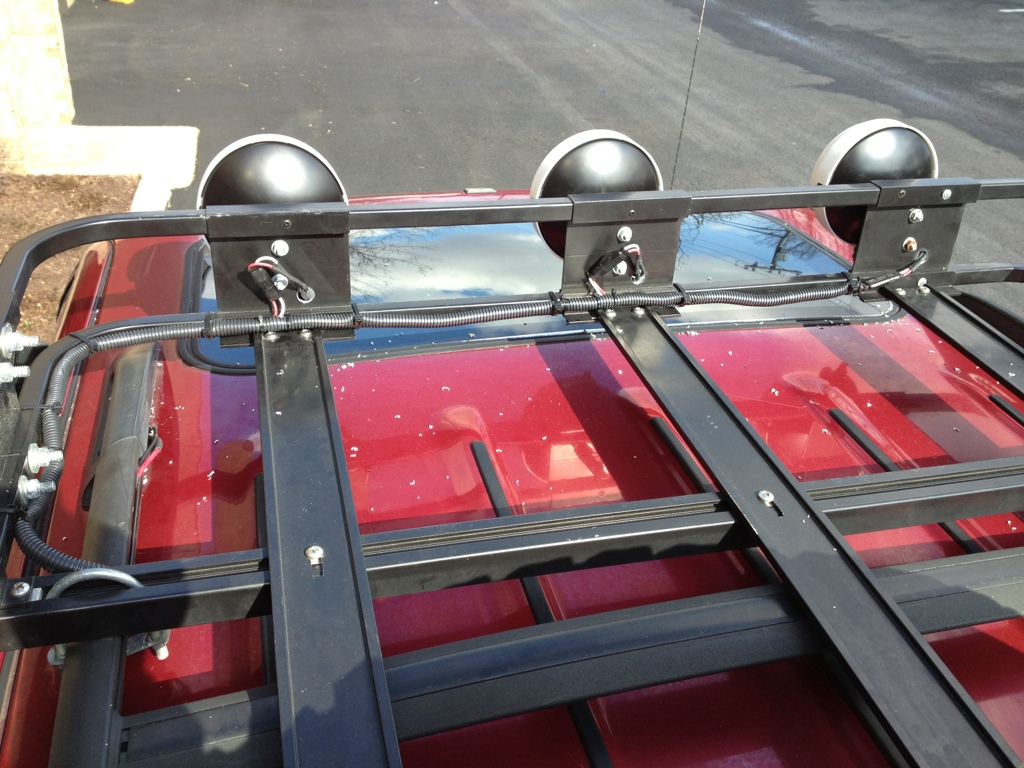
The connector tucks away nicley inside the rail and is hidden away a bit.

And after all of that this is what I ended up with.
We will start with the switches I suppose.
And then I also restretched and fixed the top of the switch panel so it looks better. This is with all the wires attached and tucked away
Then under the hood I made up a small spot to mount some relays and keep them out of the way. They are all wired and all I have to do is run one power wire to the relay and whatever I connect to it and I'm done for the additional two relays
I am going to add one more relay I just didn't have one at the time but it will be coming and the wiring is already there from the swtich for it as well.And heres a shot of the whole engine bay after everything is wrapped and cleaned up
Then on the roof I ran the wires through a hole I drilled under the support leg for the factory roof rack so that no wires would be running through doors and looking out of place. I decided to use "2 flat" connectors on everything cause they serve their purpose and they were only $3 a piece at Advance Auto.
I used the same connectors for all of the lights as well so now it is set up that I can remove my enitre roof rack by just unplugging one connector or I can remove lights individually if necessary.
The connector tucks away nicley inside the rail and is hidden away a bit.
And after all of that this is what I ended up with.
Last edited by rexmburns; Feb 1, 2013 at 01:06 PM.
Thread Starter
|
Super Moderator
Joined: Sep 2011
Posts: 4,459
From: Northern VA
Yeah I'm searching for a non cheesy way to label them. For right now I only have two things running off of them so I know which is which but I will need to do something for sure I'd hate to have the wife throw on the roof lights at night and blind someone lol!
Thread Starter
|
Super Moderator
Joined: Sep 2011
Posts: 4,459
From: Northern VA
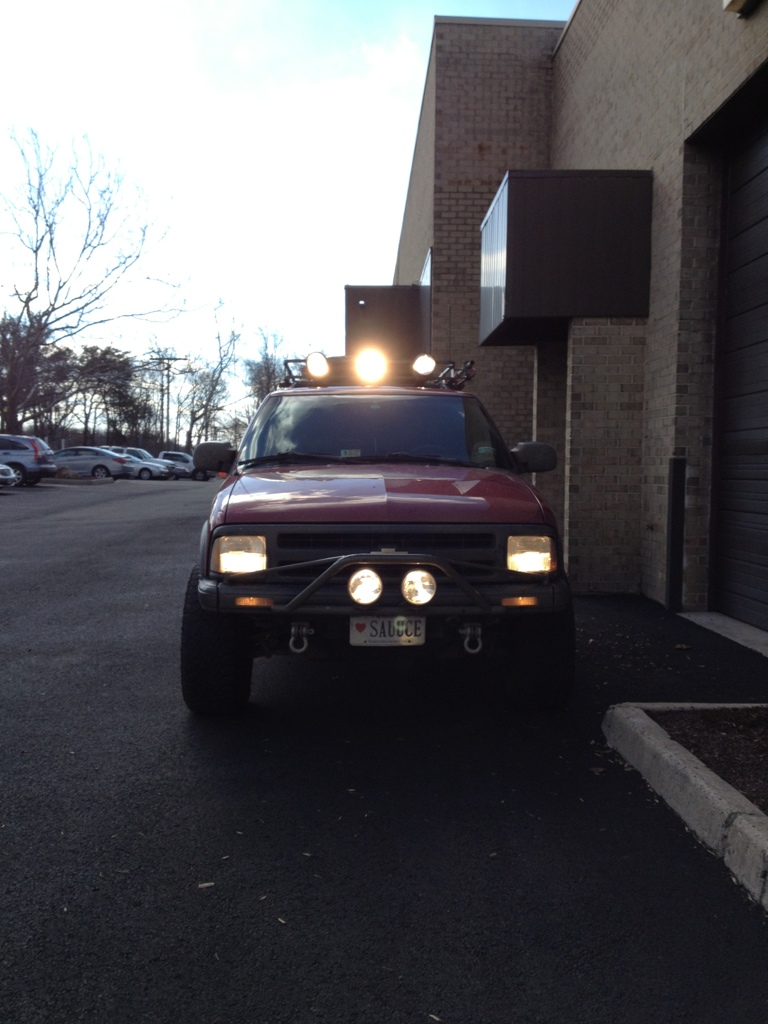
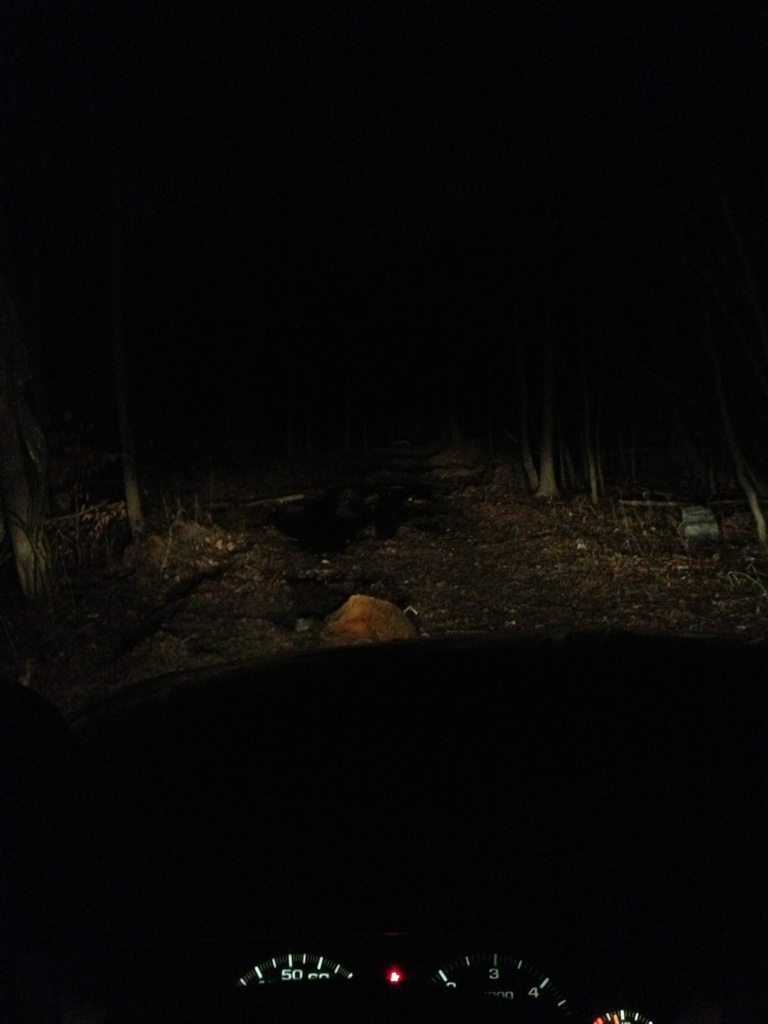
Well I came back to work late last night to drop off my work truck and decided since it was dark out I would drive down in the woods and see how well my new lighting setup worked. Heres a couple pics.
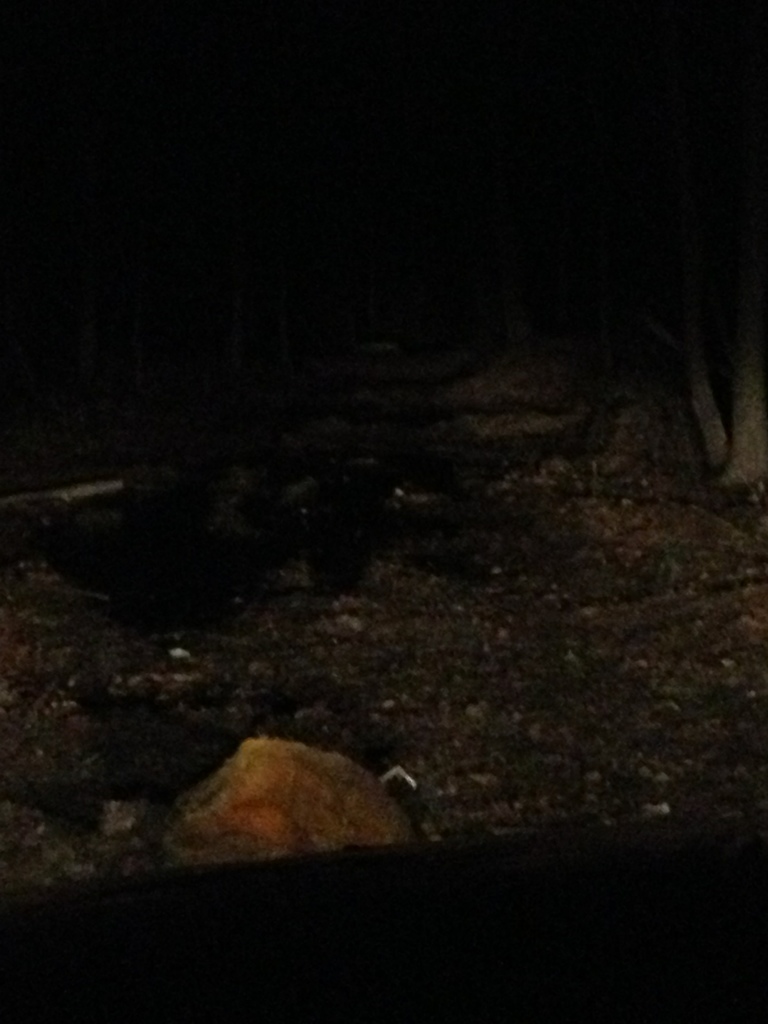
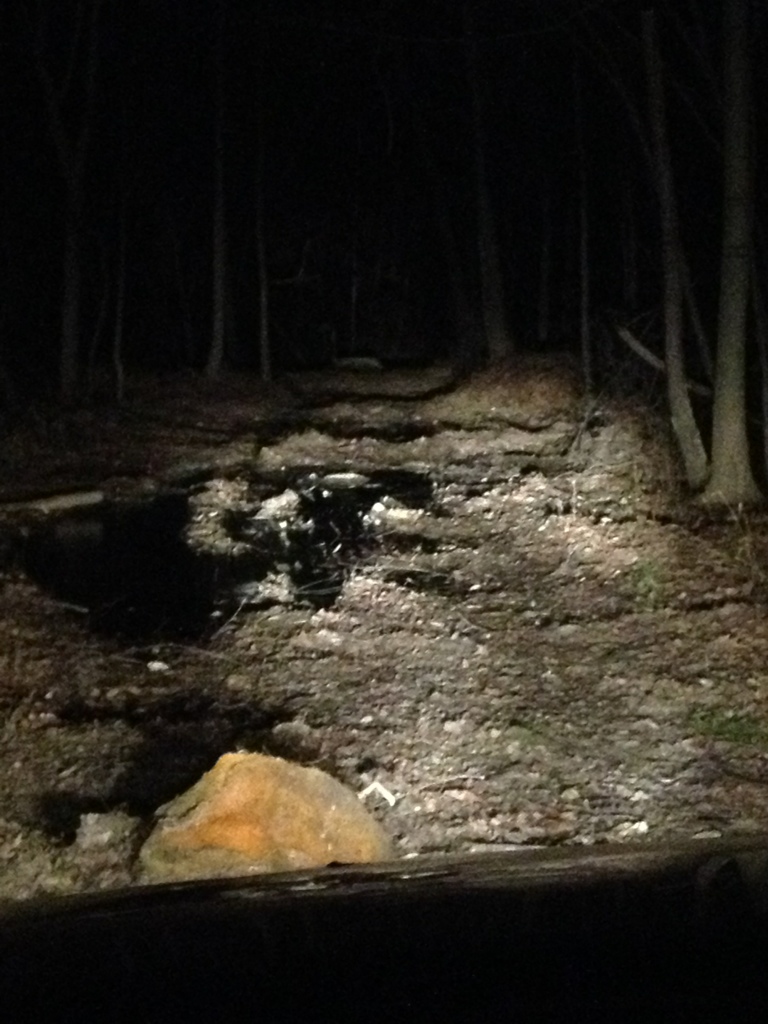
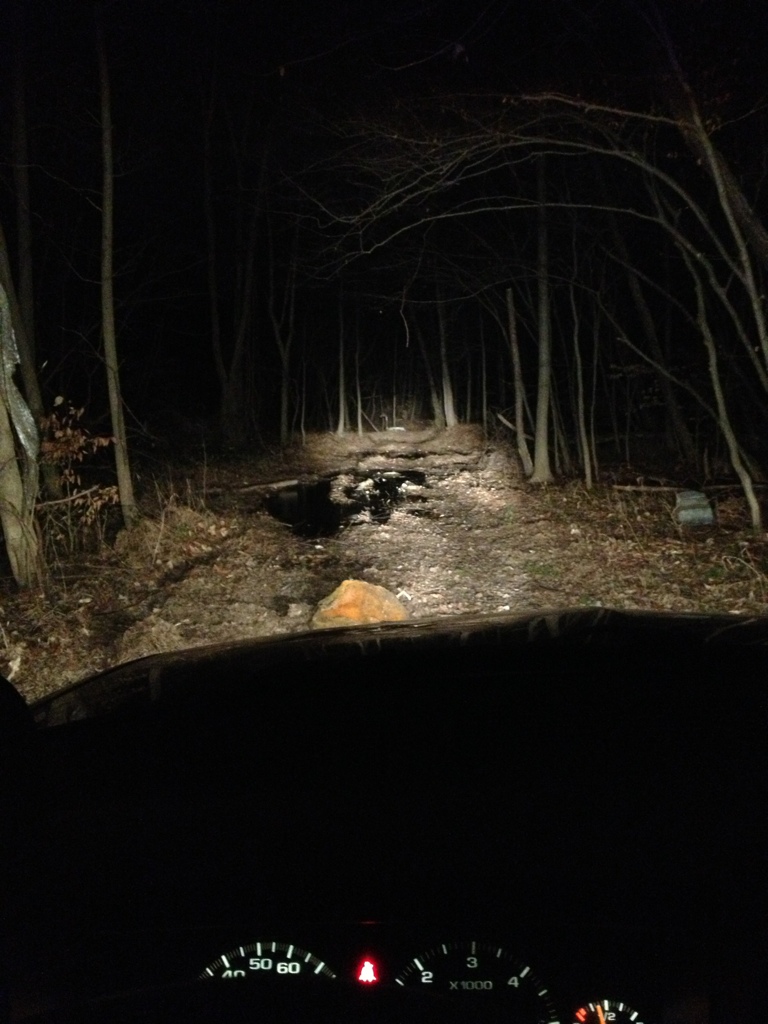
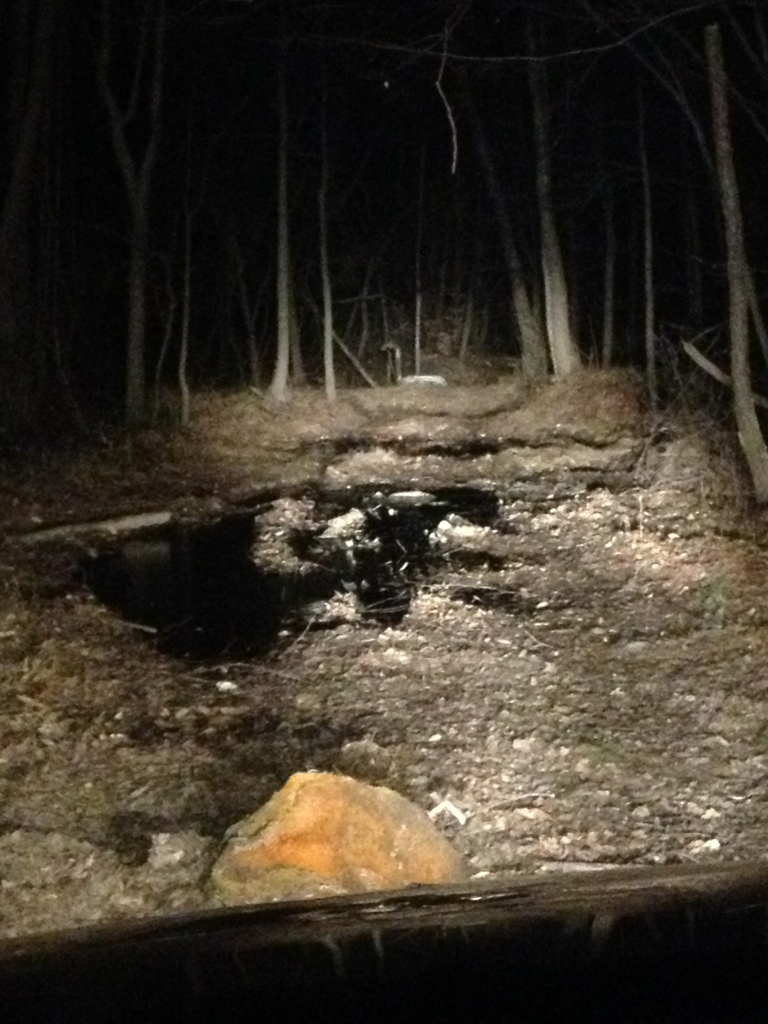
Sorry for the crappy iphone pics! The manhole is about 50 yards away.
Factory high beams
The same zoomed in a bit
2 Prerunner bar lights and factory highs

The same zoomed in a bit
2 prerunner bar lights factory highs and three roof lights
The same zoomed in a bit
I want to add two flood pattern lights to the roof in between the two outer spots but I'm happy for now.
Sorry for the crappy iphone pics! The manhole is about 50 yards away.
Factory high beams
The same zoomed in a bit
2 Prerunner bar lights and factory highs
The same zoomed in a bit
2 prerunner bar lights factory highs and three roof lights
The same zoomed in a bit
I want to add two flood pattern lights to the roof in between the two outer spots but I'm happy for now.

