
PROJECT solid axle swap/lift

BF Veteran
Joined: May 2009
Posts: 4,772
From: Halifax, NS, Canada


Wow, that's some awesome progress. It's lookin' real good. What are your plans to finish off the front end? Are you making your own bumper or bull bar?
Also, will it make it out of your garage? looks awefuly close to your roof lol.
Also, will it make it out of your garage? looks awefuly close to your roof lol.


Thread Starter
|
Starting Member
Joined: Feb 2008
Posts: 104
From: nj pine barrens

how did you do yours ?
that way seems pretty good, cutting the frame is probably going to be best for strength, and it is at that weird spot where the frame bends...
and sisk, its in my driveway, no clearance issues there. just weather ones. stock bumper for now until i make a sick winch bumper. one thing at a time though
BF Veteran
Joined: Aug 2009
Posts: 3,424
From: munster indiana
I'm on my phone so Can't post pics. I put the shackles in the front. Half the reason was the pinion angle. The shackles tipped the pinion up a little bit which was needed. I still had to grind the stops off my front driveshaft, binded at full drop. Mine is just a ghetto offroad only truck so was built ugly. Ill post pics soon as I can
BF Veteran
Joined: Aug 2009
Posts: 3,424
From: munster indiana
i did the front in the typical boring crossmember set up
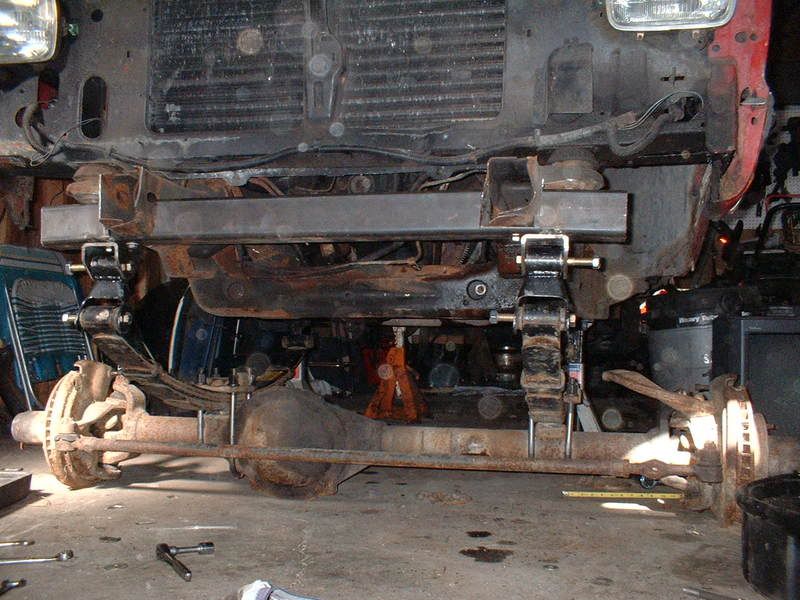
the rear i just used some 3x4 inch square metal and cut it to fit the frame, and just braced the hell out of it, pretty simple. held up great so far
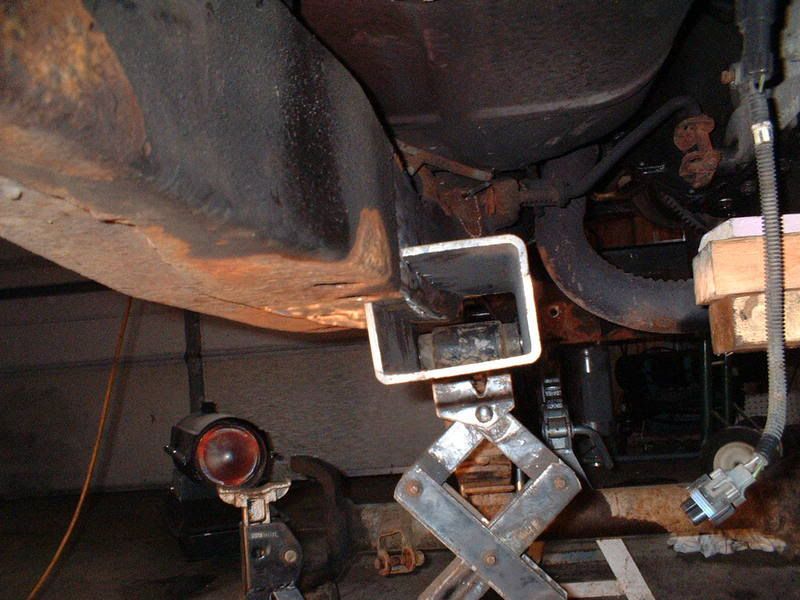
my whole thought process was if that part bends, breaks, or falls off i can just cut/grind it off and replace it.
also you can see in that last pic the stock crossmember doesnt work driveshaft goes right into it (edit.. im running a np208 case)
the rear i just used some 3x4 inch square metal and cut it to fit the frame, and just braced the hell out of it, pretty simple. held up great so far
my whole thought process was if that part bends, breaks, or falls off i can just cut/grind it off and replace it.
also you can see in that last pic the stock crossmember doesnt work
driveshaft goes right into it (edit.. im running a np208 case)
Thread Starter
|
Starting Member
Joined: Feb 2008
Posts: 104
From: nj pine barrens
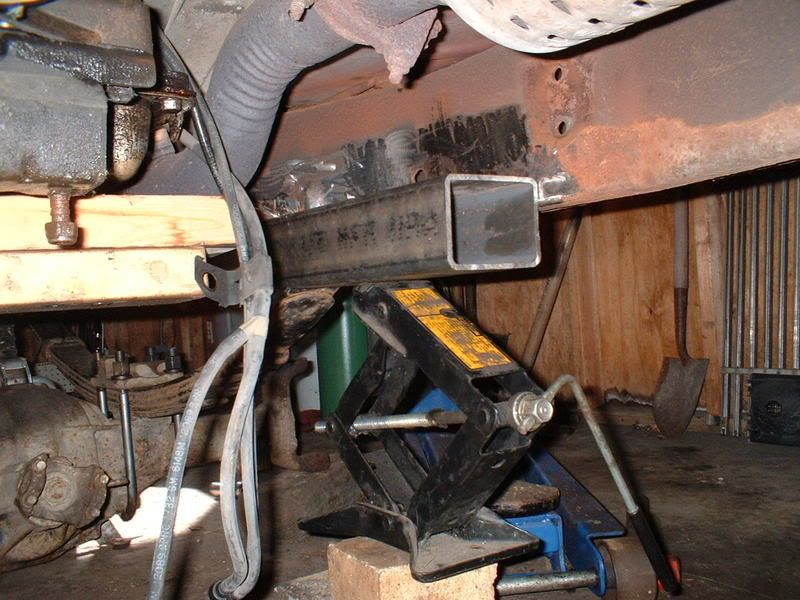
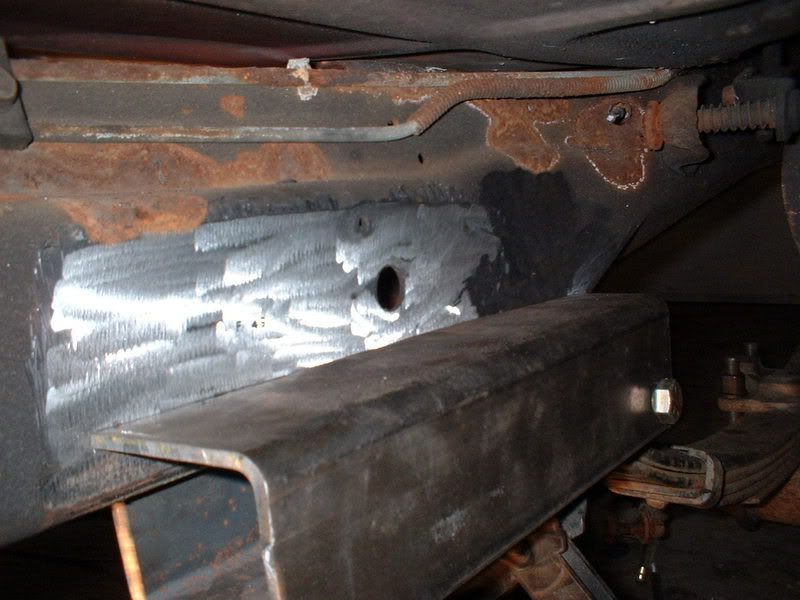
i made a crossmember for the backside, full length from frame rail to frame rail. welded it up last night, its going to bolt in on each side of the frame to make it fully removable in case of tranny issues in the future. drilling it out in a few minutes, just waiting for some bits to be dropped off
BF Veteran
Joined: Aug 2009
Posts: 3,424
From: munster indiana
i made a crossmember for the backside, full length from frame rail to frame rail. welded it up last night, its going to bolt in on each side of the frame to make it fully removable in case of tranny issues in the future. drilling it out in a few minutes, just waiting for some bits to be dropped off
all the same crap. if your lucky that dodge may have the flat top knuckles on it so you can do crossover steering cheaper and easier. you can put dump truck axles under your truck. anything is possible
Thread Starter
|
Starting Member
Joined: Feb 2008
Posts: 104
From: nj pine barrens
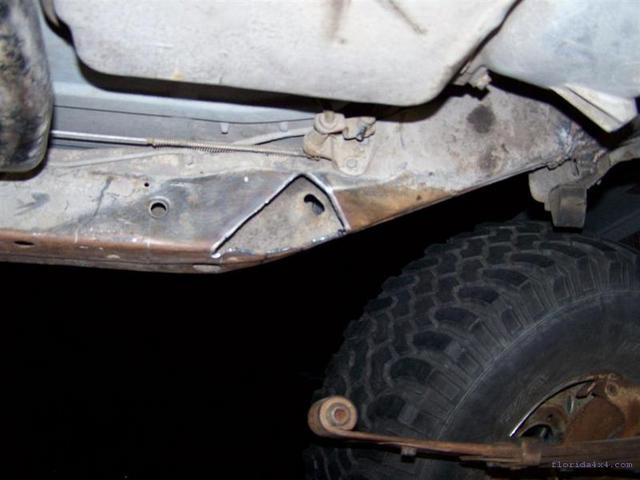
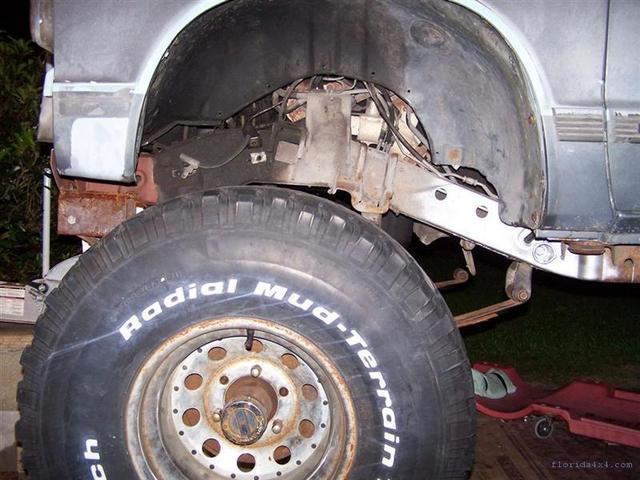
done welding. got those pics for you guys..
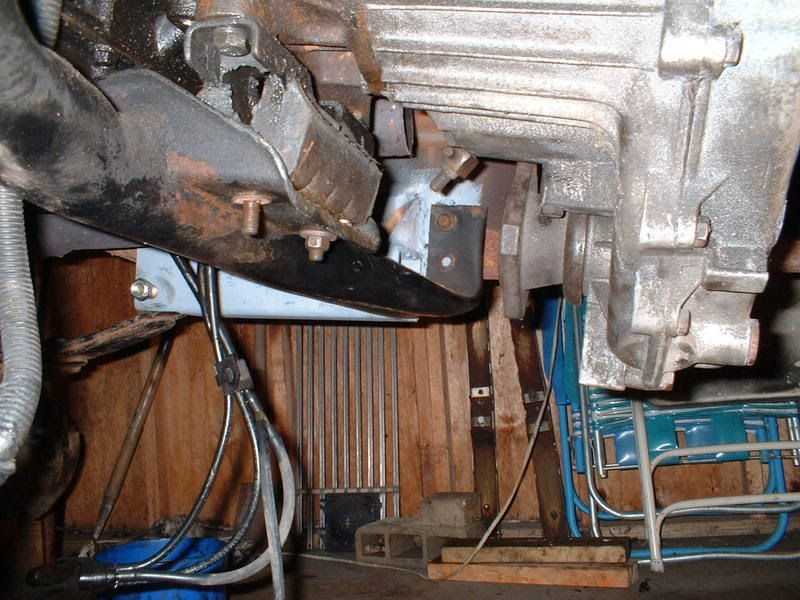
first few are front crossmember tied into frame rails with leaf hangers welded onto bottom.
next is the one i made for the backside, same idea, but drilled to bolt on -still have lots more holes to drill
last is the new leaf spring perch on the rear, ****ty weld job because i let my friend do it but ill clean it up with the grinder before paint
heres the rest