
what have you gotten done on your blazer today?

I found out why I'm having problems with my starter. Turns out the whole back end of the solenoid has about 1/8in of play. Looks like I'll be needing a new one one of these days.
I also bought a pair of projector fog lights off of Ebay. I may be sending them back, the reflector bowls look like they were painted by a 5 year old, and the cutoff shield is wavy and doesn't cover enough area.
I might just repaint the bowls and fix the shield myself. I don't know, we'll see.
I also bought a pair of projector fog lights off of Ebay. I may be sending them back, the reflector bowls look like they were painted by a 5 year old, and the cutoff shield is wavy and doesn't cover enough area.
I might just repaint the bowls and fix the shield myself. I don't know, we'll see.

 Picking it up on Tuesday morning.
Junior Member
Joined: May 2010
Posts: 364

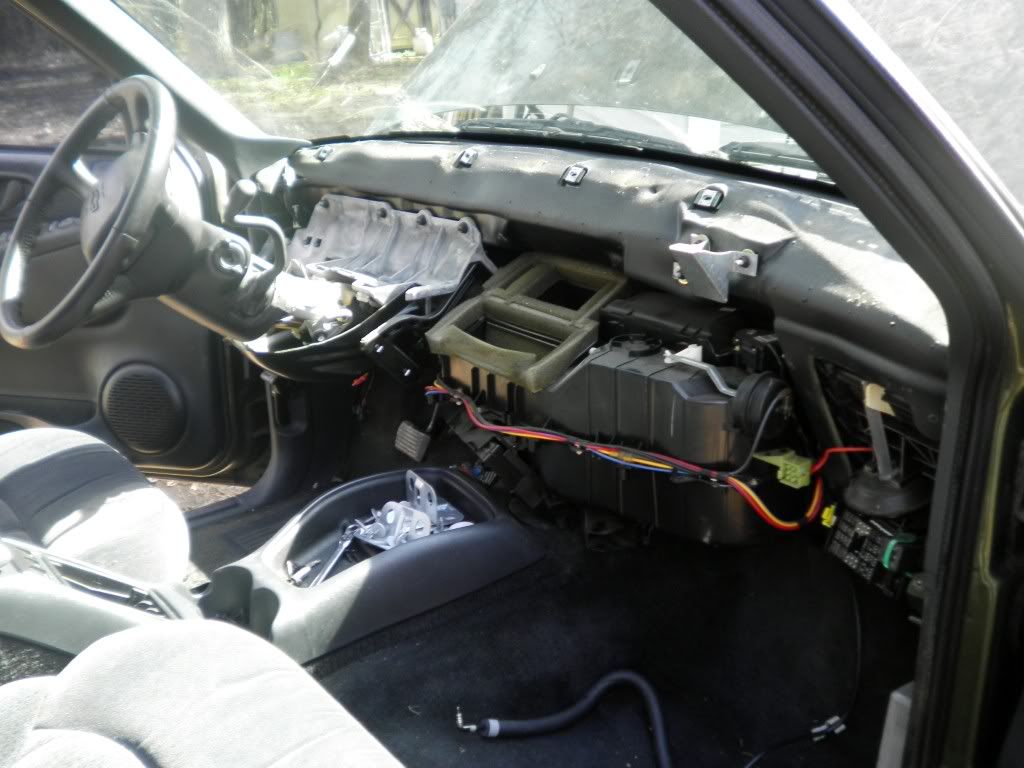
All week I was reviewing the post for removing the dash. The one with all the high def pics and instructions. When I actually went to do the job I could not find the post. I did remember enough to get the job done though. Everything went smoothly until I got to the blower housing. I could not get it free from the firewall. On the passenger side under the glove box there is one bolt going into the firewall. It appears that there are two (left and right) next to this bolt that come from the engine compartment. There is no way to get to these. I ended up prying lightly at the top to remove the core cover and clear the heater core inlet and outlet lines. The two tabs that secure the bolts coming from the engine bay broke and the one on the interior remained unharmed. Good enough... All said and done I completed the entire job in only 4 hours.
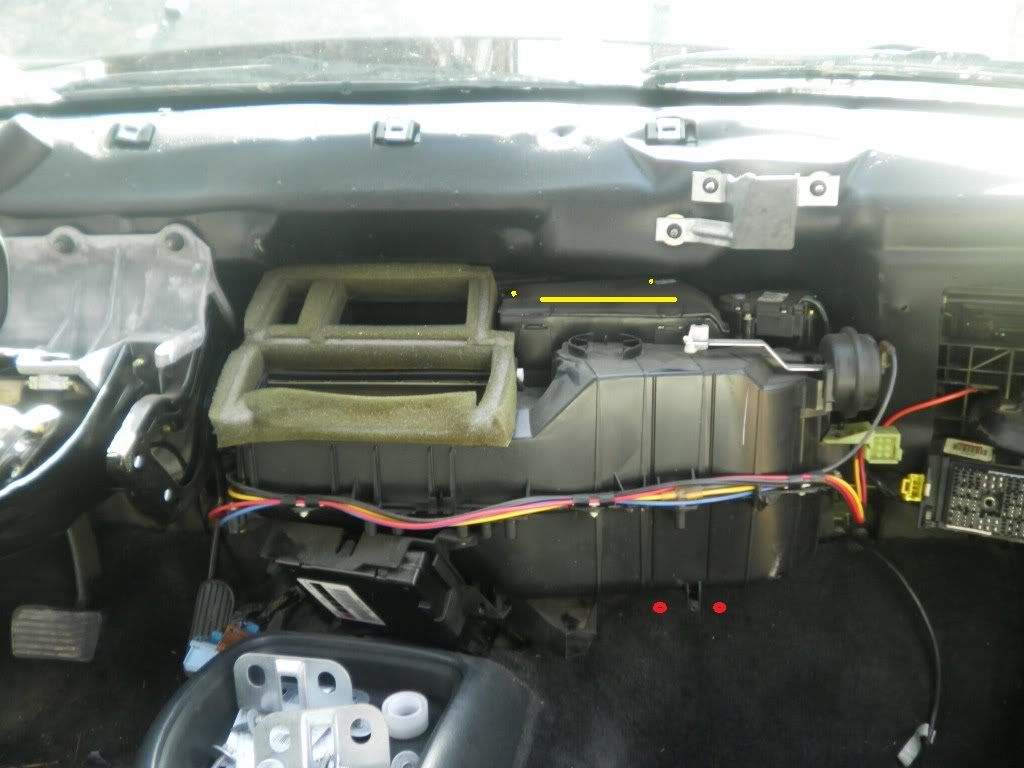
The yellow dots are showing the location of the small screws that keep the core cover on. The yellow line is showing the cover location. The red circles are showing the location of the two screws you cannot get to. I would recommend using a cut wheel to cut just above the screws. The screws looked gold in color from the interior.
The yellow dots are showing the location of the small screws that keep the core cover on. The yellow line is showing the cover location. The red circles are showing the location of the two screws you cannot get to. I would recommend using a cut wheel to cut just above the screws. The screws looked gold in color from the interior.
New spider assy today all went smoothly, tools used: 1/4" drive rachet with 6" extension, 10mm deep well socket, phillips screw driver, flat head screw driver, 3/8" 10 mm, and a 6" extension and rachet.. took about 3.5 hours,taking my time and reading more on this site as i went, i took a few pics also.
Robert
Robert
Today I Ordered  :
:
PA 2" body lift
2" lift shackles
Black Bull bar
1.5" spacers for back
1" spacers for front
Spacers will do until I can save up for functional beadlock rims and tires. I can't fit tires without the body lift and shackles anyway
Step bumper (for trailer ball hole)
Got some work to do when it all comes in
Last edited by 97Beater4WD; Feb 25, 2012 at 10:46 PM.
New Member
Joined: Feb 2011
Posts: 61
New Passenger side Wheel Bearing...And thank god because the old one was going to break into a million pieces any day lol It would hum so loud going down the road, and click HORRIBLY whenever I turned the wheel. But here's the new one, $40 from Dearborne Axles and got to my door in just over a day (And was free shipping) I highly recommend them, both my Hubs are from them now.

And I never realized how nasty my undercarriage was until I got under there again lol
And I never realized how nasty my undercarriage was until I got under there again lol