When you click on links to various merchants on this site and make a purchase, this can result in this site earning a commission. Affiliate programs and affiliations include, but are not limited to, the eBay Partner Network.
Thanks for the idea Tom, I thought about doing this but unfortunately I only have a household vac and no tubing the right size and NOT even any duct tape, so I guess I'm taking off the lower manifold, that way would be much easier though. What I'm seeing in the old Chilton does not look all too bad along as I don't need to mess with the TDC as you say, Christine... I was down bad earlier and started thinking I am not capable of taking the lower manifold off, mainly because of the setting TDC, and not having done this before looking at what the manual says is kind of intimidating at first. However after some thinking and some looking about how it's done. I think I'm gonna go for it and just take my sweet time to make sure everything is done exactly as the manual says. Really hope I can find the nut once the manifold is removed, I guess if I can't find it then that means it slid into the combustion chamber? Then hopefully, in the end, I will have fancy new lower manifold gaskets as well that should last me a good while longer!
Thanks for the idea Tom, I thought about doing this but unfortunately I only have a household vac and no tubing the right size and NOT even any duct tape, so I guess I'm taking off the lower manifold, that way would be much easier though. What I'm seeing in the old Chilton does not look all too bad along as I don't need to mess with the TDC as you say, Christine... I was down bad earlier and started thinking I am not capable of taking the lower manifold off, mainly because of the setting TDC, and not having done this before looking at what the manual says is kind of intimidating at first. However after some thinking and some looking about how it's done. I think I'm gonna go for it and just take my sweet time to make sure everything is done exactly as the manual says. Really hope I can find the nut once the manifold is removed, I guess if I can't find it then that means it slid into the combustion chamber? Then hopefully, in the end, I will have fancy new lower manifold gaskets as well that should last me a good while longer!
There are some really good writeuos of how to do the LIM gaskets. I've posted some of them on the Forum before. Send me a messsge to remind me and I can either post them on this thread or send them to you directly.
The Fel-Pro gasket set to get is this one: Part No: MS 98002 T.
Some things I remember from when I did this.
Do a good job on the application of the RTV at the front and rear edges of the lifter valley. You might want to get some new RTV to ensure what you are using is fresh. I suspect I could have done a better job on this as I have a small oil leak that could be from the front of the engine. But I cannot be sure. Be sure to clean the surfaces with isopropyl alcohol to ensure good adhesion.
The power steering bracket only is able to slide forward and it cannot come off unless you make room by removing other items such as the fan.
Removing the lower radiator hose should be sufficient to get enough coolant out since the intake manifold is so high on the engine.
There is nut that is kind of hidden away under the PS bracket that I had trouble finding. I later saw in the instructions (the one in two-parts) where it is identified. If I had read them more carefully I would have saved myself 45 minutes while trying to figure out how to remove it. LOL
I took the opportunity to replace the fuel injection spider with one from a later model since I knew was going to keep the truck for a while and I didn't want to have to open up the top of the engine again.
I also got a new set of intake manifold bolts from Fel-Pro and used doing the repair as an excuse to get myself a 3/8" drive torque wrench. You will have to at least borrow a 3/8" drive torque wrench to do the repair properly.
What I wished I had thought to do was cut the heads off of four of the old intake manifold bolts so that I could use them as temporary guide-pins to help with the alignment of the intake as I was replacing it. I should have known to do this as my the intake on my 289 in my old Mustang has four threaded rods for attaching it that make the alignment of the intake super easy.
The file that has the 2001 instructions were posted by Les Meyer and are from GM. Between both sets of instructions, you should be more than fine.
Thanks for all this Christine, it's much appreciated. I went out this morning and in my favor lordco honored the warranty and replaced the spider assembly. I also picked up a gasket set, it's not the one you said but ms 95817, I think it's the same but without the valve cover gaskets. It also came with some rtv for the intake, if I run out I think I will just use what I already have, I have quite a bit. lol funny how you said that about the torque wrench, I looked at the manual, and as soon as I saw the torque specs I knew what I had wouldn't work. Picked one up at Canadian tire for half off, 50-250 in-lbs so it should work just fine. Partly because it's so cold and partly because my hands need a break I'm taking the rest of today off and just going to relax with my family and will study the repair a bit more. Tomorrow I think I will get going on it again and hopefully find the nut! Since I have not started it I am hoping it's not in the combustion chamber yet.
EDIT: Realized I hadn't shown a picture of the old spider with the plenum off, so here it is, you can see puddles of gas everywhere and a nice big puddle in the back left crevis, it's a mess.
man that thing is covered in gunk. i notice your rig has EGR, I have been contemplating deleting that for a long while now because of all that excess buildup.
I found some pictures of when I did this job. Maybe you'll find them useful.
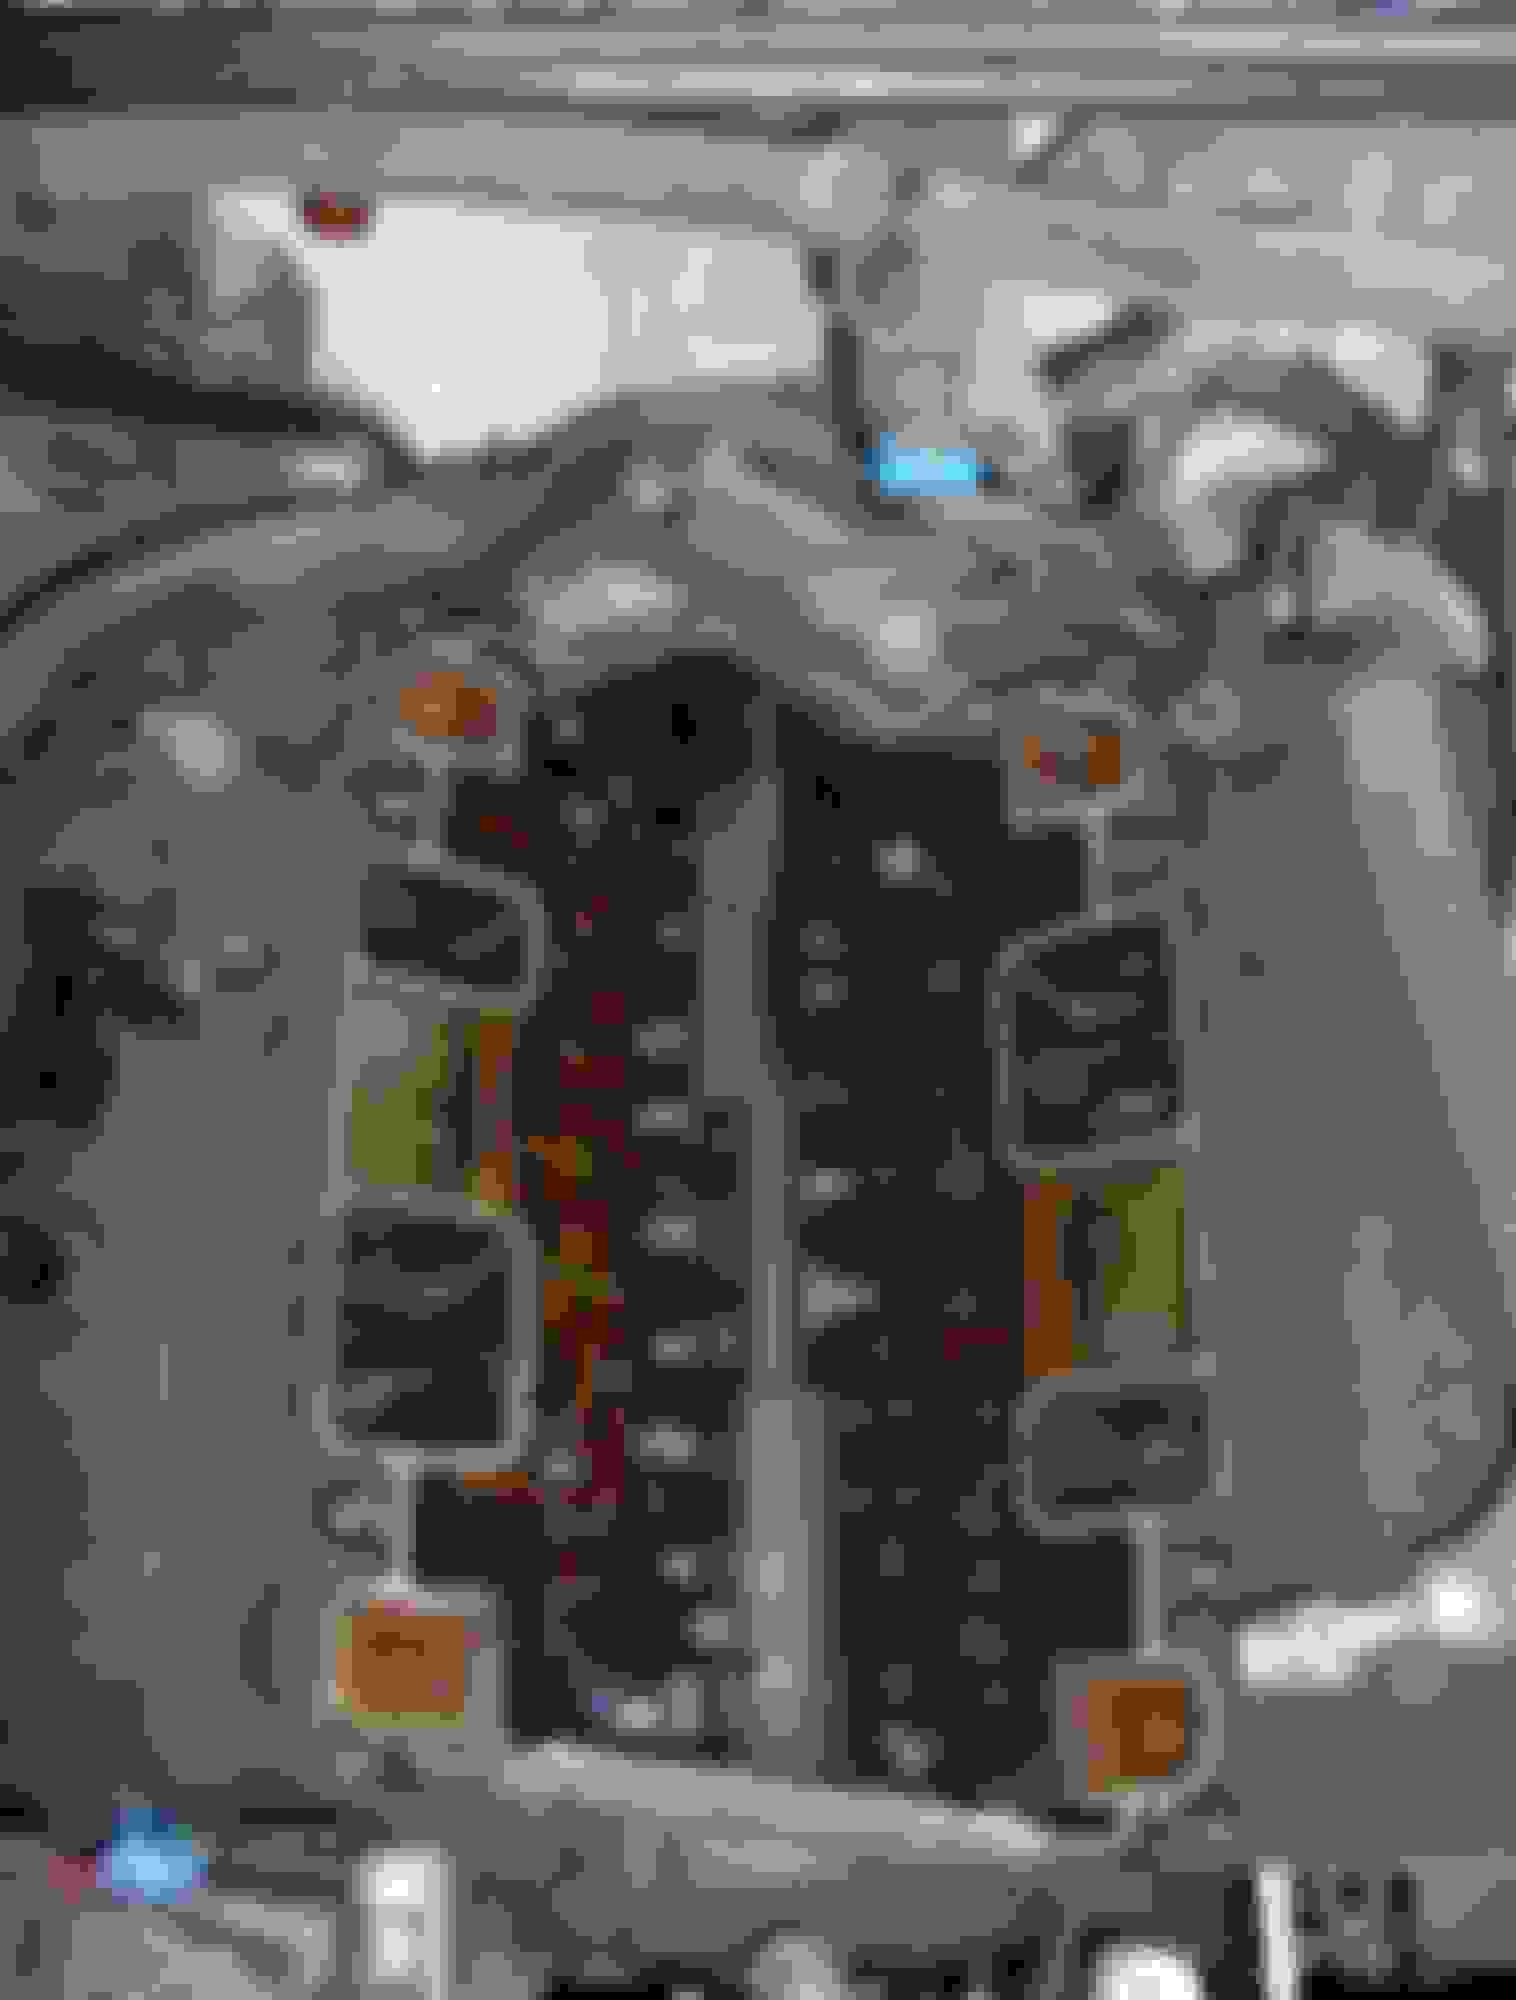
Immediately after removing the intake. The old gaskets are still in place. The bottom right water passage was getting ready to fail and dump water into the lifter valley. I had no clue this was going to happen.
Placing this in position would have been much easier if I had used guide pins in the from of threaded rods inserted where a few of the LIM bolts go.
I am glad I got as much stuff out of the way as possible.
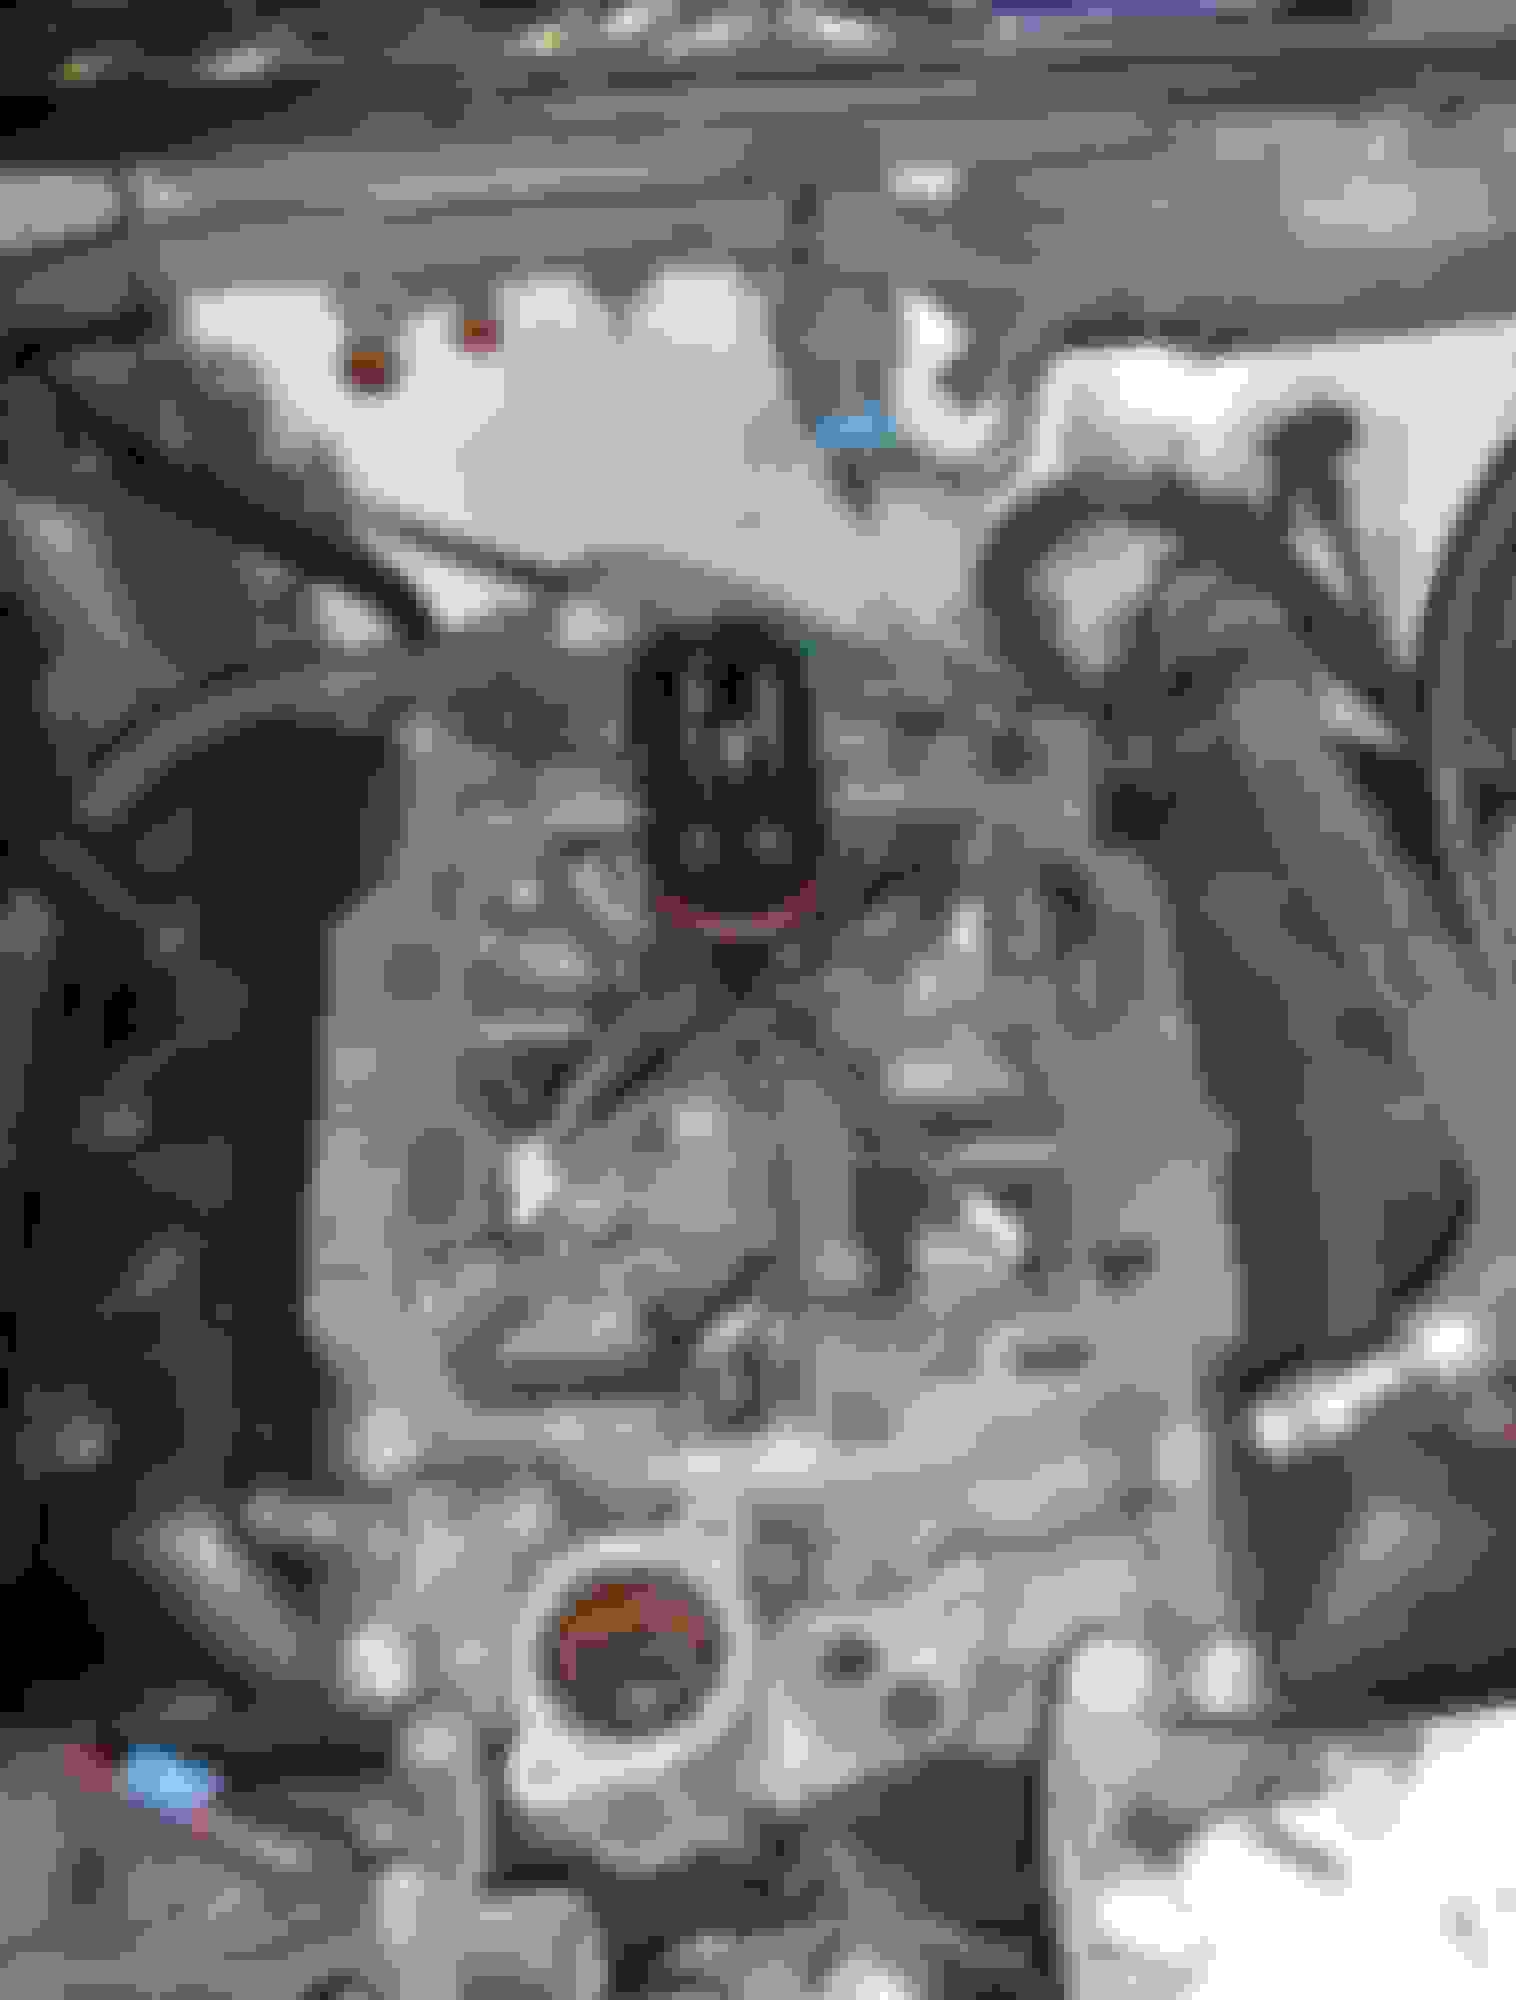
I think this is a picture of the nut on the stud that held the PS bracket on the lower end to the side of the block. I had such a hard time finding and then getting loose. Lesson: Read the directions! LOL The stud and nut that holds on to part of the PS bracket; circled. (I'm pretty sure of this but it has been 4 years!)
Thanks Christine, wow everything is so nice and clean in your engine bay compared to mine lol. I started ripping into it today and got a lot done, not as much as I wish I had have got but that's ok the important thing is that I'm not rushing myself. I took my battery out and am storing it inside my house for the time being so hopefully it still has enough charge when I'm ready to start it again. I got the coolant drained and a few hoses disconnected, also really happy I got the AC pulley off and PS pulley moved forward to where I will be able to access the front bolt on the intake when the time comes. Removed the main wire off the alternator and two bolts that I could see holding it in and it's still not coming off, I'm seeing people say there are three bolts holding it on so I will need to look up where that last one is then hopefully it should come off. Also took the distributor cap off so I could line up how exactly I would get the fuel lines off. That takes me to the main roadblock of the day, not getting a 16mm wrench yesterday while I was out, needed to disconnect the fuel lines at the test port area. So my mom just got back and grabbed a 16mm wrench and a pick tool set for me, hopefully, the pick tool set makes it easier to get the 2 hoses that are left off. It's one of the heater hoses into the intake and the hose that connects the water pump to the bottom of the thermostat. I may or may not go out and keep working today, it started snowing quite hard making it a little harder to work. You may notice I have a lot of rags everywhere in my intake now, just in case another nut gets any ideas. You may remember a while ago I commented on how oil was coming through the bell housing holes and thought it was the rear main seal leaking, after watching all these people do the lim gasket job I saw one person had oil coming out the same place in the bell housing and said it was coming from the back of the intake. I will need to look into this more while I do this job.
After reading your update, it occurred to me to suggest you look to see if there is an oil pressure sender mounted on the back end of the top of the block. The reason to look for it would be to see if it is responsible for the oil leak. It might just need to be remounted with teflon tape.
Ah guys, what a day. Things started going much faster this morning turns out the alternator was actually all unbolted and just needed some elbow grease with a pry bar to pop it out. Got the fuel lines off and the 2 coolant hoses that remained, those pick tools saved me a lot of time loosening up those hoses, then I blew out all the gunk between the valve covers and manifold and took off the manifold. Covered everything up but the sixth intake port and started looking for the nut, to my surprise when I shined a light down there I could clearly see it laying on the valve then decided to go in with the grabber tool, one slow and steady try with the grabber and I got it!!! I REPEAT THE NUT HAS BEEN FOUND AND EXTRACTED. I will spend the rest of today just cleaning the manifold and tomorrow the manifold will probably go back on. But now, I'm sipping back a drink and enjoying the victory!! Haven't checked out the oil pressure sender yet Christine but I'll be sure to before the manifold goes back on.
EDIT: Upon looking at the gaskets when I went to clean the manifold the coolant passage area on both sides looked like it had seen much better days, so it's indeed a good thing I am in here changing them now after all.
 12-26-2021, 09:17 PM


 . You may remember a while ago I commented on how oil was coming through the bell housing holes and thought it was the rear main seal leaking, after watching all these people do the lim gasket job I saw one person had oil coming out the same place in the bell housing and said it was coming from the back of the intake. I will need to look into this more while I do this job.


 I will spend the rest of today just cleaning the manifold and tomorrow the manifold will probably go back on. But now, I'm sipping back a drink and enjoying the victory!! Haven't checked out the oil pressure sender yet Christine but I'll be sure to before the manifold goes back on.